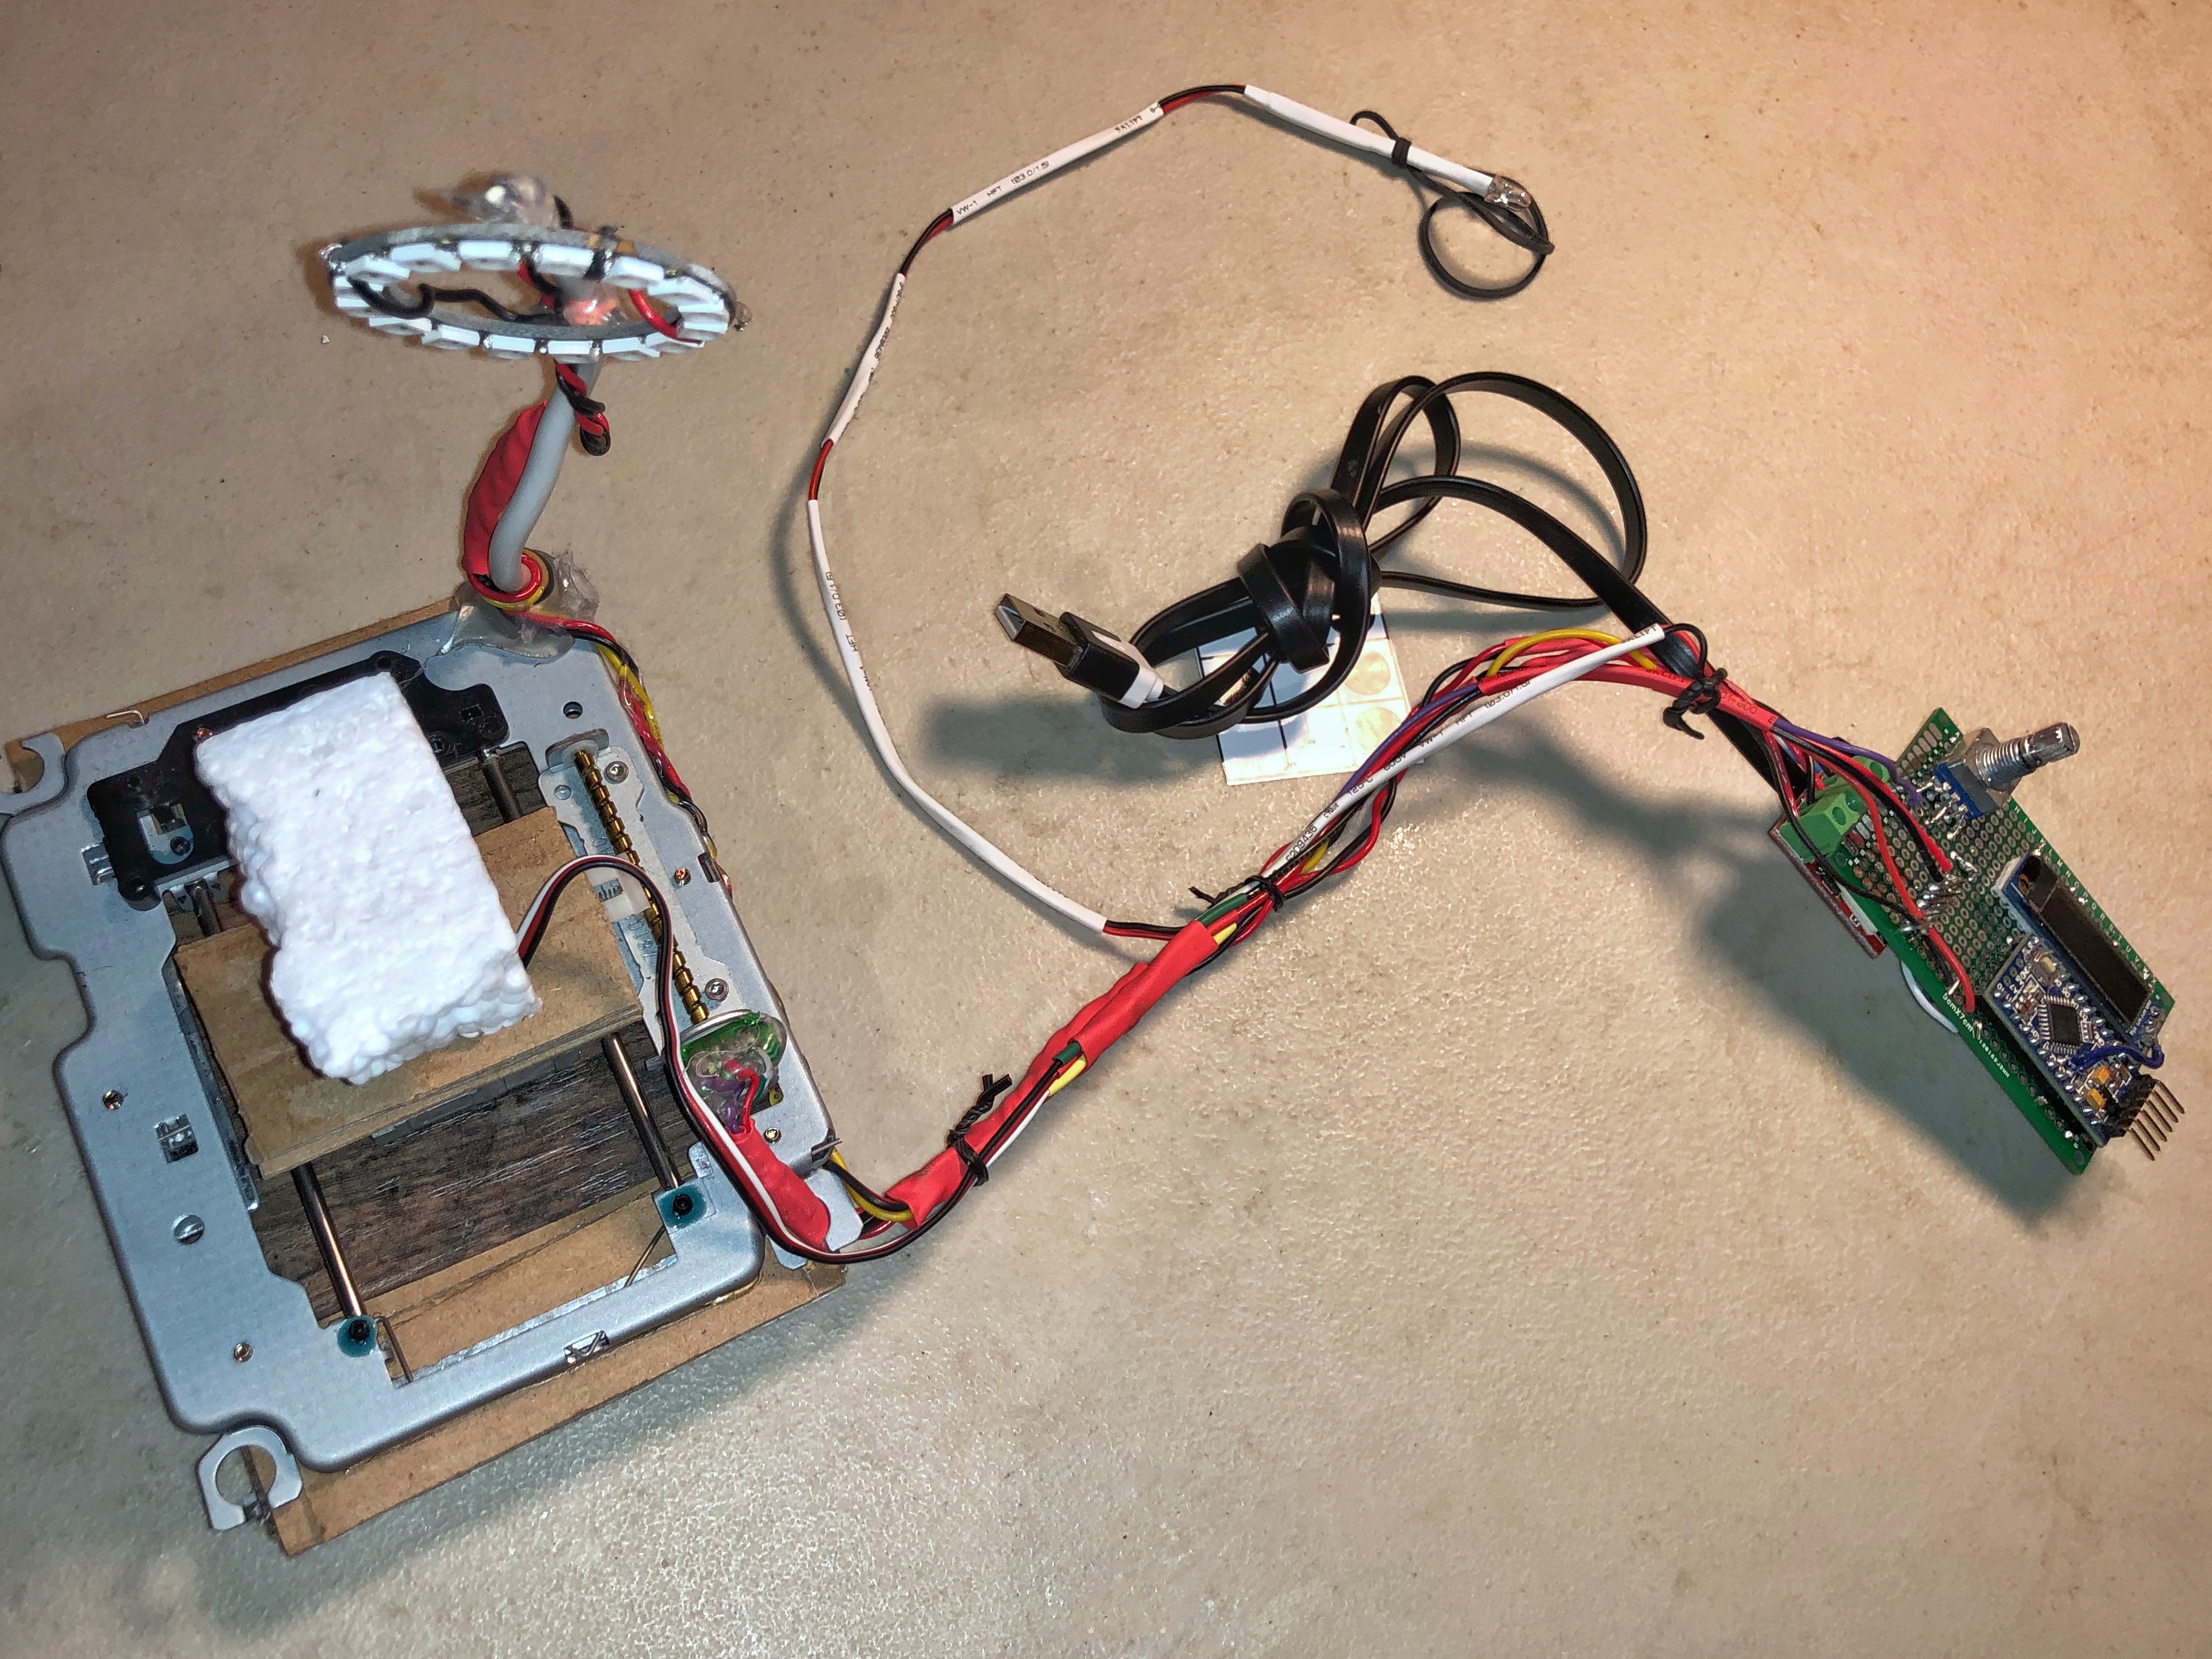
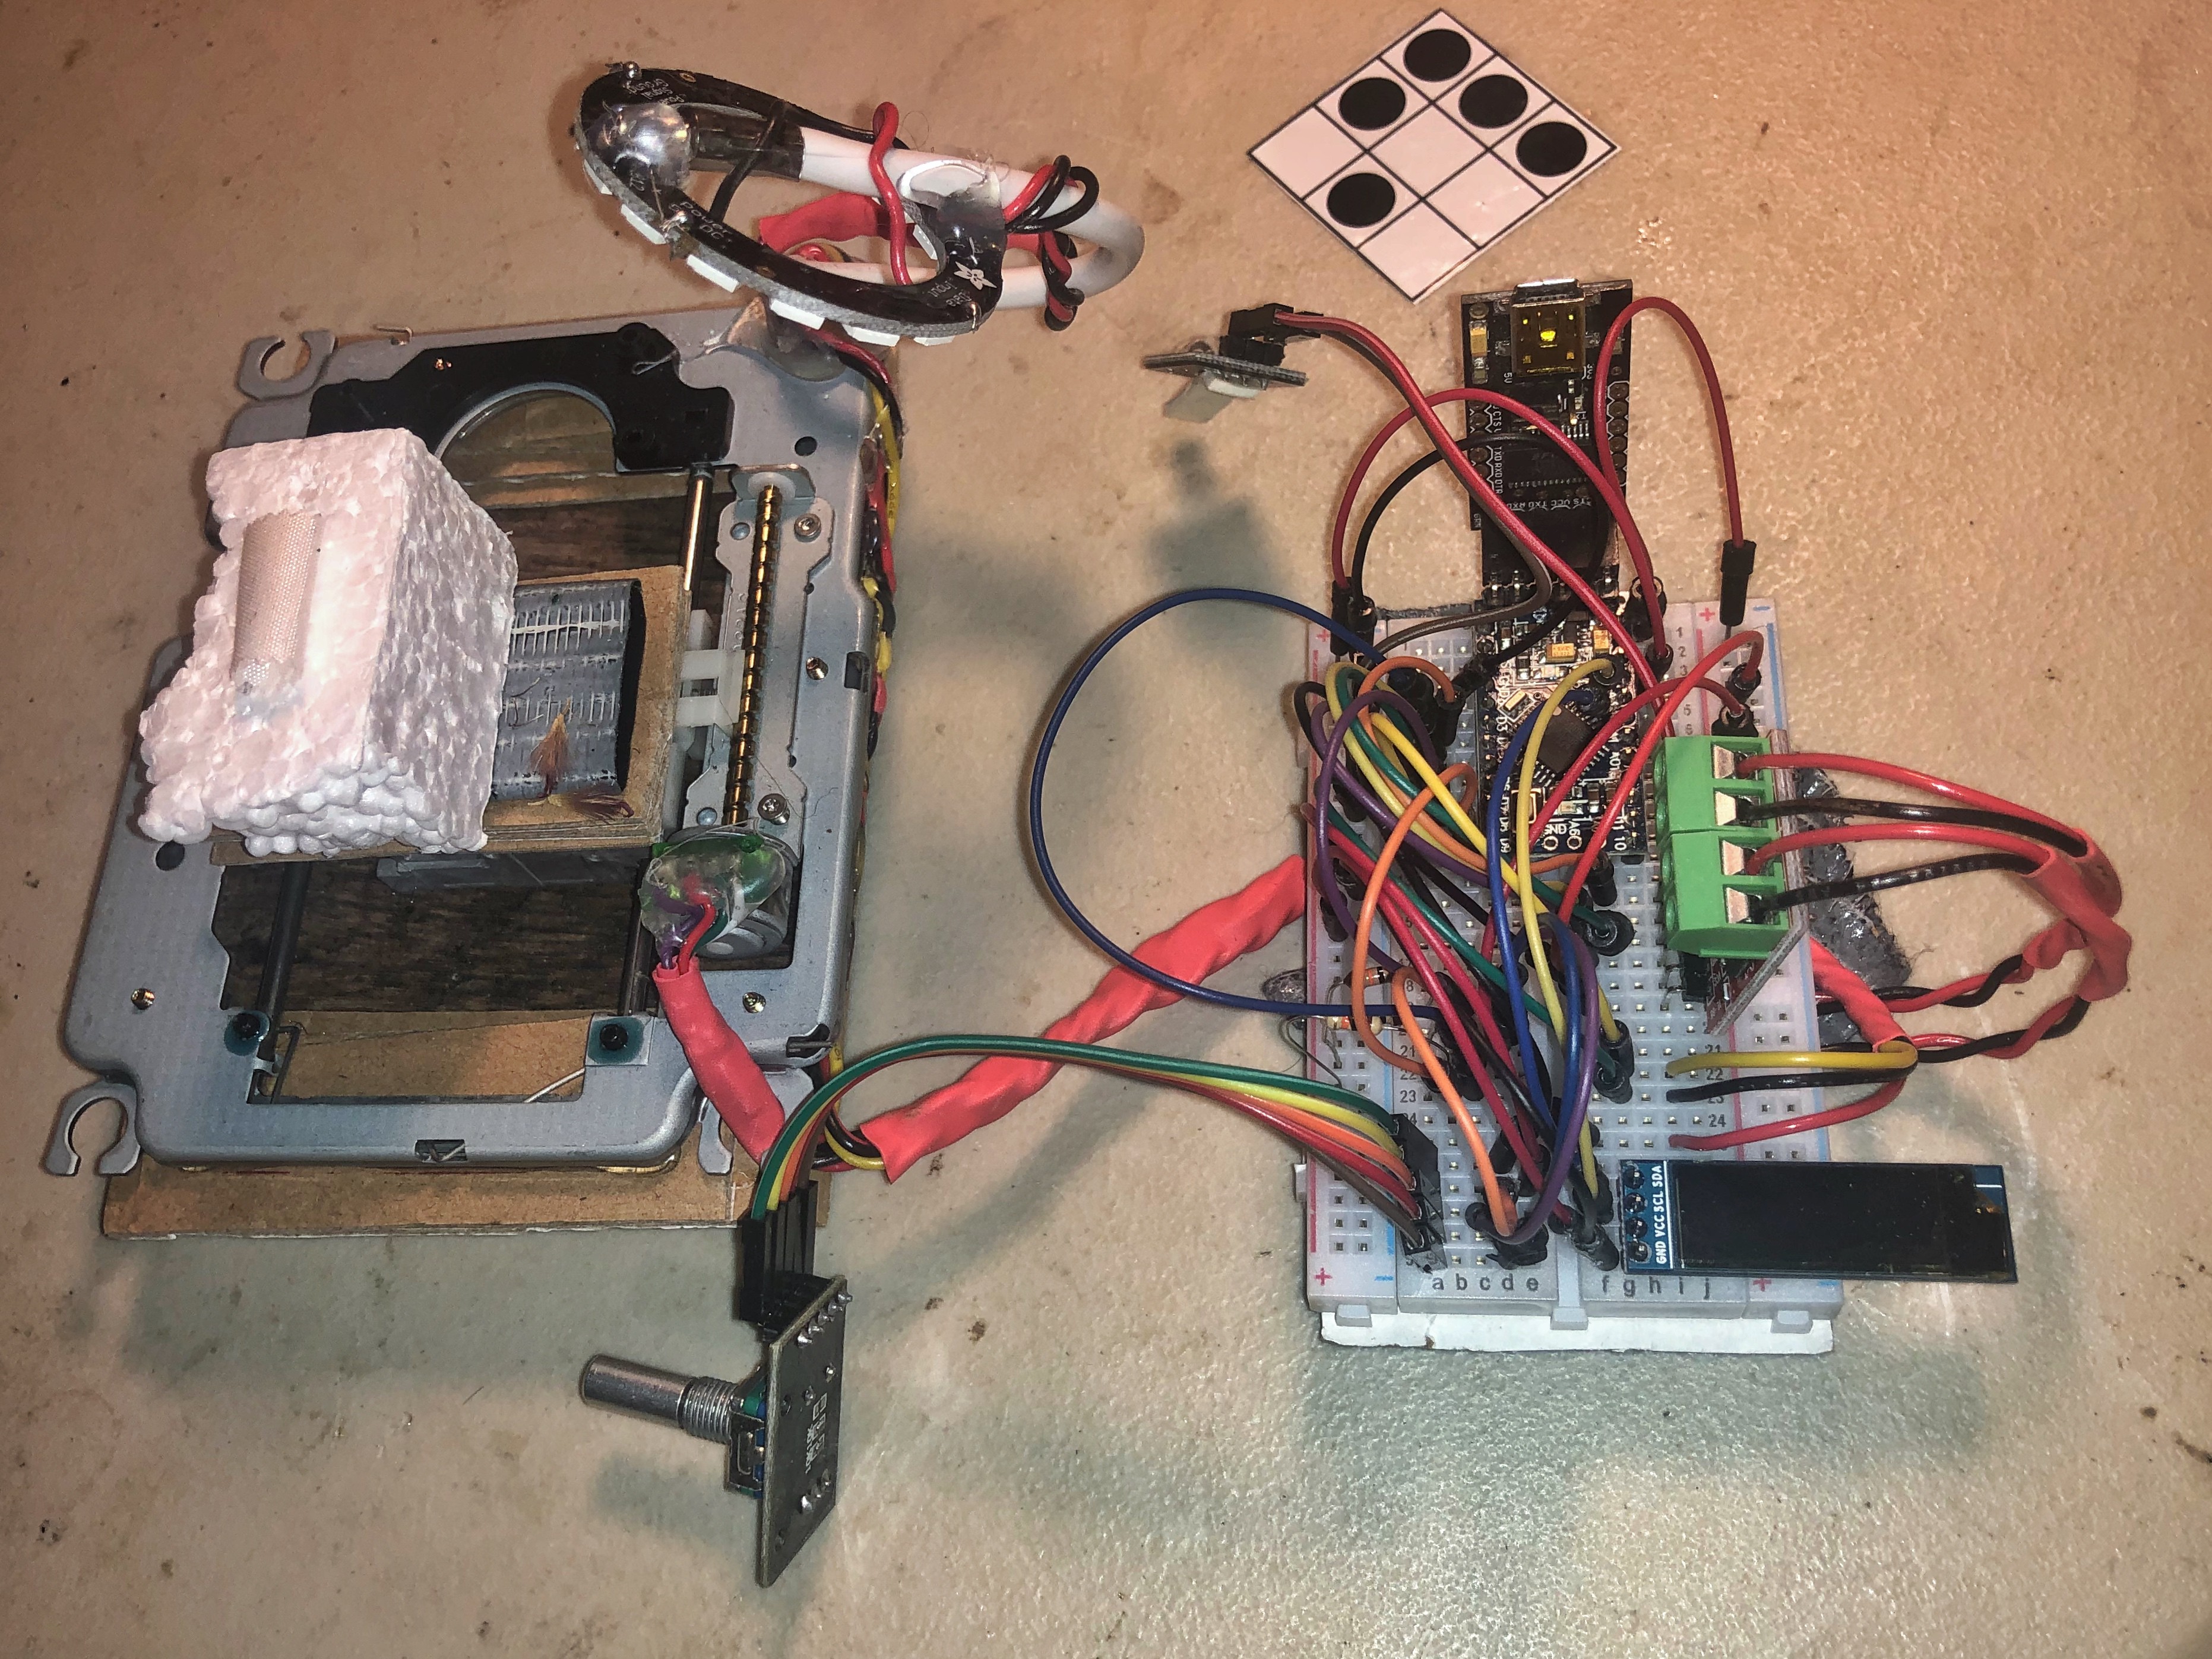
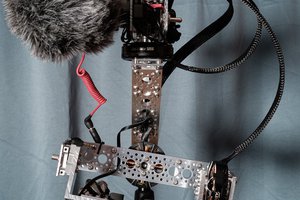
Close
0%
0%

Nikon D90 Macro Autorail

I didn't want to buy a big expensive autorail to shoot bugs, so I figured I'd build my own that will trigger the camera and be portable.

Similar projects worth following
While delving deeper and deeper into the abyss that is Extreme Macro Photography, one thing has become evident very quickly: focus stacking is essential, and it’s super hard to do by hand for stacks of more then 3 or 4 photos, let alone 30 to 70.

This led me through many different methods to avoid the inevitable: I really need a focus rail and I need to get my hands away from the goods. When you’re zoomed in to a 5:1 scale, having a pulse, breathing, and shifting weight around the tripod will all work against you. Plus, shooting 30 photos in succession and sliding the camera one millimeter every time, accurately, is basically impossible to do manually.

The obvious choice would be to go online and buy a big boy auto rail, but they’re crazy overkill, expensive as hell, and that’s just too easy. So I thought about what my options would be at home, and I realized: I have just taken apart a few desktop computers for parts and I had a stepper motor and platter from a dvd drive laying around! That should be perfect for the task. 

Moving the weight of a full camera plus extra gear would be difficult to do at minute distances without using a strong motor and good pully/gear system. So I decided to move the subject instead. You could make the point that the light conditions would be changing from shot to shot, but the subject is so small, and the light is so broad and full, that I don't think it will matter. 

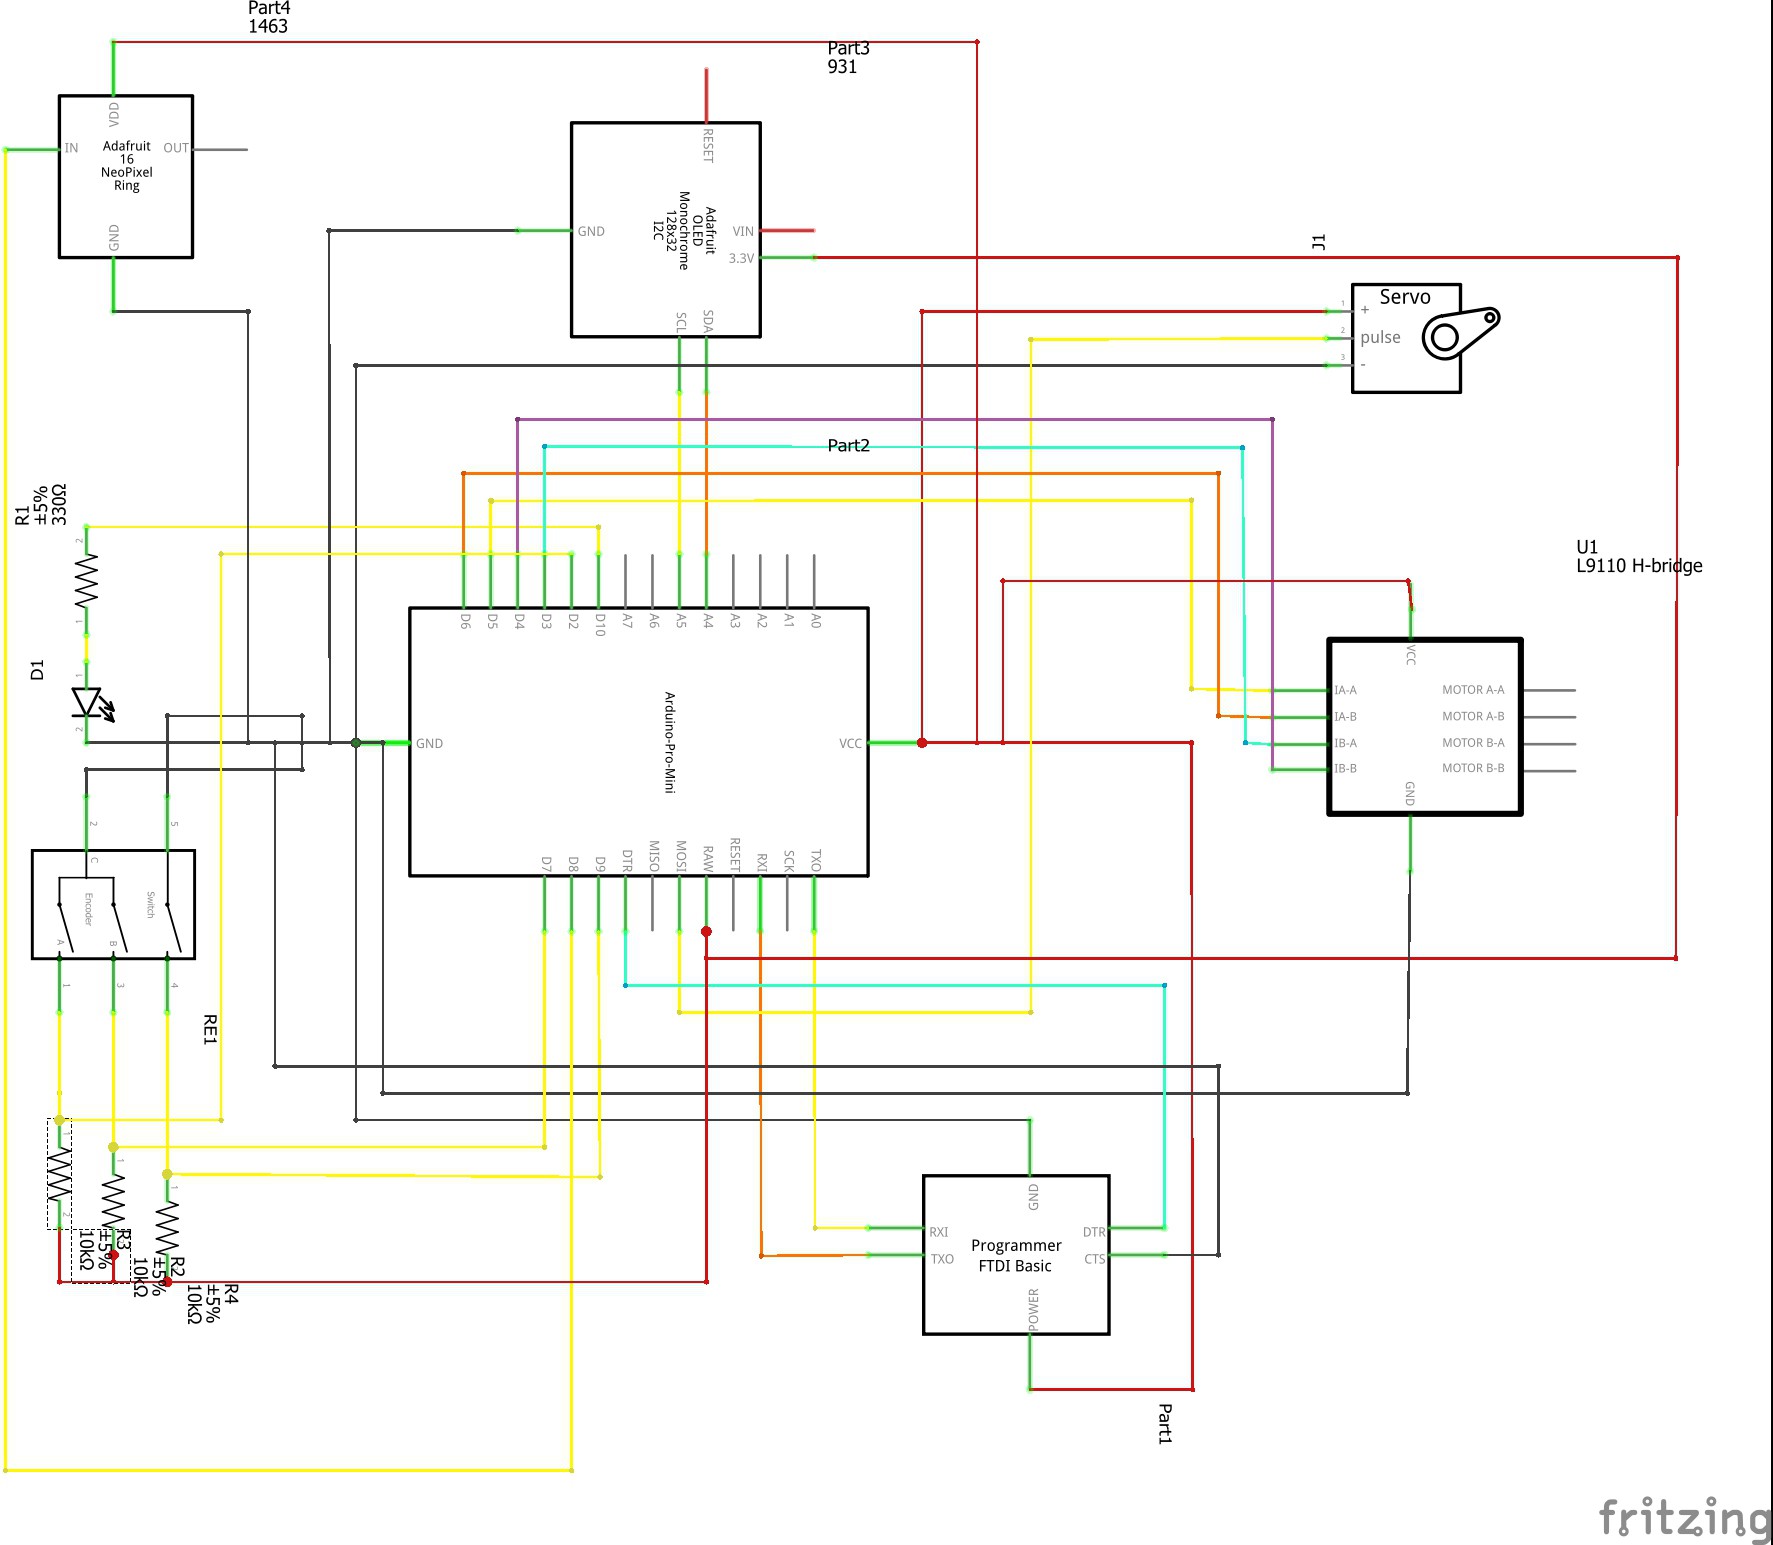
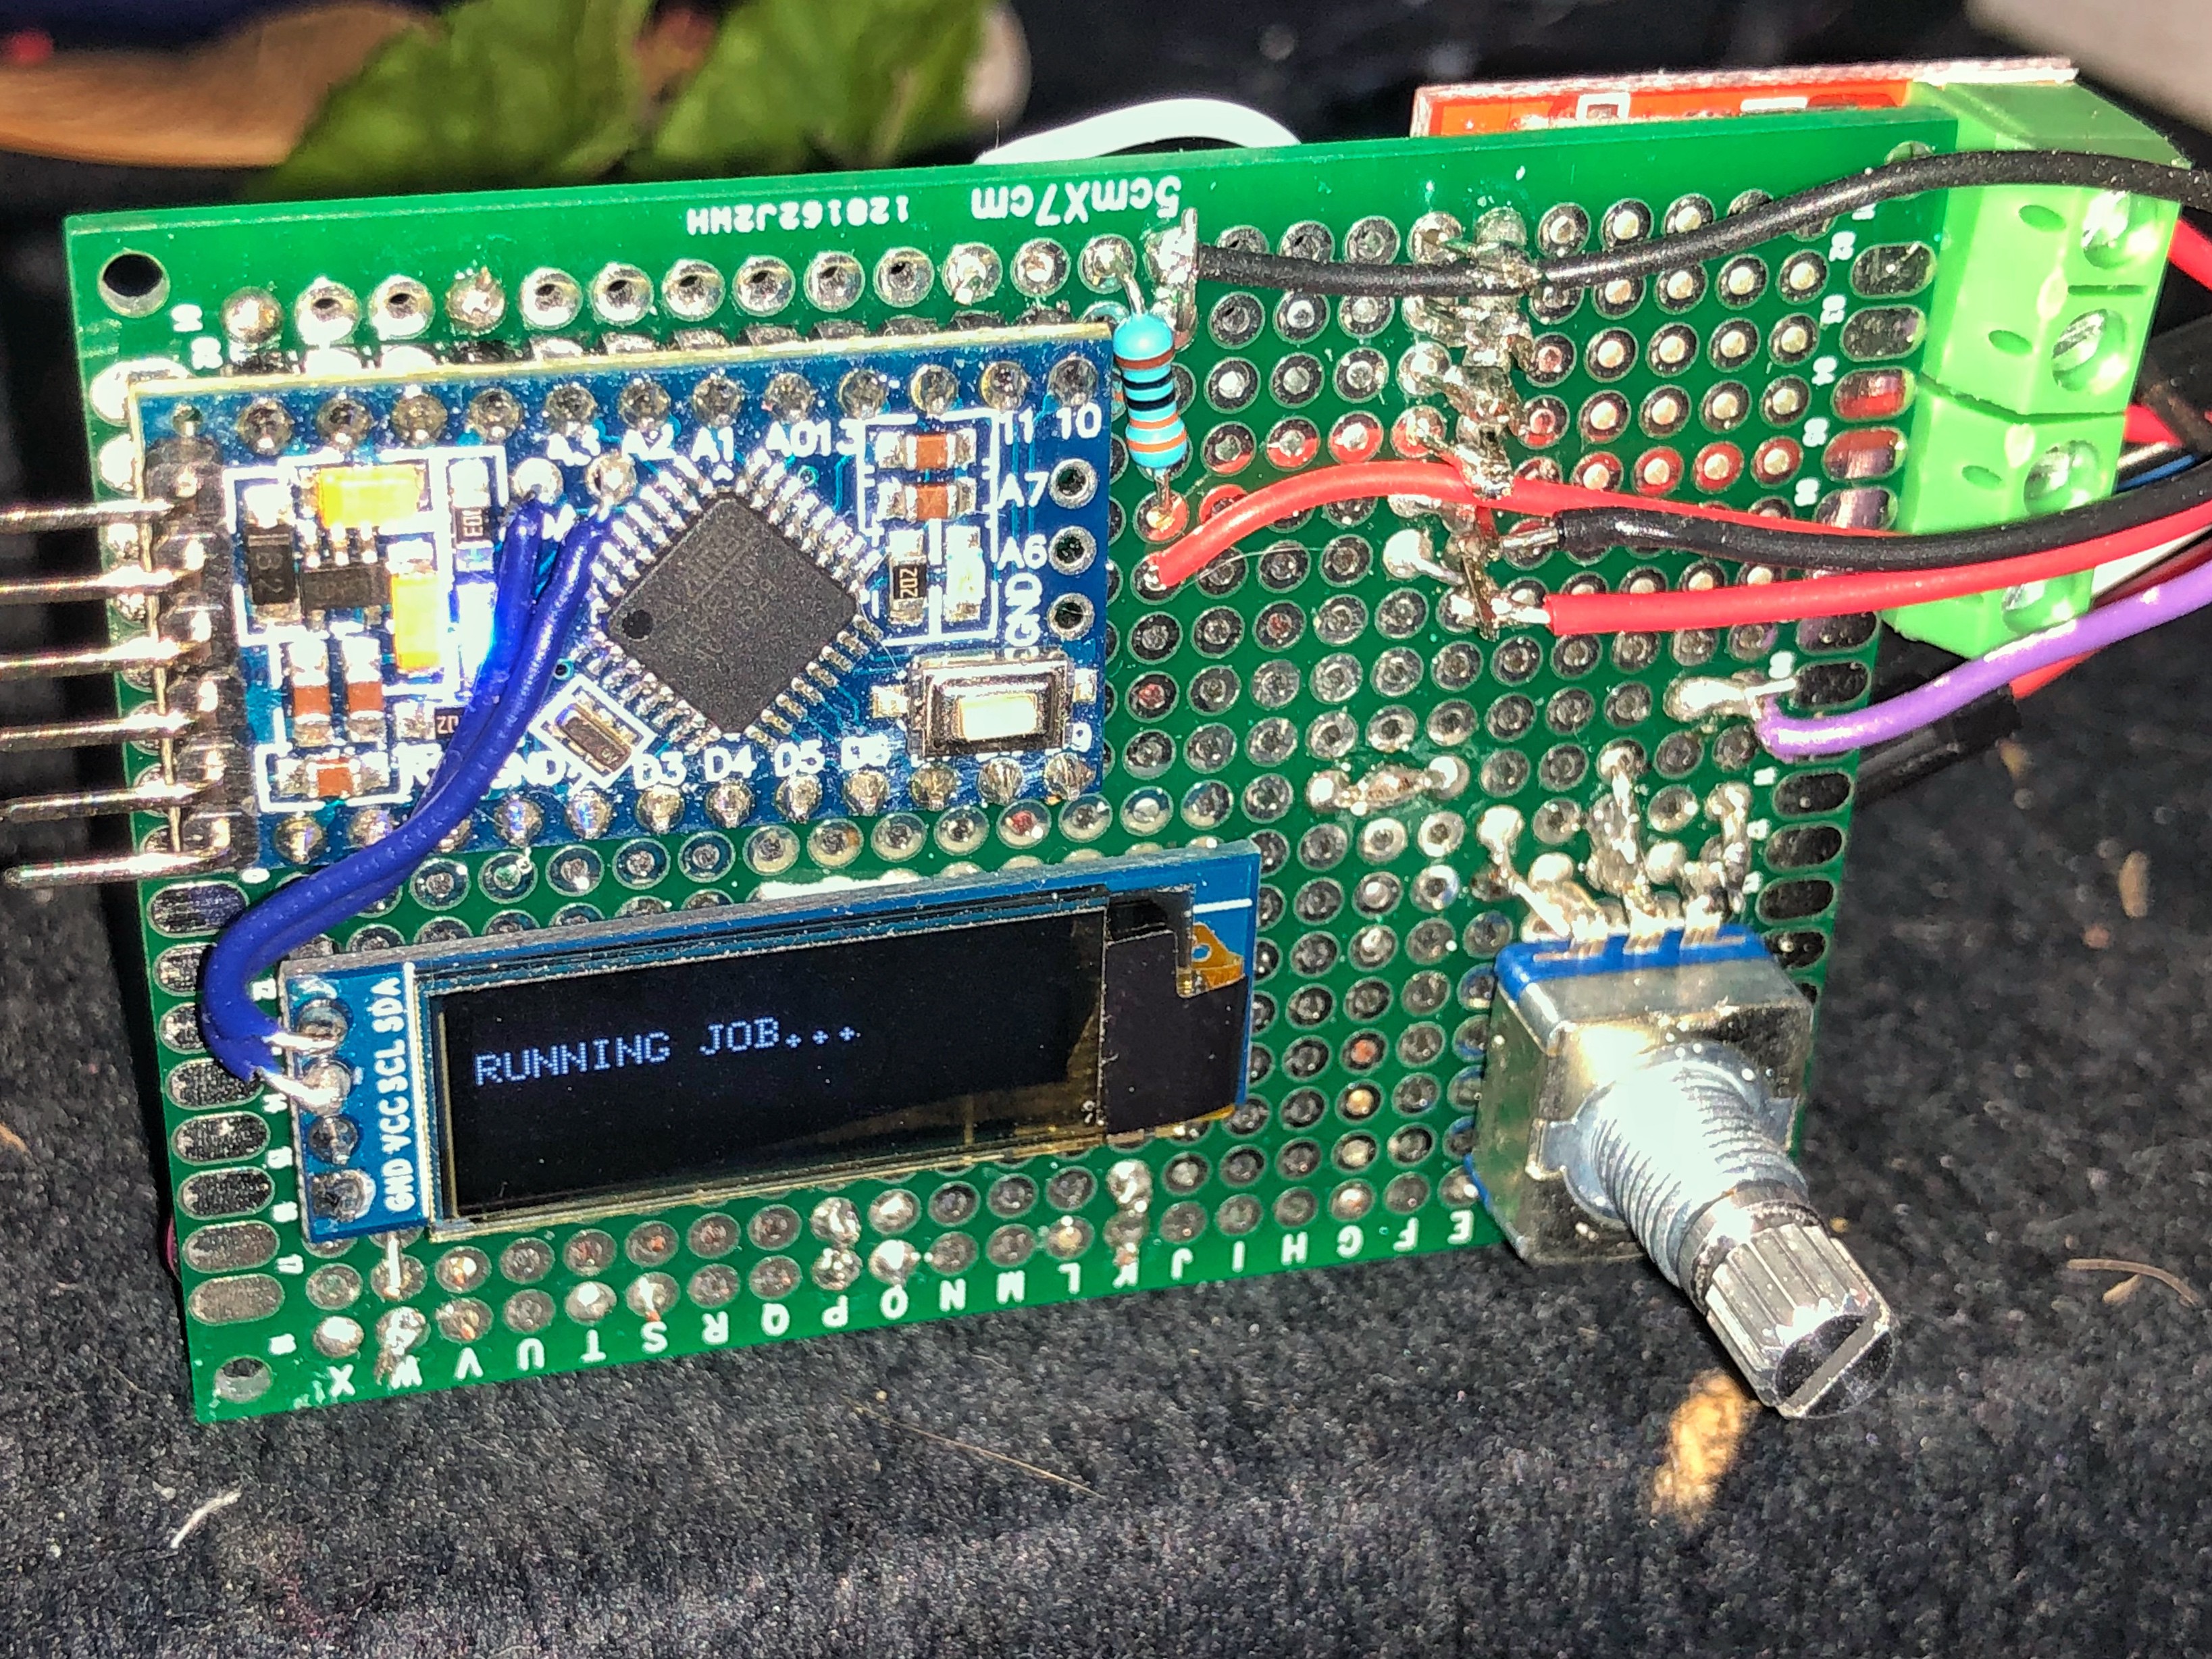
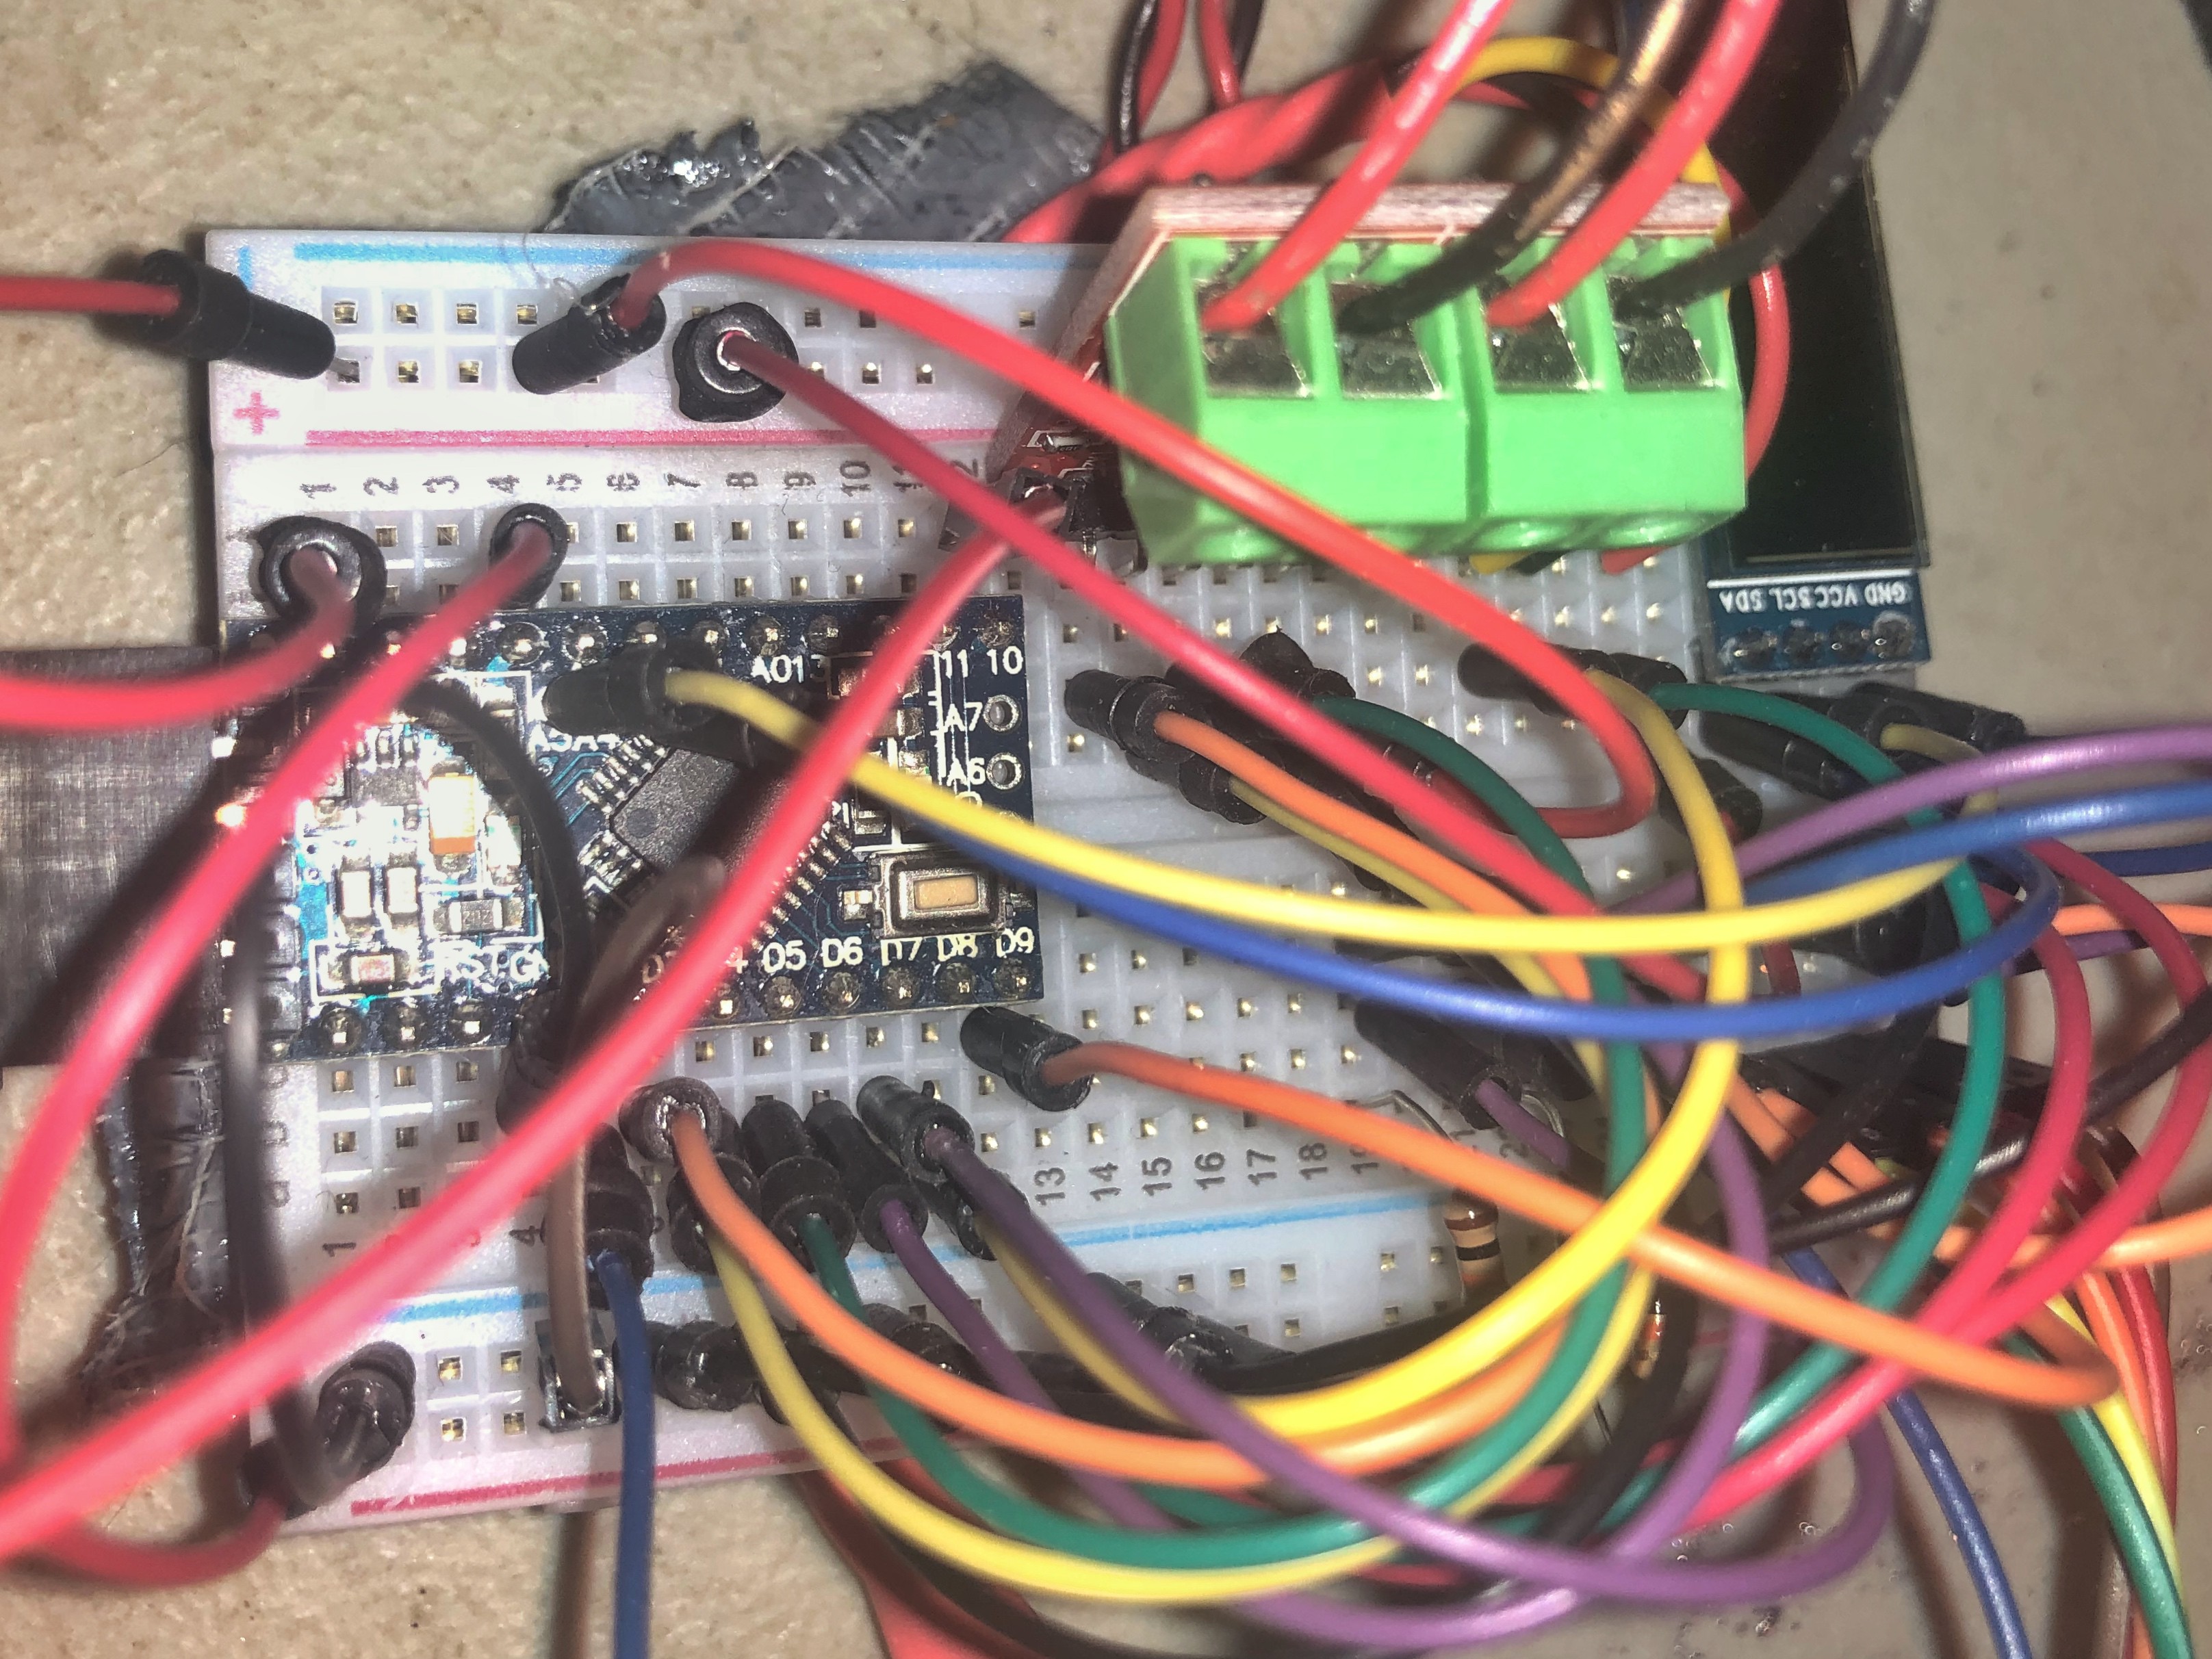
Ok, so, if I’m going to make my own autorail, what other features would be awesome? I think a stage light (which should also be good for adding colored flair to shots), an IR camera remote, of course, an OLED display, a rotary encoder for input, and a usb plug for power. 

All of this together would hugely improve my process and quality. 

  • 1 × Stepper Motor A DVD Drive Stepper Motor I pulled out of an old DVD Burner
  • 1 × 3.3v Arduino Microcontroller Arduino 3.3v Pro Mini Microcontroller
  • 1 × L9110 H-Bridge Motor Driver H-Bridge L9110 2 Way Motor Driver Module
  • 1 × 12x Neopixel ring 12x Neopixel ring
  • 1 × IR LED IR LED for remote triggering

View all 10 components

  • Prototype #2: Protoboarding!

    Jeff07/06/2018 at 15:18 0 comments

    Alright, finally the moment of truth. Time to make this into a real prototype on a protoboard. I've been dreading this, as the device has become so essential to shooting micro photography for me, but it's so delicate on a breadboard that it's kinda been hell babying it through all of these photos. 

    Protoboarding went pretty smooth, although the rotary encoder I ended up soldering down had a different pinout then the prototype version, so that forced me to think on my feet a bit. I also accidentally tried pulling the motor / stage light power through the pro mini voltage regulator which resulted in a classic display of smoke and cussing. Amazingly it didn't kill the pro mini (as far as I can tell), so after some last minute reworking, everything seems fine.

    This time around I extended the IR remote cable, and added a rubber band to it for easier mounting. I added a servo motor so I have 2 axis' of adjustment without having to reach into the stage. 

    After hours of testing, everything works great! With the amount of power the motors and LEDs draw, I really need to add some decoupling caps and I'm probably missing some other obvious safety measures to keep everything happy, so version 3 will need to be rethought a little for better build quality. 

    Some thoughts on feature enhancements: A second servo for 3 axis adjustment would be really nice. Also a smaller form factor for everything and attaching to the tripod directly would be amazing. Finally, being able to include adjustable, super bright LEDs for a flash replacement would also be really nice. Well see, maybe I can cook up some solutions for all that before I call it feature complete!

  • First prototype: Breadboard Spaghetti!

    Jeff06/18/2018 at 22:39 0 comments

    I keep a large stock of prototyping components, so luckily I didn’t have to order anything to build my first prototype. I started with a 3.3v Arduino pro mini. From there I’d need a HBridge Motor Driver to run the Stepper, a Neopixel ring for the stage light, a rotary encoder for input and an oled screen for output. I’d also need an Infrared LED for camera remote firing ( I use a Nikon D90, which accepts IR for remote fire which is super convenient in this case. )

    Some challenges with the initial build: ofcourse, operating a device with so many jumper wires that are prone to falling out is not ideal. Also, I had to use 2 pins on the pro mini that are in the middle of the board and I didn’t bother attaching female pin headers, so the oled would disconnect every time the breadboard shifted. Finally, figuring out the pin and wire configuration for the hbridge was a lot more time consuming then I would have thought. As far shooting goes: I did have a complication with very light subjects (like dead bugs), though. If they’re not secured down, they will tend to shift when the stepper moves the stage. This sounds like a deal breaker, but it forced me to start using pins to pin down the bugs, which is actually better for many reasons.

    Ultimately the prototype works out wonderfully, though! It improved the quality of my photos so much that I'm afraid of trying to build it on a protoboard and breaking it.  The neopixels are no where near bright enough to replace a flash, which I didn’t really expect to workout, but it’s super convenient as a prep light and I’ve used it a few times for edge light for adding alittle color to things. 

    All in all it's been a great success, so far! Next I'll have to solder together a nicer prototype on a protoboard and put a real schematic together.


View all 2 project logs

Enjoy this project?

Share

Discussions

Similar Projects

Does this project spark your interest?

Become a member to follow this project and never miss any updates