 staticdet5
Using a Raspberry Pi and a low-tech slow cooker, I'm going to build an open source sous vide. To be honest, I'm going to build a Raspberry Pi controlled digital mains power controller. You can plug whatever you want into the side of this thing and control it from the Pi.
OK, the project changed yesterday. Maybe it forked. The first iteration of this project is now being used to incubate test tube cultures in an austere medical laboratory. The next feature request is for a PCR machine. Having this capability in an austere lab is an amazing prospect, but should be easily achievable.


 Lars Knudsen
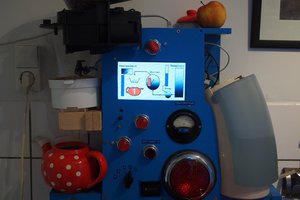
 justin
 alexwhittemore
OK, I think one of you that's following the project is familiar with the hospital where this is in use. Please keep in mind the operational sensitivities, and keep this thread clear of any specifics. I know. I almost certainly didn't have to say it, but we need to be safe out there.