 mael.henaff

Step 1: Understanding of Transhumanism - Interviews
In order to define what is the best way to become a machine, I have been in transhumanism meetings organized by "London Futurist", the London most influent group lead by David Wood. From those discussions, I understood soon enough that in order to become this machine I should first experiment what is it to be inside a new body and being control by this body.
To anticipate the experience of having his mind uploaded inside a machine I asked them what for them will be our body and how we are going to be in control of it. They replied to me that we are going to define new senses which go beyond the one we already use by using the data the machine will intercept and use them to control our movement, our behaviour and the way we live with the information around us. One of the techno-optimistic explained to me that for him, being a machine is the most sustainable way to mitigate the effect of climate change by using humidity/temperature/CO2 sensors and restricted our body in correlation with those data.
This intense picture of the transhumanism way of thinking was the point of start to build the machine I put myself into.
Step 2: Thinking Through Making - How a Machine Built by Human Can Script a Human.
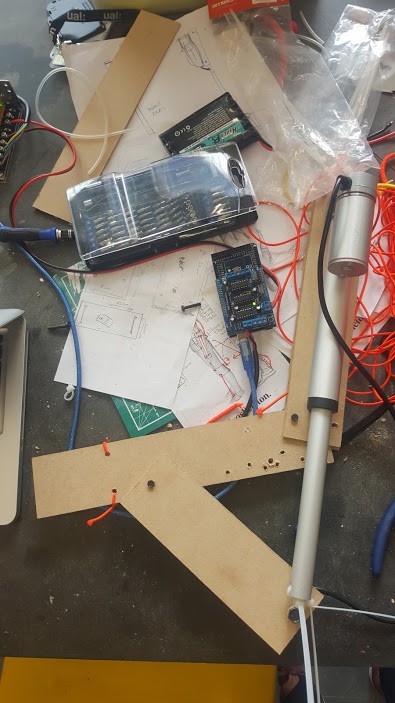
More than embracing transhumanism thoughts about being a machine I needed to experiment with the material and started to constitute my machine.
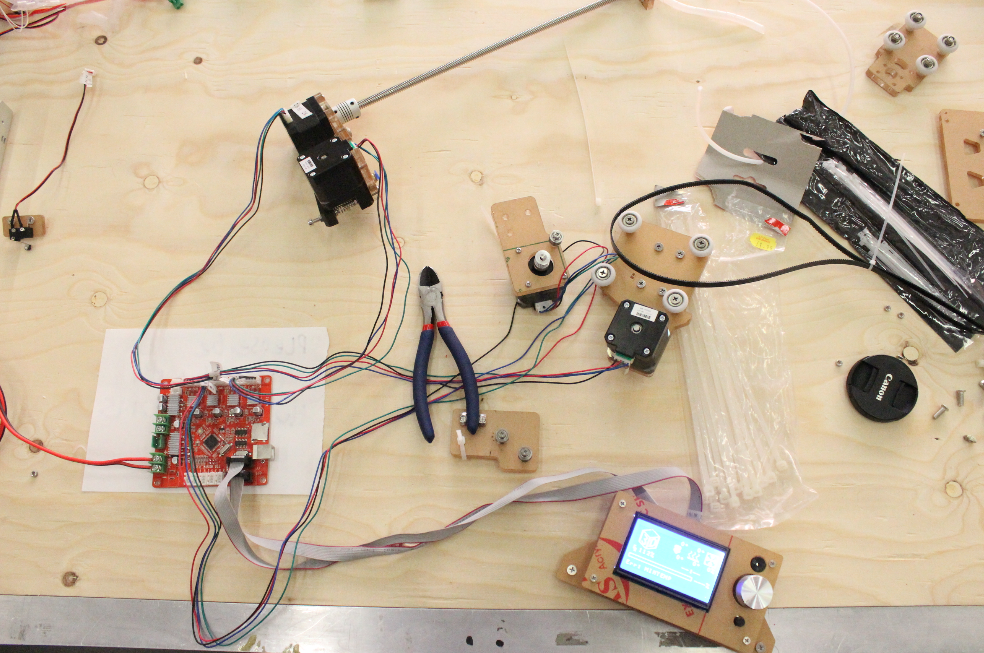
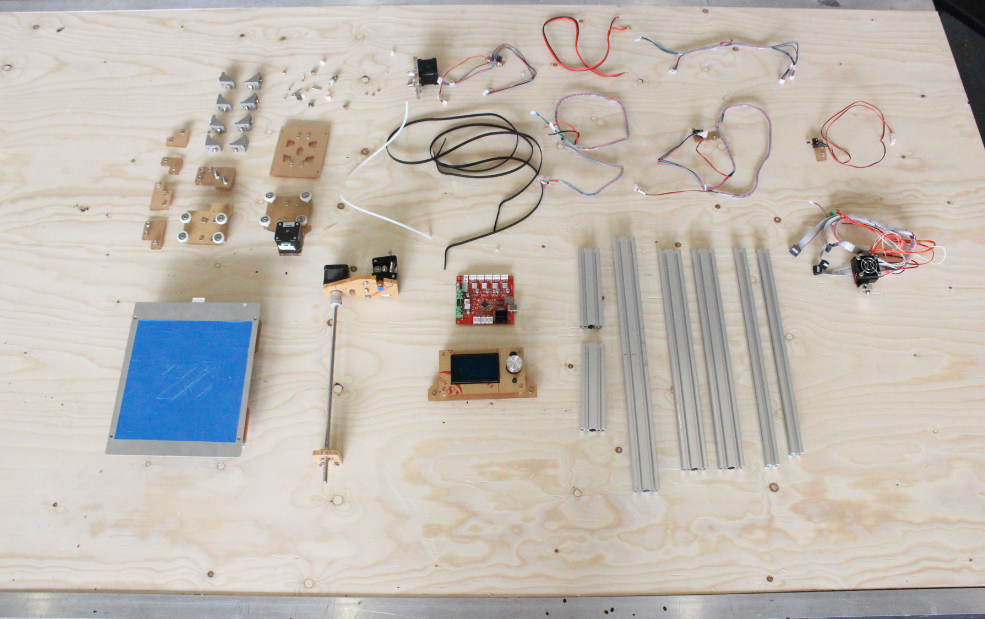
To start aforementioned experimentation I disassembled a 3D printer to recycle the old parts and incorporate them into my body.
I put a 3D model of a human into the 3D printer controller and install the X/Y/Z motors into my elbow and shoulder to see how the original purpose of making objects can be translated to manipulate and restrict the human body. Promptly, it appeared that the human mechanics are not as flexible as the 3D printer would like them to be.
Even if this experience was thoughtful, it still lacks some materials to properly talk about understanding and experience what is being a machine. From this adventure, let's move to a deepest understanding of the human body to control in a better way.
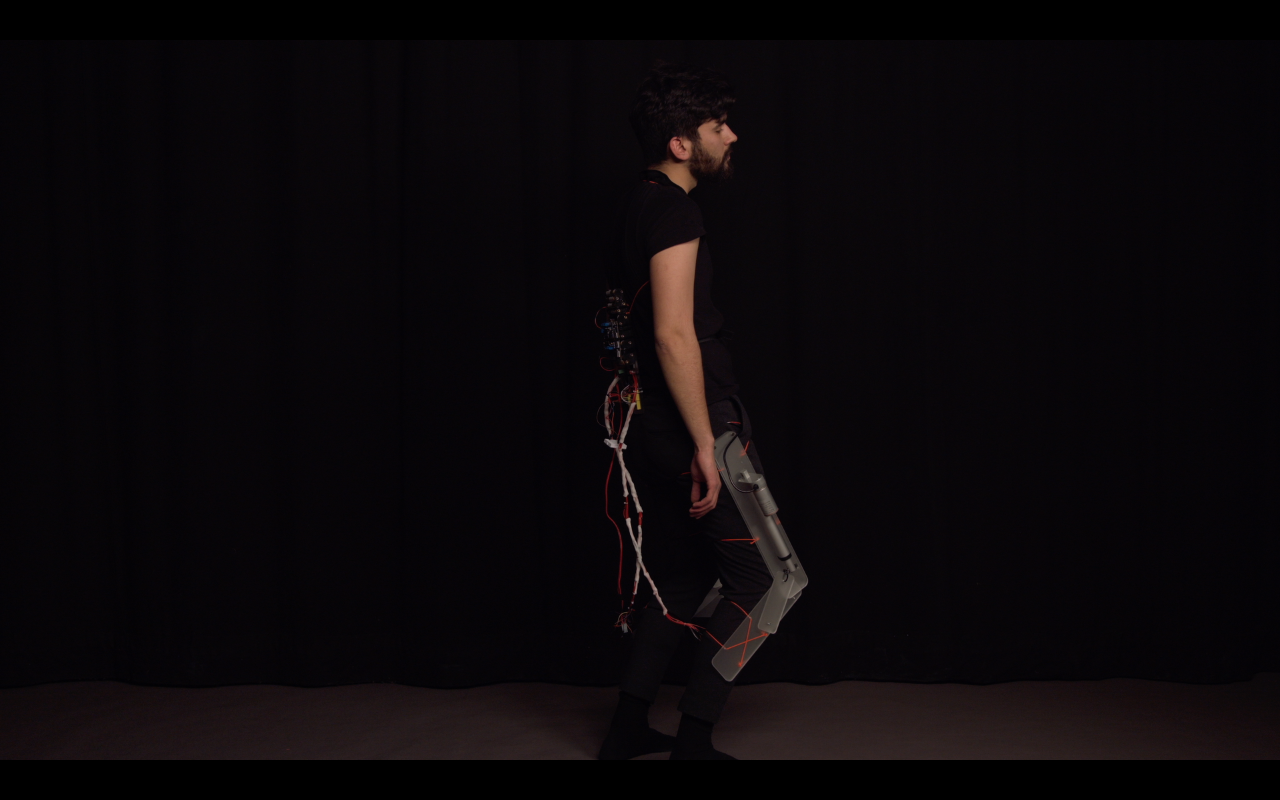
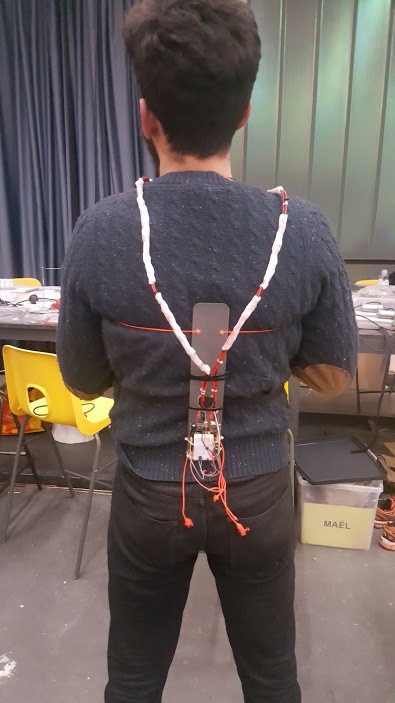
Step 3: Becoming Through Making. the Human/Machine First Exoskeleton
Here we are! Let's build the first robotic arm.
This crappy making is the result of research on what are the mechanics of the human body and the translation of those mechanics into three pieces of wood and a 12v linear actuator motor controlled by an Arduino controller. The middle piece is the representation of the elbow which needs to be both attached to the actuator the (upper-arm) and the other arm part. Depending on the size of the elbow and its position it will more or less change the movement of the arm.
Step 4: Design the Body Frame + Creating the Algorithm to Control It
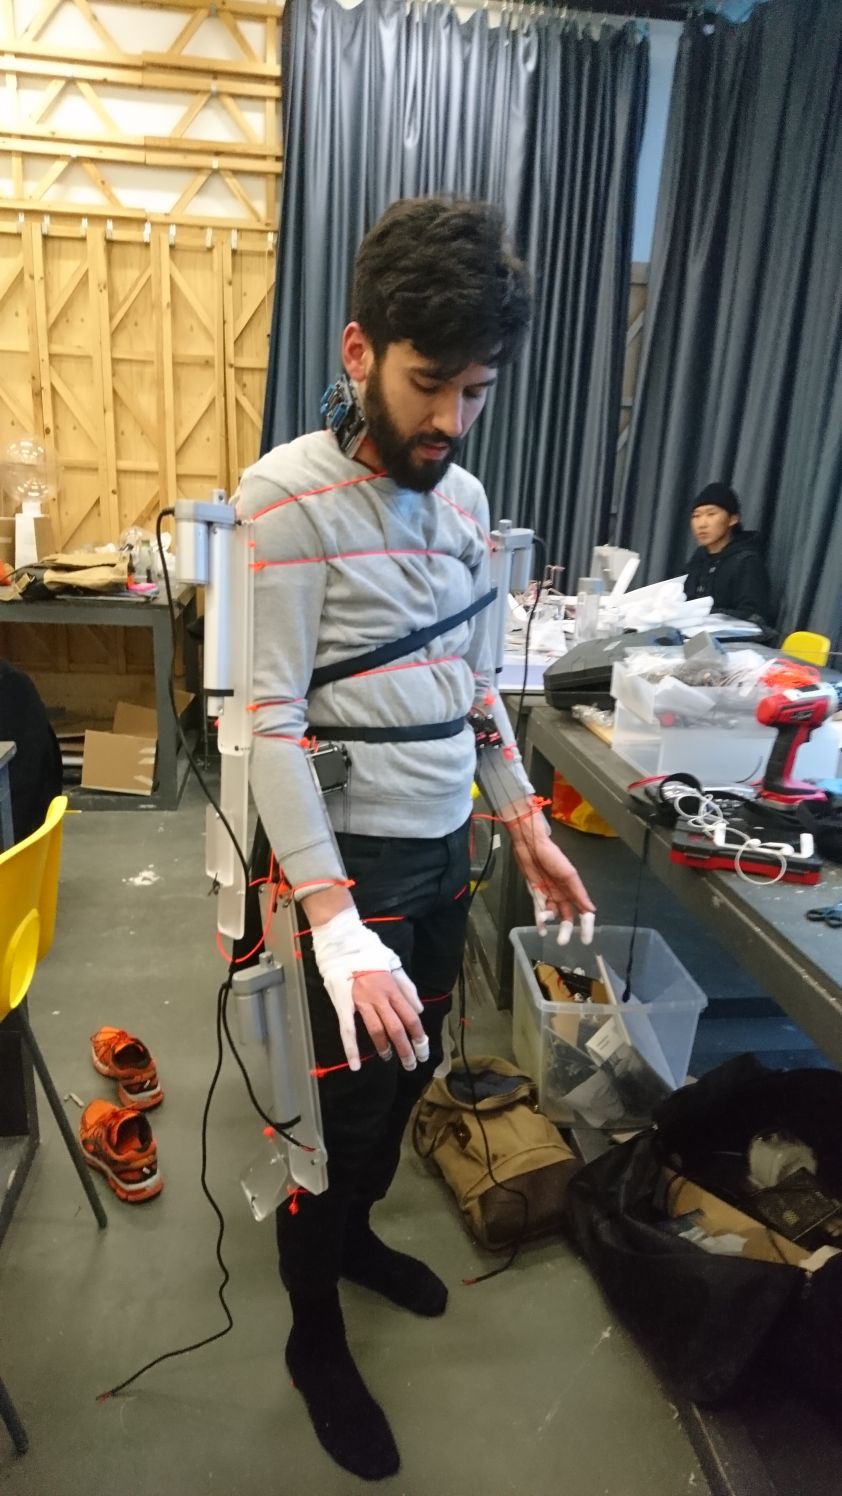
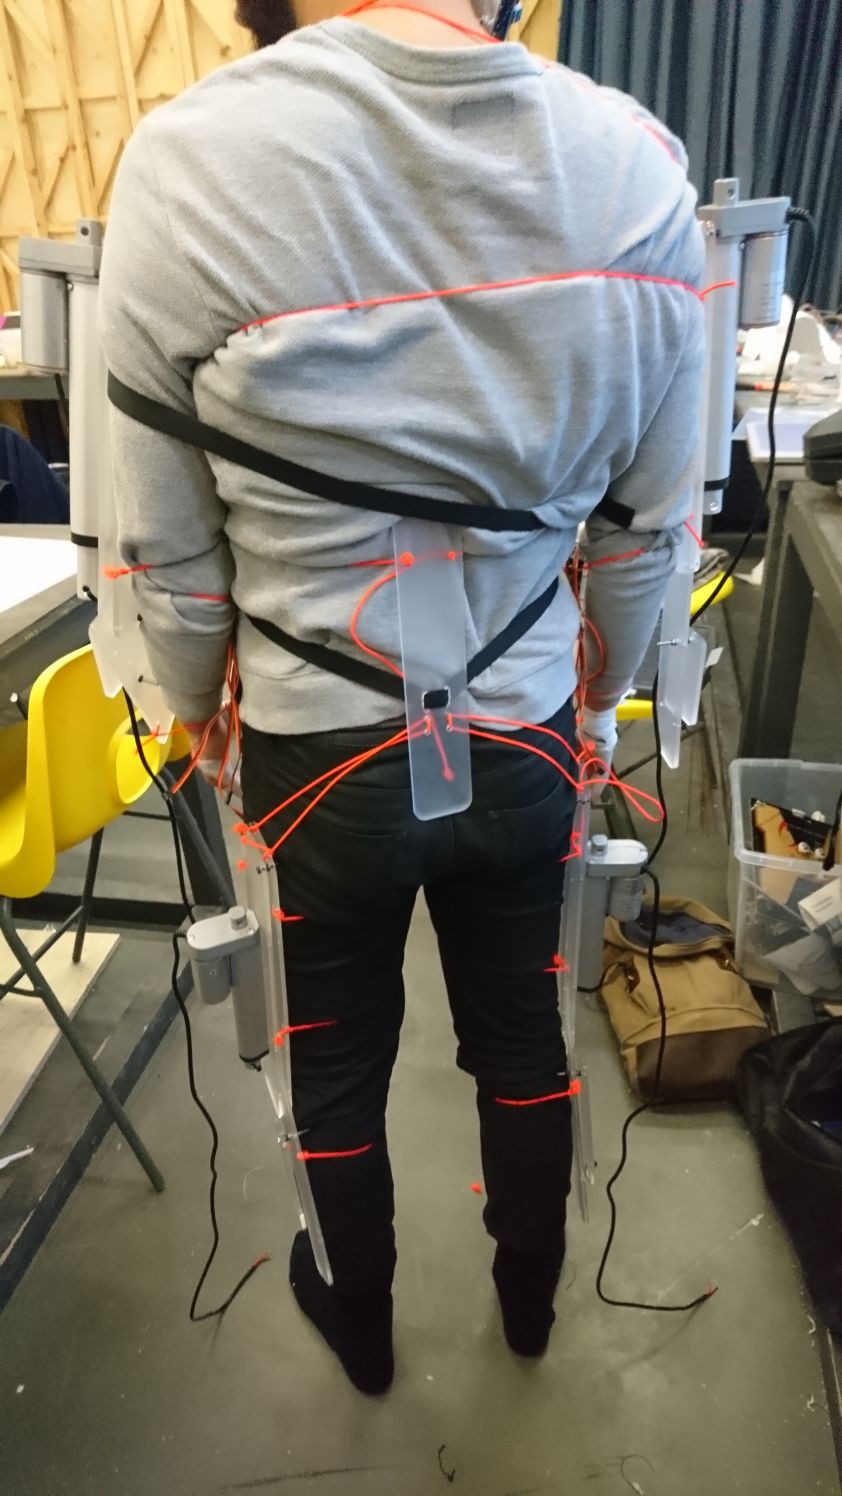
After determining the mechanics of the arm, I followed this path to build the following body parts:
- x2 arms controllers
- x2 legs controllers
- x2 hand controller
The body parts are controlled by a temperature/humidity sensor which controlled the movement of the body by restricting my body and communicating with me through fingers sign.
From this step, I realized what means being a machine. It's not just about restricting the human body to anticipate the passage of the meat machine to the steel machine. But it's understanding that our body is embodied by an algorithm in a cohabitation relationship.
I became the machine at the moment I accepted that I was controlled by it and developed new senses, not because of the restriction of my movements but because of a second algorithmic brain which communicates with me. I established a relationship with this machine, where I am literally a vessel accepting the orders of an artificial entity.
Step 5: I Am a Robot.
To conclude on this project where I experienced what is being a machine, by contextualizing a future where transhumanist thoughts are actually real solution/situations I am making a critic of the present context where assistant technology is a reality. I strive to think that it's not about reprimanding the overuse of assistant technologies but it is to state that we should behave with them with another perspective. My aim is to say that rather than humanizing algorithm we should redefine the relationship we have with it.
I deliberately auto-persuade myself that I was a robot by being controlled by an algorithm which ordered where to go depending on environmental conditions. This machine is the transhumanism representation of what will be our future-self, but also the symbolic image of the almost religious faith we put in technologies to resolve human problems.
"When the Saints Go Machine" project is knowing more about human being behaviour with technology through becoming this technology.
Step 6: DIY: Become a Machine!
Let's make the machine restrict our body and create our human/machine symbiosis.
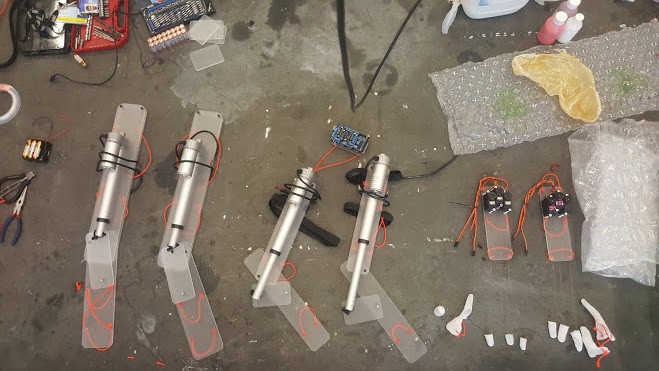
Here is a list of materials needed:
- x3 Arduino MEGA 2560 controllers
- x2 Motor Shield
- x1 DHT 22 Temperature/humidity/gas sensor
- x3 12 batteries
- Acrylic pieces to build the machine parts
- Polymer
- x20 M4 bolts
- x20 M4 nuts
- Wires females/males
- x4 12v linear actuator motors
- x6 3.3v 360° servo motors
In terms of the making part. I am sharing with you the laser cut file I made to build the different body parts. I used a 3mm white frosted acrylic.
Here is the code which will control the four linear actuators:
#include <Servo.h>

#define MOTORLATCH 12
#define MOTORCLK 4
#define MOTORENABLE 7
#define MOTORDATA 8

#define MOTOR1_A 2
#define MOTOR1_B 3
#define MOTOR2_A 1
#define MOTOR2_B 4
#define MOTOR3_A 5
#define MOTOR3_B 7
#define MOTOR4_A 0
#define MOTOR4_B 6


#define MOTOR1_PWM 11
#define MOTOR2_PWM 3
#define MOTOR3_PWM 6
#define MOTOR4_PWM 5
#define SERVO1_PWM 10
#define SERVO2_PWM 9

#define FORWARD 1
#define BACKWARD 2
#define BRAKE 3
#define RELEASE 4


Servo servo_1;
Servo servo_2;
Servo servo_3;
Servo servo_4;


void setup()
{
  Serial.begin(9600);
  Serial.println("test");

  servo_1.attach(SERVO1_PWM);
  servo_2.attach(SERVO2_PWM);
}


void loop()
{
  servo_1.write(255);
  servo_2.write(255);
  delay(1000);
  servo_1.write(180);
  servo_2.write(180);
  delay(2000);


  motor(1, BACKWARD, 128);

  delay(10000 );
  motor(1, RELEASE, 0);

  delay(50);
  motor(1, FORWARD, 255);

  delay(10000);
  motor(1, RELEASE, 0);

    delay(50);

    motor(2, BACKWARD, 128);
  delay(10000 );

    motor(2, RELEASE, 0);
  delay(50);

   motor(2, FORWARD, 255);
  delay(10000);

    motor(2, RELEASE, 0);
    delay(50);

}


void motor(int nMotor, int command, int speed)
{
  int motorA, motorB;

  if (nMotor >= 1 && nMotor <= 4)
  {
    switch (nMotor)
    {
    case 1:
      motorA   = MOTOR1_A;
      motorB   = MOTOR1_B;
      break;
    case 2:
      motorA   = MOTOR2_A;
      motorB   = MOTOR2_B;
      break;
    case 3:
      motorA   = MOTOR3_A;
      motorB   = MOTOR3_B;
      break;
    case 4:
      motorA   = MOTOR4_A;
      motorB   = MOTOR4_B;
      break;
    default:
      break;
    }

    switch (command)
    {
    case FORWARD:
      motor_output (motorA, HIGH, speed);
      motor_output (motorB, LOW, -1);
      break;
    case BACKWARD:
      motor_output (motorA, LOW, speed);
      motor_output (motorB, HIGH, -1);
      break;
    case BRAKE:
      motor_output (motorA, LOW, 255);
      motor_output (motorB, LOW, -1);
      break;
    case RELEASE:
      motor_output (motorA, LOW, 0);
      motor_output (motorB, LOW, -1);
      break;
    default:
      break;
    }
  }
}


void motor_output (int output, int high_low, int speed)
{
  int motorPWM;

  switch (output)
  {
  case MOTOR1_A:
  case MOTOR1_B:
    motorPWM = MOTOR1_PWM;
    break;
  case MOTOR2_A:
  case MOTOR2_B:
    motorPWM = MOTOR2_PWM;
    break;
  case MOTOR3_A:
  case MOTOR3_B:
    motorPWM = MOTOR3_PWM;
    break;
  case MOTOR4_A:
  case MOTOR4_B:
    motorPWM = MOTOR4_PWM;
    break;
  default:
    speed = -3333;
    break;
  }

  if (speed != -3333)
  {
    shiftWrite(output, high_low);
    if (speed >= 0 && speed <= 255)
    {
      analogWrite(motorPWM, speed);
    }
  }
}


void shiftWrite(int output, int high_low)
{
  static int latch_copy;
  static int shift_register_initialized = false;

  if (!shift_register_initialized)
  {
    pinMode(MOTORLATCH, OUTPUT);
    pinMode(MOTORENABLE, OUTPUT);
    pinMode(MOTORDATA, OUTPUT);
    pinMode(MOTORCLK, OUTPUT);
    digitalWrite(MOTORDATA, LOW);
    digitalWrite(MOTORLATCH, LOW);
    digitalWrite(MOTORCLK, LOW);
    digitalWrite(MOTORENABLE, LOW);
    latch_copy = 0;
    shift_register_initialized = true;
  }

  bitWrite(latch_copy, output, high_low);
  shiftOut(MOTORDATA, MOTORCLK, MSBFIRST, latch_copy);
  delayMicroseconds(5);
  digitalWrite(MOTORLATCH, HIGH);
  delayMicroseconds(5);
  digitalWrite(MOTORLATCH, LOW);
}
Here is the code to control the servo motors for the hands:
#include <Servo.h>
Servo myservo;
Servo myservo2;
Servo myservo3;
Servo myservo4;
Servo myservo5;
Servo myservo6;
int pos = 0;

void setup() {
  myservo.attach(9);
  myservo2.attach(10);
  myservo3.attach(11);
  myservo4.attach(3);
  myservo5.attach(5);
  myservo6.attach(6);
}

void loop() {
  for (pos = 0; pos <= 180; pos += 1) {
    myservo.write(pos);
    myservo2.write(pos);
    myservo3.write(pos);
    myservo4.write(pos);
    myservo5.write(pos);
    myservo6.write(pos);
    delay(15);
  }
  for (pos = 180; pos >= 0; pos -= 1) {
    myservo.write(pos);
    myservo2.write(pos);
    myservo3.write(pos);
    myservo4.write(pos);
    myservo5.write(pos);
    myservo6.write(pos);
    delay(15);
  }
}