I wanted a way to code for and flash uC chips and work on various electronics projects while travelling. I am not a big fan of carrying a full laptop around with me. I think they are too heavy, and none of the laptops I have have a functioning battery. Buying a new laptop I found would run me around $150-200. I figured I could use a Pi to make a smaller laptop that would have some space to store stuff and not need an external programmer for chips, like the arduino rigged as a programmer I use at home.
Because I do not particularly want to spend a great deal of time designing and implementing this, most (read: almost all) of the subsystems will be sourced from adafruit.com because I like them and I have had good experiences with them in the past. Parts for the actual laptop are at: https://www.adafruit.com/wishlists/286424 and extra bits for programming and breadboard supply are at: https://www.adafruit.com/wishlists/377733.


 j0z0r pwn4tr0n
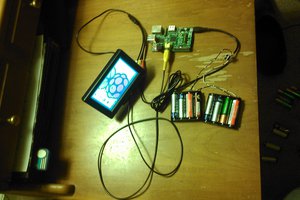
 matt venn
 Ronald McCollam