 Alex Rich
I finally 3D printed my redesigned remote control and it all seems to fit! The biggest challenge was getting all of the buttons to align, but I checked that using a simple 2D print on a piece of paper before I went to 3d printing. There are a couple of minor things I would tweak but overall this is a good replacement for an F-ed up Bose Lifestyle remote.
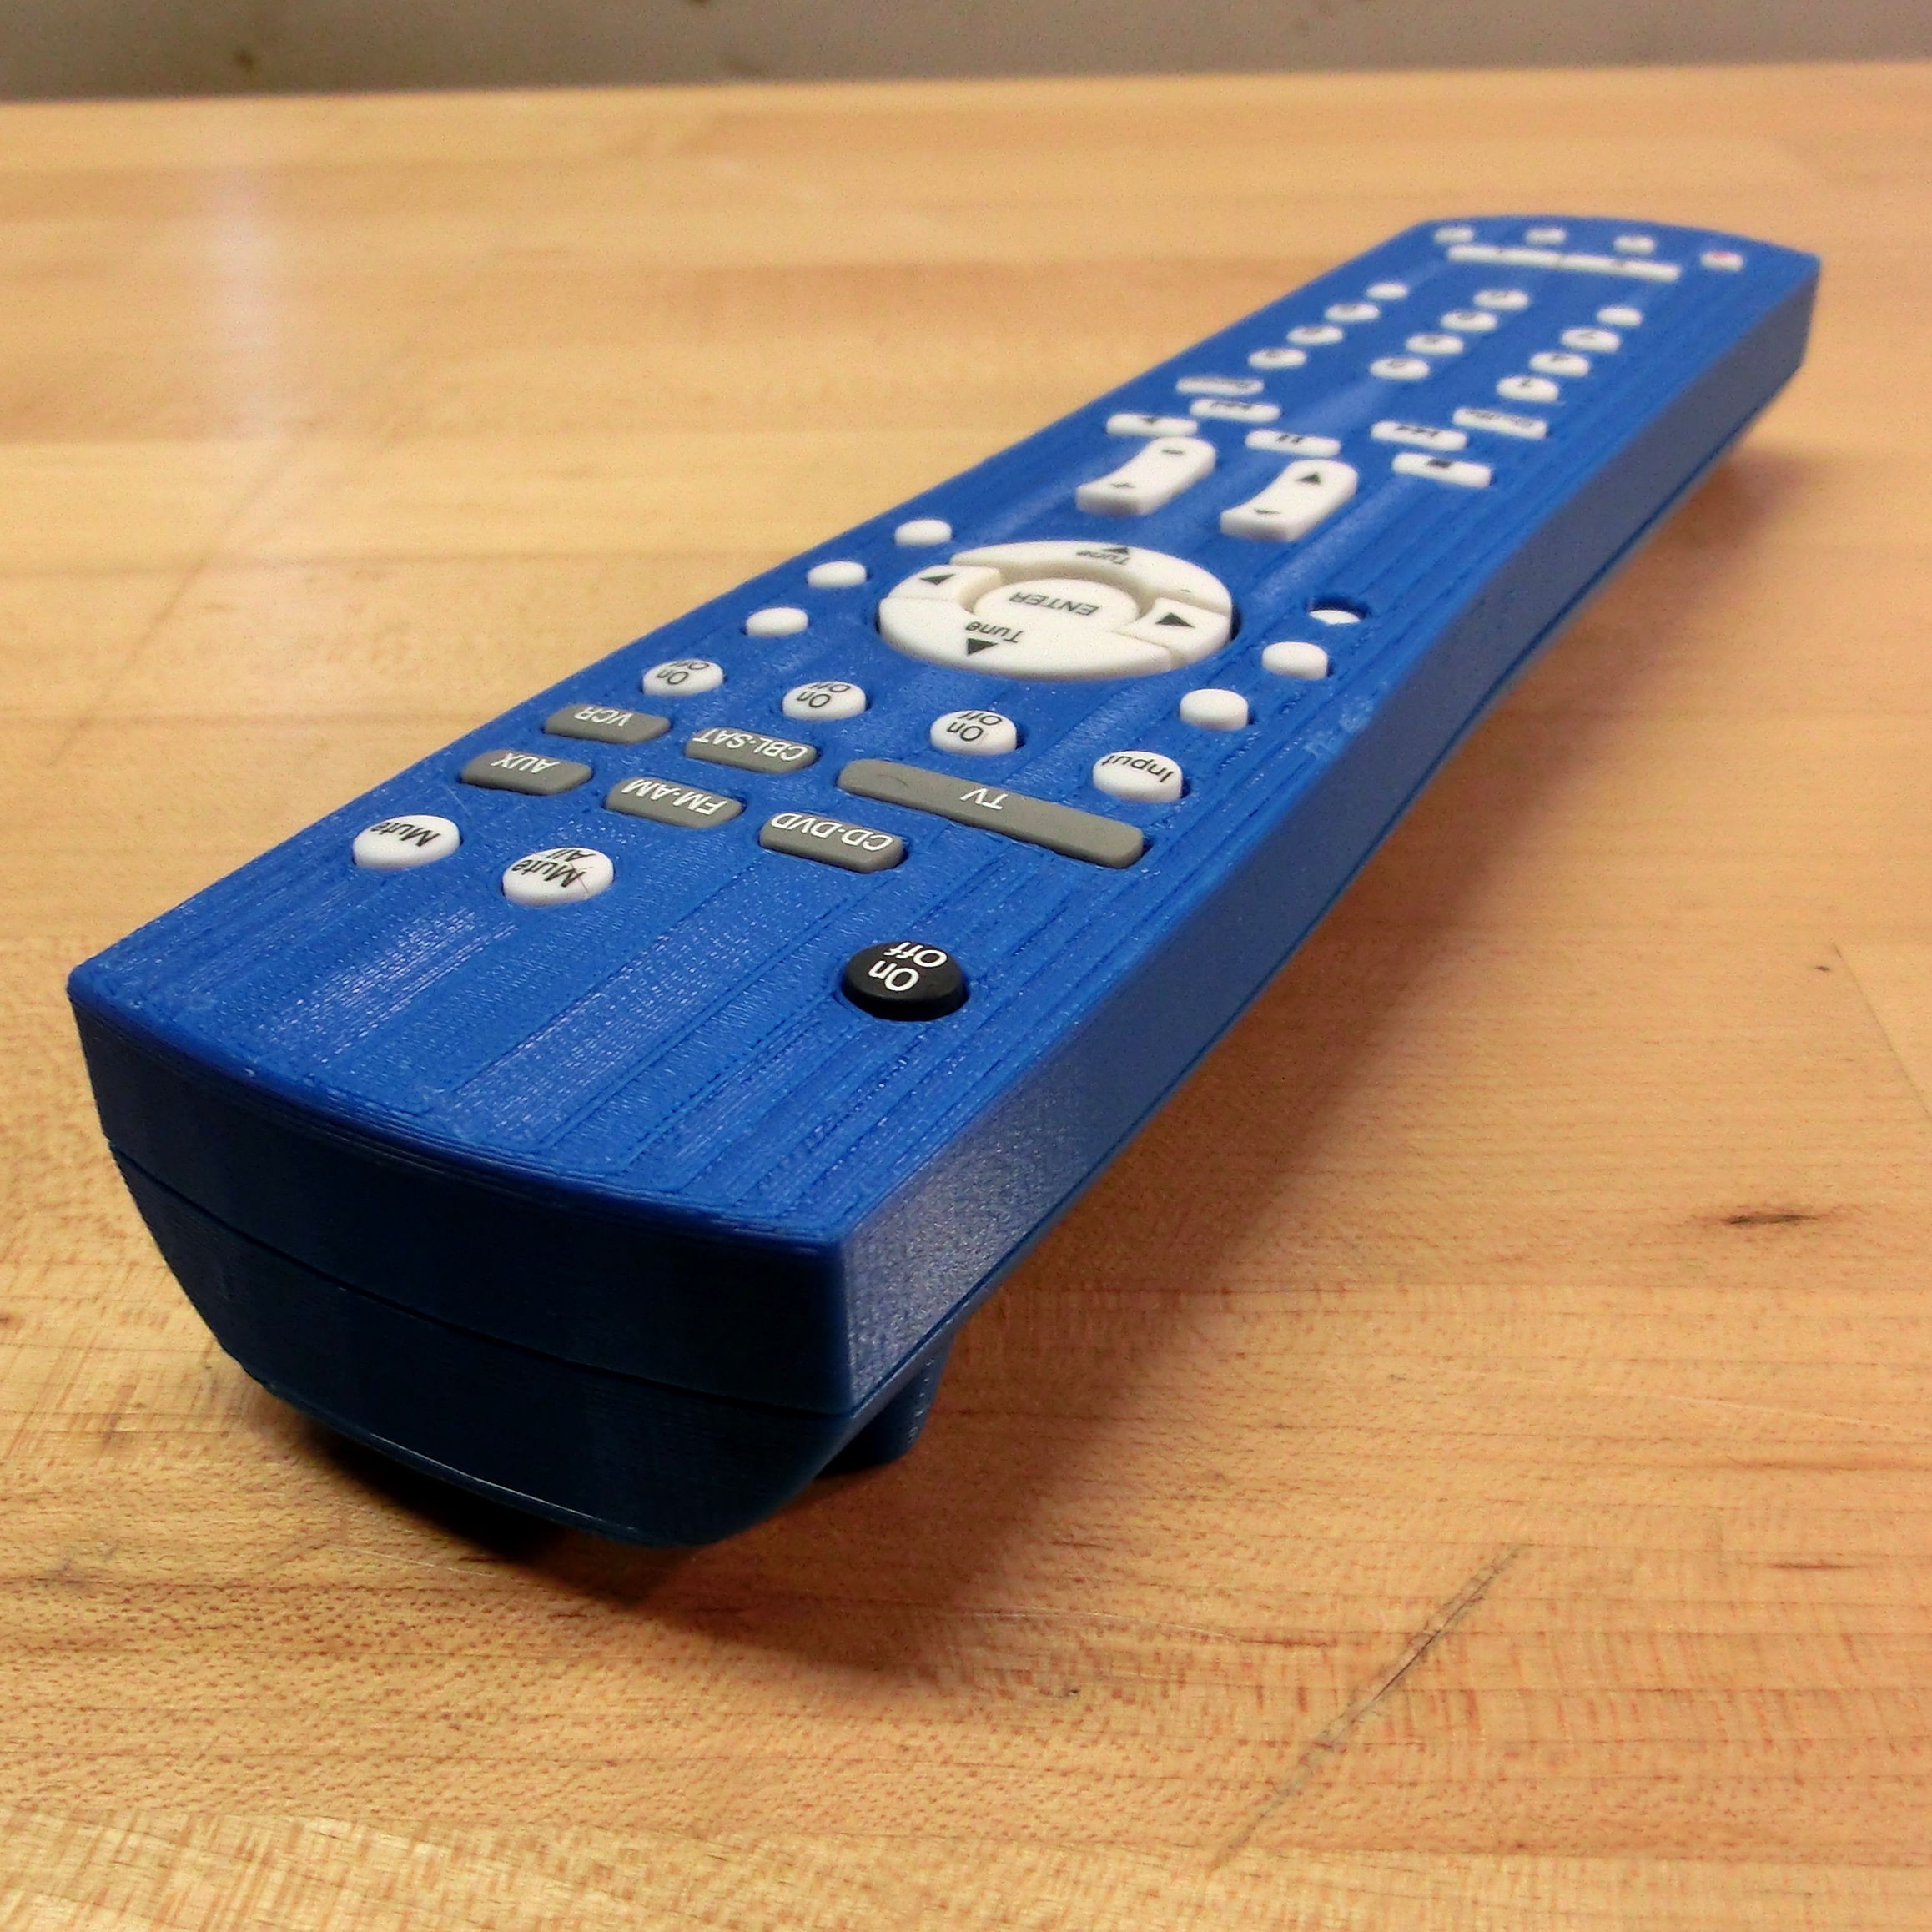
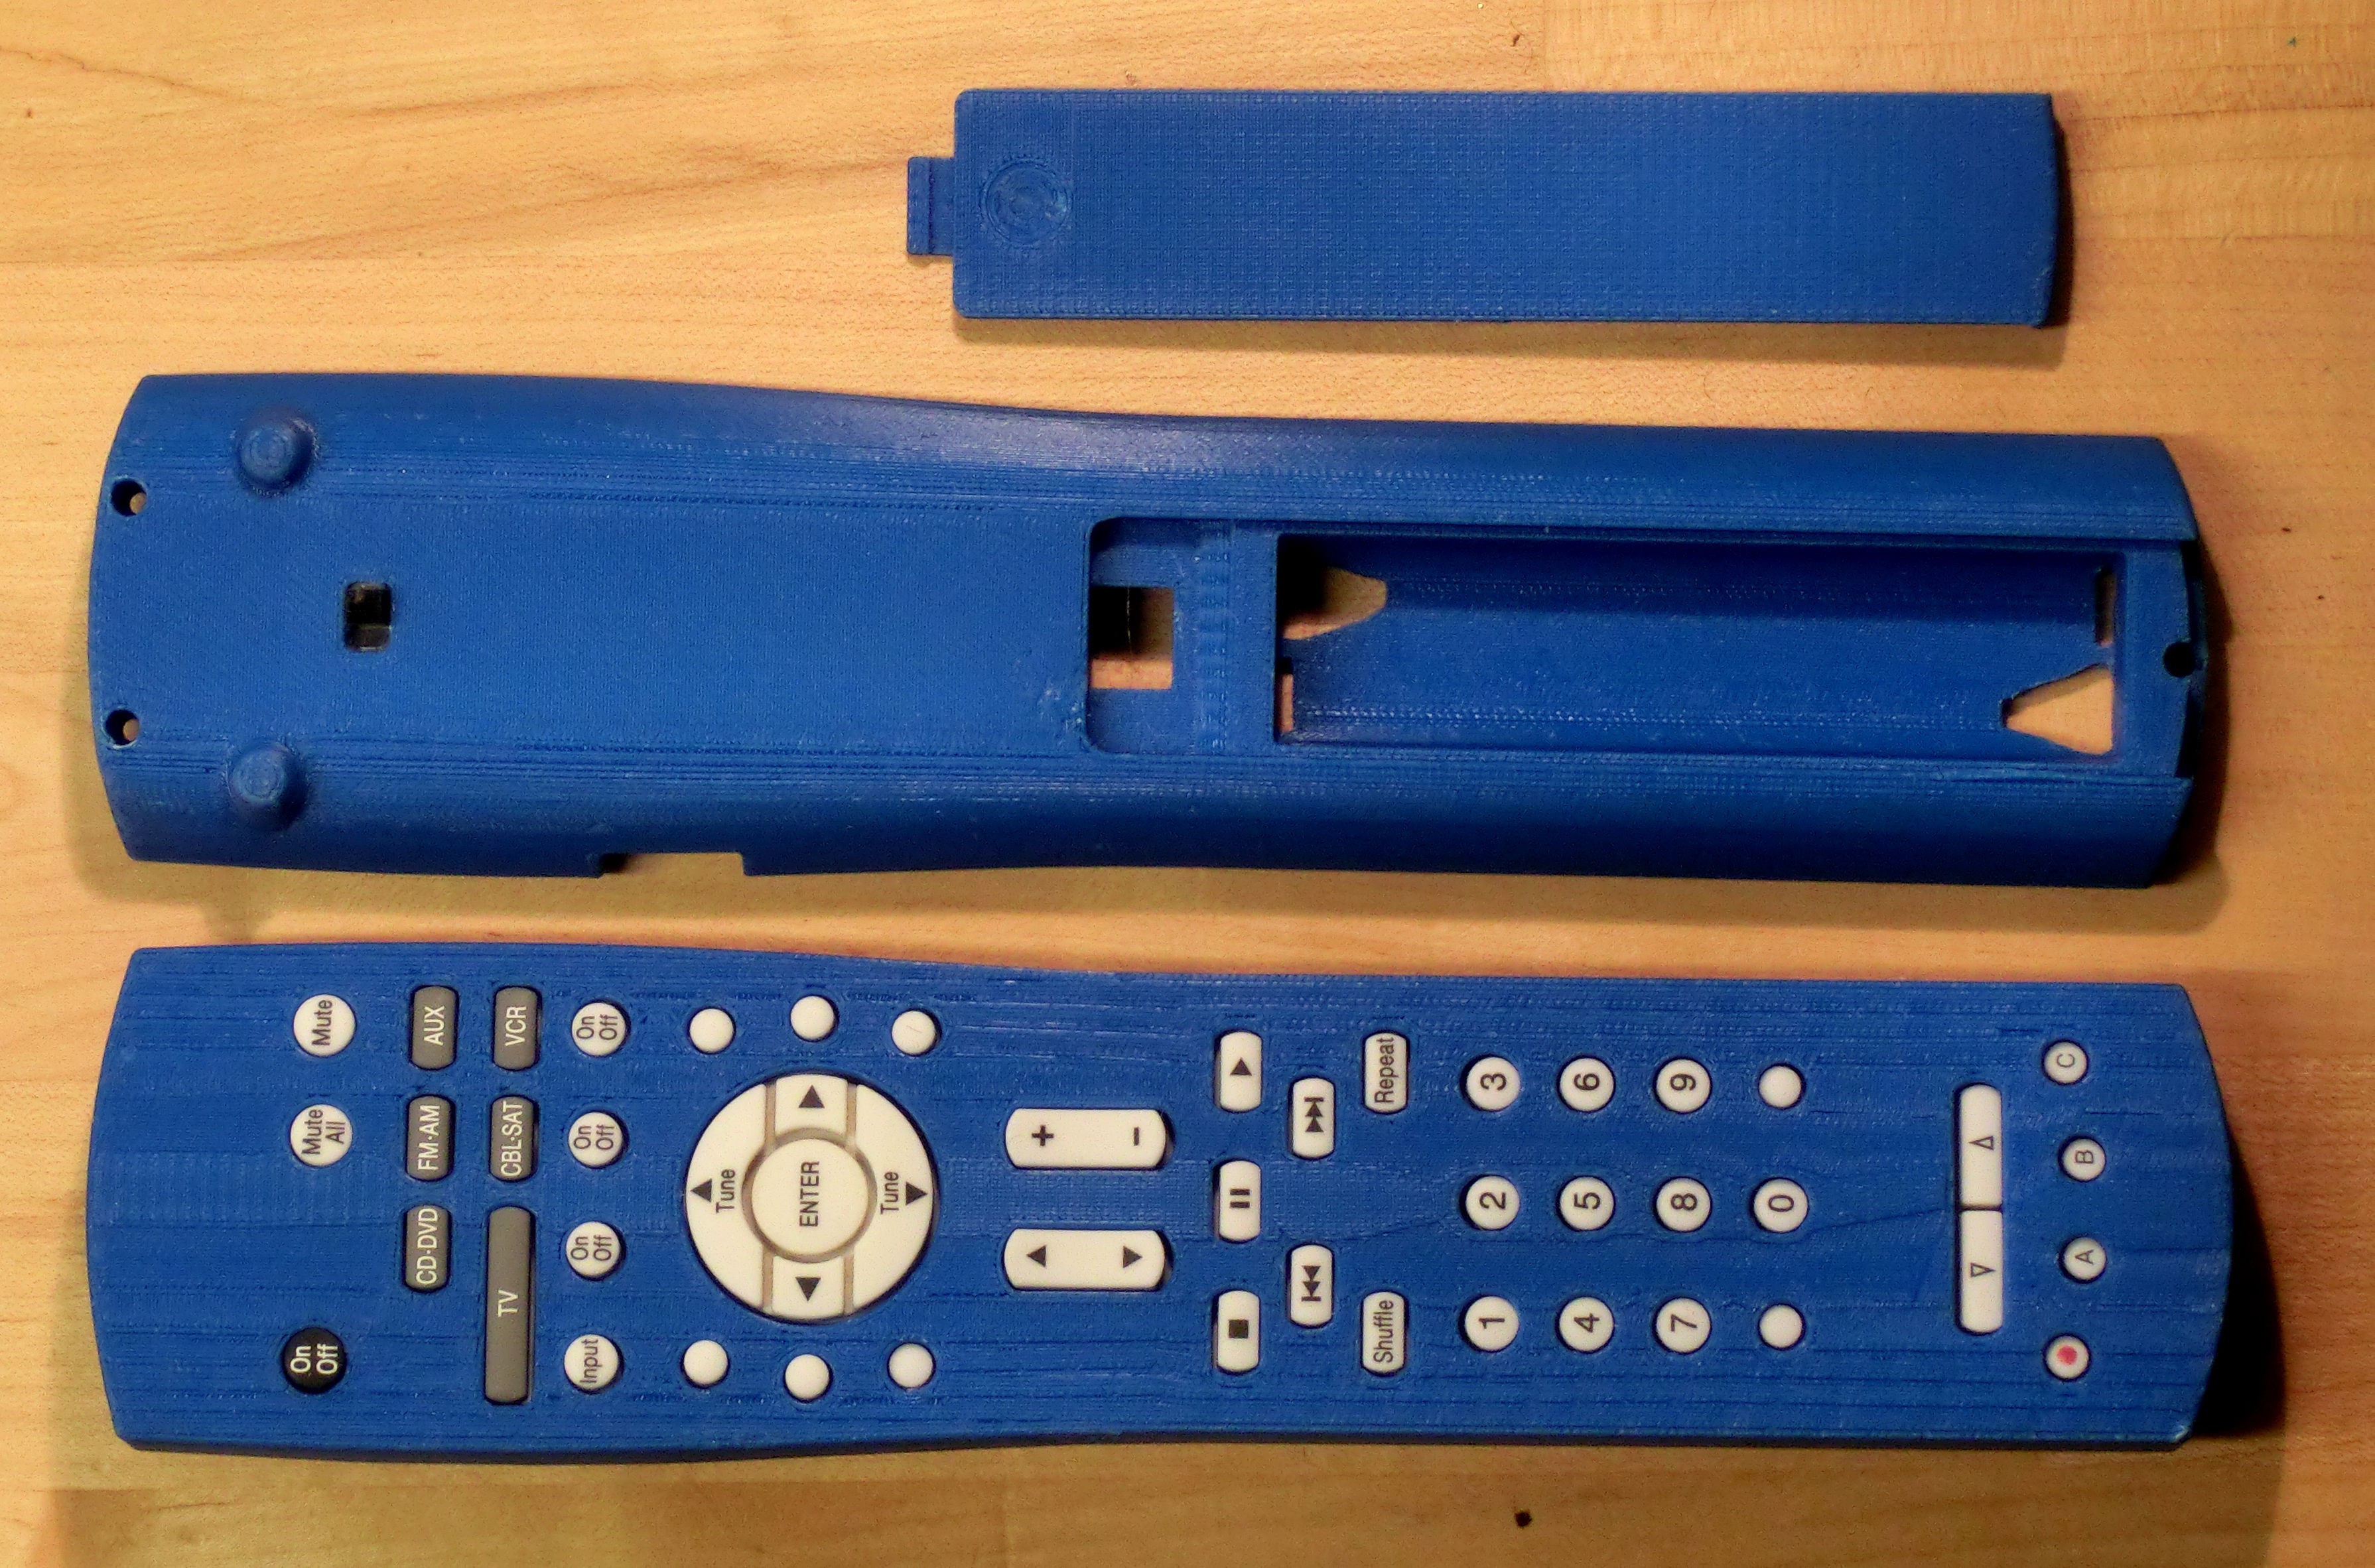
If you recall, my dog ate the original remote that I hacked. I could have ordered a new one for like $50 but I have access to a 3D printer so I thought why not reverse engineer the remote housing. Below you can see the old chewed up plastic and the new one. I also was able to incorporate a mount for a slider switch. This cuts power to the radio receiver when I'm not using the TV to help the batteries last longer.

Some more pics of the new remote parts:
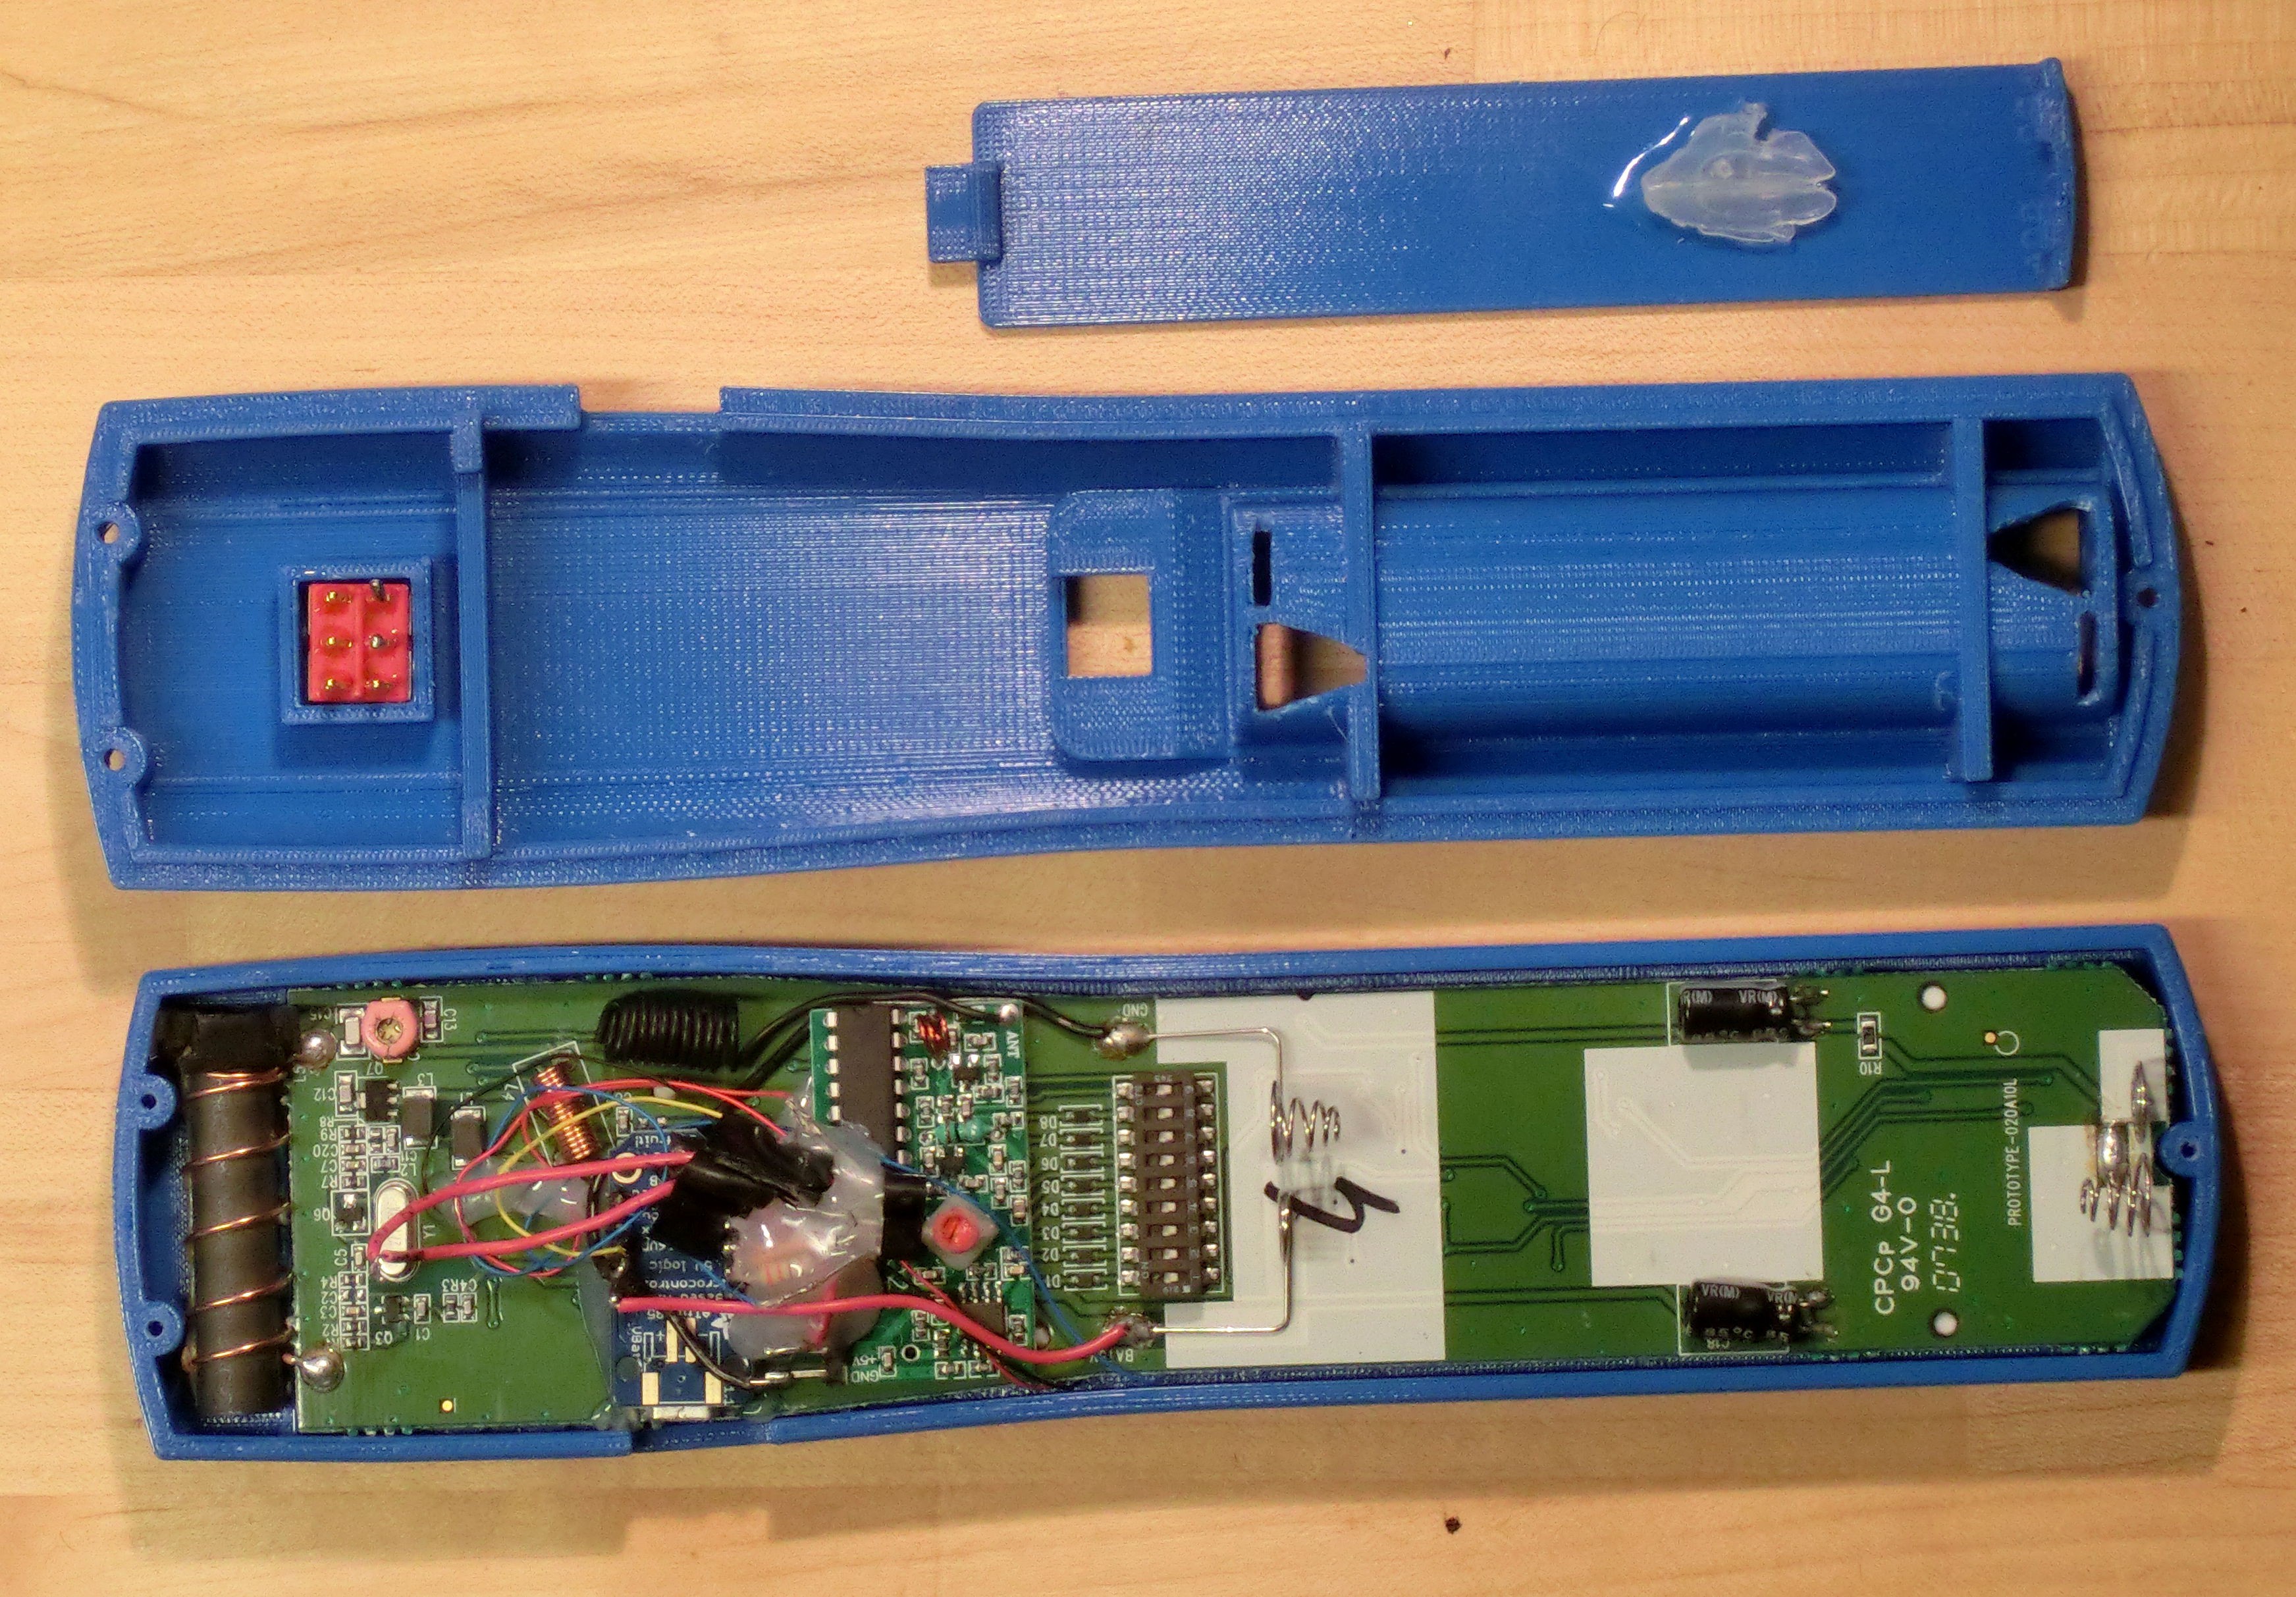
notice a blob of hot glue below, this is because the batteries were springing out of alignment and not staying down, so I sprayed a bit of WD-40 on the batteries, put a blob of hot glue on and closed the battery door. Once cooled it was a perfect mold to hold the batteries in. In the future I would 3d print a support on the door to hold the batteries in place.
Discussions
Become a Hackaday.io Member
Create an account to leave a comment. Already have an account? Log In.
Looks like a good quality print! Well done on designing the part.
Are you sure? yes | no
thanks Dave, I printed on a stratasys at work. I wonder how these parts would print without a nice support material.
Are you sure? yes | no