Close
0%
0%

Pi Media Station: Dual Pi Media player

A Reworking of my Pi Video Player for a static installation

Similar projects worth following
My first proper project here was the Pi Video Player; a Raspberry Pi based portable player with a Python-driven interface for my son. The project was a success; my son found great for the box and enjoyed watching his favourite media on it. For me, personally, I quickly identified a few areas of improvement, should I ever get the opportunity to return to this project.

My son has recently received an android tablet which has filled the role of his portable media device, which has demoted the Pi Video Player to use in his room.
Perfect time to rebuild the project and make it fit for purpose, and also add some extra features :-)

The following is a list of the thing I would like to correct:

  • Power

My long and arduous battle with the power circuitry are well documented; my adafruit powerboosts ALL frying, HDMI leads causing issues, dodgy USB hubs... Everything that could go wrong pretty much did go wrong!

  • Battery recharging

The batteries used (4 x 3.7v Li-ions, 5000mAh a pop) lasted for a fair while, but took an eternity to recharge via the powerboosts.

  • GUI

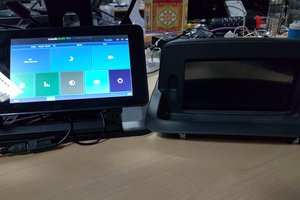
Midway through the first build I won a 7" Touch screen to put in my project to replace the 5" non-touch screen. In the original build there were 9 arcade buttons for control as the sole control of the playback and playlist selection. A rebuild would take advantage of the touchscreen in the GUI and reduce the need for so many buttons!

  • HDMI Output

While the HDMI out works great with the boy's projector and TVs etc, I somehow wanted to be able to split the output so when the output was connected the touchscreen could just operate as a GUI, and not just play what is on the output.


Bearing these in mind I have come up with a redesign that fixes the above problems and adds a million more possibilities for expansion, making it more suited for a bedroom-based installation:

  • Enclosure

Redesigned to be more in keeping with a desktop installation; think of an old-school TV or retro PC/monitor all-in-one, just really small :-)

Some rubber feet, IO panel at the back, screen on the front and a few buttons (possibly arcade, possibly small ones depending on build size/space). Internally some shelves to impose some semblance of order and tidiness for the innards.

The prototype will be 6mm MDF (w/ potentially a thinner front so the screen isnt sunk so deeply) and then will be cut in acrylic once tested.

  • Mains Powered

Two birds assassinated with one almighty stone here - cant have complex wiring difficulties and slow charging batteries if you completely remove them, can you? :)

Seeing this build will remain in place there is no need to add batteries and charging circuits. It will be powered from a 12v mains adaptor or an old laptop PSU. Inside regulators to step down to 12v and 5v will be required for the components.


  • Split screens - DUAL PI!

In order to create semi-independent outputs for the Touch screen and HDMI out two Pis will be used - this is still a brainhurt but I have a rough Idea on how it will be done!

  • Much more touch-friendly GUI

With the screen flexibility It will be possible to write a completely touch-based GUI. I am aiming to make it html-based and user the Tornado Python library to serve it up.

  • Automation

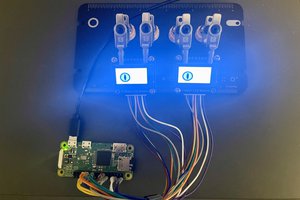
I want to add some room automation possibilities with the project; some LED strips and general light control, automated fish feeding, etc. In order to do so I will add i2c/USB breakouts to the enclosure

I will add some logs below for each of the sections to provide progress updates and further information!

  • 2 × Raspberry Pi Model B+ One for GUI & Touchscreen, other for Fileserver & HDMI out
  • 1 × FDI ELI70-CR 7" Touchscreen Touchscreen: Interfaces using USB & HDMI
  • 4 × Buttons Connected to Touchscreen Pi (Up/down/left/right formation)

  • Mode: Clock

    Craig Hissett10/26/2015 at 16:53 0 comments

    In keeping with the other modes I would love to knock up a clock mode. This would be the standby mode.

    I would love to add some kind of 'talking' feature to it when the touch screen is pressed, so it can be used to teach the time and things to my son.

    Further down the line I would like to use the clock interface to define a variety of times and alarms; shutdown timers, trigger playlists and also define times for automation (think fish feeding, night lights et al).

  • Mode: 'Pi TV'

    Craig Hissett10/26/2015 at 12:56 0 comments

    PiTV

    The first Service I want to add is a 'TV' like service; as in the previous build the main purpose of the device will be to play Media, of course. Rather than having playlists to choose from I would like to have the playlists appear as channels and make it look as if there is always something playing. Pressing the up/down buttons (or entering a number on a remote) would change the channels. I would like to also incorporate an 'Adverts' folder for us to drop content in to advertise upcoming events & news for my son, to be played between episodes of what ever channel he is on.


    Channels

    I would love to make this as modular as possible. I would love to use a 'Channels' folder and have my code compile it's own channel list when it starts up. In the channel folder could be scripts for defining the channel's number, name and channel information as well as a script for compiling the channel's content.

    GUI

    Touchscreen - when running in split screen mode (when the output pi is playing the channel content) I would like to have a simple GUI on the touchscreen with up/down and a numeric keypad for typing channel numbers (I'm thinking html for this - the main python script can then monitor the input from these buttons and pass commands to the second Pi).

    When not passing media to the second Pi and just playing on the touch screen I will look into maybe playing the video with an overlay for a small up/down button in the corner. If not, no biggie; the manual buttons can be used.

  • Modes & Services

    Craig Hissett10/26/2015 at 11:26 0 comments

    I have had some time to ponder what I would like I hope to achieve with this device. I would love to make the GUI and associated coding as modular as possible in order to facilitate quick and easy expansion, and add modes and services as both my son grows and the project develops.

    The device is going to feature 4 buttons on the front in a diamond configuration, and the left/right buttons shall enable scrolling/switching between the various Services of the device.

    In order to achieve this I have been looking for inspiration and ideas on how to make it so, and I think I have found the answer...

    GitHub user elParaguayo has been someone I have been following for a while, and his latest project features multiple services:

    https://github.com/elParaguayo/RPI-Info-Screen

    He refers to each services as a 'plugin', and uses a plugin folder. To add/remove services it's as easy adding/deleting them from this plugin folder.

    I need to get my head around his code to see how it is done!

  • Dual Pi Setup

    Craig Hissett10/09/2015 at 13:53 0 comments

    This is the most radical part of my rebuild; all of the other aspects have been touched on before in the previous iteration. However the introduction of a second Pi is completely new.

    The two Pi's; one Model B and a B+, will be directly connected to each other with a small Ethernet cable; The Pi's do not require a crossover cable so a standard CAT5 will do.

    Over this Miniature LAN the Output Pi(B+) will have all have all the media stored one memory cards/HDD, and will sit and monitor a websocket for commands to play videos from the Touchscreen Pi (B). The Touchscreen Pi will use a webserver to host the GUI and send any selected commands to the Output Pi. The touchscreen Pi will have Network File Sharing (NFS) Access to the Output Pi so it can manage playlist and also play videos itself if necessary.

    So far here is how i hope to configure them:

    Touchscreen Pi

    • Static IP
    • Tornado Web Server (handle GUI and sending play commands to the Output Pi
    • NFS Client (for accessing videos from the other Pi when no output device connected)
    • Wifi Dongle connected and bridged to the LAN (should allow both Pis internet access for playing youtube vids and more)
    • VNC Server (For programming over the network from my Netbook)

    Output Pi

    • Static IP
    • Web Client (for reading play commands from the web socket)
    • NFS Server (for allowing access to files to the Touchscreen pi)
    • VNC Server (For programming over the network from my Netbook)

  • GUI

    Craig Hissett10/09/2015 at 13:32 0 comments

    I am hoping to make my GUI html based, using the Tornado Python library to serve 2 pages on the network; the actual GUI on one port and an admin-type page on another.

    GUI

    Serving the GUI will allow my son to access and use his Media player via his tablet when elsewhere in the house; not entirely necessary for videos but greatly useful if/when I expand the unit to run pygame games.

    Admin Page

    This second page will only be accessible by myself over the network to define settings for things such as timers, any automation settings etc


    Using Tornado will also allow me to set up web sockets, which will be my primary method of passing command between the two Pi's - more on that in the 'Dual Pi Setup' Blog.

  • Automation

    Craig Hissett10/09/2015 at 13:27 0 comments

    Using i2c and USB I would like to control various aspects of my son's room.

    Things such as:

    Arduino-based fish feeder

    Various lights

    Sound units (like sirens for Alarms etc)

  • Enclosure

    Craig Hissett10/09/2015 at 13:25 2 comments

    I will post a sketch of what I am planning very soon:

    Front Panel

    Touch screen, with 4 buttons underneath for triggering underneath. Size of buttons TBC

    Side Panels

    Slots to hold an internal shelf, i2C and USB breakouts?

    Bottom side

    Holes for rubber feet to be screwed into


    Back side

    Power in, USB ports of Pi/s exposed for connection?


    Inner shelf

    For mounting Pis to.


    The Enclosure could bear a resemblance to this great build; just change the disck drive on the front for some buttons and lose the keyboard/mouse :)

  • Power

    Craig Hissett10/09/2015 at 13:09 0 comments

    This one is reasonably straight forward:

    • 12-19v power supply (probably from an old laptop charger looking for a new job).
    • Stepdown to 12v to power the touch screen
    • 3 x 5v stepdowns - 2 x Raspberry Pi, 1 x USB hub (if I chose to add one for it)

    Power will go on the bottom in the enclosure.

View all 8 project logs

Enjoy this project?

Share

Discussions

greenaum wrote 12/18/2015 at 13:57 point

Picked up a kit the other day on Ebay for about 3 quid, comes with a remote (meant for an in-car MP3, a little circuit board (not needed), and the 3-pin IC I mention. There's already Arduino libraries to read it. 

The same thing was used a few years ago by people with PCs, pretty sure they just connected the IC up to a serial or parallel port (either), and polled with software. By using the CTS line on the serial port, they had a single bit that could switch arbitrarily. Project was called LIRC / WinLIRC I think. Available for Linux, so maybe the Pi would be amenable to that.

Was UK based, postage I think free, and took a couple of days to get here. Saves a USB port and the software's already there! The Arduino version returns a several-digit hex number, I bet the Linux version has options for the same.

There's tons of stuff on the web about using them. The IC is an 1838, available with all sorts of different 3-letter prefixes. It's the standard chip for these sorts of shenanigans.

For the transmitter end, just an IR led modulated appropriately, there's lots of "PC universal remote" stuff available for that too.

  Are you sure? yes | no

greenaum wrote 12/18/2015 at 14:02 point

Actually, not to tell you how to make your project, but an Arduino for the realtime stuff might be a good addition. Again, 3 quid on Ebay, UK stock. Also has DACs if you wanted to use a cheaper touch screen. 

Also instead of the U/D/L/R buttons, maybe a joystick? The little analogue ones they sell (for about 3 quid!). An aesthetic choice, up to you. They usually have a push-in click, you could use for "ok" in an icon-based setup.

Still waiting on some bits for a little Arduino LED project I'm making myself.

  Are you sure? yes | no

Craig Hissett wrote 12/20/2015 at 09:44 point

have a look at Stefan lochbrunners pro trinket keyboard mate - 8 buttons, 4 encoders and some onboard rgb LEDs. May well be worth having a look at it :-)

  Are you sure? yes | no

greenaum wrote 12/20/2015 at 10:11 point

Ta! Might have a look at his code... There's already a library for the ring of WS2812 LEDs. It's great, this Arduino lark! 

Actually it'll probably be useful if I run into problems, I've got the basic idea of what I want and how to do it in my head, and most of the components, just need to get the pad of paper out. The programming's well within my capability.

Power consumption's another thing, I thought it'd be easiest to run it off 9V worth of AA batteries. But kids don't remember to turn stuff off. So maybe a relay or transistor in the power feed, with a push button that bypasses it to enable it to switch on in the first place, then a standard I/O line to keep it on / turn it off. 

  Are you sure? yes | no

Craig Hissett wrote 12/20/2015 at 08:01 point

Thanks for the tipoff mate! I'm currently rehashing this project in my head and will be updating very soon :)

Your tip for a remote is definitely in, and I am going to drop the idea for buttons on the front as such; the enclosure is going to be more of a prism shape so going to add two panels o buttons on the back panel to be used as shoulder buttons.

The panels I am going to use have many buttons, so the outer ones (on the shoulder) will provide shortcuts and the rest will allow changes to the led backlight I'm going to have.

The panels have their own Arduino Pro Micro on so I will have plenty of pins left to tap into.

As soon as I have a case designed I'm sure it'll make more sense ha ha

  Are you sure? yes | no

greenaum wrote 12/20/2015 at 09:35 point

Ah, I'm ordering a button panel myself, 16 little buttons. A friends kid is mad on pressing buttons. Even when he's playing with a stick, it has imaginary buttons on it. He's not allowed to use the remote control for the TV (he's 3), but you can't keep him away from it when he's feeling sneaky. 

So I thought make something with loads of buttons to press. Got one of those smart LED rings, bung an Arduino in, a few extra LEDs and a buzzer, and it should keep him occupied. I was originally thinking of using an IR remote, but I dunno if his mum wants him getting into bad habits, or making existing ones worse! The option's still there though. 


When I was 3, my grandad made me a "burglar alarm" as I called it. Was a big piece of pegboard, with loads of holes, a battery, a bell, and some jumper wires with banana plugs on the end. Maybe it had some other stuff too. Couldn't get me away from it! I used to love sticking wires in like I knew what I was doing, sometimes the bell would ring. Can't remember exactly, long time ago! Some of us are born geeks.


  Are you sure? yes | no

greenaum wrote 12/27/2015 at 20:53 point

Re that IR stuff... it's a PAIN in the ARSE! There appears only to be one library available for IR receiving on the Arduino. It takes 10K, out of the 16K I have available... and you don't get repeatable results, the same button can give different outputs, semi-randomly.

You could just check for the code you want. But the controls seem to send all FFs for "button held down". So you'd end up needing the user to press several times, the unit missing loads of inputs.

If you fancy doing it yourself from scratch, feel free like. So maybe the USB is a better option. Sorry about that man! I didn't realise what a catastrophe IR was on the 'weeno.

I could write my own one, but it involves writing an interrupt handler and microsecond timing, not got that far with things yet. 

  Are you sure? yes | no

greenaum wrote 11/10/2015 at 18:34 point

Just another thought... while you're implementing that, perhaps add an IR LED. Either do the 40KHz modulation with a simple oscillator, or do it in software. Hardware would probably be more reliable, since the Pi doesn't do realtime, especially not when decoding video I should think.

Then, since you've already got a way of reading IR remotes, you could emulate one! Switch your kid's TV to the right input, or control CD players or whatever else through the IR. A universal remote built into the project.

If messing with an oscillator is too much of a pain (without a 'scope or frequency counter, although maybe the Pi could be pressed into service temporarily to do that too), you could maybe use an Arduino or the like to do the IR reading and sending. Since they're dirt-cheap, and realtime. Communicate through a UART to the Pi. Typically an IR remote will repeat the code it sends 3 times, as a simple method of providing redundancy.

However you do it's up to you, but for the price of an IR LED and a transistor to drive it, seems like a useful feature. On top of all the others! 


There's circuits online for IR remote repeaters, meant to send the signal down a wire to another room, where the IR beams don't reach. Since they're essentially just a receiver + transmitter, split it down the middle and there's your circuit.

  Are you sure? yes | no

Craig Hissett wrote 11/10/2015 at 21:25 point

Thanks man, great idea! My son has an RGB lightbulb in his room that comes with a remote that I was thinking about controlling but hadnt worled out how. That will be awesome@ :)

  Are you sure? yes | no

greenaum wrote 11/11/2015 at 04:46 point

Ah, self-dimming lights for when he's watching a film. Or "epileptron disco" mode! You can add new gadgets as needed. 

  Are you sure? yes | no

greenaum wrote 11/10/2015 at 18:34 point

Just another thought... while you're implementing that, perhaps add an IR LED. Either do the 40KHz modulation with a simple oscillator, or do it in software. Hardware would probably be more reliable, since the Pi doesn't do realtime, especially not when decoding video I should think.

Then, since you've already got a way of reading IR remotes, you could emulate one! Switch your kid's TV to the right input, or control CD players or whatever else through the IR. A universal remote built into the project.

If messing with an oscillator is too much of a pain (without a 'scope or frequency counter, although maybe the Pi could be pressed into service temporarily to do that too), you could maybe use an Arduino or the like to do the IR reading and sending. Since they're dirt-cheap, and realtime. Communicate through a UART to the Pi. Typically an IR remote will repeat the code it sends 3 times, as a simple method of providing redundancy.

However you do it's up to you, but for the price of an IR LED and a transistor to drive it, seems like a useful feature. On top of all the others! 


There's circuits online for IR remote repeaters, meant to send the signal down a wire to another room, where the IR beams don't reach. Since they're essentially just a receiver + transmitter, split it down the middle and there's your circuit.

  Are you sure? yes | no

greenaum wrote 11/09/2015 at 19:35 point

Actually going by your idiom (couldn't find you using "colour" anywhere) you sound like you're nearer to a pound shop than a dollar store. 

  Are you sure? yes | no

Craig Hissett wrote 11/09/2015 at 20:48 point

Correct - excellent deduction sir! :)

  Are you sure? yes | no

greenaum wrote 11/09/2015 at 19:22 point

A thought... You can buy universal remote controls from pound shops ("dollar stores", translated trans-atlantic). Not the learning kind, just the kind that have lots of pre-programmed commands.

There also exists, little 3-pin ICs that look like phototransistors. Inside they contain a phototransistor (!), and demodulation circuitry. They demodulate and amplify the 40KHz infra-red that nearly all IR remote controls use. The output is simply pulses, on-off, whatever was transmitted from the IR remote at 40KHz to start with. No decoding is done, you do that yourself in software.

You could connect one to a GPIO. If you don't have an oscilloscope, use the Pi to study what pulses come from a particular remote. Either pound-shop, or maybe some old thing you have lying around from a broken DVD player. In fact there's already software available to support this, for the various Ras Pi media player projects. You might not need to write the software yourself. Although in theory it shouldn't be too hard to do. Doesn't seem like a complex system, although I confess I've never tried doing it myself. Plenty of others have though! Lots of experiments online with IR this 'n' that.

Typically there's a couple of start bits, perhaps a few address bits, then some data bits representing the button pressed. There's no industry standards, but in practice there's only 4 or 5 schemes used in the wild.

That'd be a cheap way of providing a user interface, and the remote could be easily replaced if lost. And of course, remote control! It's just not civilised to enjoy entertainment without it.

Anyway... interesting project!

  Are you sure? yes | no

Craig Hissett wrote 11/09/2015 at 20:54 point

Thanks for your ideas, greenaum - remote control was on the list of optional features to look into adding once the main functions had been added. I have seen a fair few projects using the exact method you have described, but I have a few USB IR remotes for the pi and was going to use one of them. Your suggestion is a much more useful way of doing it without wasting a USB port.

Thanks matey!

  Are you sure? yes | no

Similar Projects

Does this project spark your interest?

Become a member to follow this project and never miss any updates