Close
0%
0%

Soul Stripper - ESP8266+RatZapper

Use an ESP8266 to monitor and send notifications from a RatZapper.

Similar projects worth following

This is a simple project to to hotrod a RatZapper Ultra. Any version ESP8266 can be easily interfaced to the unit to detect the kill signal normally used for a Rat Tale indicator.

With the ESP8266, it is easy to add additional local relay control, plus any form of network-based notification (webserver, email, pubsub).

  • 1 × ESP8266 Espressif Wireless
  • 1 × 2N3906 Discrete Semiconductors / Transistors, MOSFETs, FETs, IGBTs
  • 1 × LEDs chicks dig 'em

  • 1
    Step 1

    Pick an ESP8266 version. The minimal requirement is one GPIO input, so any will work. I used a Nodemcu board (flashed with Arduino SDK and using Visual Micro for coding). The ESP12e/ESP13 dev boards and the Nodemcu board have a voltage regulator built in, but there are cheap AMS1117 power modules to use for the chip versions.

  • 2
    Step 2

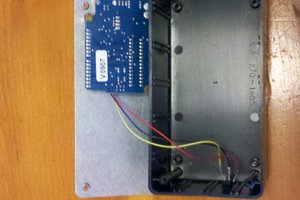
    The output jack for the trigger signal uses an open collector on the tip (blue wire in RatZapper). My first version used a PNP to pull a GPIO high. The second version just uses a 10K pullup (didn't try using just the internal pullup). So it is easy to use either a 2.5mm plug or tap off the jack terminal.

  • 3
    Step 3

    I've been powering my two for several years with 5Ah 5-cell NiCD packs. One pack died last year so I'll be switching to 2S LIPO at some point. I'll probably add a 6V regulator to be safe. There may be some 3K+ mAh packs that will fit in the battery compartment. For now, I am trying an old 6V 2A wallwart. The RatZapper gives a green light with it and I could trigger it manually without total protonic reversal.

    There's room in the control box lid to add a DC power jack if desired. For one, I added a jack and made a Y-cable with JST connectors, one for power in (wallwart) and one for the ESP (input to a voltage regulator or VIn on Nodemcu). For the minimal version, I'm using 3-wire servo connectors, which gives power, ground, and signal to the ESP. For both, I just used the unswitched power wires.

View all 8 instructions

Enjoy this project?

Share

Discussions

Similar Projects

Does this project spark your interest?

Become a member to follow this project and never miss any updates