Close
0%
0%

Restful IO

A developer friendly way of analog digital io via restful web services & usb

Similar projects worth following
Being a software developer by trade and a hardware enthusiast, it was always quite time consuming to get some quick interfacing between software and relatively simpler hardware. So I started looking up ways to interface high level software as quick and flexible as possible with hardware projects.

Rest IO is a USB device driven by a lightweight Jetty application server running on USB host pc, which exposes 8 IO ports to be controlled over restful web services. Server also hosts a fancy AngularJS based web client which provides a super easy, mobile friendly, convenient monitoring and control panel.

You can get the finished device from https://www.tindie.com/products/gorky/restio-model-o/

Before starting I put together a list of things I want and I didn't as below:

  • I didn't want this thing to evolve around a single programming language or develop an API for a particular language or develop an API for each different language that I am planning to interface from.
  • I did want this thing to be as simple and budget friendly as possible.
  • I wanted this thing to be breadboard, jumper wires, duct tape, barely working hardware and software developer hardware noob friendly.
  • I wanted to keep number of IO ports minimal unless absolutely necessary but with some flexibility so I can use same device, same ports for different purposes.
  • I wanted this device to be budget as current USB based interfacing solutions around like Phidgets are quite expensive to dispose in a single hobby project.


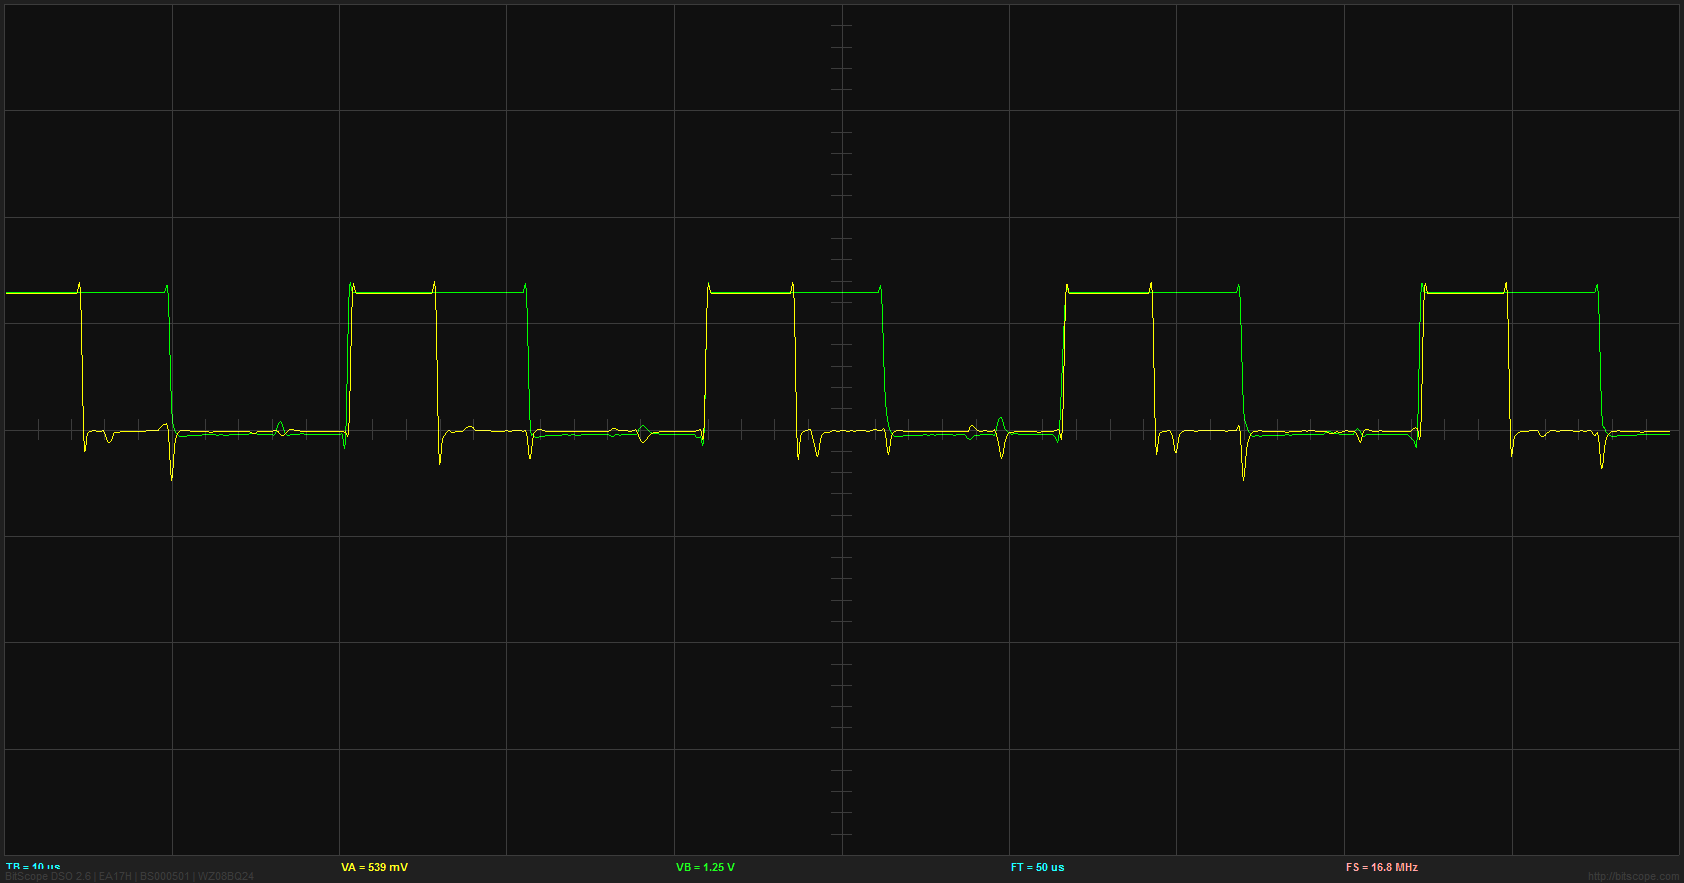
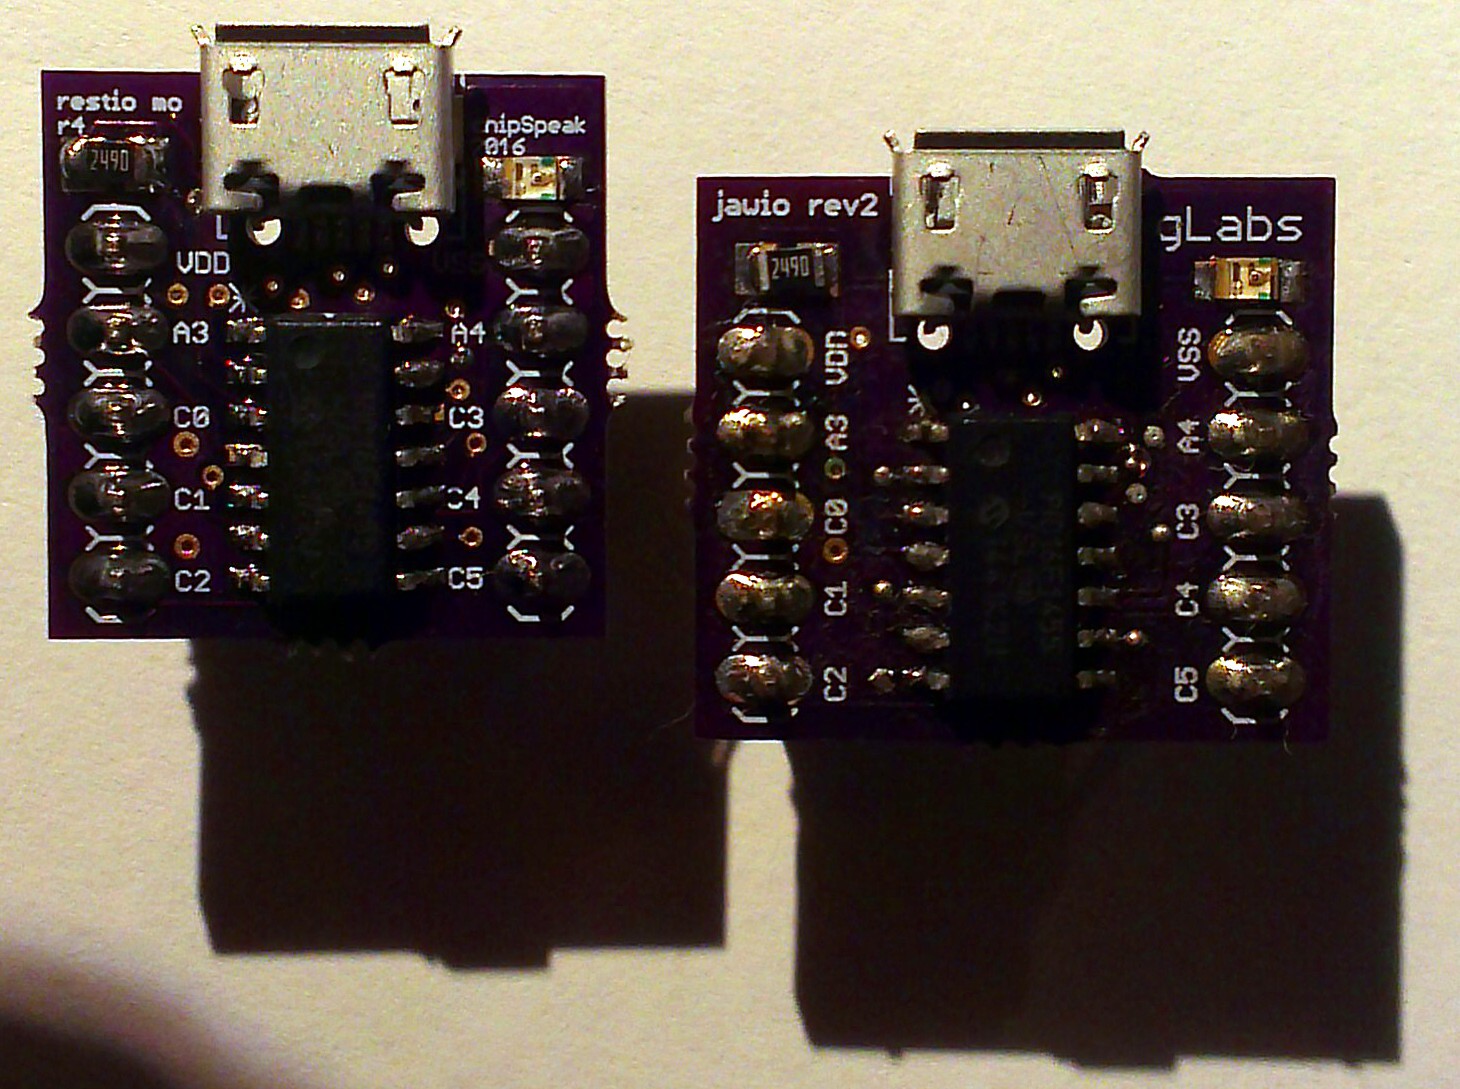
Being a fan of PIC16F1455 and familiarity with Microchip's USB stack which definitely made interfacing stuff over USB easier for me for a while now, I decided to package what was laying on my desk being used all the time for debugging hardware projects and breath life into hardware experiments. Of course there are much capable and better chips out there but 16f1455 delivers amazing features for its price and I am quite familiar with this particular chip.

Years of java web application development also took its toll on me so the server side which simply said translates rest service calls to USB hid commands, is a java application using Jetty for jax/rs implementation. I also wanted to try consuming these services and needed a fancy client and put together dashboard with AngularJS. Also used Bootstrap just for fun.

While coding the server, I decided to stick with a good old fashioned test driven development approach as it was hard for me to resist the temptation to start with unit tests for rest service calls. Those JUnit tests later also covered without me noticing integration tests of hardware. This testing framework allowed me to test every port on every single device. I put together a dozen of resistors on a bread board connecting every port to a single point as a test circuit and came up with junit based integration tests which reads and writes to ports sequentially at least testing every solder joint and port on the device.

Well, while making this project I had this feeling of an overwhelming party going on where you have invited friends from high school, uni, workplace but didn't stop there also invited your next door neighbor, barista working at the coffee shop downstairs, your childhood best friend ... There are many things that can go wrong in that sort of a party as everyone knows you but not each other. You know everyone but some of them has changed in time, some of them you barely remember or know who they were actually. Surprisingly everything went sort of smooth and hopefully the fun will go on.

Next Steps

While I considered this project being completed, I will continue this party inviting a few more cool kids from the neighborhood. Here are a few upgrades I am planning for the next couple of months on this project.

  • DAC: Utilizing DAC module on 16F1455
  • PWM: May use hardware pwm modules on 16f1455 or implement my own loops around
  • Serial comm
  • Servo Control
  • Interfacing with popular modules like DHT22 temperature and humidity sensor, ultrasonic distance sensors etc...
  • Replacing application server with ESP8266
  • Fancier analog features like frequency detection, capacitive sensing etc...

Special thanks to BSU - BS Free USB as it motivated to me to package stuff that I have been working on for a long long time now.

  • 1 × PIC16F1455 Microprocessors, Microcontrollers, DSPs / ARM, RISC-Based Microcontrollers
  • 1 × 220R Resistor Electronic Components / Misc. Electronic Components
  • 1 × LED Fiber Optics / Emitters
  • 1 × 1uf cap
  • 1 × 10nf cap

View all 6 components

  • PWM with Restful API

    Gorky02/28/2016 at 07:05 0 comments

    reLet's start with a bit of story and put a few letters together to convey the bigger picture of what I am trying to do with an acronym.

    PIAAS - for Peripheral Interface As A Service.

    Not sure if this will sound like a good idea to people working on other acronyms like IOT, SOA and SAAS as this whole concept is abstracting very low level interfaces with very high level architecture. Also makes it appealing to a few people who can understand both concepts but personally I am quite happy with the results and hope that it will drastically increase the productivity of makers and inventors with a variety of skill sets and trades.

    So here in the scope of this project I am trying to extract and expose as many peripherals as possible from a single MCU as restful web services. PWM happened to be the next one in line after digital io and analog input as I have some ideas around controlling servos and a few more fancy things which needs PWM to be controlled. Came up with three different services so far and thinking they are flexible enough for a number of applications.

    Hardware PWM Service

    There are 2 hardware pwm modules on PIC16F1455. I needed to draw the boundry here to make things a bit more straightforward and simple. Came up with two services. These services provide PWM with 10bit duty in 4 different frequencies 732 Hz, 2.9 kHz, 11.7 khz and 46.8 kHz. MCU allows a lot more options here in terms of frequency, less pwm bits but I am trying to build a flexible device here while not over engineering it. Service calls as below.

    http://restioServer/0/hardPWM/c5/256

    Starts hardware PWM at first attached RestIO device on port C5 with a duty cycle of 25%. Last parameter is for 10bit duty which is 256 in the example above, 1023 will result in 100% duty as you might have guessed.

    http://restioServer/0/pwmFreq/0

    Sets the hardware pwm frequency to 46.8 kHz, http://restioServer/0/pwmFreq/1 sets it to 11.7 kHz. Last parameter is the frequency divider where 2 and 3 results to 2.9kHz and 732 Hz respectively..

    Well long story short we have a nice and stable PWM service with a couple of common frequencies. No jitter. Not effected by other service calls or USB communication. As accurate as your USB data clock (means very accurate).

    Software PWM

    There are 7 digital output ports on Rest IO board and all can output pw modulated signals now. Good things first there are seven of them compared to 2 hardware alternatives, they have simpler services and period (frequency) of each port can be configured separately. Bad things, precision is definitely not something you can rely on, lower duty cycles higher frequencies are quite impossible and USB communication interrupts the modulation so more jitter for free. But still many applications can forgive and live with the jitter like controlling brightness of LEDs or speed of a fan etc... And this service is made exactly to meet all sorts of dirty analog output needs.

    I implemented a tight software PWM loop abusing a timer on PIC16f1455 that is controlled from Rest IO Server. Again some limitations there but quite good results.

    So here are 2 service calls to give you an idea of how flexible and easy it is.

    1. http://restioServer:8080/0/softPWM/c0/5000/10000
    2. http://restioServer:8080/0/softPWM/c1/200/2000

    Service call as usual starts with device id and command being softPWM in the above calls followed by port. Next 2 values first one is duty length in microseconds, second one period length in microseconds. First call will output PWM at 100Hz with 50% duty cycle from port c0 and second call will start another PWM from port c1 at 500Hz with 10% duty cycle and both will live nicely together. At these frequencies jitter amount will also be quite ignorable and signal will also be surprisingly precise even if you start all 7 ports at the same time. Of course you need to be easy on the other services as USB communication is priority and will block the PWM loop.

    The frequency can go up to 5Khz with 50 microseconds of duty length as minimum....

    Read more »

  • And they shrinked for symmetry

    Gorky02/04/2016 at 09:50 0 comments

    Well couple of updates on the hardware

    - Smaller footprint (17.20x17.48 mm), and now is symmetric once put on a board which was driving me crazy previously : ) Hand soldering smd stuff in on a tinier board was less painful than I imagined luckily. I still have a few big ones available at https://www.tindie.com/products/gorky/restio-model-o/ but will soon update the specs and images and will start shipping smaller ones.

    And coming up next

    • A better pcb micro layout. I needed to learn a bit more of eagle but hopefully soon my micro usb sockets will be super stuck onto the tiny boards with much more mechanical strength based roughly following usb standards.
    • I am planning to try qfn package for the mcu. Seems like a good smd adventure.
    • If I can complete next couple of software upgrades I have in mind will probably amuse myself with a small upgrade from 16f1455 to 16f1459. Simply said more ports.

View all 2 project logs

Enjoy this project?

Share

Discussions

Similar Projects

Does this project spark your interest?

Become a member to follow this project and never miss any updates