 Alan Chambers
Initial Plan
This is a project I have undertaken since joining the UoM Robotics Society. It is presented in blog form as it happens. For this reason it may contain errors. I intend to leave these in, along with the solutions when I find them so that others may learn from my mistakes. Once the project is finished I will rewrite it so it reads better; for the meantime expect some rambling.
I figured that supplementing a mechanical engineering degree with some practical electronics will improve my skill set and make me more employable. I also thought that, being a student, I would be spending a lot of time procrastinating on doing actual uni work (apparently that's what you do) so if I have something productive to do while I'm procrastinating it's not a waste of time.
Previous experience with robotics and electronics is non existent. 2 weeks before introducing myself at the freshers fair I had not heard of raspberry pi, arduino, python etc; it is safe to say I have started from scratch.
The brief was to create a robot that would operate within a predefined course; it's a sandbox challenge so I could decide on my own goals.
The course:
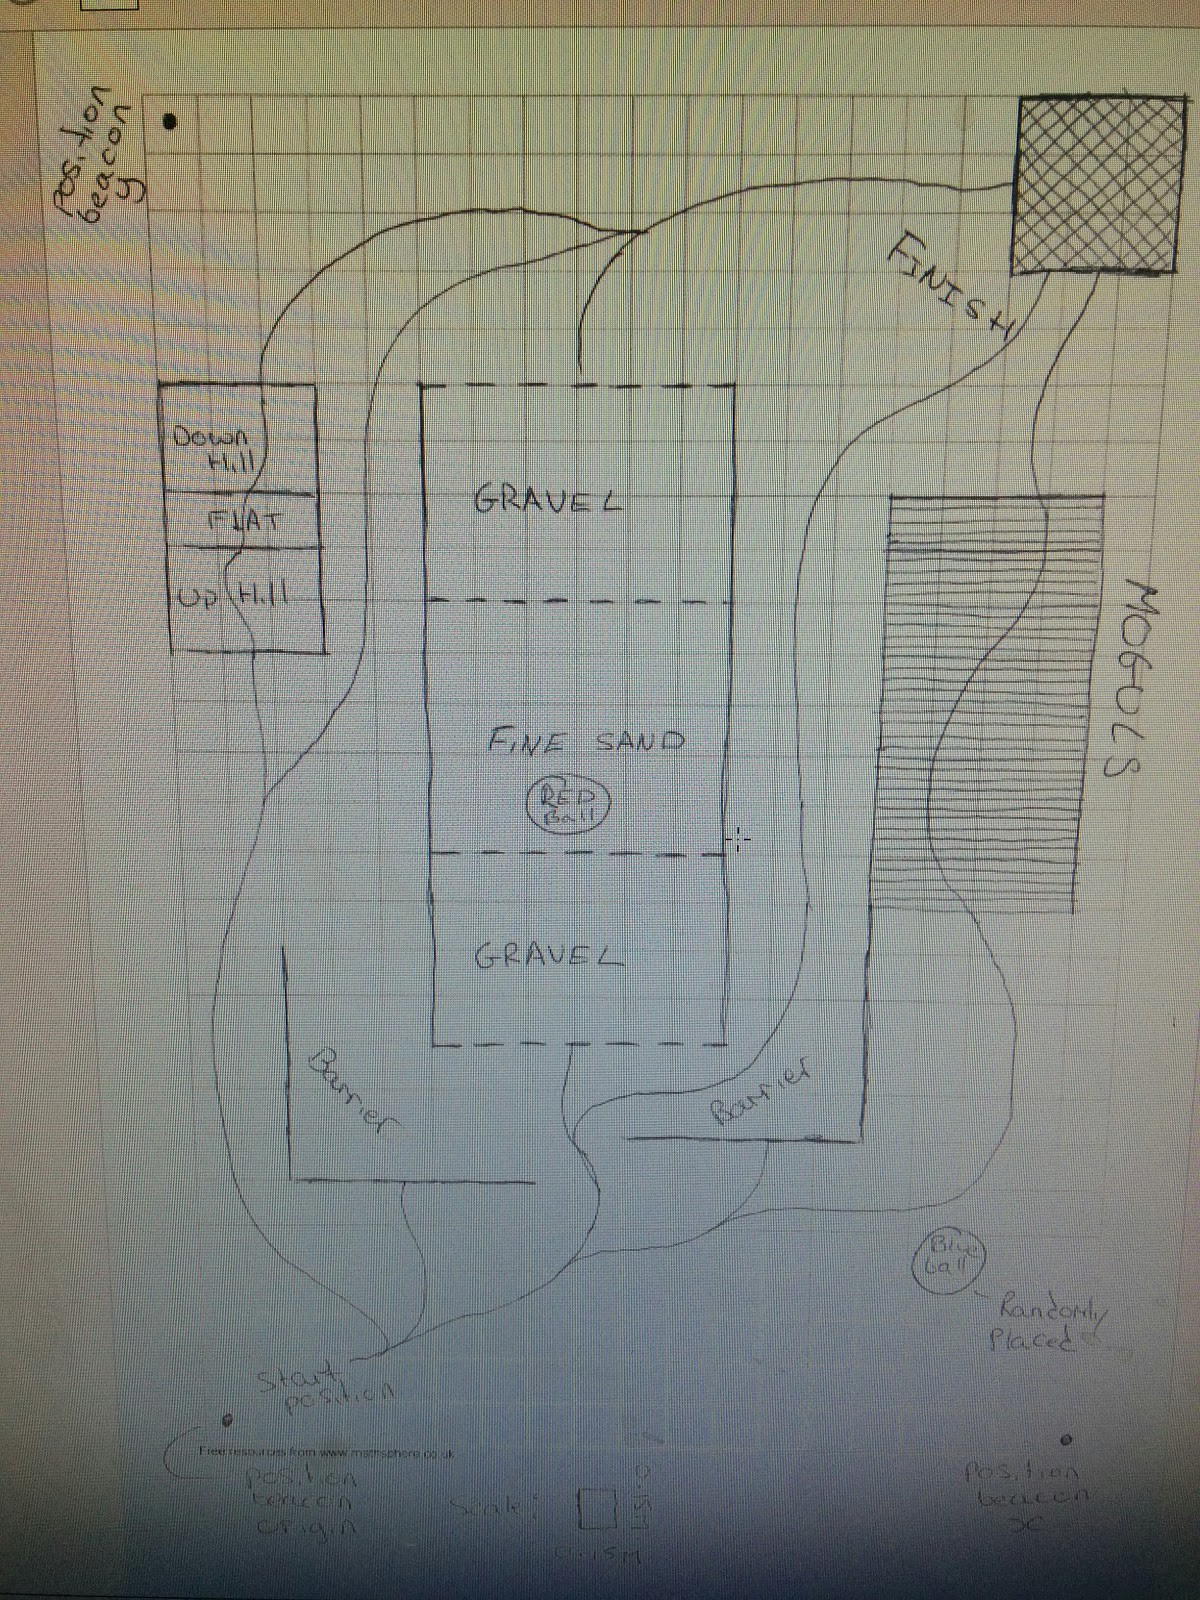
I decided to make a wheeled or tracked vehicle that would follow a line and not crash into a wall (one of the lines goes into a wall).
I wanted to keep the robot fairly simple and my personal goals are:
1: learn how to connect the various components (power supply, motors, drivers, sensors, controllers etc
2: learn some programming
Depending on how this goes I will make the decision to increase the complexity later on. A couple of ideas are to make a tilt and pan mount for the ultrasonic sensor and to install the radio beacon things which may help to determine whether or not the robot knows it is at the finish. If I could also then make it do something to signal it thinks it is at the finish that would be cool.
Component selection
I had a look at raspberry pis and thought that this would be a good start as I was already doing some stuff on code academy in python. I also liked the scratch language that can be used for exploring the concept of programming without getting bogged down in the detail of the code.
I set up a pinterest board and started getting a shopping list together. The pinterest board can be seen as a bibliography, everything on their has had a direct influence on my thinking and the projects progress:
https://uk.pinterest.com/Ageorgechambers/robotics-project/
I quite like this as it enables me to have a visual reference for relevant stuff rather than trawling through a list of bookmarks.
Basic shopping list was: battery and method of distribution, pi 2, motor driver, motors x 2, ultrasonic and line sensors. I didn't know what else I needed at this point.
Ben at the robotics society helped me out, I was given a Pololu dagu rover 5 tracked chassis with built in motors and encoders, a motor driver, raspberry pi 2, some radio receivers, an sd card for the pi, a couple of servo's for a tilt and pan mount and an arduino.
I liked the look of the arduino as it was smaller than the pi and it seemed to be more intuitive to connect due to the pins being labelled.
I then went on ryanteck and picked up some connecting wires, a line follower, resistors, tiny snips and tweezers as the tools I use for my bike were way to big to be used effectively.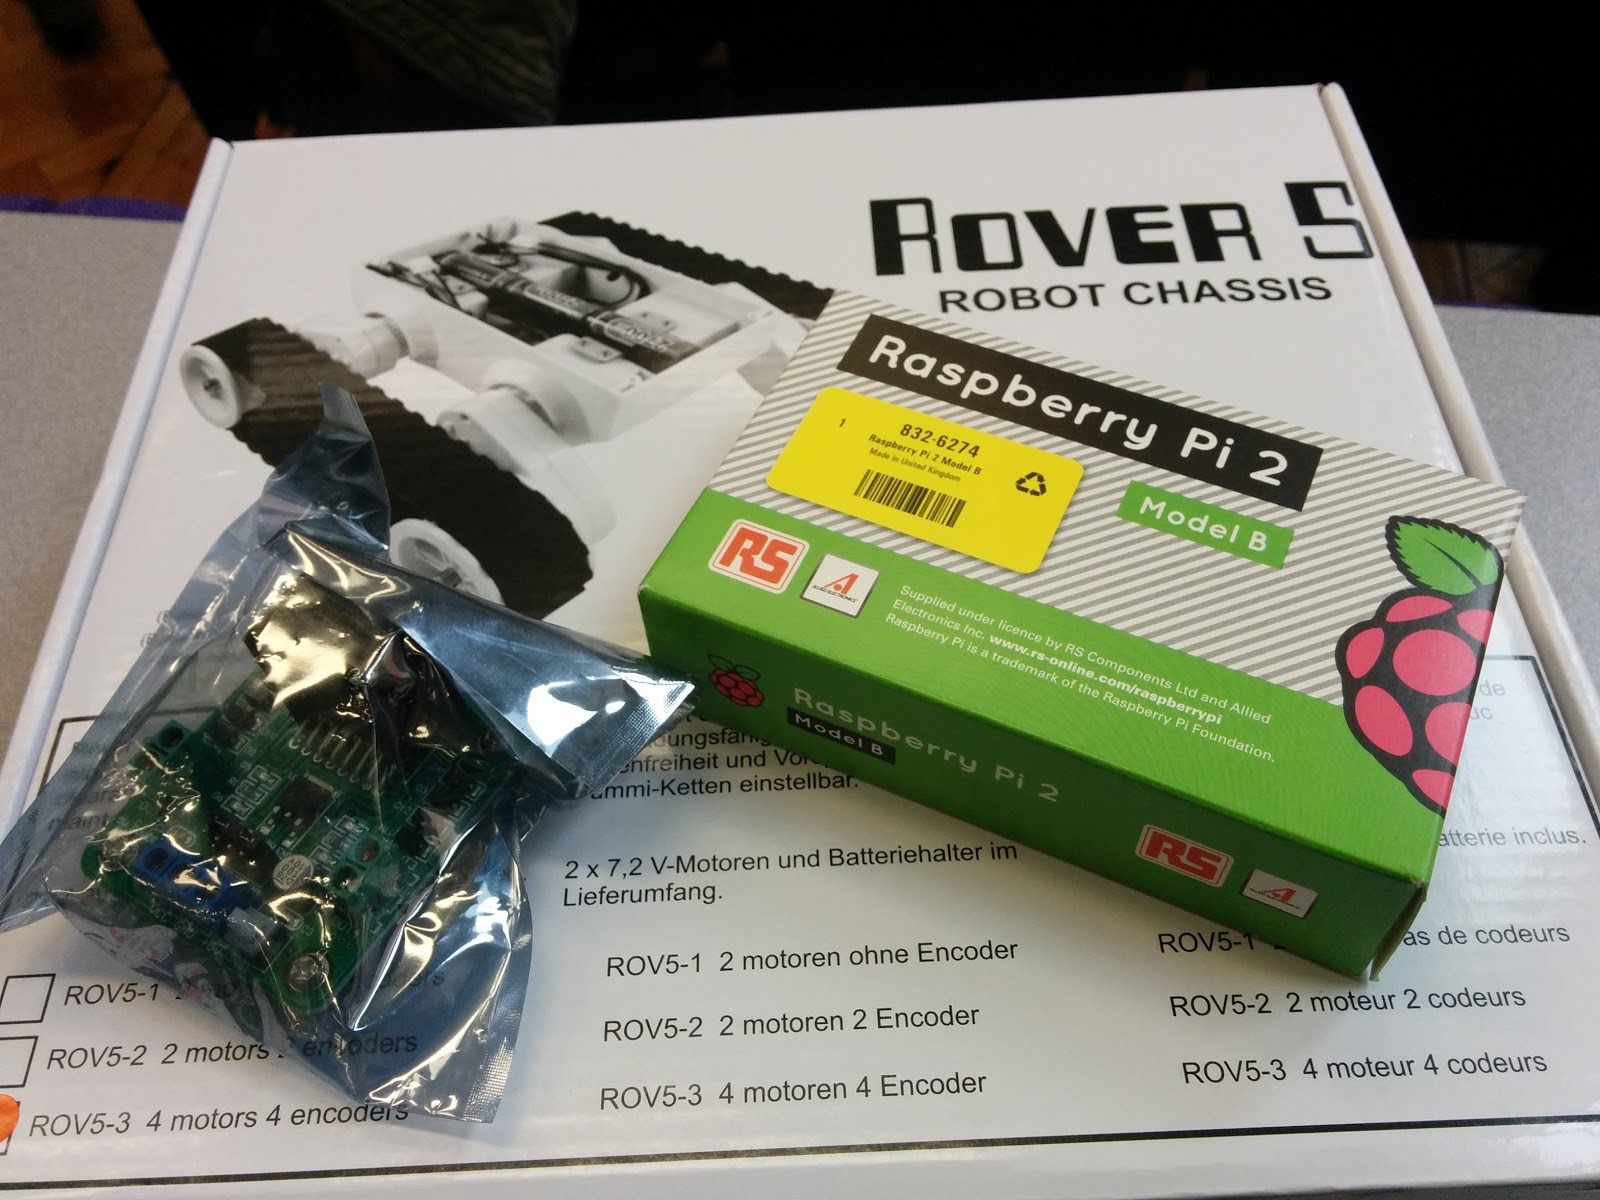
First go at connecting everything up
I decided to get the arduino set up on the Saturday. This was 5 hours of pain.
Getting IDE installed was fine; I could not get the drivers installed no matter what I did.
Whether it was a hardware wizard or manually installing drivers I had downloaded I could not get it done.
In my device manager it did not say 'ports com' as it should, instead just saying 'other device' which I could not get to work. I found myself typing stuff I didn't understand into google and then getting frustrated that I didn't understand the suggestions.
I gave up and decided to have a look at the pi. This is the point I found out that most old pc monitors do not have...


 Alex Hunt
 Timo Birnschein
 Param Aggarwal
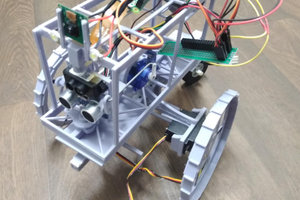
 Jacob David C Cunningham
A great beginner's project, Alan! If you're really interested in electronics, I encourage you to design from scratch. You could build your own custom microcontroller board instead of a Raspberry Pi 2. And design / build your own control circuitry: motor controller, line
sensor, etc. Perhaps even design your own chassis. Cheers and good luck!