Close
0%
0%

Autotron Pi Zero

This is a fork of the original Autotron Pi project - switching to RPi Zero W makes it more compact and more affordable at the same time

Similar projects worth following
Robot car based on Raspberry Pi Zero W and camera module. It can be controlled over Internet, making it the real moveable IoT platform.

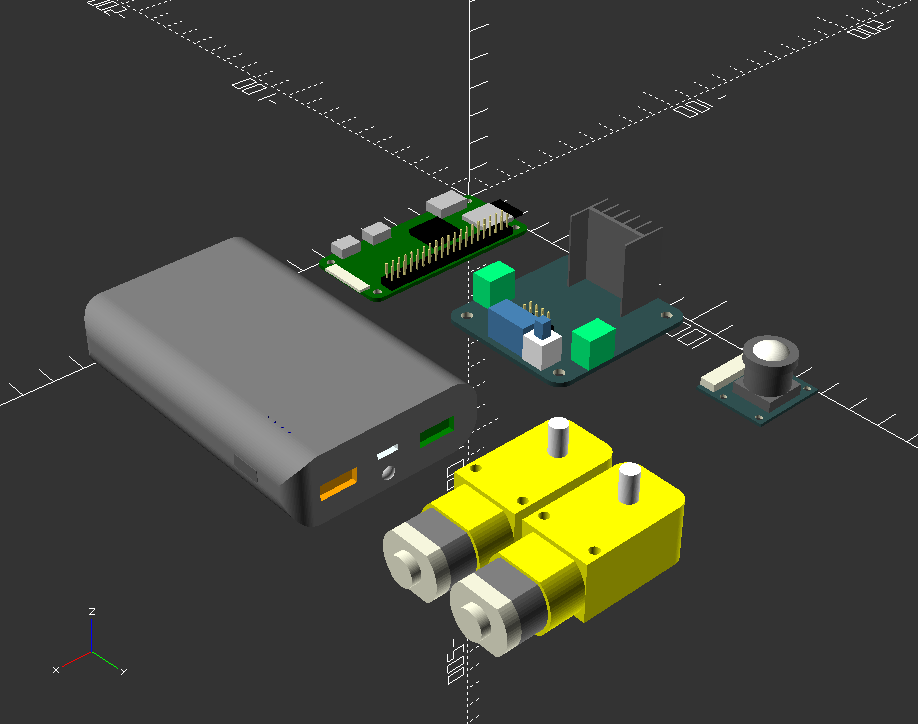
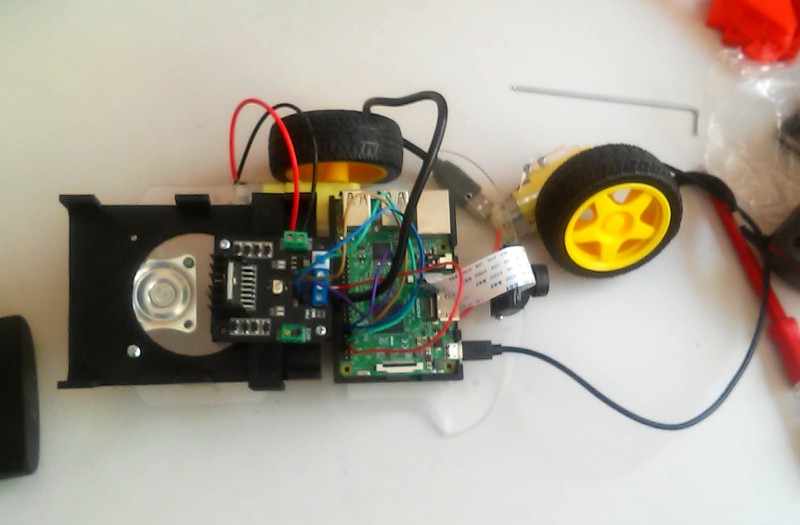
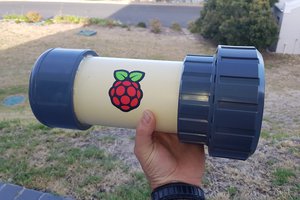
It's been some time since the last revision of Autotron Pi project, and many things have changed since - for one, there's much smaller and cheaper version of RPi that can be used for Autotron Pi: Zero W. Which is not only smaller, but also it's less thirsty, which means our juice canister can shrink too. And the price goes down again, not affecting the usability at all!

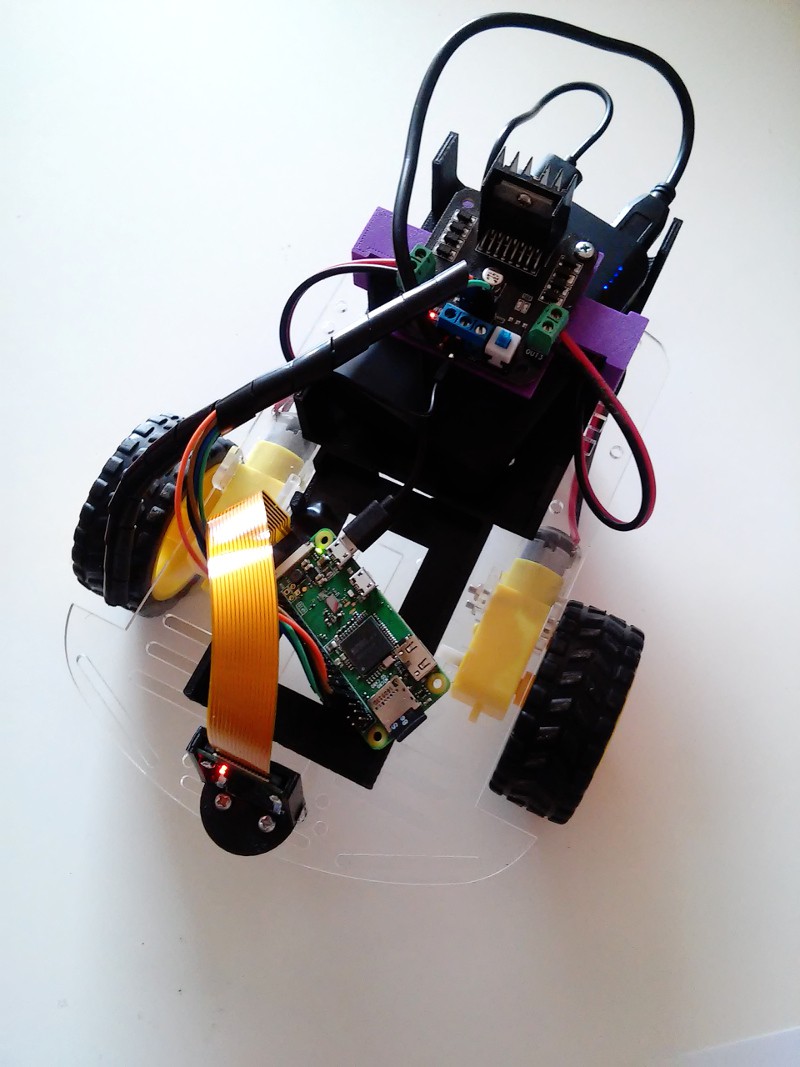
So, what else is there to do other than to restart the project? Of course, smaller component sizes means we can 3D print the chassis, right? Right! And that will allow us to ditch most of the 3D printed mounting pieces as those can be integrated into the chassis design now.

Altough it's a nice project by itself, adding more sensors to this platform is the real purpose of having (almost) real-time controlable vehicle somewhere at the other side of the globe. And it's a real fun to test drive it!

  • 1 × Raspberry Pi Zero W(H) The brainz
  • 1 × L298 Dual H-Bridge Motor Driver (ITEAD Studio Edition) The muscles, need it to drive the motors
  • 1 × Micro SD Card At least 4 GB size, UHS-I (Class 10) speed is recommended.
  • 5 × 10 or 20 cm Cable with Dupont Connectors - Female to Female Need them to connect the brainz to the muscles. One of them can be M-F, but F-F will work just fine too.
  • 1 × Spare USB Cable The one you dont need any more. Coz, you'll have to cut it open and rip it apart!

View all 12 components

  • A puzzle

    Tomislav Preksavec04/17/2018 at 20:17 0 comments

    Well, all the pieces of the puzzle are here, now it's time to solve it and design the chassis that we can mount it on. Easy, right?

  • (Sound) & Vision

    Tomislav Preksavec03/29/2018 at 20:58 0 comments

    When you want to move around, the most important thing is to see where you're going. And the more you see, the better you move. Most robot cars these days use ultrasound sensors (hence the 'sound' in the title), but we're stuck with the 'vision' part from the beginning. Using the original Raspberry Pi 5MP camera was quite OK, but things did get in the way - things that we didn't see. So, we wanted to see some more.

    First of all, we had to work on the FOV (Field Of View) issue: it was just a bit to narrow. So, we decided to test some other options, i.e. the wide angle RPi camera. And, well, there IS a difference! As you can see from the images below, you can see much more with the wide angle camera. Yes, the image is distorted, but there is soooo much more to see :-)

    Regular camera view

    Wide angle camera view

    Sorry for the blurry pictures, it was not a perfect setup, but the difference is quite obvious...

    The other thing that could help is NOT mounting the camera at the front of the car - although it is more immersive experience, it might be more convenient to mount it somewhere where the driver can see the front wheels. And anything that could get in the way of the wheels. So, that's something worth considering in the chassis design process.

  • Is it working?

    Tomislav Preksavec03/25/2018 at 17:38 0 comments

    We've ported the code from RPi 3, done some power testing and had some good results, but before going to the next stage, it would be nice to see if the project works as expected. Since we don't have the new chasis yet, let's use the old one for the moment - you can see what it looks like, there's a lot of space left once you replace RPi 3 with Zero W.


    Everything's connected, let's fire it up! And...., it's all green :-) That is, only Zero W is green, all the other LEDs are red or blue, but it seems to be working. Now, all there's to do is to take it for a test drive. Which went as expected, so now it's time to start working on a brand new 3D printable chasis.

    Some final thoughts for this log entry:

    1. As our original github repo will be used for this project too (which makes sense as we'll use most of the original code), the old RPi 3 version is now available as a v1.0 release (git tag) and all new development will be done on the master branch

    2. Just something we've learned along the way - while testing Autotron, it's always wise to do so on the floor, because leaving it on the table can (and eventually will) lead to the unwanted crash test, as seen in the picture below :-(

    P.S. Altough unwanted, the crash test showed us that the chasis is the weakest part of Autotron - all of the other parts were left unharmed. Sorry for the slightly blurred image, the adrenaline was high at the moment ;-)

  • Power, power, power...

    Tomislav Preksavec03/21/2018 at 20:43 0 comments

    When building autonomous project, providing enough power is the key to success. Our original project used quite beefy juice canister, 10000 mAh was a must as we had RPi 3, video stream, and two DC motors running at the same time. As we're now down scaling the whole project, our power source should shrink too. Or not?

    Well, we're going to find out the only way we can: let's try it out! First of all, we'll pick smaller power bank which still has two USB outputs and a power button. Of course, one of those outputs has to be able to give us more than 2 amps while maintaining 5 V, so we'll pick manufacturer we can trust, keeping in mind the price/quality ratio :-)

    Tadaaa, our first pick is RealPower's PB-6k 6000 mAh power bank - a German company should deliver, right? Once we've got our hands on it, we cycled it few times through charge - discharge stages, just to make sure it's going to be consistent through the tests. And now, the fun part starts!

    Image by RealPower

    First we installed Raspbian Strech Lite (AKA headless) version on a SD card and enabled WiFi and SSH on it (instructions on how to do that coming soon - don't worry, it's easy-peasy). The only thing added was a crontab line which is logging the uptime (yes, we'll share that one too) and we're set to go - all we have to do now is wait...

    .

    .

    .

    .

    So, one day and 14 hours later, our test was officially finished - not bad for a first run. While we're charging the power bank, it's time to try some tricks. It appears that HDMI connector onboard RPi Zero is pretty hungry even if nothing's connected to it, so let's turn it off. Fortunately, that's easy when running Linux, all you have to do is to add this line:

    /usr/bin/tvservice -o

    to /etc/rc.local. And we're good to go one more time...

    .

    .

    .

    .

    .

    One day and 19 hours later we've learned that one line in one file saves five hours of uptime. Wow! We could save a little bit more by turning off a power LED, but is seems we'll lose more than we'll gain, so we'll forget about that one, as our uptime looks quite good right now.

    Let's give our Zero something to do - we'll add 5 MP camera to it, and we'll run start script which will start onboard command server and video stream. How long will it hold out now?

    .

    .

    .

    Of course, not so long, but 22 hours is more than good enough for us, we've nailed the power source at the first go. Yay!

View all 4 project logs

  • 1
    Raspbian installation

    Never installed Linux before? No biggie, we're here to lend you a helping hand :-)

    First thing you have to do is to download one: go to Raspbian download page and choose the Lite version. This one is not easier, it's just lighter as it comes without the GUI. Your basic installation comes to writing the image file to micro SD card, and  the instructions for this step are here.

View all instructions

Enjoy this project?

Share

Discussions

Similar Projects

Does this project spark your interest?

Become a member to follow this project and never miss any updates