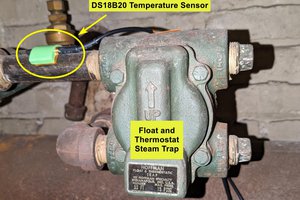
This is a version 2 of my wood stove monitor. On the first version, the thermocouple amplifier breakout board was downstairs and the microcontroller/LCD was upstairs. A >20' cable connected them together and it was a pain in the ass. The thermocouple used was applied to the surface of the chimney and the precision was poor due to lack of good contact.
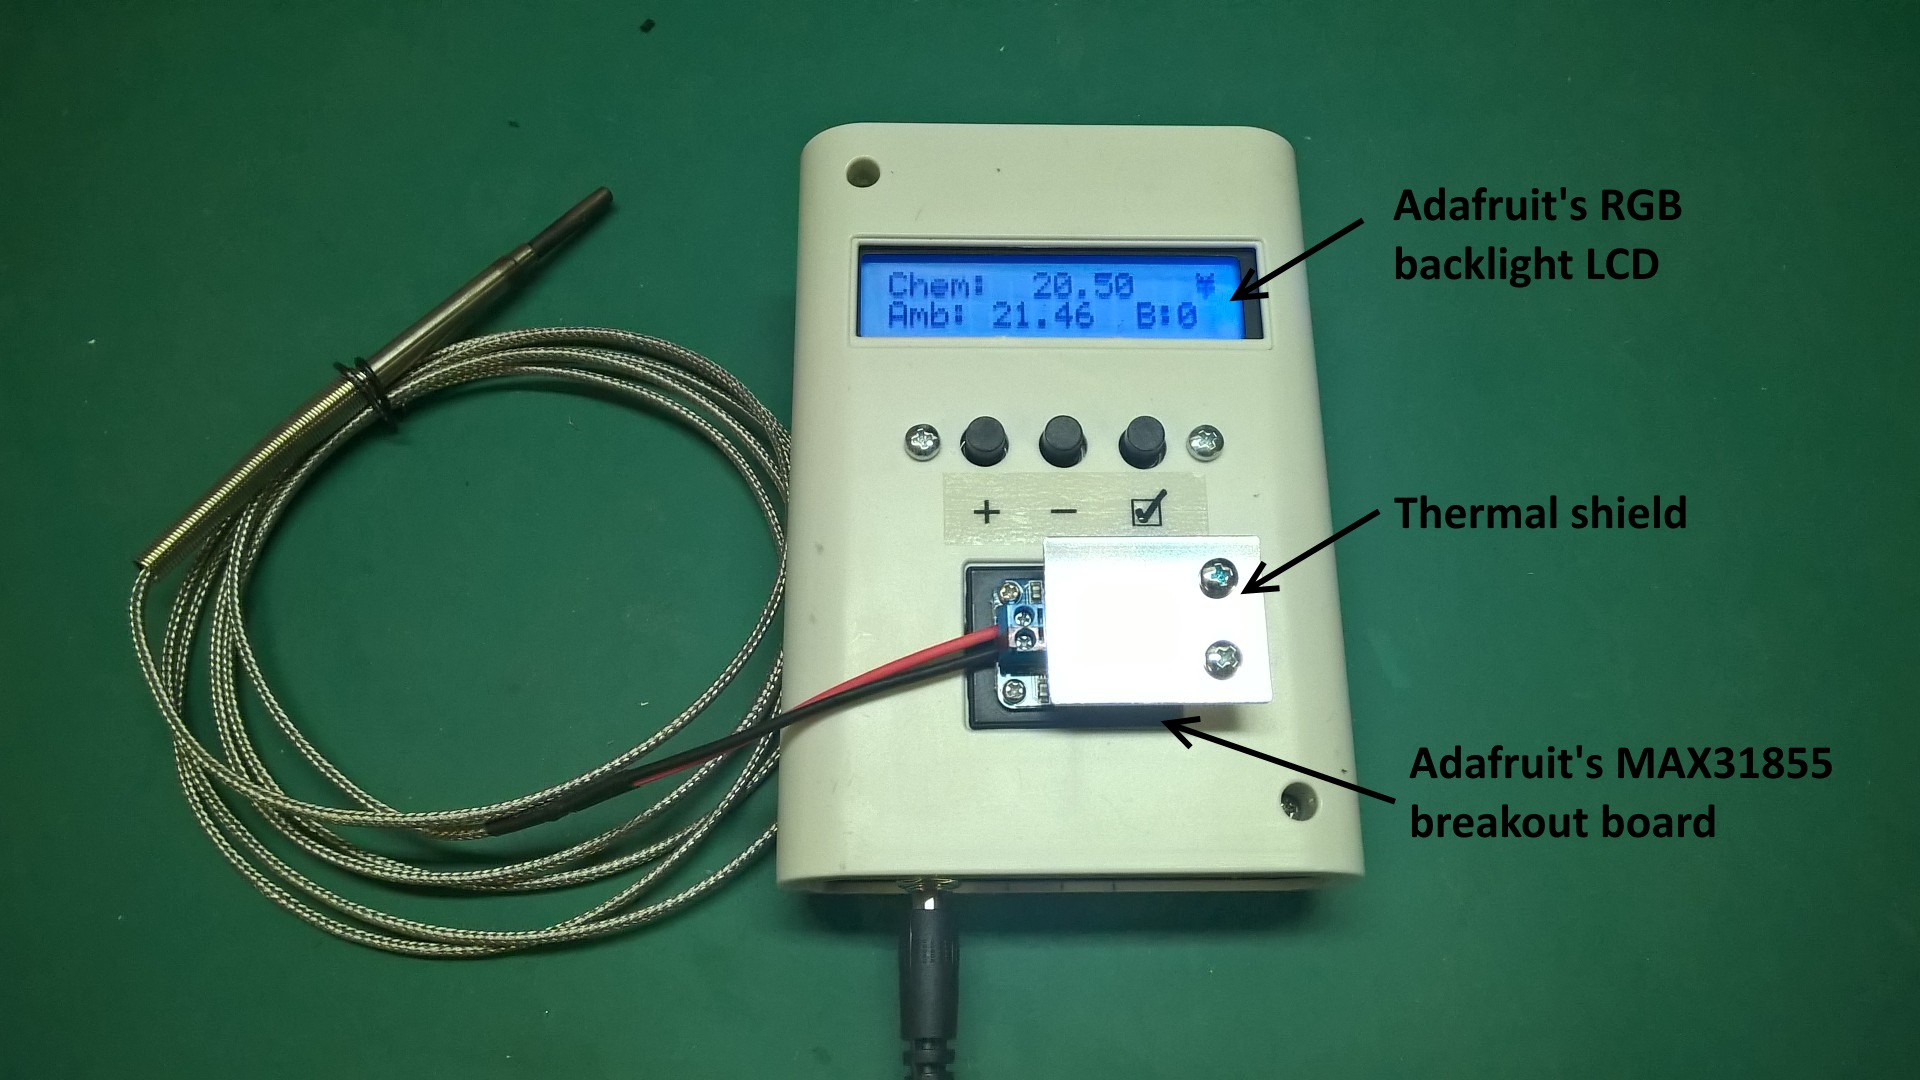
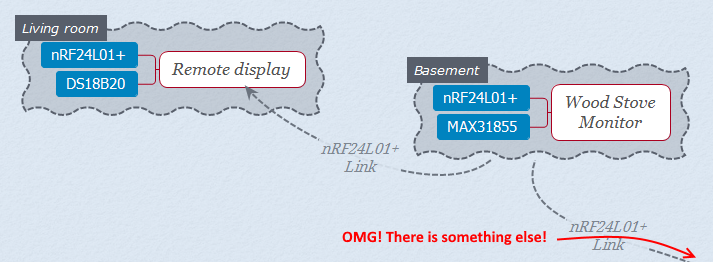
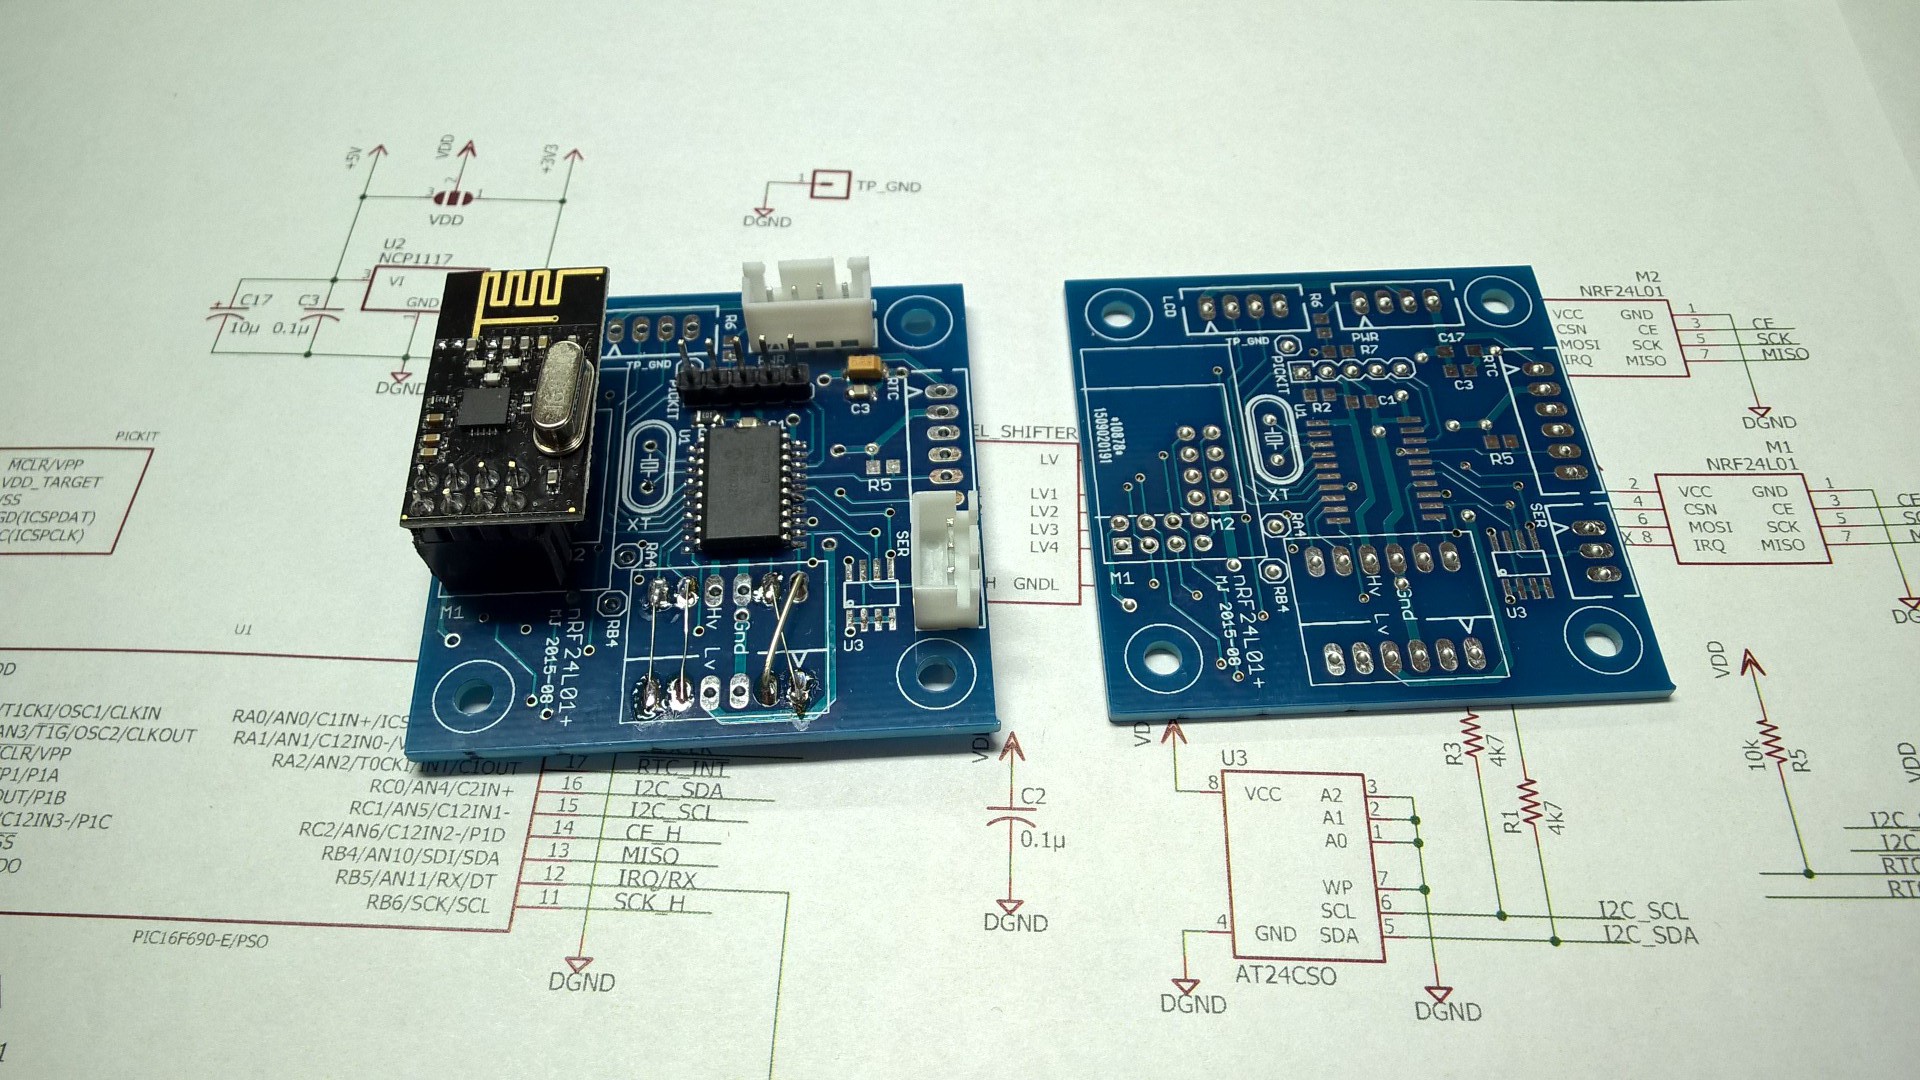
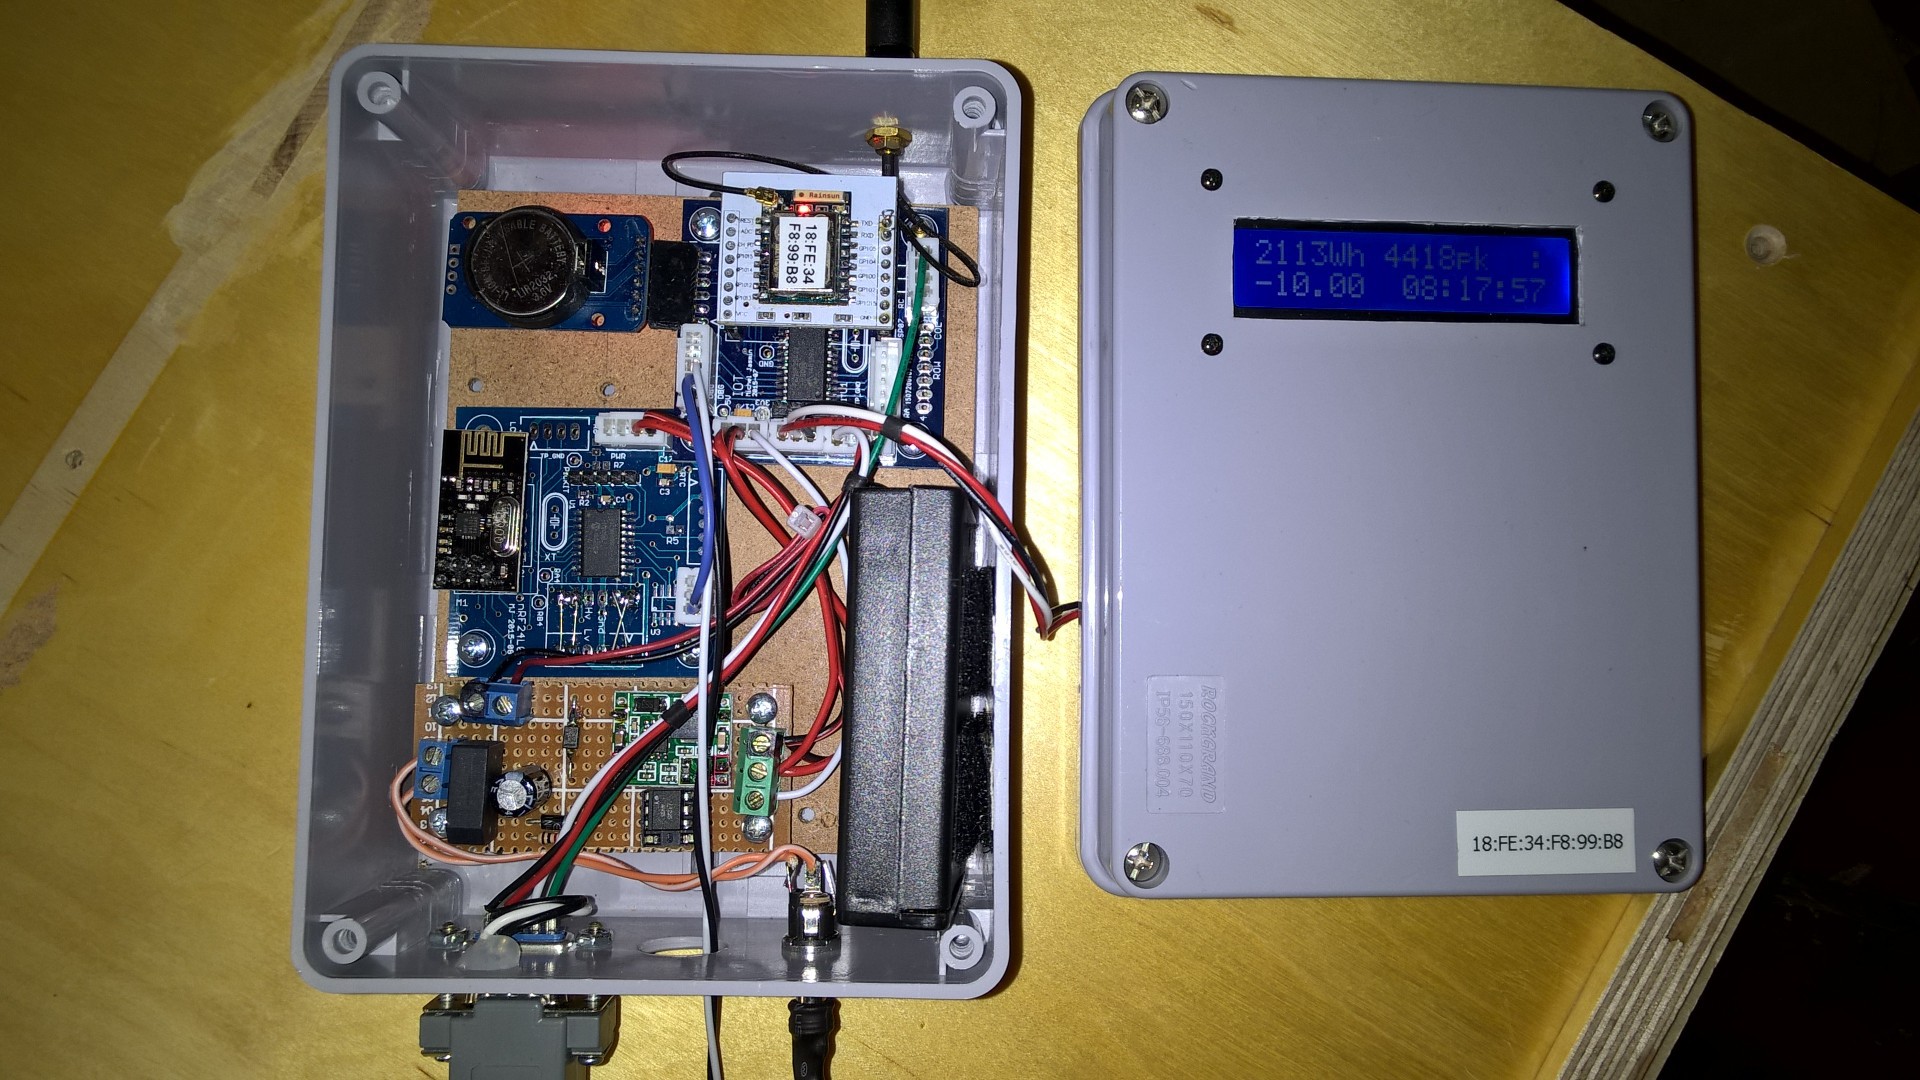
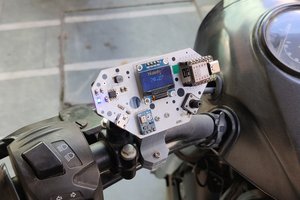
The new version uses an EGT (Exhaust Gas Temperature) thermocouple and measures the gases inside the chimney. An nRF24L01+ transmits the data from downstairs to a battery operated remote display. The downstairs module has an Adafruit’s RGB backlit LCD which changes color depending of the temperature measured. The thermocouple is interfaced with an Adafruit’s MAX31855 breakout board. This chip has an internal cold-junction temperature sensor for compensation. I’m reading it to get the basement temperature. I’ve installed a thermal shield to prevent any distorted reading due to the radiated heat from the wood stove. That shield will be updated to protect the screw terminal too because it must be at the same temperature of the chip for an accurate compensation.
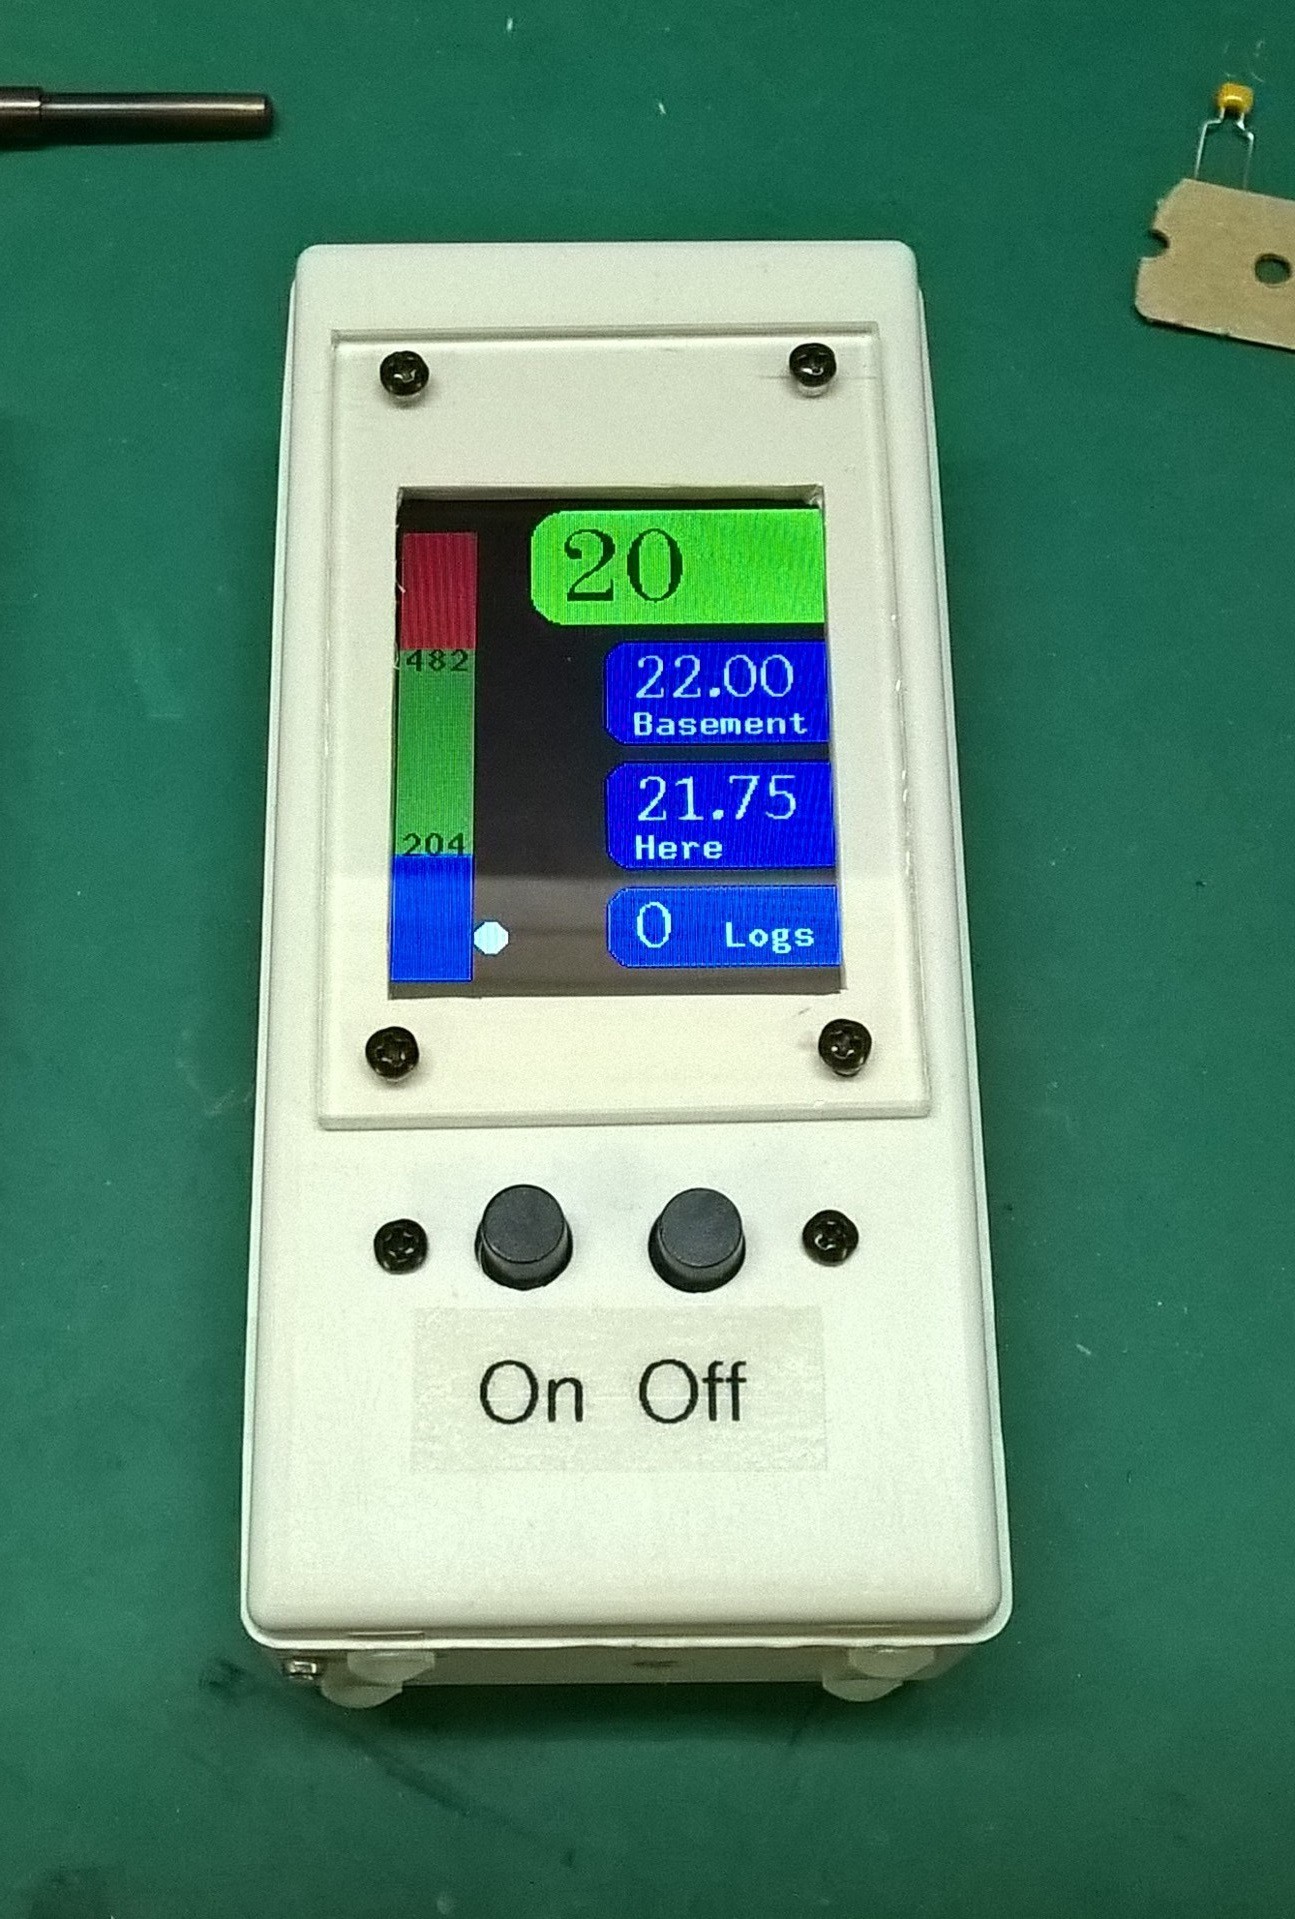
The remote is equipped with a 2.2" graphic color LCD and a DS18B20 to measure the ambient temperature. The remote is powered by a salvaged LiPo battery and turn itself off after one minute without incoming signal from downstairs.

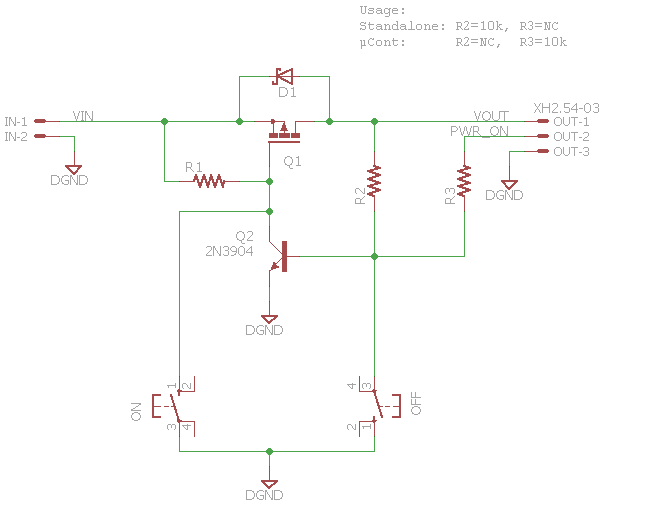
The power management circuit is a simple high side switch. Thank you Bil Herd for the tutorial!
http://hackaday.com/2015/09/16/learn-and-build-a-high-side-switch/
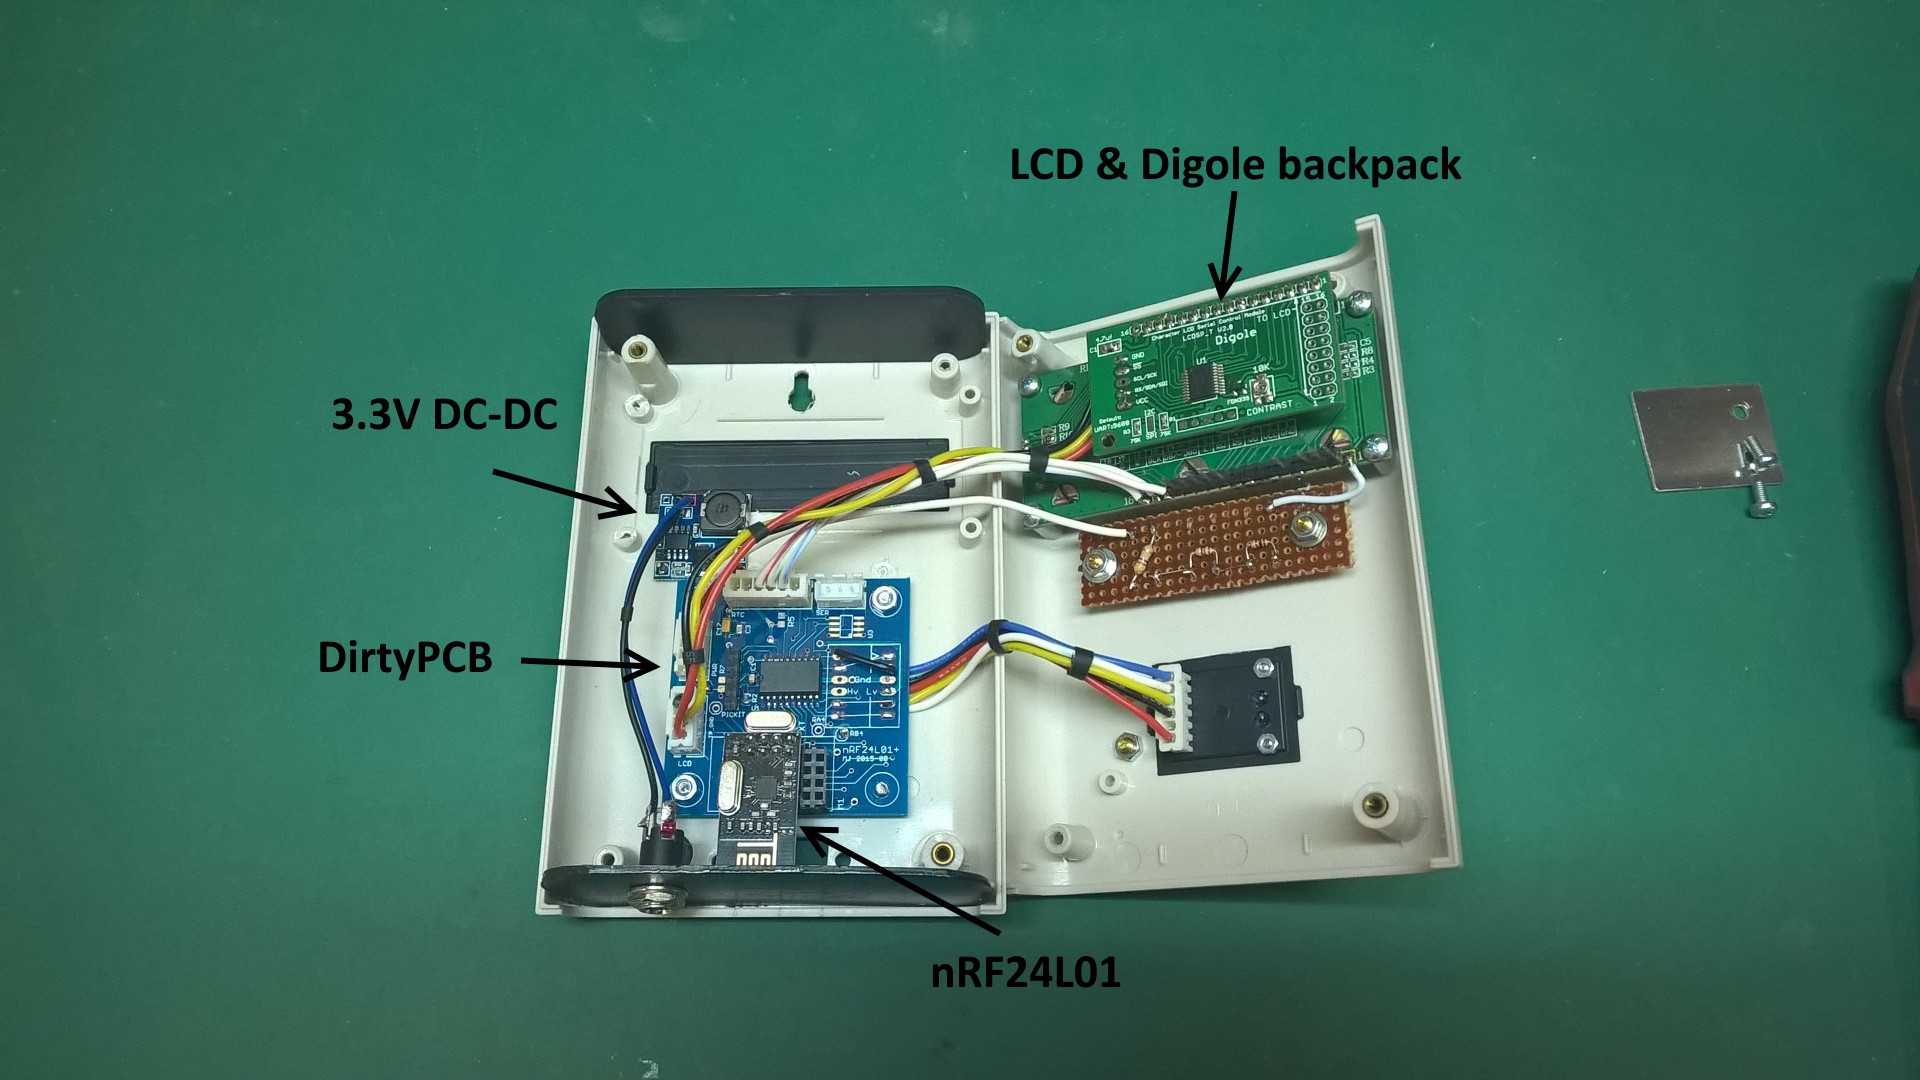
The main board on both transmitter and receiver are DirtyPCBs I designed as a universal nRF24L01 platform. The microcontroller is a PIC16F690 running PicBASIC code (more on this in the FAQ). You’ll notice on the remote a field named “Log” (“B” on the transmitter). This is the actual log count. This project is part of a bigger one which will be published later: Power Monitor. It’s a simple hack of my smart meter to monitor the household power consumption VS exterior temperature and wood stove usage. It is currently under development. See https://thingspeak.com/channels/20713

 Arnov Sharma
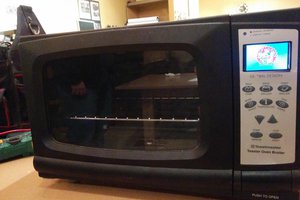
 Sukasa
 Tim Rightnour
Hey,
great project. I actually do have the same Problem in my chimney from the previous tenant. Could you give me (or anyone who's interested) some data on what temperature range you try to keep?
Another thing: I do have a hole to the chimney in the living room for a second stove. do you think that there is some way to measure the temperature there (around 3-4 m above the exhaust of the stove in the cellar) or is this too far away from the heat source to get a reliable measurement?. Would be great to get it there, because then I could simply put a small circuit inside the bezel that seals the opening (I'm thinking of a simple RGB LED to indicate too cold, too hot, perfect or something like that.