 ironBit
You will see everything from 3D Printing, Mechanics, Arduinos, PIC32's, Charging Systems, Quadcopters, Touchscreen LCD's, and all sorts of other things in this. This project ended up being one of the biggest projects we had to tackle. We started this for Senior Design and recently finished the class. We want to thank our sponsors for helping us with this project:
University of Central Florida
Theta Tau-Rho Gamma Chapter Professional Engineering Fraternity
and all of our other friends who have helped us along the way.
Now that we have finished and are graduating, they actually decided to let us keep the project and further develop it. We have always joked about making it into amphibious, well now we are actually going to do it. We are planning on sealing everything off, and using a system we came up with to be able to drive it on water.
I will try and organize the build log in sections to help with more details. Please feel free to ask any questions. I am currently working on trying to have all of our schematics and code out in the open. Right now, you can find a lot of our details here:


 The Big One
 Peter Wasilewski
 AngelLM
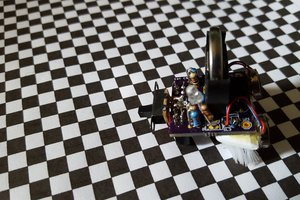
 Extreme Electronics
Nice remote controller.