-
Status 6/17/16
06/18/2016 at 02:55 • 0 commentsMotors are wired up and functioning, I started with the Z-axis motor, which had to be converted from unipolar to bipolar following this guide: http://www.jangeox.be/2013/10/change-unipolar-28byj-48-to-bipolar.html
Next up is the X-axis motor, which worked out of the box on wiring up, though I had to set the stepper driver to the highest microstepping mode (1/16) since full step was very coarse. This axis may need to move to 1/32 microstepping if the steps are still too coarse for use on the highest magnification setting of 1000x.
Lastly the Y-axis motor was wired up, and I found the wiring was wrong; the correct order of the pins from left to right are A+ B+ A- B-. After swapping the two center wires the motor worked as expected. I ended up changing to another Y-axis motor since I bent the shaft trying to fit the slide on.
Here's a video of all 3 axes being exercised:
Next up I'll start designing the actual slide holder and bracket to hold the focus motor assembly.
-
Status 6/16/16
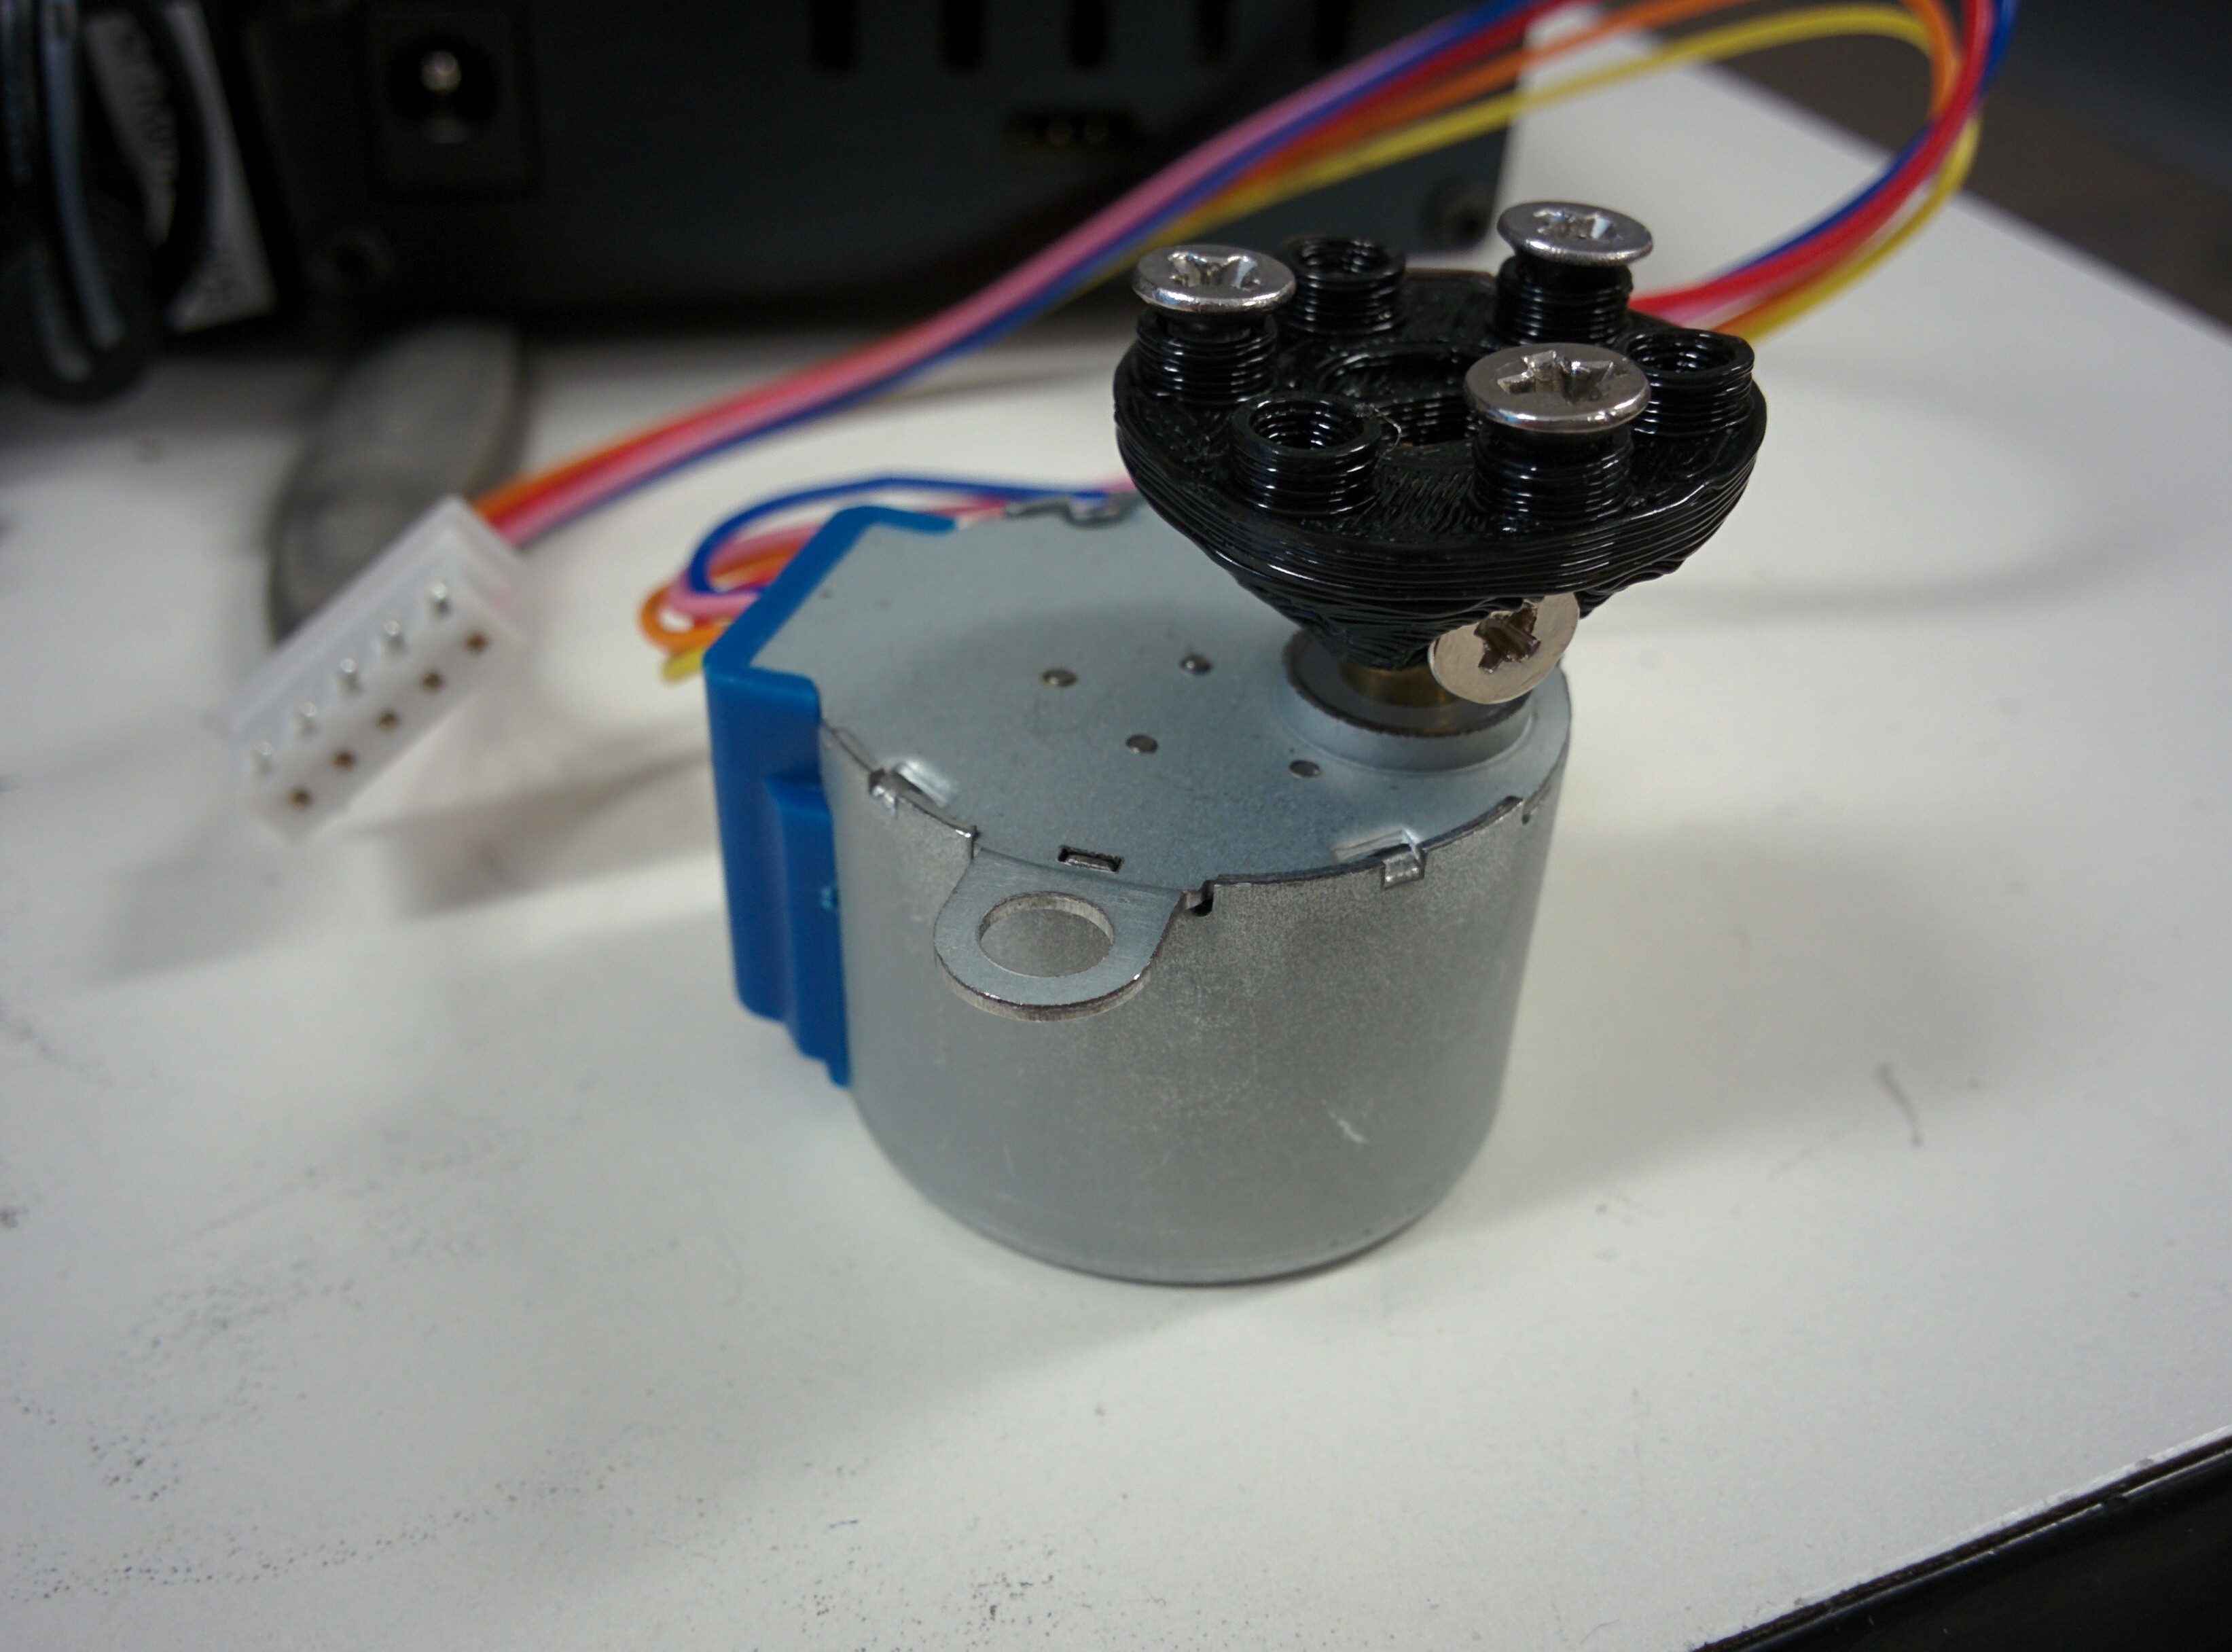
06/17/2016 at 01:35 • 0 commentsGot the Lego wheel in the mail yesterday so I added that to the focus stepper with a little persuasion.
![]()
Arduino is in the mail today, so I should have the 3 axes wired up to test tomorrow.
-
Status 6/15/16
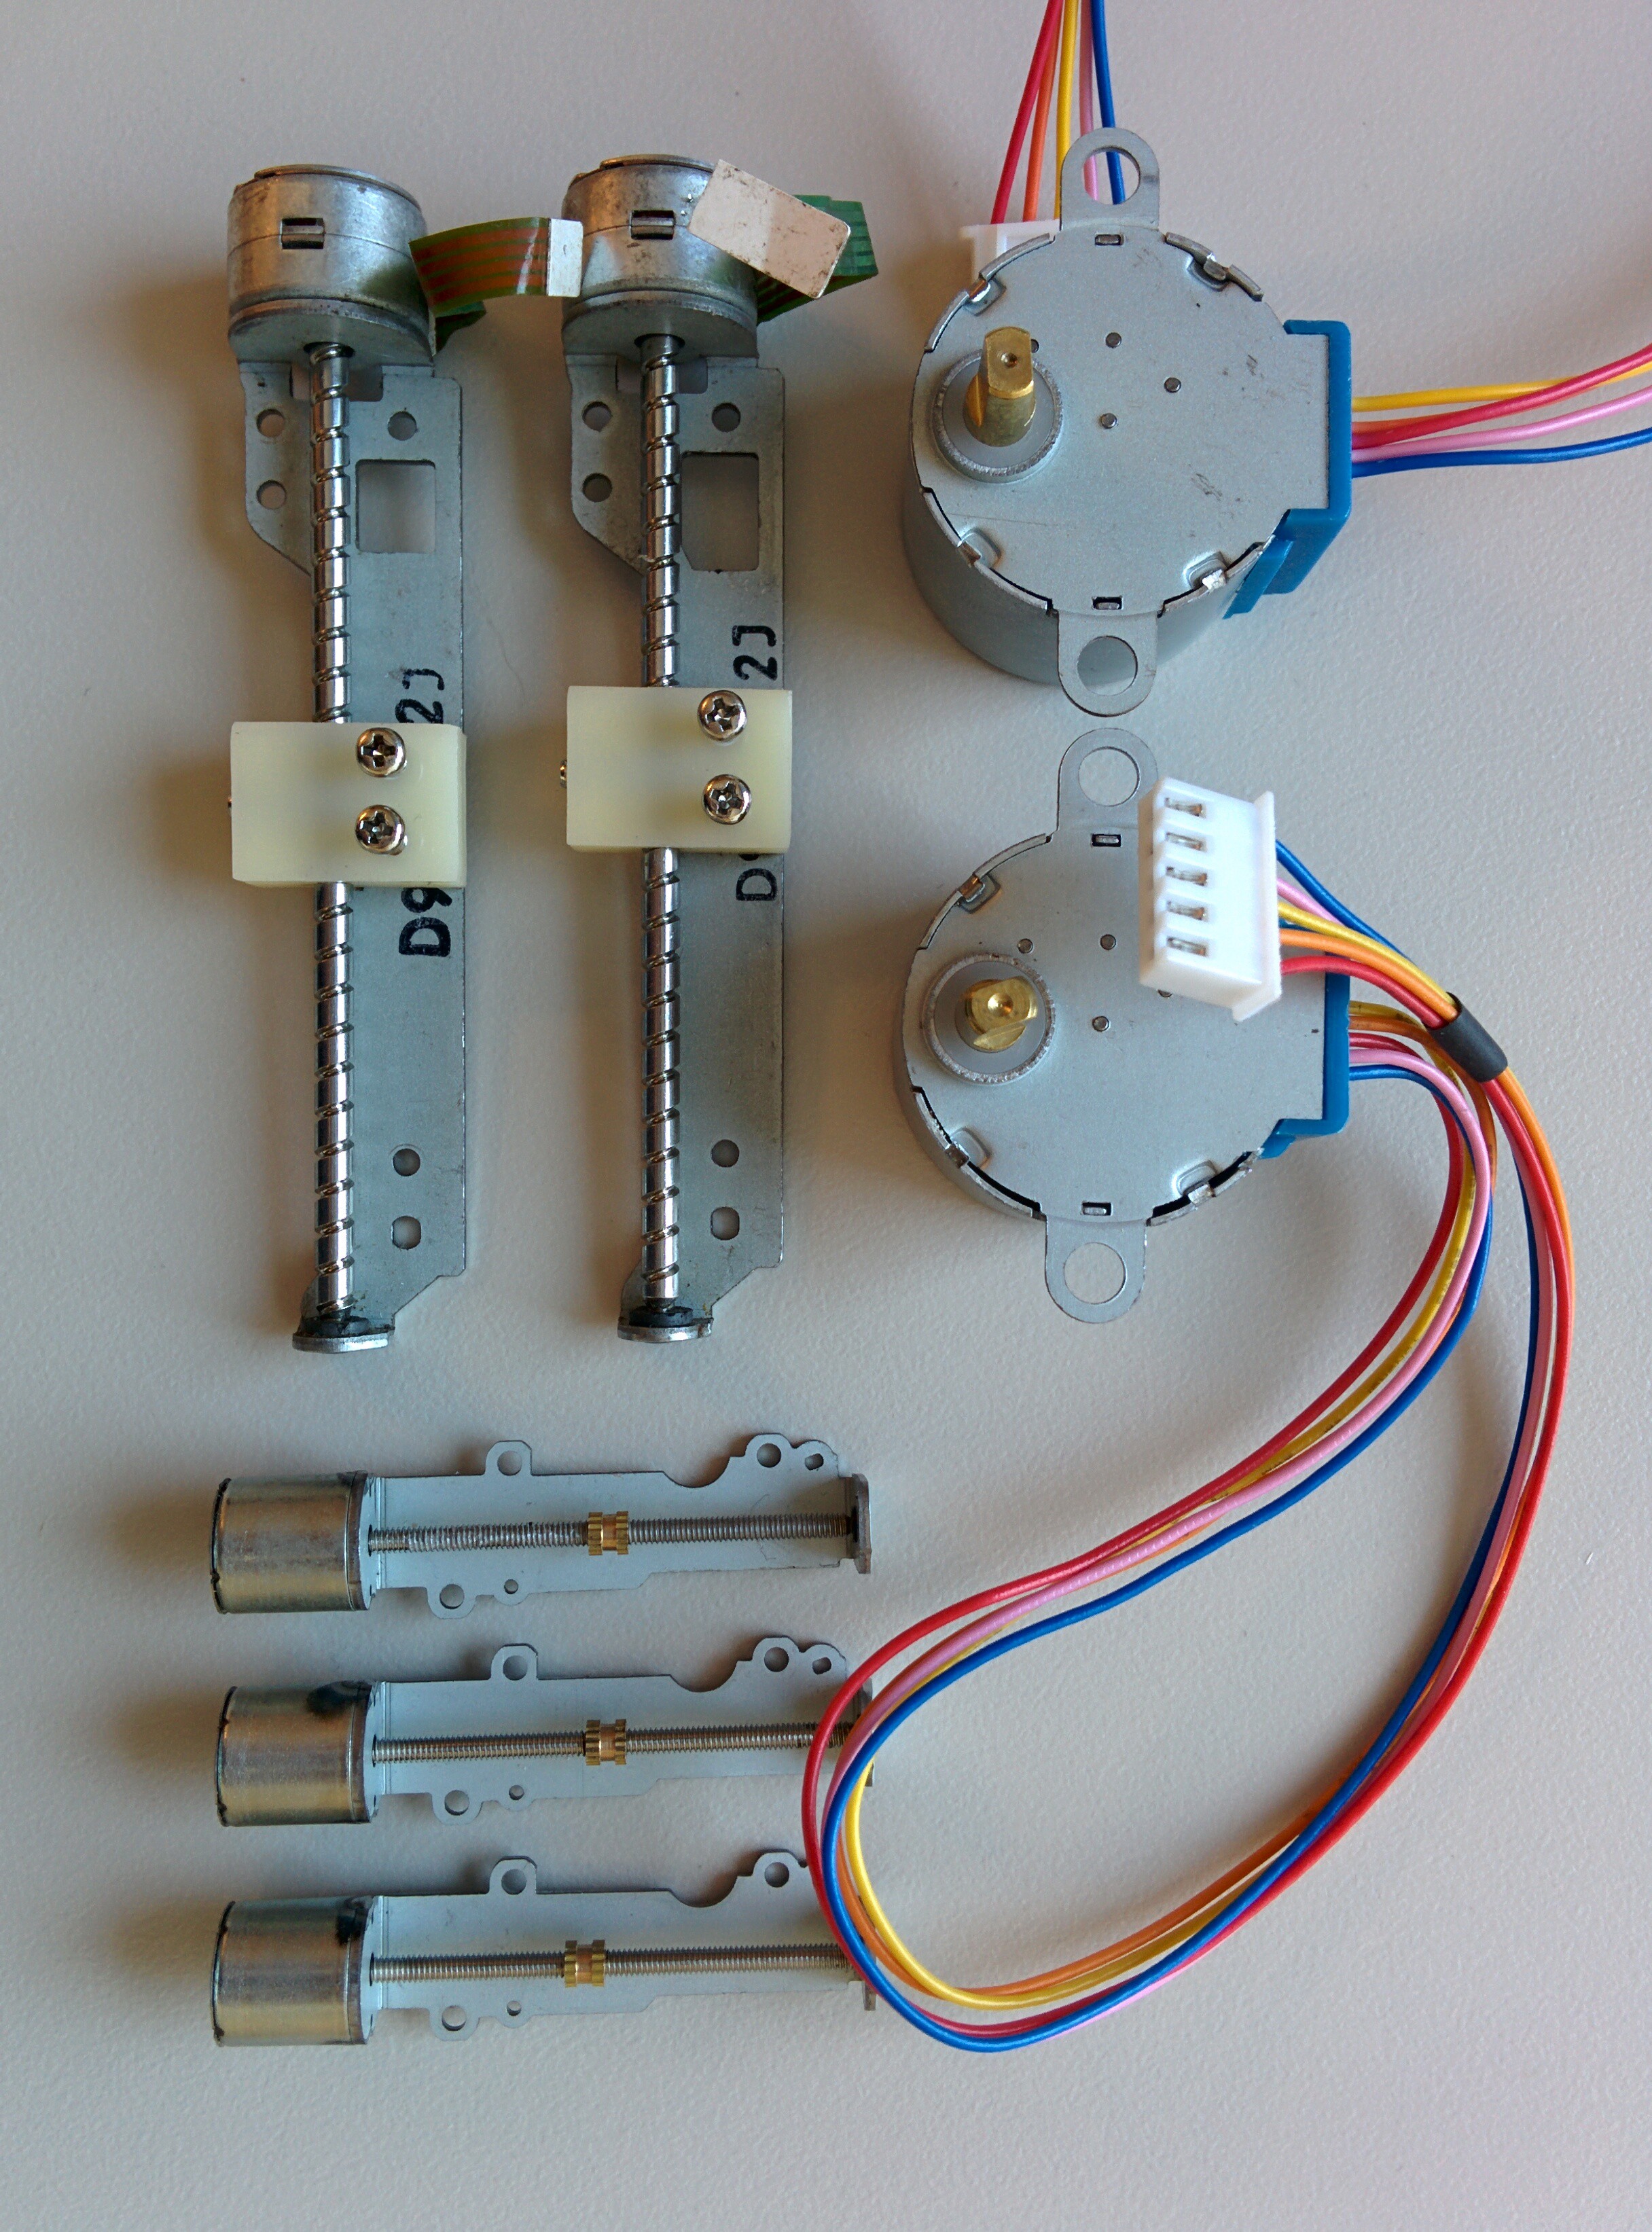
06/16/2016 at 01:28 • 0 commentsWiring! My least favorite part of any electronic project. This one wasn't so bad though despite the crazy small wire gauges (30 gauge wire wrap wire), and turned out pretty nice. Just need to add some hot glue for robustness and make sure the 4 phases are in the right order once I get my Arduino/Grbl setup.
![]()
-
Status 6/14/16
06/14/2016 at 20:50 • 0 commentsBought another Arduino to load Grbl on, since mine keep disappearing for use in other projects. Should arrive Thursday.
Printed the adapter for the Lego wheel to the Stepper motor. Had to adjust the model slightly with a less "flat" chamfer to prevent sags, and increased spacing around motor axle by 0.2mm in order for it to fit. Hopefully the Lego wheel fits, haven't received that part yet.
![]()
-
Status 6/13/16
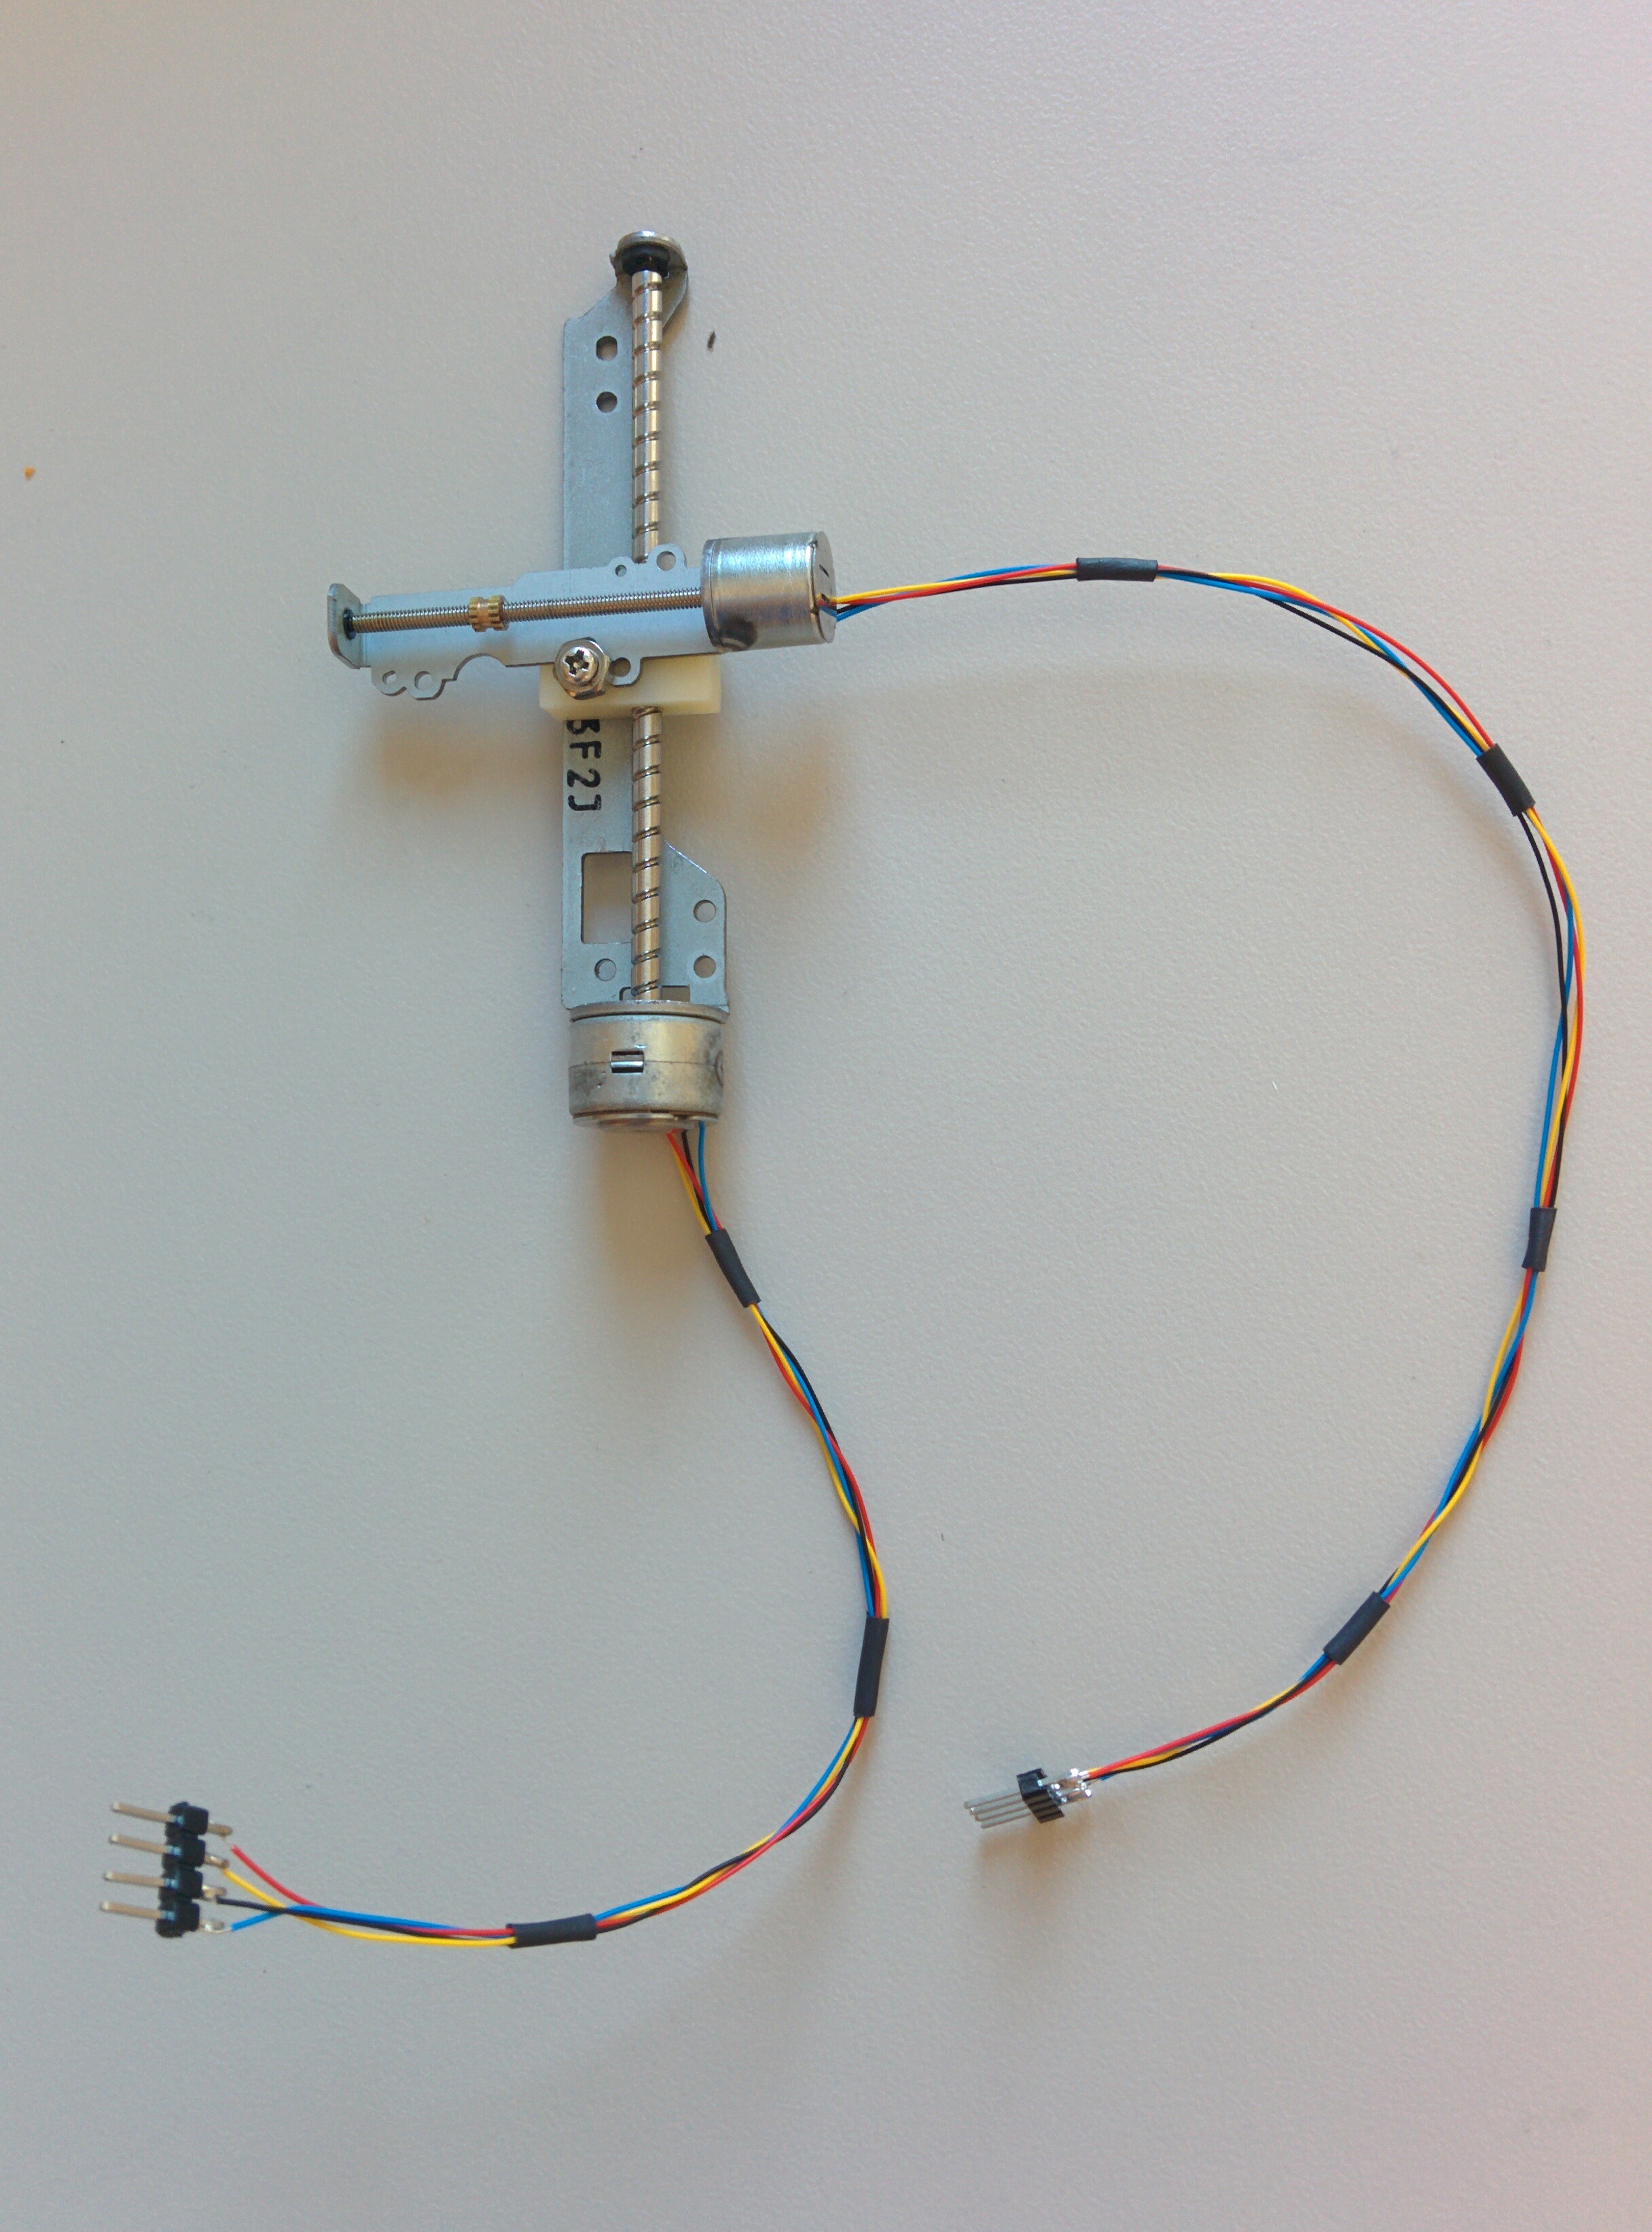
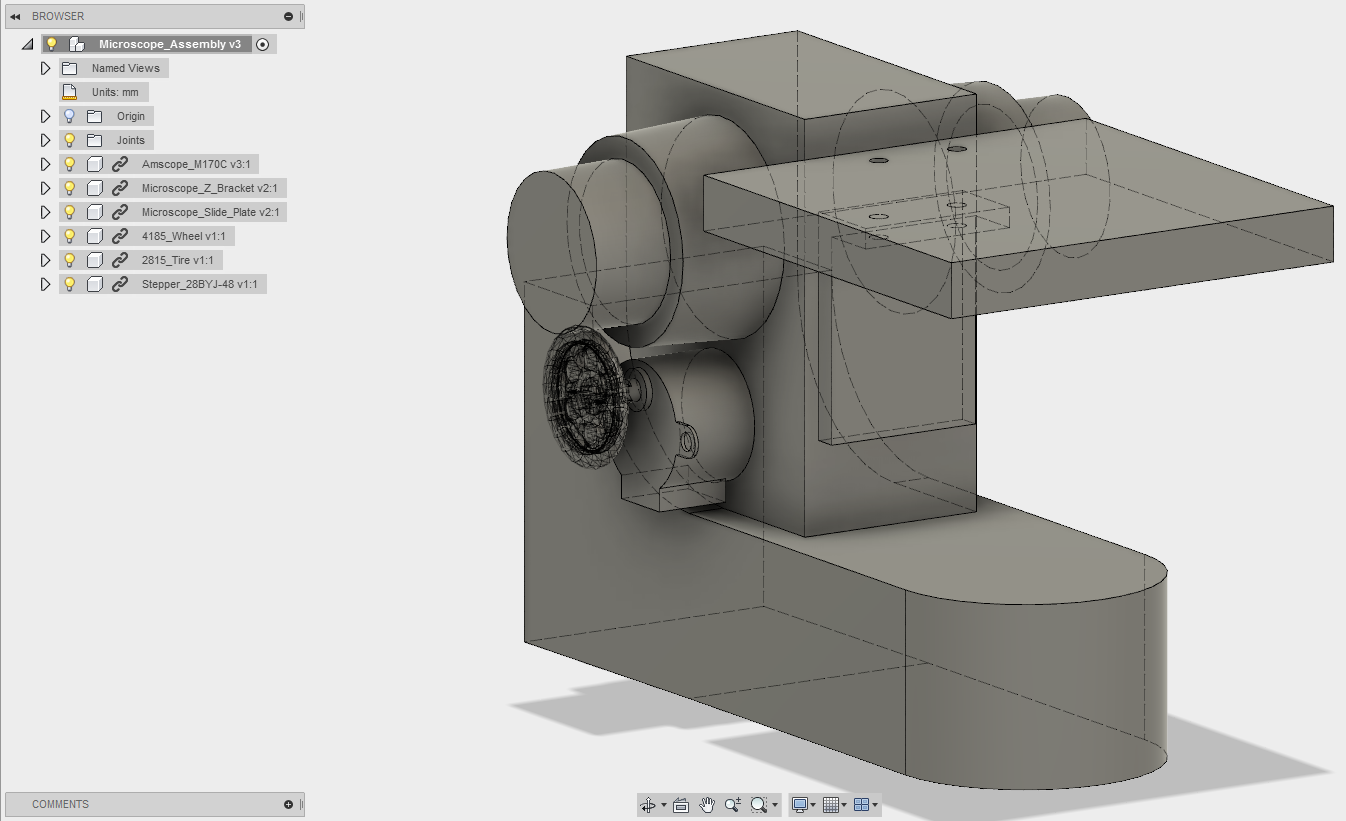
06/13/2016 at 19:27 • 0 commentsReceived the X and Y axis stepper stages today, have begun modeling the microscope in a basic way to figure out where to mount the focus motor and X/Y motors.
![]()
![]()
I should be able to wire up the 3 stepper motors to an Arduino with Grbl in the next day or so to get the steps per mm and thus positioning resolution, and will start working the slide holder mechanism.
I've completed modeling an adapter between the stepper motor and Lego wheel, I will 3D print this part to check fitment to the stepper motor and set/mounting screws. Lego parts should arrive later this week.
![]()
Specs for the Y-axis motor are as follows:
Motor diameter: 10mm
Motor length: 10mm
Length of rod: 36mm
Slide stroke: 33mm
Winding resistance: 54 ±1 Ω
Step angle: 18°
Drive voltage/current: DC 4-6V / 100-300mA
Specs for the X-axis motor are as follows:
Driving voltage: DC 4-5V
Screw length: 73mm
Slide stroke: 63mm
Screw pitch: 3mm
Step Angle: 18°
Stage size: 90 * 30mmSpecs for the Z-axis motor are found here: http://robocraft.ru/files/datasheet/28BYJ-48.pdf
-
Status 6/11/16
06/12/2016 at 04:41 • 0 commentsI'm starting to plan the focus mechanism first, since I just received the focus steppers this week. Since the stepper motors are geared and don't allow free motion unpowered like most steppers, I need to use either a friction drive of some sort or be able to engage/disengage the motor if I want to use the microscope manually. My initial plan is to use a simple wheel friction drive against the fine tune focus knob. Hopefully the friction of this drive mechanism would be just enough to engage the focus knob but allow free motion when it is not in use.
Here is the exact Lego wheel I purchased:
http://www.bricklink.com/v2/catalog/catalogitem.page?P=4185#T=S&O={}
http://www.bricklink.com/v2/catalog/catalogitem.page?P=70162#T=S&O={}
I will 3D print an adapter to go from the stepper motor to the Lego wheel.
-
Status 6/2/2016
06/02/2016 at 18:26 • 0 commentsCurrently, the microscope is hooked up to a Fire Phone with a 3D printed adapter I designed (here: http://www.thingiverse.com/thing:1470646) and running a live stream to Youtube via the IP Webcam Pro app (here: https://play.google.com/store/apps/details?id=com.pas.webcam.pro&hl=en&gl=us) using Xsplit Broadcaster free running on a desktop PC, and a program to convert the IP camera live feed to a virtual webcam for use with Xsplit. Current issues are latency and reliability; the live stream is around 20? seconds behind real time view, and sometimes crashes or gets stuck on a static image.
To Do: Hunt down 2 floppy drive motors and wire up to a stepper driver with an Arduino running GRBL to test the feasibility of the X/Y positioner. After verifying the basic functionality, I will design a custom X/Y carriage that can be 3D printed and will work with a standard disk drive/camera motor stepper from eBay. I purchased the following:
Main long axis stage (qty 1): http://www.ebay.com/itm/182071687426
Short or long axis stage (qty 2): http://www.ebay.com/itm/262136734214
Short axis stage (qty 3): http://www.ebay.com/itm/121934710060
Stepper driver (qty 5): http://www.ebay.com/itm/381655454577
Stepper for focus knob (qty 3): http://www.ebay.com/itm/111901908529
After that will be putting together an ESP8266 controller board with 3 stepper drivers and USB power, and writing a program to allow web control of the X/Y position and focus.
Web Enabled Microscope
Enhance a microscope with web control, enabling gigapixel panoramic or focus stacked shots, live streaming/control and more!