Close
0%
0%

Sawppy the Rover

Motorized model of Mars rovers Curiosity and Perseverance For Under $500

Similar projects worth following
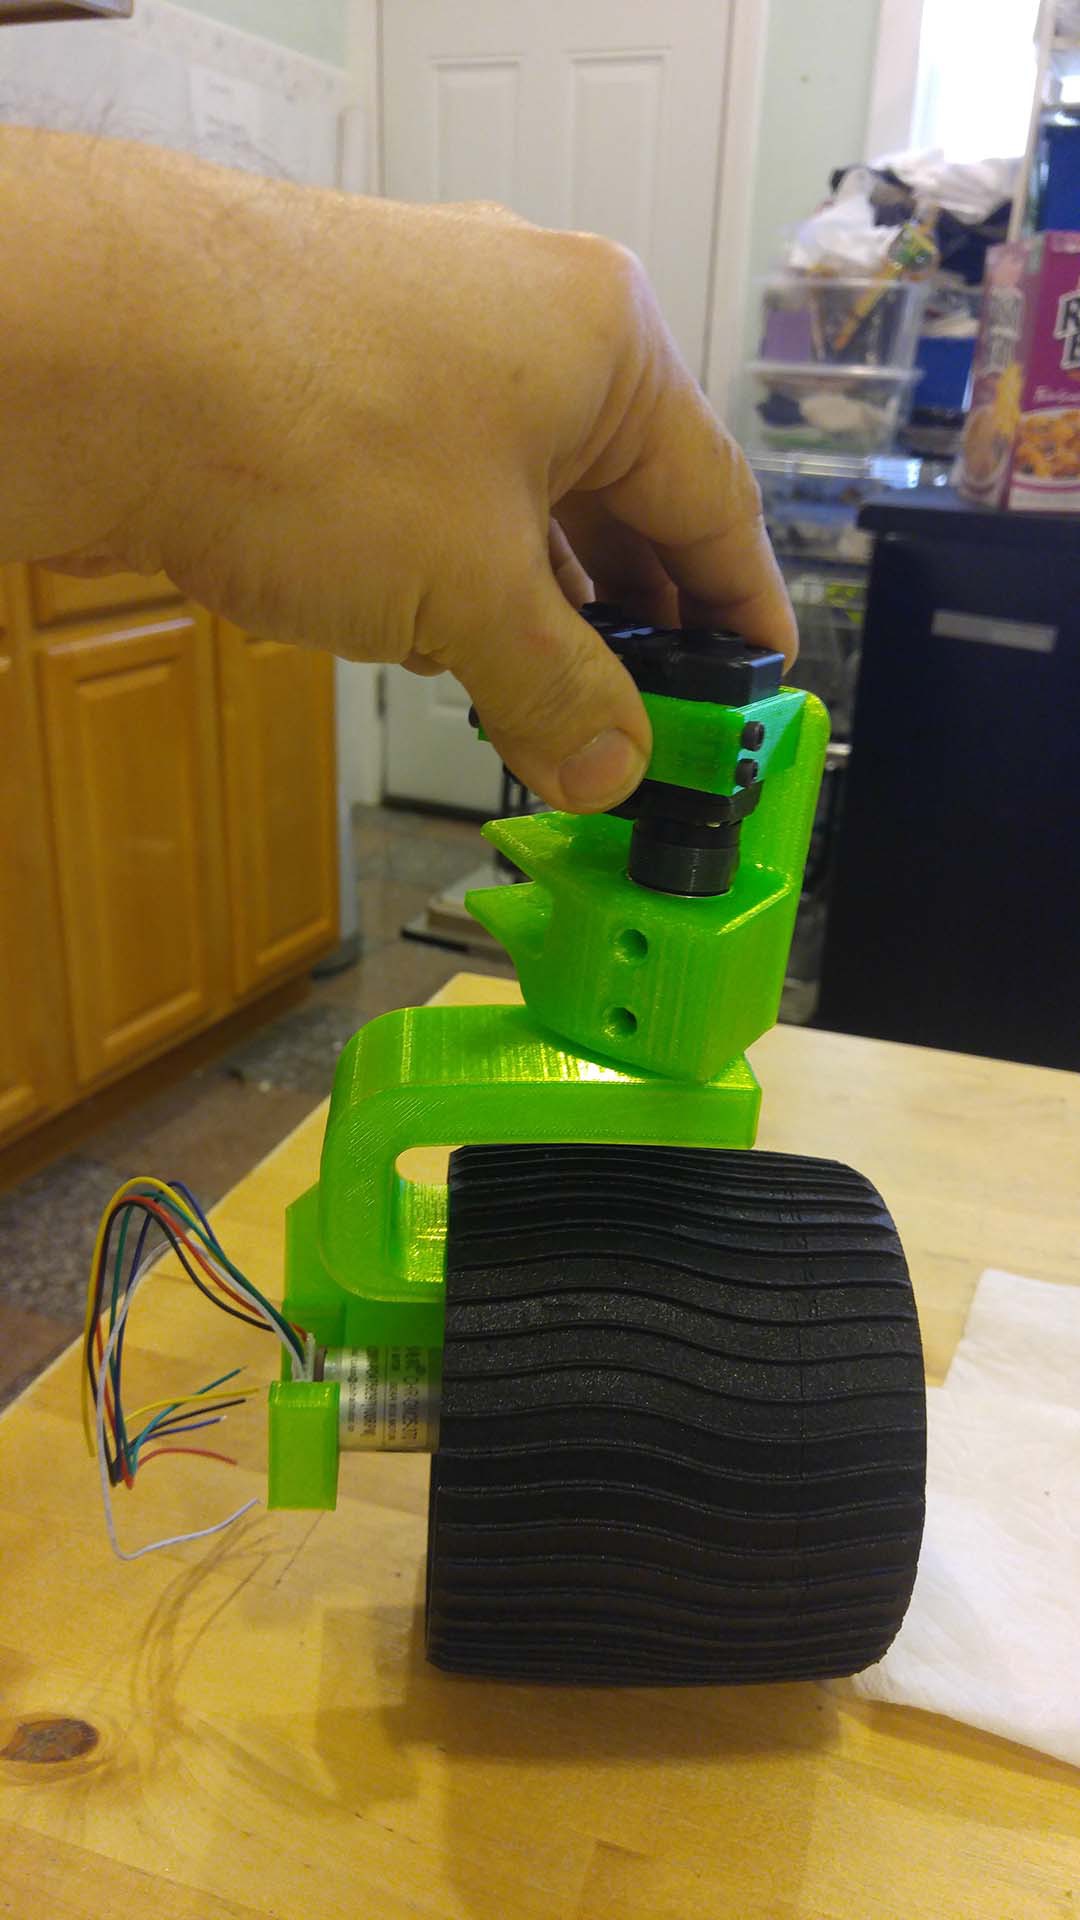
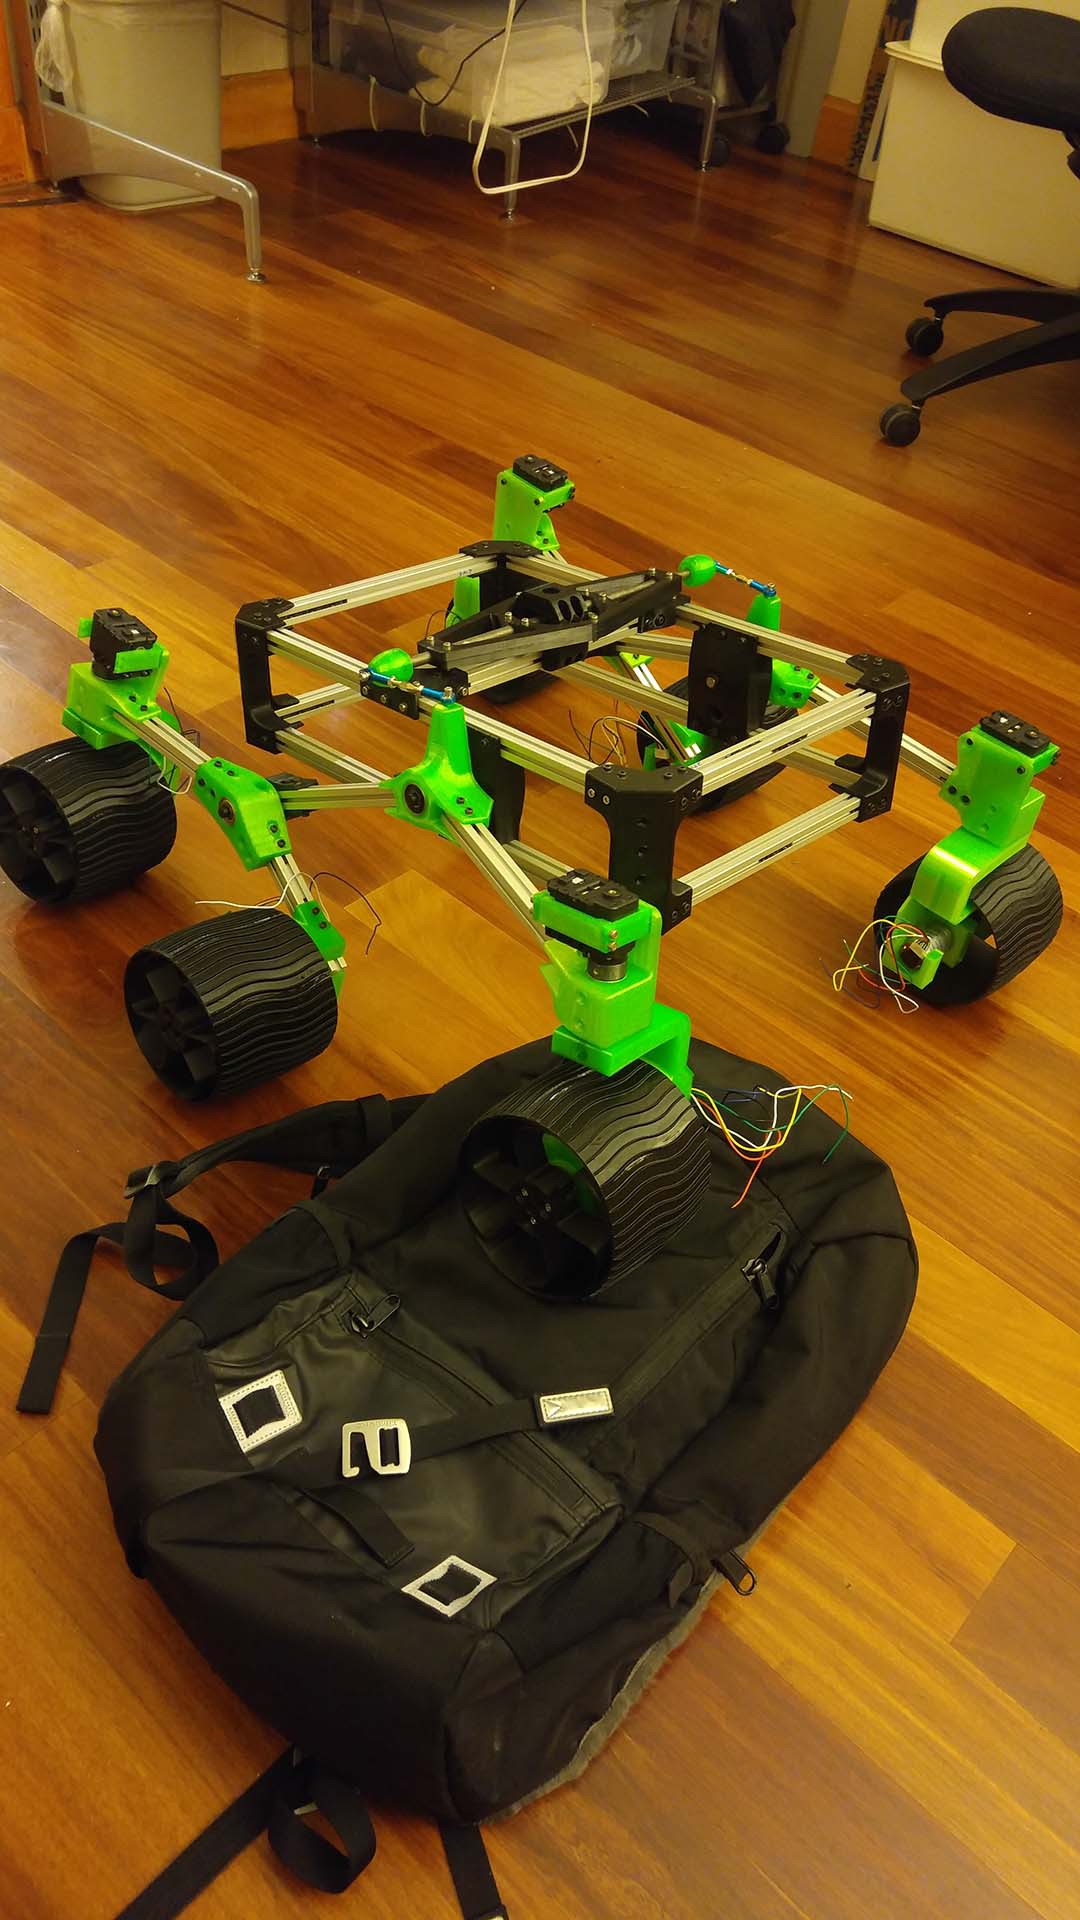
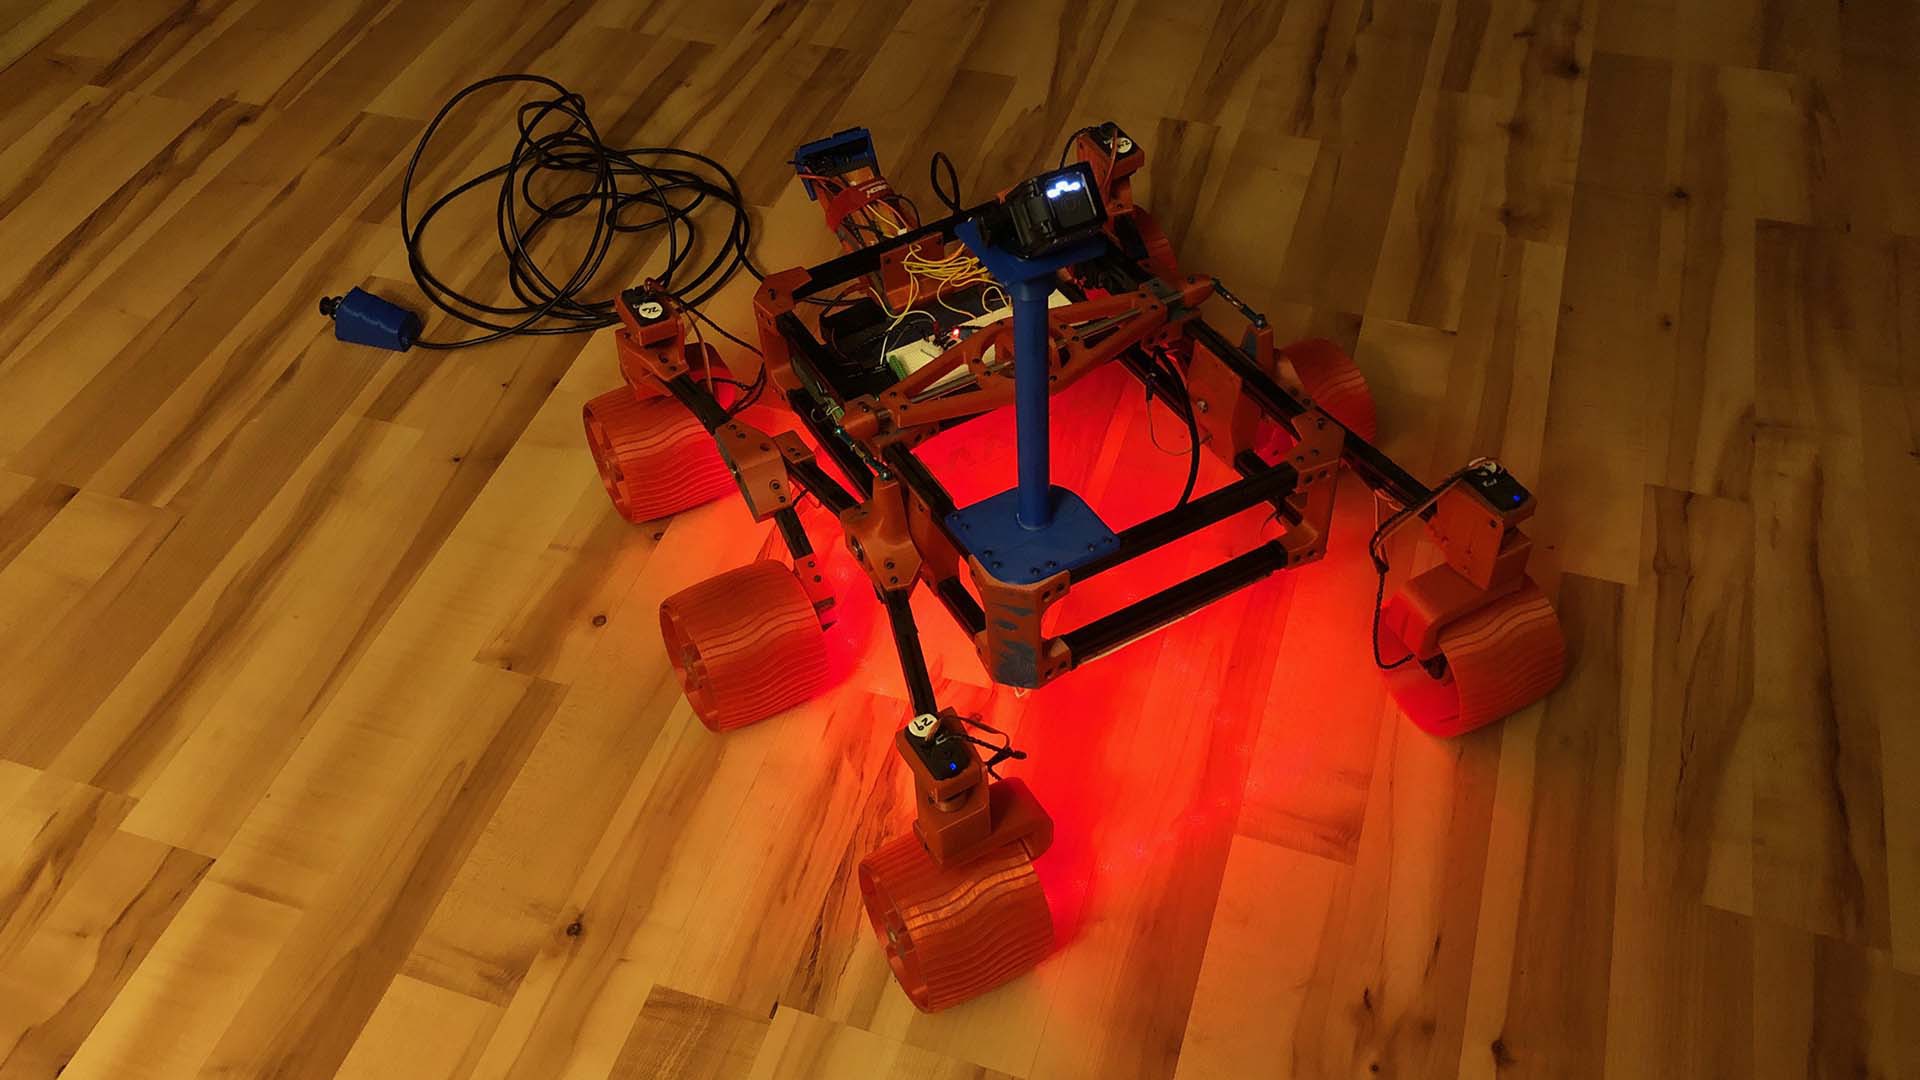
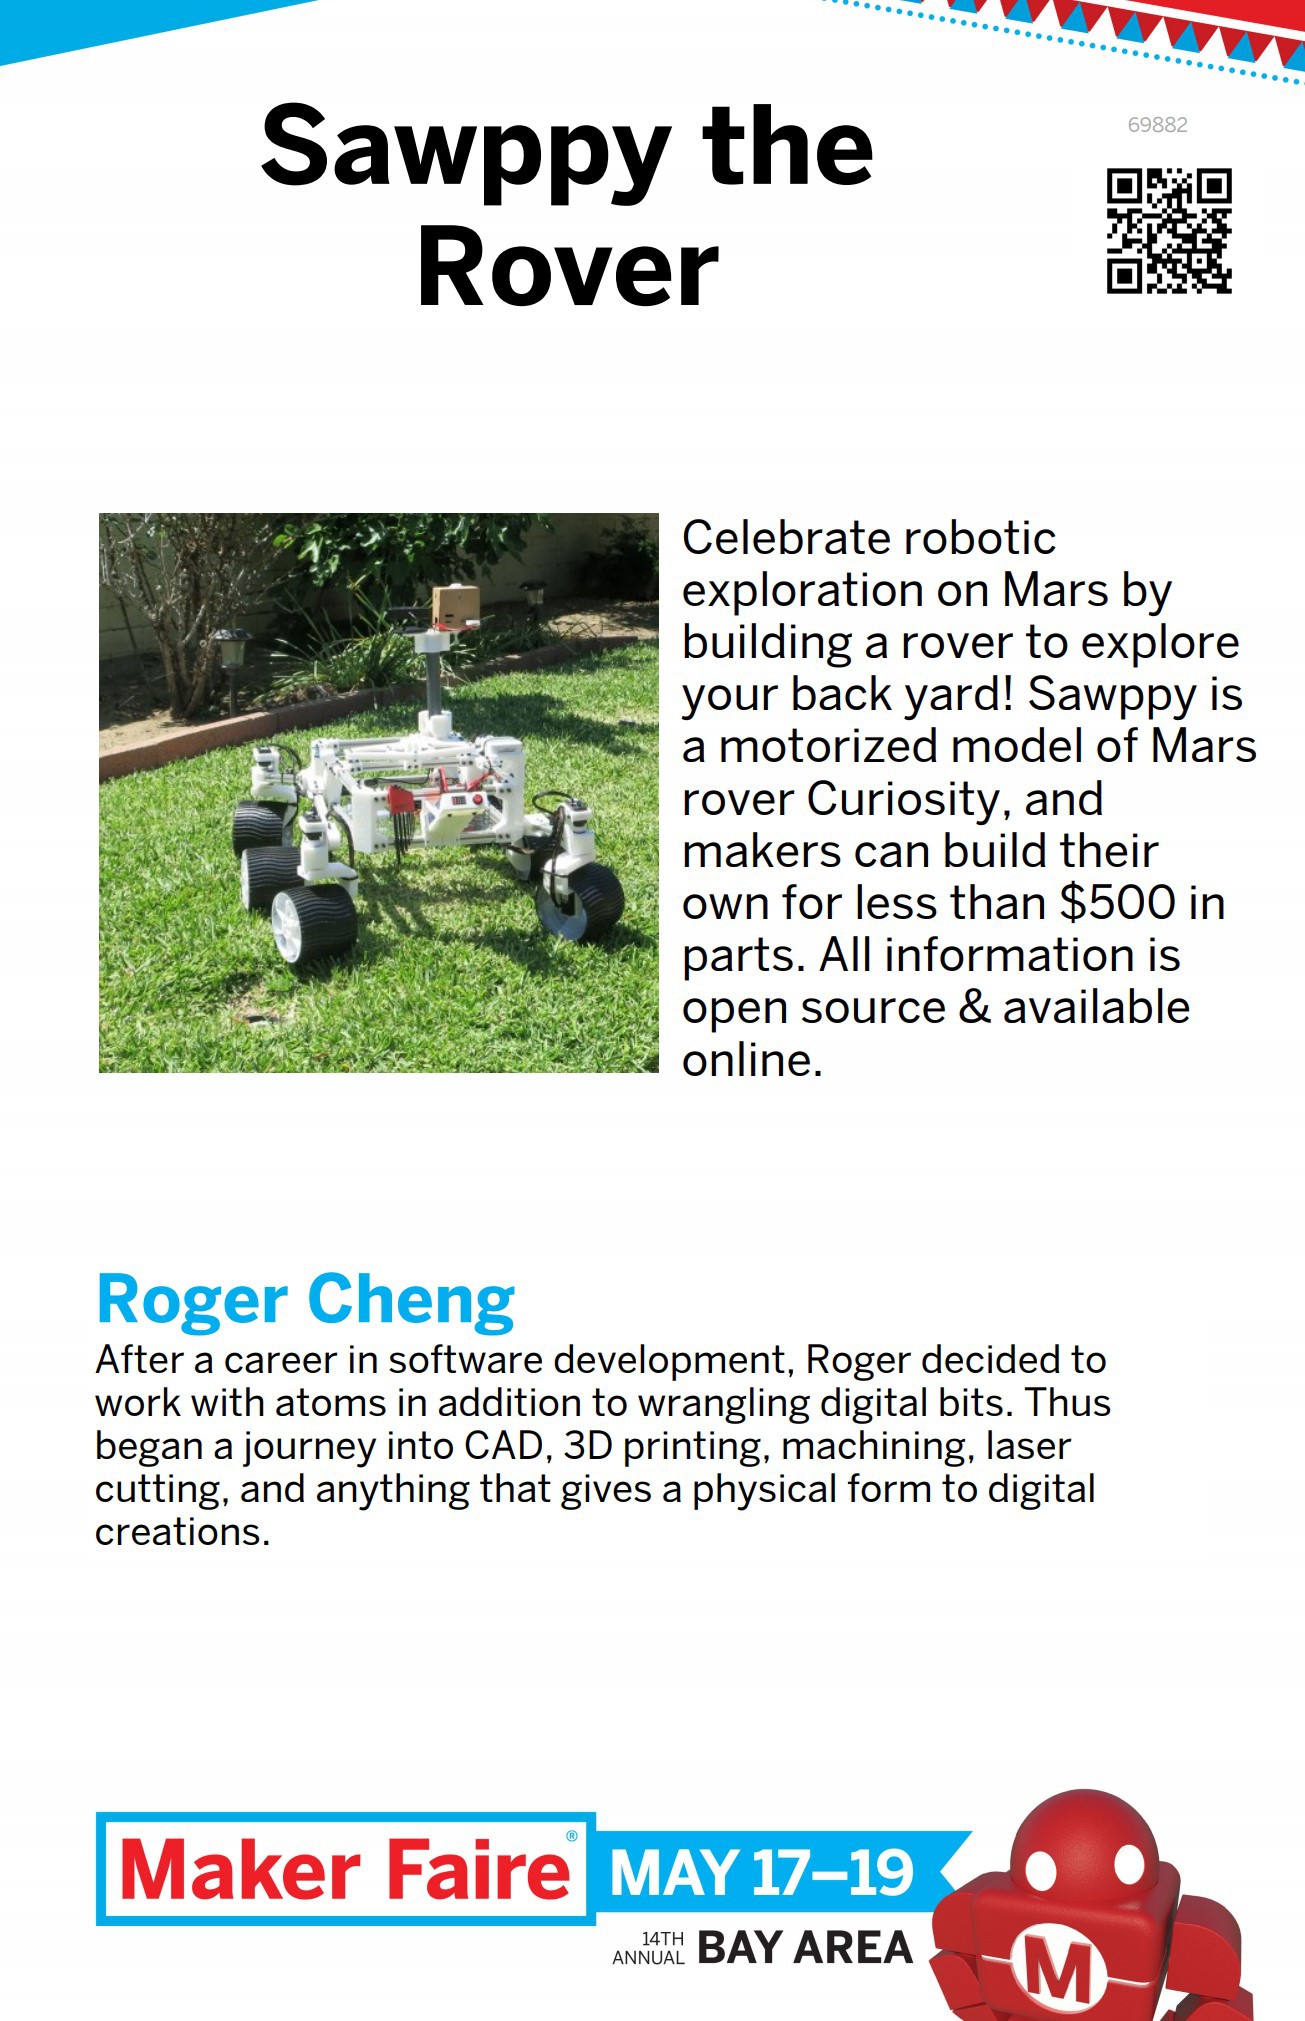
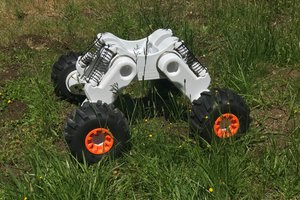
Sawppy is a motorized model whose layout and proportion mimics that of Mars rovers Curiosity and Perseverance. It faithfully reproduces the suspension kinematics of real rovers and is intended to be a hardware platform for future software projects in autonomous operation. Go forth and boldly explore the back yard, Sawppy!

Sawppy the Rover was inspired by JPL's Open Source Rover project. Most of the differences between Sawppy and its JPL inspiration were motivated by a desire to reduce cost and complexity. JPL's rover is designed for education, to be assembled by a school team and give a robust foundation for structured curriculum. Sawppy is more suited for individual hobbyists like myself who are happy to tinker and willing to make some trade-offs to lower cost.

The budget was $500, and getting there required the following changes:

These two major design goals can be summarized as: Servo Actuated Wheels, Printed Interconnect For Extrusion. The acronym SAWPIFE led to the nickname "Sawppy".


See the "Links" section for pointers to additional information:

  • Live Onshape CAD file: This is where I'm tweaking and building Sawppy in full public view. Be warned the live file has upsides (latest ideas!) and downsides (latest idea doesn't work!)
  • Github: This is where the assembly instructions currently live. It also has a snapshot of Sawppy components in STL file format. These parts may lag behind the live CAD data, but they have been printed, installed, and proven to work on my rover.
  • Build Blog: The history of Sawppy, including stories of design goals and lessons learned from failures.

Since the time I declared Sawppy version 1.0 (mechanical foundation) complete and posted assembly instructions, others have built on top of what I've released to the world! They're outlined in the project log "Sawppy Builders" entries, page 1 and page 2 with more to come as I hear about more rovers.

Sawppy V1 Schematic.png

Bare bones Sawppy version 1 schematic

Portable Network Graphics (PNG) - 192.78 kB - 03/13/2019 at 06:14

Preview
Download

  • 3 × 1 kg spool of 3D printer filament Exact amount of filament used will depend on slicer settings, see "Instructions" section.
  • 10 × LewanSoul LX-16A Serial Bus Servo Design also can be adapted to use Dynamixel AX-12A or Herkulex DRS-0101
  • 3 × Box of 100 M3 * 8mm hex bolts Fastening 3D-printed components to aluminum extrusions
  • 3 × Box of 100 M3 hex nuts Fastening 3D-printed components to aluminum extrusions
  • 3 × Box of 100 M3 washers (< 10mm diameter) Fastening 3D-printed components to aluminum extrusions. Design can accommodate up to 10mm diameter washers, larger washers will require modifying CAD file.

View all 17 components

  • 2022/12/15 Hangout and Nerdout

    Roger12/12/2022 at 22:23 0 comments

    "Hangout and Nerdout" will have a space-themed episode on December 15th 2022, and Sawppy will be one of the topics of discussion.

    My presentation slides are here: 20221215 Hangout Nerdout

    Event landing page: https://events.hackster.io/hangoutnerdout

  • Status Update, Perseverance Landing Edition

    Roger03/02/2021 at 02:07 0 comments

    Generating web traffic was never an objective of my Sawppy project so I hadn't kept an eye on the statistics, but I looked at it just now and noticed a distinct rise over the past two weeks. I guess the successful landing of Perseverance rover on Mars motivated a lot of people to think about 3D-printing their own rover here on Earth. Welcome, fellow rover fans!

    Here's a quick summary past and future for fans new and old alike:

    What you see on this project page is what I now refer to as "Sawppy V1". It was my first project that I documented with the explicit goal of helping others build their own. In contrast to most of my other projects which were just to show an example and/or notes to remind myself later. I was happy to see that many people have accepted my invitation and built their own rovers. (See "Sawppy Builders" log entries elsewhere on this page.) I appreciate constructive feedback submitted by Sawppy rover builders from around the world, and have been pondering how I can evolve future Sawppy versions to address feedback.

    One persistent line of feedback was that Sawppy was still too complex and expensive for some rover fans, even though Sawppy was designed to be more affordable and simpler than the JPL Open Source Rover that inspired it. It is true I built Sawppy for myself and others with roughly my level of skill and budget. This translated to an audience of mostly adult hobbyists and some students of college and high school age who can drop $500 USD on a project.

    To address the audience left out of the fun by Sawppy V1, my current step in Sawppy evolution is "Micro Sawppy". I am designing and developing a smaller, simpler, and more affordable rover. One that I want to be accessible to elementary school age students (with adult supervision) with a target parts cost of $100 USD. I also want to write the instructions to be more exact and prescriptive. Sawppy V1 instructions had several areas that were left open to builder preference, something I've learned is confusing to beginners who lacked the experience to have a preference.

    Micro Sawppy also serves as my testbed for several ideas for 3D-printed rover construction that, if successful, I want to adapt and scale up to a "Sawppy V2". This future rover would be roughly the same size as Sawppy V1. But I want to make it easier to build, more adaptable to variations, and a lower base cost target of $400 USD.

    For latest updates and/or more details, I post my development progress to the Sawppy category on my personal blog. (I used to cross-post them to this project page, but I've stopped doing that since it's a different rover project.)

  • Trying to Improve Sawppy Documentation

    Roger11/09/2020 at 07:11 0 comments

    When I decided to release Sawppy to the world, I thought briefly about how to best organize all the information I want to convey for rover assembly. I quickly fell into a state of Analysis Paralysis and, as a path out of that state, decided that it was better to have something written down whatever the format. No matter how unorganized, is still better than keeping it all in my head.

    I first tried putting it in the “Build Instructions” section, but that feature has some strange and unpredictable limitations that became annoying as the length of instructions grew. The final straw was when I noticed that images and instructions for earlier steps were disappearing as I added later steps. That made me… unhappy, so I went to something else.

    The second attempt is what I have as of today: a loose collection of Markdown files on a Github repository. Edited in a code editor rather than a word processor, I struggled with typos and grammatical errors as I lacked the usual automated proofreading tools present in a word processor. Still, with a large helping of assembly pictures, it was just barely enough for people to build their own rovers.

    I was painfully aware of the fact there is a ton of obvious room for improvement. This was just the “get it written down” first stage and at some point I need to revisit the various problems still open. The most significant of which is lack of structure beyond an index page with links to all the other pages. The index suggested a relative ordering that matched my personal assembly order, but that doesn’t necessarily work for anyone else. And worse, they would be stuck if they wanted to ask some specific questions my layout is unable to answer.

    As an example of problems with Sawppy’s documentation, look at a single component: a Sawppy wheel axle. There are at least three entirely separate pages relating to the wheel axle:

    1. The page of parts list, telling a builder to buy 8mm metal shaft.
    2. The page for 8mm shaft modification, where I describe how to cut the long shaft into shorter segments. Followed by steps to turn these segments into wheel axles. Other segments were turned into steering shafts, plus those turned into rocker-bogie suspension pivots.
    3. The page for wheel hub assembly, which incorporates a single segment of the 8mm wheel axle shaft.

    While these three files were all linked from the index page, there’s no obvious way to retrieve the relationship between them in the context of wheel axles. I can manually add links between them, but this is time consuming and perpetually incomplete. Even worse, as the number of relationships grew, it will quickly become a maintenance nightmare.

    Thus I started my quest to find a system to document and track these types of relationships without losing too much of the advantages of my current system. This means every candidate system must meet the following challenges:

    Challenge A: Easy to Contribute

    When a Markdown file is hosted on GitHub, a potential contributor can click the “Edit” button to create a fork of the repository, make a quick fix, and create a pull request all via GitHub website. This presents an extremely low barrier to entry for contributors which is a feature I want to preserve. If contributors were required to install and learn some piece of documentation software, that would discourage many people from participating before we even talk about the learning curve for that software.

    Challenge B: Easy to Manage

    When using GitHub’s web interface to edit a Markdown file, visualizing the change is as simple as clicking over to the “Preview” tab of the editor. Sadly such ease can’t be matched by any system external to GitHub, but it would be nice to have some way to let a contributor see what the end results look like. Failing that, I must have a way to visualize the final impact of changes before I merge a pull request. It is unacceptable to not see changes until after merging into...

    Read more »

  • Rhys Mainwaring’s ROS Melodic Software and Simulator for Sawppy

    Roger01/31/2020 at 22:37 3 comments

    When I created Sawppy, my first goal was to deliver something that could be fun for robotics enthusiasts to play with. The target demographics were high school students and up, which meant creating a software stack that is self-contained and focused enough to be easy to learn and modify.

    To cater to Sawppy builders with ambition for more, one of the future to-do list was to write the necessary modules to drive Sawppy via open source Robot Operating System. (ROS) It is a platform with far more capability, with access to modules created by robotics researchers, but not easy for robotics beginners to pick up. I’ve played with ROS on-and-off since then, never quite reaching the level of proficiency I needed to make it happen.

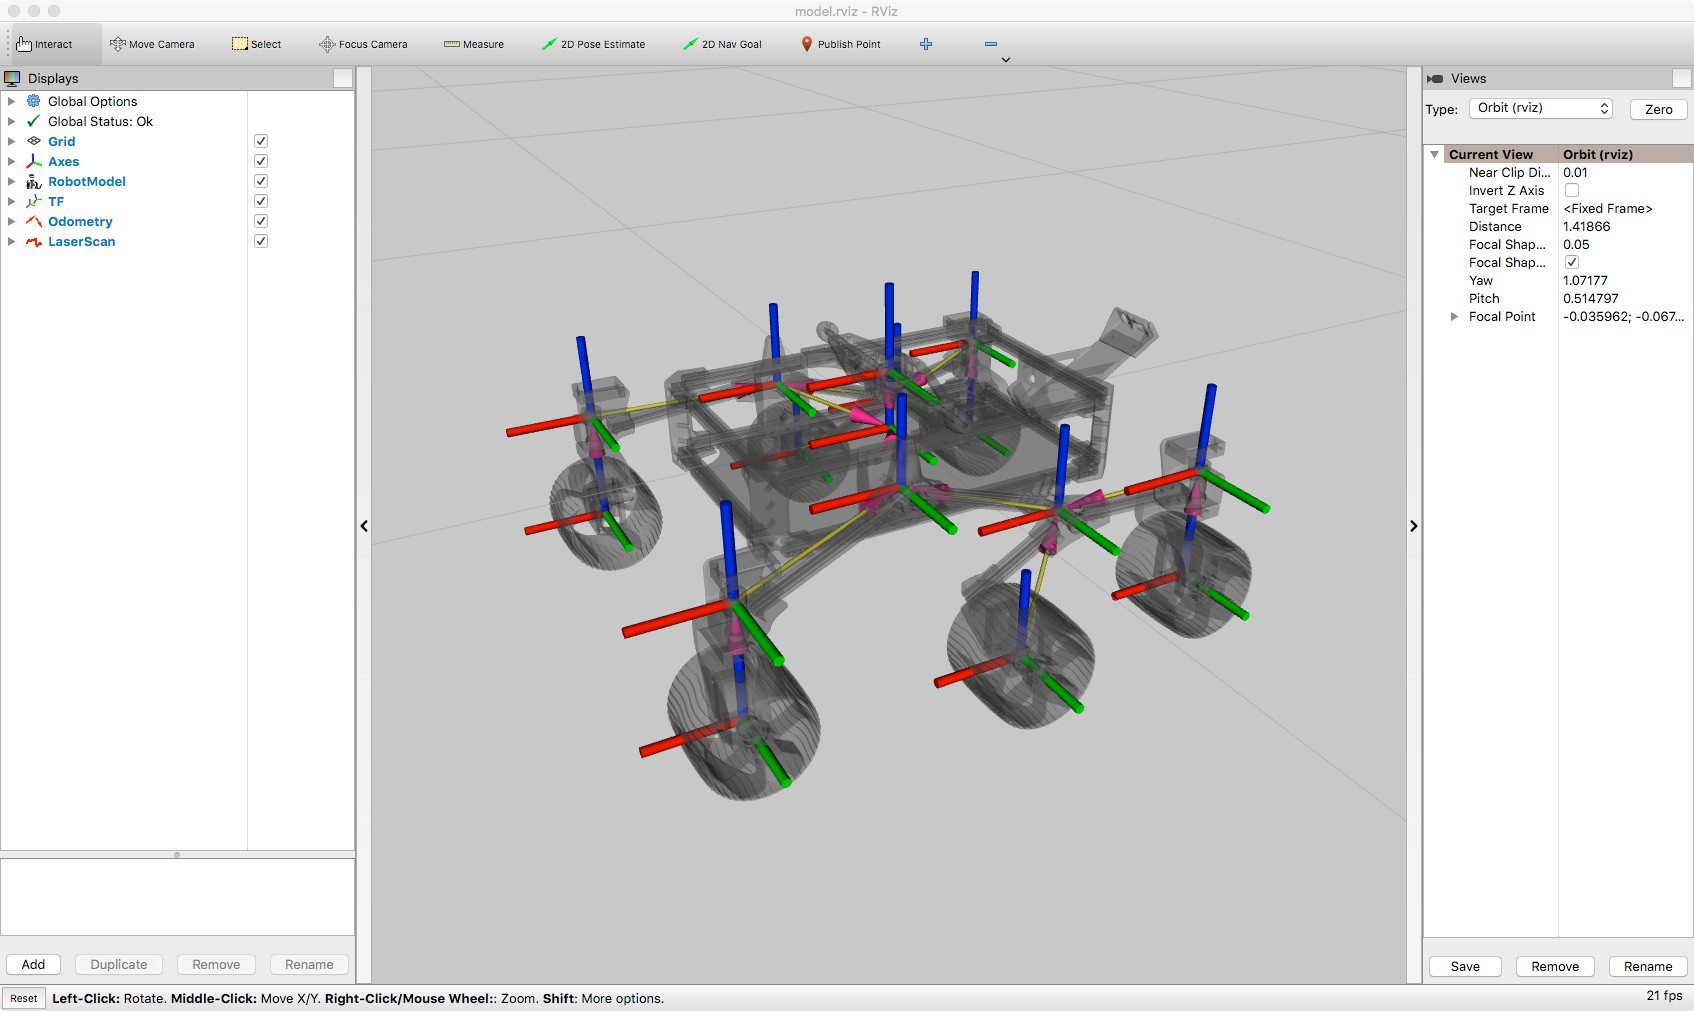
    So I was very excited to learn of Rhys Mainwaring’s Curio rover. Curio is a Sawppy sibling with largely the same body but running a completely different software stack built on ROS Melodic. Browsing the Curio code repository, I saw far more than just a set of nodes to run a the physical rover, it includes two significant contributions towards a smarter rover.

    Curio Rover in Simulation
    There’s a common problem with intelligent robotics research today: evolving machine learning algorithms require many iterations and it would take far too long to run them on physical robots. Even more so here because, true to their real-life counterparts, Sawppy and siblings are slow. Rhys has taken Sawppy’s CAD data and translated physical forms and all joint kinematics to the Gazebo robot simulator used by ROS researchers. Now it is possible to work on intelligent rovers in the virtual world before adapting lessons to the real world.

    Rover Odometry
    One of the challenges I recognized (but didn’t know how to solve) was calculating rover wheel odometry. The LX-16A servos used on Sawppy could return wheel position, but only within an approximately 240 degree arc out of the entire 360 degrees circle. Outside of that range, the position data is noisy and unreliable.

    Rhys has managed to overcome this problem with an encoder filter that learned to recognize when the servo position data is unreliable. This forms the basis of a system to calculate odometry that works well with existing hardware and can be even faster with an additional Arduino.

    ROS Software Stack For Sawppy
    Several people have asked me for ROS software for Sawppy, and I’m glad Rhys stepped up to the challenge and contributed this work back to the community. I encourage all the Sawppy builders who wanted ROS to look over Rhys’ work and contribute if it is within your skills to do so. As a ROS beginner myself, I will be alongside you, learning from this project and trying to run it on my own rover.

    https://github.com/srmainwaring/curio


    (Cross-posted to NewScrewdriver.com)

  • Sawppy Builders (Page 2)

    Roger08/23/2019 at 07:48 2 comments

    This is the second page of Sawppy Builders, for Page 1 click here.


    Steve (jetdillo)

    I met Steve at Maker Faire Bay Area 2019 in May, where he showed me pictures of a few of his Sawppy parts. It is now August 2019 and his Sawppy is mechanically complete. Steve is a HomeBrew Robotics member like Marco, and the new rover is neon green to distinguish from Marco's neon yellow Sawppy.

    In terms of modifications, Steve is adopting Marco's faster wheel drive motors, and instead of cutting drive shafts from metal Steve has printed his from NylonX. It'll be interesting to see if that material is strong enough for the job!

    See more details at Steve's YASP (Yet Another Sawppy Project) page.


    Leif Sorgule

    Leif is teaching a robotics course for high school students and he thought Sawppy might be an interesting team project for the class. The class will start with the Arduino control option, given cost and learning resources available for Arduino. It'll be fun to see what the students dream up for their own Sawppy modifications.


    Patrick Leiser

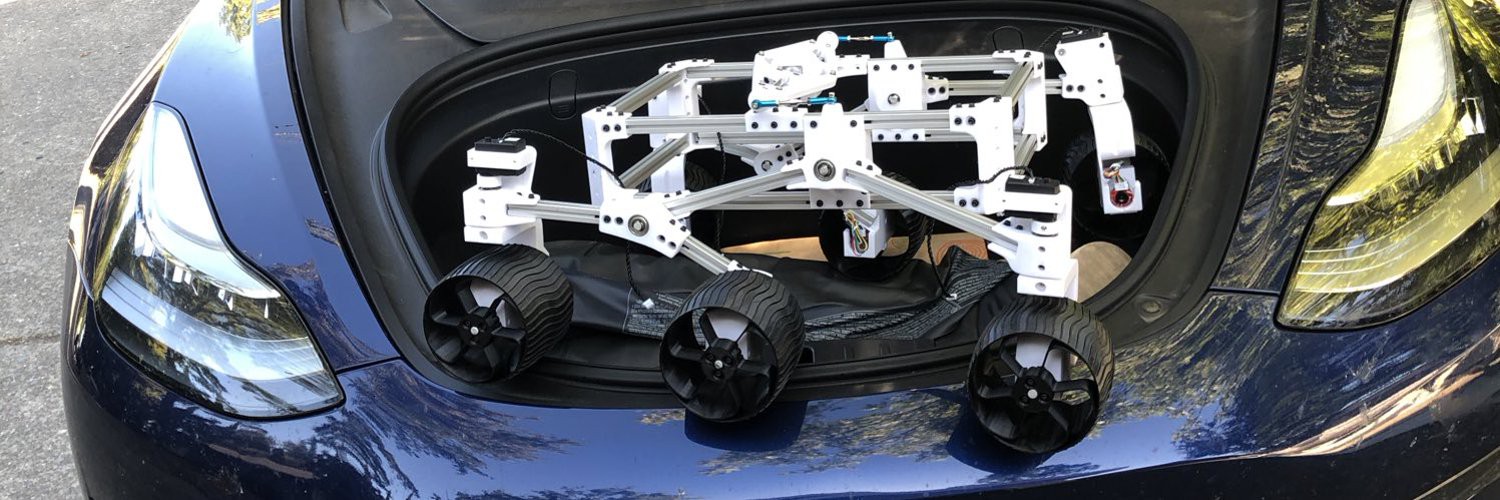
    Patrick's Sawppy variant (named Swappy) made an appearance at the Rocklin Mini Maker Faire, representing the Sierra College Robotics Club. It might be the first of Sawppy's siblings to be chauffeured around in a Tesla Model 3, though this picture shows it doesn't quite fit in the frunk.


    TeamSG Aussie Sawppy

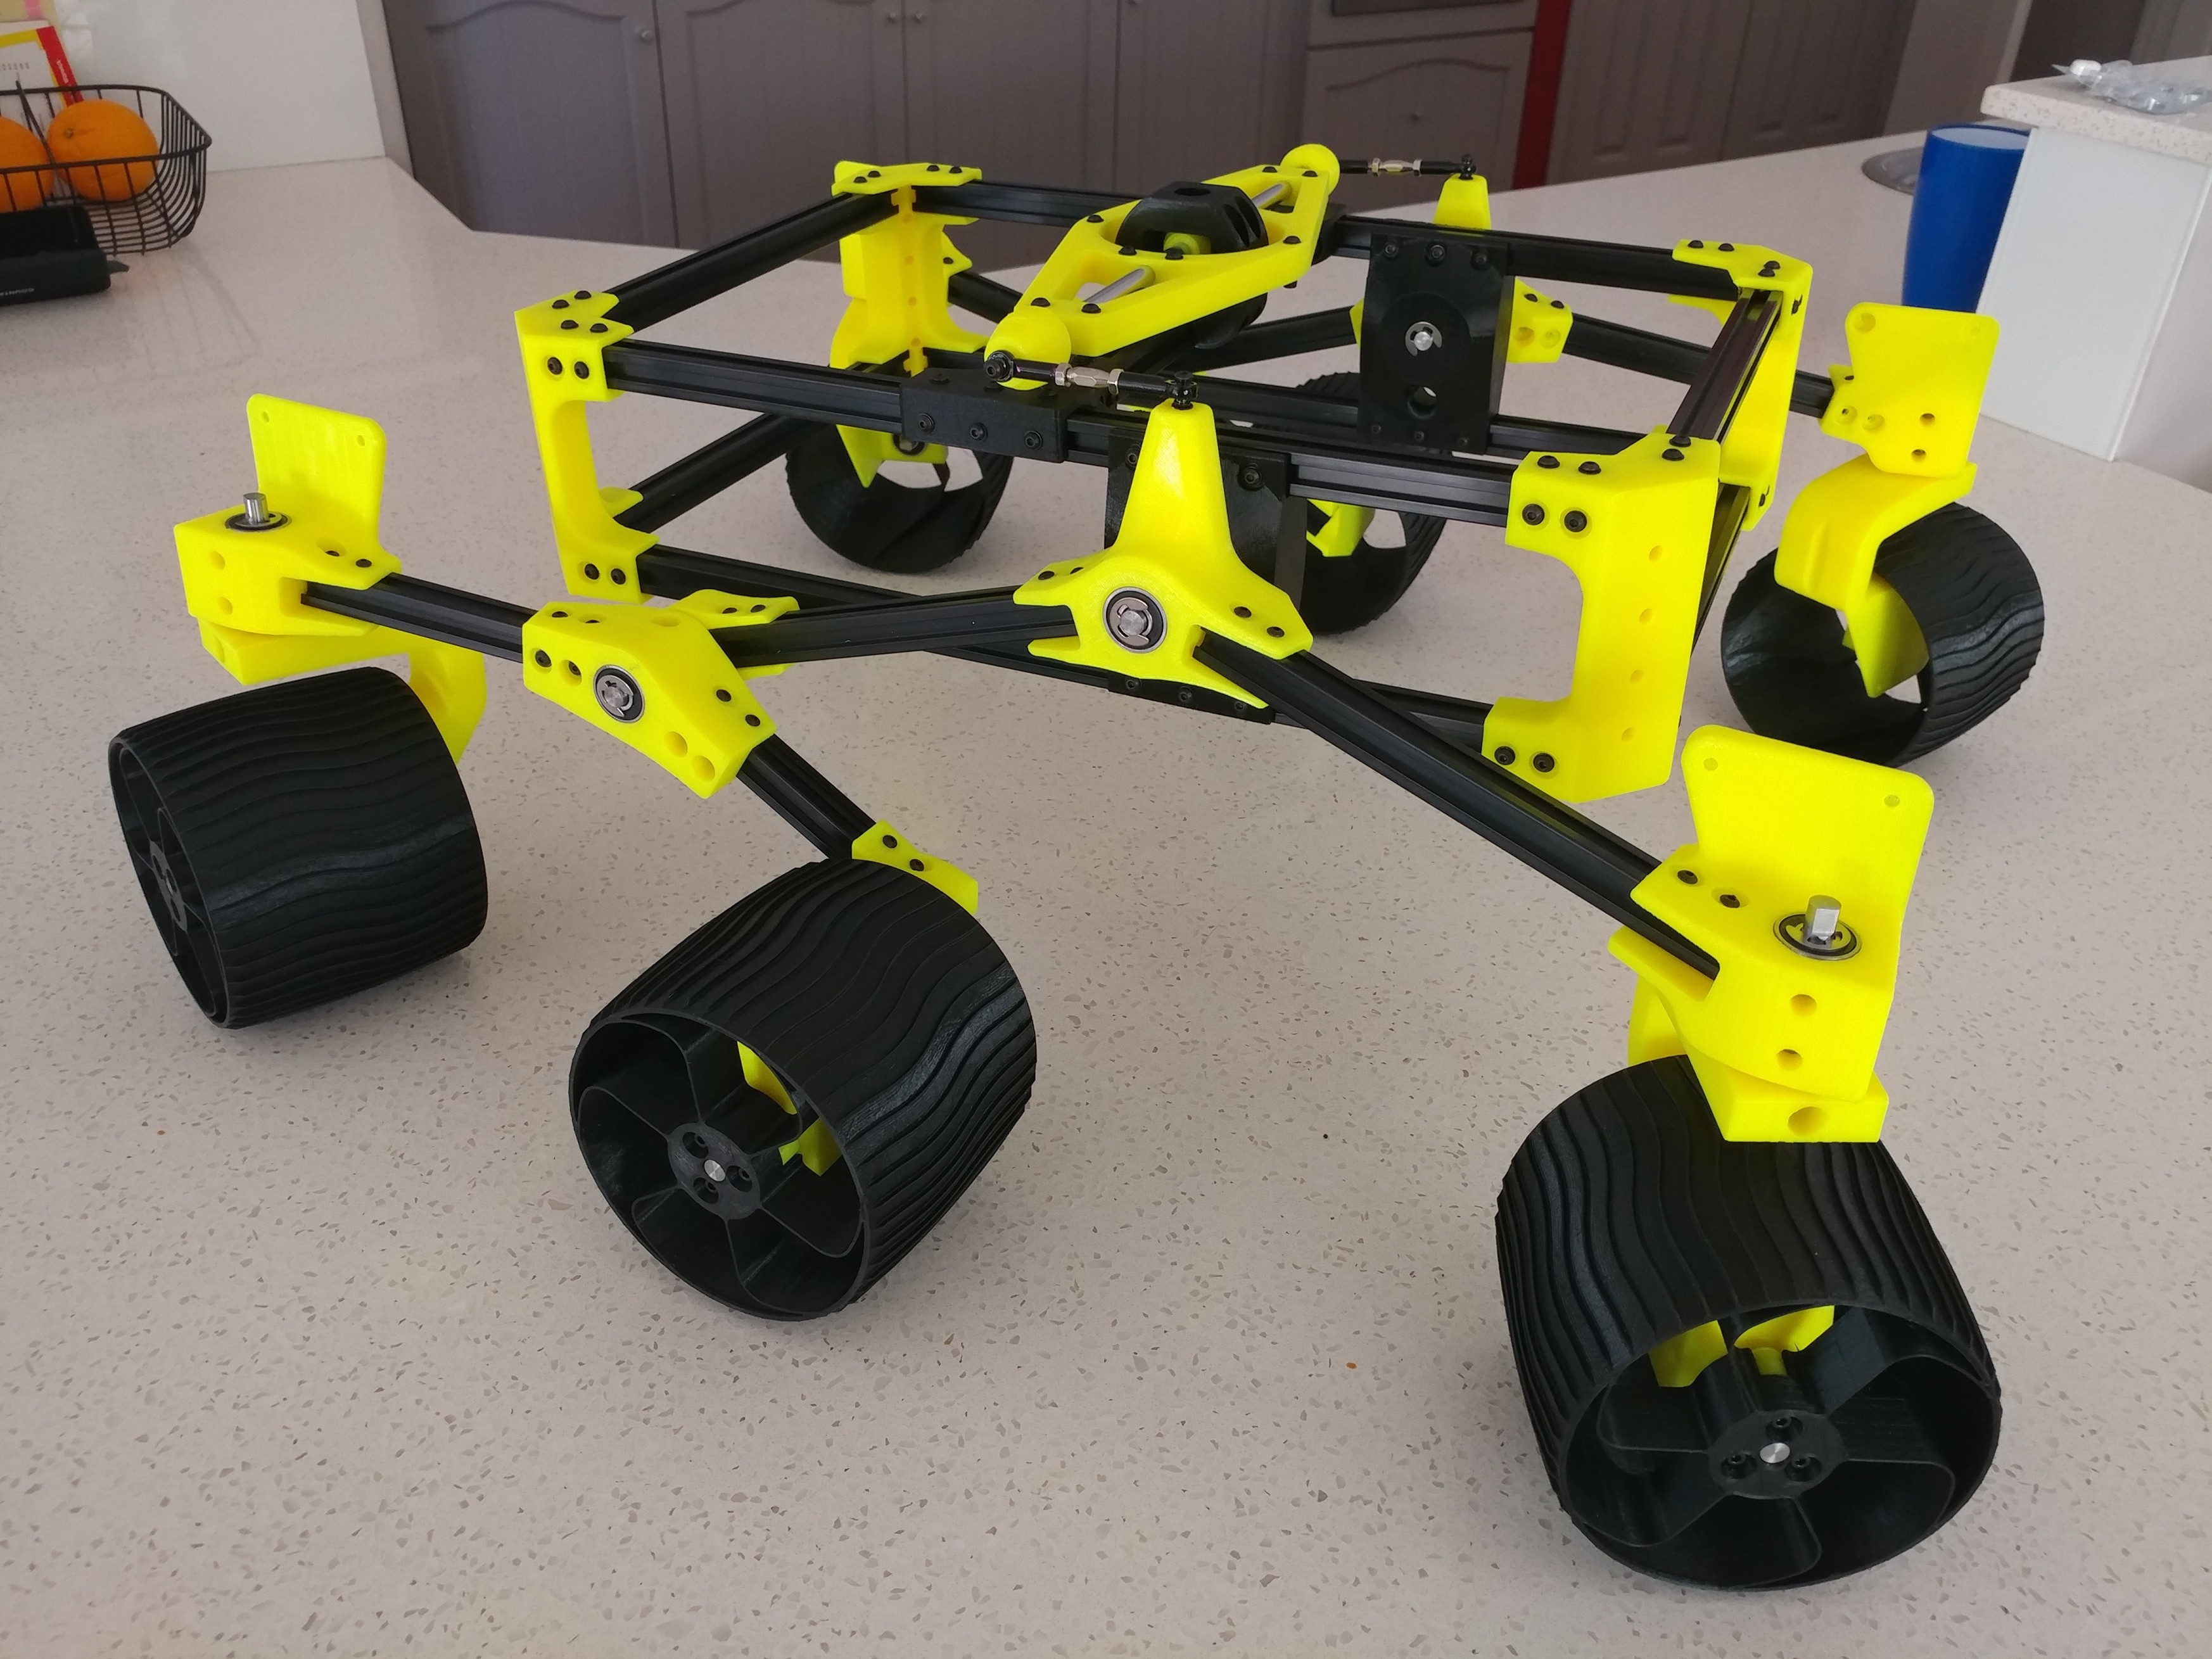
    Sawppy has a brother down under! This is a father-and-son team putting a rover together, and their chosen yellow-and-black color scheme looks very sharp.


    ... and hopefully more rovers to come!

  • Sawppy at Maker Faire Bay Area 2019

    Roger07/28/2019 at 23:53 0 comments

    I took some footage of Sawppy's adventures at Maker Faire Bay Area 2019 and assembled them into three videos.

    It was raining at the event, so Sawppy needed to put on a raincoat before venturing outdoors:

    It was the first time Sawppy attended a three-day long event and one of the steering servos failed on the third day.

    After the event, Sawppy needed some cleaning and minor repairs.

  • Curiosity Rover 3D Resources

    Roger06/25/2019 at 20:52 0 comments

    Prompted by a question on the JPL Open Source Rover web forum, I compiled all the 3D resources I had collected on Mars rover Curiosity. This reference data helped Sawppy match Curiosity's overall proportions and suspension geometry, which was my goal of making a mechanically faithful motorized model. I stopped there, but others rover builders like @lmckeega are working to improve accuracy in appearance so I thought I'd share these resources to assist such efforts.

    3D web sites

    My starting point was JPL's official open source rover website whose opening animation has a 3D model of Curiosity cruising on a simulated Mars surface. I tried to extract that 3D mesh without success.

    On a similar front, we could see a 3D model of Curiosity in the "Experience Curiosity" website. It's possible this is using the exact same data set as the OSR, but still I'm not enough of a web developer to pull out the 3D data.

    Finally we have a 3D model visible on Curiosity's mission site. Again it may or may not be the exact same one used in above two sites, but the difference here is that we have a "Download" button. Clicking that button results in a file named Curiosity_static.glb. My laptop running Windows 10 has a 3D Viewer app installed by default, which was able to view this file. I don't know what viewer software would be required for other platforms.

    3D printing

    A web search for "Curiosity 3D Model" and similar keywords would repeatedly lead me to a 3D-printable static model. Unfortunately, for my purposes this model is not useful. The geometry of this model were modified to be friendly to 3D printing and is not a faithful representation of Curiosity.

    3D animation

    However, on the same site, there are two Curiosity models for the free open source 3D animation program Blender. As far as I can tell, these two models have the same 3D data but with different textures. "Clean" is factory fresh Curiosity, and "Dirty" represents Curiosity after cruising on Mars for a while.

    The advantage of these files is that suspension parts are separate elements that can be animated to show suspension articulation. I believe these files formed the basis for Gazebo simulation described here.

    It also means we can split parts apart for a closer look. However, this file only has enough detail for animated graphics, it does not have enough detail for CNC machining. Much of the surface detail are represented by bitmap textures instead of 3D mesh data.

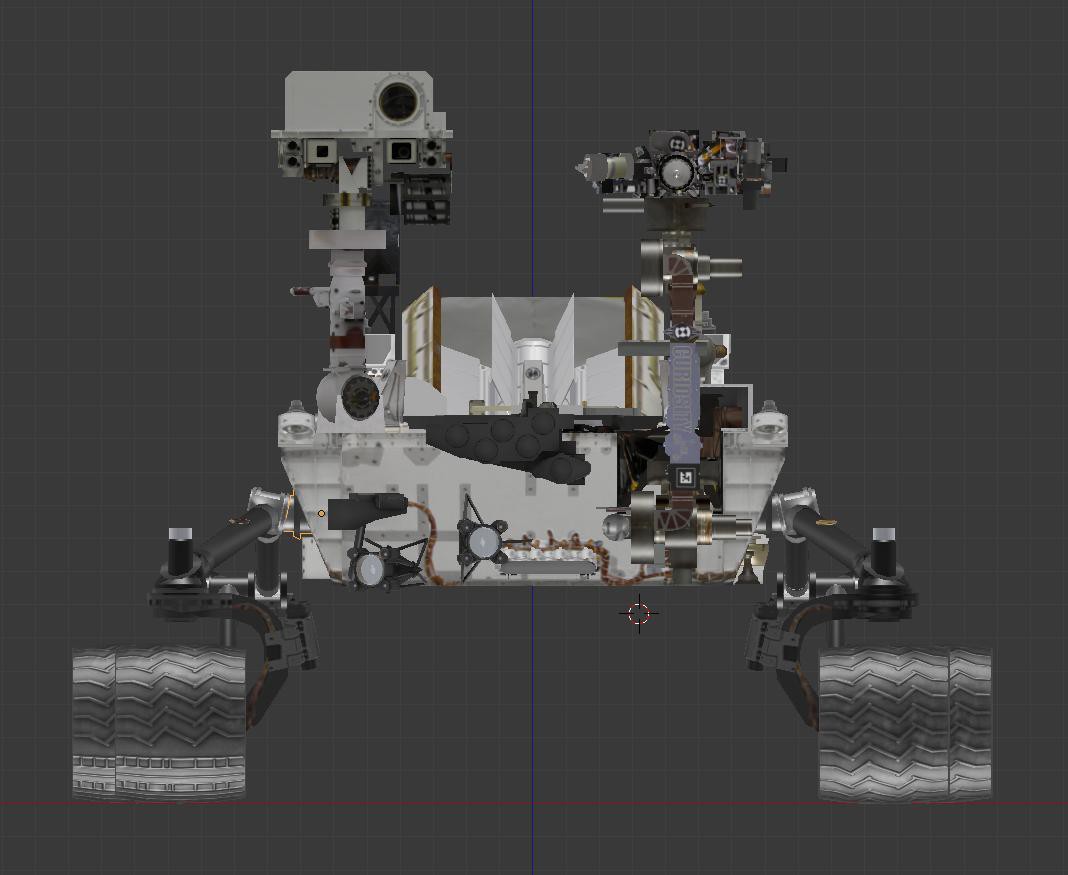
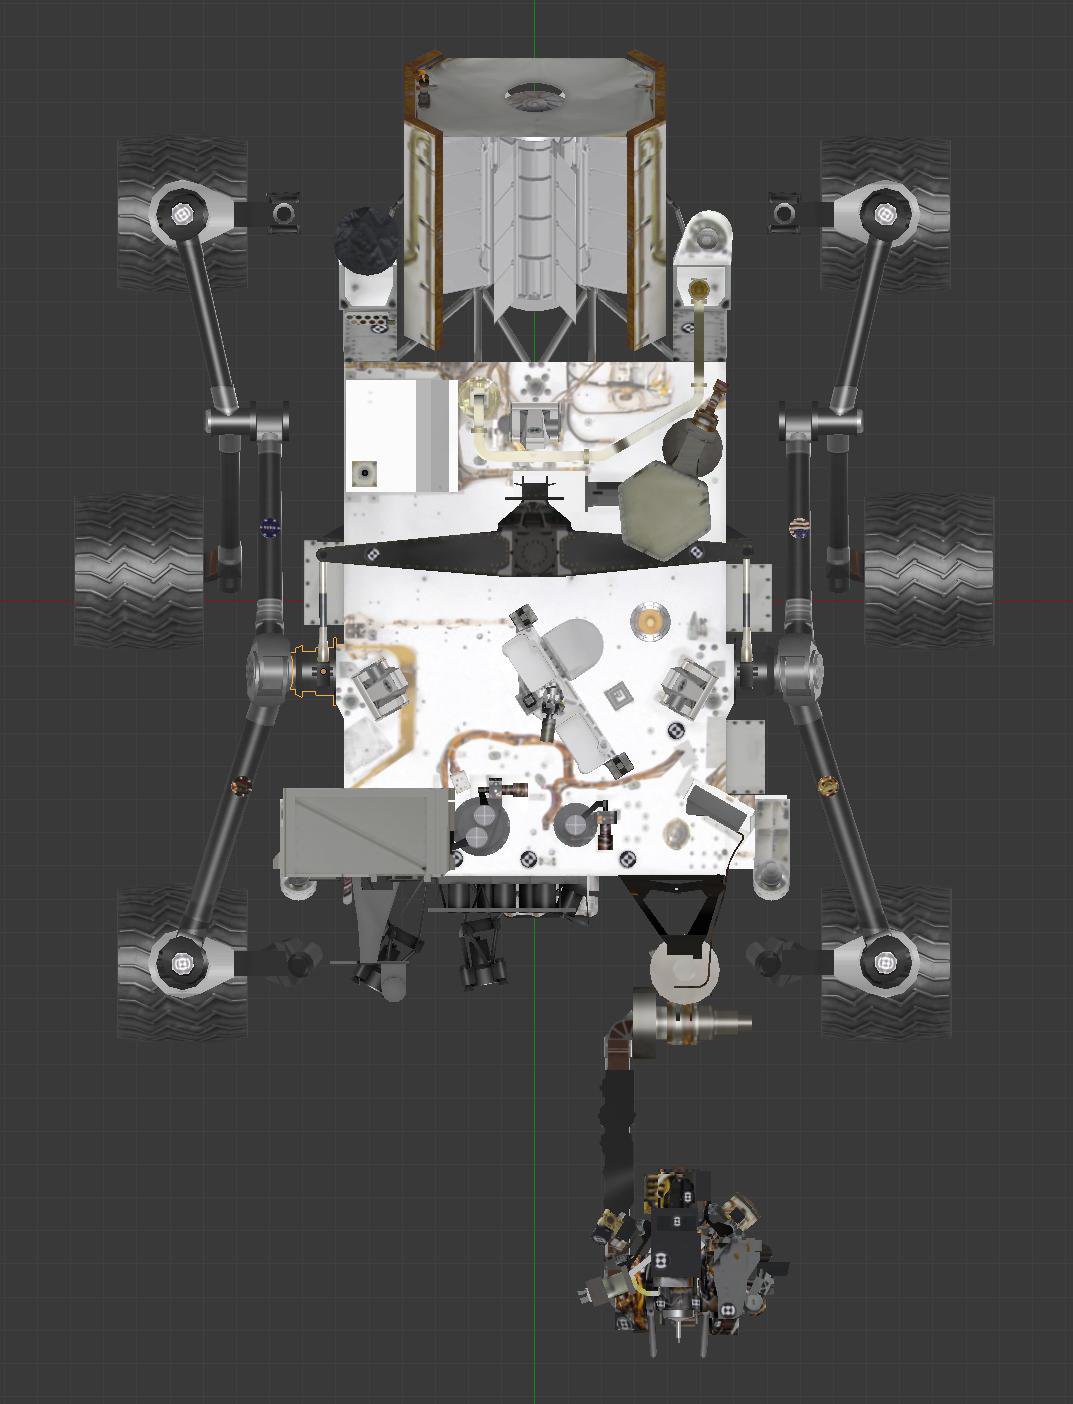
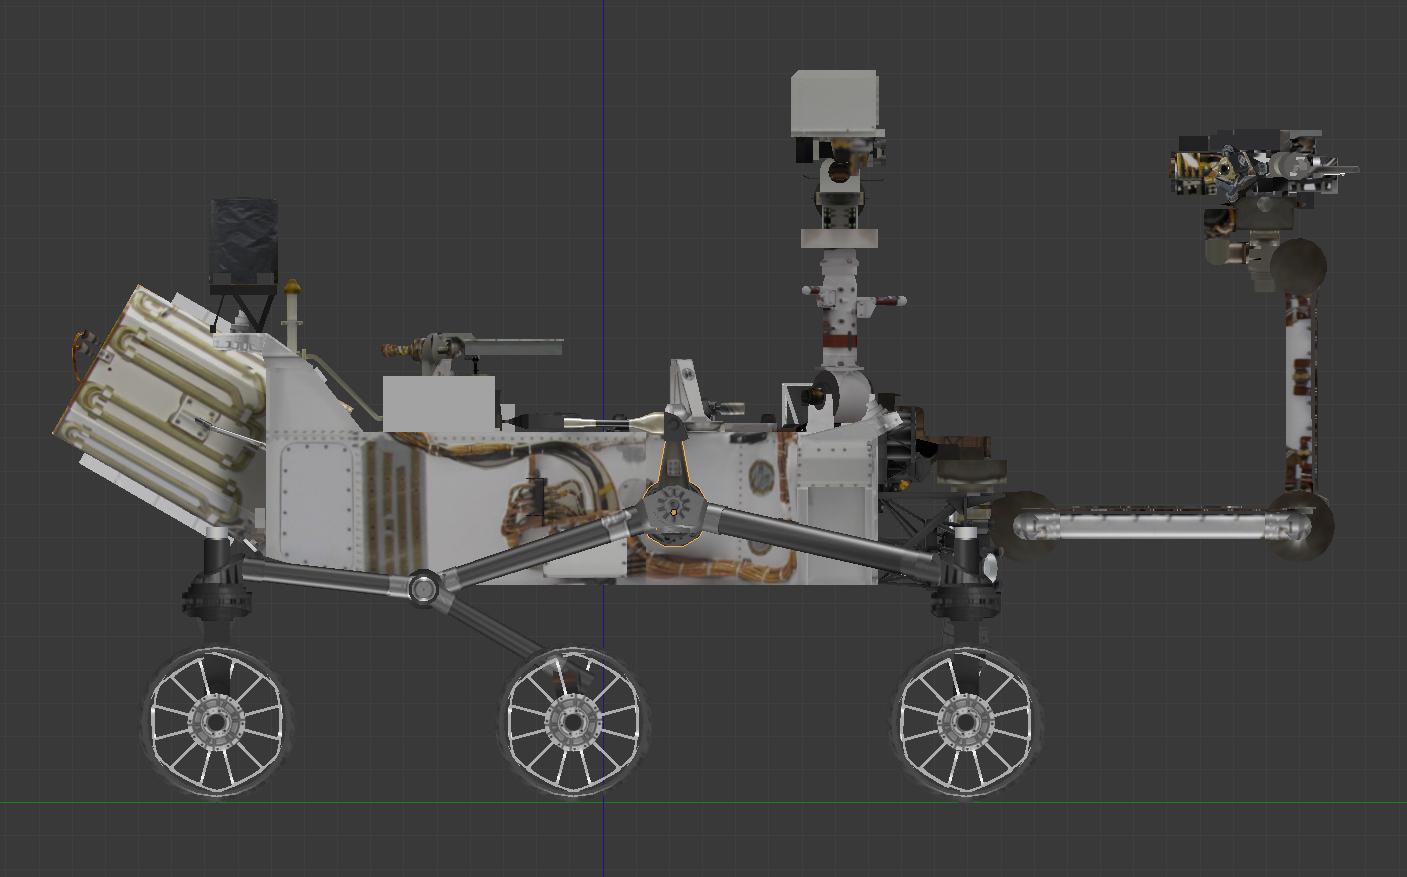
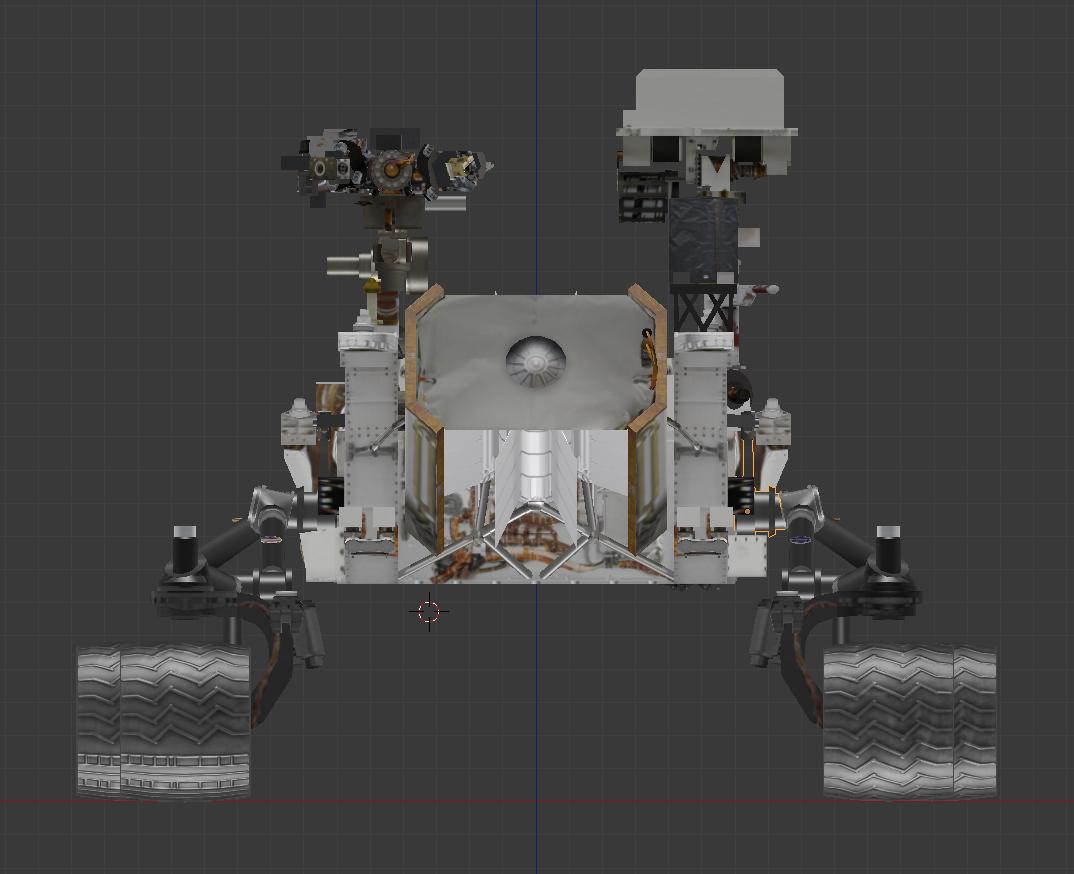
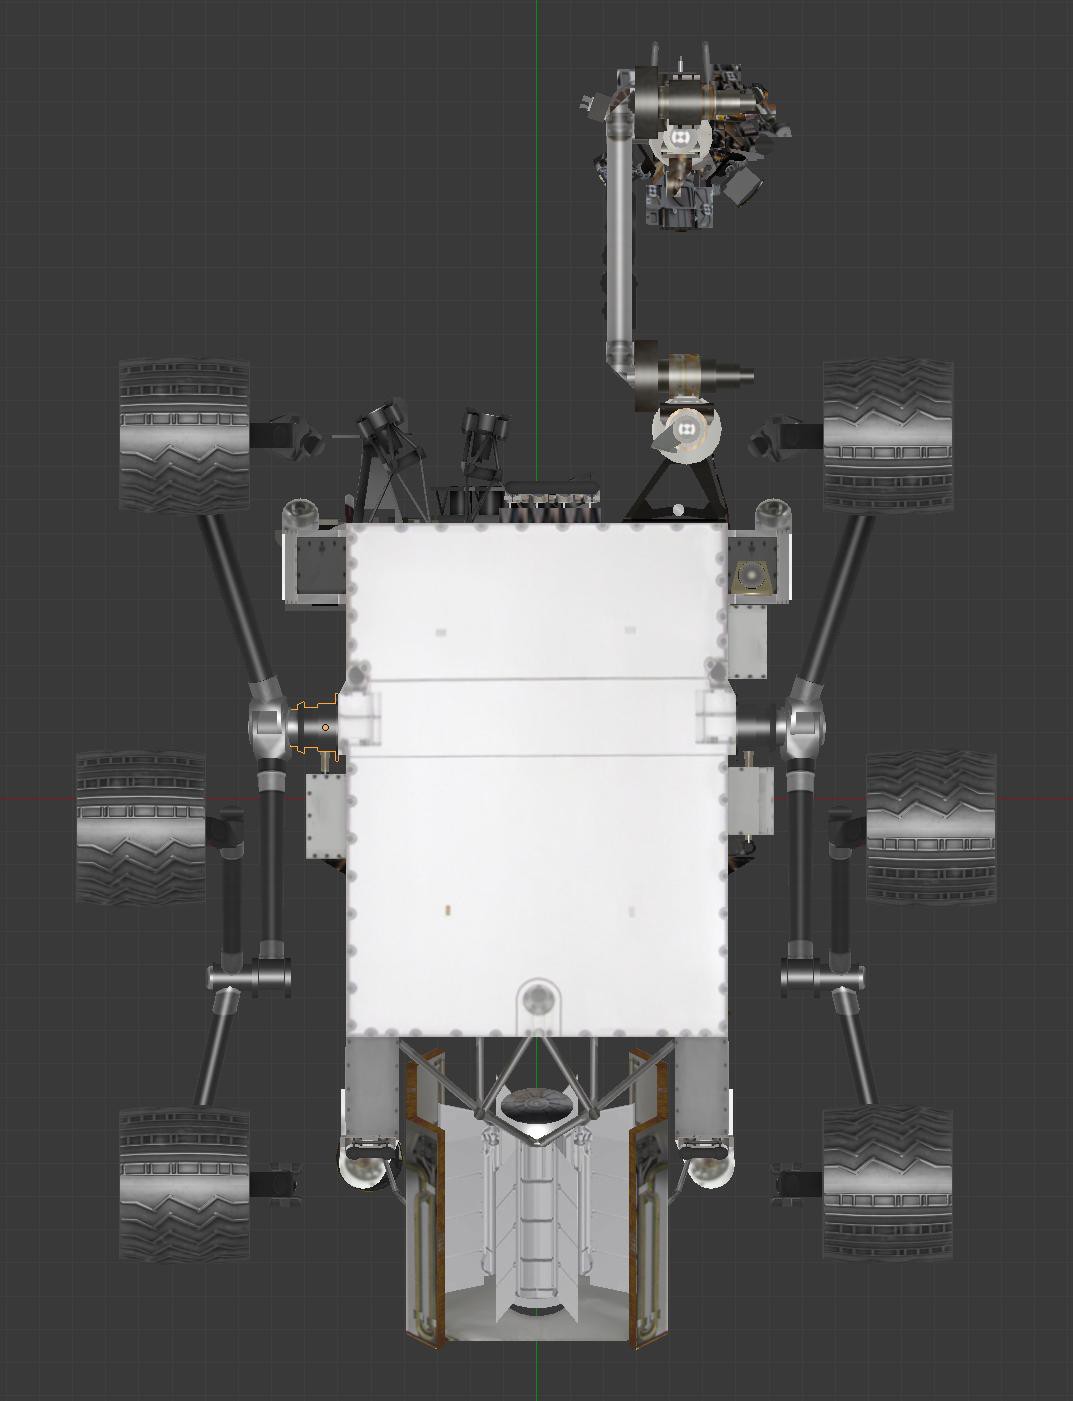
    While there is not enough detail for building a high fidelity model, these files were the best resource I had to measure component sizes and their relative layouts. I was able to bring them up in Blender, switch to orthographic projection view, and get images of Curiosity free of perspective distortion. In case that's useful to anyone, and you don't want to install & run Blender just to obtain those images, here they are:

    (Cross-posted to NewScrewdriver.com)

  • Wired Joystick Controller With Arduino

    Roger05/24/2019 at 00:37 2 comments

    As a presenter it was great to see the wealth of information provided by Maker Faire Bay Area organizers. It is clearly the compilation of many years of experience and lessons learned. One item caught my eye: anyone using wireless communication should have a contingency plan in case wireless fails.

    I've definitely encountered this before with SGVHAK Rover and Sawppy on the standard 2.4GHz WiFi band. So far I've been able to avoid most problems by adding a dual-band router and moving up to the 5 GHz band, but in a large event like the flagship Maker Faire, even that might not be enough.

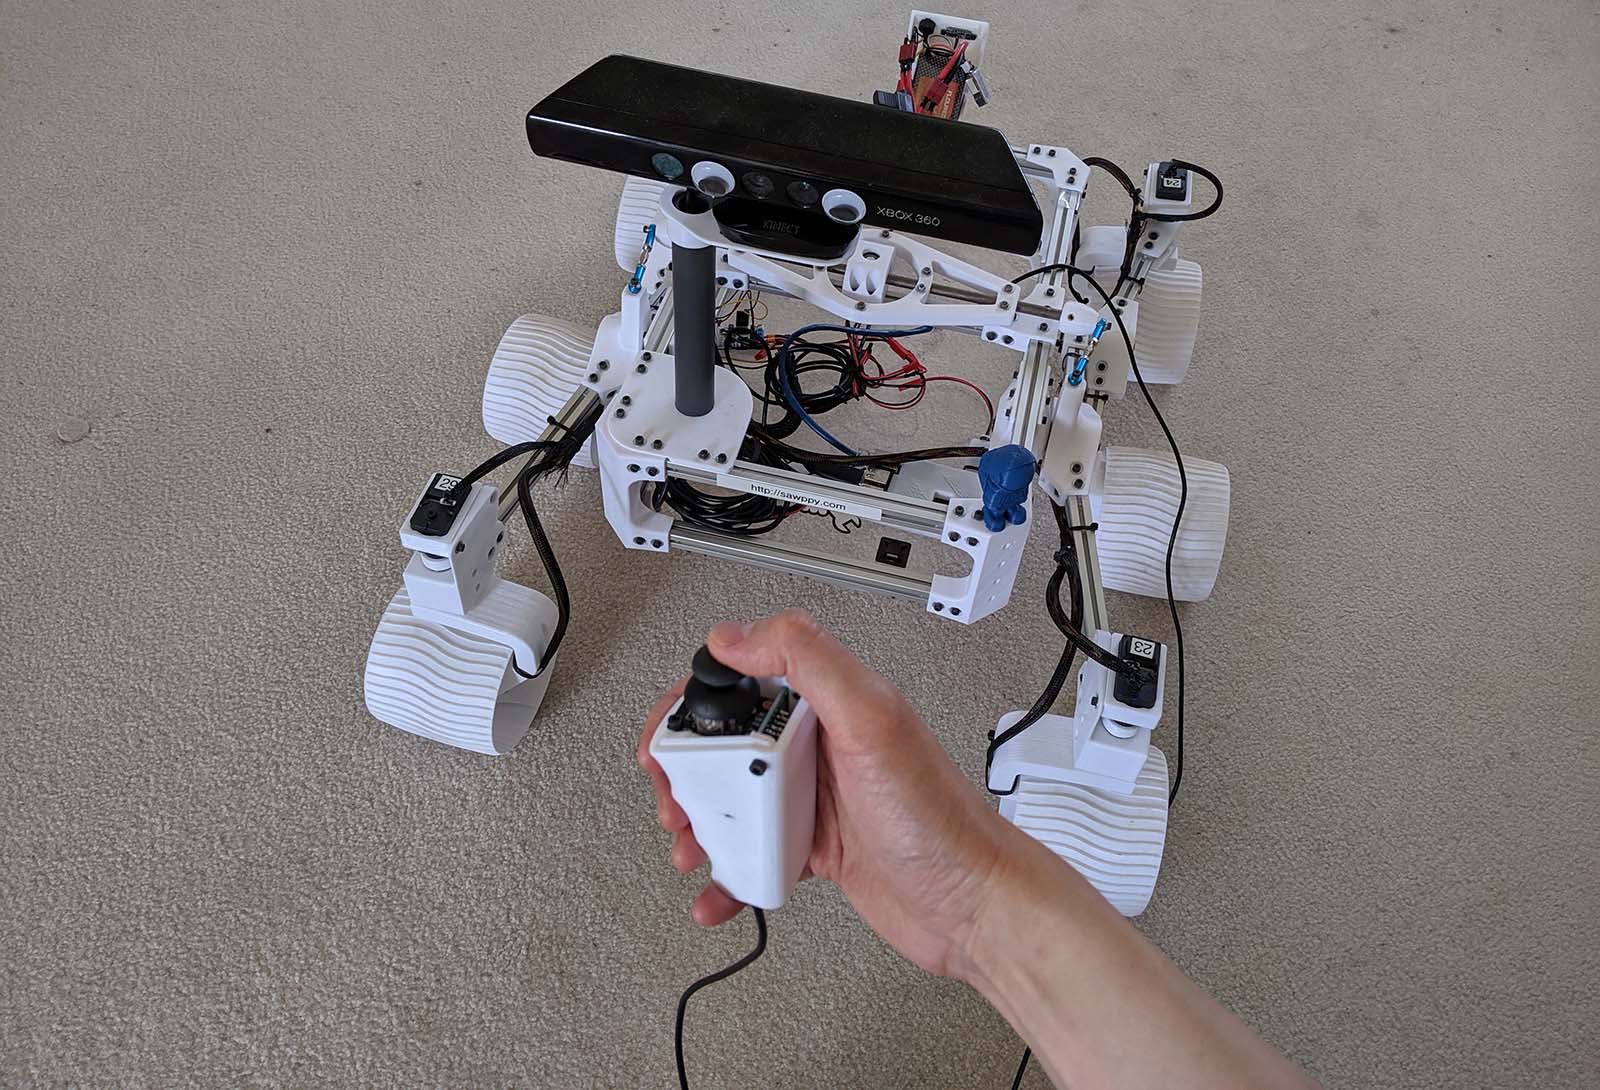
    So as part of my Maker Faire prep work, I designed and built a wired joystick controller with an Arduino as the microprocessor. When active, it replaces the Raspberry Pi and wireless router on board Sawppy. This also serves as a lower-cost alternative to rover builders or those who like the thought of walking their rovers on a leash.

    More resources:

  • Sawppy Will Be At Maker Faire Bay Area 2019

    Roger05/10/2019 at 19:43 0 comments

    I know I've said I wanted to keep my Hackaday.io project page focused on rover design and evolution and less on rover adventures in the wild... but I'm going to break my own rule for this one. I'm super excited to have been accepted as a maker presenting their project at Maker Faire Bay Area 2019. It's not just A maker faire... it is THE maker faire. Most of my travel logistics have been nailed down, it is happening!

  • Sawppy Builders (Page 1)

    Roger05/07/2019 at 23:03 0 comments

    I started my Sawppy project in March 2018. By May 2018 I had my first rolling chassis but it was fragile. Every time my rover broke, I learn a little more about mechanical design, and Sawppy improved over the following months. I also started writing assembly instructions and supporting documentation to help any other interested people build their own Sawppy, not knowing if anyone would take me up on my offer. It was extremely gratifying to see other people have indeed accepted my invitation!

    This post recognizes those who have embarked on their own Sawppy adventures, roughly in the order of when I learned about their efforts. Sometimes I learn about their ambitions before they got started, sometimes I learn about it only after their rover had been completed. Given this, it is likely there are other Sawppy builders out there I don't know about at all! But that's fine, I just love the fact there are more Sawppy rovers running around.

    I used to list a few Sawppy builders in my main project description page, but the list has grown too long to fit in that space. I'm going to track Sawppy builds on this project log entry, editing it as I go to add more rovers as they come online. I don't know if there'll ever be a day when even this is too unwieldy to track all the Sawppy builds out there... but as far as problems go, that's one I would be very happy to have.

    To everyone who decided my project was worth your own time and money and effort to build: Thank you.

    Roger


    Daniel Perron

    Daniel was one of the first to jump in and start exploring the information I had released. Daniel also helped spread the word of Sawppy via comments on various web page comments about JPL's Open Source Rover, and for that I'm grateful.

    I designed Sawppy to use Misumi aluminum extrusions because I saw Misumi had distributors worldwide. Unfortunately my hope of easy availability turned out to be wrong in Canada. But makers are problem solvers! Daniel redesigned his Sawppy to use wooden beams instead.


    Quinn Morley

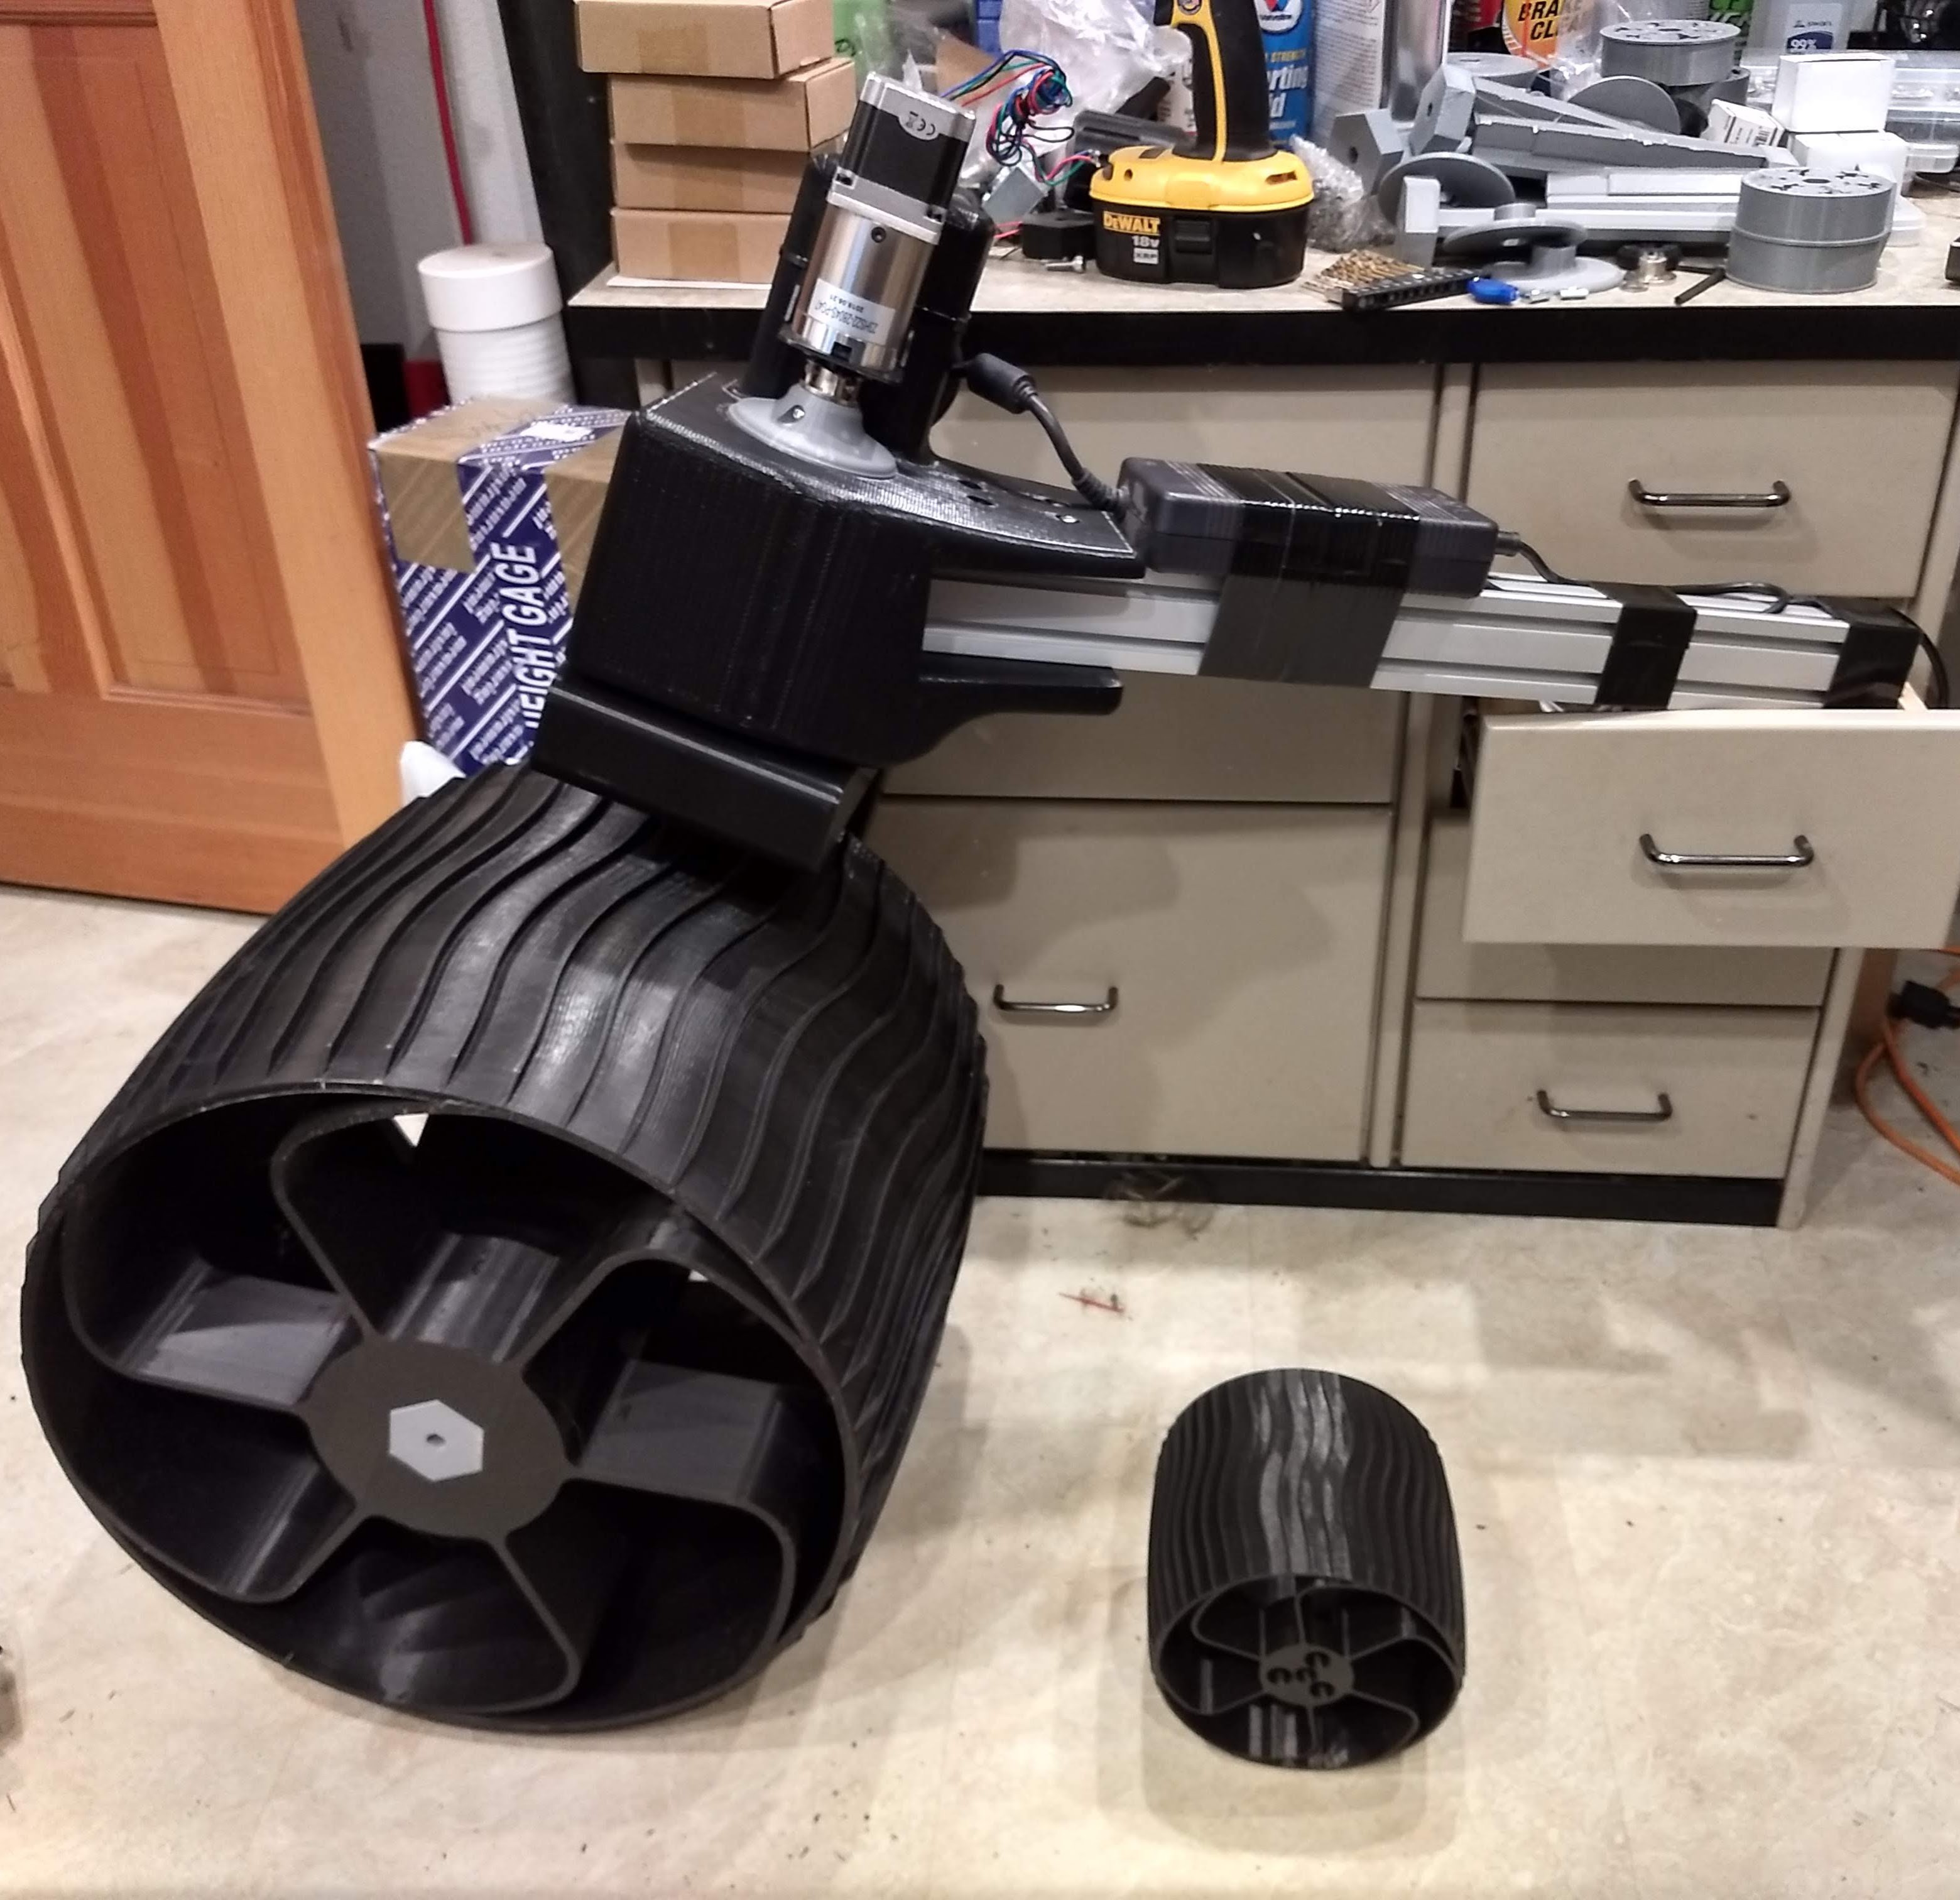
    Quinn is a person who thinks big. Quinn has been working to scale up Sawppy's design, making modifications as needed, for a much larger rover. This picture shows one of his big wheels next to a standard sized Sawppy wheel. This rover will be a mobile testbed for his project developing deep ice drilling techniques.


    Bob Krause, Inventor Studios

    Bob leads a FIRST Robotics team and they have their own version of Sawppy's CAD file filled with their improvements for a better fit with what they want their rover to do. They can't use their rover in an actual FIRST competition because I didn't design Sawppy around competition rules. However, the team members are thinking about using Sawppy's construction technique for their future projects. All of this makes me extremely happy.


    Chris Dakin

    Sawppy has a sibling in the UK! During Sawppy's evolution I had to adjust various pieces and occasionally aluminum extrusion lengths. This resulted in some recuts and some unnecessary (in hindsight) waste. When I documented their final dimensions, I thought it was possible someone could cut all the required pieces out of two extrusion beams at the 2 meter standard length sold by Misumi. Thanks to the build log for Chris' Sawppy, I saw this hypothesis has been proven.


    Marco Walther

    Marco has lots of robot building experience and wanted to add a Sawppy to his robot army. I received many helpful pieces of feedback about my posted instructions for Sawppy, pointing out where I could...

    Read more »

View all 43 project logs

  • 1
    New Home for Sawppy Build Instructions

    After a loss of data event for instructions posted to hackaday.io, Sawppy the Rover's build instructions are now hosted on Github.

View all instructions

Enjoy this project?

Share

Discussions

Ameer wrote 04/14/2020 at 19:23 point

  Are you sure? yes | no

Roger wrote 04/14/2020 at 22:42 point

Yay, looking forward to another Sawppy sibling taking form.

  Are you sure? yes | no

Rhys wrote 04/04/2020 at 23:37 point

Roger, I'm in the process of upgrading the controller on my Sawppy from an Arduino Mega 2560 to a Teensy 4.0 and am having an issue getting the serial communication between the Teensy and the LX16A servo board to work. I am using a bi-direction logic level shifter to manage the 3.3V to 5V level shift.

I've established the same setup works for other 5V serial devices such as a  serial RC receiver, just not the servo board.

I have also found that I cannot get a response from the LX16A servo board when connecting to its serial port with a USB-to-UART bridge rather than connecting directly to the servo board's USB port.

I'm wondering whether anyone using this servo board for their Sawppy has seen similar issues?

  Are you sure? yes | no

Roger wrote 04/05/2020 at 02:35 point

The serial communications issues I've known about are classic serial communication stuff. (TX/RX reversal, forgot to connect common ground, etc.) I haven't heard any problems specific to the servo board. However, I haven't heard from anyone who has interfaced its serial pins directly via 3.3V logic so you may be the pioneer here.

  Are you sure? yes | no

Ameer wrote 03/31/2020 at 20:34 point

Roger, while printing I noticed in the list

https://github.com/Roger-random/Sawppy_Rover/blob/master/docs/Parts%20List.md

"4 Steering Knuckle" Are those 2, then mirrored into another 2?

Thanks

  Are you sure? yes | no

Roger wrote 03/31/2020 at 21:03 point

My own Sawppy has four identical (non-mirrored) knuckles. I designed all functional dimensions to be symmetric so they should work in either original or mirrored orientation, because I expect some rover builders may want to mirror them as a personal aesthetic choice much like the wheels. (Even if the knuckle details are pretty hard to see once the rover is assembled, unlike the wheels.)

  Are you sure? yes | no

[deleted]

[this comment has been deleted]

Roger wrote 03/26/2020 at 00:22 point

This is mentioned in Sawppy wheel printing instructions. https://github.com/Roger-random/Sawppy_Rover/blob/master/docs/Print%20Wheel.md

"The rover will need 6 wheels. Printing half of them in a left/right mirror-image is an optional aesthetic choice. Note that the real Curiosity rover does not left/right mirror its wheel spoke design."

Curiosity spokes are the same on all six wheels, see JPL video: https://www.jpl.nasa.gov/video/details.php?id=910

  Are you sure? yes | no

Ameer wrote 03/27/2020 at 21:04 point

awesome thanks. just read it, I deleted the note

  Are you sure? yes | no

Roger wrote 03/27/2020 at 22:07 point

No need to delete. It's a honest question and it received an answer. It's fine to leave it up as reference for future Sawppy builders.

  Are you sure? yes | no

Ameer wrote 03/14/2020 at 20:47 point

From the list of Parts, where do we buy: 2 "RC car steering turnbuckle" that Connect differential bar to rocker joint? Thank you.

  Are you sure? yes | no

Roger wrote 03/14/2020 at 21:21 point

Those are fairly generic items, the important attribute is the end holes must fit a M3 fastener. Here is one example: https://amzn.to/2wYKXkc (affiliate link)

  Are you sure? yes | no

Ameer wrote 03/14/2020 at 22:04 point

Thank you, since we only need 2, are those suitable?
The difference is the min/max Distance eye-to-eye.
https://www.amazon.com/uxcell-Steering-Linkage-Turnbuckle-Orange/dp/B07R3QR8Z8/ref=sr_1_5?keywords=Turnbuckle+Steering+Linkage+Rod+m3&qid=1584222827&sr=8-5

  Are you sure? yes | no

Roger wrote 03/15/2020 at 03:27 point

Eye-to-eye distance is not important, since Sawppy's differential bar position can be adjusted front/back to suit. That item will probably work. However I recommend getting extras as spares due to my first hand experience: If not properly tightened, the center portion will work loose and a lock nut will drop off and disappear. And if your luck is as bad as mine, it'll be the reverse-threaded nut.

  Are you sure? yes | no

Ameer wrote 03/01/2020 at 23:01 point

Roger, an FOV Camera streaming the footage to the operator - like any drone

  Are you sure? yes | no

Roger wrote 03/03/2020 at 09:01 point

Self-contained FPV drone camera systems operate independent of the Pi.

  Are you sure? yes | no

Ameer wrote 03/05/2020 at 23:39 point

I agree.
I will attach a Wifi camera on an Alt/Az fork. Capable of Live Streaming and Recording; both in Natural Color and in IR. Controlled with an App on the Same Android Phone controlling the Rover.

  Are you sure? yes | no

Ameer wrote 02/26/2020 at 18:43 point

Hello everyone. I'm building a sawppy or two; I just ordered some parts; whatever that is 'Available' at the moment. I want the robot to do a few things besides move, so I have Questions if anyone can chime in plz.

Best method of a mini HD Camera on Sawppy? Like this size https://www.ebay.com/itm/264505733433

Can Sawppy handle a small Robotic Arm? Best way to go about it? What if I attach one of these http://lewansoul.com/product/list/74

Thank you in advance

  Are you sure? yes | no

Roger wrote 02/26/2020 at 19:03 point

Camera: lots of flexibility here for a Sawppy rover.

GoPro-style camera mounted on rover will record good footage of rover adventures.

Cameras sold for FPV (first person viewpoint) remote control vehicles are fun for a live rover's-eye-view as you drive Sawppy.

I've used a USB webcam plugged in to Pi on my Sawppy to transmit over rover network, but the Pi wasn't very good at video compression so I had to choose between high latency (bad) or high bandwidth consumption (bad).

I've heard from people who want to do on board machine vision so Sawppy could drive autonomously, and I'm eager to hear results of their experiments.

  Are you sure? yes | no

Ameer wrote 02/26/2020 at 19:47 point

Thank you Roger.
You think a cam should be independent of the Pi?

  Are you sure? yes | no

Roger wrote 02/29/2020 at 16:01 point

It depends on your intent for your camera. Are you recording for later viewing? Do you want to enjoy a live view? Or do you want the rover to process vision itself?

It is also valid to have multiple cameras aboard, catering to different intents.

  Are you sure? yes | no

Roger wrote 02/26/2020 at 19:06 point

Robot arm: Sawppy was designed from the start to have a robot arm mounted in the front like the real rovers do, though I have yet to build one for my own rover. The chassis should be able to handle the type of arms you linked, but you will need to design an adapter to mount their robot arm base to the aluminum extrusion beams of Sawppy's body.

  Are you sure? yes | no

Ameer wrote 02/26/2020 at 19:45 point

Thanks man! Great

  Are you sure? yes | no

lmckeega wrote 03/27/2020 at 19:09 point

My version of the Sawppy, CJ, has an arm. I don't have the skills to program it to be controllable at this time, but it can extend and do pre-programmed movements. Not unlike the real Curiosity, I guess. 

https://hackaday.io/project/165094-cj-a-sawppy-variant

The arm uses 5 of the LX16A servos.

I would be willing to share my stl or scad files . 

  Are you sure? yes | no

Ameer wrote 03/27/2020 at 21:05 point

wow. awesome, i'm still wondering how to configure the Arm and the Camera! I'm still printing parts for now, done w the wheels, i'll print more parts this coming week. I should prob. print the servo coupler and other parts you changed, I saw one STL on ur page, are there more? what else should I change in the print?

I'm in Disco Bay, where about are you?

  Are you sure? yes | no

Roger wrote 03/29/2020 at 19:11 point

Have you posted any video of CJ's arm running through some pre-programmed movements? I'd love to see it.

  Are you sure? yes | no

Roger wrote 05/03/2020 at 19:37 point

CJ's arm looks fantastic!

  Are you sure? yes | no

Steve wrote 06/01/2020 at 07:09 point

I'd love to see the CAD for CJ's arm :)
I plan to add an arm to my own Tenacity rover some day:
https://hackaday.io/project/167736-tenacity-yet-another-sawppy-project
I even have an old coffee-grinder motor in a box here, waiting to be part of a  home-built RAT.

  Are you sure? yes | no

[deleted]

[this comment has been deleted]

Roger wrote 02/17/2020 at 06:17 point

Thank you for your interest in Sawppy! If you have questions please I encourage you to ask them here publicly. Others can help with public questions if I'm otherwise distracted as I was this past week. If you prefer to communicate privately, you may click on my name and click "Send a Private Message".


I can tell you there hasn't been a "final" version of Sawppy. Things are continuing to evolve under the hands of the Sawppy builders community and myself. If you care to share more information about your deadline, budget, skill level etc. perhaps that can help generate useful suggestions.

  Are you sure? yes | no

Ameer wrote 02/17/2020 at 22:47 point

Thanks Roger,

I will read further on the development and come back with ideas.

  Are you sure? yes | no

Juhwan Yoo wrote 12/27/2019 at 18:17 point

Hi, @Roger Firstly I really appreciate to you. It's so amazing robot. : ) Do you have any plan to upgrade the Sawppy Rover for ROS? In order to control this robot on the ROS environment, I think it's enough to just develop control node with rosserial. (e.g. Jetson Nano installed ROS --> Arduino --> debug board --> LX-16 actuator). How do you thnk about?

  Are you sure? yes | no

Roger wrote 12/28/2019 at 03:51 point

I plan to experiment with ROS on Sawppy using Raspbery Pi --> Debug board --> LX-16 network. I've looked at @Marco Walther ROS project (Thanks, Marco!) and have some ideas on how I can contribute with a different approach. I plan to start with ROS Melodic, which has provisions for Python 3 absent from earlier versions of ROS.

The first planned node will be a Python 3 script subscribed to /cmd_vel and send out commands to all ten LX-16A servos (four steering, six driving.) Once that is successful, I'll build out other pieces of Sawppy functionality.

Can't a Jetson Nano communicate with Debug Board directly? I'm curious why you proposed using an Arduino between them.

Also, NVIDIA's Isaac SDK seems to be a robot framework tailored to take maximum advantage of their products like the Jetson Nano. Are you aware of Isaac? If so, I'm interested in your reasons to use ROS instead of Isaac.

  Are you sure? yes | no

Marco Walther wrote 12/28/2019 at 04:08 point

Yeah, my Rover node is basically a very thin interface to your original Sawppy Python code (plus my handling for the drive motors;-) But all that should easily translate into Python3

  Are you sure? yes | no

Juhwan Yoo wrote 12/28/2019 at 16:31 point

Thanks for your reply @Roger
In fact, there is no special reason to use Arduino. I want to use what you set up code and H/W, without any modifications. In addition, despite of many benefits of Jetson Nano, there are major limitations on the Jetson Nano. For example, it occurs sometimes I/O issues, because of a small size of on board memory. So I want to just reduce some loads on the Jetson Nano. It's all.
Actually I don't know well about ISSAC SDK. Maybe it would be so excellent. But there are not enough materials than ROS to me.

  Are you sure? yes | no

Roger wrote 01/31/2020 at 22:43 point

Hi @Juhwan Yoo you may be interested in this: @Rhys has written a complete software stack for running a Sawppy rover on ROS Melodic. I've just posted a project log here about it. Feel free to read it or you can go straight to the repository: https://github.com/srmainwaring/curio

  Are you sure? yes | no

Juhwan Yoo wrote 12/27/2019 at 18:10 point

Hello, @Marco Walther Could you tell me how to launch and control the Sawppy Rover on the ROS melodic environment? In addition, Can I use the browser to control remotely the Sawppy Rover on ROS? For reference, I'm using the SBC like Jetson Nano, ZED Depth Camera, and LiDAR(LDS-01 for Turtlebot3).

  Are you sure? yes | no

Marco Walther wrote 12/27/2019 at 18:49 point

Hello @Juhwan Yoo ;-) I did not try with Melodic but I don't actually expect many problems. I'm somewhat dependent on my Up-Board. The code is mostly simple Python2. I don't have access to the rover right now, but I'm planning to push all my latest changes to the repo after the New Year.


On the browser control, it should not be too hard to add/modify the browser code to emulate a joystick node in ROS. I did it for my RC setup;-) But I'm not really interested in a browser UI;-) Iff I need that, I can simply switch to the [semi-] original Sawppy Python code and that works just fine;-)

Have fun,

-- Marco

  Are you sure? yes | no

Juhwan Yoo wrote 12/28/2019 at 16:38 point

Thanks for reply @Marco Walther 

Wow, I am very excited the information about your latest code. If possible, for someone like me, please update the Readme content. Actually it's so hard to understand the current code, especially how to use it.

  Are you sure? yes | no

Marco Walther wrote 10/16/2019 at 15:56 point

A little update on my Sawppy. I added the Intel RealSense T265/D435 cameras ( https://www.intelrealsense.com/depth-camera-d435/  https://www.intelrealsense.com/tracking-camera-t265/ )and I'm playing with ROS[1] on it now. I can drive it via ROS nodes and the rover behaves pretty much as before. I got both cameras to report in the correct frame yesterday. Now I have to get it to map some rooms;-)

https://www.bytesalad.org/~marco/sawppy_eyes.jpg

https://www.bytesalad.org/~marco/sawppy_rviz.jpg

https://github.com/mw46d/Sawppy_ROS

  Are you sure? yes | no

Patrick wrote 10/13/2019 at 21:12 point

Swappy, my take on the Sawppy rover design, was a huge hit in the Mini Maker Faire Rocklin! Here's a photo of it at the event: http://www.patronics.org/swappy.html  Unfortunately I was kept too busy answering questions to remember to take any other photos of it, but it was so much fun meeting other people interested in it, hopefully inspiring some to try similar projects on their own!

I did have a few repair sessions to retighten the set screws on the wheels, so I'll definitely be trying your suggestions of loctite and making bigger detents on the axels https://newscrewdriver.com/2018/06/20/improve-motor-shafts-with-larger-flatter-detents-and-apply-loctite-to-set-screws/

  Are you sure? yes | no

Roger wrote 10/13/2019 at 21:35 point

Congratulations on a successful outing! I frequently find myself facing the same problem you encountered: have so much fun talking to people about the rover we forget to take pictures. But as far as problems go, that's a pretty good one to have, right?

I look forward to reading about your upcoming modification experiments.

  Are you sure? yes | no

Marco Walther wrote 10/16/2019 at 15:44 point

I was thinking about the Mini Maker Faire Rocklin;-) But we had fun with a High Altitude Balloon launch & recovery on that Saturday;-)

Too much fun and too little time:-(

  Are you sure? yes | no

Patrick wrote 10/07/2019 at 23:00 point

I've finally just about finished my Sawppy rover, (mine's nicknamed Swappy), after finally fixing an insideous electrical glitch that kept killing the Teensy Microcontrollers (I'm also using @Marco Walther's design for the wheel driving). Everything's functional except 2 of the steering motors (the connectors for making a longer cable are in shipping now), but it works well enough to drive even without the other motors.

I'm also experimenting with allowing it to be controlled over long ranges over the cellular network! Photos and/or videos coming soon, it's difficult to film it and drive at the same time, and waiting on finishing the last two steering motors. 

I'm so thrilled with it so far, thanks so much for inspiring me with Sawppy at Maker Faire Bay Area @Roger

  Are you sure? yes | no

Steve wrote 08/12/2019 at 01:22 point

I finally have my Sawppy built and am starting on the electronics and compute build-out.
It has a body, now it needs a brain:
https://drive.google.com/file/d/1DdWZY4xo6N1cITnRVAw_B5MOwnU0gL9O/view?usp=sharing

  Are you sure? yes | no

Roger wrote 08/12/2019 at 03:21 point

It looks great! I love the green color, the picture makes it look translucent like Jade. Are you using @Marco Walther design for wheel drive actuators? Looking forward to seeing it run.

  Are you sure? yes | no

Steve wrote 08/12/2019 at 04:19 point

Yes, I'm using the same DC motors he is. Probably the biggest challenge so far has been the holes for the heat-inserts. All the models I printed out, the holes were too big and the inserts were pulled out under tension or they just didn't seat correctly to begin with..So I've made them smaller with OpenSCAD.

Also, I've printed out the axles and drive shafts using NylonX at 100% infill.
We'll see if that holds up. So far the Rocker and Bogie shafts are all bearing the weight fine and the set-screws seem to bite into the shafts nicely.

  Are you sure? yes | no

Marco Walther wrote 08/12/2019 at 05:56 point

I can't see a reply link on Steve's last comment:-( Not sure, the longer heat inserts worked well for me. https://www.mcmaster.com/94180a333

  Are you sure? yes | no

Marco Walther wrote 04/22/2019 at 04:15 point

A little night excursion into the backyard;-) https://www.youtube.com/watch?v=rvCmtjlanaQ

  Are you sure? yes | no

Roger wrote 04/23/2019 at 19:11 point

Wow, how are the bright yellow pieces glowing like that? Are they UV-reactive and you installed UV LEDs on board?

  Are you sure? yes | no

Marco Walther wrote 04/23/2019 at 19:56 point

The filament (and paint) are UV-reactive, yes. But I just had an external UV CFL (normally used for Halloween;-) for illumination. I do have UV LEDs (from other projects), but since most events are during daylight, I did not see the need to add them to my rovers;-)

Still without Sawppy, but my rovers plot to take over the world;-) https://www.bytesalad.org/~marco/RoversPlotToTakeOverTheWorld.jpg

  Are you sure? yes | no

Marco Walther wrote 04/21/2019 at 22:52 point

I never posted in this thread:-( I do have built a Sawppy as well and I'm very happy with it;-)

https://cdn.hackaday.io/images/original//2983811547403540755.jpg  (Sawppy on a planet far far away;-)

In the meantime, I replaced the drive servos with 25D geared motors with encoders. That should help with switching the software to a more ROS-based setup.

  Are you sure? yes | no

Roger wrote 04/21/2019 at 23:14 point

Welcome to the public discussions Marco! I think your motor replacement project holds a lot of promise, looking forward to hearing how ROS integration works out.

  Are you sure? yes | no

Marco Walther wrote 04/22/2019 at 03:10 point

It might just have to wait until after MakerFaire Bay-Area. I'm kind of busy into then.

  Are you sure? yes | no

lmckeega wrote 04/21/2019 at 05:05 point

Hi Roger. I just finished the initial build of my version of Sawppy. I am still working on the electronics and have designed a PC board to mount everything. I started a project page at https://hackaday.io/project/165094 and will document some things that I am doing differently. 

My plan is to add detail to the body to make the rover look  as accurate as possible to the Curiosity rover.

I took the rover 'off roading' today. There is a video of the trip at the link above.

Many thanks for your work on this project. Without your work and sharing, I would not have been able to complete a project like this.

  Are you sure? yes | no

Roger wrote 04/21/2019 at 23:13 point

Congratulations on getting your Sawppy up and running! It's always a lot of fun for me to see one running around, climbing over things. I look forward to seeing your enhancements to make your rover look more like the real rover Curiosity.

  Are you sure? yes | no

W. James Dittmar wrote 04/20/2019 at 10:00 point

+1 I just built this as well.  Great job on this project Roger. 

Here is a link to a video I made of it: https://www.youtube.com/watch?v=vTzPXhKfGCg

Couple of thoughts/questions:

1. What is the purpose of the differential brace? I can't seem to figure out what it is supposed to do. It is a big part so I decided not to print it. It seems like everything works without it.

2. If you are scared of using hand power tools to cut steel at home (like I am) you can use a hacksaw to cut the steel bars. It takes about five minutes to cut through a bar. On a related note, you can also use a hacksaw to cut the grooves for the retaining clips. Just put the shaft in a vice, do a couple swipes perpendicular to the vice with the hacksaw, then rotate the shaft a couple millimeters and repeat.

3. You used a cheap 3D printer (about $200). I also took this approach and bought a used Ultimaker Original for about $300. It looks like you ended up spending another $100 to upgrade the hot end. I spent hours and hours fiddling around with the printing settings, making adjustments in the model, filing / sanding / hammering parts to get them to fit together well. Amidst all of this I purchased an MK3S kit for about $700. Everything printed perfectly with no changes in the settings and printed several times faster. You may want to point out that you may save a couple hundred dollars by getting a cheap 3D printer, but you are going to pay for it by fiddling around with your cheap printer for many hours. I also noticed that the better precision that you can get with the better 3D printers results in more structural integrity of the PLA. My parts were much stronger when I printed them with the exact same infill and the exact same model with the better printer. PLA is actually pretty strong and it should not fail at the loads it will be carrying in this thing. The only advantage of PETG would be that it is more resistant to heat. 

Again, great work. I found this project because I was originally going to build the JPL open source rover, but then realized I didn't want to spend $5,000 to develop something that extremely over-engineered to drive around in my back yard :)

  Are you sure? yes | no

Roger wrote 04/20/2019 at 20:43 point

I'm always happy to see more Sawppy rovers taking shape and running around. Thanks for sharing the video!

To answer your question: the differential brace helps distribute load along the length of the differential rod. If your Sawppy equipment bay is lightly loaded and/or well balanced, it would indeed work just fine without a brace. (Or if you use a very strong material for your differential rod.) But as you add to your rover, you'll start seeing the differential bar bending under load.

And thank you for sharing your tips about the hacksaw, plus additional confirmation that cheap 3D printers always end up demanding we spend more time to address their problems. There's no free lunch here, it's always a tradeoff.

  Are you sure? yes | no

W. James Dittmar wrote 04/24/2019 at 11:51 point

Ah, ok that makes sense with the differential brace. 

Side question: how did you learn to design this and your other projects?  I would like to learn how to build these types of electromechanical systems. Do you have any formal background in mechanical engineering? Did you just kind of look at the JPL rover design, eyeball everything in CAD, test, and iterate? I am trying to figure out whether I would be able to build stuff like this with a top down approach (learning other people’s designs, building, experimenting), or whether I need to take some courses in mechanical engineering to have some formal background. 

  Are you sure? yes | no

Roger wrote 04/24/2019 at 19:03 point

I have no formal background in mechanical engineering, just experience gained from design, test, and iterate. While there's value in learning some lessons first hand vs. from a book, I'm sure a formal background would have cut down on the number of mistakes I've made. Fortunately for people like us, 3D printers have made mechanical design/test/iterate much faster and cheaper, letting us learn by doing without dying of old age or going bankrupt.

I would summary my position as this: formalized mechanical engineering background would be useful, but willingness to design/test/iterate is critical. Don't get discouraged when the first few attempts don't work, everybody goes through that. Learn something from the experience and try again.

For your amusement, here's a picture I took showing every... "lesson"... on my way to the version 1.0 rover you see on this project page. https://newscrewdriver.com/2018/07/16/road-to-sawppy-is-paved-with-plastic/

  Are you sure? yes | no

Phillip wrote 04/11/2019 at 23:45 point

Add another SAWPPY to the list of functioning builds. Just finished assembling mine and other than a few typo's I made in the configs, it works fine.

  Are you sure? yes | no

Roger wrote 04/12/2019 at 00:34 point

Great to hear! Do you have pictures to share? I'd like to see if I may.

  Are you sure? yes | no

Roger wrote 04/20/2019 at 20:21 point

Your Sawppy looks great, Phillip! I love the red & black color theme.

  Are you sure? yes | no

lmckeega wrote 02/25/2019 at 03:37 point

Hi Roger,

I am really having a good time working on this project. Your work on it is very inspiring.

I think I have the electronics figured out but have a problem with programming.

I've loaded the program on a Raspberry Pi and it runs fine, but I am having trouble figuring out how to make it work with any motor except roboclaw.  The way I read it, I need to change the  config_roverchassis.json file to replace "robocloas" with "lewansoul". When I do this I get a 'unknown motor control type' error. I also tried to change it to 'adafruit_servo' with the same results. Can someone point me in the right direction?

  Are you sure? yes | no

Roger wrote 02/25/2019 at 06:30 point

Which branch of SGVHAK_Rover repository are you in? The 'master' branch is focused on SGVHAK rover. Sawppy code like the LewanSoul support class lives in the 'development' branch. As for the JSON file itself, please see config_sawppy.json for example. On my Sawppy's local clone of the repository, config_sawppy.json is copied over config_roverchassis.json.

  Are you sure? yes | no

Roger wrote 03/25/2019 at 07:28 point

FYI I have merged all changes from 'development' to 'master' branche in order to avoid any future confusion. I was also alerted to a problem with default config files published on Github, which I have just fixed. (Thanks Martin!)

  Are you sure? yes | no

Similar Projects

Does this project spark your interest?

Become a member to follow this project and never miss any updates