Close
0%
0%

Monoprice Mini Marlin 2.0 Support

Getting Marlin to run on the Monoprice Mini/Malyan M200.

Similar projects worth following
I greatly enjoy my Monoprice Select Mini 3d printer. For an entry-level printer, it's all kinds of fun. The only problem is that as much as I like to tinker with hardware, I *love* to tinker with software. And the mini's firmware wasn't open-source. Thus began the process of getting Marlin 2.0 to run on the mini.

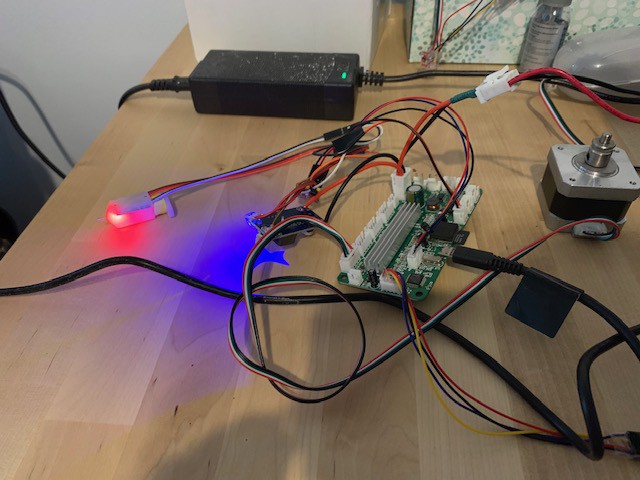
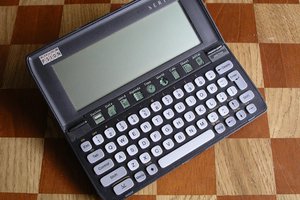
The MPMini/Malyan M200 V1, V2, and Pro (V3, for all purposes) run on an STM32Fxxyy processor using a firmware which is claimed to not be derived from Marlin (hook a serial monitor to the display port and make your own decisions whether or not that's true). These project logs follow my progress making Marlin 2.x run on this board across multiple hardware revisions/Arduino cores.

V1 and V2 work today if built with the Arduino IDE. V3 in theory works (it's the same processor as most V2s) though ABL doesn't work without EEPROM emulation. M300 support would most likely be a different project, but it feels like an extension of this one, so for now, I'm leaving it here.

  • V3/Pro Support

    J.C. Nelson08/14/2019 at 21:24 1 comment

    Thanks to a discussion on Facebook, I've solidified the V3 pinouts. For those of you keeping score at home, the probe is the old Z-Min pin (PB5) and the Z-min moves to PA2 on the Serial2 header. I'll have a code change for this/PR for Marlin soonish. I don't recommend using this on the Pro or V3 yet because the menu for adjusting the Z offset doesn't work - there's a whole new set of commands I need to implement (P:I, S:S, M:[0-998, 999], where S:S is save settings, M:0-998 sets a Z offset, and P:I initiates leveling).  Also, this will require the failsafe EXTUI support, which has to come first.

  • Timeouts, Failsafes, and other annoyances

    J.C. Nelson06/15/2019 at 03:08 0 comments

    So, octoprint users were consistently hitting an issue where the printer would switch to relative mode and die from over extrusion protection. Or turn off the heaters. You know, the fun sort of stuff that makes a 3d printer a little more useful than a boat anchor. Solution? A bluepill. I keep a handful around at any time, and they have a couple of great properties:

    1. They run on 3.3v logic, meaning I don't need to spend time shifting levels.

    2. Two free hardware UARTS. What's not to like about that?

    3. USB! A nice, pretty USB Mini connector, which means that all I really need to diagnose protocol issues is a set of jumpers. Wire one Serial to the Mini's mainboard, one to the display, serial + GND and just a scratch of Arduino code, and we have a cheap protocol sniffer. 

    As I noted, nothing seemed to repro on my hardware, except for the delta.

    And if I had just paid a little more attention to waht my eyes were telling me, I wouldn't have needed to do any protocol sniffing.  See, if you simply watch a late run V2 or delta's screen while issuing a temperature wait command. Go ahead, I'll wait.

    Back already?

    Yes, it switches to a screen I call the build screen, because the command that takes the mini to it is "{SYS:BUILD}"

    This screen does NOT result in a timeout. Without a file call, it won't show you the file being printed, but that doesn't matter - what matters is that it doesn't time out. 

    Fixing this required extending the malyan_lcd code to support status prints. We can't possibly display them but we can check to see if they match the heating messages (using their string constant names) and issue the SYS:BUILD command there.

    I've pushed a set of changes for this, but there's a few caveats:

    It's essential that at least one temperature wait comand be used. M140, M109, whatever wait method you want in your slicer. Don't do that? Prepare for timeouts. Also, thanks to a project contributer, speed adjustment should work better. Note that if you are using an early V1, this may break speed adjustment, as I'm near certain there's a bug in V1 LCDs where it sends the wrong command while adjusting feedrate. If so, this fix breaks that, but I don't have my early V1 LCD anymore. I'll watch reports and see if it crops up. If so, I can make adjustments.

    Happy printing...

  • LCD Failsafes

    J.C. Nelson06/12/2019 at 14:58 0 comments

    So...I've been printing on my mini for nearly a couple years using different flavors of Arduino, different branches of Marlin, etc, and had support for the LCD ever since my great ice-meets-two-wheeled-vehicle accident. Most of my prints are from octoprint, but I often use the LCD to tune the temperature and so on. 

    All of that meant I thought I had a fairly decent idea of how everything worked. But in the comments of this project, I found not one, but two different people who reported seeing injected (LCD) commands which switched steppers to relative or disabled them, set temperatures to zero, and so on.

    Being as this is my code, a bug is more probable than possible, so I went hunting.

    And I found nothing.

    My wife and I have been binge-watching House, and while the motto there is "Everyone Lies," generally speaking, people only lie when there's something in it for them. There's nothing in it for someone to report a weird bug that affects steppers/hotends, which means these people were telling the truth.

    We began to theorize it was a timeout in which the UI was intentionally injecting "shut down commands as some sort of failsafe.

    MRozay was kind enough to confirm for me that he'd hit the same thing in his M4MPD project (which uses a variant of my LCD code). To get around it, he switched to the BUILD screen during homing and heating. The build screen doesn't have such a failsafe.

    Ok, great. 

    I sat down and fired up my UI tracer sketch, which I modified to report the heaters were active and then started \my M200 printers - an original run V2 (STM32F103) and a second run V1 (STM32F103). Both were hooked to their respective LCDs, both set to trace any input from the LCD so I could figure out exactly what the firmware does.

    Twenty four hours later, they were holding steady with zero input.

    Then I started looking at reports and thinking. The LCD code in the Minis is something I tinkered with but realized was out of my depth, but I did learn there's several major revisions, and each has quirks. On a hunch I pulled the LCD from my Mini delta, and thirty minutes later, it killed the temps (but didn't trace my output, because I don't have a delta version yet).

    So, there IS a timeout.

    I can print from Octoprint to the Delta just fine, meaning the stock firmware must do something different I don't know about. This weekend, I'll set up a pass through bluepill to trace communications and run some test prints on the delta. Also, it can't hurt to actually mail Malyan and ask how they avoid it. Worst case is they refuse to explain.

    Fingers crossed.

  • Easier Compiling, at a Cost

    J.C. Nelson05/31/2019 at 15:59 0 comments

    So many people have had difficulty compiling due to the fluid nature of the ST Arduino core, difficulty installing supported boards, etc, that I took some time out to look into how to make it easier. Arduino supports a concept called "Portable" wherein an install, all of its packages, sketches, temp data, etc, live in a folder, appropriately named "Portable" under the Arduino folder.

    One look at this and I knew we had the key to allowing others to compile.

    The cost? Some time, some download effort, and being locked onto a single version of ST's arduino core. Obviously the portable install will need to be updated when HardwareTimer libraries are added, etc, but a click-to-compile solution seemed possible.

    To do this, I set up a new, clean laptop. My dev machines have git enlistments, half a dozen (really) copies of Marlin in different states, are symlinked together so I can use a git repo as my Arduino Core without copying things over--all the usual stuff.

    To simulate someone else building, it had to start from scratch. I had a few problems and wound up downloading an hourly build of Arduino (in a step I no longer think was necessary), but finally got to the point where i could set the options correctly, click, and compile.

    It's unlikely Hackaday wants to host a half-gig file for me, so I shared it on OneDrive.

    Arduino Portable for Windows: https://1drv.ms/u/s!AjuNQlXUvQuaq-45AF_Nwk7l9XIhag

    To use this, download the portable install and unzip it.

    Make sure you configure your settings correctly - there's no way I know of to set the IDE options in a project or I would already have done it.

    Obviously if you're compiling for a V2, you'd choose V2. Be careful! Some black (early run) V2s use an STM32F103. If your V2 is horrendously loud, uses the 46.5 steps per mm, and has a 103 chip under the hood, choose "V1" in spite of it.

    One thing I'm still playing with - on my machine I have an upload option called "copy to file" which copies to a drive, which is what the Mini requires. I may add this in to the portable, with the understanding that since the Arduino IDE doesn't have a good way to enumerate drives as ports, the script expects the drive to be called "PRINTER" under OSX and probably "M:" for windows.

    Flashing - First make sure you can easily move between official versions of the firmware. If you can't do it with Malyan's firmware, don't expect Marlin to work. The Malyan Bootloader is picky about SD cards in a way that defies understanding. Smaller is better, the one that came with the printer is best. For V1s, it's called "update.bin," for V2, "firmware.bin." 

    Good luck, people. Happy printing.

  • Side-Hack: Connecting a Raspberry PI/Octoprint Directly

    J.C. Nelson05/26/2019 at 18:33 1 comment

    This began as an answer to the question "Is there any other way to hook up Octoprint that doesn't involve USB?" 

    Why? Because the person in question had discovered that if one steps on the usb connector, it will transmit the force upward, outward, and other-wards. In the words of my 2 year old daughter, it "badded" the connector.  

    Now, those with nimble fingers and usb-electron-robo-soldering irons will easily repair the port, sometimes even soldering on a different size/type. Not me. Soldering to the debug pads on a V2 is a complex operation for someone as shaky as I am. But there are other options. While I acknowledge that the Raspberry Pi Zero W isn't recommended for octoprint, that's primarily because of slowdowns when streaming video.  On this particular board, I had no LCD, so why not take the opportunity to make an all-in-one?

    To do this, you'll need a Raspberry Pi Zero W (if you're going to attempt this with a B, A, or anything else, go ahead and wire up a power supply.

    Some form of cable to connect it. - If your LCD works or you ever intend to replace it, a JST kit  in like SPH-001T in either P0.5L or P0.6L depending on whether or not you have a V1 or V2 (V2 uses the narrower pin connection).  See https://mpselectmini.com/parts/wire_connectors for a good breakdown of connectors and sizing. If your LCD is dead and you're never, ever going back, you could cut the display cable (shudder!) and use it.

    To plot out our wiring, refer to https://pinout.xyz/pinout/pin1_3v3_power

    It turns out, we can power the PI directly, feeding it 3.3v. The PI will report it's underpowered, since the 5v side isn't being supplied, BUT, it behaves fine in my testing, and since the 5v exists to feed the 3.3v regulator, we're probably fine. 

    Probably. Proceed at your own risk.

    Now, we need four things to power the PI and communicate: 3.3v power, which the display header gives us, Ground, which the display header gives us, TX, and RX, which...the display header gives us.

    To begin with, setup OctoPi on your raspberry PI and ssh to it.

    We need to enable the mini UART for serial in order to gain access to /dev/ttyS0 (the mini UART). Follow the instructions here:

    https://www.raspberrypi.org/documentation/configuration/uart.md

    Specifically, you want to run:

    sudo raspi-config

    Select option 5, Interfacing options, then option P6, Serial, and select No

    You want login not running on Serial, and Serial enabled.

    Exit raspi-config, saving changes, and reboot the pi.

    Next, in the octoprint UI, choose the wrench, setting, and add the ttyS0 as an option:

    If you are not running Marlin, you can try adding 500000 as a baud rate. There's a decent chance Octo will connect to the /dev/ttyS0 device at 500000, but I am running my own sotware, so I didn't need to do this.

    Now, wiring:

    If the display connector is closest to you, with the bed/hotend connectors away, power is on the left of the connector, ground on the right, and TX/RX are in between. A picture is worth more though, so see how this is run:

    Wtih that done, a quick "connect" and I had Octoprint working straight through the display. And yes, it works perfectly well if I swap it out to the Serial2 connector above the MCU, allowing you to use both the LCD and Octoprint directly. Wifi printing does NOT work in this configuration. Marlin supports two Serial instances, and Wifi printing consumes one with its pass-through serial.

  • Mesh Bed Leveling Video

    J.C. Nelson05/24/2019 at 16:09 0 comments

    Now with 100% less cat. Not that there's anything wrong with cats, but there are no known great cat film directors for a reason. This is Mesh Bed Leveling running on a Monoprice Mini V2/Malyan M200 V2. This one is using the endstop as a sensor just to test the code. If I had an actual sensor wired to this printer, it would absolutely work.

  • Bed Leveling on V1/V2

    J.C. Nelson05/23/2019 at 04:12 0 comments

    One of the big features the V3/MP MIni Pro brings to the table is automatic bed leveling, but I've always been of the opinion there's no reason to restrict bed leveling to a new product. Marlin supports it, so why not the mini?  To do this required a couple of changes underlying everything else:

    First, eeprom emulation wasn't working. The 103 in the V1 doesn't support SRAM and there's no I2C eeprom (and precious few pins available to wire one up). So EEPROM emulation it is. Here, I was led astray by some of the pre-existing code. the STM32F4 and F7 HAL support EEPROM emulation, and I first attempted to port it, but flash programming is very different between 103, F4 and F7. 

    So, instead, I deleted all the existing code and wired together a simple one using the platform's EEPROM library. There's some overhead to this that's not good, but for now it works and lets us save settings using M500...a prereq for bed leveling.

    After enabling bed leveling in a fake mode (linear, using z min pin, aka "pretend to level using the z endstop"), I recompiled and immediately failed, overflowing the ROM region by 2k bytes.

    But it's actually much worse than that. 

    The linker script doesn't (and shouldn't) take into account EEPROM emulation, which takes a full page. THis means that of the 128K available, 8k goes to the bootloader, 4k to the emulation, so we were overflowing by over 6k, and 6k is a LOT in the ARM world.

    arm-none-eabi-nm -t d -S --size-sort

    gave us the output for where the sizes were going.

    Our biggest culprits? We expect dtoa and strtod (a couple of large functions we need and you don't expect to vary much - the whole subject of decimal conversion and representation is intricate and fasinating, and a lot of the value in these two is that they do things the same way everywhere, all the time).

    34263024 00000940 T _ZN14MarlinSettings4saveEv
    134309128 00000984 T HAL_RCC_OscConfig
    134336292 00001104 T __gethex
    134277628 00001128 T _Z8probe_ptRKfS0_12ProbePtRaisehb
    134307920 00001156 T HAL_PCD_IRQHandler
    134326604 00001182 W _printf_float
    134252048 00001204 T _ZN10GcodeSuite22process_parsed_commandEv
    134234936 00001296 T __aeabi_dmul
    536873824 00001344 B _ZN7Planner12block_bufferE
    134285852 00001368 T _ZN11Temperature12PID_autotuneERKfaab
    134232892 00001516 T __aeabi_ddiv
    134246040 00001524 T _ZN10GcodeSuite3G29Ev
    134280316 00001552 T _ZN7Stepper23stepper_block_phase_isrEv
    134264188 00001596 T _ZN14MarlinSettings6reportEb
    134231120 00001772 T __aeabi_dadd
    134236232 00001840 T __aeabi_dsub
    536877664 00002048 b eeprom_buffer
    134274192 00002312 T _ZN7Planner15_populate_blockEP7block_tbRA4_KlfhRKf
    134265784 00002724 T _ZN14MarlinSettings5_loadEv
    134333160 00002984 T _dtoa_r
    134328968 00003132 T _strtod_l
    

    The problem with this output is pretty much everything here, we need (there may be some optimizations available by removing PID autotune, but that's re-arranging deck chairs on the Titanic to slow the sinking. We need big savings, and the first thing we have to do is find out if it's using function sections.

    Unfortunately, that flag is already on. 

    However...a quick check shows that Link Time Optimization is NOT on. A quick change, and we get:

    Sketch uses 100392 bytes (81%) of program storage space. Maximum is 122880 bytes.
    Global variables use 9724 bytes (47%) of dynamic memory, leaving 10756 bytes for local variables. Maximum is 20480 bytes.

    That is totally acceptable. A quick check, and G29 works flawlessly.

    Next up, time to fix the Z homing speeds to be something normal. Right now it homes very slowly because I'm looking at how the ISR services pulses. I'll try something more rational soon, and then homing should behave normally, and hooking up leveling probes to the mini will be straightforward.

  • V2 Success

    J.C. Nelson05/13/2019 at 17:28 11 comments

    Last night I was able to successfully do a few test prints of the lucky cat and butterfly using the V2 (STM32F070) MCU. This means this project is drawing to a close, of sorts. Marlin main now supports the printer, V1 and V2 both click-compile for the most part. The sample config will work if I update the documented settings on how to compile, or I may update the sample config. 

    V3 (with auto-level) is a matter of defining the probe pin (I believe it's PA3) and configuring ABL, but to do that, I'd need to re-enable EEPROM emulation. It doesn't currently work under ST's core using the unified HAL. It's really one of the last things to be needed, and once it's done, short of adding WIFI printing to Marlin Main, and Malyan's custom GCODE, there's not much left.

    I created a config for the Malyan M300 delta /MPMD and may do a test with it as an extension of this, but the delta more or less just works. We'll see once I draw the V2 work to a close.

    V3 is a possibility, enabling ABL, except I don't have a V3 - I'll need to use my V1 + probe or the bl-touch I wired to a V2. 

    Delta is a possibility.

    Soon I'll get back to the Lerdge project.

  • BL-Touch (on a V2).

    J.C. Nelson05/05/2019 at 01:22 1 comment

    I have been experimenting with a number of different probes, and returned to something I'd only gotten tangentally working - a BL touch sensor on the V2. Why the V2? Because nice, new V2 motherboards have a handy JP socket exposing Serial2. Older boards all the way back to original V1s have solder pads or through board vias you can put a header on, but the V2 came ready. So I built a little adapter to let me test it.

    In short, there's a lead from the 12V input which runs to a buck converter, providing 5v for the BL-touch and powering the 5v side of a 5->3v level shifter. Power and Ground from Serial2 plus PA3 go to the low side of the 5->3v level shifter, and the rest of the wiring is pretty much standard bl-touch. 

    Does it work? It does. It probes just fine, though it's not clear to me why the bl-touch can't be at an agle. There's probably a reason. 

  • Wifi Printing

    J.C. Nelson04/26/2019 at 19:59 0 comments

    The MalyanM200/Monoprice Mini has an interesting feature in that it supports wifi printing - the ability to connect Cura or something similar via wifi and print directly that way. This is accomplished via  combination of features, starting with the ESP8266 which drives the LCD. By default the ESP bridges telnet to serial.

    The Malyan firmware also supports a sort of dual host support, in which bytes with the high bit set from the UI are UI commands, and bytes with the high bit off are channeled commands.

    Marlin 2.x has multihost support in which you can have multiple serial outputs, but what is missing is a simple bit of glue: A ring buffer Serial implementation which can be fed the channel bytes, while the UI code consumes the encoded ones. Fortunately, both the ESP and Linux HALs have a sort of fake Serial, which I quickly adapted to MemorySerial, and plugged into the LCD code.  There's a new feature in configuration.h, WIFI_PRINTING, which enables this. 

    I'll be testing this once I can get my mini joined to the WIFI network. Malyan's firmware supports custom GCODE commands to set the SSID and password. Marlin does not. I'll need to figure out a way to get it set up.

    The last missing chunk only really works on Windows. MalyanLink uses the opensource Com0Com virtual com port driver to link a host and port to a virtual com port. I'm not sure what I'll use, yet, since OSX doesn't let me symlink using netcat to create a virtual modem.

View all 27 project logs

Enjoy this project?

Share

Discussions

hackbot wrote 11/13/2019 at 09:55 point

I'd like to give your project a try some day for my "MP Select Mini V2" but it's not quite clear which Marlin version (git branch names are confusing - 1.1 or 2.0 or ... ?) or sources are to be used - are these the complete build instructions? https://github.com/xC0000005/Marlin/issues/1 Could you maybe reference these more prominently? What are current limitations in comparison to the stock firmware? Are there any updates on a open UI firmware that you mentioned? Unfortunately, the Facebook group (probably this: https://www.facebook.com/groups/1717306548519045/) is closed so I can't have a look. Thanks!

<hr/>

https://github.com/MarlinFirmware/Marlin/tree/bugfix-2.0.x/config/examples/Malyan/M200

  Are you sure? yes | no

lawrence_jeff wrote 06/01/2019 at 01:30 point

@Thomas - I have the same echo:enqueueing "G91" being injected into my prints you reported - did you have any luck identifying the source?

  Are you sure? yes | no

Thomas wrote 06/03/2019 at 13:06 point

Yeah, something was causing the LCD to send movement commands even when it was in that "dialog" mode that marlin appears to be putting it into. Either disconnect the LCD, or make a modification to marlin to ignore commands from the LCD when printing (if J.C. Nelson hasn't done it already)

  Are you sure? yes | no

J.C. Nelson wrote 06/15/2019 at 02:21 point

I just pushed a change that should fix this - it switches to the build command during heating, which is what the new motion controller firmware also does. There may be other problems, but it's a solid start.

  Are you sure? yes | no

J.C. Nelson wrote 06/05/2019 at 17:47 point

Can you share with me the gcode file you were printing via octoprint? I will replay it and see if I can repro and debug.

  Are you sure? yes | no

lawrence_jeff wrote 06/09/2019 at 04:27 point

J.C. - I think I have tracked this down. The UI controller I have has a safety function where if it sits on the home screen with heaters engaged for over 30 minutes it shuts them down. When printing from USB/Octoprint, the UI controller doesn't know a print is occuring (it stays on the home screen since it never gets a {SYS:BUILD} during USB print.) As far as its concerned there is nothing going on so it executes the safety shutdown 30 minutes into the print (which shows up as heaters being disabled and the motor enable/disable cmd). I hacked in some very rough code to pickup the USB print and send the {SYS:BUILD}  - this switches it to the print view and stops the shutdown at ~30 minutes (since it is communicating back and forth with the motion controller and knows a print is occuring). My hacked up code is here https://github.com/lawrence-jeff/Marlin/commit/e5ddd2882a79816e9858d8311143a1b4d9109811 Maybe you could use it as a starting point to add better USB detection. I'm not sure if my issue is unique to the goofy UI version I have (Its the odd ball one everyone says don't try to update). I also submitted a pull request that fixed a few other items I noticed but I didn't submit this one as its pretty hacky

  Are you sure? yes | no

Károly Kiripolszky wrote 05/22/2019 at 14:39 point

Now I have the printer and made my first test print, so I know it works fine. I also have Marlin for M200 V2 compiled in Arduino IDE and I suppose I could try to upload it now. But I'm wondering if I'll be able to revert to the stock firmware.bin later?

  Are you sure? yes | no

J.C. Nelson wrote 05/22/2019 at 16:02 point

Yes. Try it - flash back and forth between diffrerent official versions. It will also help you sort out the SD card to be sure you can. Not all SD cards play nice with the bootloader. If you can flash back and forth between official firmwares, you are clear to try your own, but as always, this is "out on your own" territory. Malyan/Monoprice don't support this, and it's a hobby for me. Should you succeed in finding a way to kill your printer, I'll be interested in learning how, but not responsible for fixing it.

  Are you sure? yes | no

Károly Kiripolszky wrote 05/26/2019 at 08:56 point

I tried. I have put the resulting firmware.bin and the FLG file on the card and after poweron it printed a version number something like "V99.x.x" as an indication that something has happened, though I couldn't spot any differences compared to the stock firmware. And so I flashed back to stock V41 and it tells me that flashing with this card works. What am I doing wrong?

  Are you sure? yes | no

J.C. Nelson wrote 05/26/2019 at 18:04 point

This is motion controller firmware. The Mini has two complete computers in it - the STM32Fxxyy motion controller, and an ESP8266 display controller. If it showed 99, you were running Marlin under the hood.

  Are you sure? yes | no

Károly Kiripolszky wrote 05/26/2019 at 21:19 point

OIC. So a more capable UI is still left to write. There is a stub project, although seems to be dead, which provides an excellent ground for such work:

https://hackaday.io/project/25518-reverse-engineering-the-monoprice-mp-select-mini

I will definitely look into writing a custom UI on top of Marlin! Thank you for your time and spreading the knowledge!

  Are you sure? yes | no

J.C. Nelson wrote 05/26/2019 at 21:52 point

On the MP MIni Owners Facebook group, there's a person who has a functioning UI replacement he's working bugs out of. It will be open source when he's ready. My goal was to swap out Marlin in the motion controller, and that's mostly functioning now. Next up will probably be M300/MPMD.

  Are you sure? yes | no

Károly Kiripolszky wrote 05/29/2019 at 13:34 point

Will it be possible to rebase to upstream bugfix-2.0.x branch later? Sadly, I don't have the inisghts necessary to resolve the conflicts. I tried with "ours" resolution strategy, but then it didn't compile.

  Are you sure? yes | no

J.C. Nelson wrote 05/29/2019 at 14:19 point

If you want to build from bugfix-2.0.x, switch to it, copy over the example config, set the motherboard to M200 (I'll fix that soon via  PR) and recompile. My branch has support for WIFI printing and a few other minor differences but there's no reason you can't move to the bugfix-2.0.x.

  Are you sure? yes | no

Károly Kiripolszky wrote 05/29/2019 at 14:37 point

Checking out configuration from M200Fixes branch yields in a "#error "SERIAL_PORT_2 must be from -1 to 6" compile error (since it is set to -2). Whatever, this platform is not convenient to discuss development matters, so I will just keep an eye on further progress at GitHub and stop spamming here. Thanks! :)

  Are you sure? yes | no

J.C. Nelson wrote 05/29/2019 at 15:28 point

I've changed the setting to allow "issues" on my github. https://github.com/xC0000005/Marlin/issues/1

  Are you sure? yes | no

Károly Kiripolszky wrote 05/16/2019 at 20:12 point

Just found this project and have ordered a Select Mini V2 yesterday. According to the post from 3 days ago Marlin seems to be working now. Incredible timing! :D The Mini will be my first 3D printer. Thank you for your work, awesome project!

  Are you sure? yes | no

Thomas wrote 04/30/2019 at 17:33 point

I've got a Select Mini V2 I'm willing to help test with. What is the current state like? Will your marlin or stock marlin now print at least as well as the stock firmware? 

  Are you sure? yes | no

J.C. Nelson wrote 05/05/2019 at 01:15 point

I believe it does. You're welcome to download and test. It's a bit of a pain since you need to install using the dev board manager, delete the downloaded core, and then drop the github repo in on top. I'm experimenting with building a portable directory for Arduino. It seems to work, but I"m not sure where I'll host.

  Are you sure? yes | no

Thomas wrote 05/13/2019 at 14:17 point

I've got the arduino ide setup with the STM32 core, loaded up Marlin and coppied the example config for the M200, and twiddled the build menu settings to things I think make sense (3d printer boards + M200 v2 + CDC/no serial, etc) and it fails to compile with an error about serial port 0 not existing. I've tried playing with the board config menu options but nothing seems to work. 

edit: AAAH, you did say I need to delete the downloaded core. sigh. I'll try that...

  Are you sure? yes | no

J.C. Nelson wrote 05/13/2019 at 14:19 point

Thomas - every STM32 core has different definitions for Serial. You want to set it to -1 for USB.

  Are you sure? yes | no

Thomas wrote 05/13/2019 at 14:48 point

ok, trying the two methods for copying things over, I get compiler missing errors. woo. I'll keep trying.

  Are you sure? yes | no

Thomas wrote 05/13/2019 at 17:06 point

Ok, cool. I got Marlin to compile with only a single warning: 

warning: #warning "No CMSIS startup file defined, custom one should be used" [-Wcpp]
 #warning "No CMSIS startup file defined, custom one should be used"

All I needed to do was setup the board support package in the board manager, installed the STM32 stuff from git in ~/Arduino/hardware", downloaded and installed a newer arm gcc package since the stm32 stuff seems to want it.. then modified the platform.txt file to update a few things (like CMSIS paths etc). I'm hoping it'll work now. 

  Are you sure? yes | no

J.C. Nelson wrote 05/13/2019 at 17:20 point

The CMSIS warning is expected. A custom one is defined (or else it wouldn't link, since it has my reset handler in it). Sounds like you have a firmware to try updating with.

  Are you sure? yes | no

Thomas wrote 05/13/2019 at 17:58 point

Ok, I've coppied the .bin file over to the sd card and it appears to have attempted a flash, however it appears to not be responding over usb or sending any version number to the LCD on bootup. so I assume its currently not booting properly.

  Are you sure? yes | no

Thomas wrote 05/13/2019 at 18:04 point

Tried a different sd card for kicks knowing the board's finickyness, and that appears to have gotten it to change some things and show up over usb. currently though the LCD is having issues doing anything with the printer.

  Are you sure? yes | no

Thomas wrote 05/13/2019 at 18:18 point

trying to print via octopi and the printer halts when it tries to move one of the axis.. I think a bunch of the axis pins are wrong. is there a known working config for the M200 v2? The one in the example's folder for M200 is incomplete.

  Are you sure? yes | no

J.C. Nelson wrote 05/13/2019 at 18:37 point

The one in the example folder is exactly complete, however, like any M200 printer, there's a significant chance your axis are reversed. Put the X carriage in the middle of the bed and issue a G1 X10 command. If it moves inward (toward the tower), you need to invert X. Same thing with Y. If it doesn't move forward, invert it. Same thing with X. Marlin 2.x will kill the printer if a homing move doesn't actually succeed in homing. The solution, as always, is to fix the config to match your individual printer.

  Are you sure? yes | no

Thomas wrote 05/13/2019 at 18:42 point

Maybe I got the wrong thing then, because I needed to change the MOTHERBOARD macro to 

BOARD_MALYAN_M200. ALSO I just did some more testing and I'm wrong, its just that the axis are moving really strange. Z is deff backwards and simple enough to fix, but X and Y don't always respond to commands and If I spam move commands from octoprint it will sometimes move but erratically.

  Are you sure? yes | no

Thomas wrote 05/13/2019 at 19:32 point

More testing. X and Y will moove in relative mode but they wont always move the same amount between each G1 command. sometimes they go backwards a bit. And they don't move anywhere near as much as they should given the M92 settings.

  Are you sure? yes | no

Thomas wrote 05/13/2019 at 20:30 point

And more testing. Not sure what change I made fixed things if anything did.. but homing now works properly :D  

  Are you sure? yes | no

Thomas wrote 05/14/2019 at 14:41 point

I have a feeling it was the options to disable the steppers all the time that may have done it. I told it to keep them active, and thats probably what did it? Now though I'm part way through a print and the printer just decides to cool down and raise the head till it hits the top then eventually gives an error.

  Are you sure? yes | no

Thomas wrote 05/14/2019 at 15:33 point

Part way through this print I get a bunch of strange behavior and messages. I generally notice when the printer sends the head to the far right, and the bed to the front (so the head is in the back right), and then raises the head a few mm at a time every few seconds... messages like:

Send: N26641 G1 X45.6 Y55.479 E1299.51499*91
Recv: echo: too long extrusion prevented

checking the gcode, I think it might be the model. weird...

  Are you sure? yes | no

Thomas wrote 05/14/2019 at 18:21 point

Different model that I know used to work is now failing the same way. WEIRD. I think its the PREVENT_LENGTHY_EXTRUDE option.. but I've tried 500mm, which you'd think would be enough unless cura is doing something strange? trying 1000mm now.

  Are you sure? yes | no

Thomas wrote 05/14/2019 at 19:25 point

Latest attempt and it just got to a corner of a test model and spazzed out trying to extrude with too high a feed rate and sent the head to the back right again. so weird.

  Are you sure? yes | no

J.C. Nelson wrote 05/14/2019 at 21:01 point

Are you printing via USB and octoprint? If not, try raising the SPI speed.

  Are you sure? yes | no

Thomas wrote 05/14/2019 at 22:38 point

Yes, printing via usb with octoprint.

  Are you sure? yes | no

Thomas wrote 05/15/2019 at 00:05 point

Interesting, I think the problem occurrs after the following lines i get in the terminal:

Recv: echo:enqueueing "G91"

Recv: echo:enqueueing "M18"

Which means it's switched to relative position mode and disabled the steppers?  Neither commands are found anywhere in the gcode for the model that was printing. The octoprint terminal also doesn't show any "Send" lines containing those commands near by. So its possible its something marlin is doing. For what, or where it's doing it, I don't know. I'll try and dig around a bit, but it doesn't appear to happen every print. I thought printing slower seemed to help, but it probably didn't make too much difference. perhaps delayed it?

  Are you sure? yes | no

Thomas wrote 05/15/2019 at 00:07 point

Wait.. a quick grep shows it might be the "process_lcd_j_command" function in the lcd/malyanlcd.cpp file which is handling stuff comming from the lcd I think... So the lcd is sending down some commands? :o erm why would it do that if I didn't touch it?

  Are you sure? yes | no

J.C. Nelson wrote 05/15/2019 at 00:10 point

If you disable the LCD and select/start the print via USB, does it work? If so, I'd guess your LCD dial is flakey. I may look into disabling move processing during a print.

  Are you sure? yes | no

Thomas wrote 05/15/2019 at 00:24 point

Currently running another test print. I'll try yanking the lcd connector next time. Why would it send down a J: E command to extrude if the menu was last on the home screen, nowhere near the movement menu? I don't touch the dial/lcd much at all in general. That'd be quite the bug in their firmware... 

  Are you sure? yes | no

Thomas wrote 05/18/2019 at 17:22 point

So, I stopped getting the random issues after yanking the LCD. But after a few days of testing the board has now just died. won't even initialize the usb or the LCD now. I presume the mcu isn't starting up. I may try to troubleshoot at some point.

  Are you sure? yes | no

J.C. Nelson wrote 05/20/2019 at 16:29 point

Troubleshooting - make a simple arduino sketch that turns on the fan. Alternately, attempt to re-flash to the default firmware. That said, something you said bothers me. If the LCD isn't coming on at all, thats a key indicator of what's wrong. The LCD is an independed MCU (ESP8266). All it gets from the mainboard is power. if it's not coming on at all, it's not the firmware. I would check, in order: 1. Powersupply is plugged in, lit up,a nd supplying 12v. 2: switch is supplying power to main board. Actually, that's all. Usually what you see is that the LCD continues to operate and the mainboard does not.

  Are you sure? yes | no

Thomas wrote 05/21/2019 at 12:16 point

The screen turns on, at least the backlight does. The first start after a firmware flash attempt it'll start up with black on the left and white on the right. boots after that its just black with backlight. I presumed there was some kind of enable signal. I tested the psu voltage, its 12v. The failure of the mb happened while the lcd wasn't connected, so its odd that the screen is also experiencing issues if it was some kind of power surge, it shouldn't have killed the lcd.

  Are you sure? yes | no

J.C. Nelson wrote 05/21/2019 at 16:51 point

I've never seen the motherboard kill the LCD (heck, I have only once managed to kill a motherboard with firmware, and that was via heat). If the dial is pressed in, the ESP waits in bootloader mode for an update, but only the default firmware can do that.

  Are you sure? yes | no

Thomas wrote 06/03/2019 at 13:10 point

Interesting. I wonder if it was just that it tried to flash itself and it bricked. I'll have to see if i can find the firmware for the esp then. 

  Are you sure? yes | no

dukeneukam wrote 11/29/2018 at 02:59 point

I'm interested in this project.  If you need someone to help with testing, let me know

  Are you sure? yes | no

Similar Projects

Does this project spark your interest?

Become a member to follow this project and never miss any updates