 eforge.electronic
The system is controlled by an Arduino MEGA which is programmed based on the LCDMenuLib2 by Nils Feldkämper (aka Jomelo). To have easier connections to the RAMPS display unit i also used the RAMPS shield.
To handle the current of the pumps (~250mA for each small pump and 1.2A for the big ones) i use simple relay boards that get powerd by a volatge step down regulator.
The case is planned for a steelframe (15*15*2). The panels are all 3D printed (20*20 printer is enough) and extremly modular.
CAD Files: https://a360.co/2OqhUJI
Code will follow soon.
Shematics will follow soon.
 Thomas Capricelli
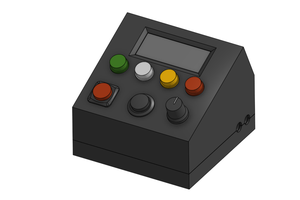
 sotos.zorbas