Close
0%
0%

X-Ray CT Scanner

Tomographic scanner using my X-Ray machine, a simple motor to rotate the object and a reconstruction software

Similar projects worth following
This project uses my simple X-Ray machine and a motor that I (probably) took from a microwave oven. The hard part of this is developing the software using the Filtered Back Projection algorithm, you can find it below.

Yes, I have a lot of free time.

This project derived from the x-ray machine. The addition to the machine are the motor to rotate the object and the software. The software is working already but needs finishing and will be uploaded here when completed. *Edit* source code here.

The program is written in C++ and it only uses OpenCV as external lib.

I have done some testings to it, here you can see a lighter:

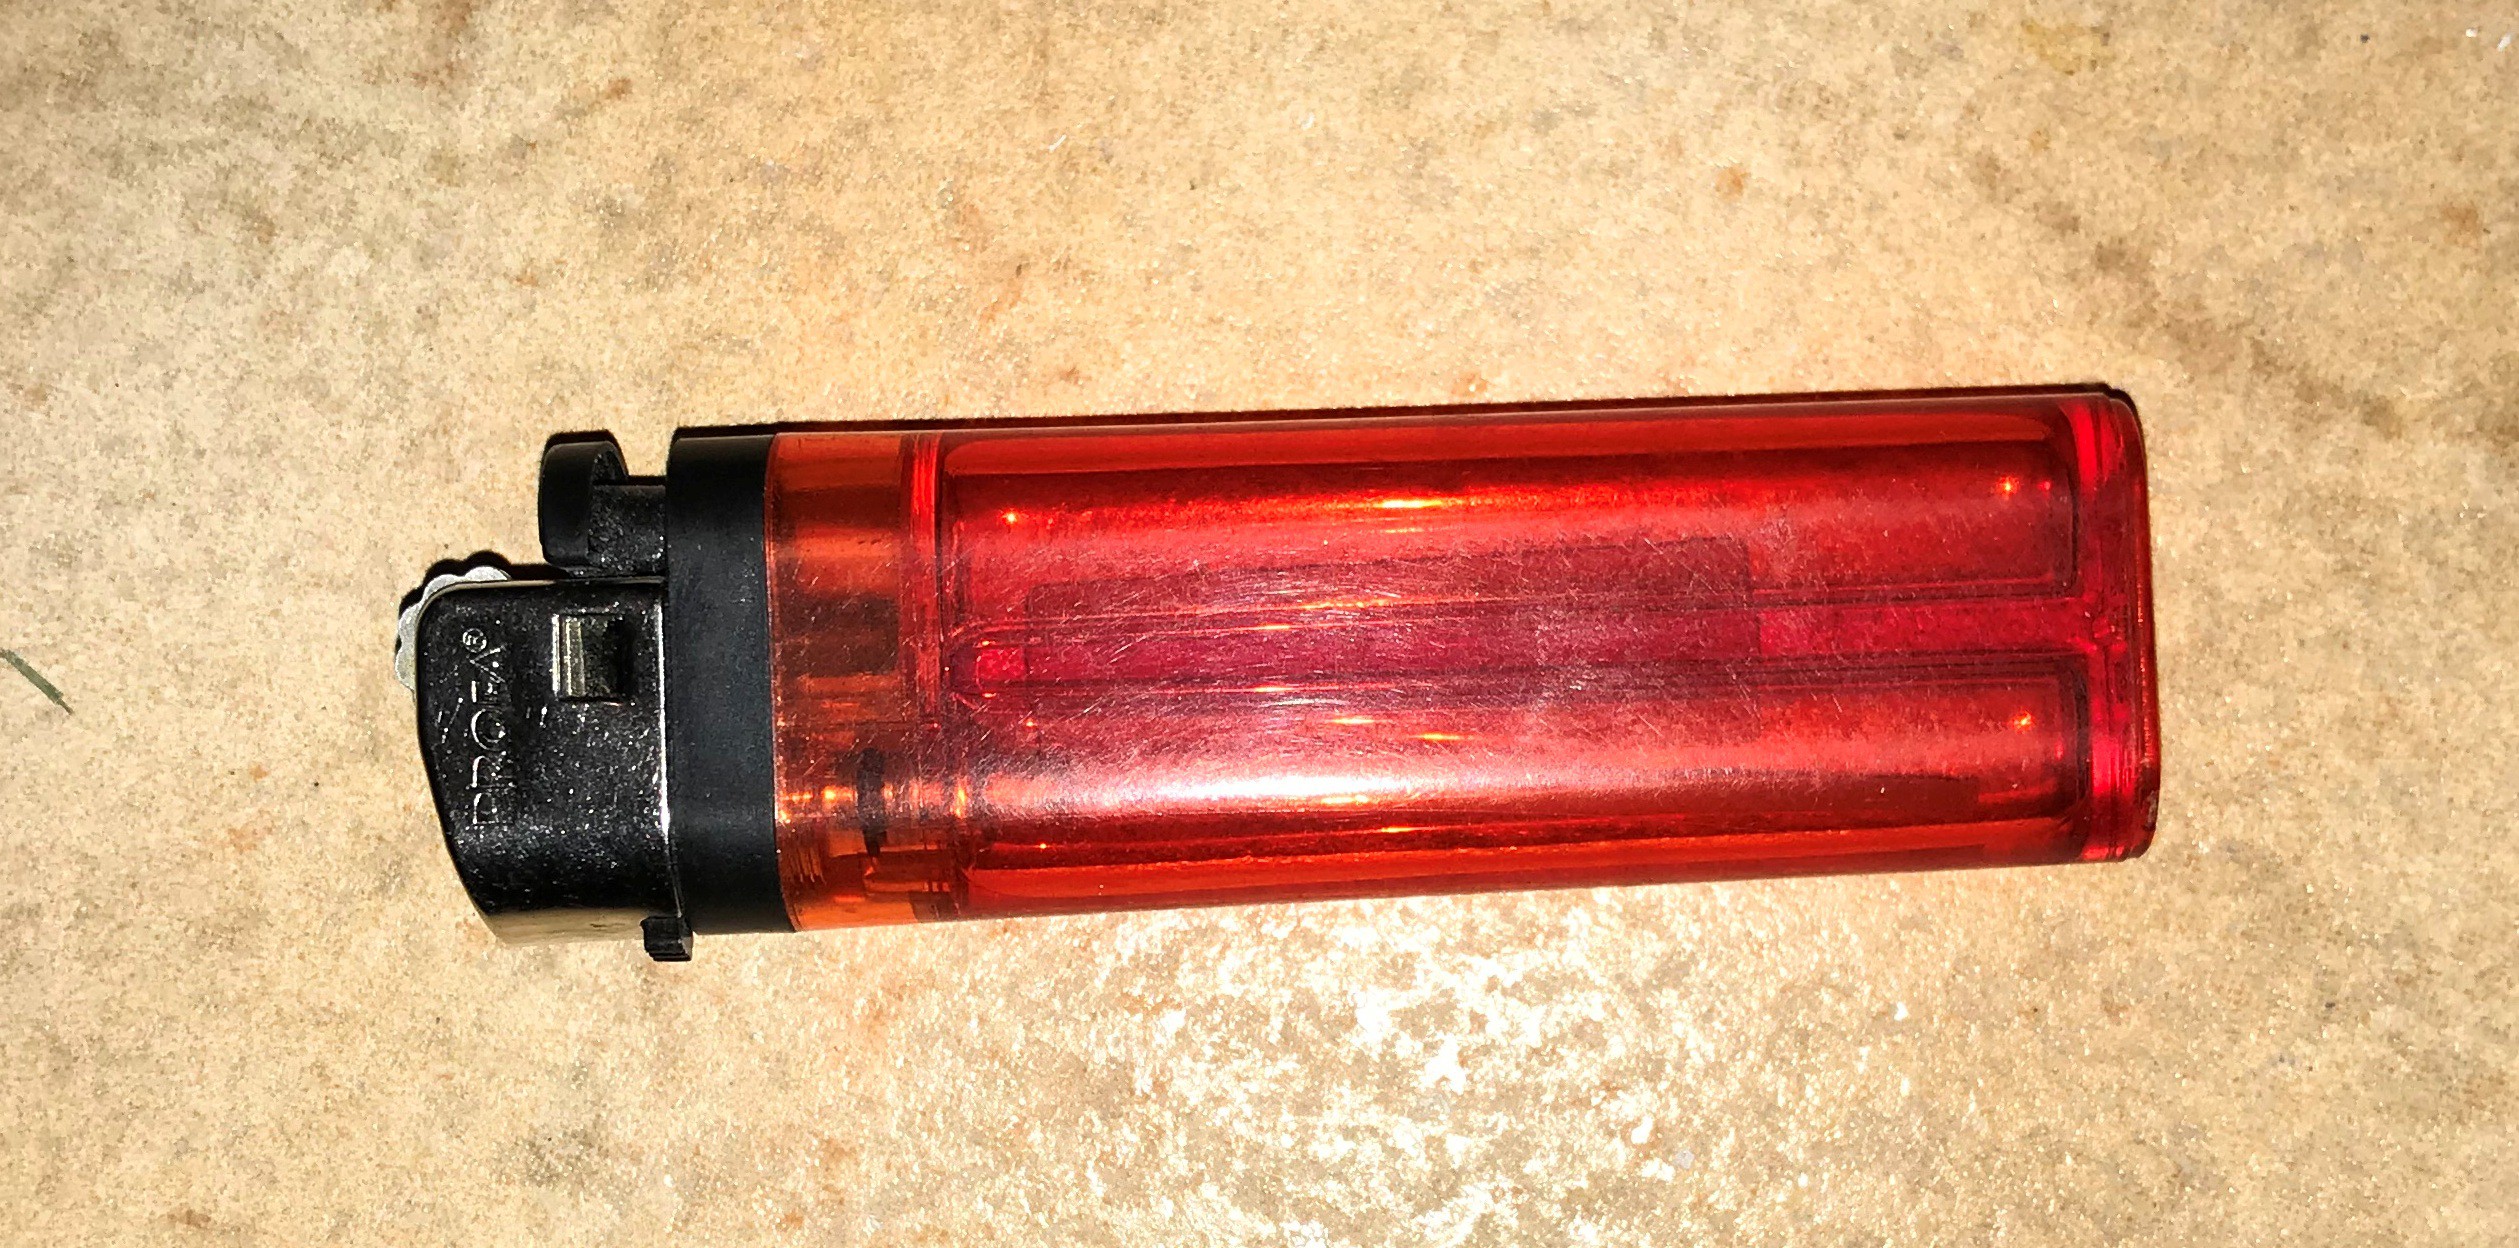
You can see it spinning opening the file "lighter.mp4"

The program then performs the reconstruction. This is the axial view of a slice:

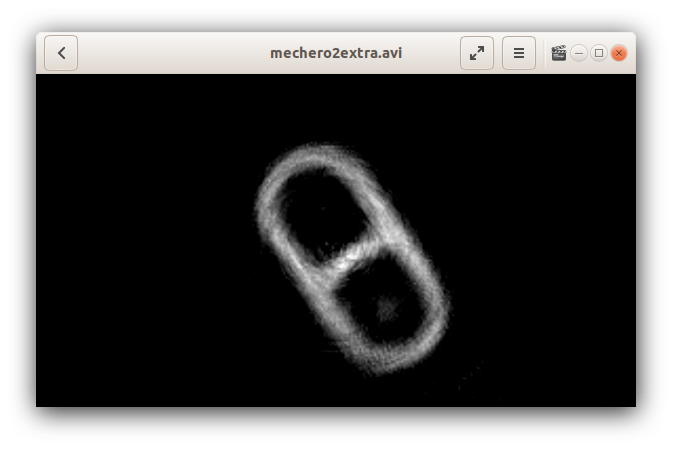
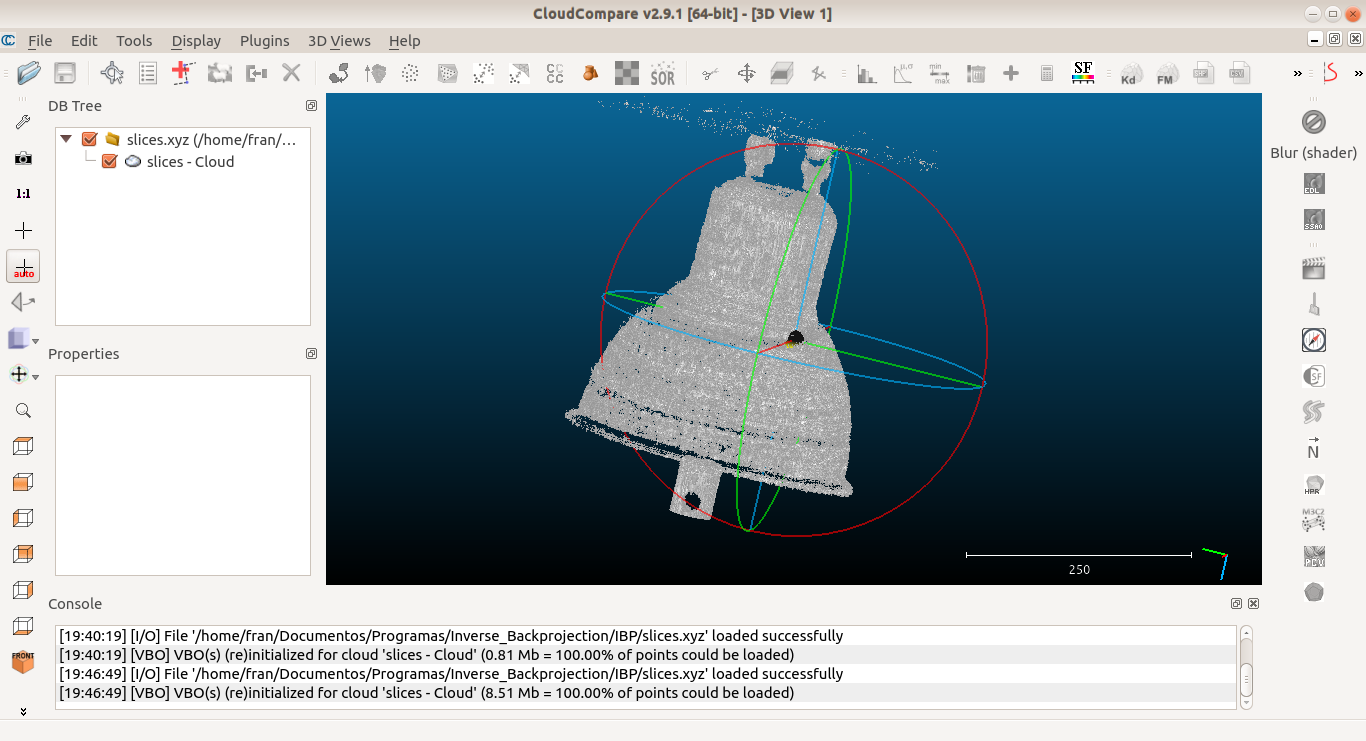
The program also saves the object in point cloud format so you can open it with a 3D point cloud viewer:

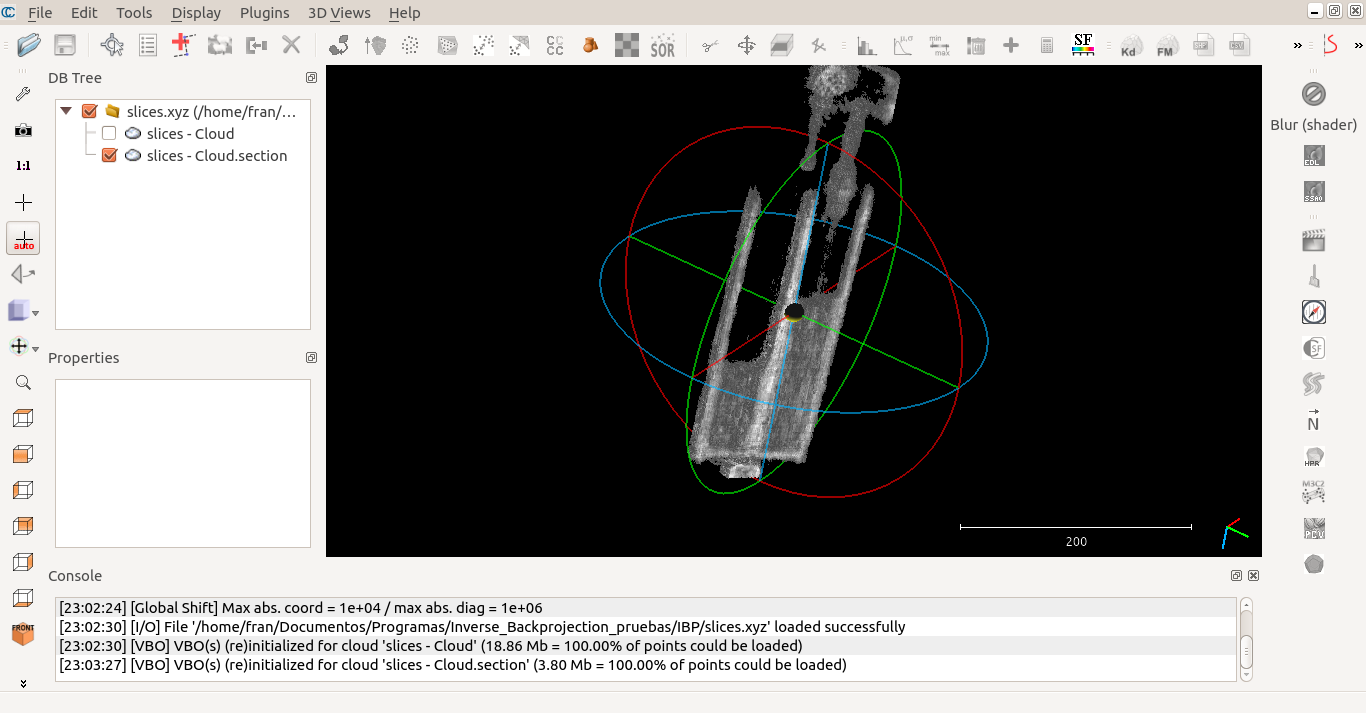
The cool thing about this is that you can cut out the walls in the computer and separate parts, above you can see that I removed the walls of the lighter and I'm now able to see the gas.

Another test this time with a GU10 LED lamp (see file "led.mp4"):

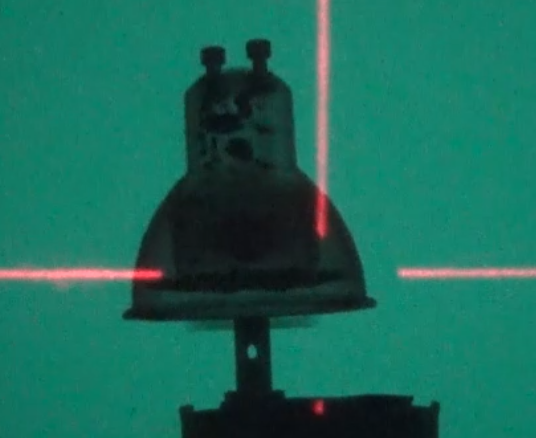
and the reconstruction:

The program computes all slices, so I can see how many leds the lamp has, by selecting the proper slice:


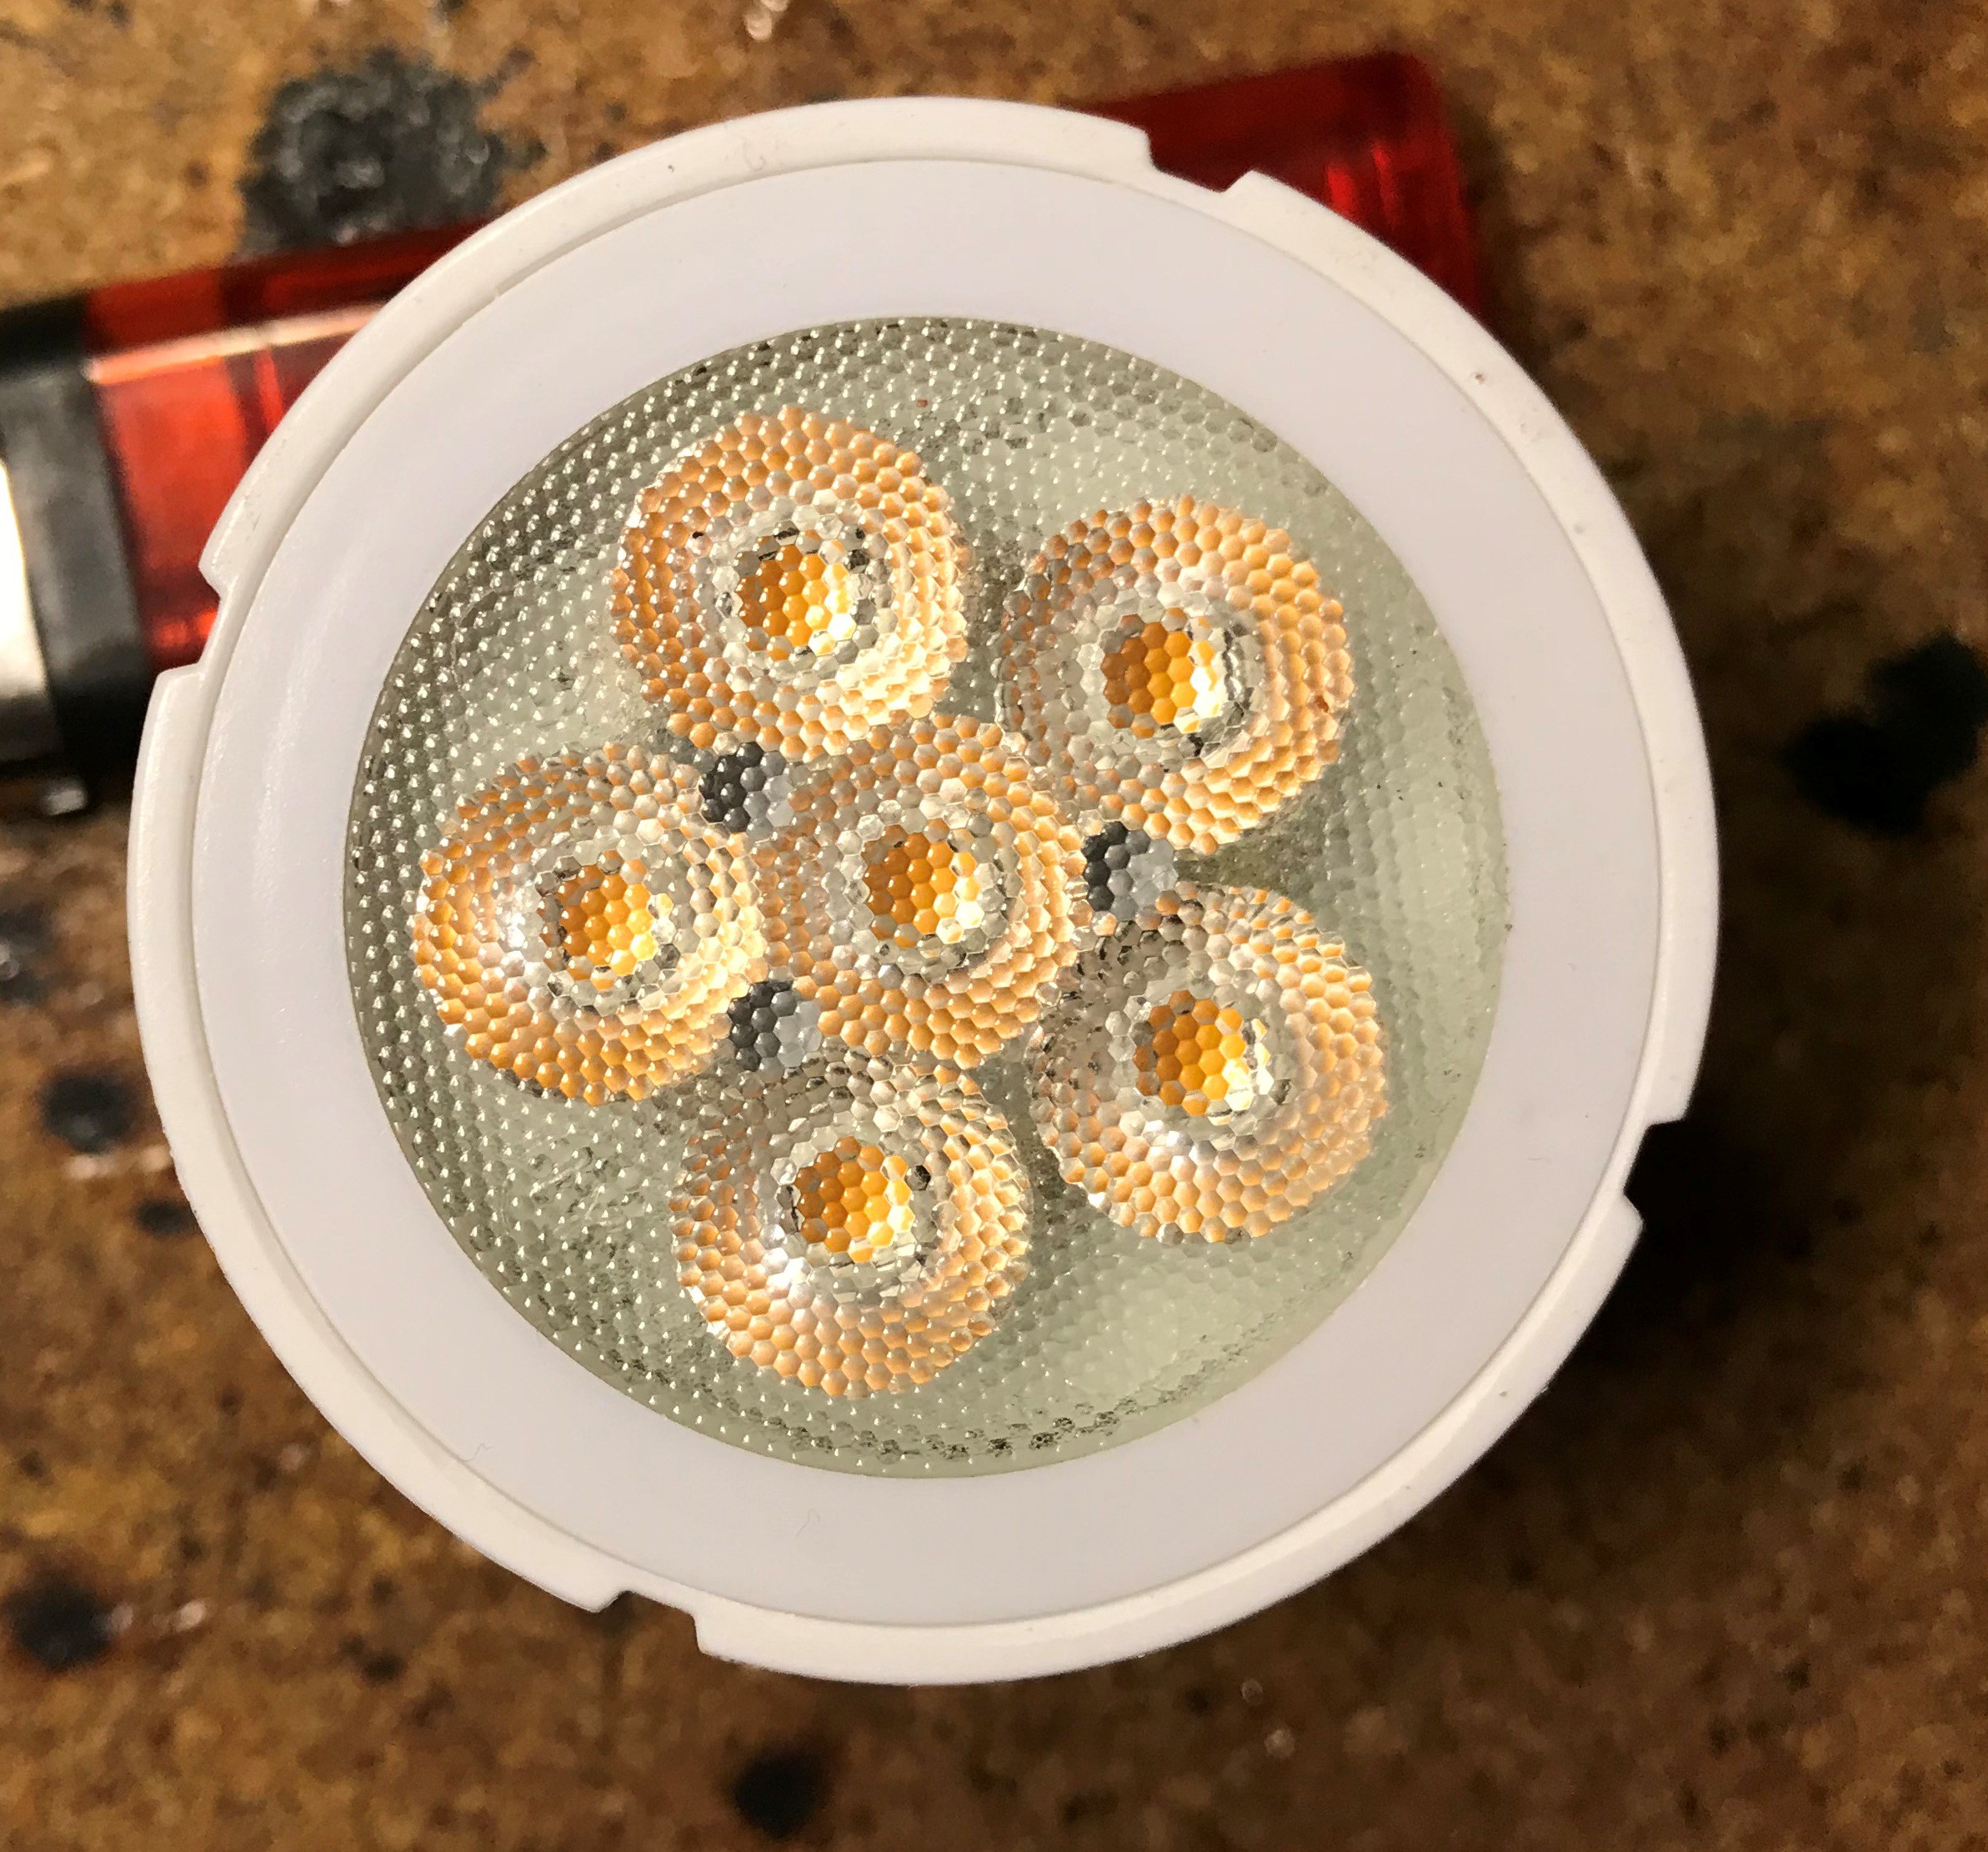
Well, not bad keeping in mind that I forgot to turn off the laser grid, so I have lots of artifacts coming from it.

Now I will explain how the program works:

  • First I record a video of the object spinning, only for around 3 seconds. My camera records at 25fps so that means very few images to do a reconstruction free of noise, but we will see later that It's not a big problem.
  • I then pass the video to the program. It loads each frame of the video in a vector of (OpenCV) Mat objects.
  • The program asks me to select wich frame is the beginning (angle 0) and ending (angle 360) of the scan.
  • The program removes all frames except these and then asks me to select the object:
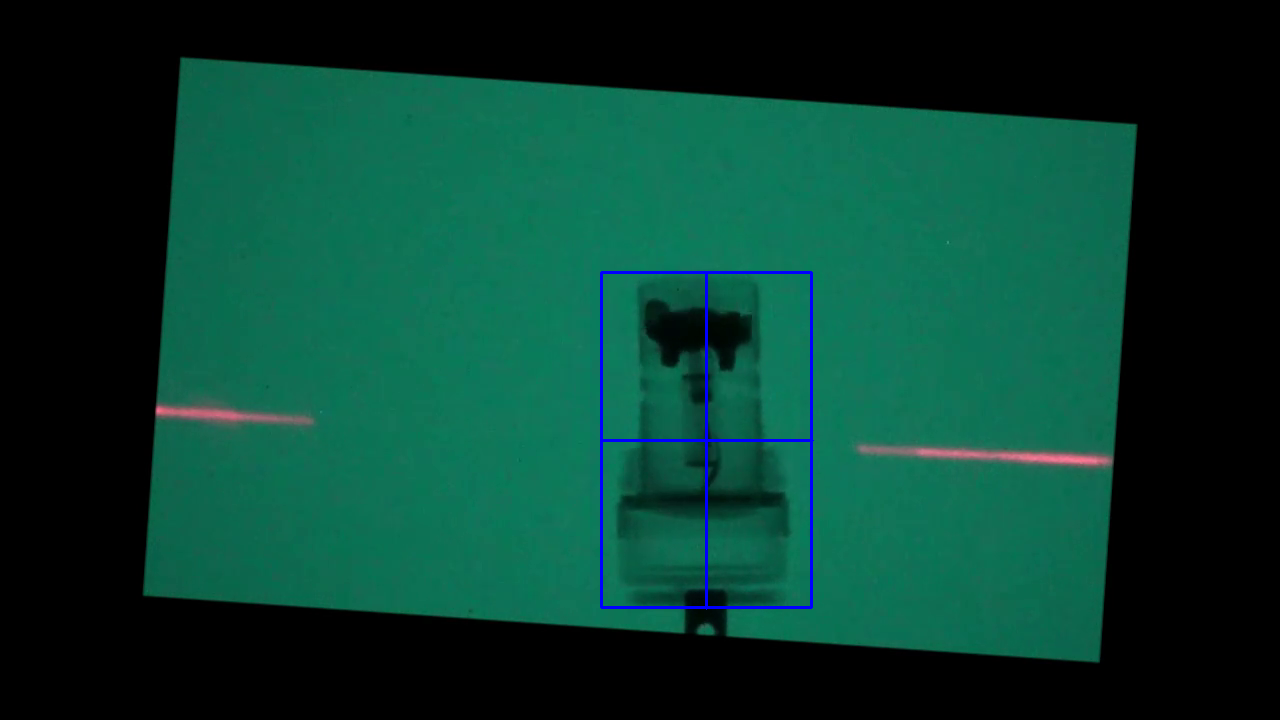
  • I select it in a way that the vertical blue line of that grid matches the axis of rotation.
  • The program converts the images from 8bit BGR to 32bit RGB, with pixel values normalized to 1.
  • A gamma correction is applyied to all channels of all frames, this is done just taking each pixel and raising it's value to the power of 2.2.
  • The program now performs a linear interpolation between frames, adding 1 extra frame for each pair of frames recorded, so I now have doubled the number of images I have. This has the effect that the reconstructions are a bit blurry but the noise has almost gone completely.
  • All images are converted from 32bit RGB to 32bit grayscale. My scintillation screen glows green so I'm just taking the G channel for this.
  • The program ask the user to select an area corresponding to the background. This is done to know how bright is the x-ray beam and then a new correction is done, all pixels get a new value known as absorption:

  • The program makes the sinograms. We will have as many sinograms as height in pixels of the input frames of the object.
  • All sinograms get a high pass filter.
  • Now the inverse Radon transform is calculated for all sinograms and we will get all the slices.
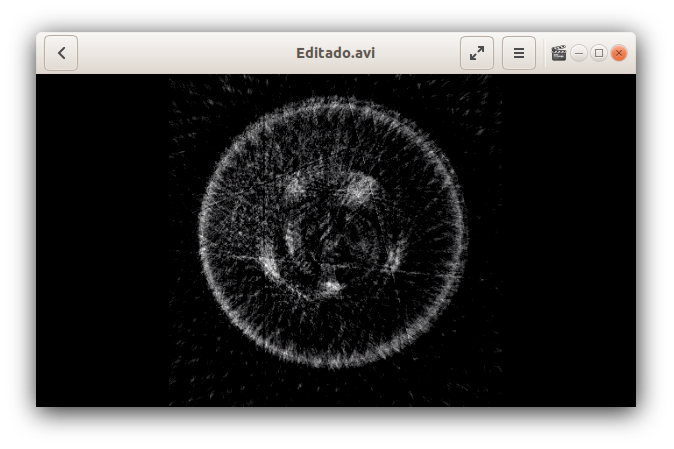
  • The program saves the slices in point cloud .xyz format and also in video format, yo can see all the slices of the lighter opening the file "ligher_slices.avi". You will see all slices in axial view, starting from the top ang going down.

And that's it, many thanks to user nevermore78 for helping me with the image processing :D

MPEG-4 Video - 1.09 MB - 02/15/2019 at 15:31

Download

MPEG-4 Video - 15.84 MB - 02/08/2019 at 22:22

Download

Audio Video Interleave (AVI) - 1.35 MB - 02/08/2019 at 22:21

Download

MPEG-4 Video - 2.13 MB - 02/08/2019 at 22:21

Download

  • Source Code

    Francisco Piernas02/14/2019 at 17:51 3 comments

    Here is the version 1.0 of the code: https://github.com/fpiernas/FBP

    Read the instructions, although I have done my best to make the code very simple to use. It's possible to reconstruct a sinogram image in just 5 lines of code: 

    Mat sinogram=imread("sinogram.jpg",IMREAD_COLOR); //load the sinogram image "sinogram.jpg"
    Mat filtered_sinogram=filter_sinogram(sinogram); //filter the sinogram
    Mat reconstruction=iradon(filtered_sinogram,false); //perform back projection. Change false to true if sinogram is a full turn
    renormalize255_frame(reconstruction); //normalize to 255
    imwrite("Reconstruction.jpg",reconstruction); //save reconstruction

    You can also download the videos I've posted to try the code to perform a 3D reconstruction.

    I strongly recommend to use Cloud Compare to open the saves point cloud "slices.xyz" that the code creates.

  • New tests

    Francisco Piernas02/12/2019 at 20:49 0 comments

    Hi everyone, I'm still finishing the code and testing it with new object, this time it's a panel led like this one:


    Let's see what it has inside:

    We see two screws and what seems to be a capacitor and a resistor. Let's CT scan it.

    I removed the walls and filtered by value, the capacitor itself seems to be as transparent to x-rays as the walls, so if I remove the walls I will also remove the capacitor except for its pins.

    User nevermore78 did this animation to show the differences between two methods of normalizing the results of the filtered back projection:

    The left one is the result of normalizing each pixel of each slice to the maximum value of that slice so this pixel gets the value 255. It has the advantage that this automatically attenuates plastic if metal is present in the slice, but the disadvantage that it may remove some points where it shouldn't (see the capacitor).

    The center example is what happens when the object is normalized to the absolute maximum value of all slices. It has the advantage that each pixel gets the value that it should have depending on absorptance, but generally walls aren't removed. The right example is a comparison between the other two.

    That's all for now, I will upload the code when it's finished.

View all 2 project logs

Enjoy this project?

Share

Discussions

Brian wrote 01/03/2024 at 20:30 point

Amazing project! What are you using for the scintillation screen? Is it something you made?

  Are you sure? yes | no

Francisco Piernas wrote 01/03/2024 at 20:32 point

Hi Brian, no I bought it on eBay, used in old x-ray casettes.

  Are you sure? yes | no

Ahron Wayne wrote 06/09/2021 at 01:03 point

thank you for the detailed writeup on your data processing, as well as making such a cool project in the first place. I just wanted to start by taking regular x-rays, but once you do that, I can definitely appreciate just taking the leap and going 3D. 

  Are you sure? yes | no

Jose Vigil wrote 05/08/2020 at 13:31 point

Hi Fran, I am working on a bone regeneration project and looking forward to set a telemoritoring method for mobile device. You think we can talk? Let me know if I can chat you in private please. Congrats!

  Are you sure? yes | no

natschil wrote 12/22/2019 at 12:28 point

Cool project! What kind of radiation are you exposed to from operating this?

FYI: in case you are interested in fancier reconstruction methods that might yield better results, a nice open-source library was released recently for doing so at https://gitlab.lrz.de/IP/elsa . As far as I know it in addition also has hardware-accelerated versions of various projection operators which you could use for doing filtered back-projection.


  Are you sure? yes | no

Ted Yapo wrote 02/12/2019 at 02:03 point

Awesome stuff! Truly amazing (and maybe slightly scary from a radiation safety perspective ;-)

I wonder if the results would change if the images were converted to linear intensities (with the 2.2 power) before interpolation and conversion to grayscale. My compulsive side also wonders if using the sRGB reverse gamma transformation with its 2.4 exponent and linear range in low intensities would affect the result.

But really, just wow! Well done.

  Are you sure? yes | no

Francisco Piernas wrote 02/12/2019 at 19:26 point

Hi, thanks for the comment :D

You will have to ask user nevermore78, he knows a lot about image processing and he's helping me with that.

  Are you sure? yes | no

Nevermore78 wrote 02/19/2019 at 04:27 point

Hi Ted! Thanks for your input!

I agree with you in that it is always preferable to convert to linear ASAP and then proceed with the remaining math. However, in the particular case of the frame interpolation I am unsure wether it would make a real difference. It could easily be tested, though.

Regarding the details of gamma compression, I suggested Fran to go with a global 2.2 for simplicity's sake, but as he uses a DSLR he's probably getting an sRGB output. So yes, a proper sRGB reverse transformation (https://en.wikipedia.org/wiki/SRGB#The_reverse_transformation) should produce a bit more accurate results, particularily for the most radiopaque parts. Luckily, it should be fairly simple to implement in the code.

  Are you sure? yes | no

Mike Szczys wrote 02/11/2019 at 23:36 point

This is bananas. @Ted Yapo have you seen this one?

Anyone perusing, swing by the files section and view the videos.

I suppose when you have an x-ray machine, everything looks like something that needs to be viewed from the inside at every possible angle :-D  You're blowing my mind so keep it up!

  Are you sure? yes | no

Francisco Piernas wrote 02/12/2019 at 19:34 point

Hi Mike, thanks for commenting :D

It's true that I now have the need to x-ray and CT scan everything in my house xD

I know this is not a toy, but it's a fun tool.

  Are you sure? yes | no

Similar Projects

Does this project spark your interest?

Become a member to follow this project and never miss any updates