Close
0%
0%

Recreate lost or broken plastic items

Short tutorial video on how to redesign and 3D print a random item

Similar projects worth following
Have you ever lost a plastic item? Have you ever found yourself into a dead end situation when you have an expensive machine that suddenly ends up having a broken part? This example video might help your future projects with new redesigning and 3D printing skills.

   A few months ago I was having a key chain organizer that was missing two key chains. Of course missing key chains means missing keys and this means that I had to replace some locks too. But I didn't really wanted to buy a new organizer and spend some extra time in mounting it on the wall for such a small piece of plastic. I was still hanging the key rings of the plastic hook but it wasn't as convenient and handy as before. If I had multiple keys removed in the same time, I was finding a hard time putting them back to their right place and identifying them.  

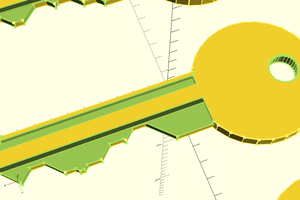
   So I said to myself, this would be a good example of quick recreating a lost plastic part. I took the caliper and one of the leftover key chains, I measured all the dimensions and redraw them in AutoCAD. I thought it's worth posting so it can be useful for more people out there who are owning a 3d printer and facing a similar situation. Of course this is just a very simple part and the video below is made only to demonstrate the principle. 

   Check the Instructions tab for more details and advice. 

You can also check the Cults3D page for details. 

https://cults3d.com/en/3d-model/home/key-chain-organizer-replacement-part

Keychain_holder.dwg

example CAD redesigned part

DWG Drawing - 141.64 kB - 02/28/2019 at 01:25

Download

Keychain_holder.stl

example STL redesigned part

Standard Tesselated Geometry - 10.43 kB - 02/28/2019 at 01:25

Download

  • 1 × 3D printer you need a 3D printer for this job
  • 1 × caliper recommend an electronic one instead of mechanical
  • 1 × old broken part or picture of it just for reconstruction
  • 1 × solid editing software

  • 1
    Measure

    Make accurate measurements using the caliper, a micrometer or any precise measuring tool depending on the desired accuracy. Be careful with the tolerances. Some 3D printers are extruding more material for the outer shells of the print, especially for small inner holes of the printed part. You know your 3D printer best. Think in advance. for example, if you measure with the caliper a 3.5mm hole that would fit an M3 bolt, maybe it would be a good idea to draw a 3.7mm hole on your design. This unless you have an SLS or SLA printer or you are using a CNC mill to drill it in aluminium. 

  • 2
    Draw

    Draw the new design using the numbers you obtained from the measurements. I used AutoCAD for this example but there are plenty of solid generating softwares out there. 

  • 3
    Slice

    Export the newly created solid to STL by slicing it using one of the existing applications on the internet. I am metioning just a few examples for those who are new in this thing. You can tru Slic3r, Cura, Repetier, but there are others available too.  

View all 4 instructions

Enjoy this project?

Share

Discussions

Similar Projects

Does this project spark your interest?

Become a member to follow this project and never miss any updates