 Sam Smith
This project is intended to be easy to replicate using widely available and easy-to-fabricate parts. It was inspired by the Precious Plastic movement, independently developed by Sam Smith, with a lot of help from a lot of people, especially Darcy Neal, Molly Miner, Nathaniel Garst, and Emma Pritchard.
This print head is simple but effective, and stands to be improved significantly. If you have skills and time to make mods and improvements, please do, and please share your work with the same level of detail that I have. If you appreciate this work, which is completely free and available to everyone at no cost, please consider supporting me on Patreon so that I can keep doing this!
The purpose of this design is to enable printing of large, strong, flexible objects directly from recycled plastic flakes made from common recyclable plastics (currently PP and HDPE), without the need to make filament. It is not intended to have the same resolution or rigidity of desktop printers, although with some improvement to the extruder, software, and gantry, much higher print quality is probably possible.
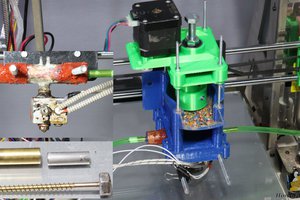
However, it's worth noting that the larger nozzle size of the Trash Printer is a major part of why this project works at all. Projects like the filastruder enable folks to make filament out of recycled plastic that can be used in existing desktop printers, but the problem with that approach is that without a ton of post-processing, truly post-consumer trash is always going to have little bits of food or labeling or dirt that will quickly clog a typical .2-.4mm printer nozzle, and common recyclable plastics have a lot more warp than ABS or PLA, and are much more difficult to print small parts with. Simply using a bigger nozzle (currently mine is about 4.5mm) and printing bigger stuff, is how the Trash Printer gets around this problem.
Parts printed out of recycled Polypropylene with a 4.5mm nozzle and a .4mm layer height end up being very thick and INCREDIBLY strong.
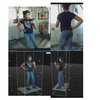
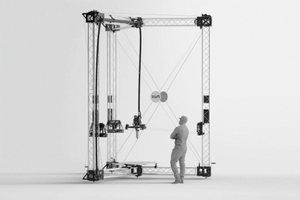
You should be able to mount this extruder to any CNC gantry that can support a router, runs G-code and has at least a few inches of Z travel. I am using an "MPCNC" LowRider2 gantry, which costs under $500 in parts and is mostly 3D printable. You can find plans for that at V1engineering.com.
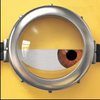
You will have to dial your extruder to your gantry and preferred software, I am using Repetier Host software, Marlin Firmware, running on a RAMBO 1.4 board at 24VDC. I am using an Solid State Relay (SSR) so that the 24DC from the control board switches 120VAC on and off to the band heater. The band heater is what allows for high-throughput, and I have "tricked" the software to control its temperature by telling it that it is the "heated bed".
Polypropylene and Polyethylene are both highly self-adhesive, which means excellent layer adhesion, but poor bed adhesion. I have solved this problem simply by printing directly onto Polypropylene sheets, eliminating the need for a large heated bed in order to get good adhesion. At the right temperature, the extruded PP will adhere but not fuse to the base-PP, and the parts simply pop off once the print is finished.
I am running the barrel heater (treated as bed heater in software) at 200C, and the hot end at 245C. I am not currently using a part fan, and I believe that if I did it would improve print quality, especially on smaller parts where layers have less time to cool.
Feel free to leave questions in the comments, and I will try to answer them as best I can, and please let me know if you replicate this design, as that is the ultimate test of any open hardware.
This project is a sub-project of my larger "Metabolizer" project, which was a finalist for the Hackaday Prize last year.


 Norbert Heinz
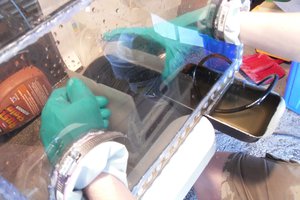
 Atte Linna
https://www.youtube.com/watch?v=oRNgIu3K7vg