 Kea
KeaAfter wishing to construct a walking robot for a long time, since I thought they were undeniably cool, if a little impractical. I decided to try and put together something relatively low cost with a significant margin for upgrade and improvement.
The base of the quadruped ("sparx") is a MePed v2 kit, consisting of laser cute plywood parts, some m3 hardware and 8 mg90s (clone) servos. This is a low cost kit coming in at on or around £30.
The brain is a standard raspberry pi zero, low cost, decently powerful and compatible with USB devices makes it very handy for attaching devices. The wifi included model would remove the need for a USB WiFi adaptor and will likely be a future upgrade.
The servo controller is an Adafruit PCA9685, relatively low cost (clones can be had for less money but may be questionably functional) and capable of driving 16 servos with the ability to daisy chain more boards for more servos. Plenty of space to add more for the future.
The battery and charge controls use what I had lying around, the batteries are pretty standard 3.7v LiPo batteries, one is 2000mAh and drives the servos, the other is 1200mAh and drives the pi. Using these batteries Sparx was capable of turning on the spot for over 2 hours before one of the batteries drained (specifically the one controlling the pi)
The code for the project is based on the open source code made available with the meped kit, but translated into python using the Adafruit library for the servos and PCA9685. These libraries made the code considerably easier to do.

 Alan Chambers
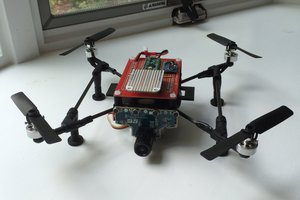
 Mihir Garimella
 jacksonliam