0%
0%
Interactive Electronic Birthday Card
Interactive electronic birthday card where you can blow out the candles and the card will sing you happy birthday
 schwarzrmsu
Become a Hackaday.io member
Already have an account? Log in.
Just one more thing
To make the experience fit your profile, pick a username and tell us what interests you.
Pick an awesome username
hackaday.io/
Your profile's URL: hackaday.io/username. Max 25 alphanumeric characters.
Pick a few interests
Projects that share your interests
People that share your interests


 Augusto
 Richard Hogben
 Shahriar Alam
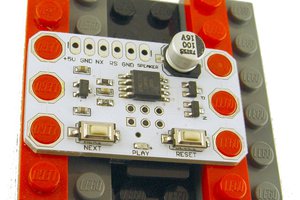
 bobricius
I like the approach of suspending the batteries in cutouts to reduce the height of the board. Same with the magnetic reed switch - that's for detecting opening I'd guess?