Bill of Materials
Analog Soil Moisture Sensor For Arduino
UTSOURCE Rotary Potentiometer 10k
Introduction
In several residences, it is common to find jars with different types of plants. And with the great number of day-to-day activities, people forget to water their plants and they end up dying for lack of water.
As a way to avoid this problem, we decided to create a system to inform when a plant has no water. In this way, you will never forget to irrigate your plant and it will stay alive for a long time.
Next, we will present the whole development of this project.
Project Development
One of the ways that we use to detect the quantity of water in the plant is through the moisture parameter. So, the less water is in the jar of our plant, the lower the soil moisture.
Therefore, we must use a humidity sensor to analyze the state of moisture in our plant.
Through it, we set up a circuit mounted in the breadboard with Arduino, to carry out the monitoring and indication of low humidity of the cactus jar. So, by means the display LCD to inform our user about the moisture, as is shown in Figure 1.
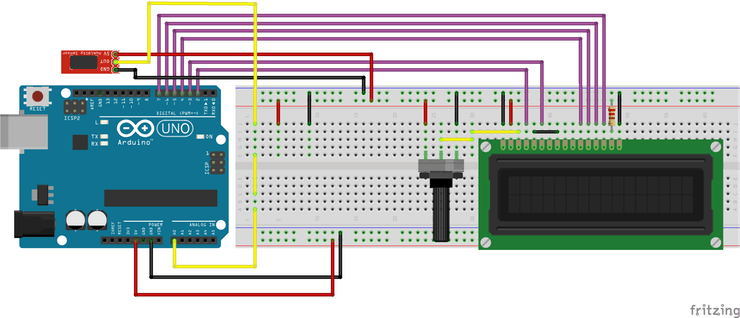
Figure 1 - Moisture detector circuit with Arduino.
From the above circuit, we will insert the probe for humidity measurement in the plant that we wish to monitor. In our project, we insert a probe into a small cactus, as shown in Figure 2.
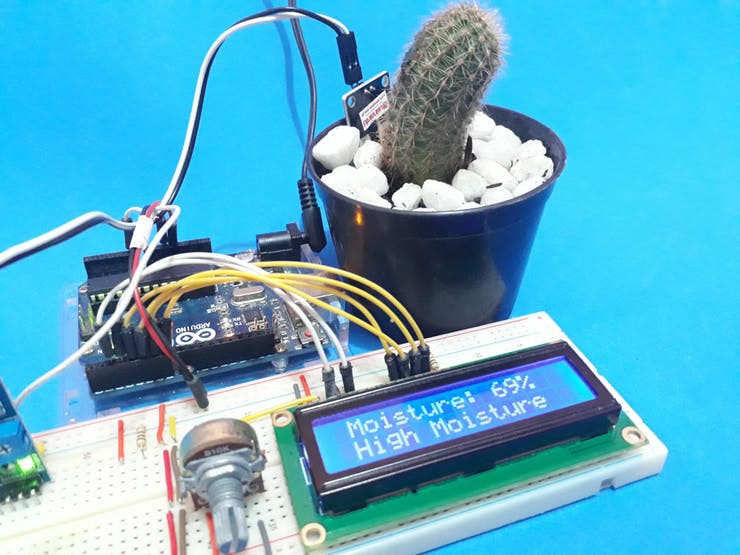
Figure 2 - Project Circuit with moisture sensor in the cactus jar.
Now, We will see how to project work step-by-step and hereafter, will learn how to create the controlling code.
Initially, when we do not connect the sensor inside the jar, the device has a low moisture content of 2% outside the cactus jar. This can be seen in Figure 3.
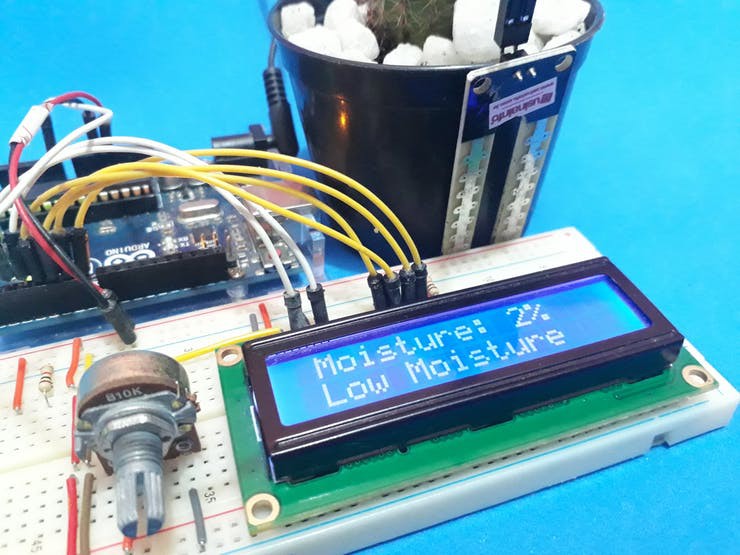
Figure 3 - Moisture sensor out of the soil of the cactus jar.
This low percentage value represents a low humidity. Now, after inserting the sensor into the soil of the cactus jar, a value of 36% will be displayed, as is shown in Figure 4. That is, our humidity is low and the system displays the message Low Moisture because the value is less than 60%.
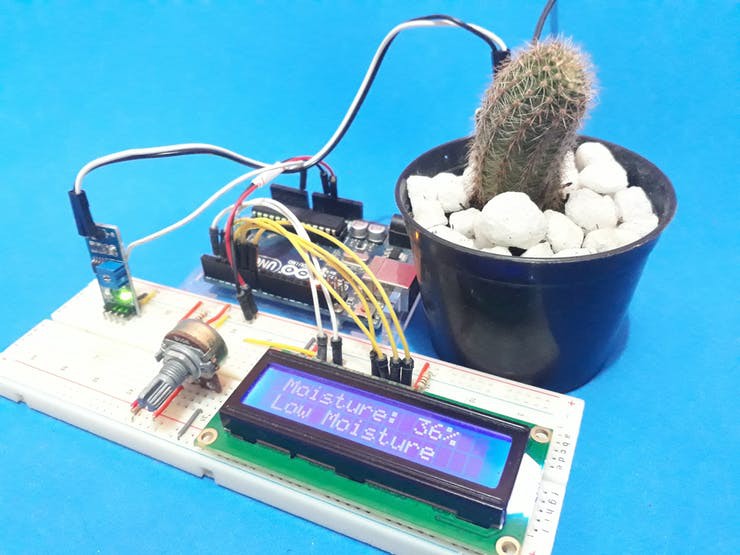
Figure 4 - System presenting the percentage value and leve of moisture in the cactus jar.
The next step is to irrigate the soil of the pitcher of our cactus and we can verify the increase of the value of the humidity to 69%.
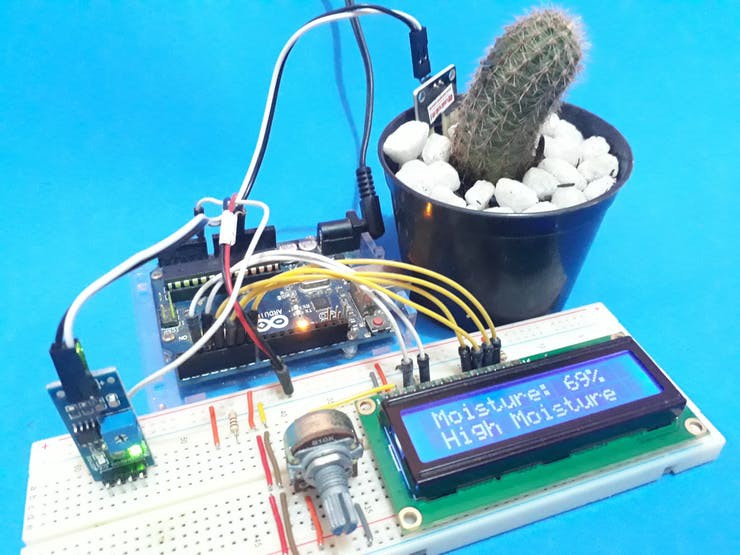
Figure 5 - System presenting the percentage value and high level of moisture in the cactus jar.
After understanding the working of the project, we will present all the construction logic to create this monitoring system. Let get started!
Logical Programming
Hereafter, the programming logical will be presented through the code constructed.
Initially, was declared the library of Display LCD, variables and was created an object LCD with its pins of connection with Arduino UNO.
#include <LiquidCrystal.h>

#define sensor A0

bool LCDControl = 0, LowUmid = 0, HighUmid = 0;
byte UmidityPercent = 0, moisture = 0, PreviousValue = 0;
int ValUmidade = 0, AnalogValue = 0;

const int rs = 2, en = 3, d4 = 4, d5 = 5, d6 = 6, d7 = 7;
LiquidCrystal lcd(rs, en, d4, d5, d6, d7);
After this, the setup function and display LCD 16x2 were initialized and the pin of the sensor was configured as an input.
Finally, we made the first reading of our sensor and we used as a reference for variable PreviousValue, as is shown below.
void setup()
{
 Serial.begin(9600);
 lcd.begin(16,2);
 pinMode(sensor, INPUT);
 PreviousValue = analogRead(sensor);
}
With the variables created and the commands in the void setup function, we will explain all logical programming in the loop function.
//Le o valor do pino A0 do sensor
 AnalogValue = analogRead(sensor);

 //Mostra o valor da porta analogica no serial monitor
 Serial.print("Analog Port: ");
 Serial.println(AnalogValue);

 UmidityPercent...
Read more »
 Silícios Lab