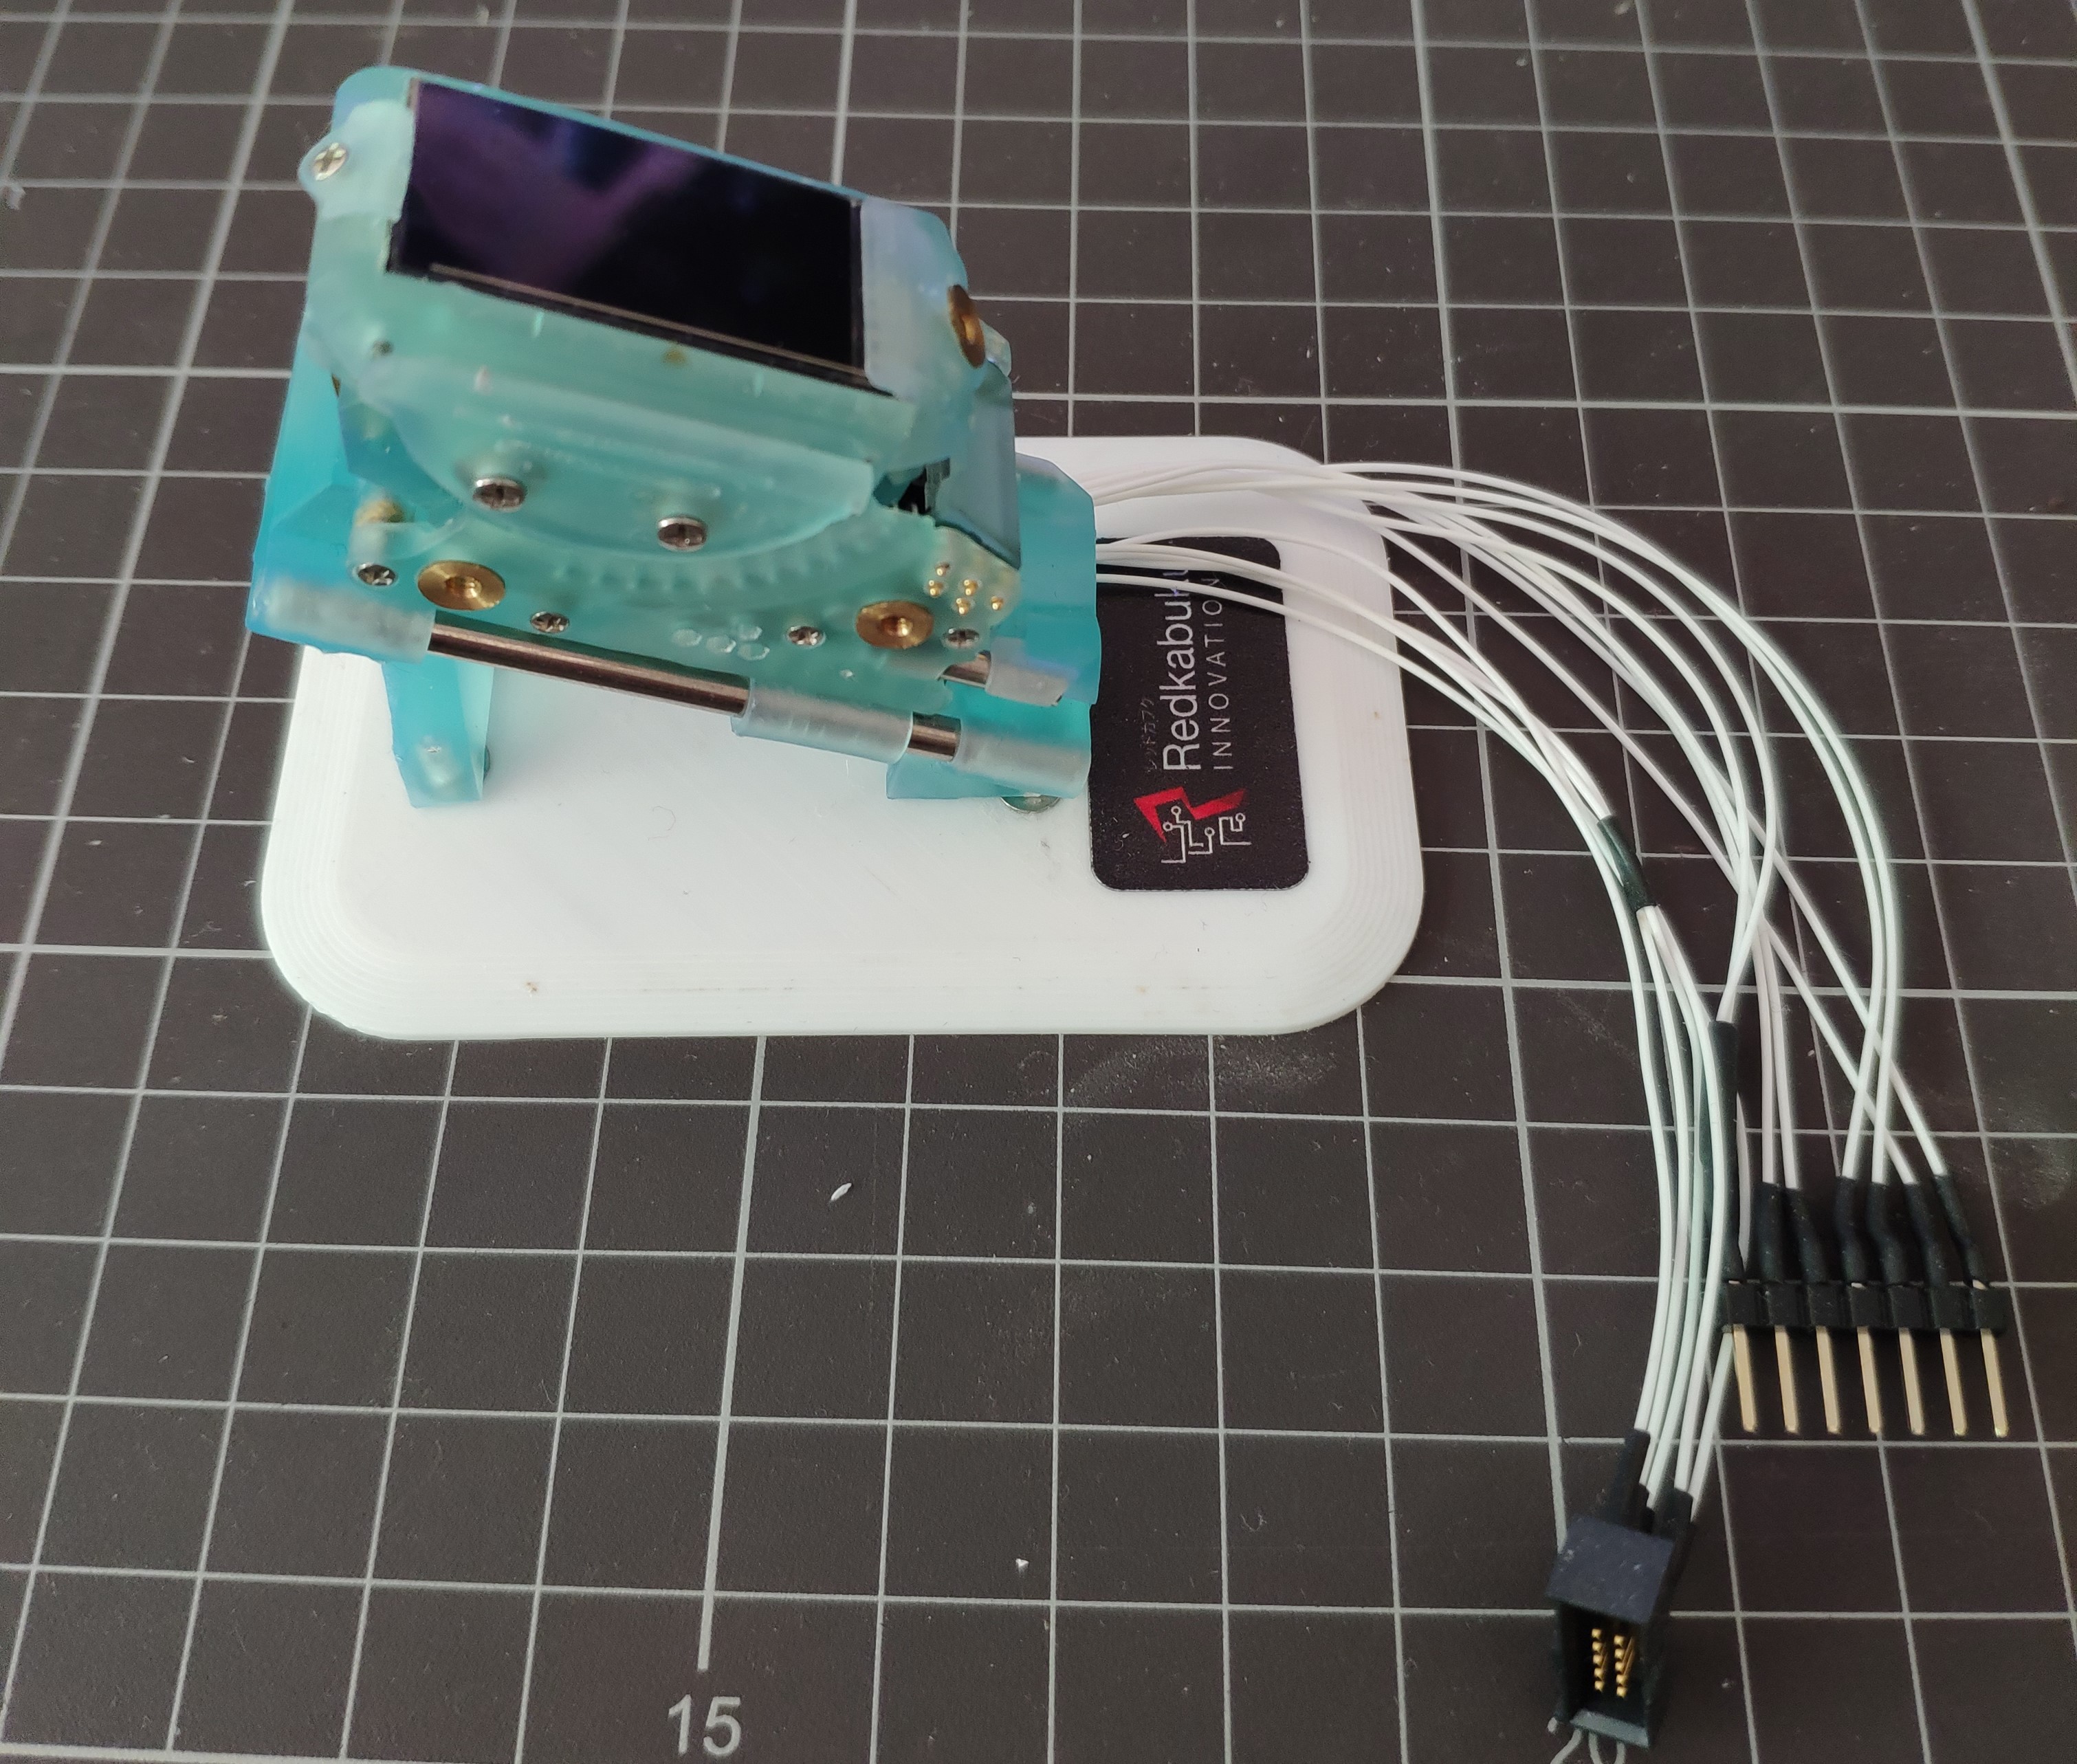
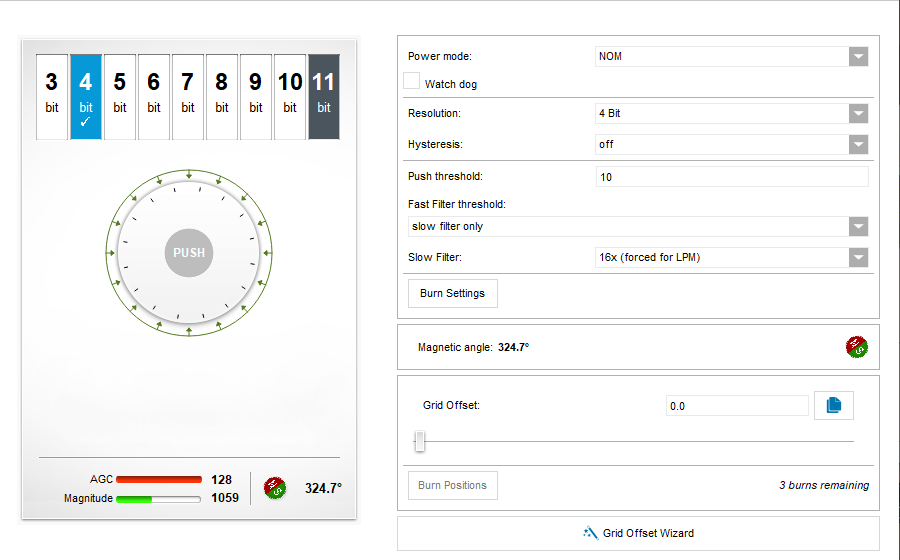
Its all about the small Victories after a long day of work. Today's success is getting the touch screen up and running with some trial Arduino code to read the fingers position on the screen.
After I stopped my finger from jumping about the sensor values from both the sensor (via the SiLABS Tool and software) the micro-controller via I2C match up. Over the next couple of days I'll combine the TFT display and the touch screen together for the next stage of testing.
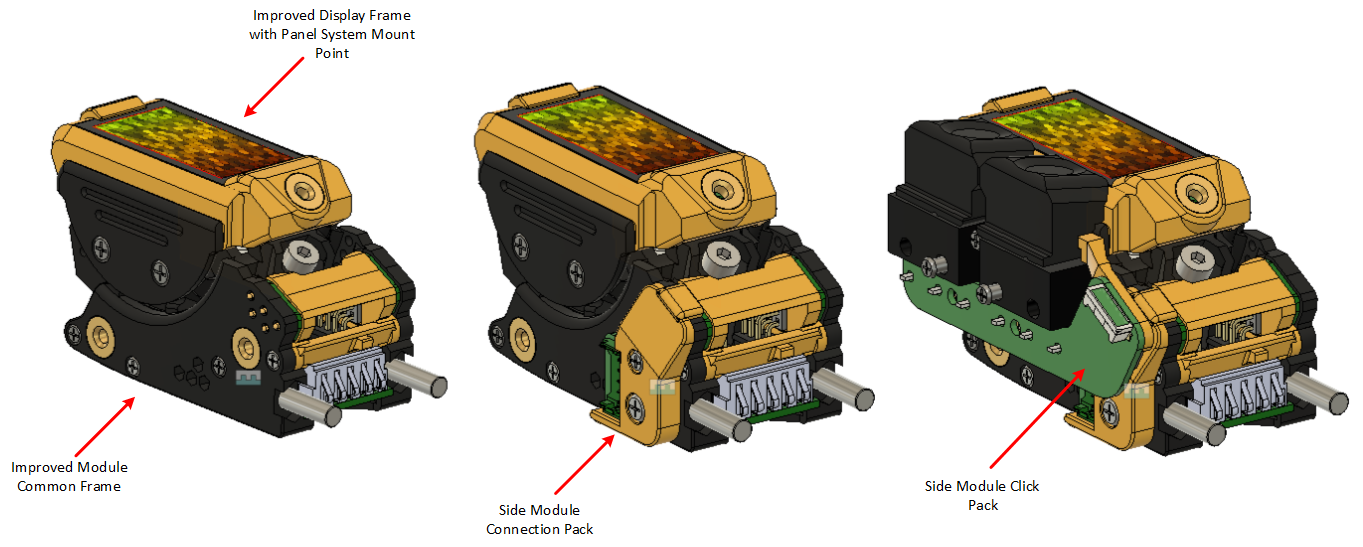
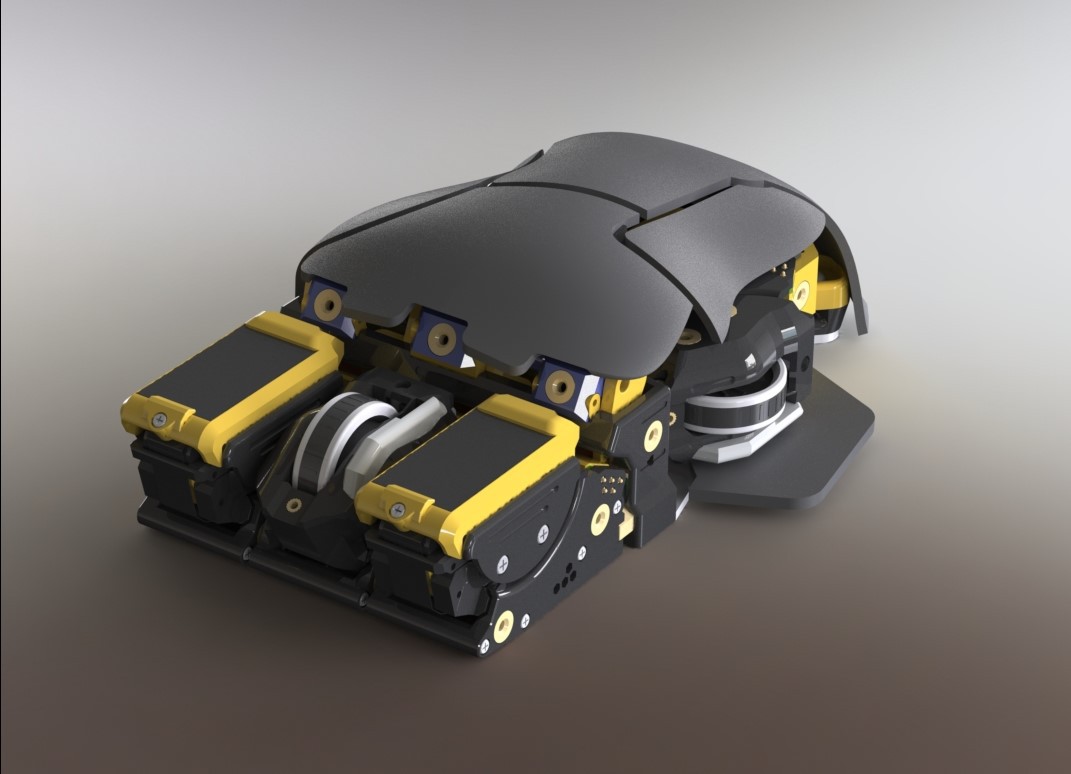
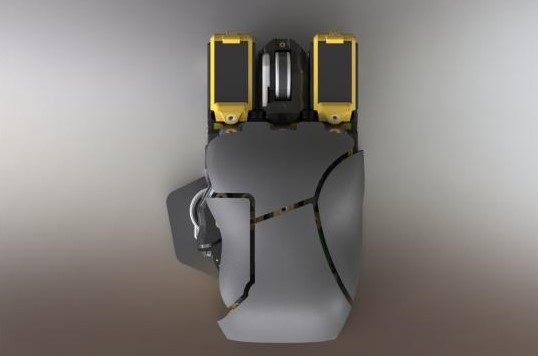
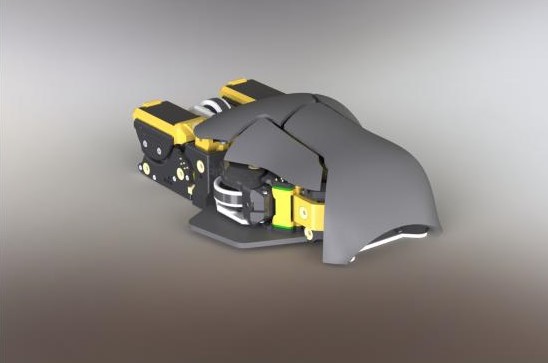
First a big shout out to gecko242 for helping us develop a draft shell for this project. It's still in it's early days of development but it is looking great. This shell is one shape of many that this mouse can take. It's pretty much limited to your imagination and 3D printer limitations. It will be great to see what panel sets the community will make, Maybe some themed ones? (secretly hoping for a Gundam Theme). Gecko242 has chosen to use two Touch-D modules and two SMART modules for his ideal mouse setup and started to generate the shape. I'll keep everyone posted on how this panel set develops.
Touch-D Module:
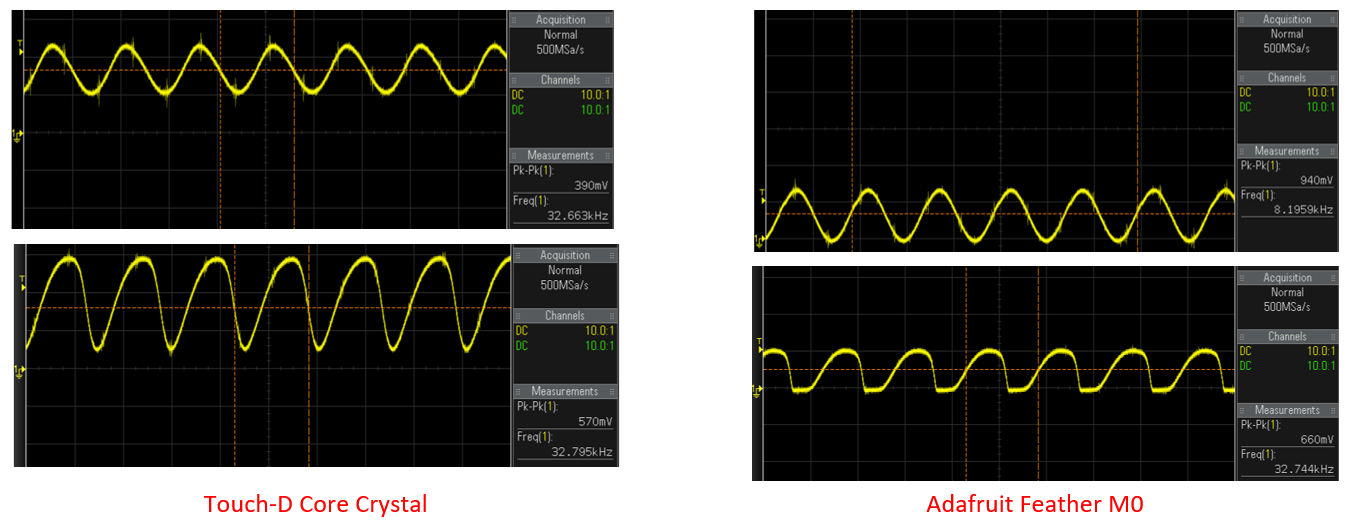
The TFT display is working a treat but I'm having some odd issues with the ATSAMD21 core, mainly unresponsive SPI buses but I've found the issue and it was easy to spot with the right equipment. Luckily I had a Adafruit Feather M0 around. This Adafruit board was used to try the TFT before I designed the custom PCB. The test was to measure both 32.768KHz crystals and compare as this crystal is used for the timing controls (The best place to start when having unresponsive SPI, always check the sources first).
It's interesting that Touch-D core Crystal waveform is well above 0V, it definitely shouldn't be this high above 0V. I will have to figure out why it is like this. I suspect that it is a home re-flow process issue. So for the time bring I'm using the Adafruit Feather and a FPC interface to develop the code for this module. I'll then modify or redesign the PCB to correct this and any other issues found while debugging the hardware.
SMART Scroll Module:
Scroll wheel positioning sensor working great of very impressive accuracy.
Once I've figured out the issue with the Touch-D Core I'll be fixing the SMART Scroll Core. So for the time bring I'm using the Adafruit Feather and a FPC interface to develop the code for this module.
It's the little things that make me happy. For example I always have my fingers crossed when trying to read the device signature for the first time. This time I won and can successfully talk to the ATSAM 32bit micro. Over the weekend I'll start typing out some code to test the module features and get the display running.
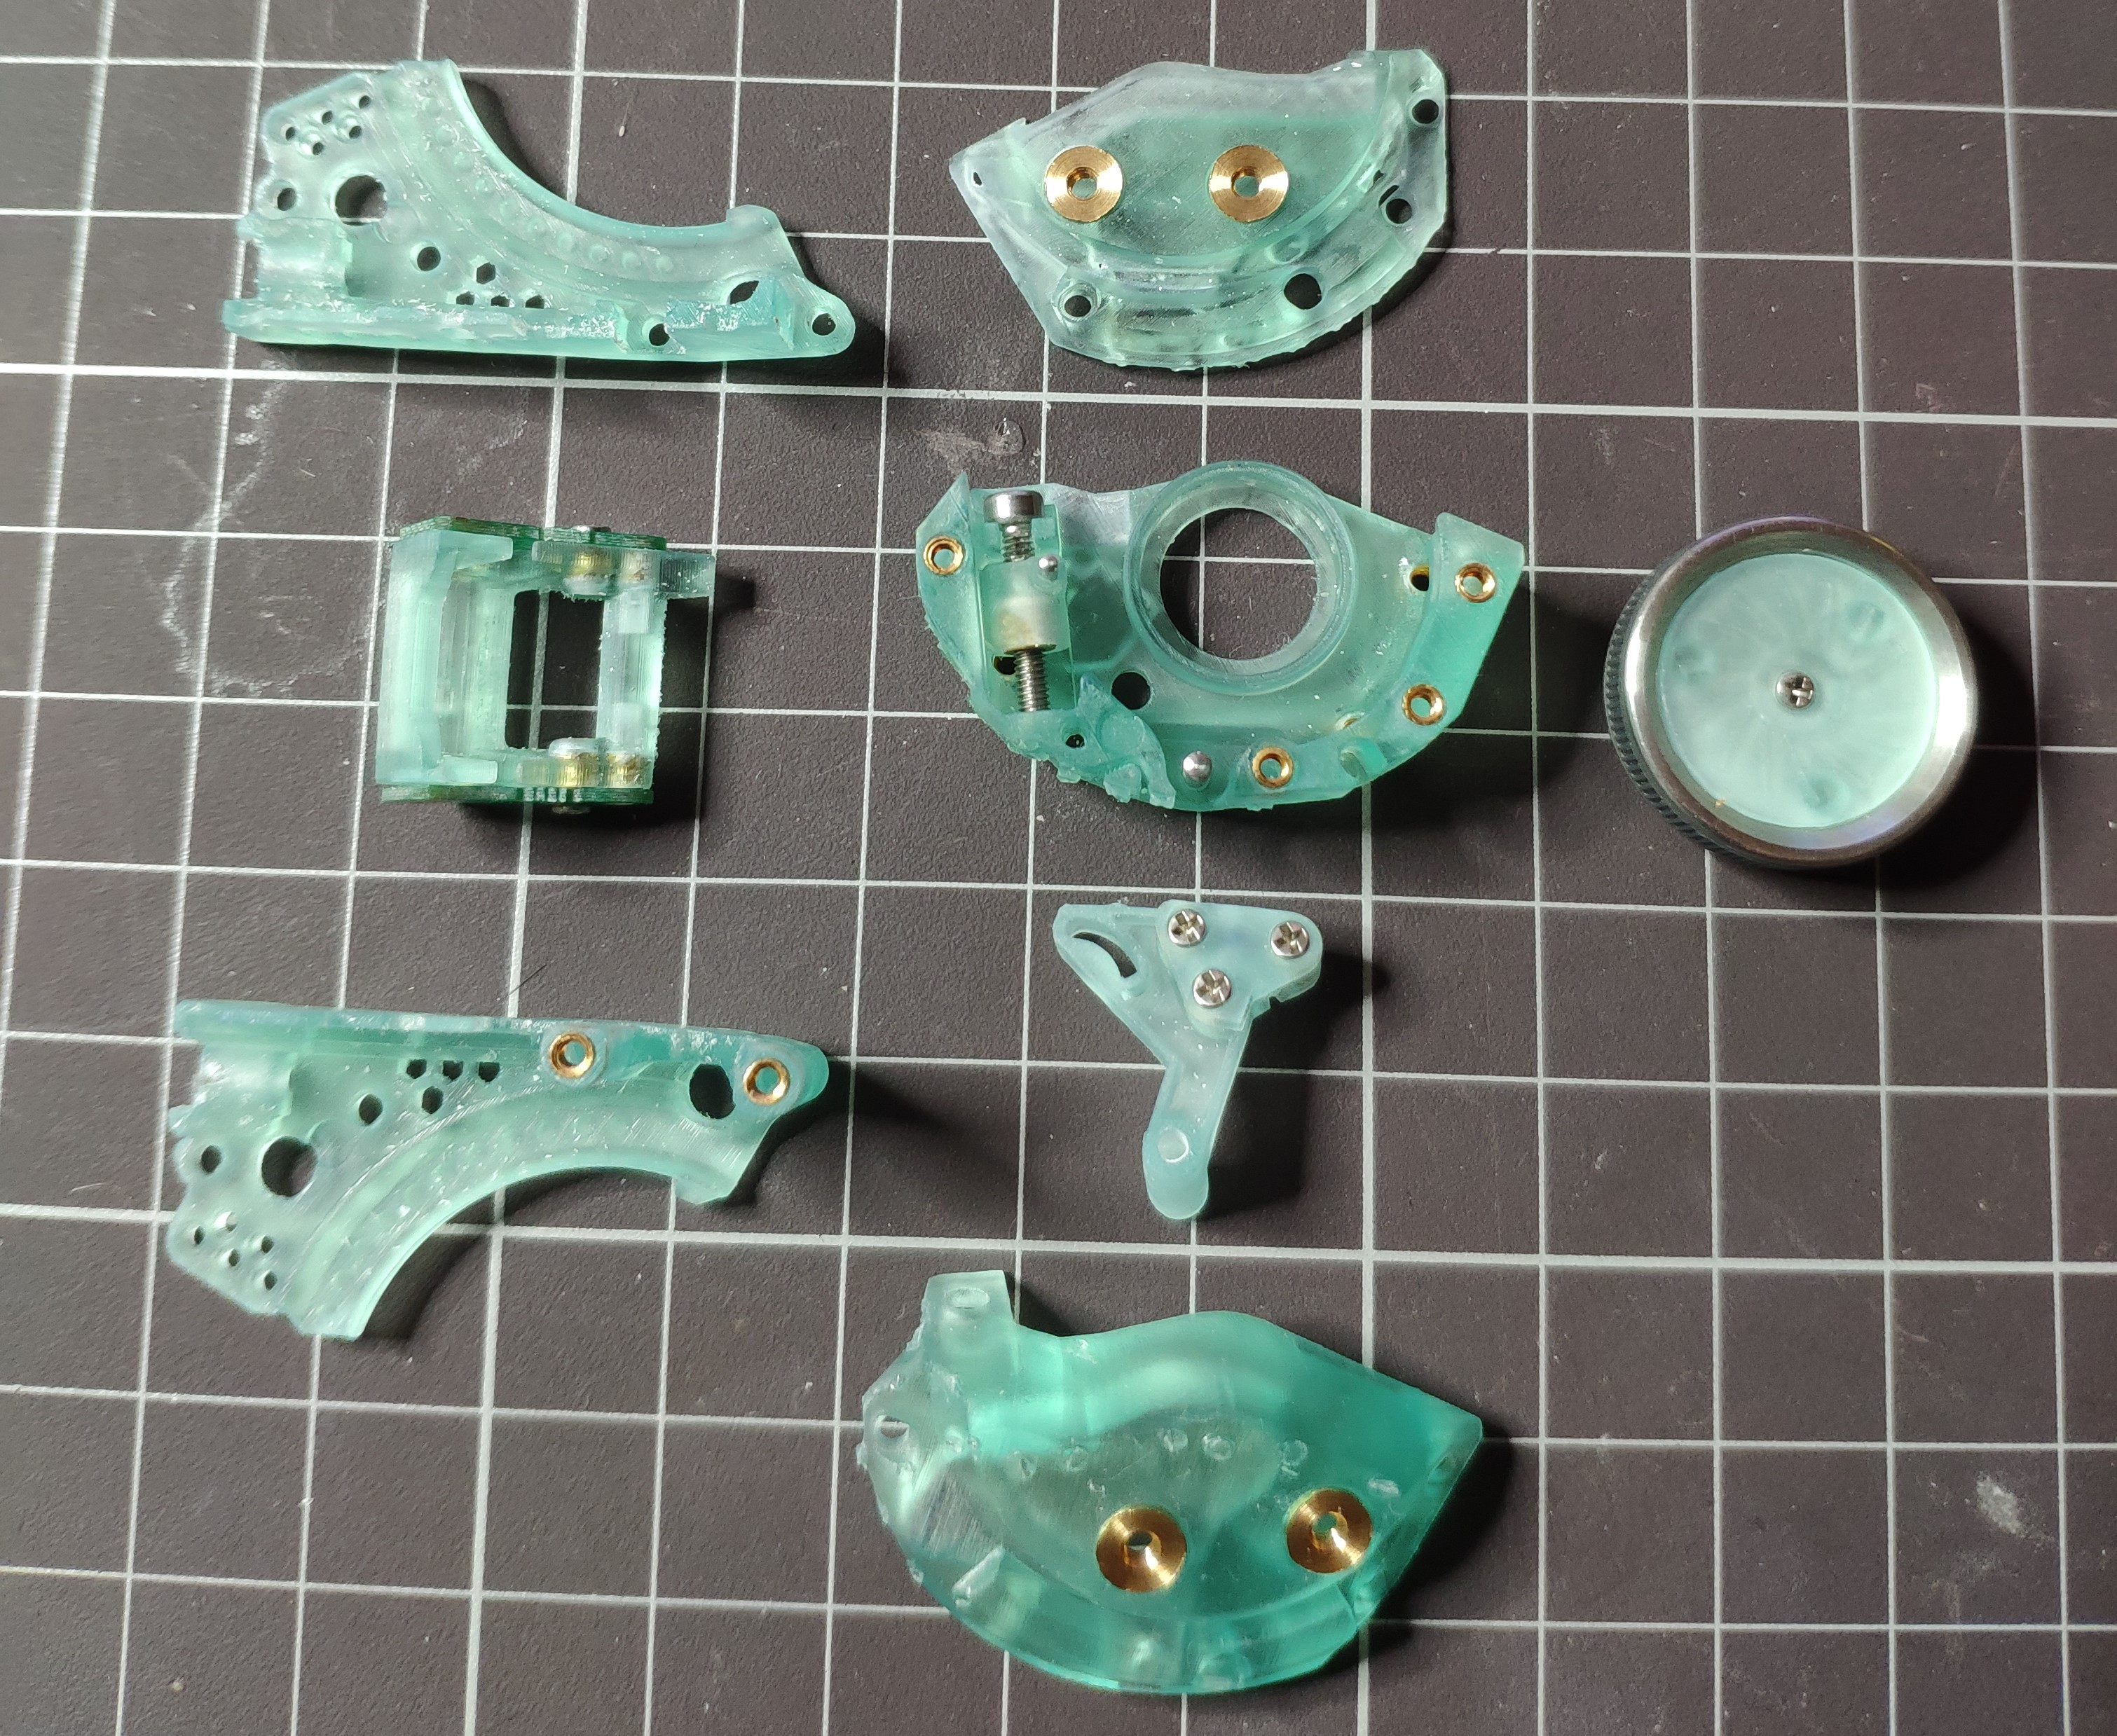
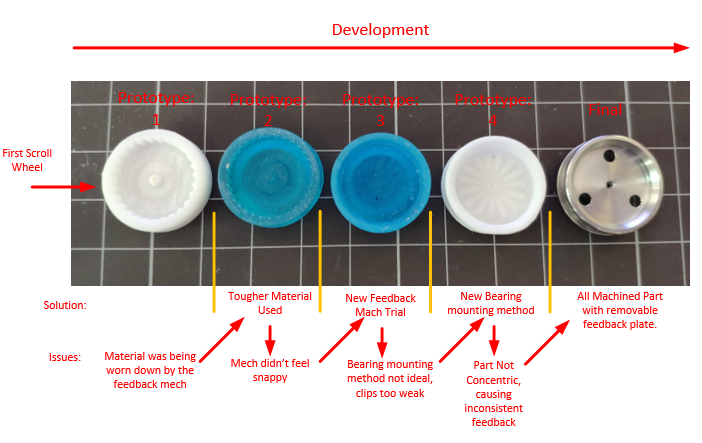
Scroll Module:
The parts for the scroll module were successfully printed and the scroll adjust mechanism works like a charm.
For those who are wondering, yes that it a custom machined scroll wheel I designed. You wouldn't believe the trouble I was having 3D printing this. Having this machined from stainless looks and functions great and the adds weight of the wheel feels lovely when set to free spin.
For those who like abit of machined metal this one is for you:
Remember to keep liking this project ^^ So I can keep developing this beauty of a device.
Finally received my FEP Film for the printer. The first item set to be printed is:
Touch-D Module:
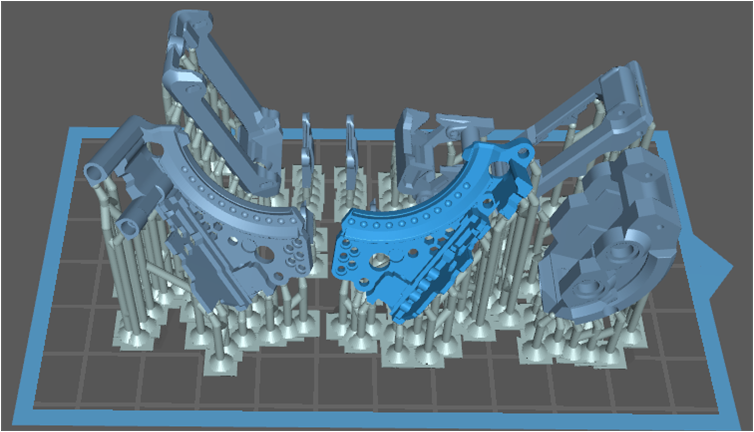
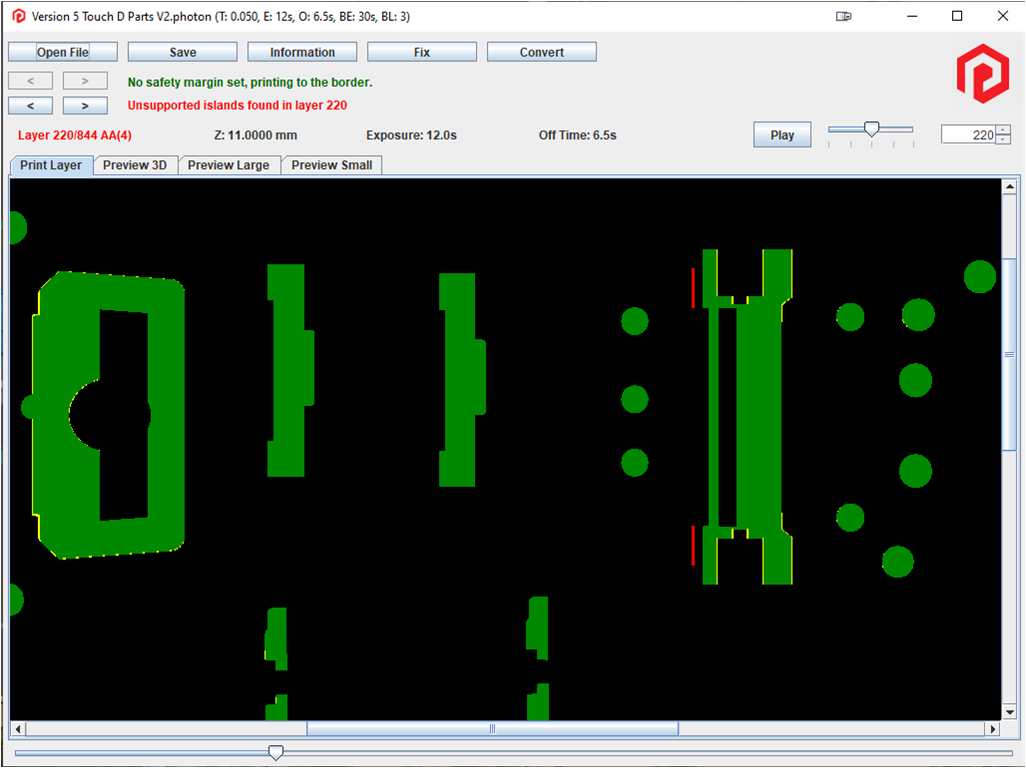
Fully supported on Chitubox, Time to run the slicer model on Photon File Validator. This program has saved many prints from the bin as you can't always catch all the overhangs when in the slicer.
As you can see there is always one or two unsupported parts in the slicer file which you can do the following:
Press the 'Fix' button and fingers crosses it can solve the issue. (this normally solves 80% of issues)
Go back into the slicer on the faulty layer height and add supports or rotate the model.
Time to fire up the photon and print these bad boys :D
The PCB's have been assembled but sadly the last two 0402 10K resistors I needed to finish the boards went flying from my tweezers never to be found again :/ Time to order some more. As for the module 3D printed parts, sadly my FEP Film failed during printing. Time to order some more so I can print the parts.
So the theme of my bank holiday weekend has turned into a waiting game.
But luckily today some good news ^^
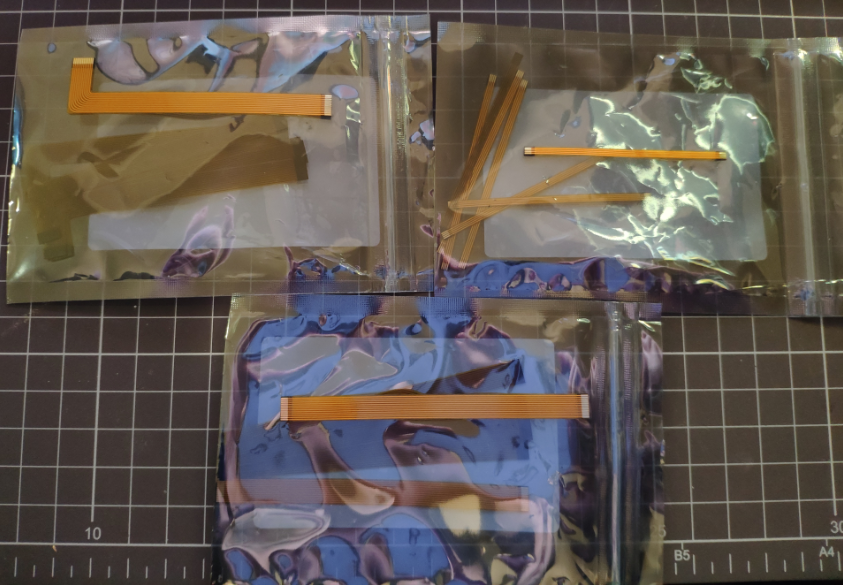
FPC Cables Received:
Just received some very nice FPC cables to try on the modules. Once my printer is up and running and the modules are assembled it will be finally time to get some code done.
Having some spare boards around comes in very handy when you require an method of debugging some items.
After 2 hours designing the 4 hours printing on the photon I now have a module debugger.
Just waiting for the boards to arrive to finish it off. Exciting times. I do love seeing the pogo pins in use. The pins are used to connect to the SWCLK ,SWDIO, RESET and GND target pads on the core module PCB's
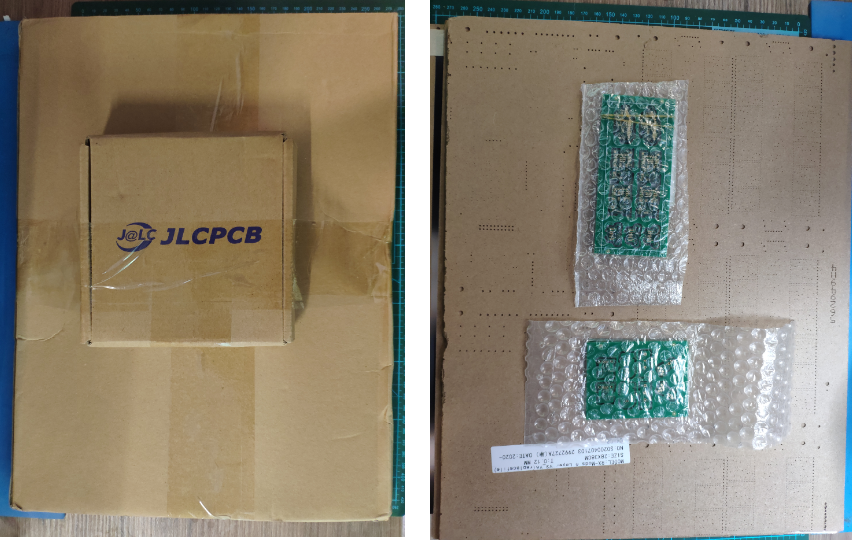
It's certainly exciting to be finally having the first batch of prototype boards and FPC manufactured.
PCB Manufacture:
This batch features all the 0.8mm FR4 boards that that used to prototype the following:
Touch-D Module:
Touch Core
Click Interface
Side Interfaces
Button Board
SMART Scroll Module:
Scroll Core
Scroll Interface
Side Interfaces
Interfaces:
These interface boards were added to the 0.8mm panels
Thumb Module Interfaces
Core Module interfaces
The Thumb Module Interface board comes in very handy when developing an module programming and debug station
FPC Manufacture:
I got three FPC Cables made to finish off the Touch-D and SMART Scroll Modules. They were fairly easy to have made they just require three things:
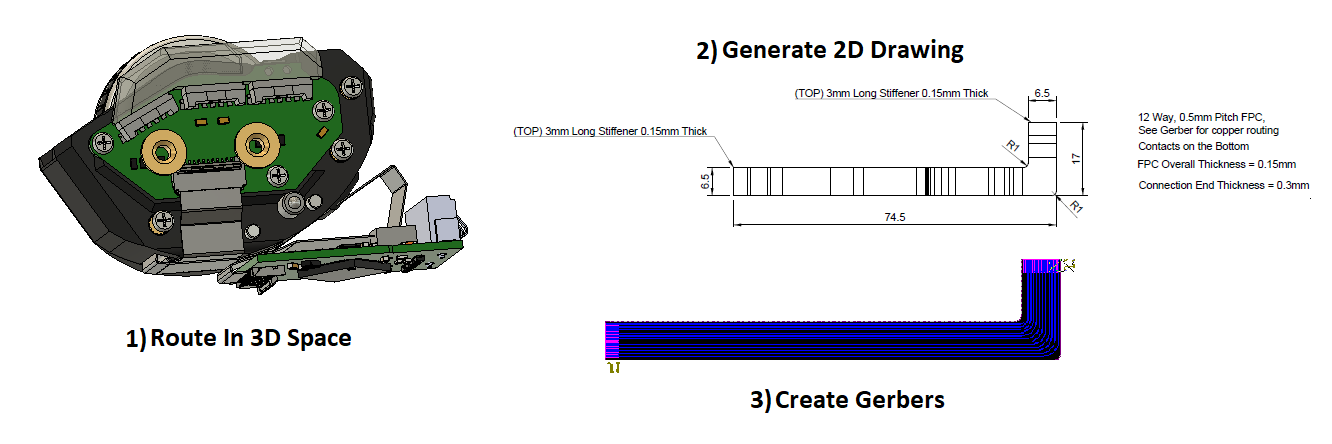
FPC Design Tip:
For anyone wanting to design FPC cables I would recommend using the 'sheet metal' tools in Autodesk fusion 360. It works a treat and lets you route the FPC in 3D then will automatically generate the flat view with dimensions.
But why design a custom FPC when you can buy them?
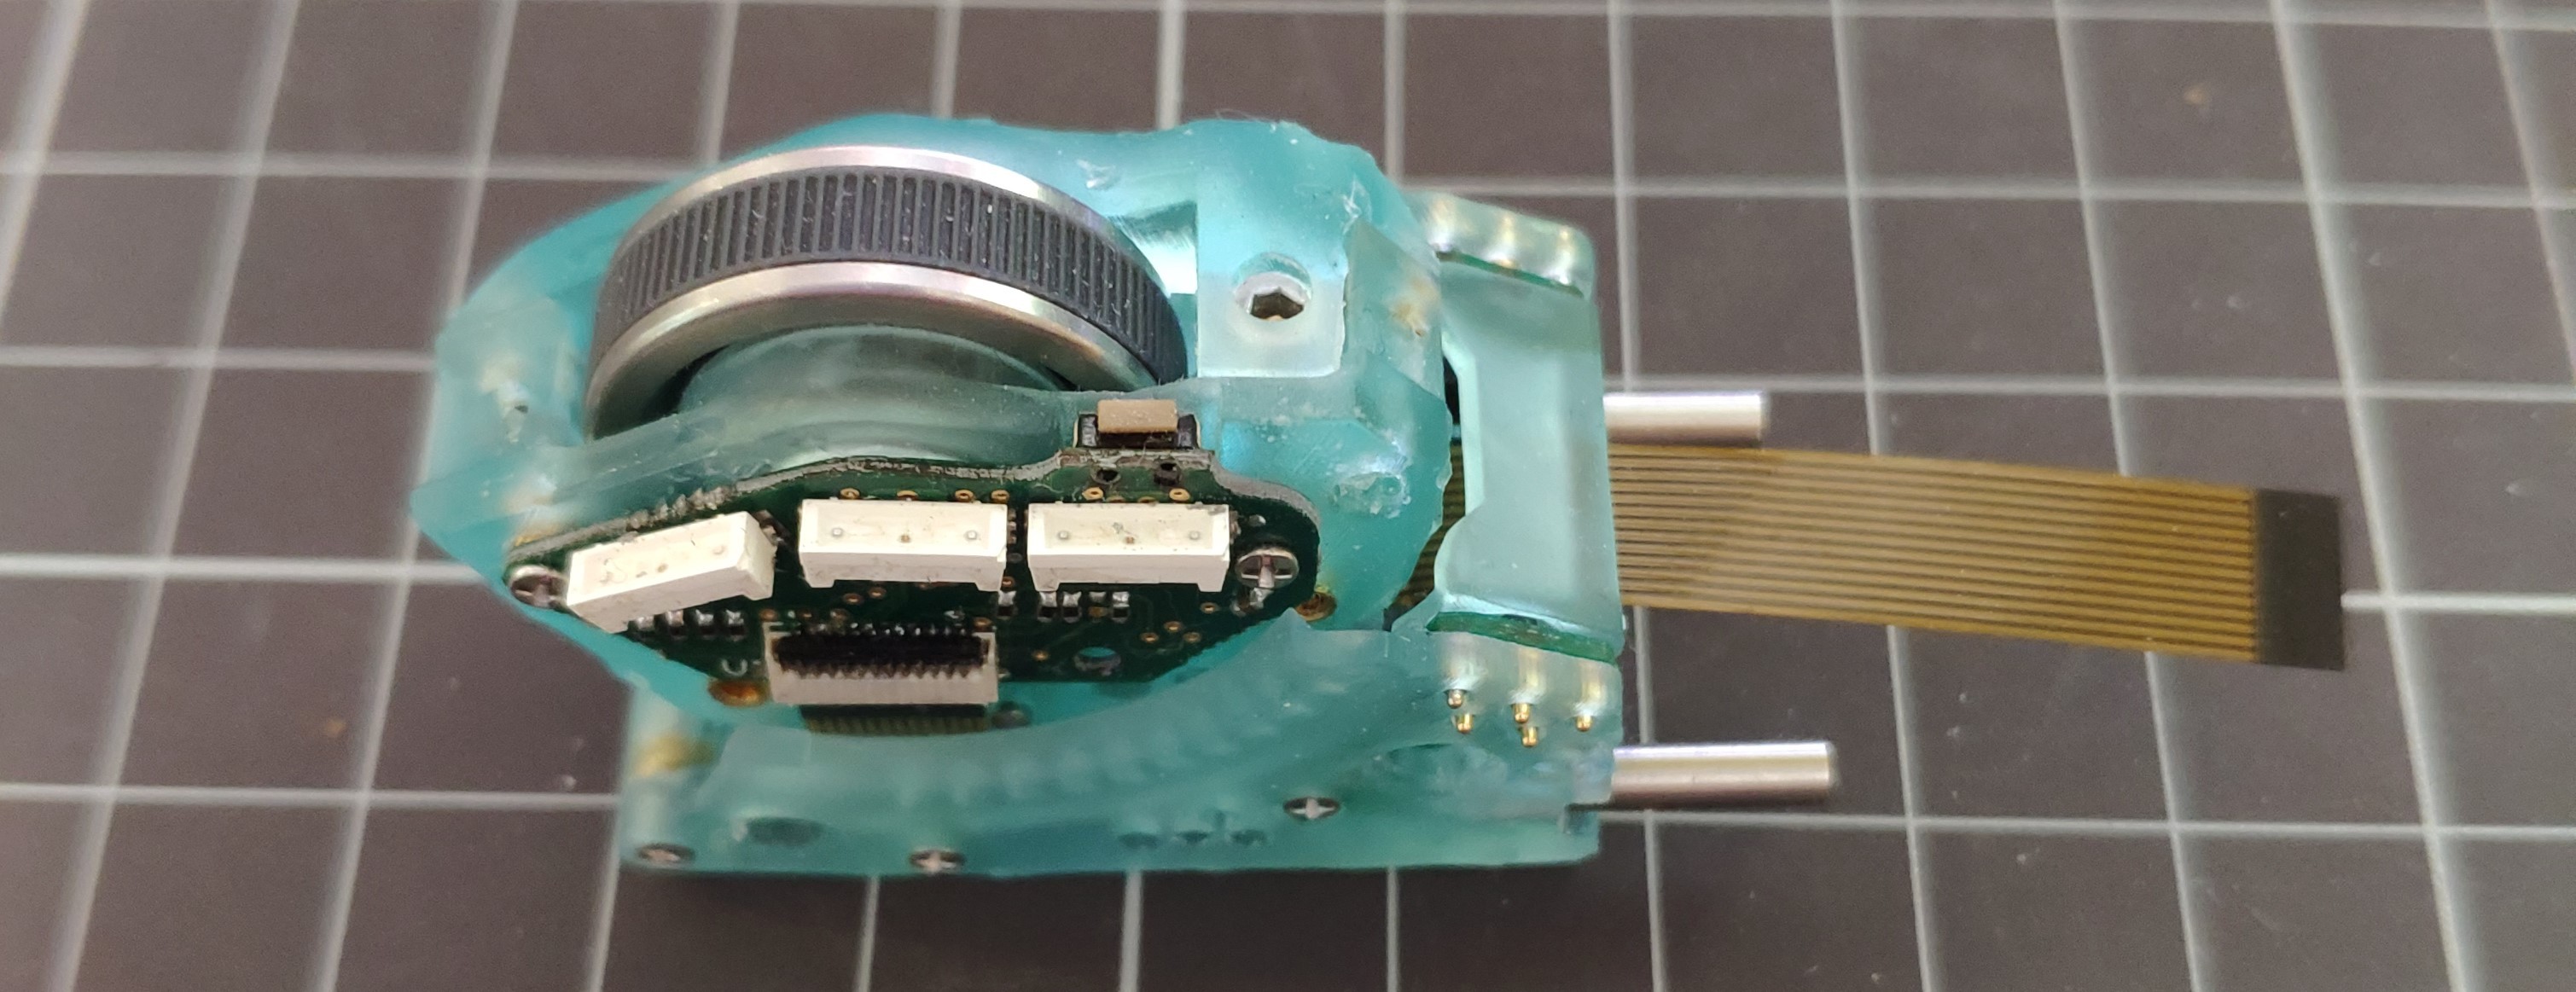
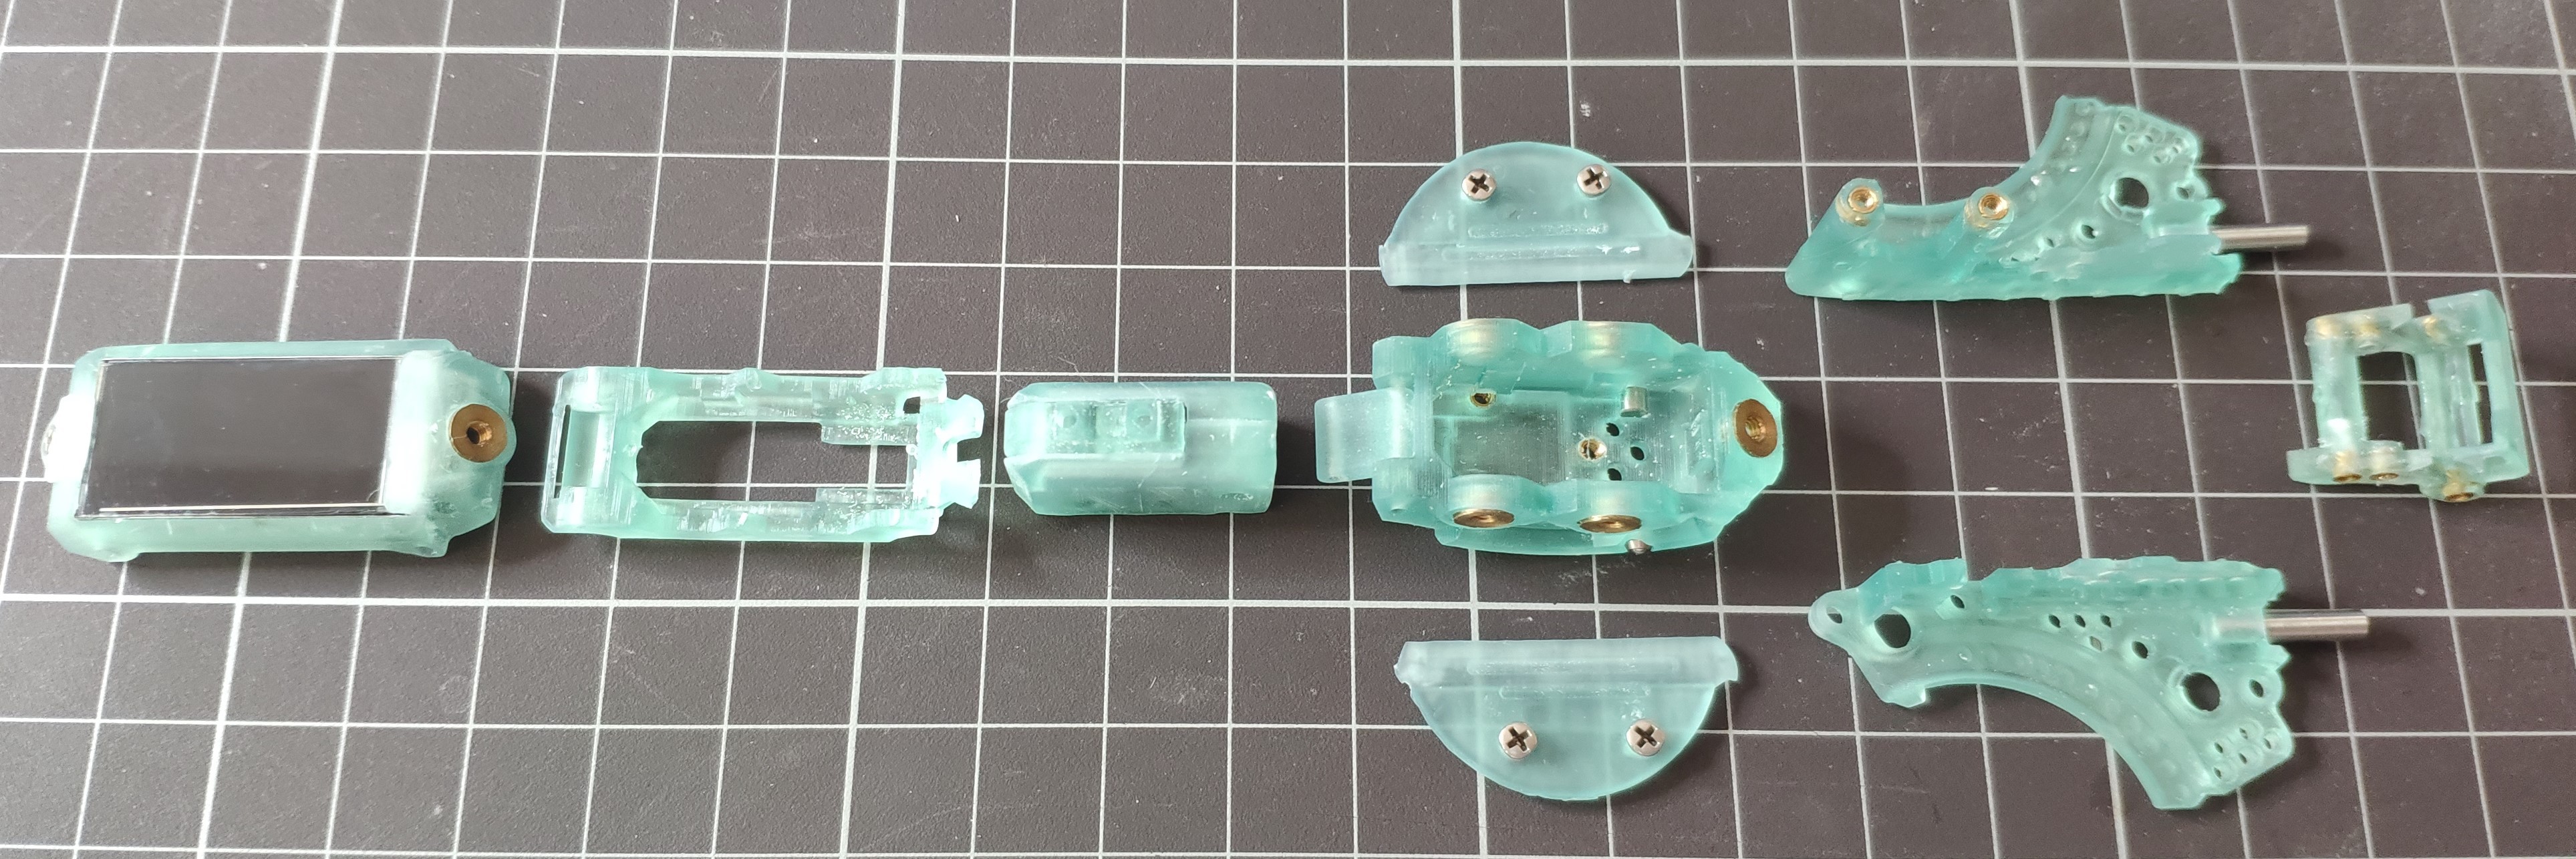
The problem with off the shelf FPC cables is at they aren't as flexible as one would think. I purchased quite a few and found they had a bend radius of about 3mm. Now this does sound good big but lets add some preservative:
The above image is the Internals of the Touch-D module each PCB seen is 0.8mm FR4 and all fixings are very small M1.6. Once you start having 3mm bend rads on all FPC cables you would find that there is no space of the module the 'sweep'.
 benw
benw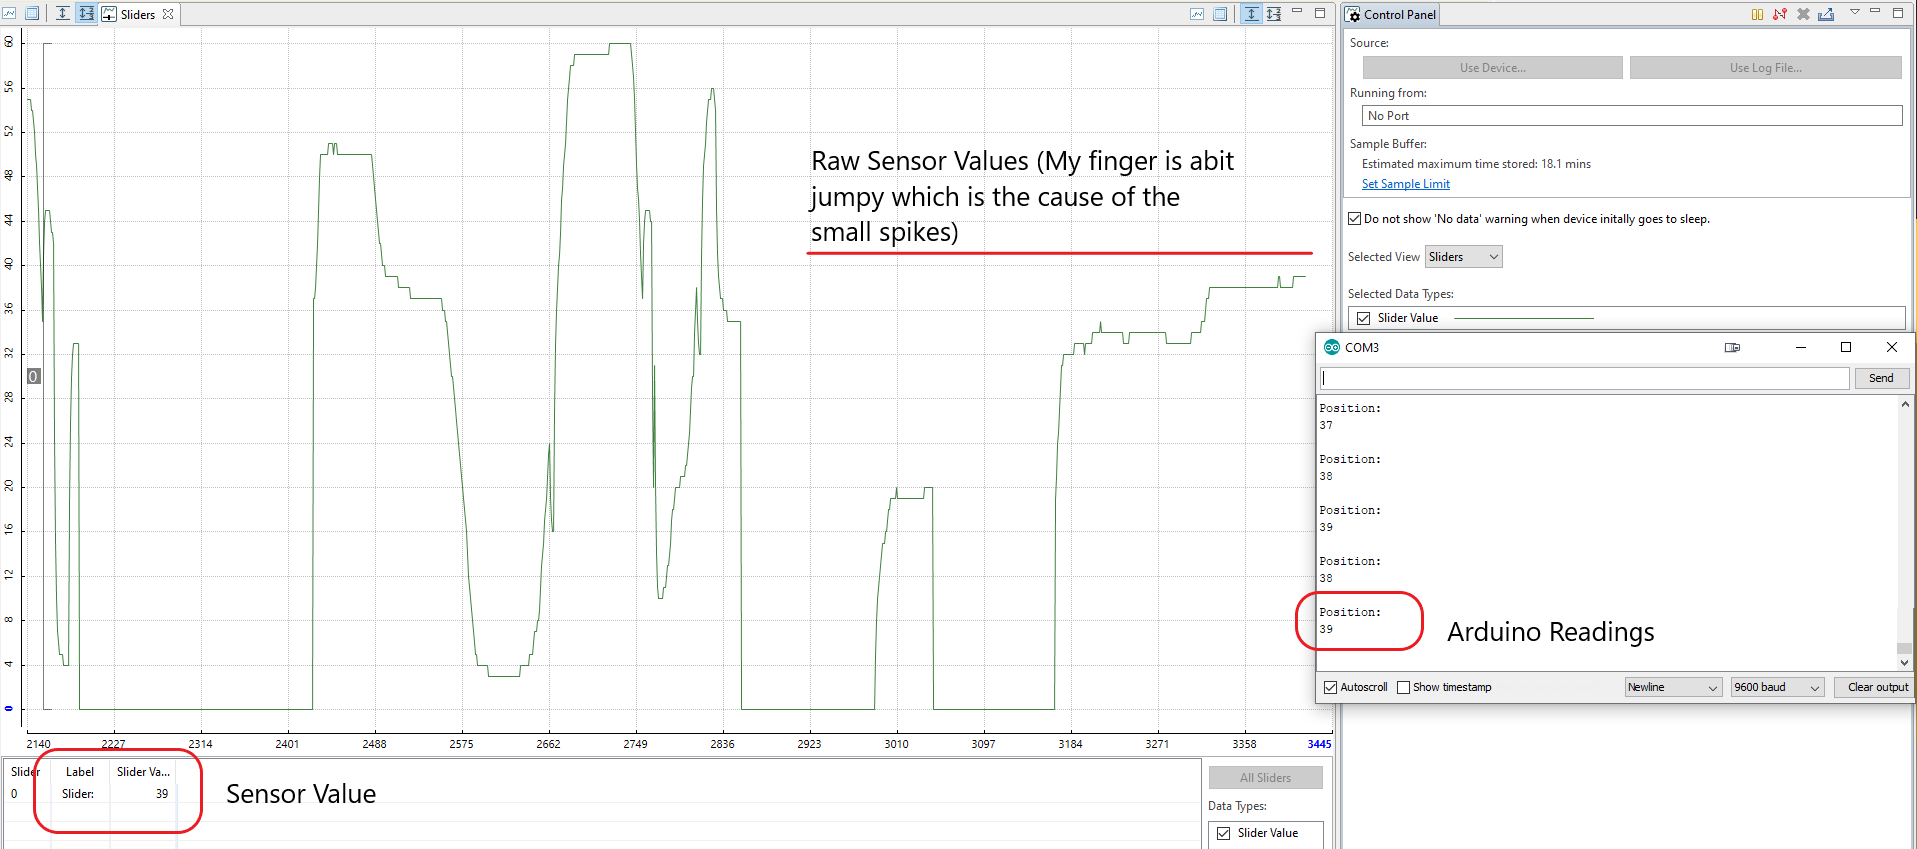
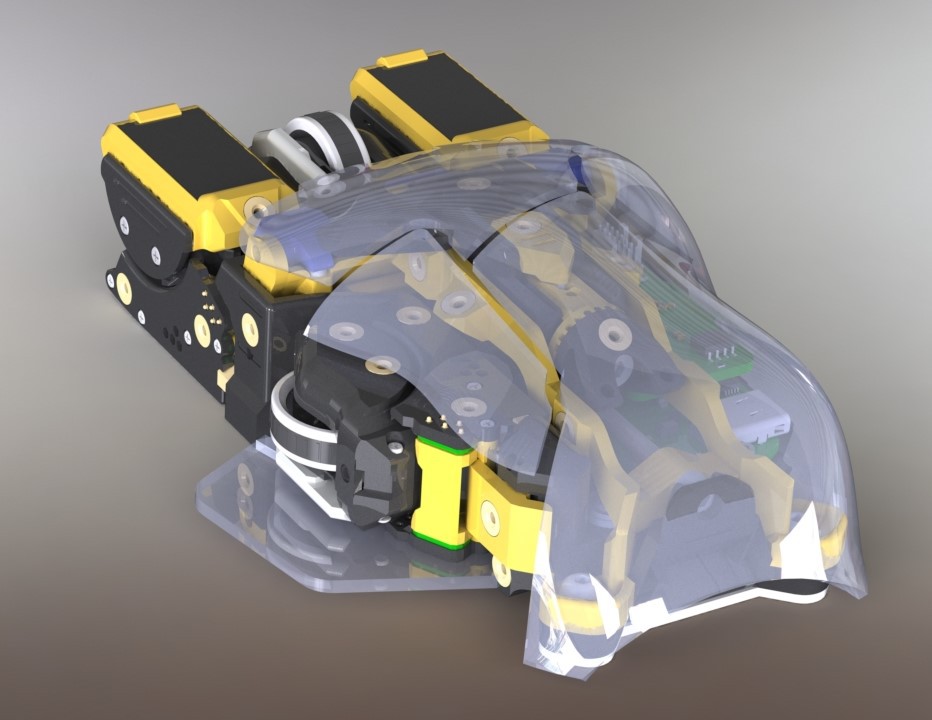

 With all the electronics and FPC cables in place this module so packed full of features.