Close
0%
0%

ResQ Search and Rescue Tools

Air and ground-based tools to detect people by using their existing cell phone signature

Similar projects worth following
This open source project uses beacon packet sniffing to locate people such as lost hikers, campers and even poachers in game preserves. This works anywhere- as long as wifi is enabled on the targets phone. The hardware detects the beacon frames from their cellular phone, records the GPS coordinates, data and even photos. 3 flavors are made: hand-held portable, airborne carried by plane or drone and a stationary "Sentry". There is also a camera module compatible with all 3!

RESQ:

I was inspired by the constant stream of search and rescue operations on the television show "North Woods Law". Each week they struggled to find lost people in the remote/rugged areas of Maine U.S.A. These areas often have no cellular service but in almost every case the target people had cellphones on them and working. As I live in Canada- we have a surplus of these situations in our vast wilderness as well.  I theorized I could use an external 2.4GHz antenna to receive the beacon frames from those phones ad capture that data and locate persons of interest. 

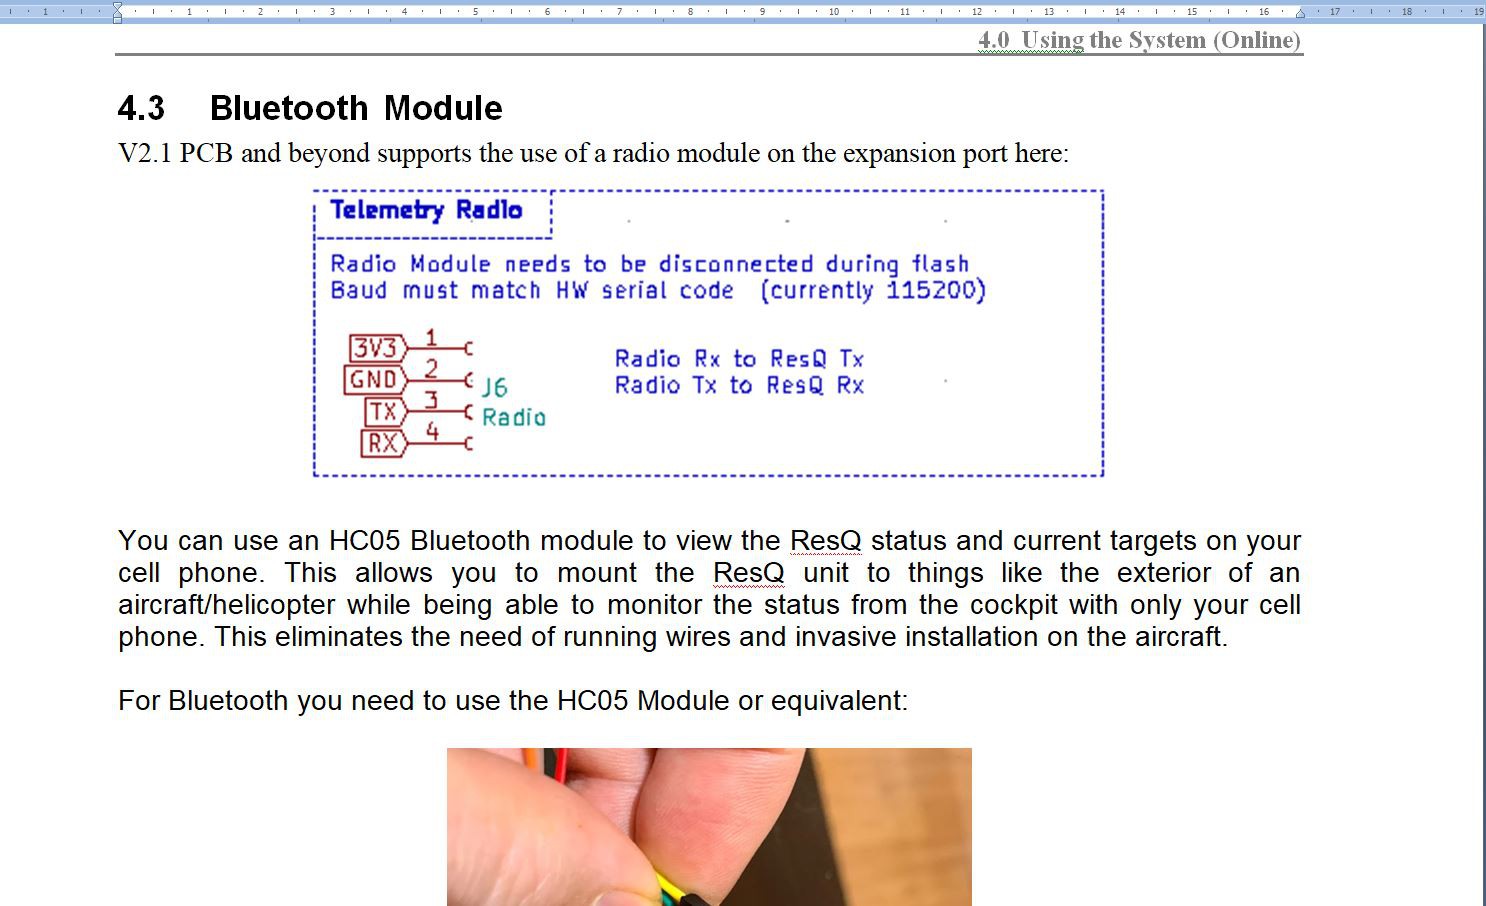
This hardware can be embedded in to any very small drone or RC aircraft. It can also be attached to existing manned aircraft already participating in the search. It can even be monitored live via Bluetooth on your phone or tablet from inside the aircraft cockpit!

Using small drone aircraft (like the Nano Talon I use here) gives all the advantages such as flight condition tolerance, height, terrain, time of day etc that drones have over manned aircraft. They can also be sent on the full way-point mission without human intervention and tracked live from any ground station. 
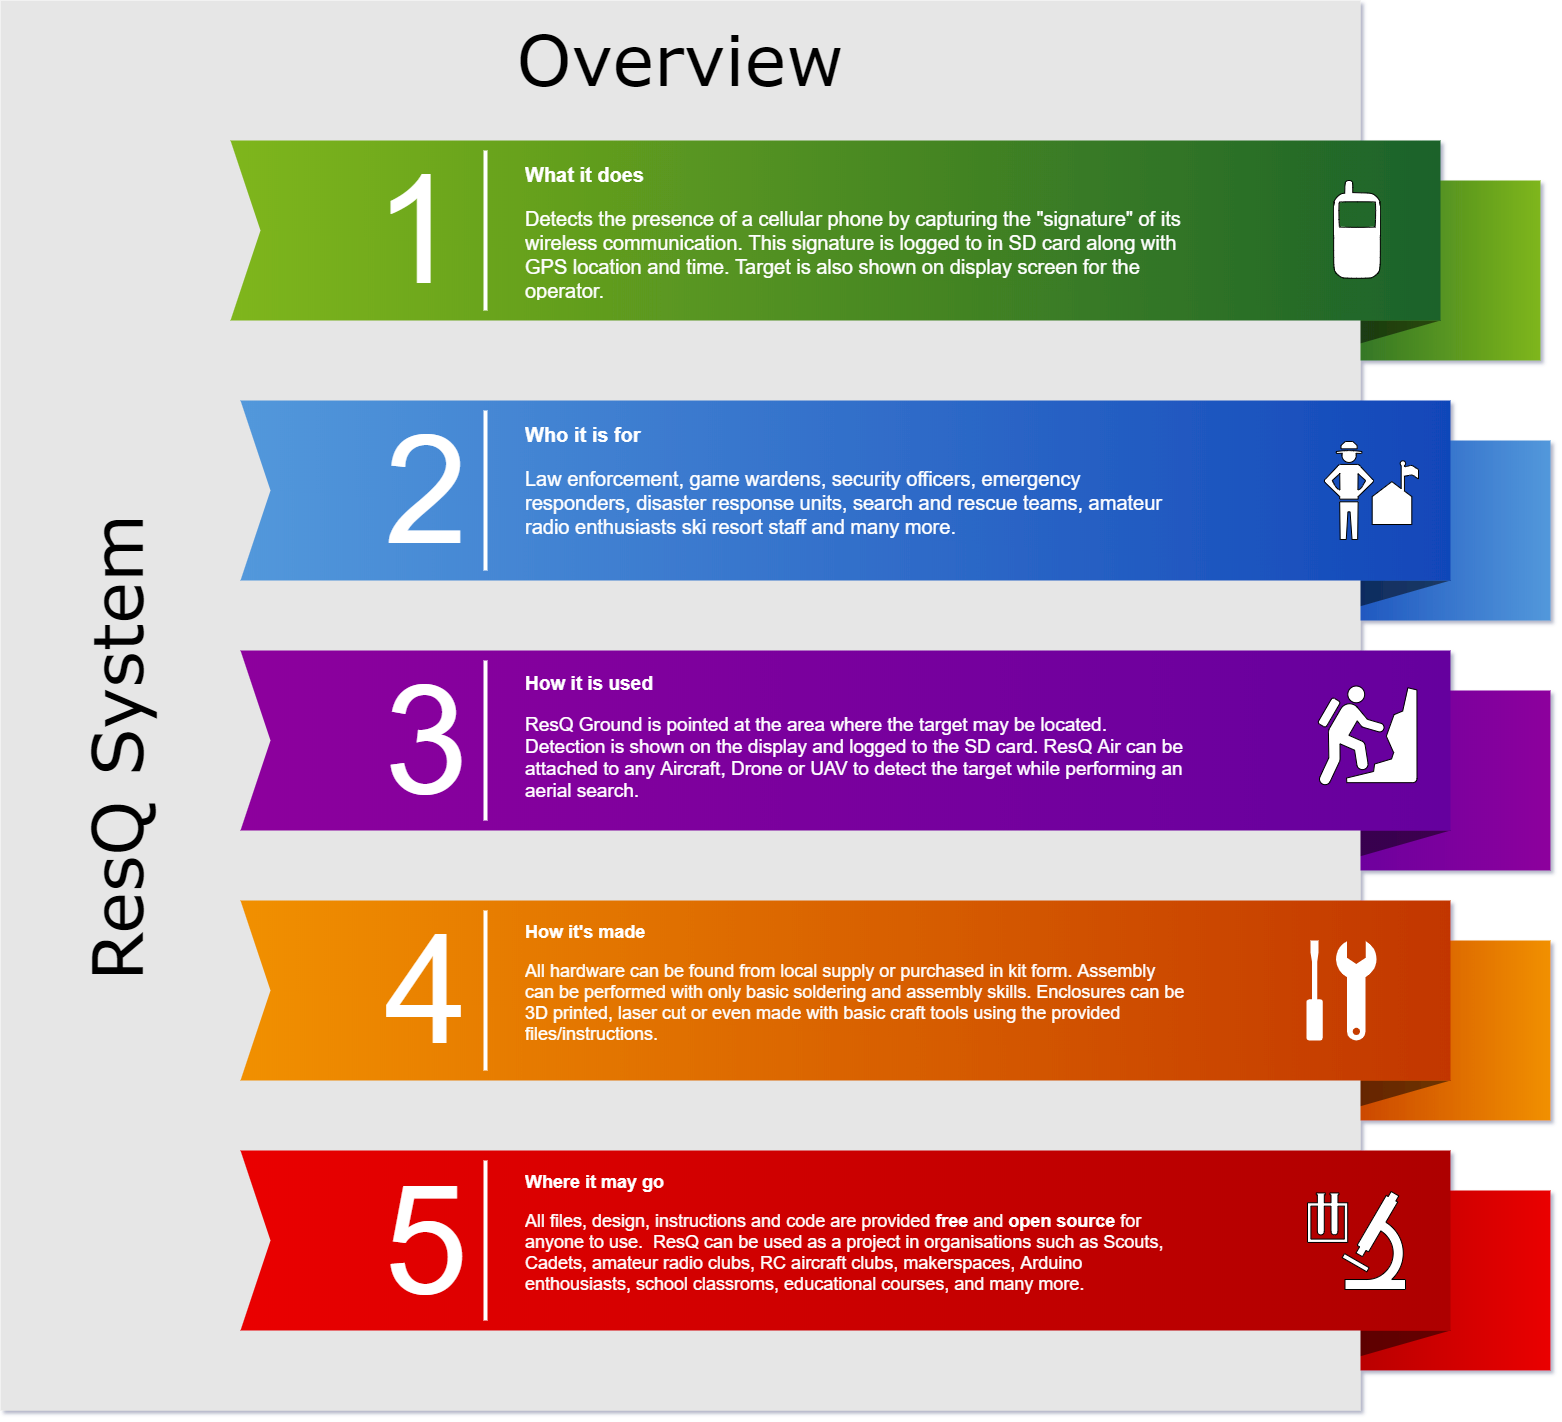
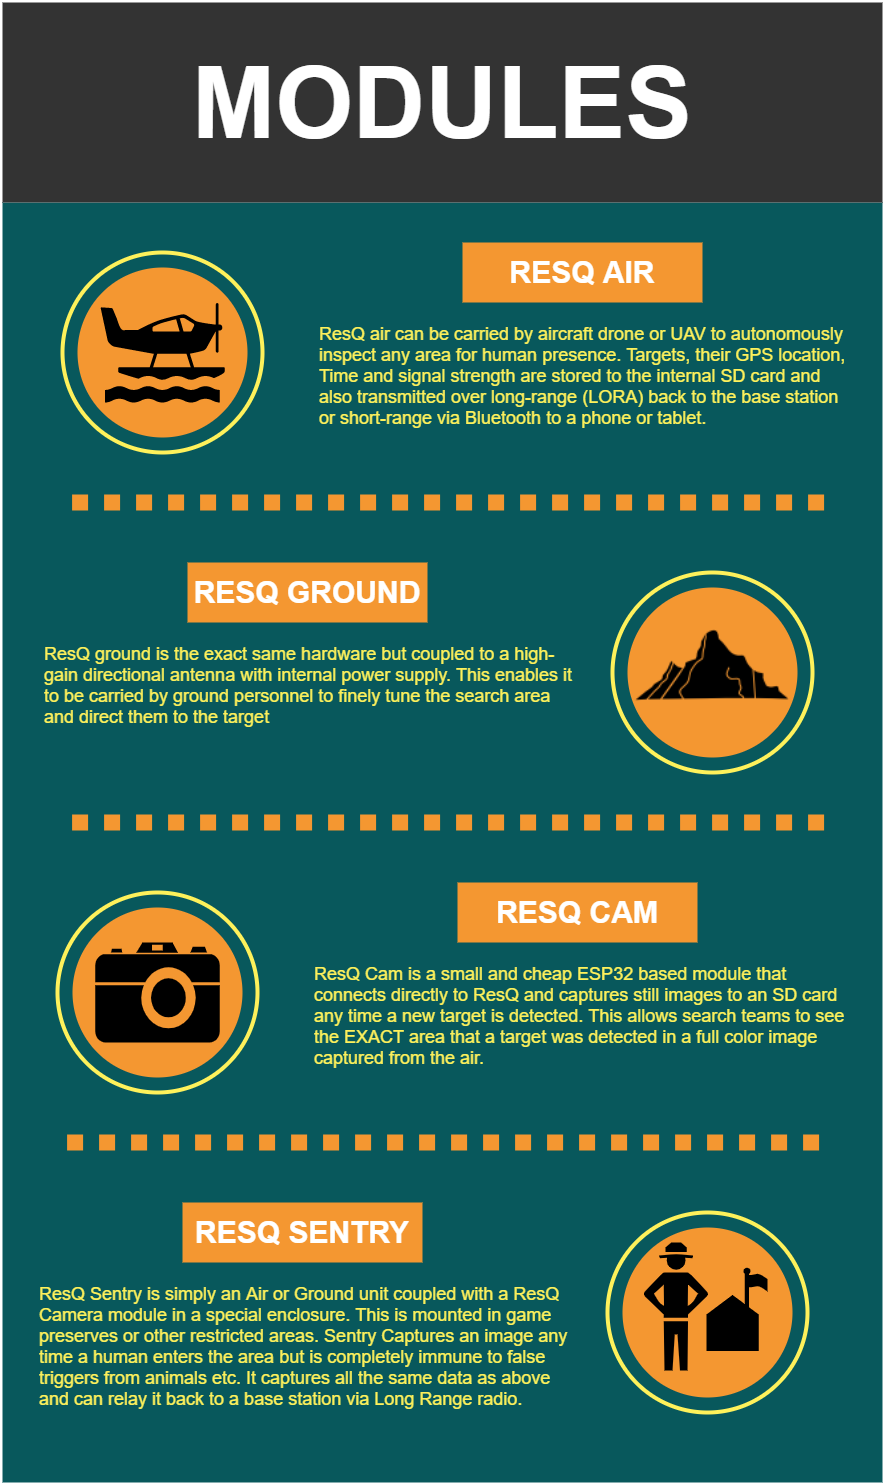
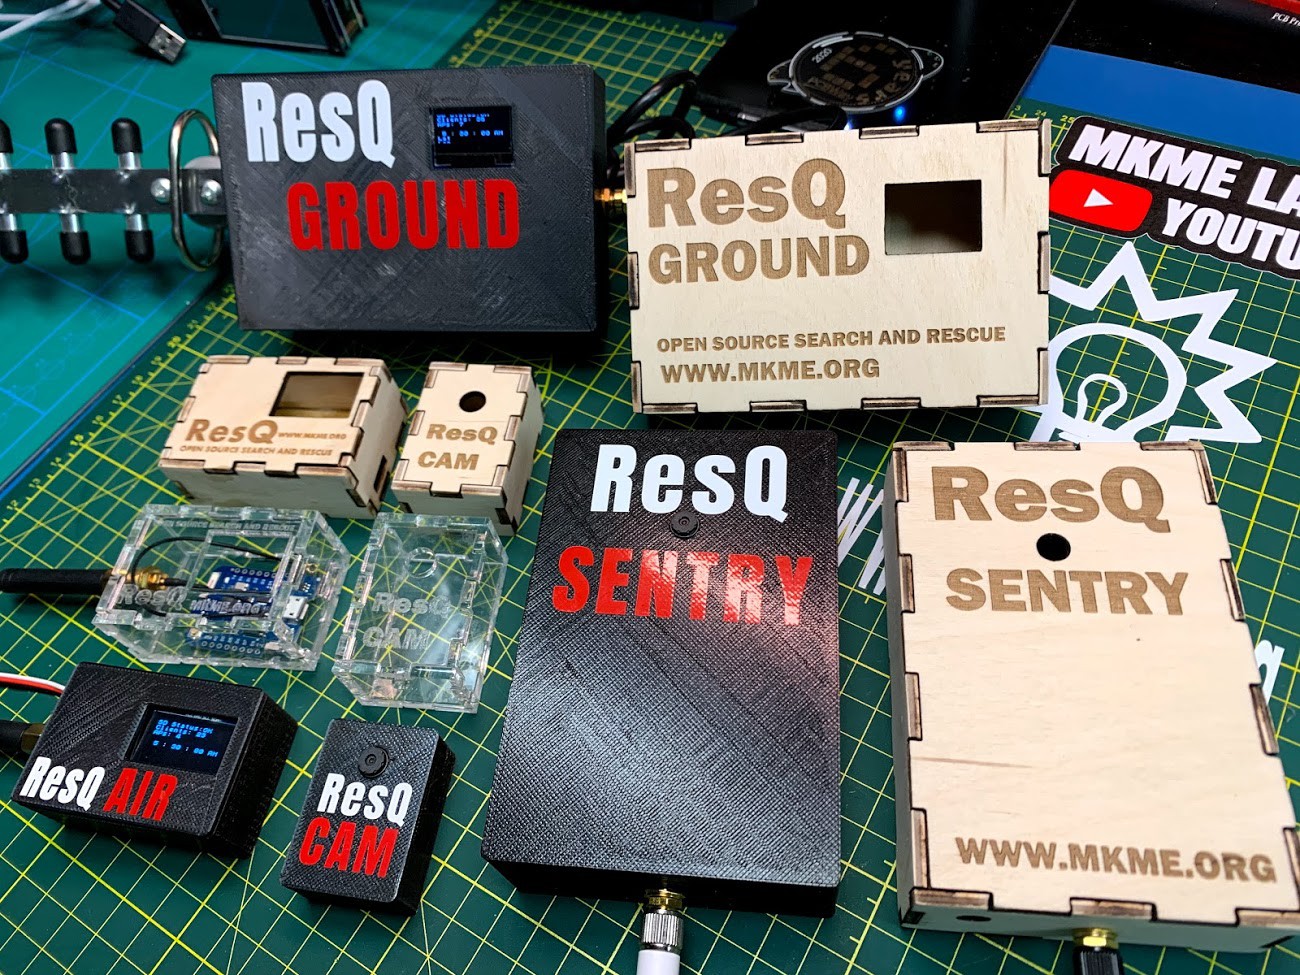
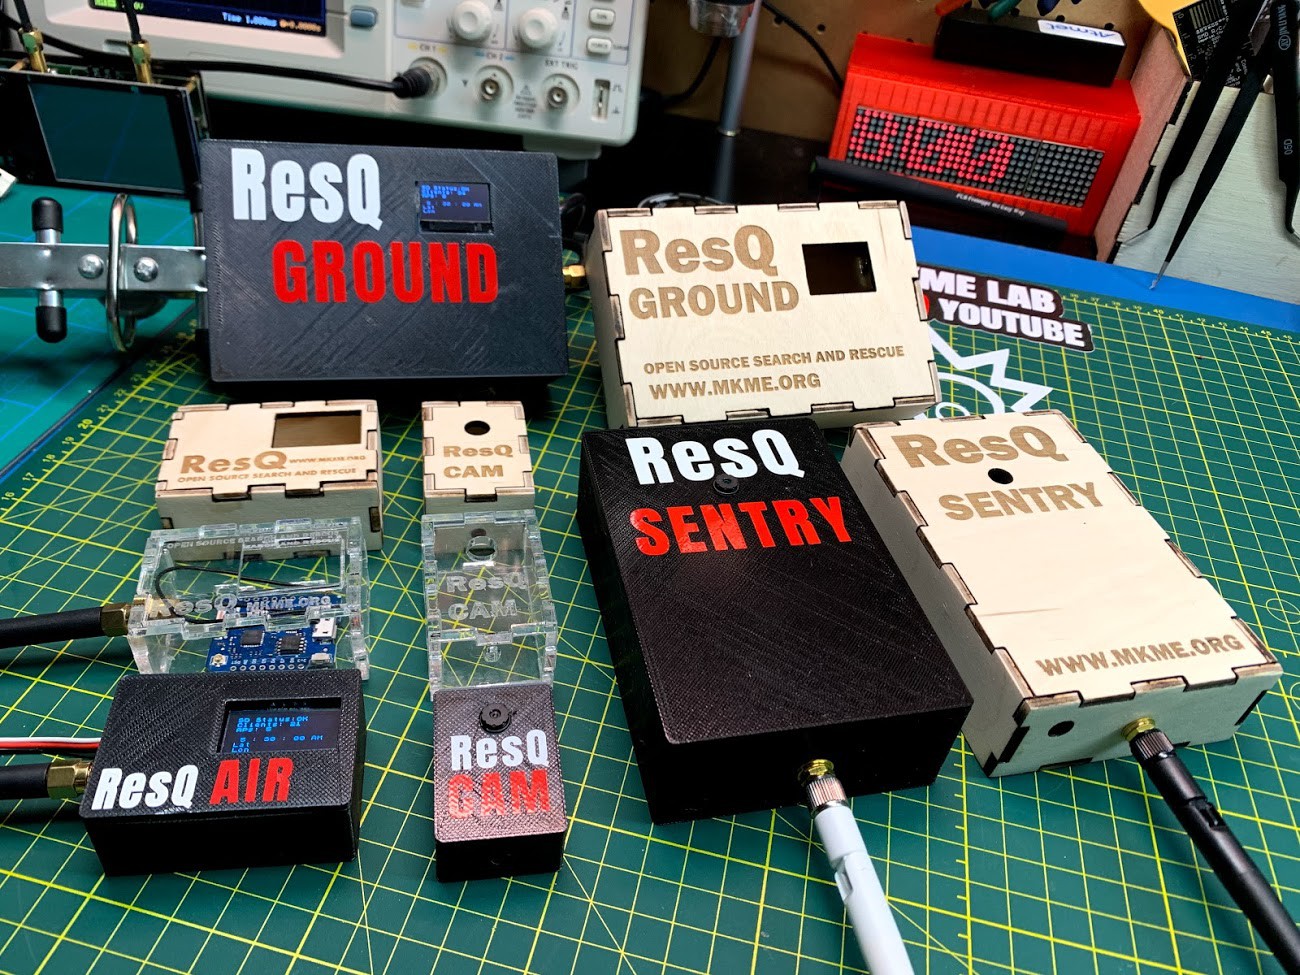
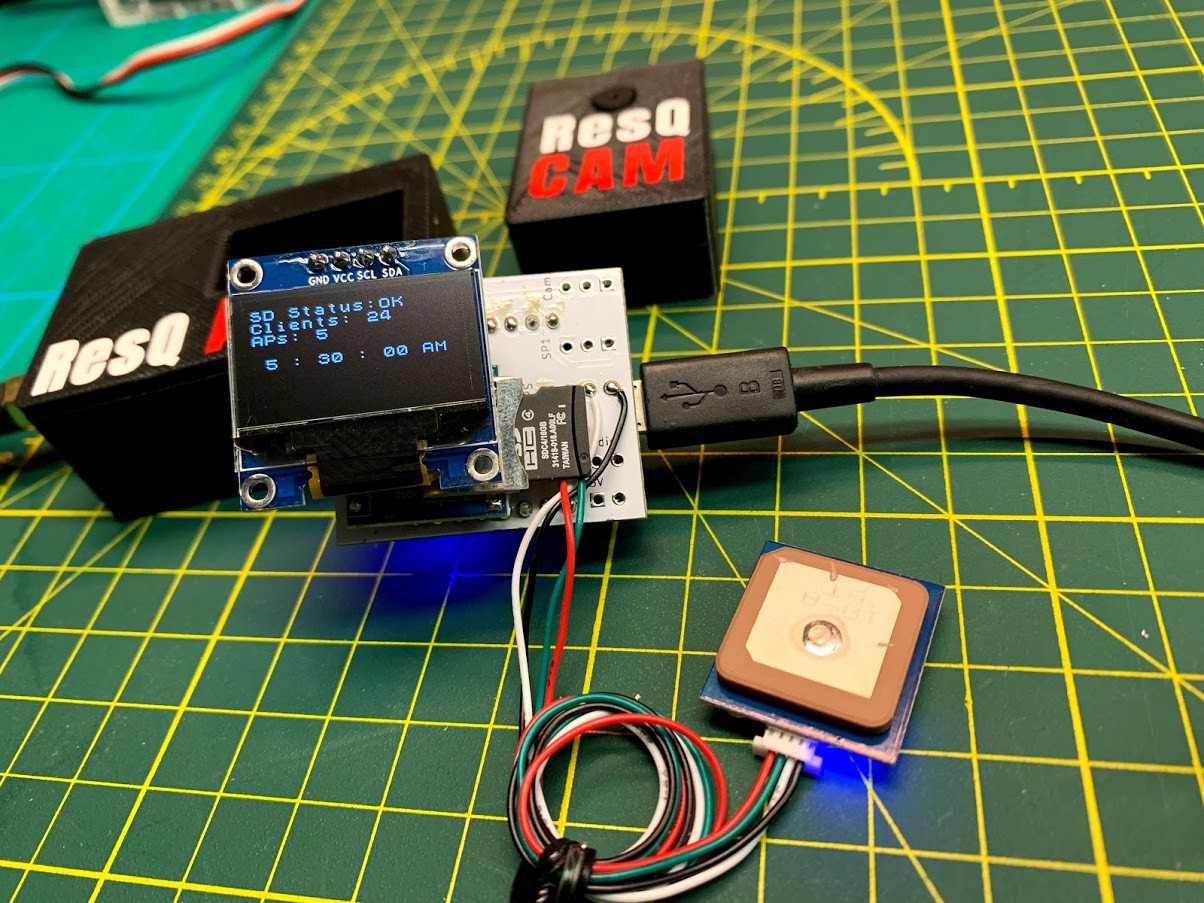
What ResQ does:

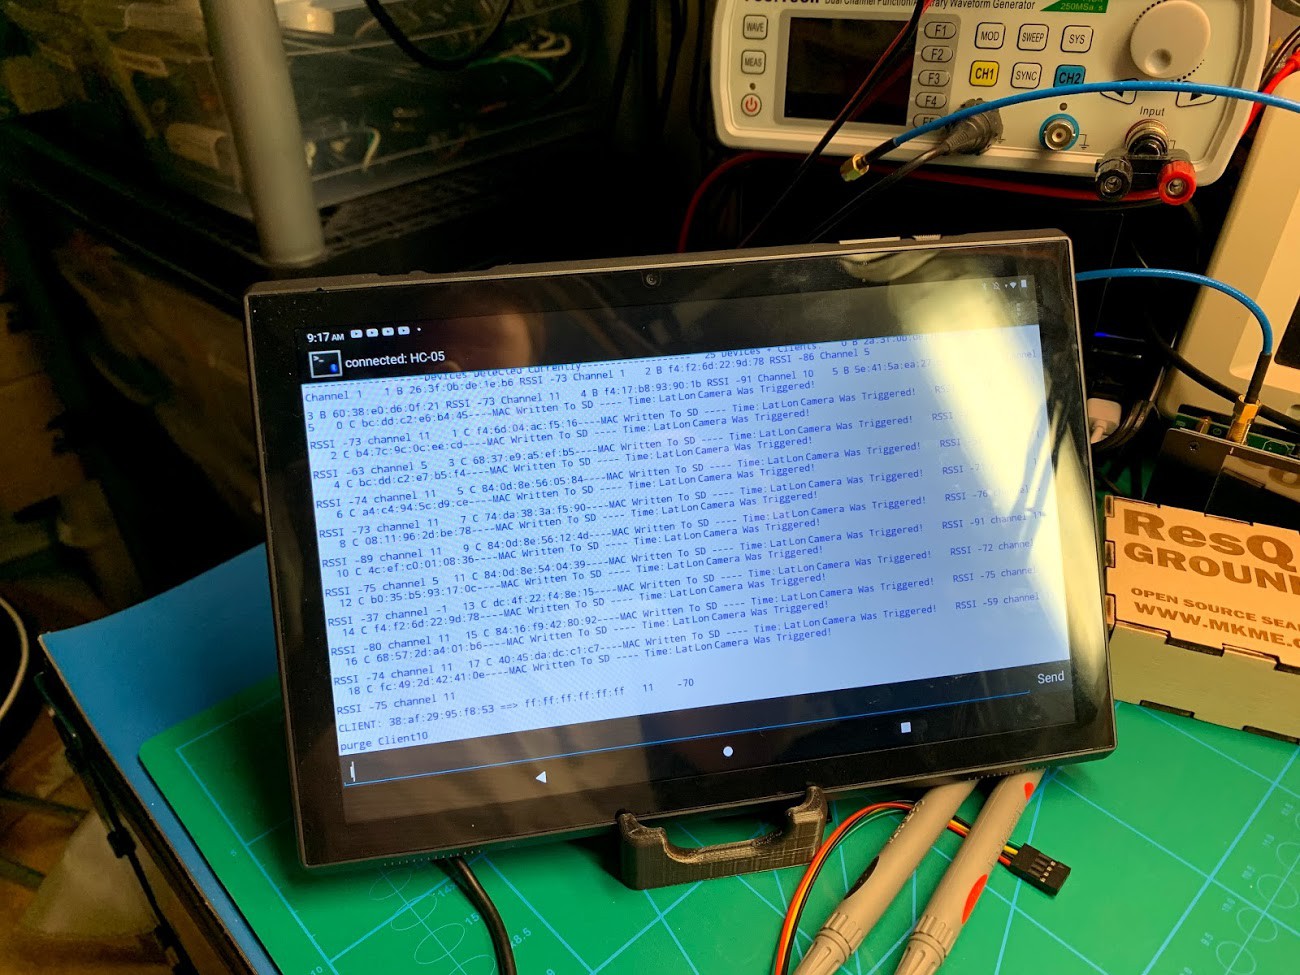
  • Detects all Beacons, their RSSI and their MAC addresses 
  • Detects All Access Points (APs) in range -not needed but I log them anyhow
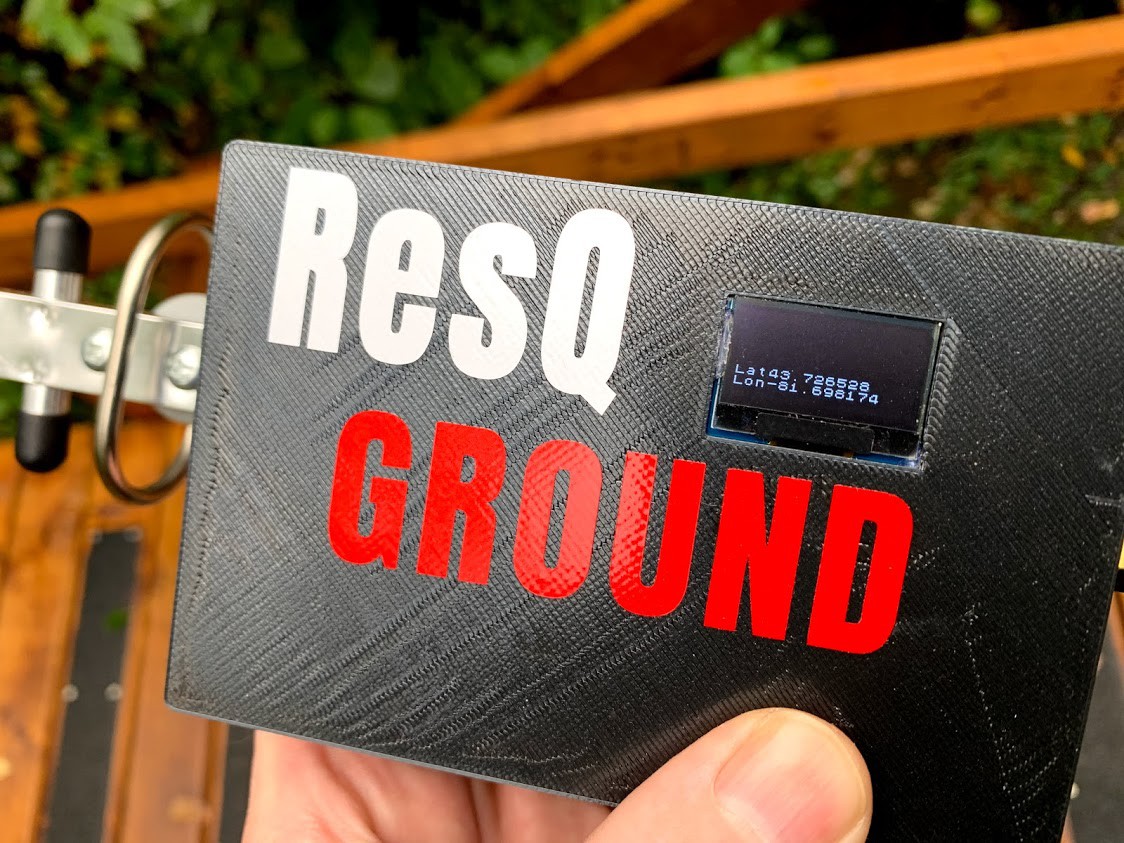
  • Gets GPS Lat/Long position
  • Gets GPS UTC Time
  • Logs all the above to the SD card .csv file every time any new target is detected
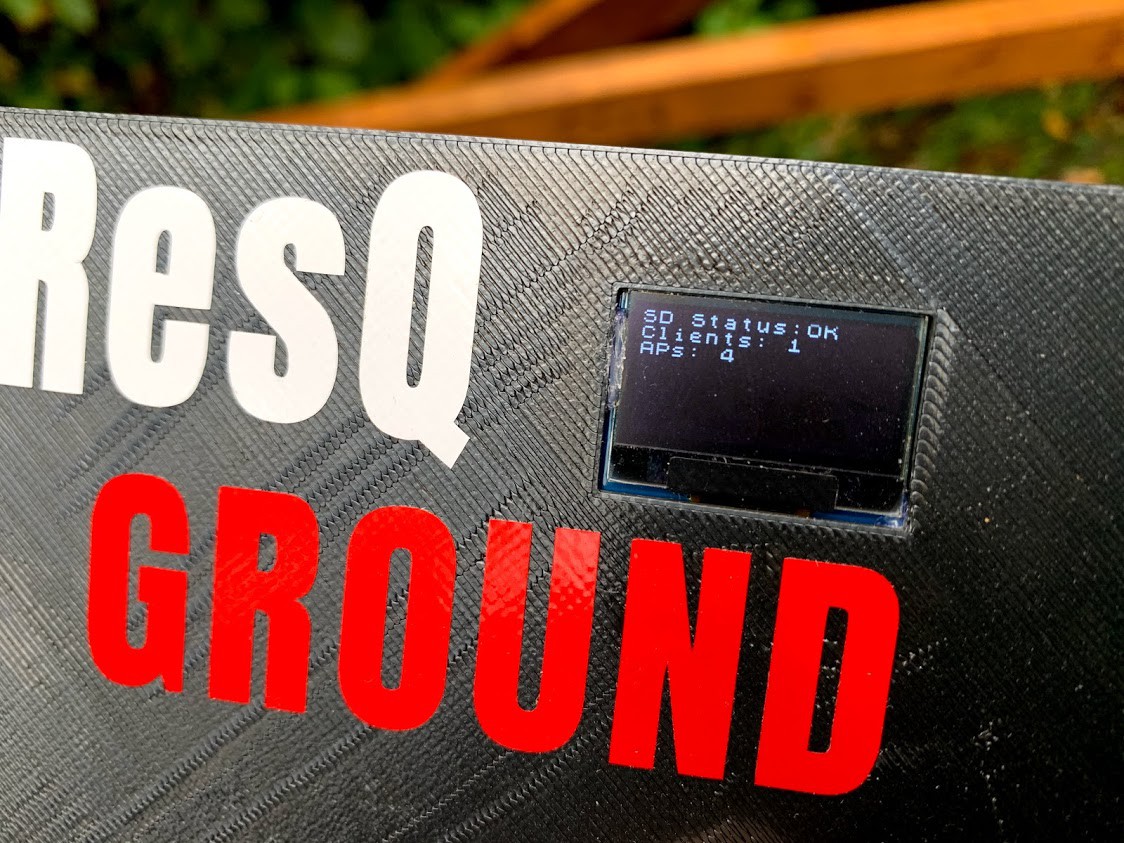
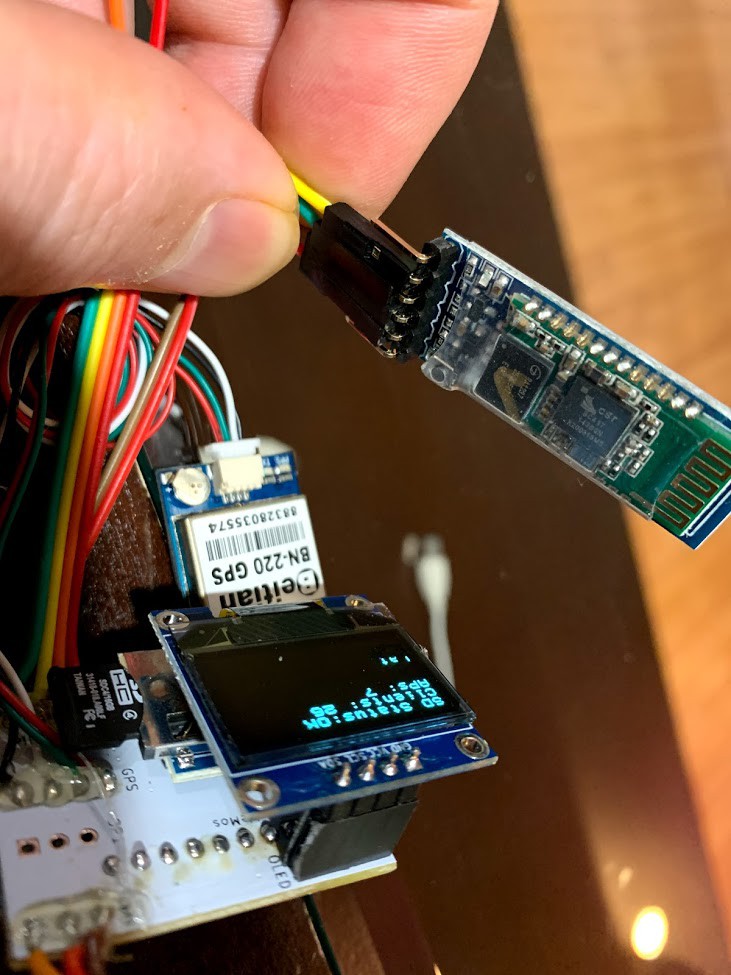
  • Displays the number of clients detected, APs detected, time and Lat/Long on the OLED screen live. 
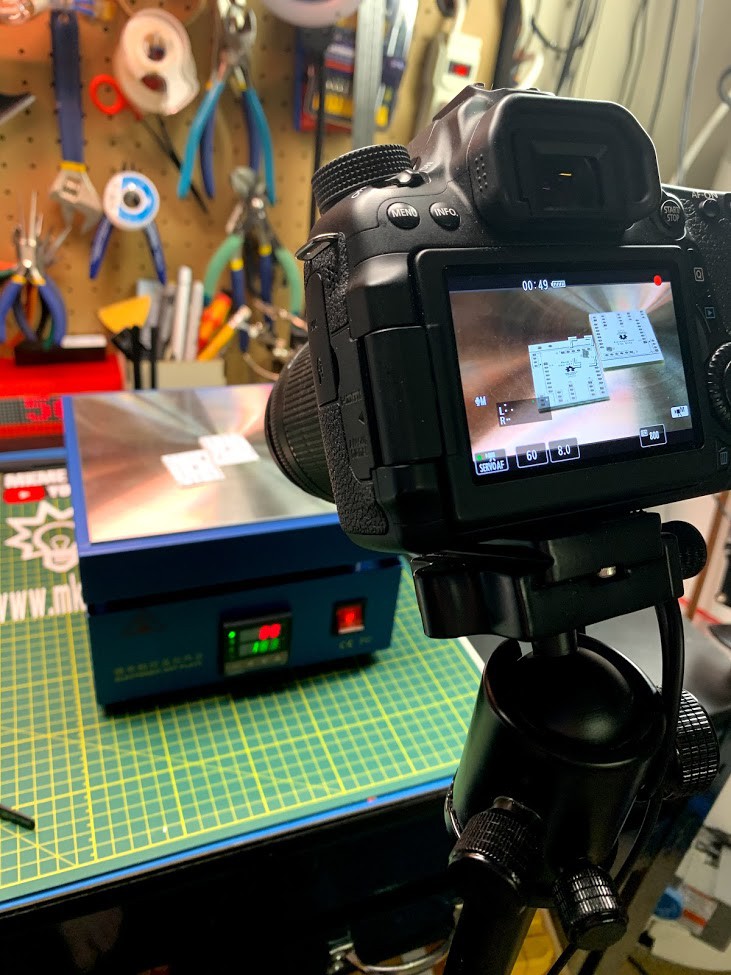
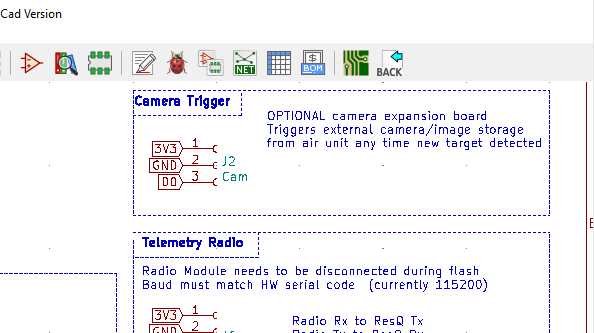
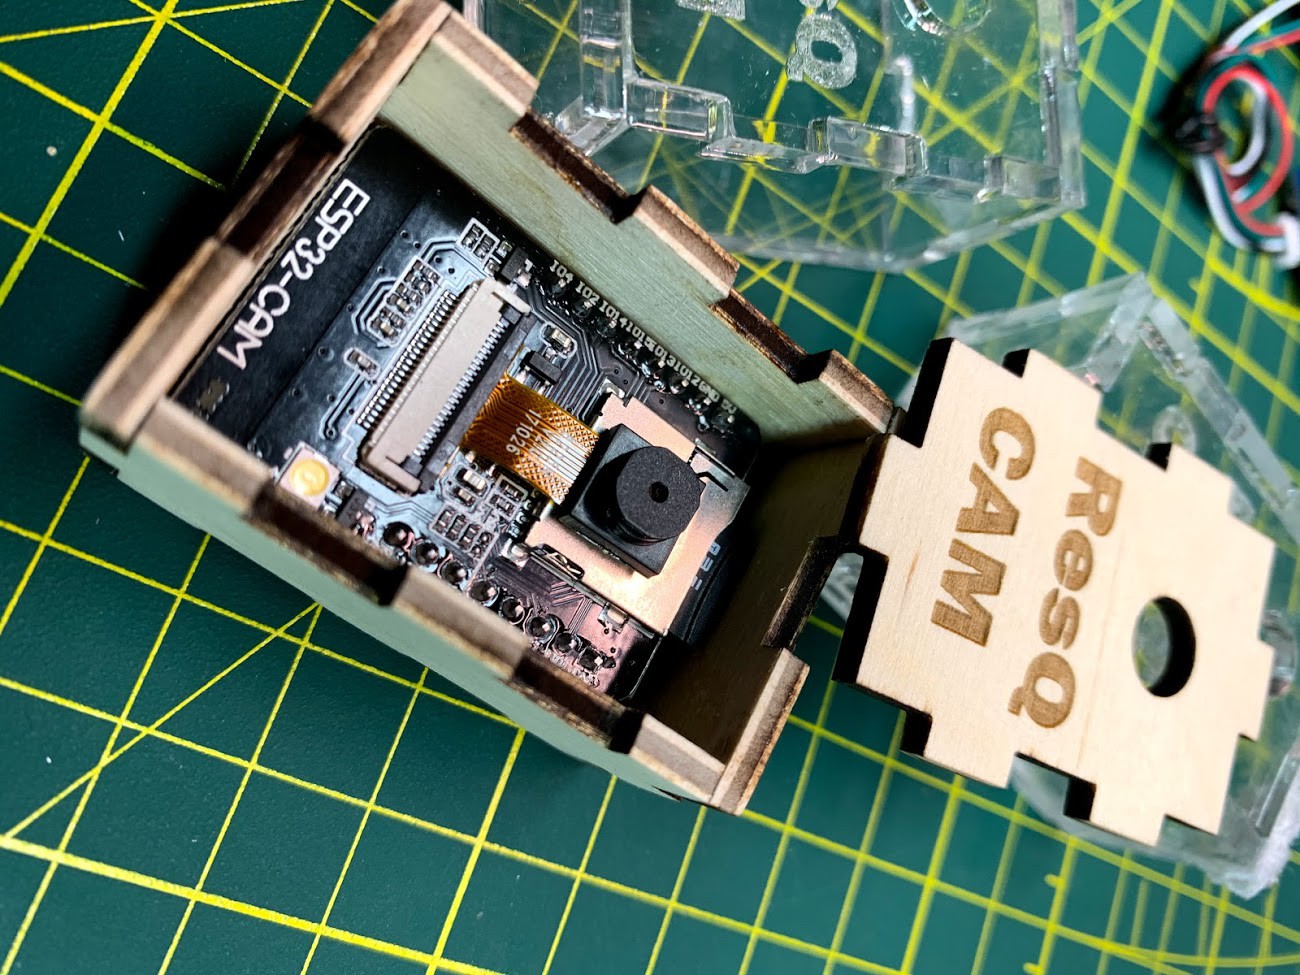
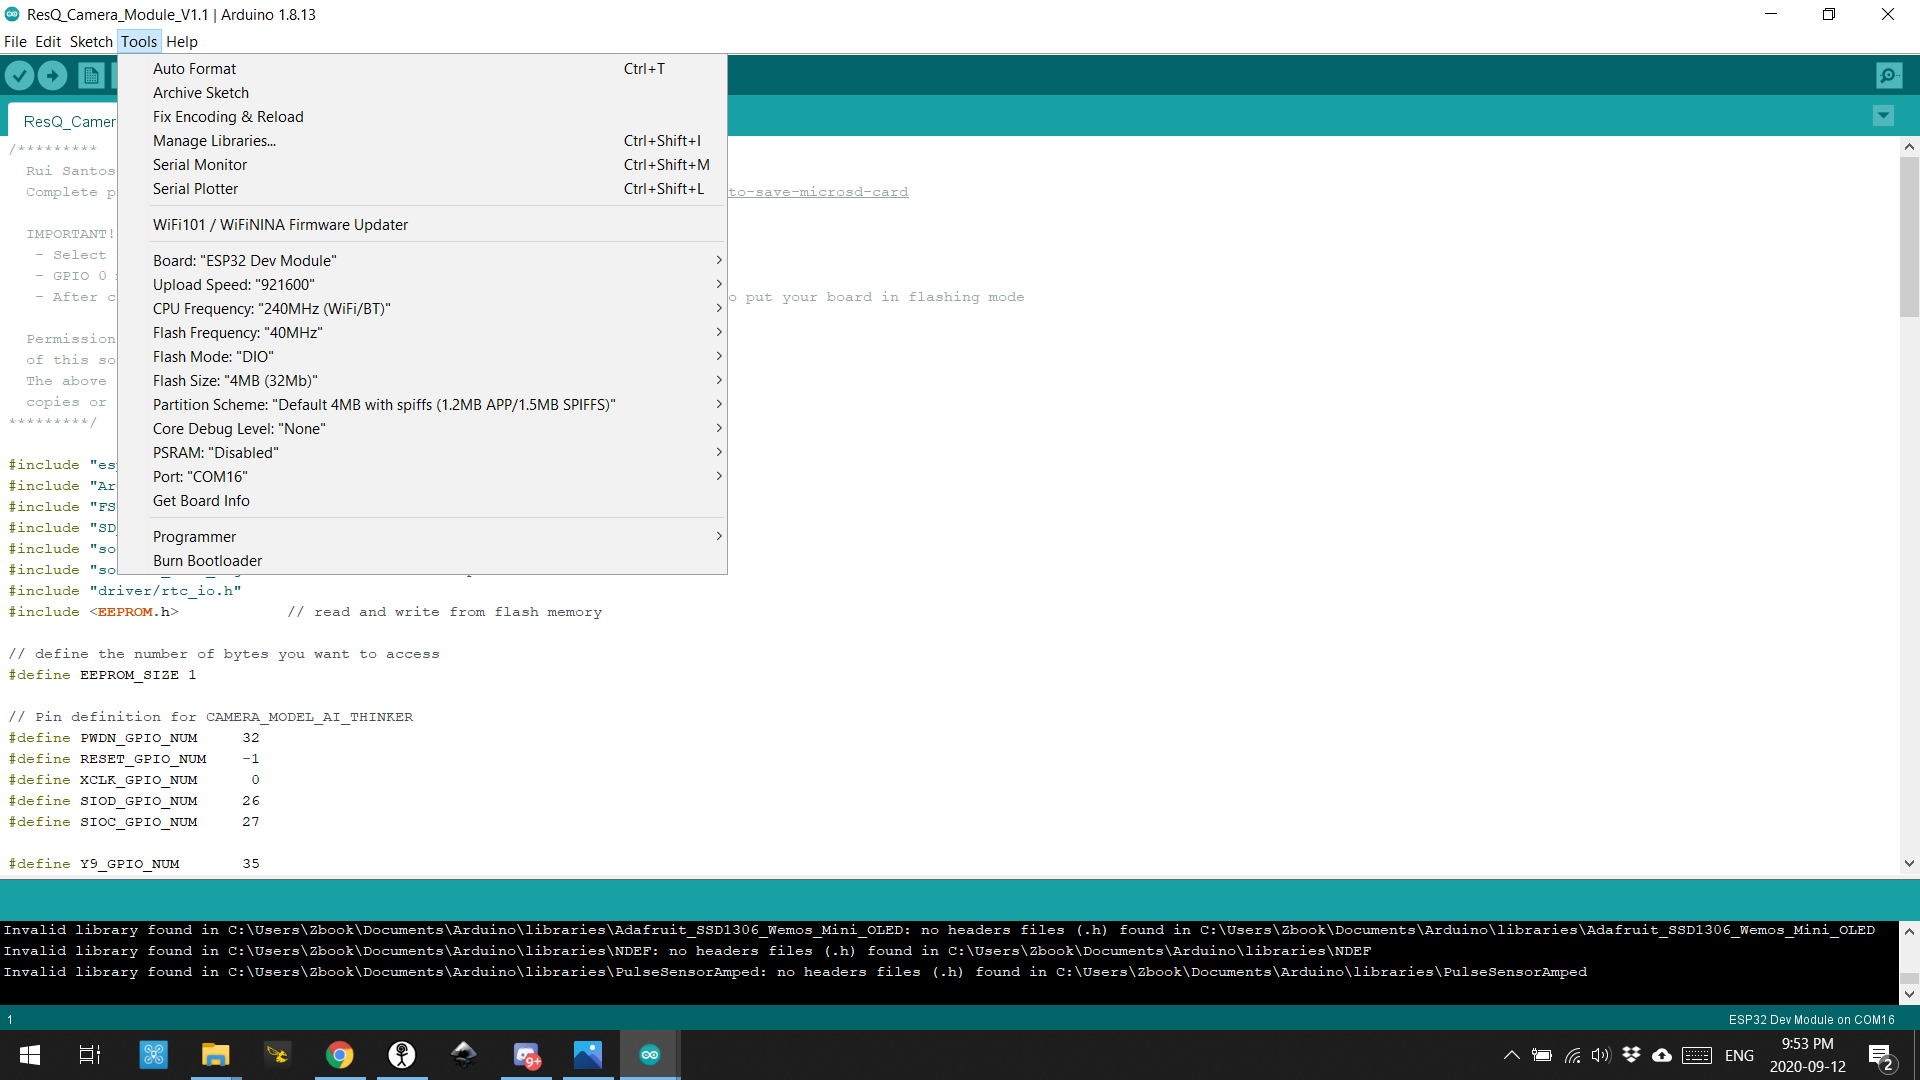
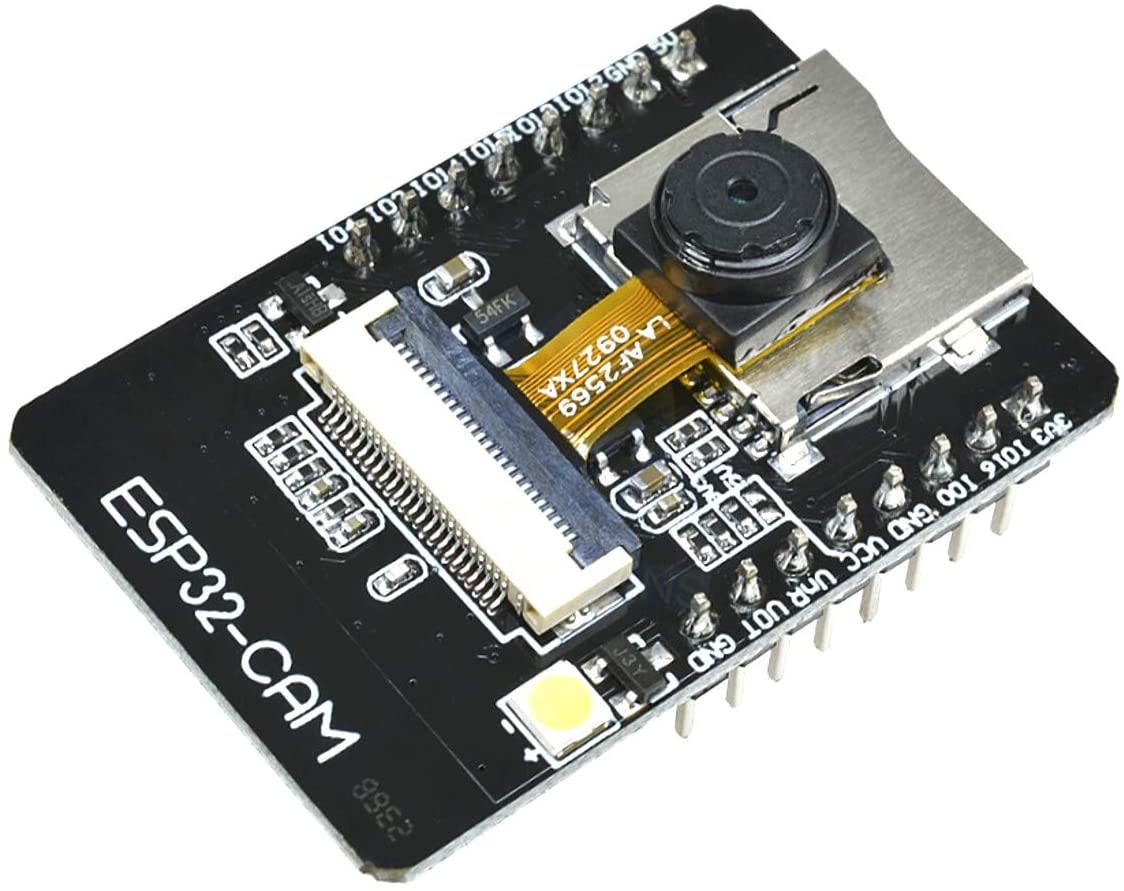
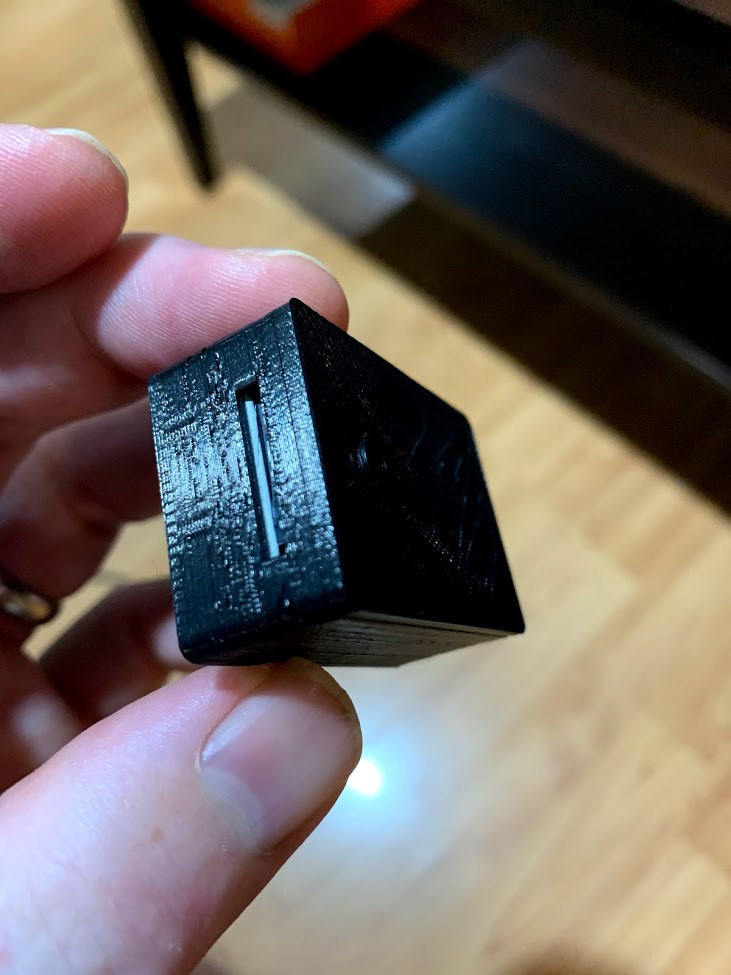
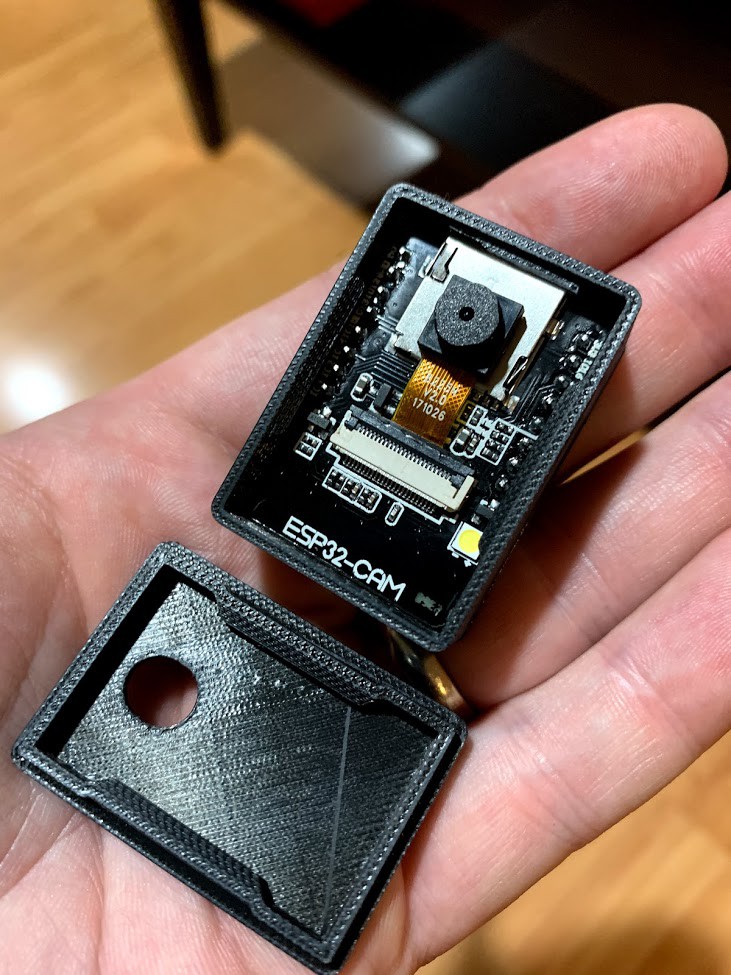
  • Triggers the camera module to capture an image of the area (optional)
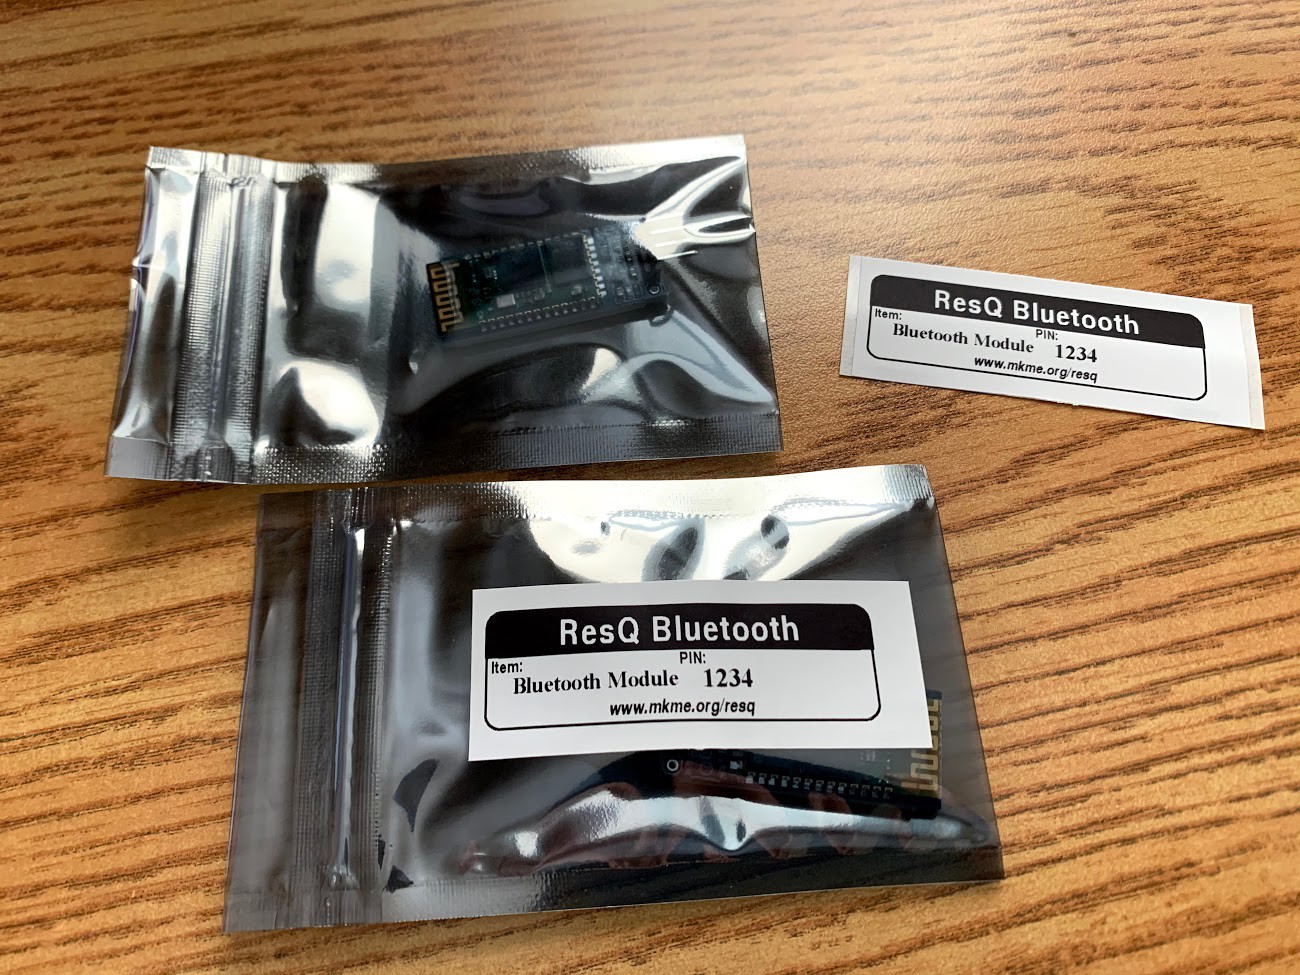
  • Sends the target info to your phone/tablet over Bluetooth (optional)
  • Sends data to remote monitoring station via LORA (under final dev currently)

COMMERCIAL OPTIONS 

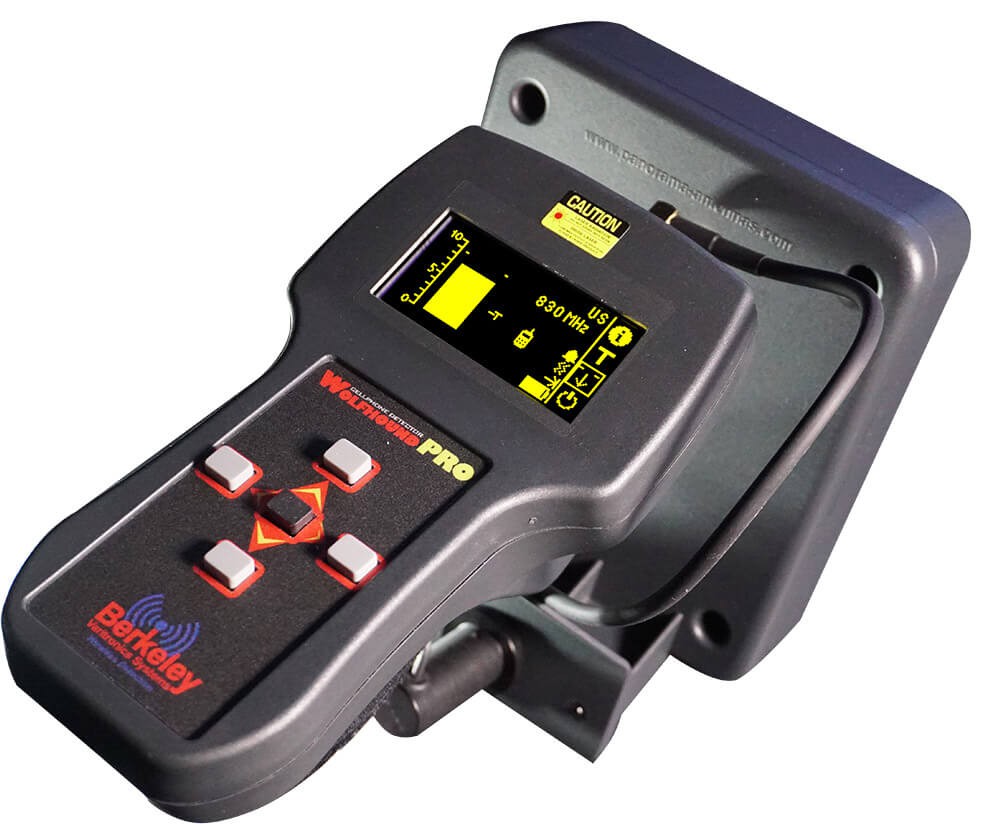
I have only found this one unit which does a similar task but is handheld only, limited to ~150 feet range and retails for $2400 USD.  Our ResQ project has similar functionality (using 2.4 GHz) for only a small fraction of this cost.  Our air unit is also easily deployed by aircraft or drone. Nice. 
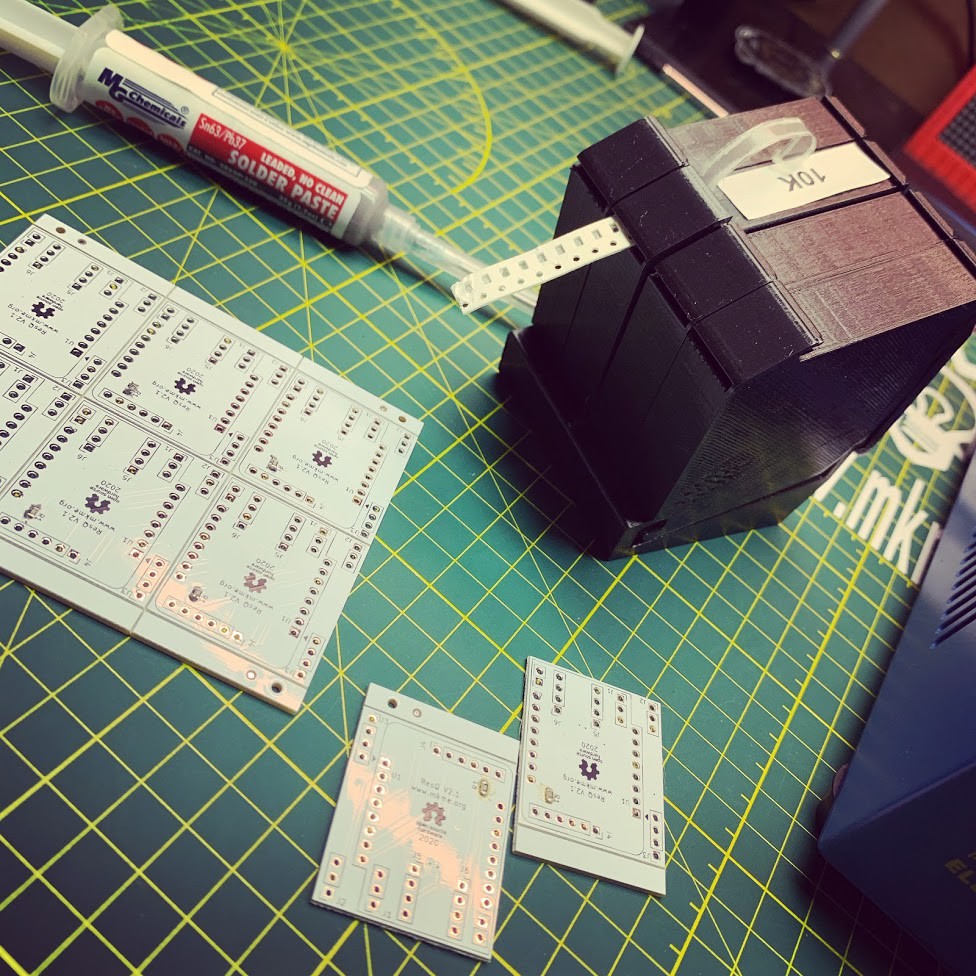
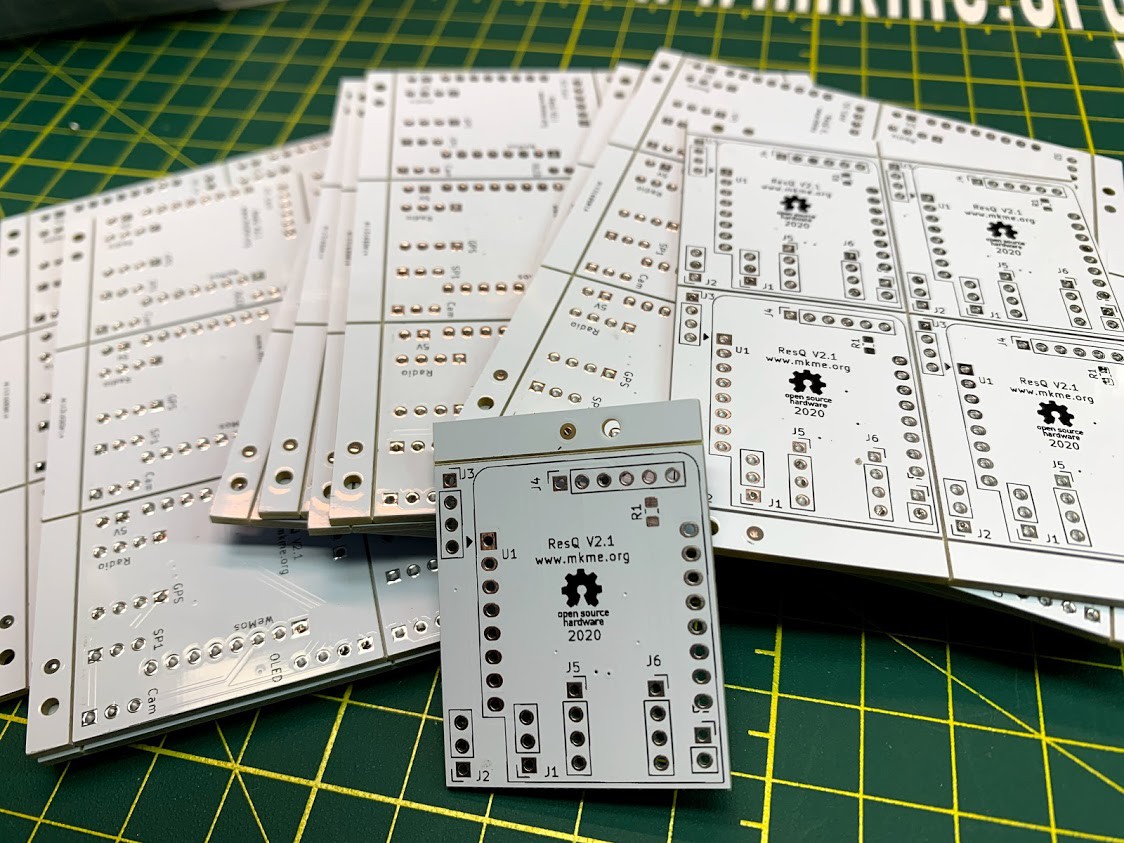
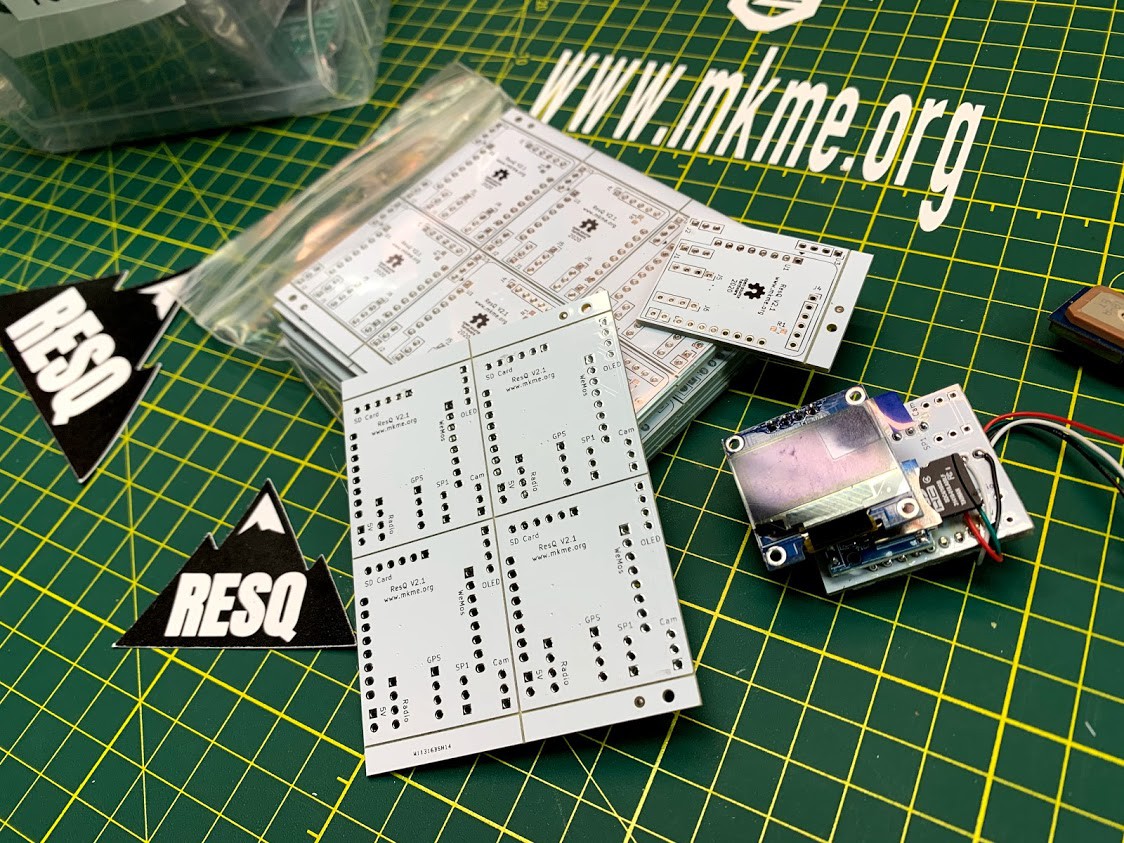
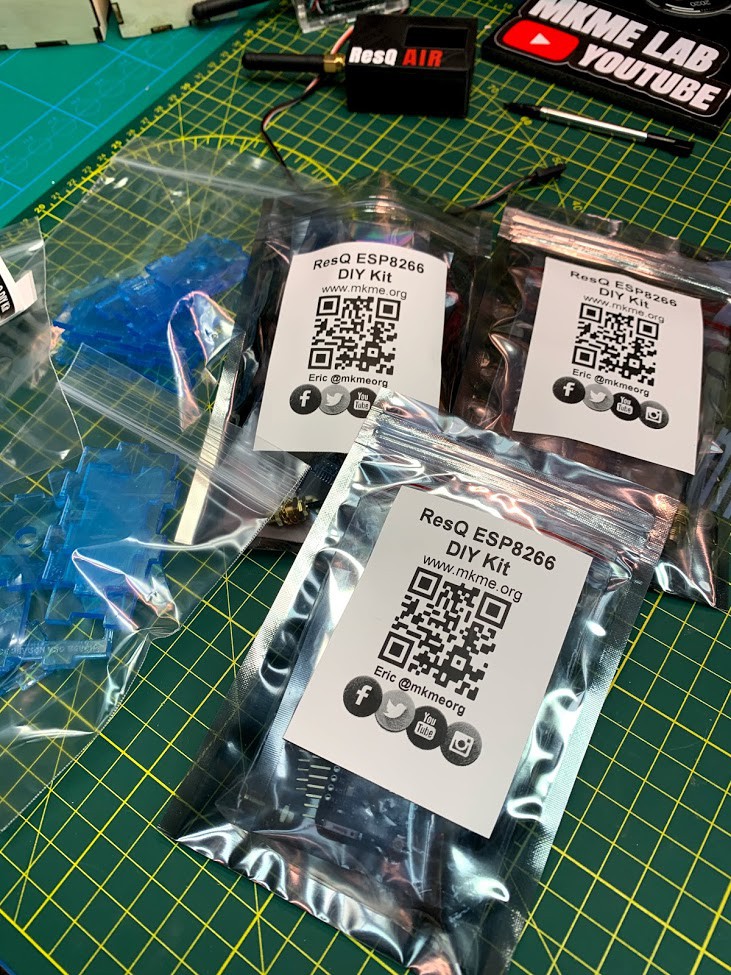
BUILD

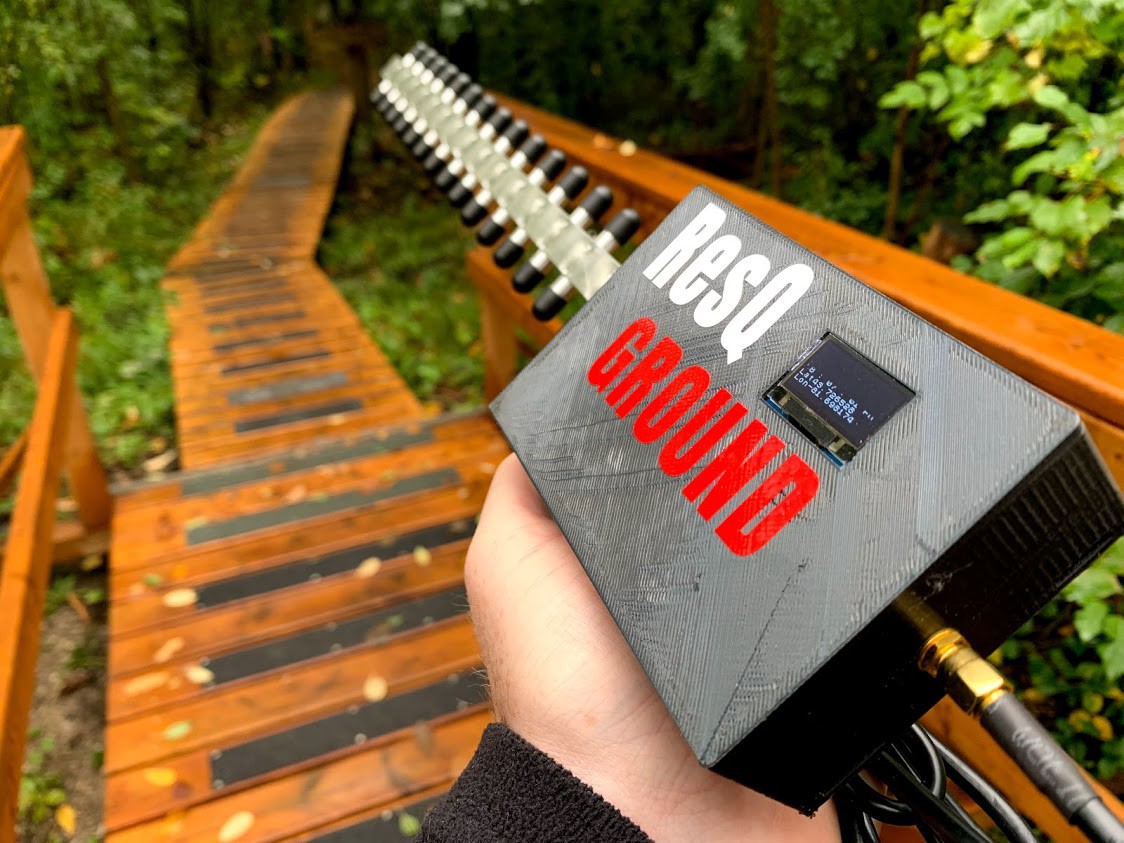
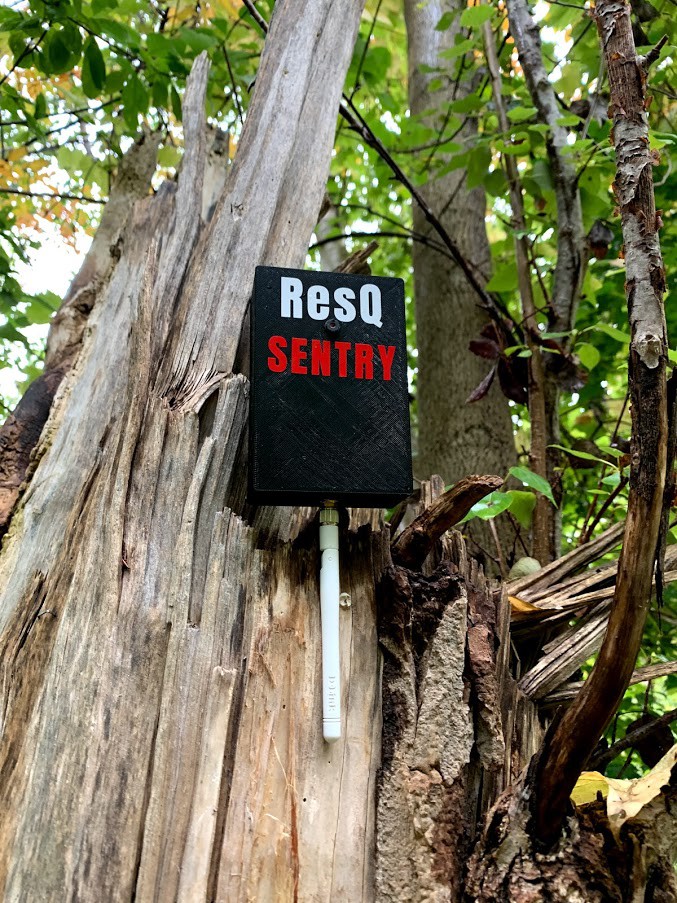
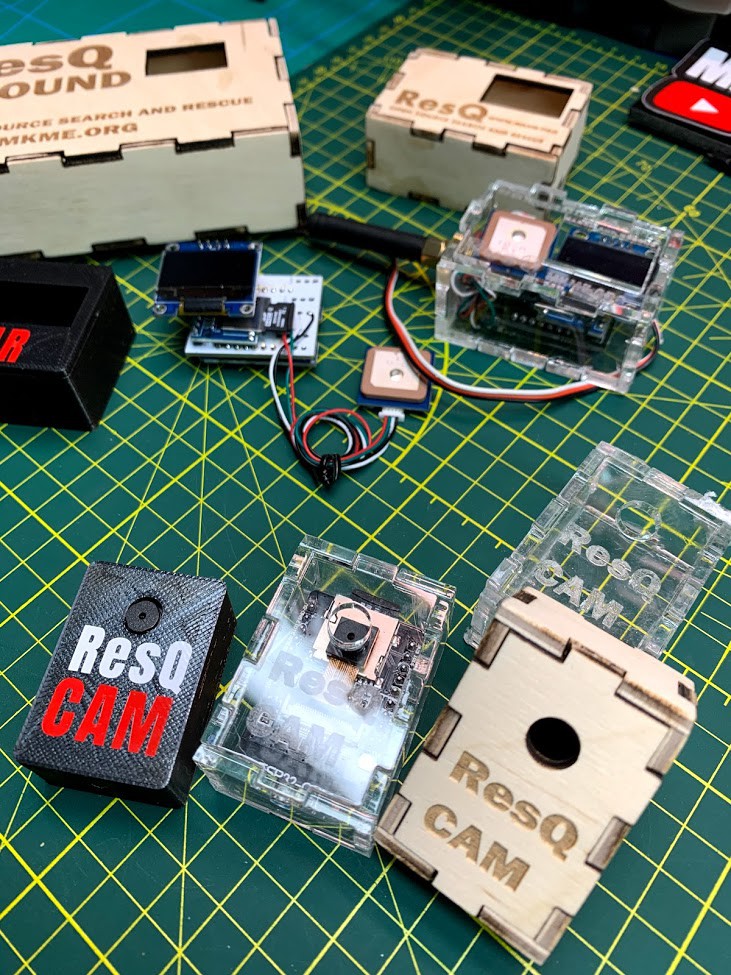
The air and ground units both use exactly the same hardware/PCB with the only difference being the power supply on the ground (battery) and larger directional antenna on the ground unit. This keeps the instructions, assembly and BOM very simple.  All the parts (except YAGI) are currently even stocked in my local Amazon warehouse here in Canada - Handy!

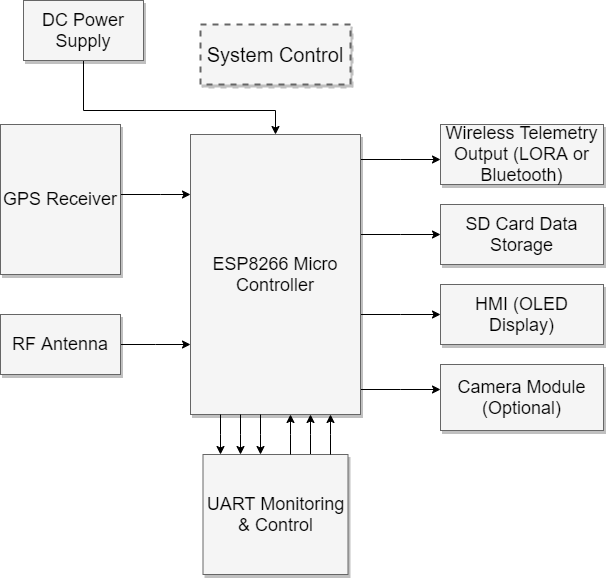
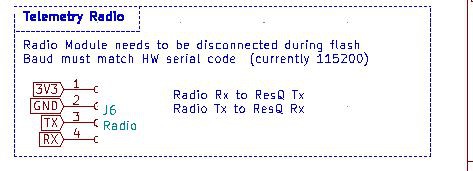
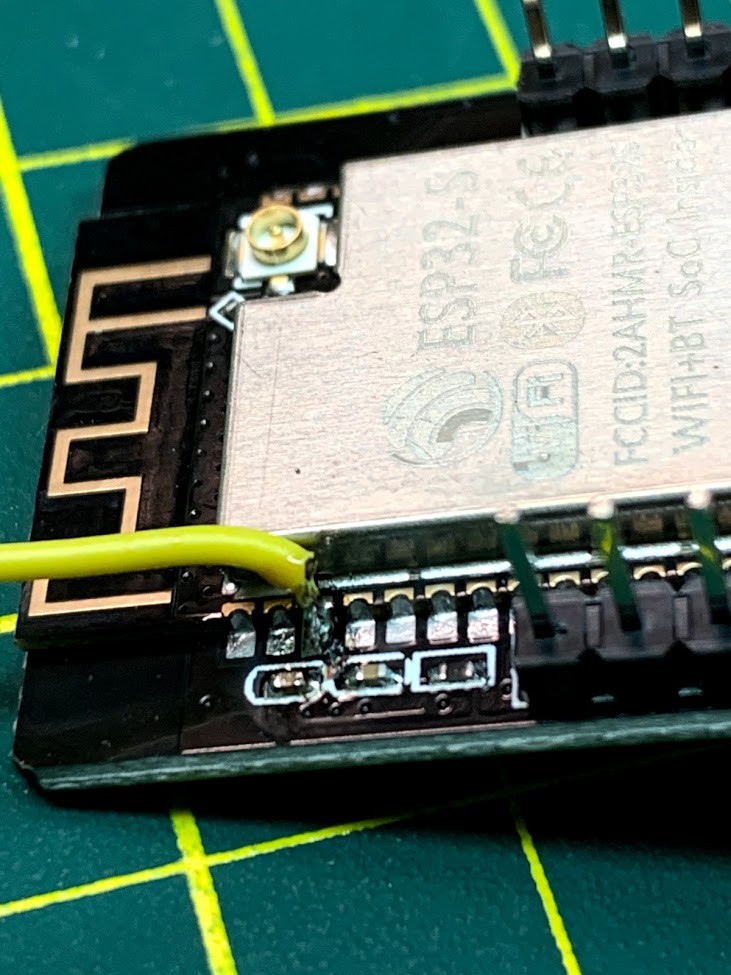
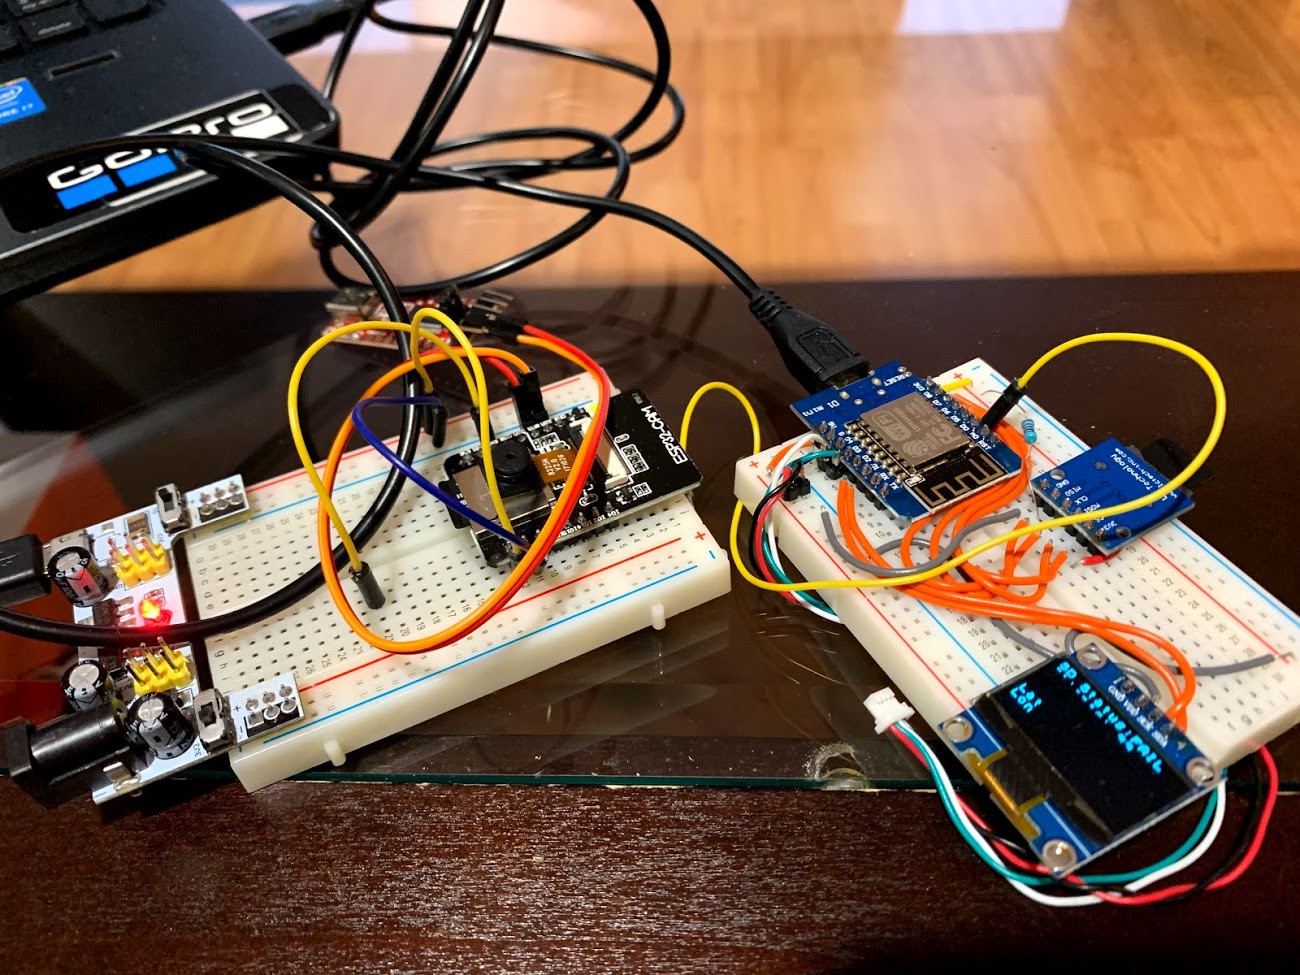
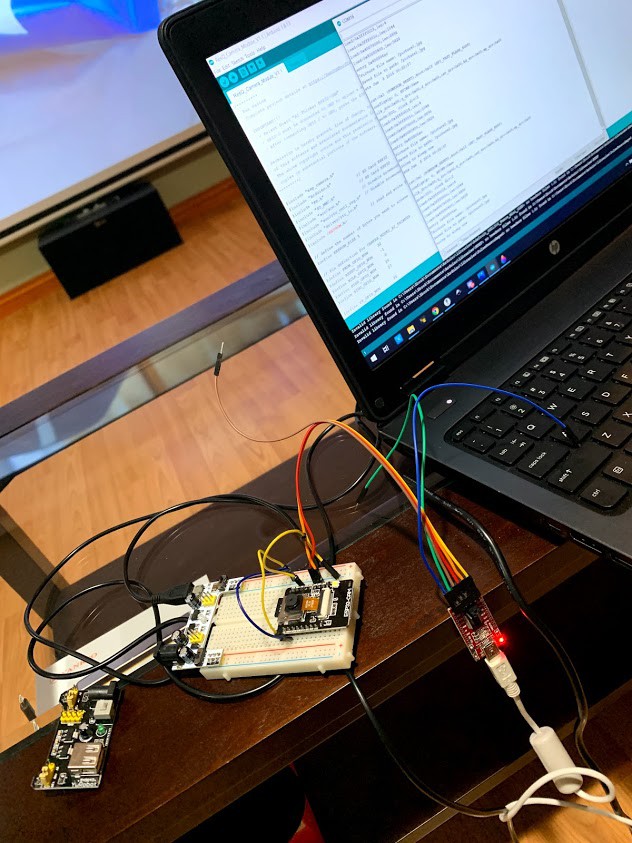
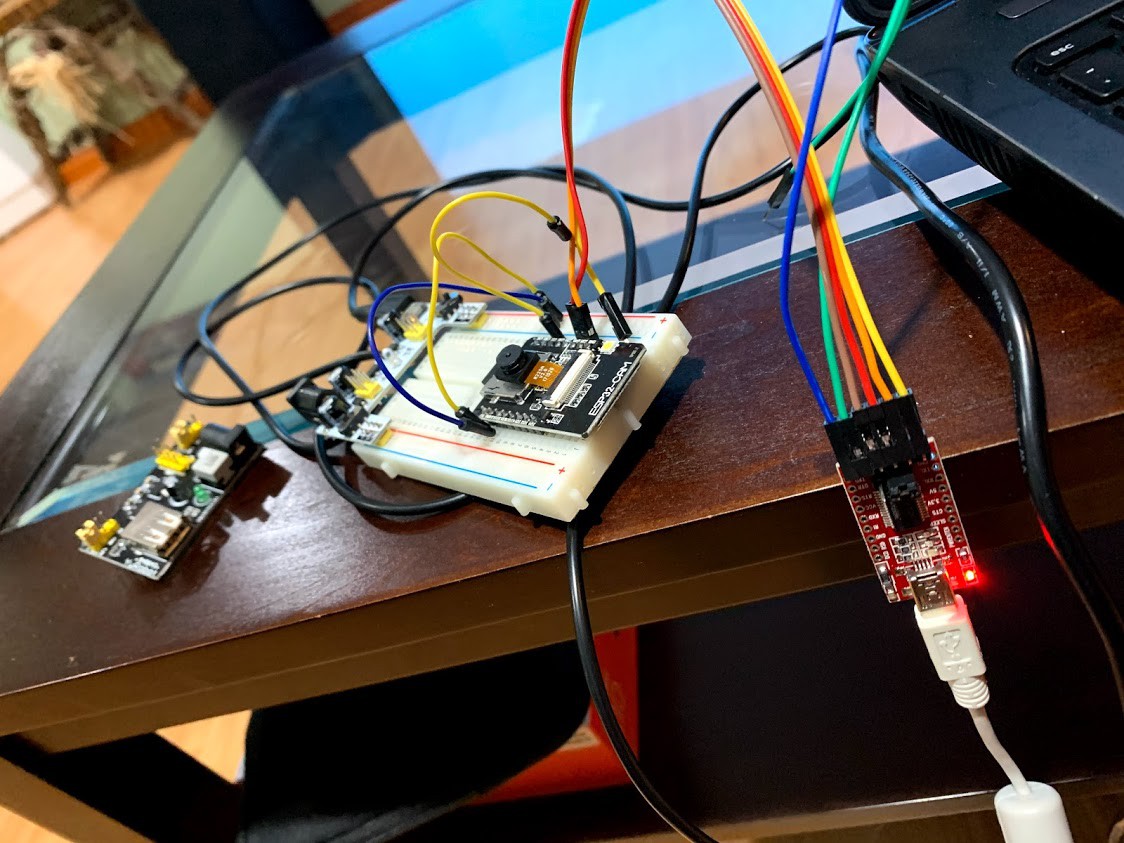
I am using the Wemos D1 mini PRO ESP8266 (for both air and ground units) with an external antenna (YAGI or omni/dipole) to receive the beacon frames, log them to SD Card with the MAC address and GPS coordinates to  easily plot with Google Earth/maps. It can also transmit the live data telemetry via LORA or similar module to the ground instantly as well by sending the debug UART via  radio to a simple USB  interfaced ground station.

The electronics are simple enough that anyone with basic soldering skills can assemble their own ResQ from scratch or kit in under an hour.

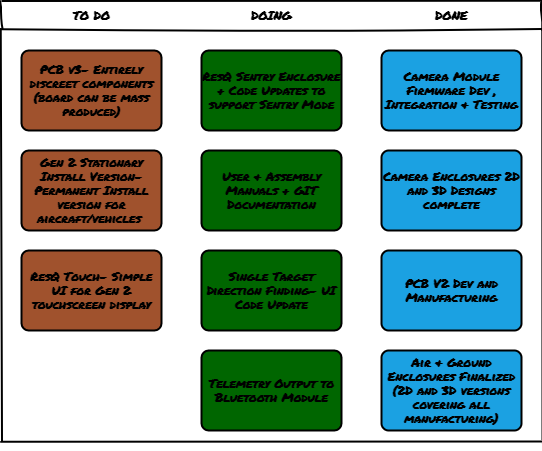
V3 of the PCB/project will be entirely discreet components and open the door to possibly producing these units at scale for a lower price and MUCH smaller package. 

MEDIA

Contest Entry Overview Video:

Build Part:1

Build Part 2:

Build Part 3:

Part 4:

See YT playlist for existing tutorials in the links (I documented most facets of the build in standalone related videos which when all combines- make this project) Handy eh

Skills Learned

Here's a fun little summary of the things I think this project has directly taught me or drastically improved by doing it. Maybe it might be of interest to you to learn them too if you make this project!

  • PCB/Design in Fritzing- I could do a bit but now its much easier (no longer needed- see below)
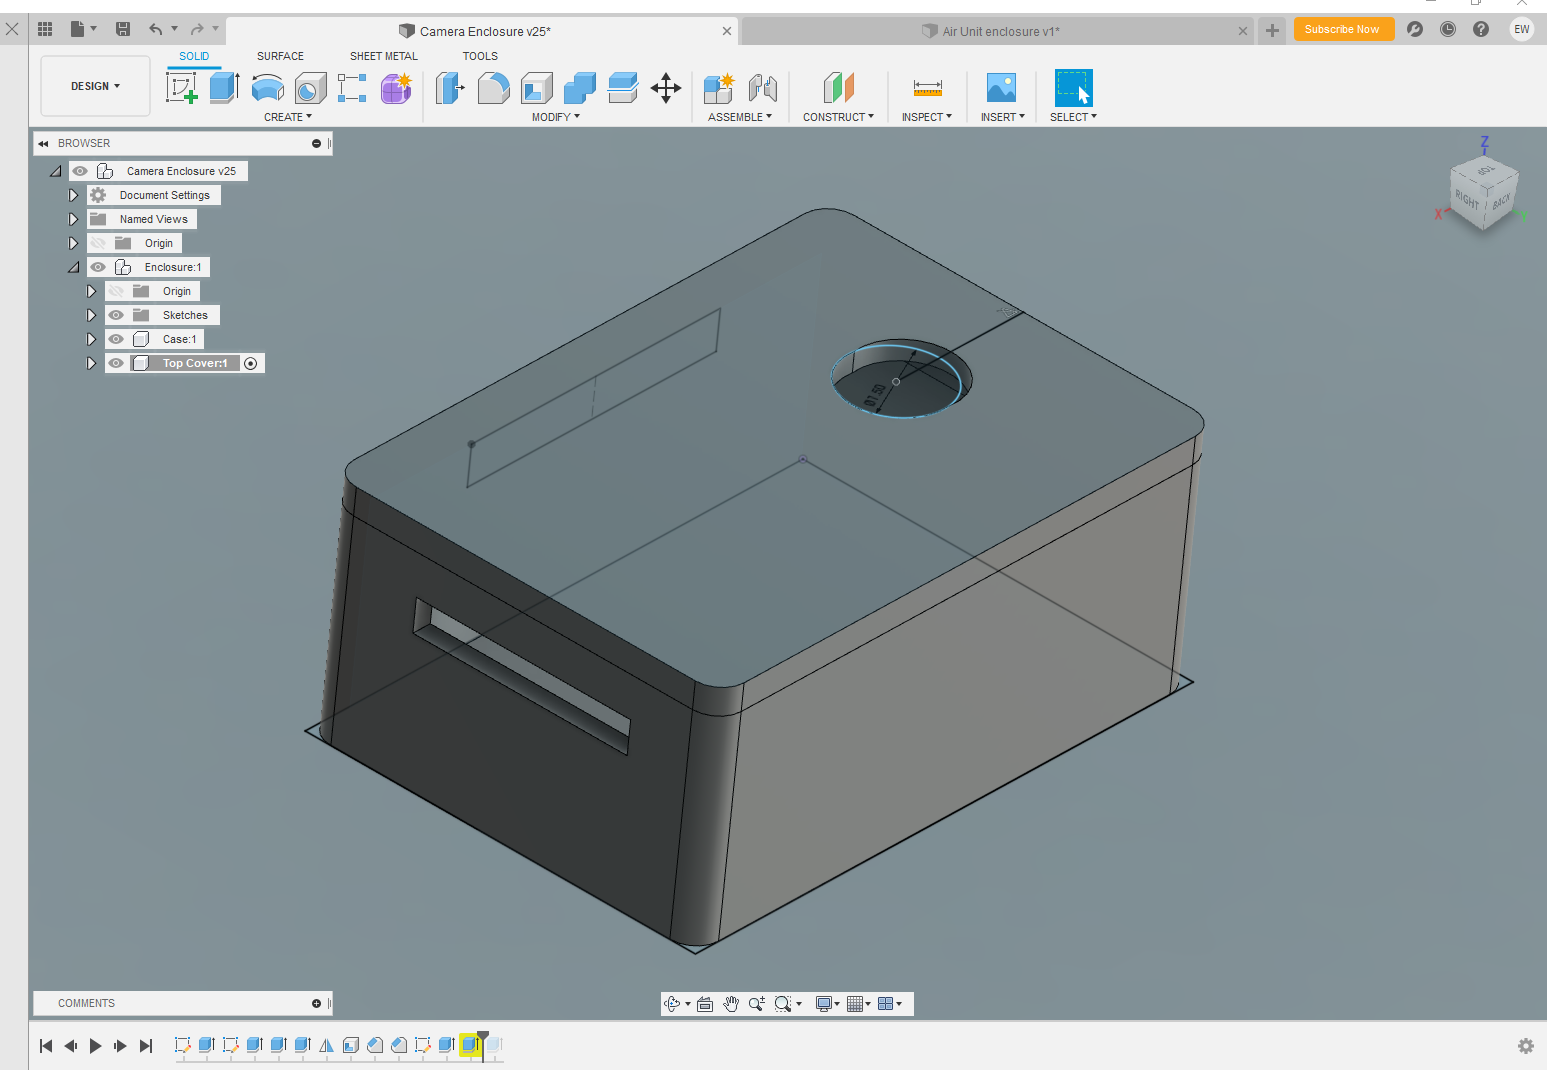
  • OpenSCAD- Had never used it before this project. Now it makes total sense (premade items not coding from scratch) and makes customizable...
Read more »

All Files Stored in Git Repo For Version Control.txt

All Files Stored in Git Repo For Version Control

plain - 89.00 bytes - 10/04/2020 at 18:24

Download

ResQ Assembly Instruction manual V1.1 .pdf

User Manual and Assembly Guide

Adobe Portable Document Format - 7.48 MB - 10/04/2020 at 18:12

Preview
Download

  • 1 × Updated BOM maintained in Github Repo (with updated links to parts) https://github.com/MKme/ResQ
  • 1 × Wemos D1 Mini Pro ESP8266
  • 1 × SPI SD Card Reader/Card
  • 1 × 0.96" OLED Display
  • 1 × 2.4 GHz Yagi Antenna

View all 9 components

  • New video Up

    Eric Wiiliam12/05/2020 at 14:03 0 comments

    Well ResQ didn't get so much as a sticker from being a prize finalist but I was able to get a new video done.  

    Components kits are in stock on my store here: https://store.mkme.org/?product_cat=custom

  • In the wild now!

    Eric Wiiliam10/14/2020 at 18:45 0 comments

    Well the first ResQ kit has officially started its journey to Alabama USA!  This was bought and paid for by someone I have never met nor had any connection to whatsoever. When people spend real money to buy a kit from me I take it to mean that people really do believe in the project!  I'm not crazy after all :)

    Kit 001:

    This will be the first time I can get some independent feedback on the function and project overall.  I cant wait for more of these :)  Really cool bonus- the new owner is going to be testing it out on a 2.4 GHz control based commercial drone which I haven't tried yet (my control is all ~900 MHz currently).  It should work just fine but real world tests are the best!

    For the easiest, lowest price and lowest environmental impacts I'm shipping them with the 2D laser cut enclosure (in the files for you) cut from locally sourced acrylic (plexiglass).  I cut 6 more assemblies this weekend too on my cheap K40 laser cutter. on Thanksgiving day while I was cooking a turkey :) 

    I got some baggies from eBay and to give things a bit more of a professional look I'm even factory-sealing them with my handy food saver vacuum sealer which actually works magnificent for this :)

    An entire set of components plus stickers and a few other things ships in this standard bubble mailer envelope (from Amazon) which cost me ~$15 to USA which is actually really great for tracked and expedited shipping from Canada. Any larger package would nearly double that price. The laser cut enclosure makes this all possible though. 

    I also assembled the SMD pullup resistors on a bunch of the V2 PCBs 

    I grabbed a cheap reflow hot-plate in an Amazon sale and finally gave it a try with the resistors

    I think it will be handy for preheating boards but TBH- I just used my hot air station to install the resistors way faster and easier.  Maybe I will try the oven someday if a bunch of people want boards.  ResQ kits, PCBs and enclosures are available from my store here if you want one too.  

    I am taking a few weeks off I hope to rest and regroup then hopefully some LORA long range tests and some winter missions too.  Some of the enclosures and design could use some updates and improvements but I decided it is far more important to get this project out there in the wild first and keep iterating as we go.  Handy phrase I live by:

    Don't let perfect stand in the way of better. 

    Still having so much fun with this. Cant wait to see a bunch of ResQ's in the wild! 

  • Test Test Test!

    Eric Wiiliam10/05/2020 at 00:21 0 comments

    I finally had a miserable day to get out in the woods with the ResQ ground- I needed the rain and cold to get everyone to stay home from the trails so I could test the 2.4 GHz signal propagation in a bit heaver obstacles (heavy forest).  

    The rain and wet foliage would be perfect for more test results (the moisture should attenuate the target signal and make it even harder for ResQ) :

    And test results we got!  I placed a target in the woods and to my surprise- it was received even better than previous tests.  I really dont expect ANY results without fairly clear line of sight since 2.4GHz should not penetrate hardly at all but it seems that grabbing a packet here and there by ResQ is entirely possible.  

    Someday I will bring an SDR to see just how far down in to the noise floor ResQ can identify a target of interest- the tests indicate it is pretty sensitive indeed! I really want to see this myself on a waterfall and it will make for a nerdy fun empirical test...

    Note: the rolling shutter effect blocks half the display at any given time:

    The client is my test but check out the AP's- this I didnt anticipate. The gain on the antenna is apparently so high that I am able to detect and identify access points from the businesses in the industrial park just beyond the woods.  Very cool.

    The GPS took a few moments to get position as the last field test was far from here. The position lock is much faster if you power up close to the position of the last 3D fix.  Overall- I'm still super happy with the results.  

    I would like to fast the ground unit to a light aircraft facing down and do an aerial survey to test the results with the YAGI. The Air unit with an omni antenna has worked well but the high gain directional is a BEAST.  

    I took Sentry along too for a play in the woods.  As usual I forgot a key part- the SD card from the ResQ cam was sitting in my laptop at home... Murphy.  I have enough tests on the camera now that I am happy.  

    Next up I would still like to get V3 PCB on the go, alter the Sentry code to capture more image options (capture timed/burst sets of pictures) and finalize the LORA and Bluetooth code so the data stream can be best used in a phone/tablet app and base station for multiple ResQ Sentry installations in a game preserve or other large area needing surveillance. 

    I may take some weeks off just to rest and regroup on the project now though as I've lived an breathed ResQ for months now.  I doubt I will be able to stay away though...

    Loving this project :)

  • Introducing ResQ Sentry!

    Eric Wiiliam09/29/2020 at 16:40 0 comments

    Just when you thought ResQ could do ALL the things- BUT WAIT- THERE'S MORE!!!

    I present to you ResQ Sentry. This application of the basic ResQ hardware allows a stationary install which monitors for any new cellphone in the area then captures a still image(s) and data to the SD card(s). Just like a game camera with one HUGE advantage- this cannot be triggered by animals, movement or other uninteresting things-  An image, MAC addresses and details are ONLY captured when a human enters the scene with a wifi enabled device!  

    In applications like game preserves or other private areas you will only capture people of interest and is completely immune to wildlife and all environmental variables- cool eh? Cameras with infra-red sensors get constantly triggered by every warm blooded creature or environmental hiccup- not Sentry- it only cares about human traffic.

    For endangered species protection, human interference or other intrusions ResQ Sentry can be deployed with a small solar panel and battery supply system to silently monitor the area for any unauthorized access. 

    But wait- THERE'S MORE!  

    Couple this with the LORA radio integration already supported- You can get an alert of the intrusion, information AND MAC adress from many miles AWAY!  You can even deploy multiple Sentry's and not have to change a thing- The GPS coordinates are already broadcasted over the telemetry radio- so you will always know what sentry was tripped and WHERE!  I told you it was cool eh?

    This is all accomplished with the existing hardware- NO MODICFICATIONS! Simply plop your ResQ Air or Ground unit in to the Sentry enclosures I have provided.  Same as the Air and Ground I have provided a 3D printable version, 2D versions (for CNC, Laser or manual cutting) and all the source files. 

    Now we are really cooking...  A very simple set of hardware- reproducible anywhere in the world and multiple applications from basic human life preservation, to animal protection, security and MORE!

    And here is it with the $20 solar panel I grabbed from Amazon which already has a Lion battery and DC to DC converter inside!  They are marketed to game cameras which is exactly what this does but BETTER!  (disclaimer- I haven't tested how long it can go on solar and suspect I need to source a bigger panel but this is a start for V1- I have learned its better to just start building an testing rather than waiting on the perfect parts to arrive)

    Looks neat eh?

    This is really fun now...

    /end 90s shamwowcommercial...

  • Bluetooth Integration Complete!

    Eric Wiiliam09/25/2020 at 14:09 0 comments

    If you have been following this project you will have seen in PCB 2.1 I added support for UART telemetry radio directly on the board here: 

    Located here: 

    This allows for a long range telemetry radio (for ResQ Air Drone use) but ALSO allows us to easily add a Bluetooth radio which you can use to see the information live from your phone/tablet. 

    This is intended to be used when ResQ is utilized from a light aircraft or helicopter- you can mount the ResQ ground unit (or air module) OUTSIDE the aircraft fuselage and wirelessly get the data/targets right on your phone.  Handy eh! No running wires or messing around with the aircraft structure- just jump in any Cessna- attach ResQ to the wing strut or wherever- point it downward  and go search :)

    Lat night I updated the code and live tested an HC05 with the ResQ 2.1 PCB system

    After some learning to AT command program - Sure enough it works great!  It happily yaps out all the data over Bluetooth no problem:

    Sometime downrange I will try to make an APP which will graphically display the data on a map- should be easy as I am already providing GPS Lat/Long and the target info. Just need to plot it to make it nice and friendly to human eyes. For now though- it can work- it shows you when a target is detected and where in text form. 

    I've added all the instructions to my user and assembly manual (FYI ALWAYS update your manuals RIGHT when you finish a task- otherwise it is very hard to go back and get motivated to write documentation). It will be published here soon once I clean it up and make it really good for people to make this project.  Snippet:

    Since AT programming the module via a serial programmer (needs to have baud rate changed to match ResQ)  isn't the easiest thing- I went ahead and made these available pre-programmed alongside the ResQ kits on my website http://store.mkme.org/product-category/custom/

    They are even programmed as ResQ name and PIN is easy at 1234

    Next update here should be a HUGE one as soon as I finish it :)

  • Kanban Time

    Eric Wiiliam09/24/2020 at 17:07 0 comments

    I use Kanban and Scrum a fair bit in my day job and occasionally use it in my projects/videos as well.  It just helps me focus on what I really need to be doing right now, what can wait and what I want to do long term in any project. 

    I decided others might benefit from seeing this too so I took a few minutes and visualized my current whiteboard in a Kanban format. I will update it periodically on GIT as we keep moving in to the final phases of this project. 

    In reading the above you will get a sneak-peek of the pretty huge announcement coming up soon here :)  

    I am super happy with the modular approach I took with this project whereby I can re-use the hardware and software for MULTIPLE different uses.  And now I will soon be adding one more, then some weeks from now- yet another big one.  

    This is getting fun now...

  • Camera Integration Complete!

    Eric Wiiliam09/21/2020 at 14:32 0 comments

    This weekend I completed the camera module integration,  tested and pushed the code to GIT. I was also able to design and manufacture a 2D version of the case (3D printable one was already done) and made a few prototypes. The camera module (if connected) is triggered by ResQ to wake up from deep sleep, take a still image of the area when a new MAC address target appears, store the image as a jpg to sd card then go back to deep sleep and wait for a new target.  Nice eh?

    How I did it:

    I took the existing ResQ which has always lived on a breadboard (it's a good idea to keep a breadboard version of any project so you can quickly test any changes you like). I took the ESP32-CAM module we had previously tested the code on and added a wire to the RST line. 

    I connected this RST line to the CAM Output on ResQ (D0 pin broken out on the PCB and schematic) Shared a ground between the boards (also broken out on the PCB). 

    Then updated the code. I knew the design was solid and SHOULD work but real hardware testing is the only way to know for certain how it will truly function.

    I updated the ResQ code to trigger this output pin low any time a new MAC address is written to the SD card.  This means that you will catch an image of the area any time a new target is detected.  Later I'll put options in the code to catch a series of images at set intervals which will cover more area. This should work great when carried by a drone/UAV since you will have images of the area from above EXACTLY where your target is located. Nifty. 

    I then designed and laser cut the 2D case models out of 3mm plywood and acrylic.  

    They turned out great and are big enough that users don't have to remove the camera board pins as seemingly every one of them found online comes pre-soldered.  Desoldering headers is a pain so lets avoid that and make it easy for people...

    Super happy with the code, design and function. 

    We now have a full family of case options for the Air, Ground AND Camera modules. 

    Now this seals the deal for yet ANOTHER use for ResQ coming soon- with ZERO code or hardware modifications we can use this system in a pretty cool application I will show in an update soon. 

    Stay Tuned :)

  • The Future Is Bright!

    Eric Wiiliam09/18/2020 at 23:06 0 comments

    It was Christmas again for me this week. V2.1 PCBs arrived from PCBWay and I have to say- I love them. 

    I went with white mask this time and I'm really happy I did. Not only do they look cool but they make it VERY easy to tell them apart from V1's in my workshop (V1 is black mask).  This time I let the board house do the penalization and the V-grooves are waaaay nicer than the mousebites.  

    I got one out and started adding components right away...

    It works! 

    I still need to check the expansion connectors but so far things are working great.  As before- users can decide which side of the board they want to mount the components on by simply soldering the headers to the side that suits their preferred "stack".  It is best to have the old not firmly mounted and instead use wires or ribbon.  For my tests here I like it stacked for ease of testing.  

    This will all be shown in the assembly an user manual as well as videos.  I just finished editing video Part 3 today and it will go live next Friday on YouTube (editing takes forever).

    Now to start on the design for an all-in-one board solution that could be manufactured with discreet components.  Of course it will still be the same base design so it can be used in both the air and ground versions- Handy!  One ResQ board to rule them all! 

    I still have a pretty big announcement coming on a NEW ResQ application I am finalizing- just when you thought ResQ could do all the things- but wait... THERE'S MORE!

    I ween.

  • Cameras are hard...

    Eric Wiiliam09/13/2020 at 20:04 0 comments

    I had some time last night I really wanted to finalize the camera expansion module.  I have never had such a difficult time programming any board as I did with the ESP32-CAM. 

    I was able to talk to it and program it just fine but every time although successful- just resulted in gibberish and errors via serial after. Tonnes of posts online reference this problem and almost ALL blame it on too little power (brownout) or bad USB cable. Odd

    After over 2 hours of annoying failure I found a couple posts referencing changing the settings as well as wiping the flash with a python tool. I wasnt able to wipe the flash and I had to change the board type and then alter a few settings to match the info one person recommended. Here are the settings I used:

    And it WORKED! I was finally able to capture images to the SD card when the ESP32 boots up them puts itself back in to deep sleep waiting for another boot.  Perfect.  

    I have no idea why the pictures are so green but I'll work on that :)  

    I think I will supply some of the camera modules as part of kits since they are a royal pain in the %$@& to program. No wonder so many people reported giving up and blaming the hardware in all the posts I read.  They are tricky but...

    I ween. 

  • Camera Expansion Module is Born!

    Eric Wiiliam09/10/2020 at 12:47 0 comments

    Last night I made some time to do the development on the camera module. Although this is a totally optional expansion on the project- I did design this output in to the Gen2 PCBs. This module is actually key in a pretty huge possibility for the project as well (stay tuned for that this fall). Long story short:

    ESP32 Cam boards are very cheap and will be triggered to capture a still image when a new MAC address (search target) is detected. This is pretty handy for an aerial search as you can have a downward facing still image of the area of interest to send ground teams to directly. Handy. This is the board:

    Since all of them from eBay and Amazon seem to come with the pins already soldered I had to make my own case design so people dont have to desolder headers if they build this project- just drop it in the case.  In Fusion 360 I simply scaled the air/ground unit files again with the user parameters , added a couple holes and BAM:

    So cool I learned how to do this from the adafruit tutorial. i did exactly ONE iteration to adjust the camera hole and add the SD card slot and this was the result 

    Sooo happy!  The files are in Git but not added to the manuals/docs yet as I want to finalize the use case and hardware tests. I dont see any issues except maybe power supply.  Although this is strictly and optional expansion for ResQ- I think it will add a significant bit of functionality and under $15 USD cost. 

    I even assembled my first kits to help others make this project

    You can find them here: http://store.mkme.org/product-category/custom/

    I ween. 

View all 32 project logs

Enjoy this project?

Share

Discussions

Andrei wrote 07/29/2020 at 13:48 point

we have 99% cell network coverage in our country. how it will work here? maybe directional antenna can be used? 

  Are you sure? yes | no

ris wrote 07/10/2020 at 23:45 point

My guess is you'd get even better results if you listened for signals on the cell frequencies. The phones may be out of range but they'll still be probing at full power for a cell station.

  Are you sure? yes | no

Eric Wiiliam wrote 07/13/2020 at 20:43 point

Surely but that would require a specialty radio that I do not have I'm afraid. Hence 2.4

  Are you sure? yes | no

ris wrote 07/13/2020 at 21:15 point

You could do it with a low-end SDR.

  Are you sure? yes | no

Similar Projects

Does this project spark your interest?

Become a member to follow this project and never miss any updates