 Chris G
There's a little video here that gives an overview of the project.
You can access the Fusion360 project here: https://a360.co/2PXgAUS - so feel free to print your own version if you want.
For the microphone in the video, I'm using my own ICS-43434 microphone board but it will work equally well with the INMP441 microphone board.
These are both I2S microphones that interface directly with the ESP32.
The I2S 3W amplifier board is from Adafruit and powers the speaker. This also directly interfaces with the ESP32.
For the ESP32 board, I'm using a TinyPICO, but any generic dev board can be used as we aren't using any special features in this project.
I'm using a custom PCB - I got this made up by the great people at PCBWay - as usual, they did a great job and I'm really pleased with how the boards have come out.
I've got a lot of audio projects and it's really nice to be able to just plug things together and not to have to worry about wires going everywhere. The only slight omission I've made is not breaking out the remaining GPIO pins - so I think I'll do a version 2 of the board soon.
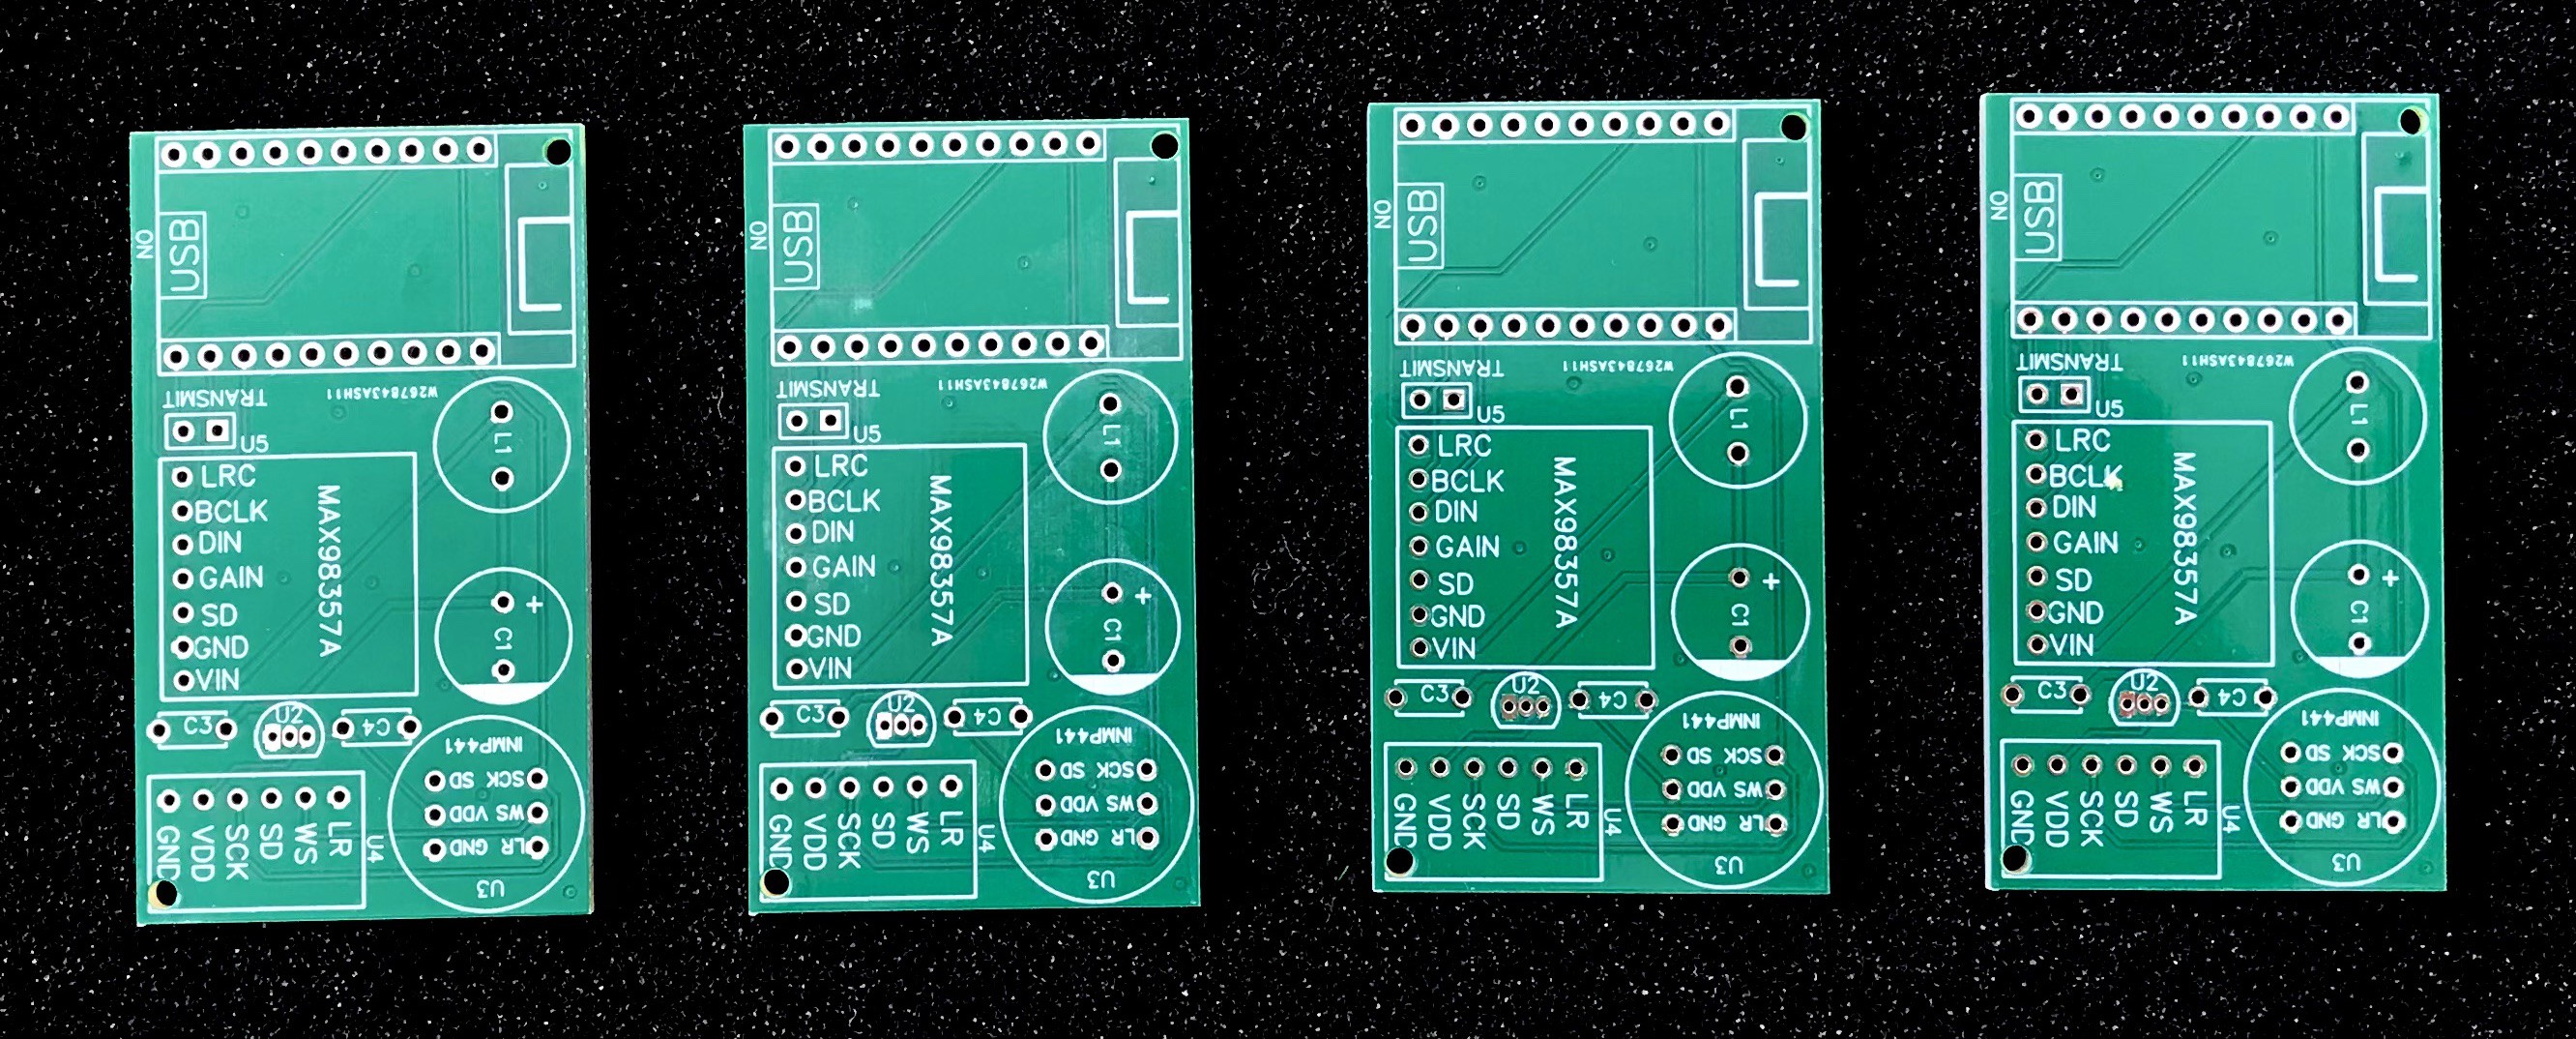
Here's a link to the schematic and PCB on EasyEDA and a link to order the board directly from PCBWay if you want to.
Having said that, you really don't need a PCB, you can easily just connect everything up on breadboard - and that's exactly what I did when I was prototyping.
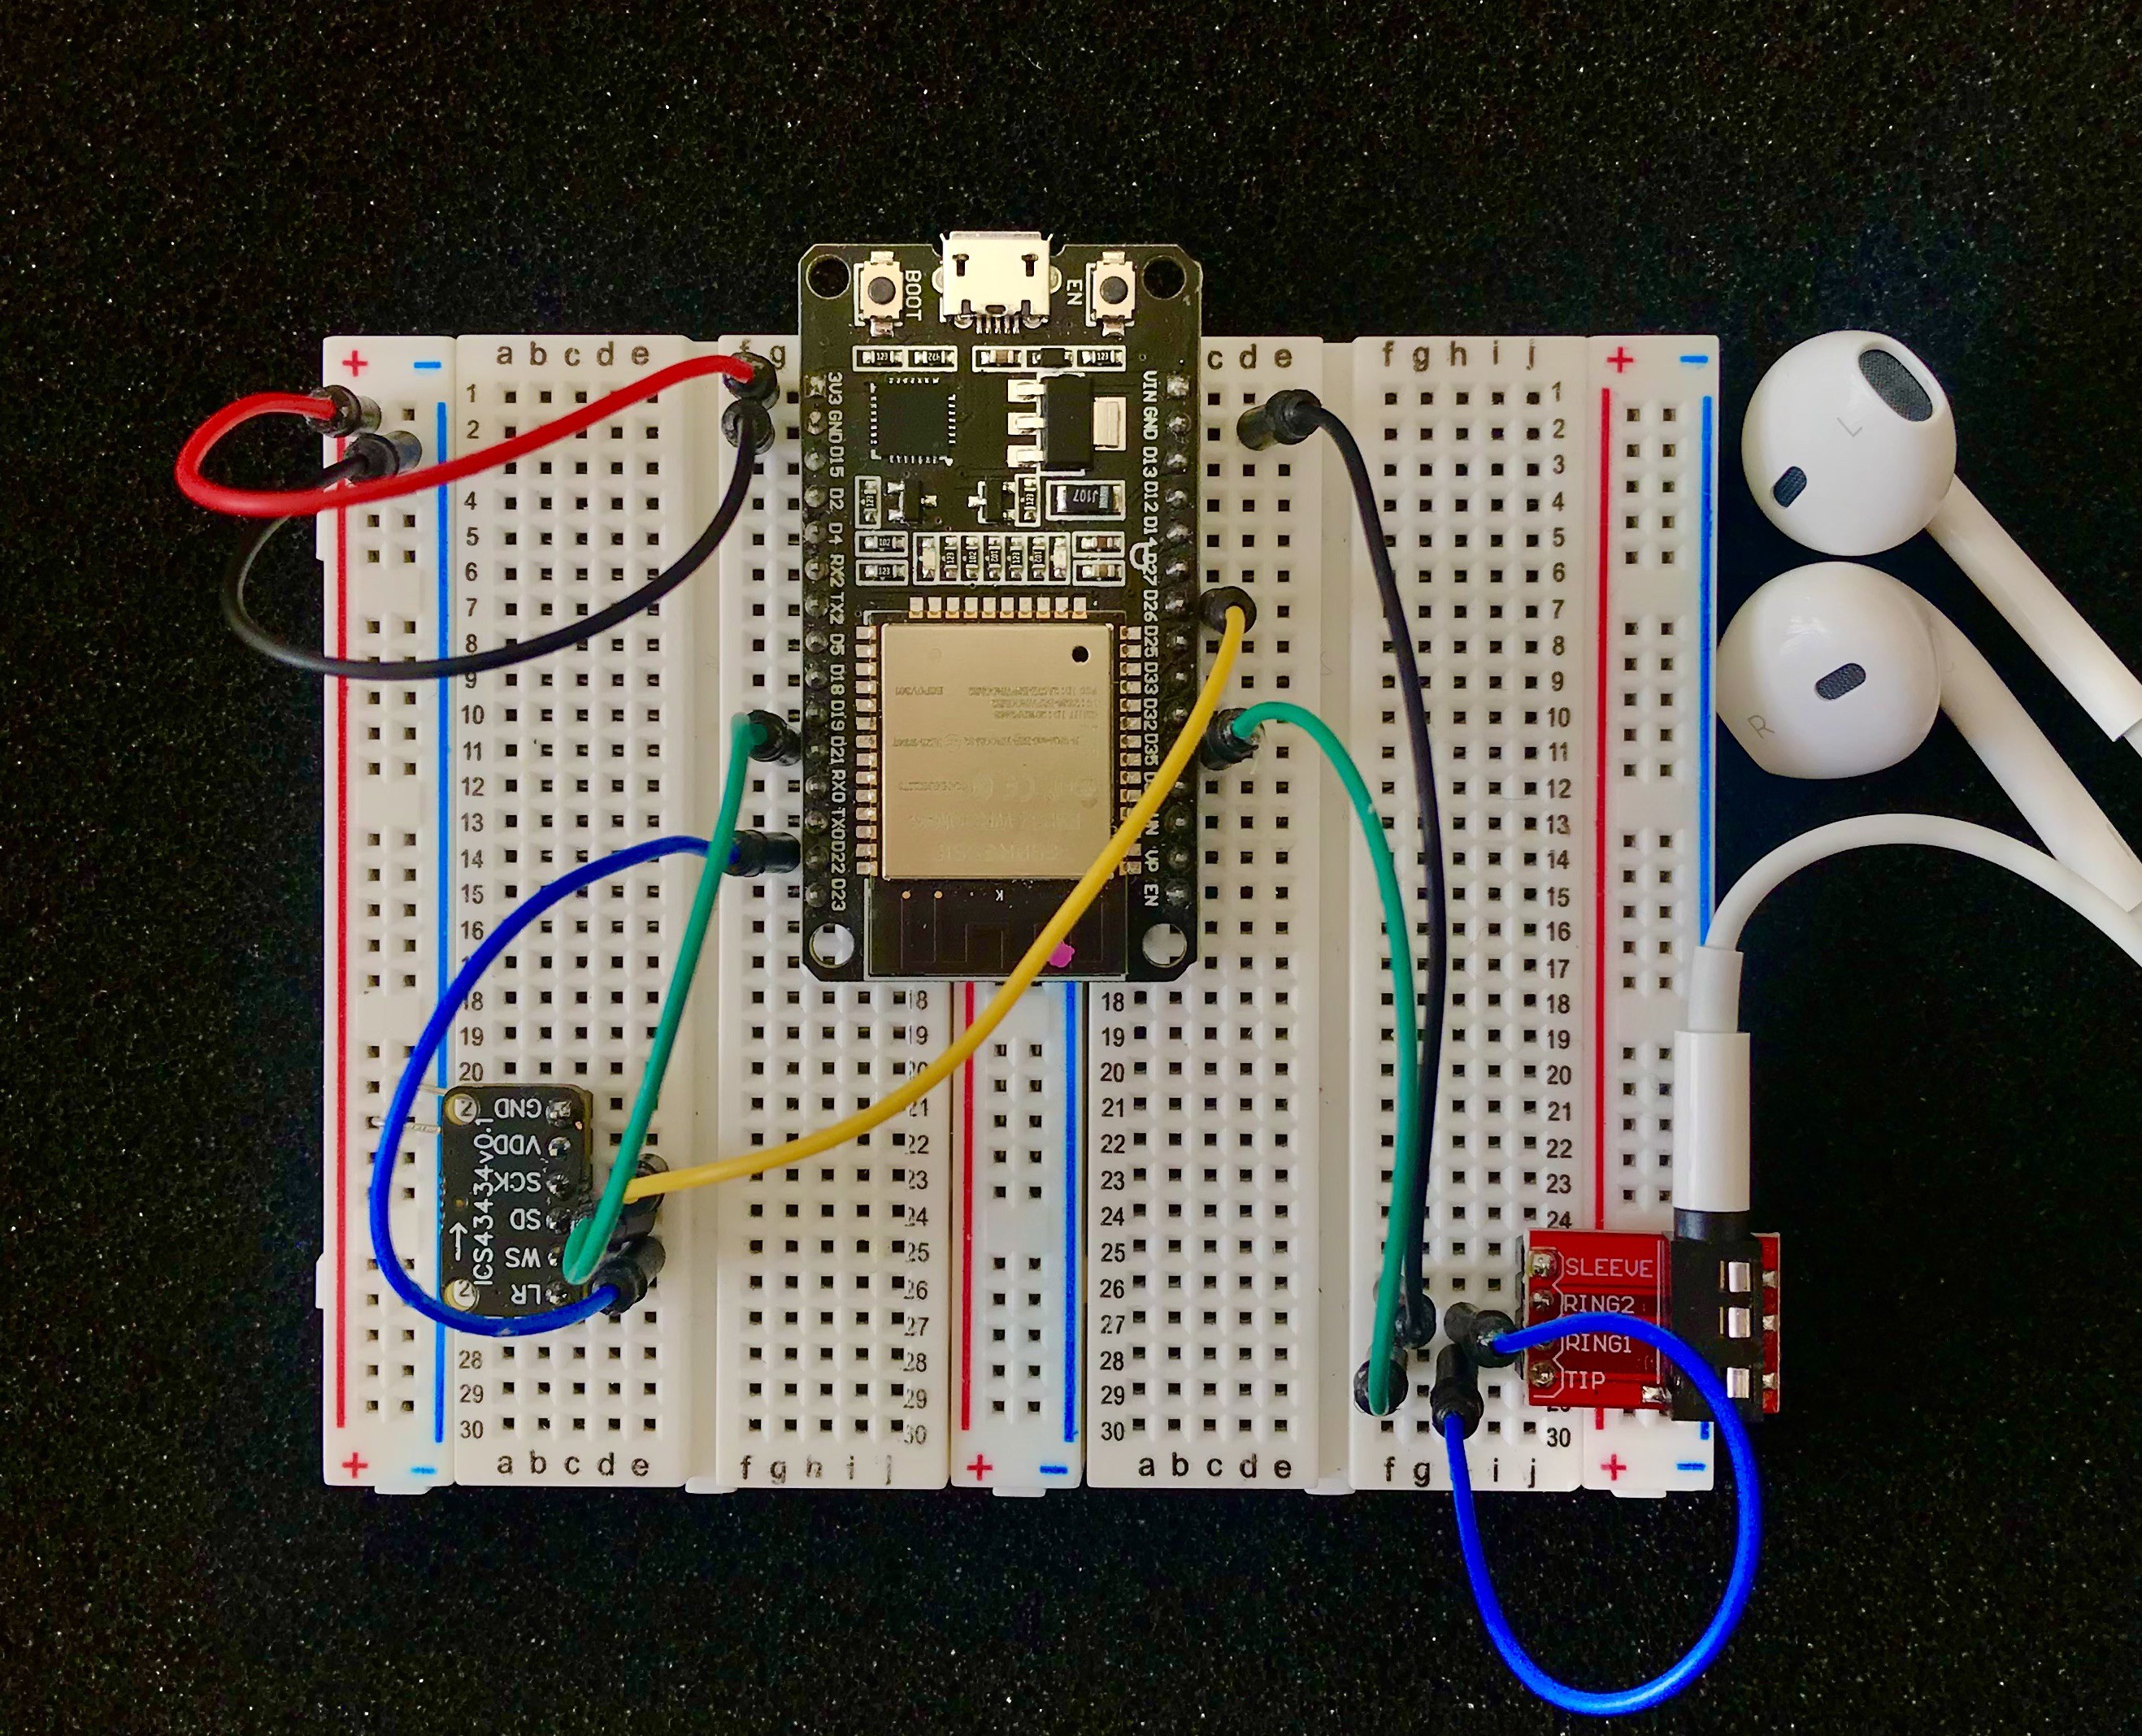
The schematic is very simple - we're using I2S boards for both the microphone and the speaker which makes the wiring up of these to the ESP32 very straightforward.
You can of course modify the code to use the built-in ADC for input and the built-in DAC for output. Very handy if you want to use analogue microphone boards and a headphone jack for output.
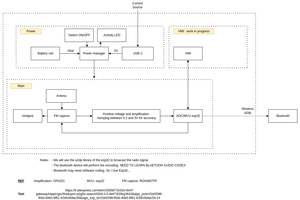
I've added a bit of extra circuitry to my board to create a clean power supply for the microphones. If you watch some of my earlier videos then you'll recall that we were picking up quite a lot of noise on the microphones when using WiFi.
To fix this noise problem we are creating a clean 3.3v power supply for the microphones by taking a direct feed from the battery, we filter this with an LC filter and then pass this to a Low Drop Out regulator. This gives us a really nice and clean power supply for the microphones which removes a lot of the noise issues.
All the code is on GitHub - it should be mostly self-explanatory, but I'll give a high-level overview here.
The main challenge with this project is how to get the audio broadcast from one walkie-talkie to all the other walkie-talkies.
I've implemented this in two different ways. You can easily switch between these in the code with a simple hash define.
The first way is using UDP broadcast. UDP broadcast is a very simple mechanism. You send a UDP packet to a special IP address and your router broadcasts this packet to all the other devices on your network.
We can safely send up to 1436 bytes in a UDP packet so if we're sampling at 16KHz and using 8-bit samples that's around 90ms of audio data. So we need to send around 11 packets per second. This is well within the capabilities of the ESP32.
The big advantage of using broadcast UDP is that we don't need to know about our peers, we can just broadcast a message and anyone who is listening for it will receive it. We also don't need a centralised server that everything connects to. All the heavy lifting is done by the router.
However, there are some disadvantages of UDP that we should be aware of:
- Delivery of UDP packets is only best effort - there is no guarantee that someone will receive the packet you send.
- There is also no guarantee of packet ordering - someone may receive the packets you have sent in completely random order.
For this project, I've chosen to ignore these two issues. With broadcast packets, we're generally staying in the same network so we probably won't lose too many packets and our packets will probably also come in the correct order. If they don't then we'll just get a bit of noise and...
Read more »


 Christoph Tack
 andriy.malyshenko
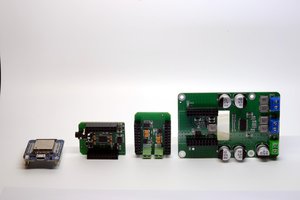
 VertOlive
is possible add sound/mic to the ax25?
for example i use baofeng and this device hear sound and put some 'answer' and transmit data trought sound
similar amodem, or minimodem in linux