Norbert Heinz
-
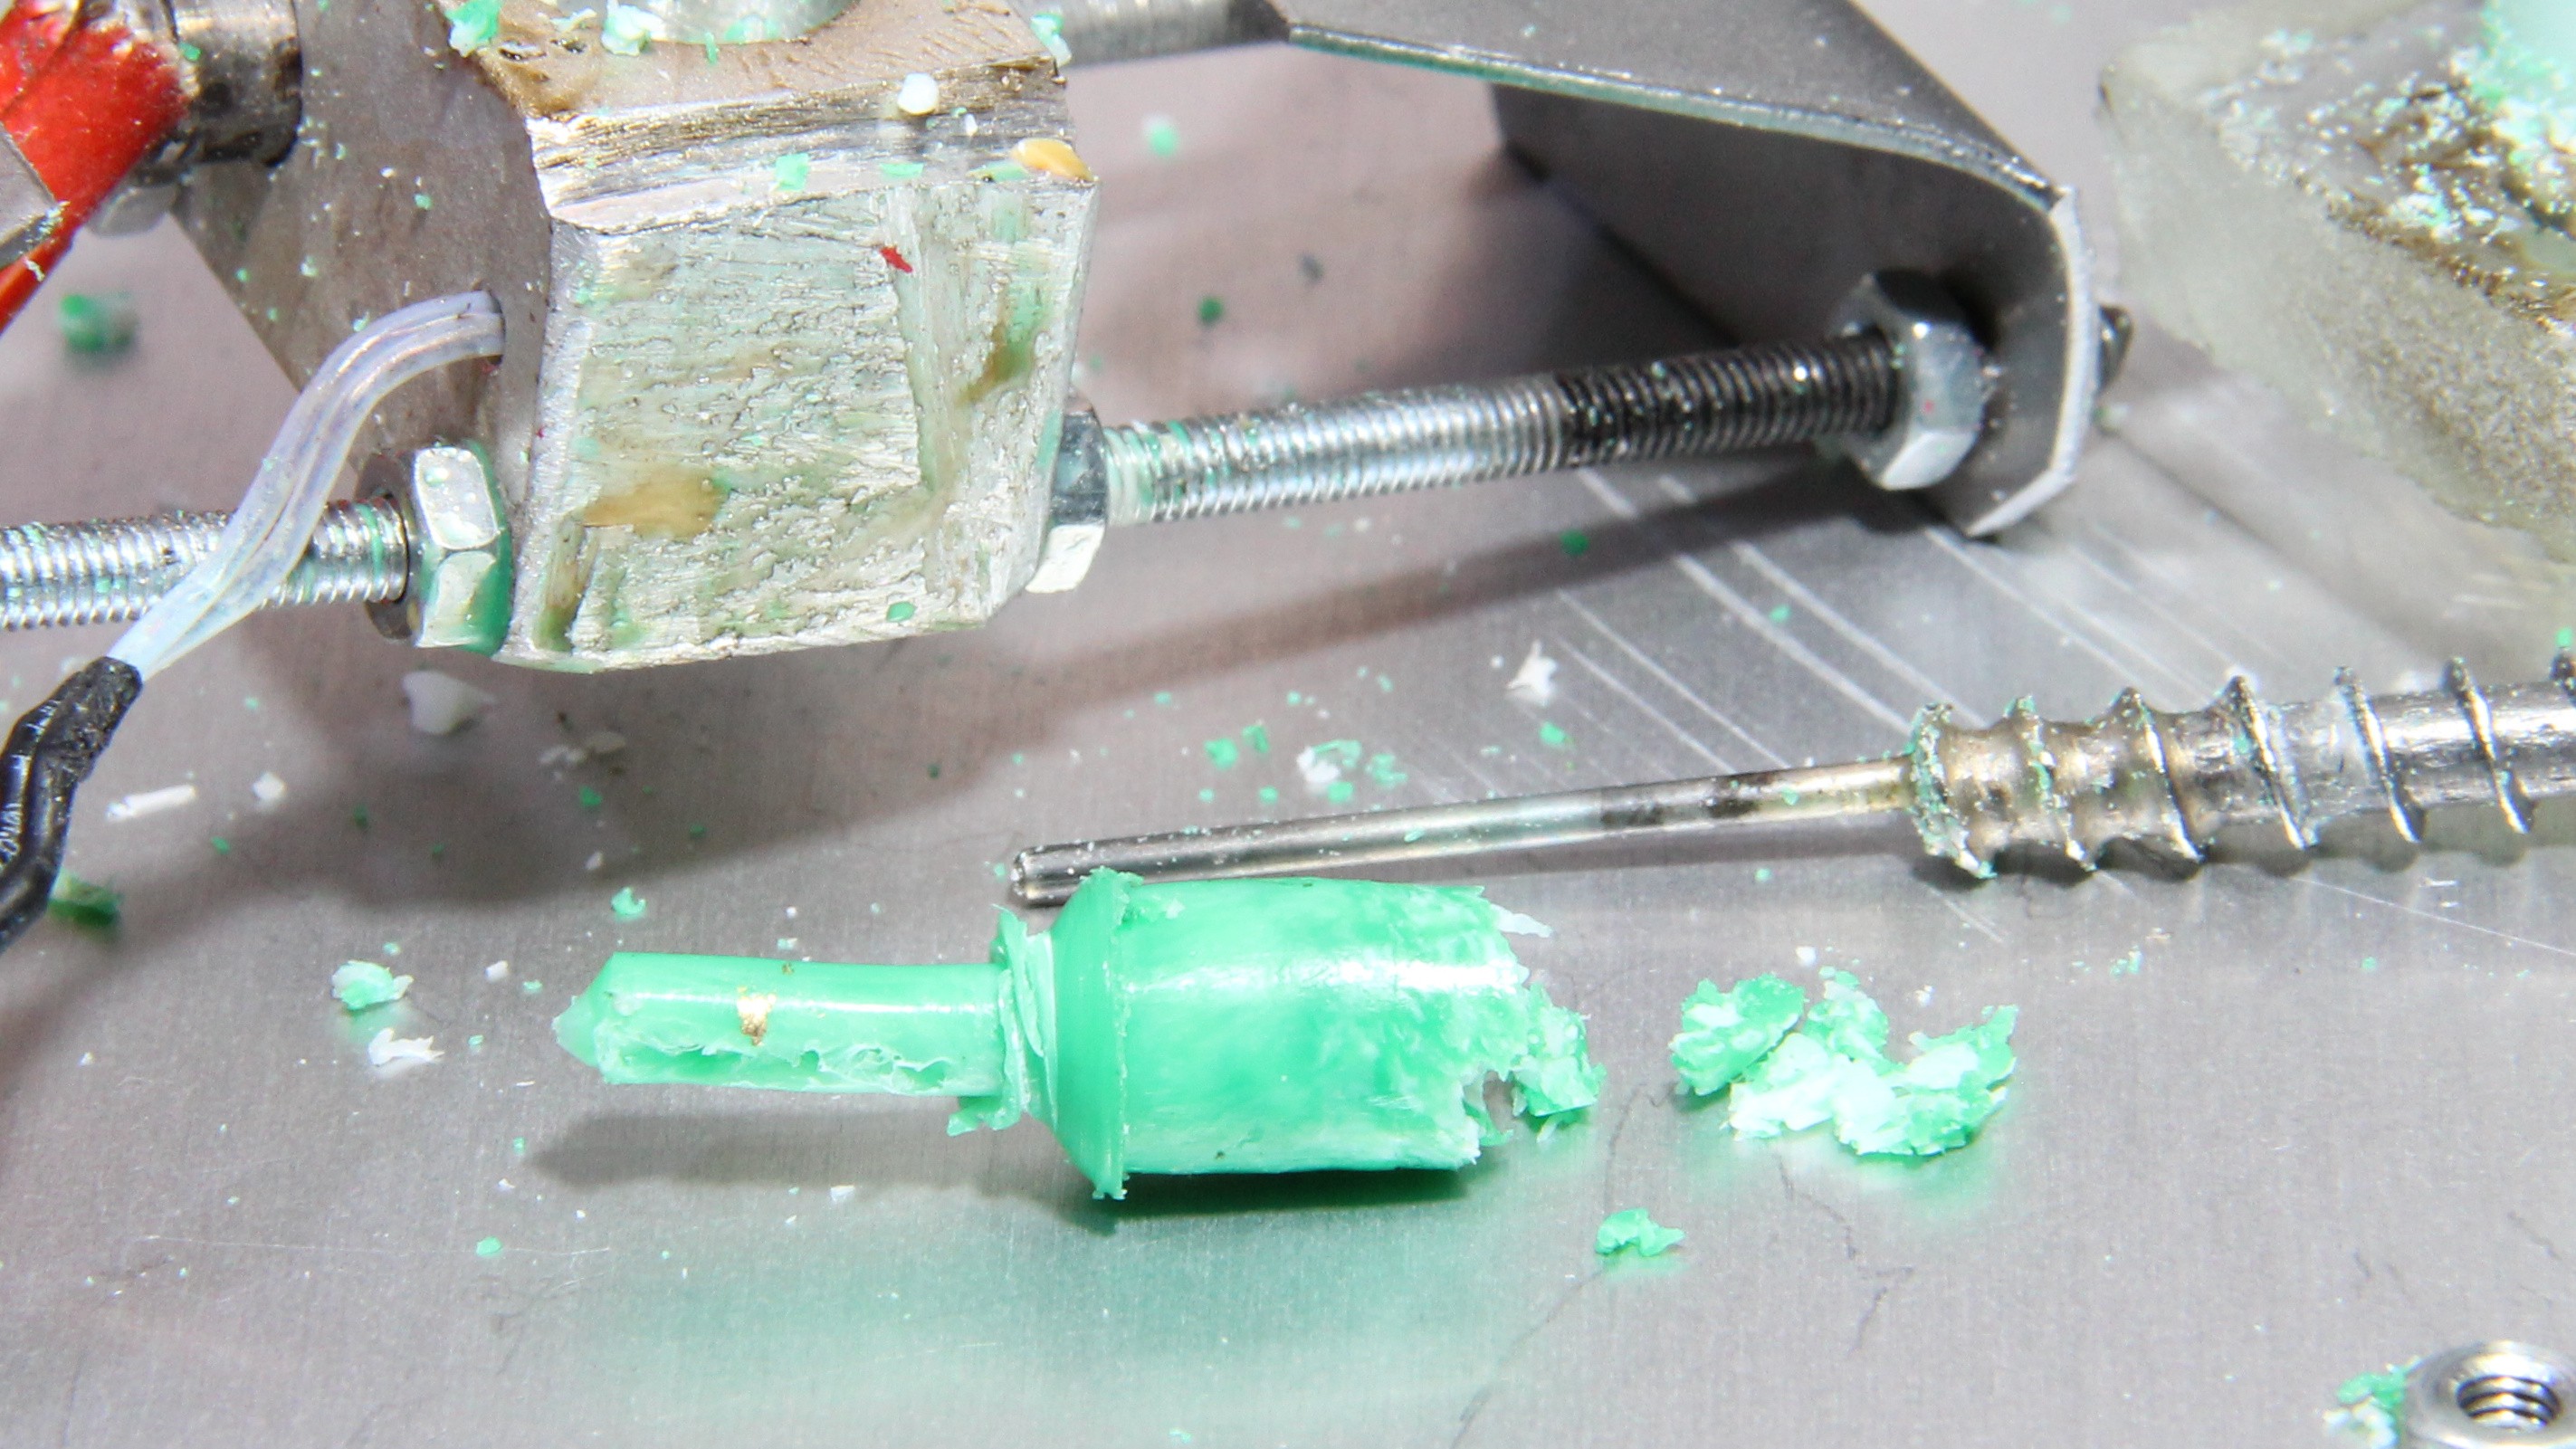
Video showing the history of my extruder development
10/30/2021 at 19:17 • 0 commentsIn a video I am talking about the history of my extruder development. It was no straight path to success:
Analyzing material samples from the inside of the extruder enabled me to finally build a working prototype:
![]()
-
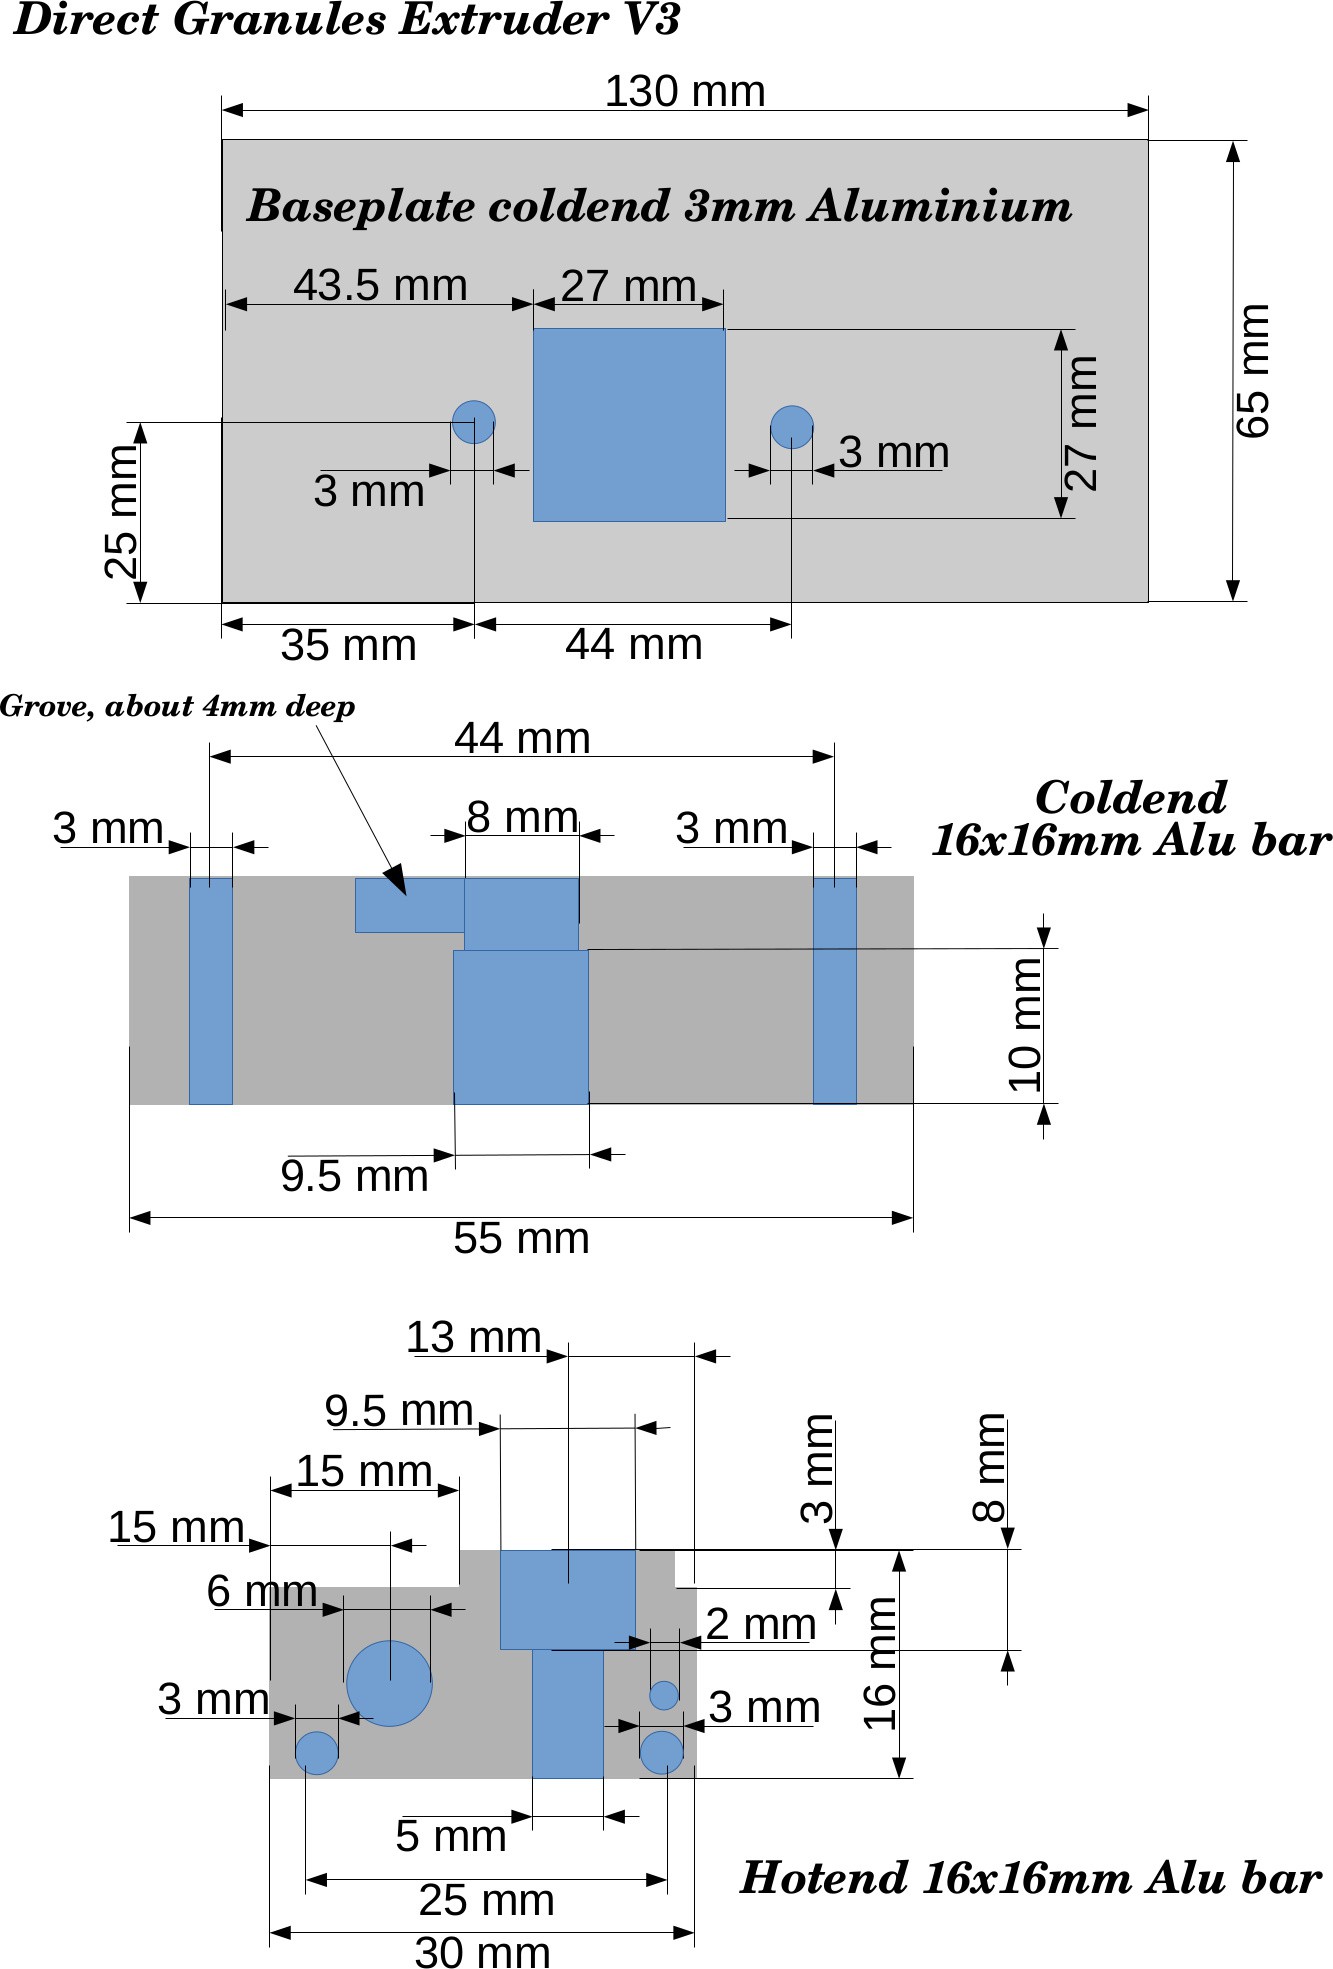
Revised build instruction, drawings added
10/26/2021 at 09:17 • 1 commentRequests are coming in from people that are interested in making a copy of my extruder prototype. That's why I have revised the build instruction and also added drawings with more exact dimensions. I have built the extruder prototype more or less following my intuition, so I had to do a couple of measurements to give you some more numbers:
![]()
CAD files will be available for the coming stage of my extruder evolution since this is meant to be created by machines...
-
3D printing sugar
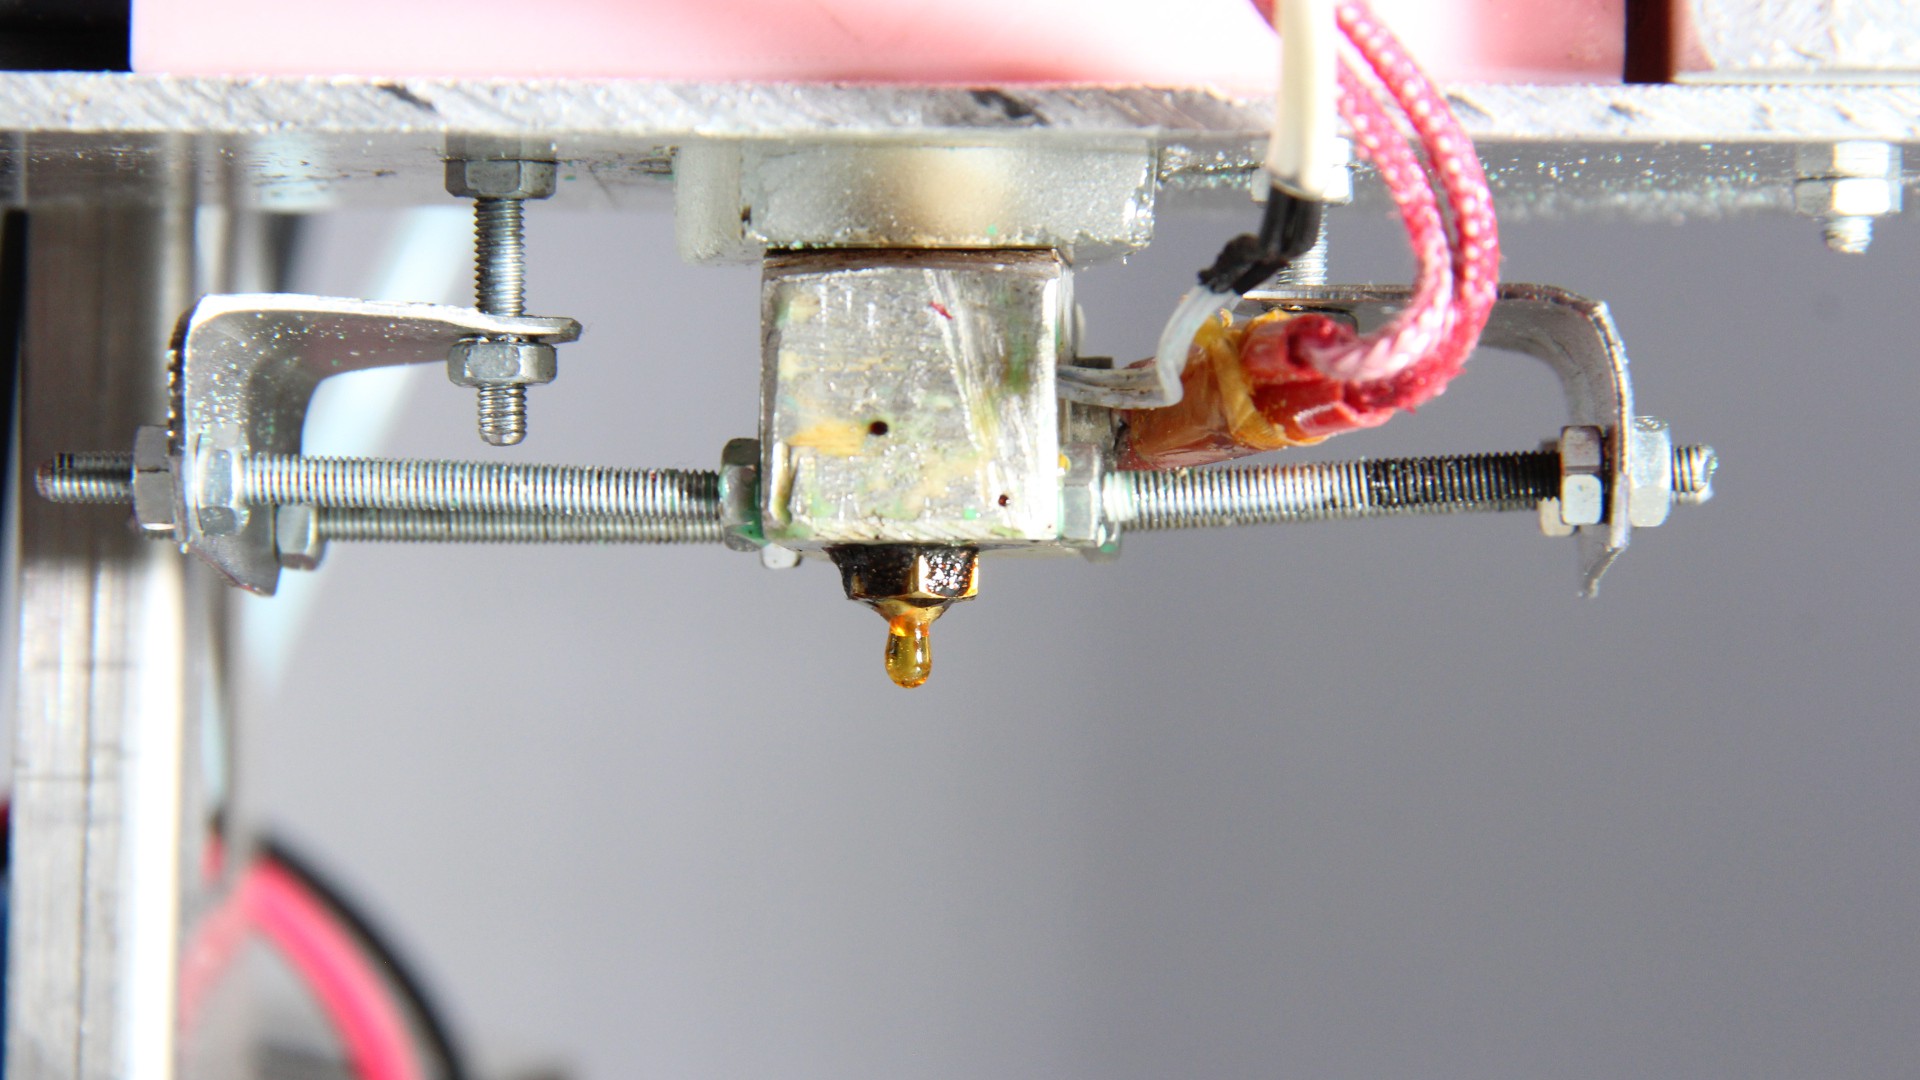
10/24/2021 at 19:40 • 0 commentsHave I found the sweat spot of my direct extruder?
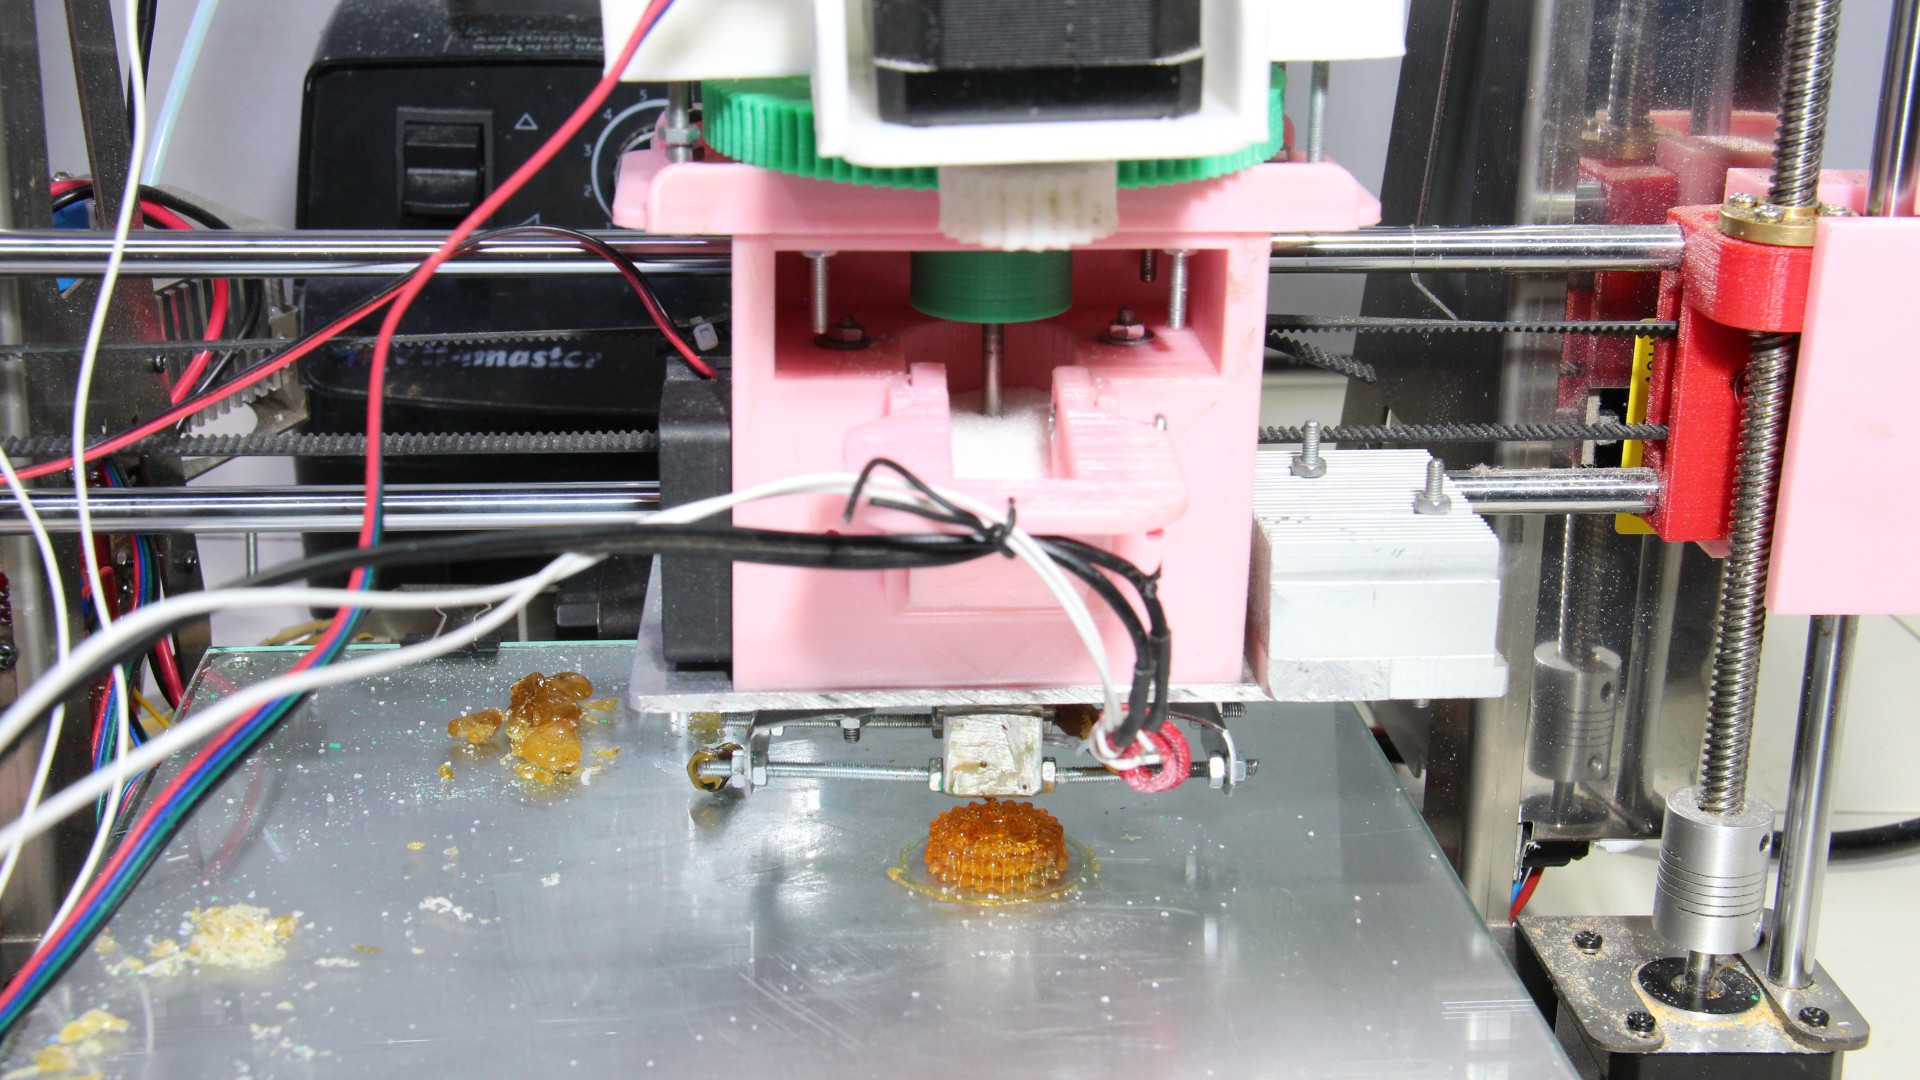
Printing PLA works fine. The raw material can be sourced from failed prints, pellets or waste plastics. Put it in a blender and sieve the grains - done. But what about using a raw material that is available in each hosehold? On a lazy Sunday afternoon,. sugar came to my mind. So let's check if that material melts at temperatures my extruder can reach. Yes, it does. So heat up the machine and put a couple of spoons full of sugar in the hopper. First thing I noticed was that sugar doesn't exit the extruder as a string, such as PLA does. Instead it is dripping out more like water:
![]()
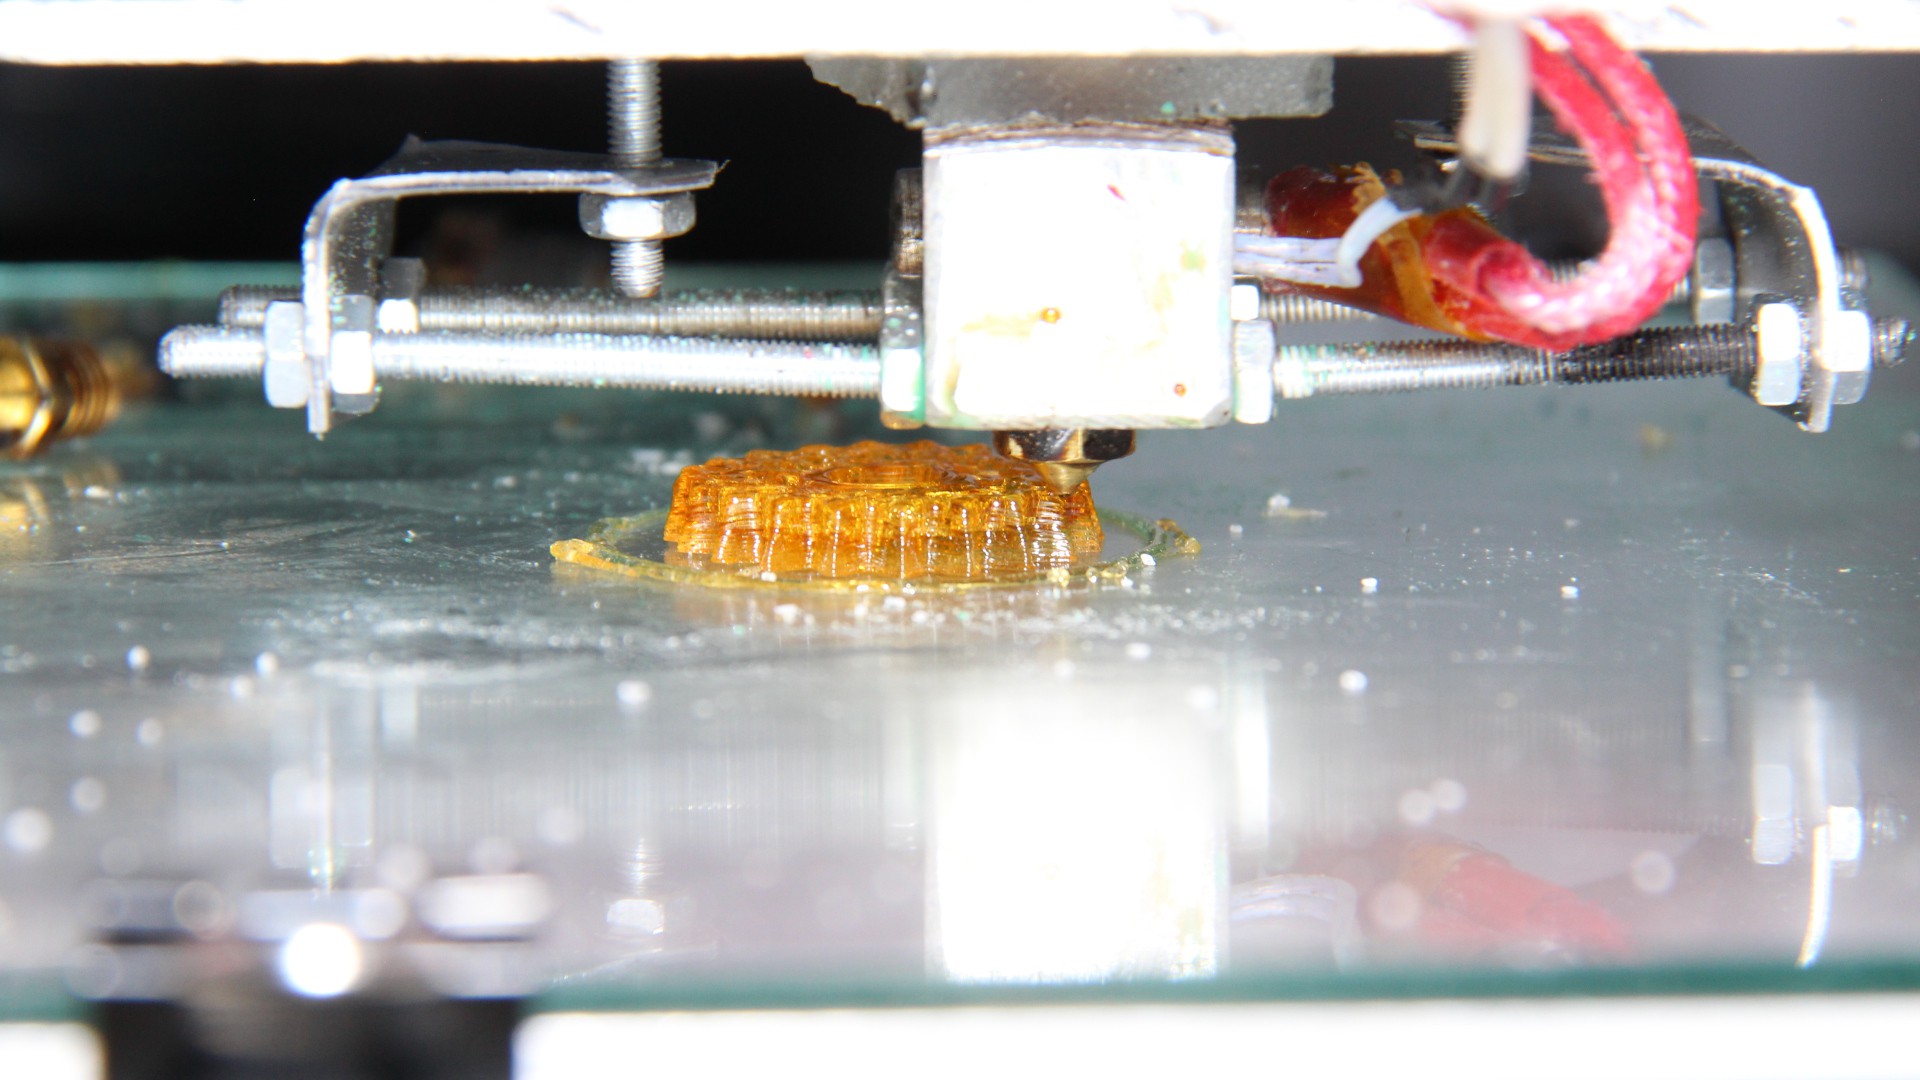
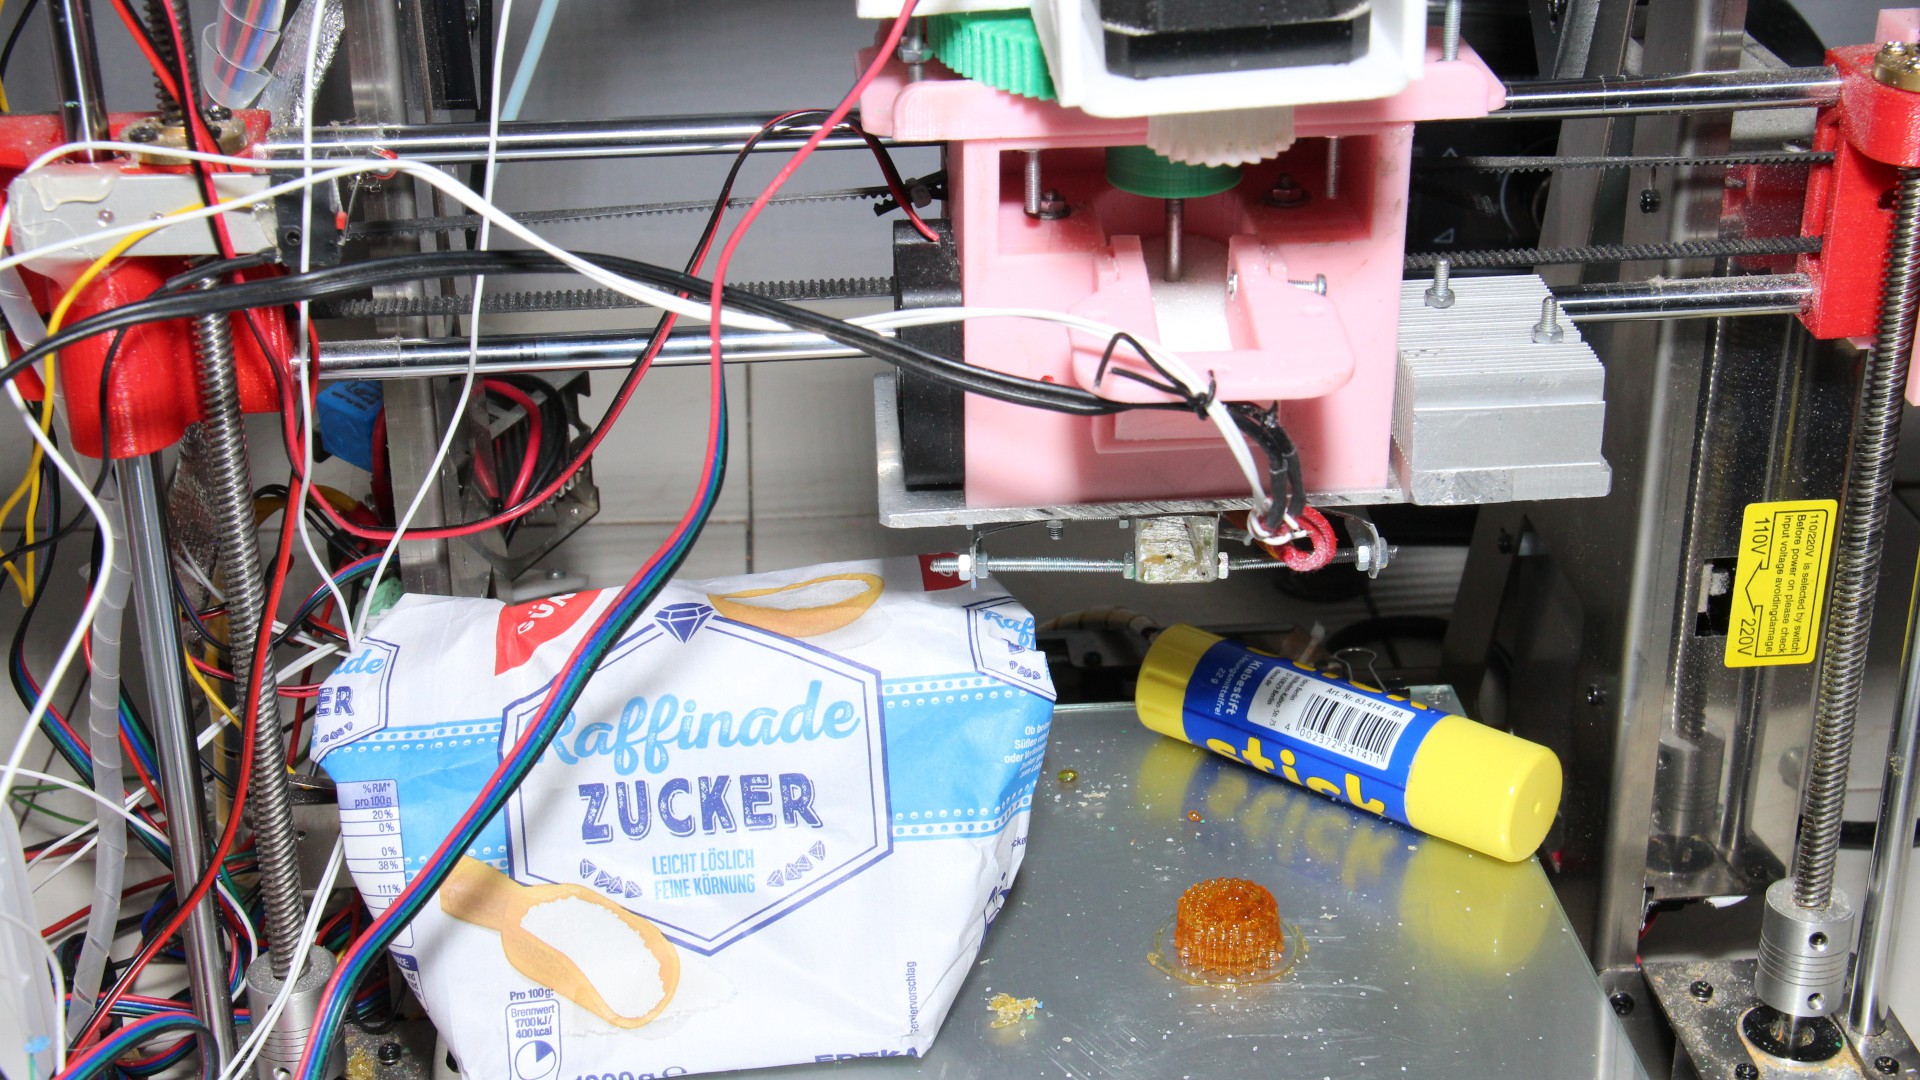
Well, now that there is sugar in, let's give it a test run anyway. Getting a first layer stick to the print bed worked in the third run. I swapped to a different wood screw to get a higher extrusion rate. The layer of glue stick grew thicker with each run. Finally the printer made it:
![]()
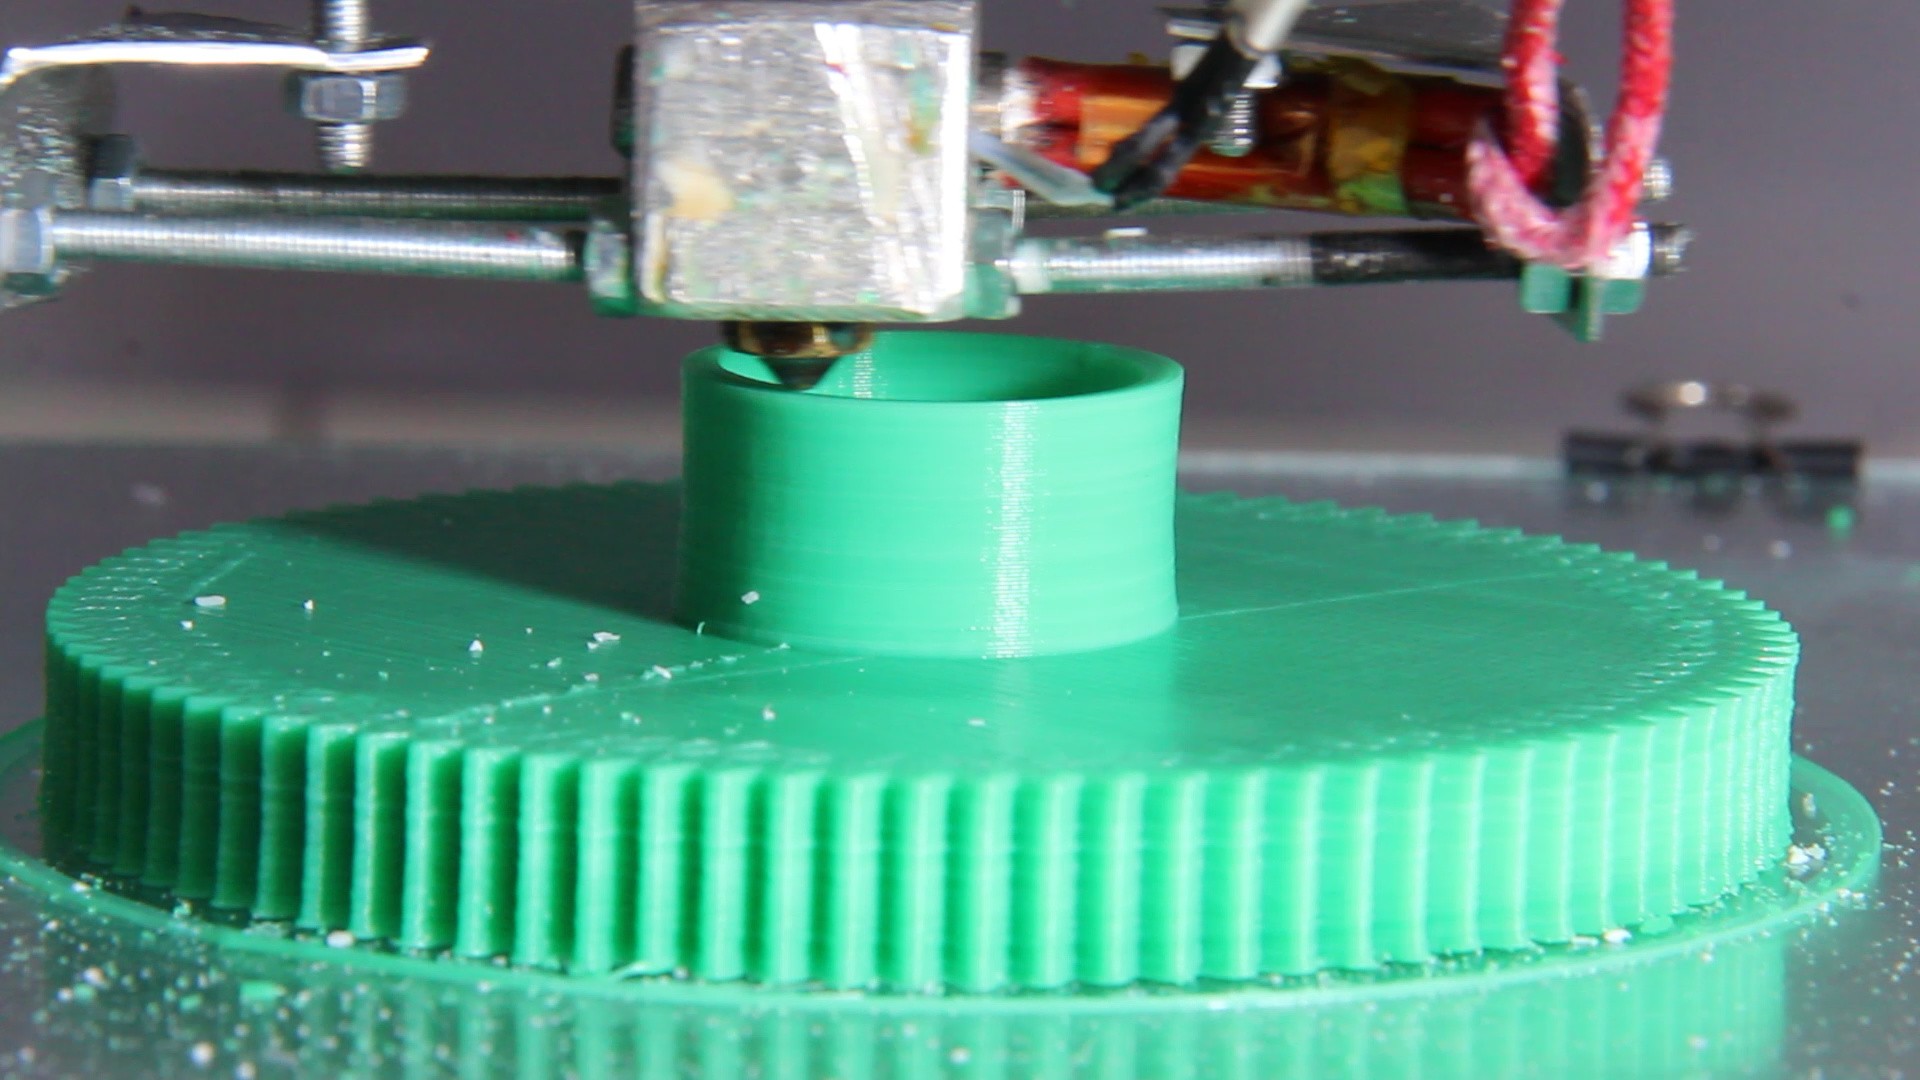
While the print grew layer by layer, I have adjusted the flow rate. It was tricky to do so, because of the very different properties of the extruded sugar. Due to the more water like viscosity and the high surface tension, the top layer always looked a bit rough. Nevertheless the gear grew:
![]()
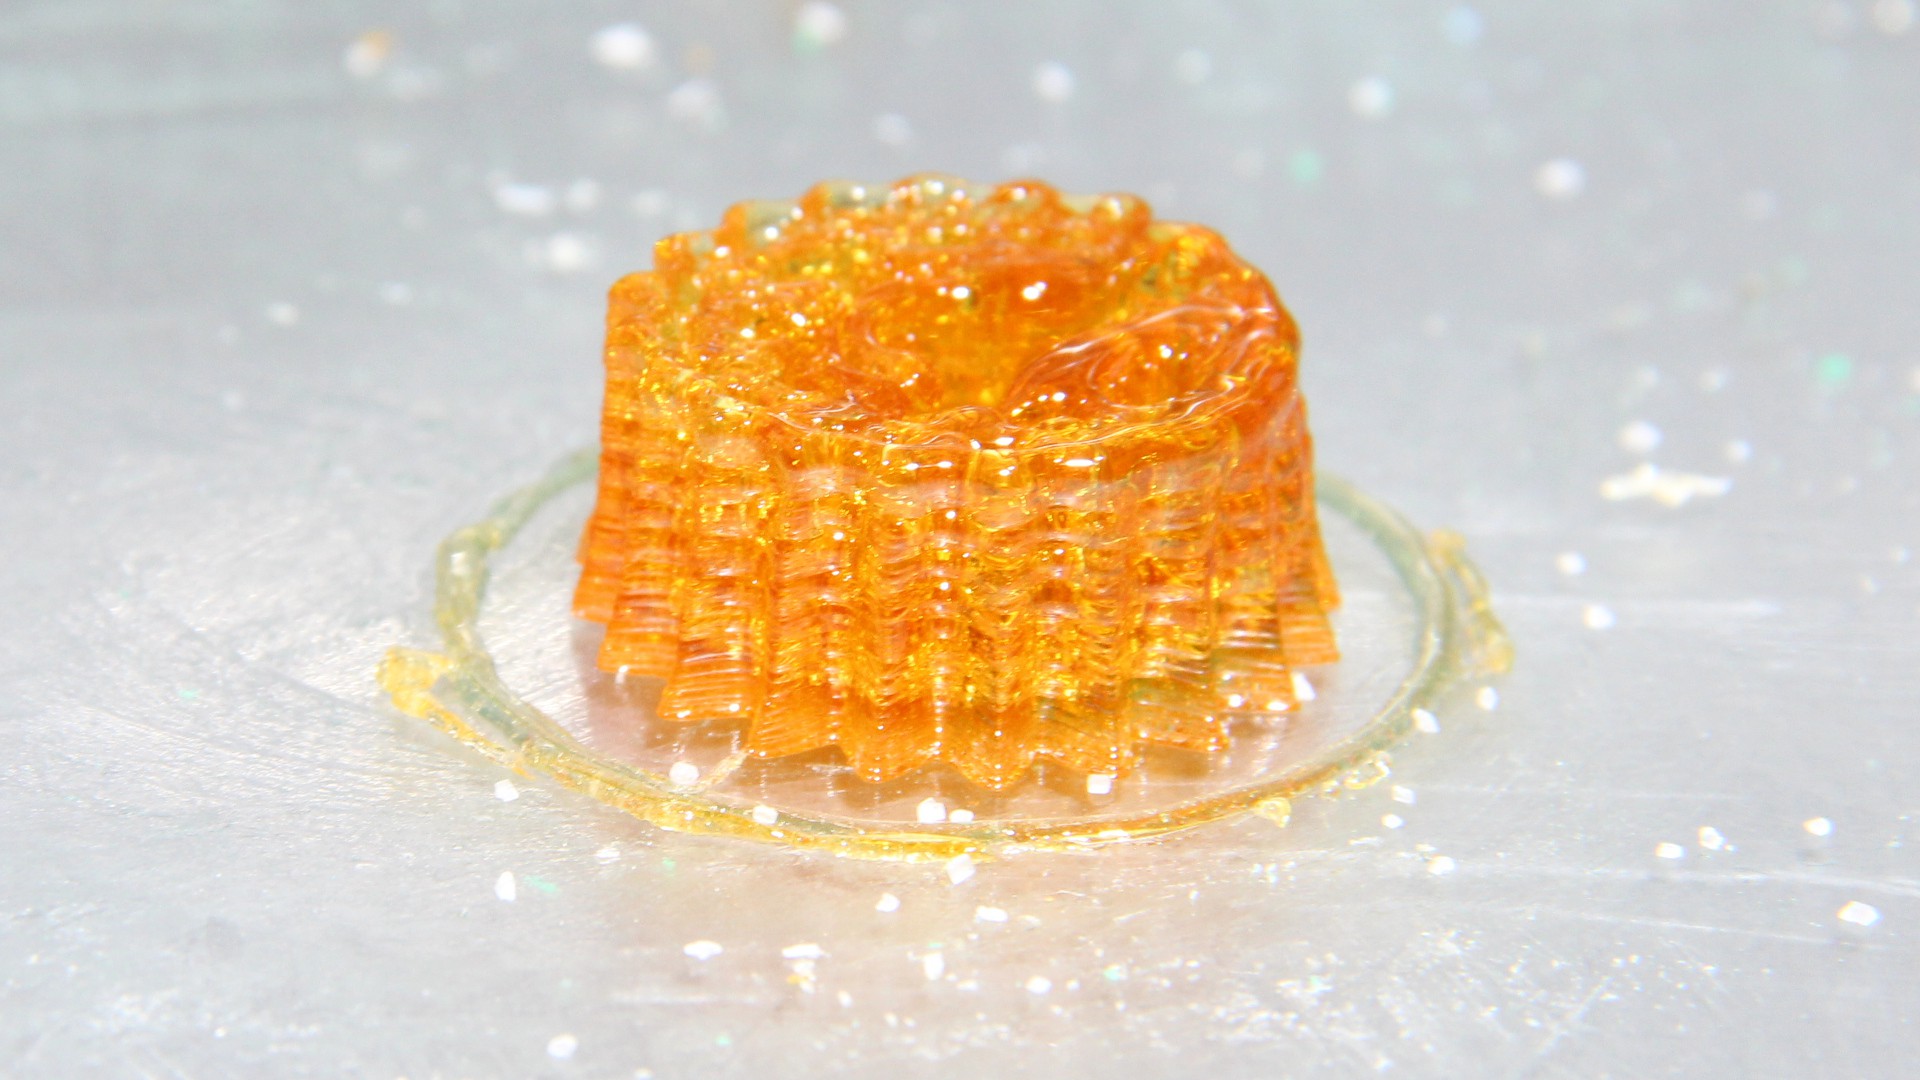
The final result is far from being perfect, but keep in mind it was just a lazy Sunday afternoon project:
![]()
There is more than just one kind of sugar available in a supermarket, maybe that there are better recipes for the "sweet spot". Sugar is too brittle to be turned into filament, so there is no way around a direct granule extruder if you want to print with a brittle material like that. It would be a great material for water soluble support structures.
![]()
-
Video shows details of the construction of Extruder V3
10/23/2021 at 11:15 • 0 commentsThe video also explains why I did some things the way I did them and you can see a quick speed test at the end:
-
First test print with a 0.6mm nozzle
10/22/2021 at 18:49 • 0 commentsIf you want to hide the weak points of your printer, print something big in vase mode ;-)
I don't want to hide the weak points, which is why I have made a test print of a tiny object. It is the link of a chain with the dimensions 27x25x12mm. The object cooling fan is still not mounted on the extruder and closing the nozzle to avoid stringing doesn't work as it should (yet). Stringing will be a subject in a coming video. I have used a 0.6mm nozzle for the print. Layer height is 0.2mm, extrusion width 0.5mm.
The 2mm walls are straight, which is an indication that V3 can handle constant extrusion:
![]()
-
I have printed a spare part with my extruder for my extruder
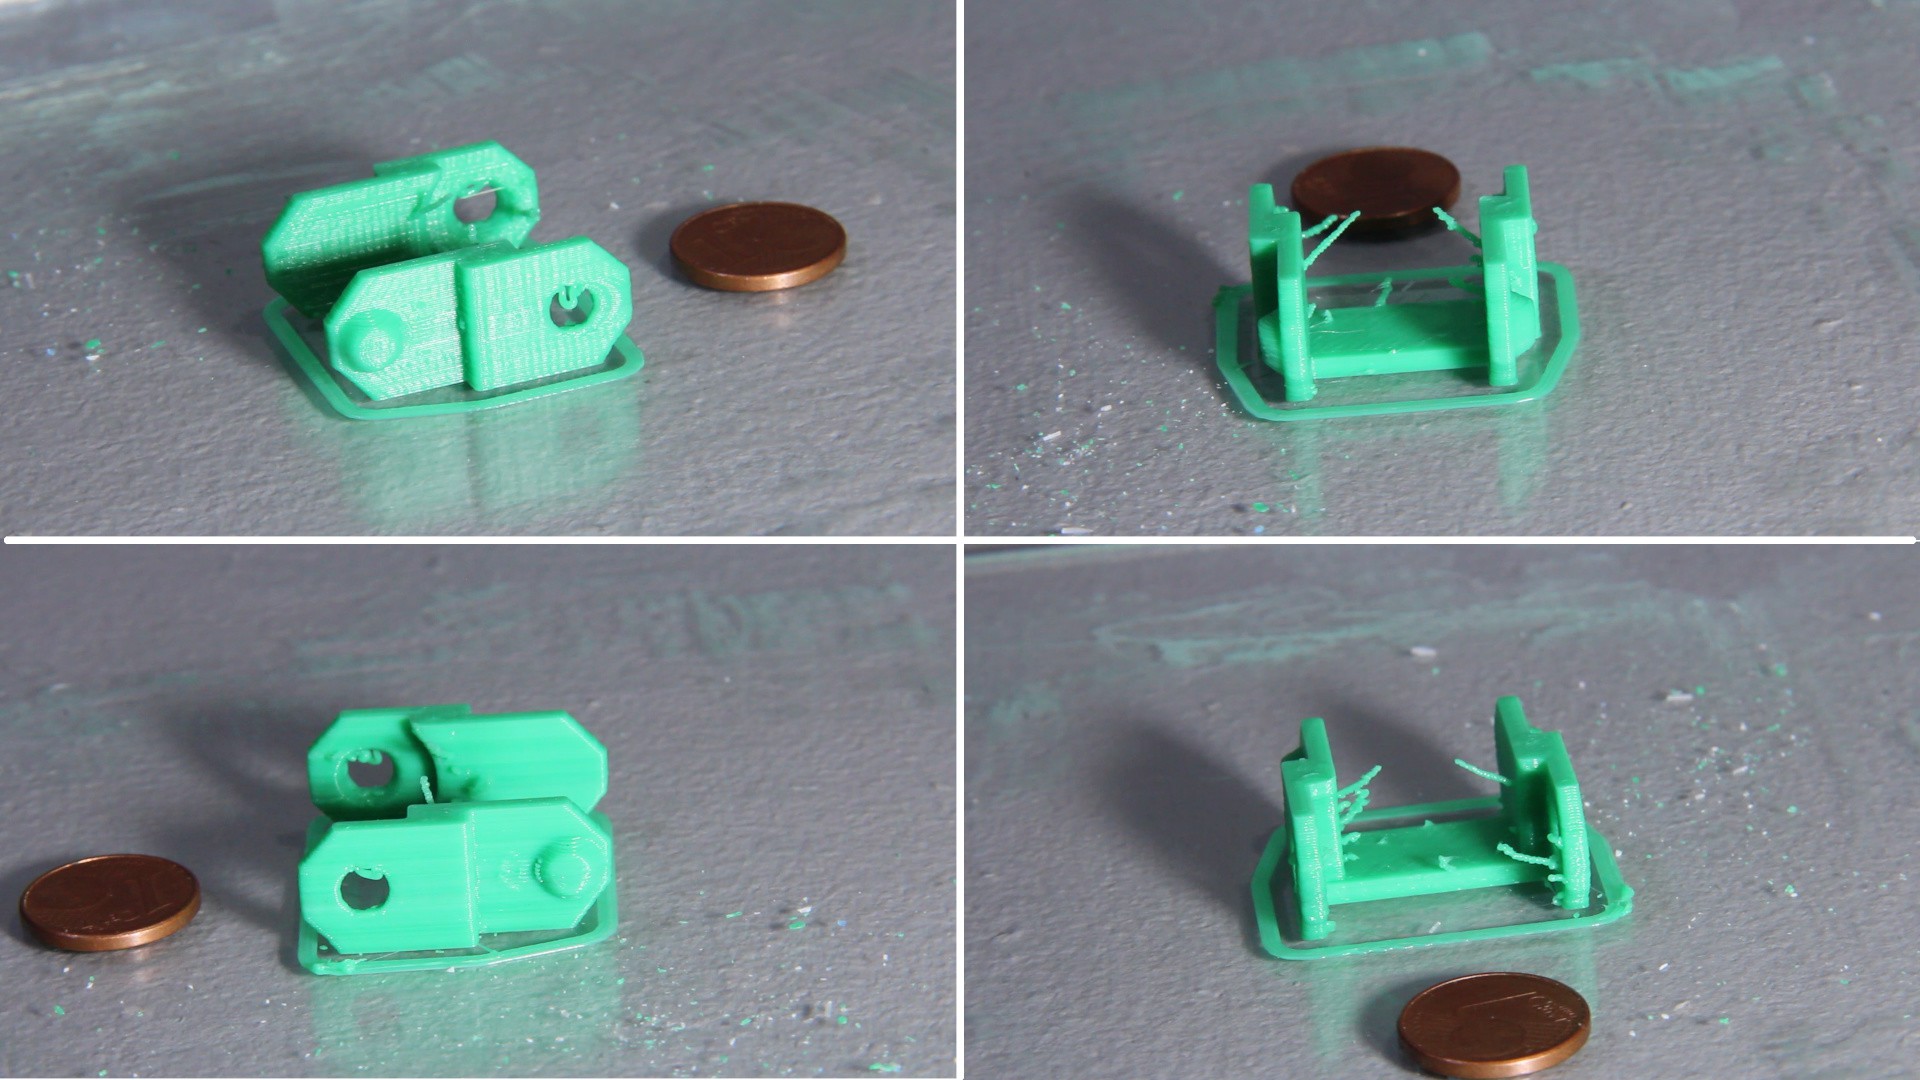
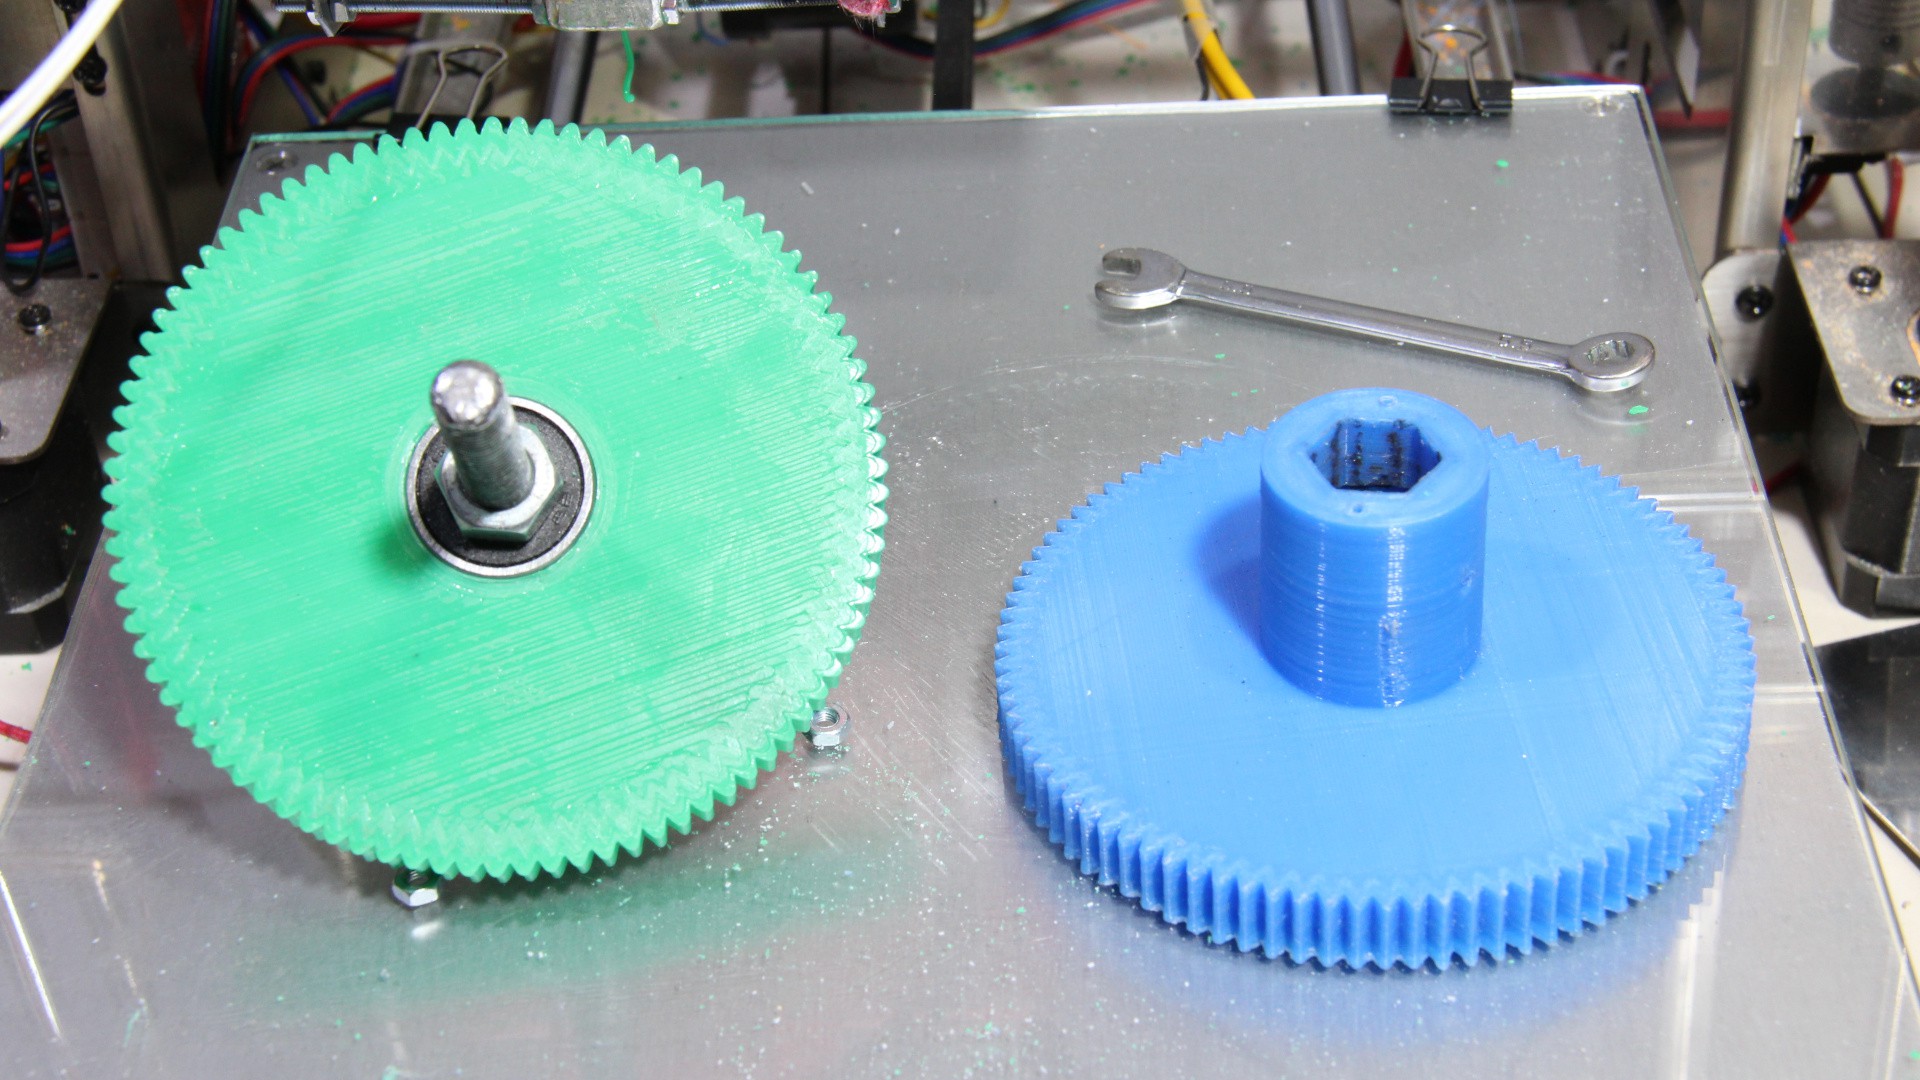
10/21/2021 at 18:43 • 0 commentsThe main gear of my extruder drives the wood screw I am using as auger. During lots of experimentation, especially when failed designs lead to clogging of the extruder, there was a bit more wear on the shaft than it could handle. With a trick (placing an additional nut on top of the screw head) I could use that gear for a last print:
![]()
I have printed a copy of the failed gear to get my needed spare part.
![]()
Even though the result isn't perfect (I should have squared the weak printer mechanics before starting the print), the replacement part works fine:
![]()
-
First "build instruction" of Extruder V3
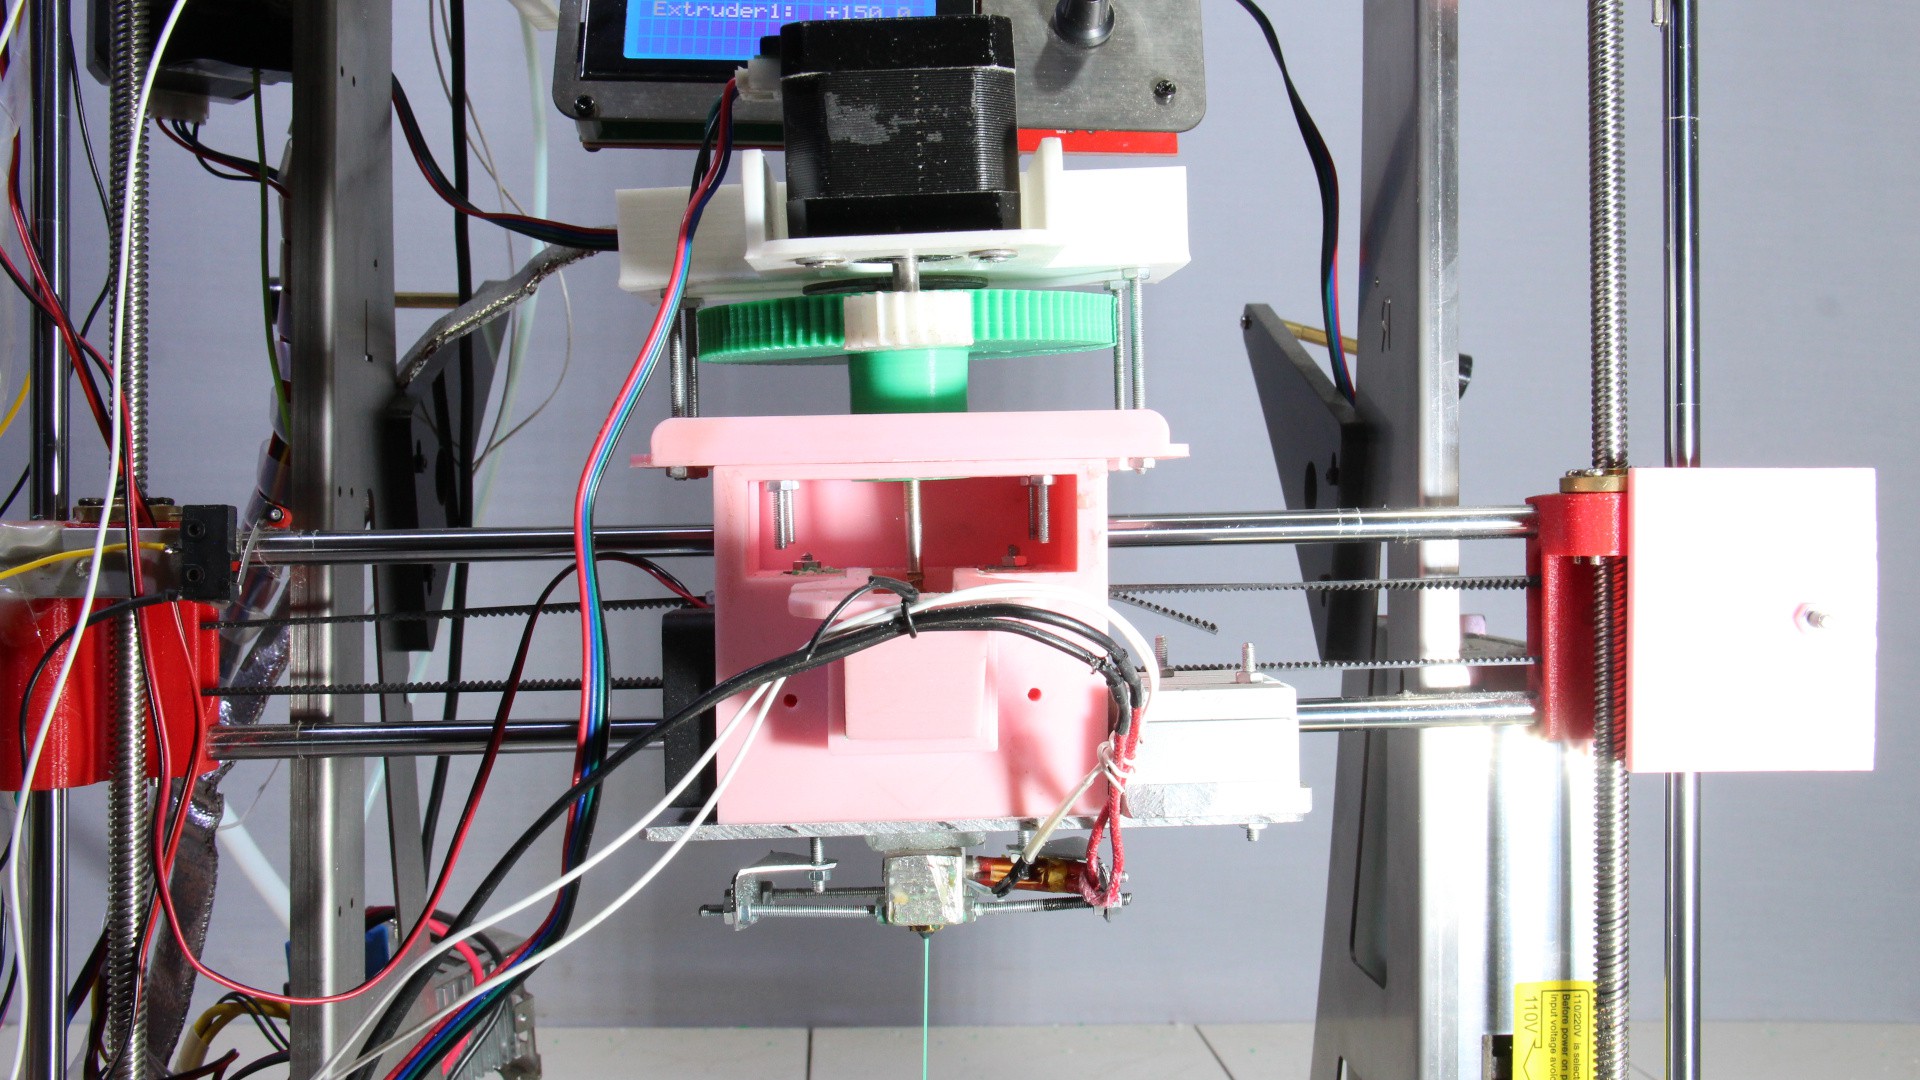
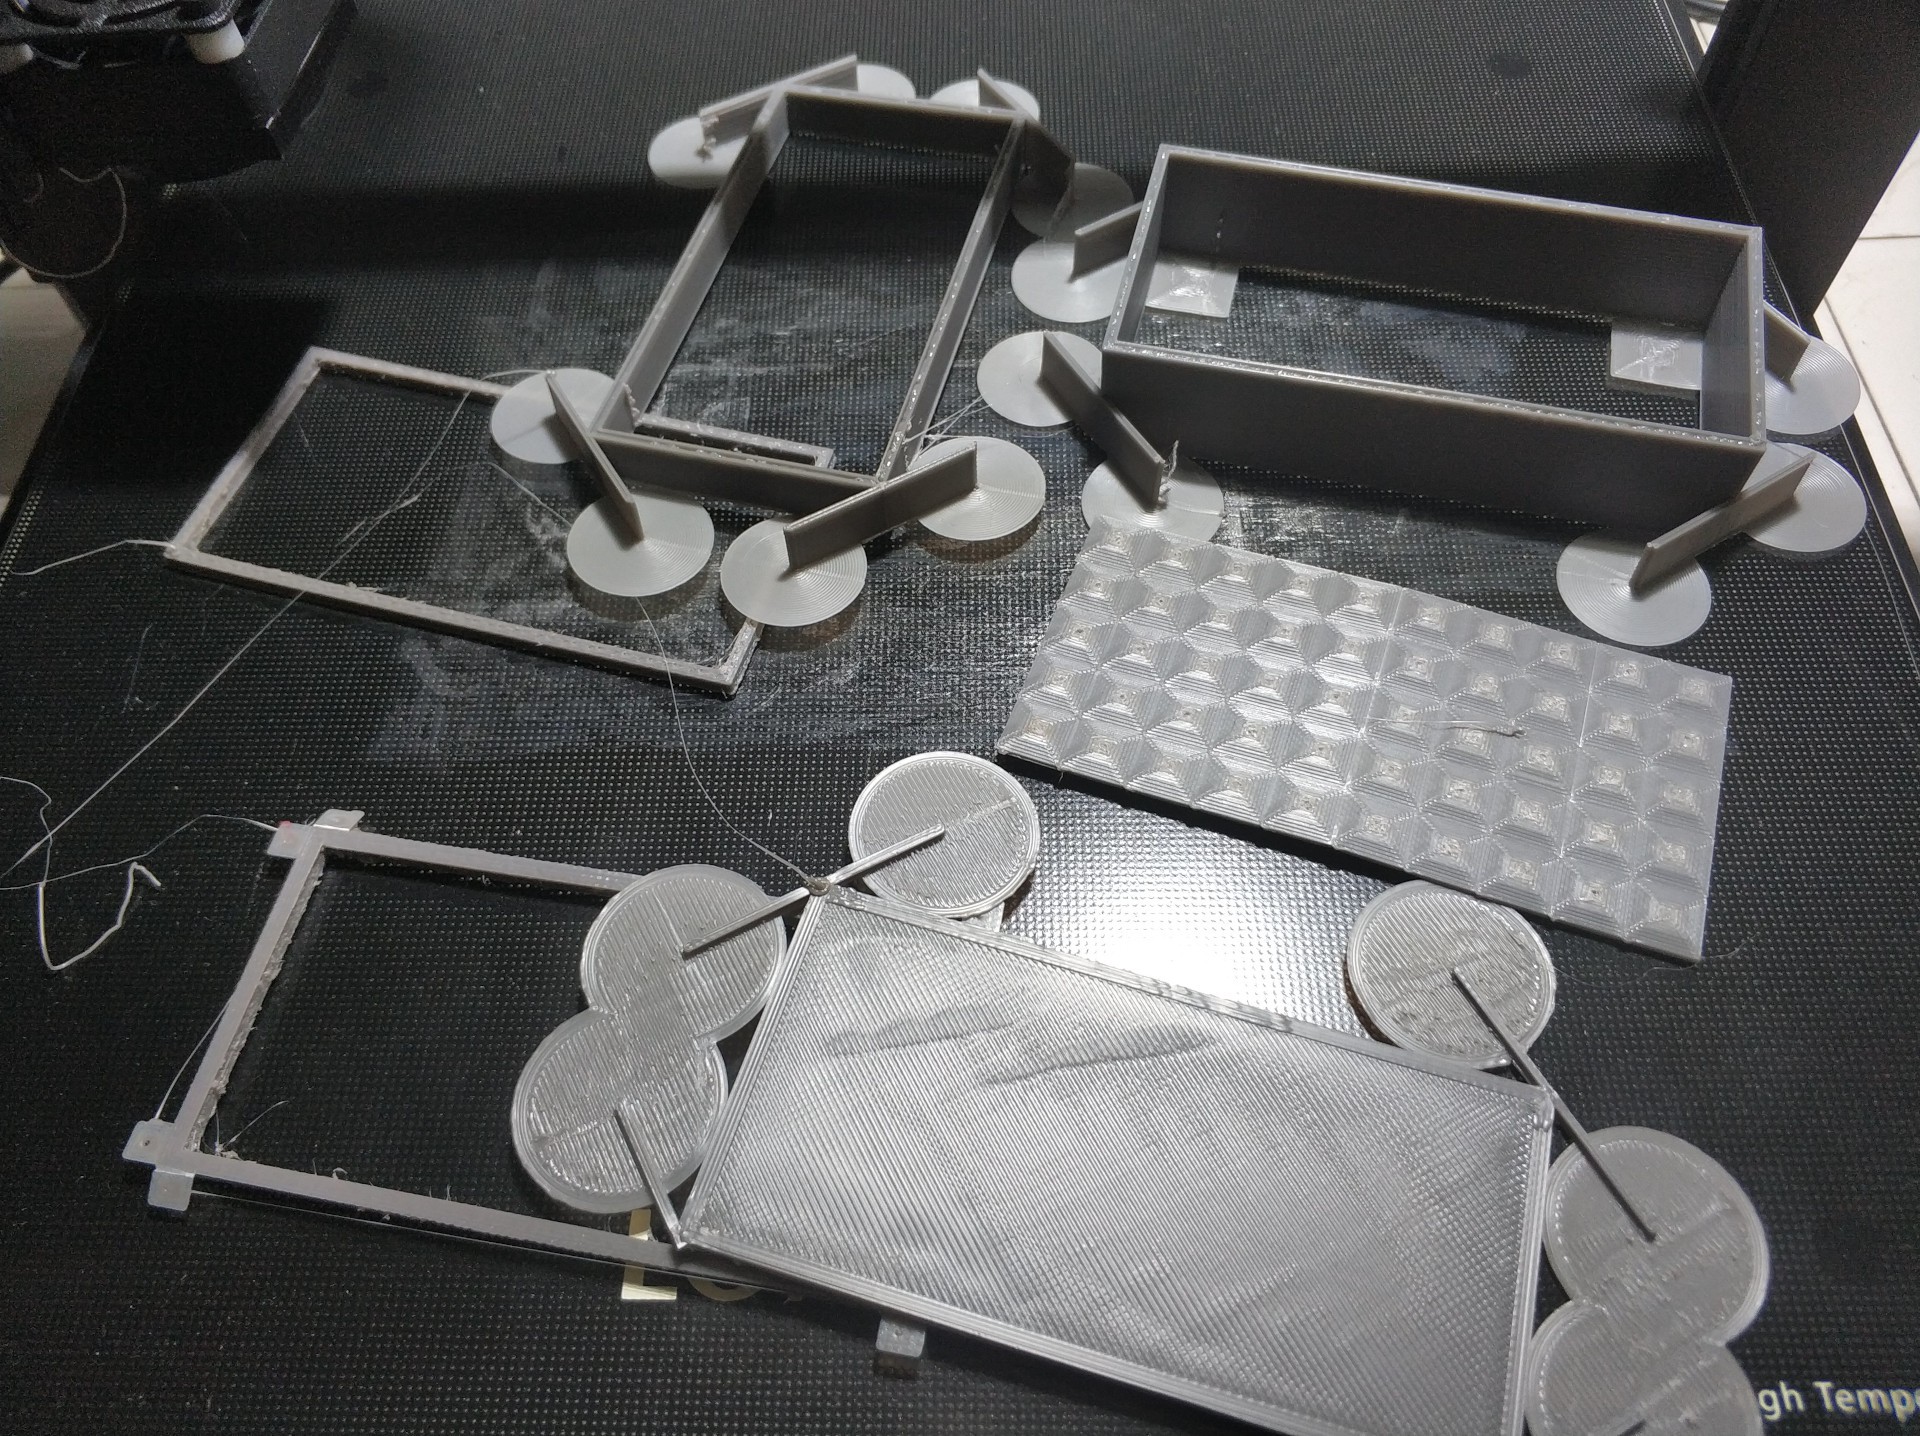
10/19/2021 at 18:02 • 0 commentsI am currently working on a video showing more details of my Direct Granules Extruder V3 and explaining why I did the things I did the way I did them. With the pictures taken for the video, I have written a first build instruction. Since this machine was mostly created using the rule of thumb, it is no accurate step by step instruction. Instead, it gives you a deep insight into all parts the extruder is composed of. This should enable you to make a copy, if you'd like to. Of course, if there are questions remaining, feel free to leave a comment.
![]()
![]()
![]()
-
First look on Direct "Pellet" Extruder V3
10/17/2021 at 07:18 • 0 commentsI hope, the jury of the Hackaday Prize doesn't mind that I am posting my application video for a Fellowship of the Shuttleworth Foundation. To get my granules extruder mainstream, I will have to spent more time and money to bring my ideas over the finish line, which is why I took the opportunity to get support from there, too. The video gives a quick look at what I am working on:
A video showing the extruder in more detail is under construction...
-
Teaching old bots new tricks: Warping
09/03/2021 at 10:43 • 0 commentsWarping occurs due to material shrinkage while 3D printing. Hot plastics is put on top of a cold layer and while cooling down, the top layer shrinks and so builds up tensions in your print. The larger your print and the more the material shrinks while cooling down, the sooner the corners of the print start to lift and detach from the build plate. ABS is well known for high shrinkage and that's why two spools of that material were lying in a corner of my workshop for years. When I got an offer for making a video about a 3D printer I decided that it would be the right time to prove ideas to fight warping that grew in my brain over the years:
The idea is not to print in pure horizontal layers, but to add a vertical component. The gcode for this printing method was generated by Python scripts (available in the "files" section of this Hackaday project). No need for a new printer nor for making any hardware changes to your existing machine. It seems to work fine for special cases, as demonstrated in the video, but more experimentation has to be carried out. Good luck, I have some more ideas to continue fighting....
-
Things I am working on...
08/23/2021 at 12:46 • 0 commentsRound 3 of this year's HackadayPrize ends today. Time to give a quick look on what I am working on:
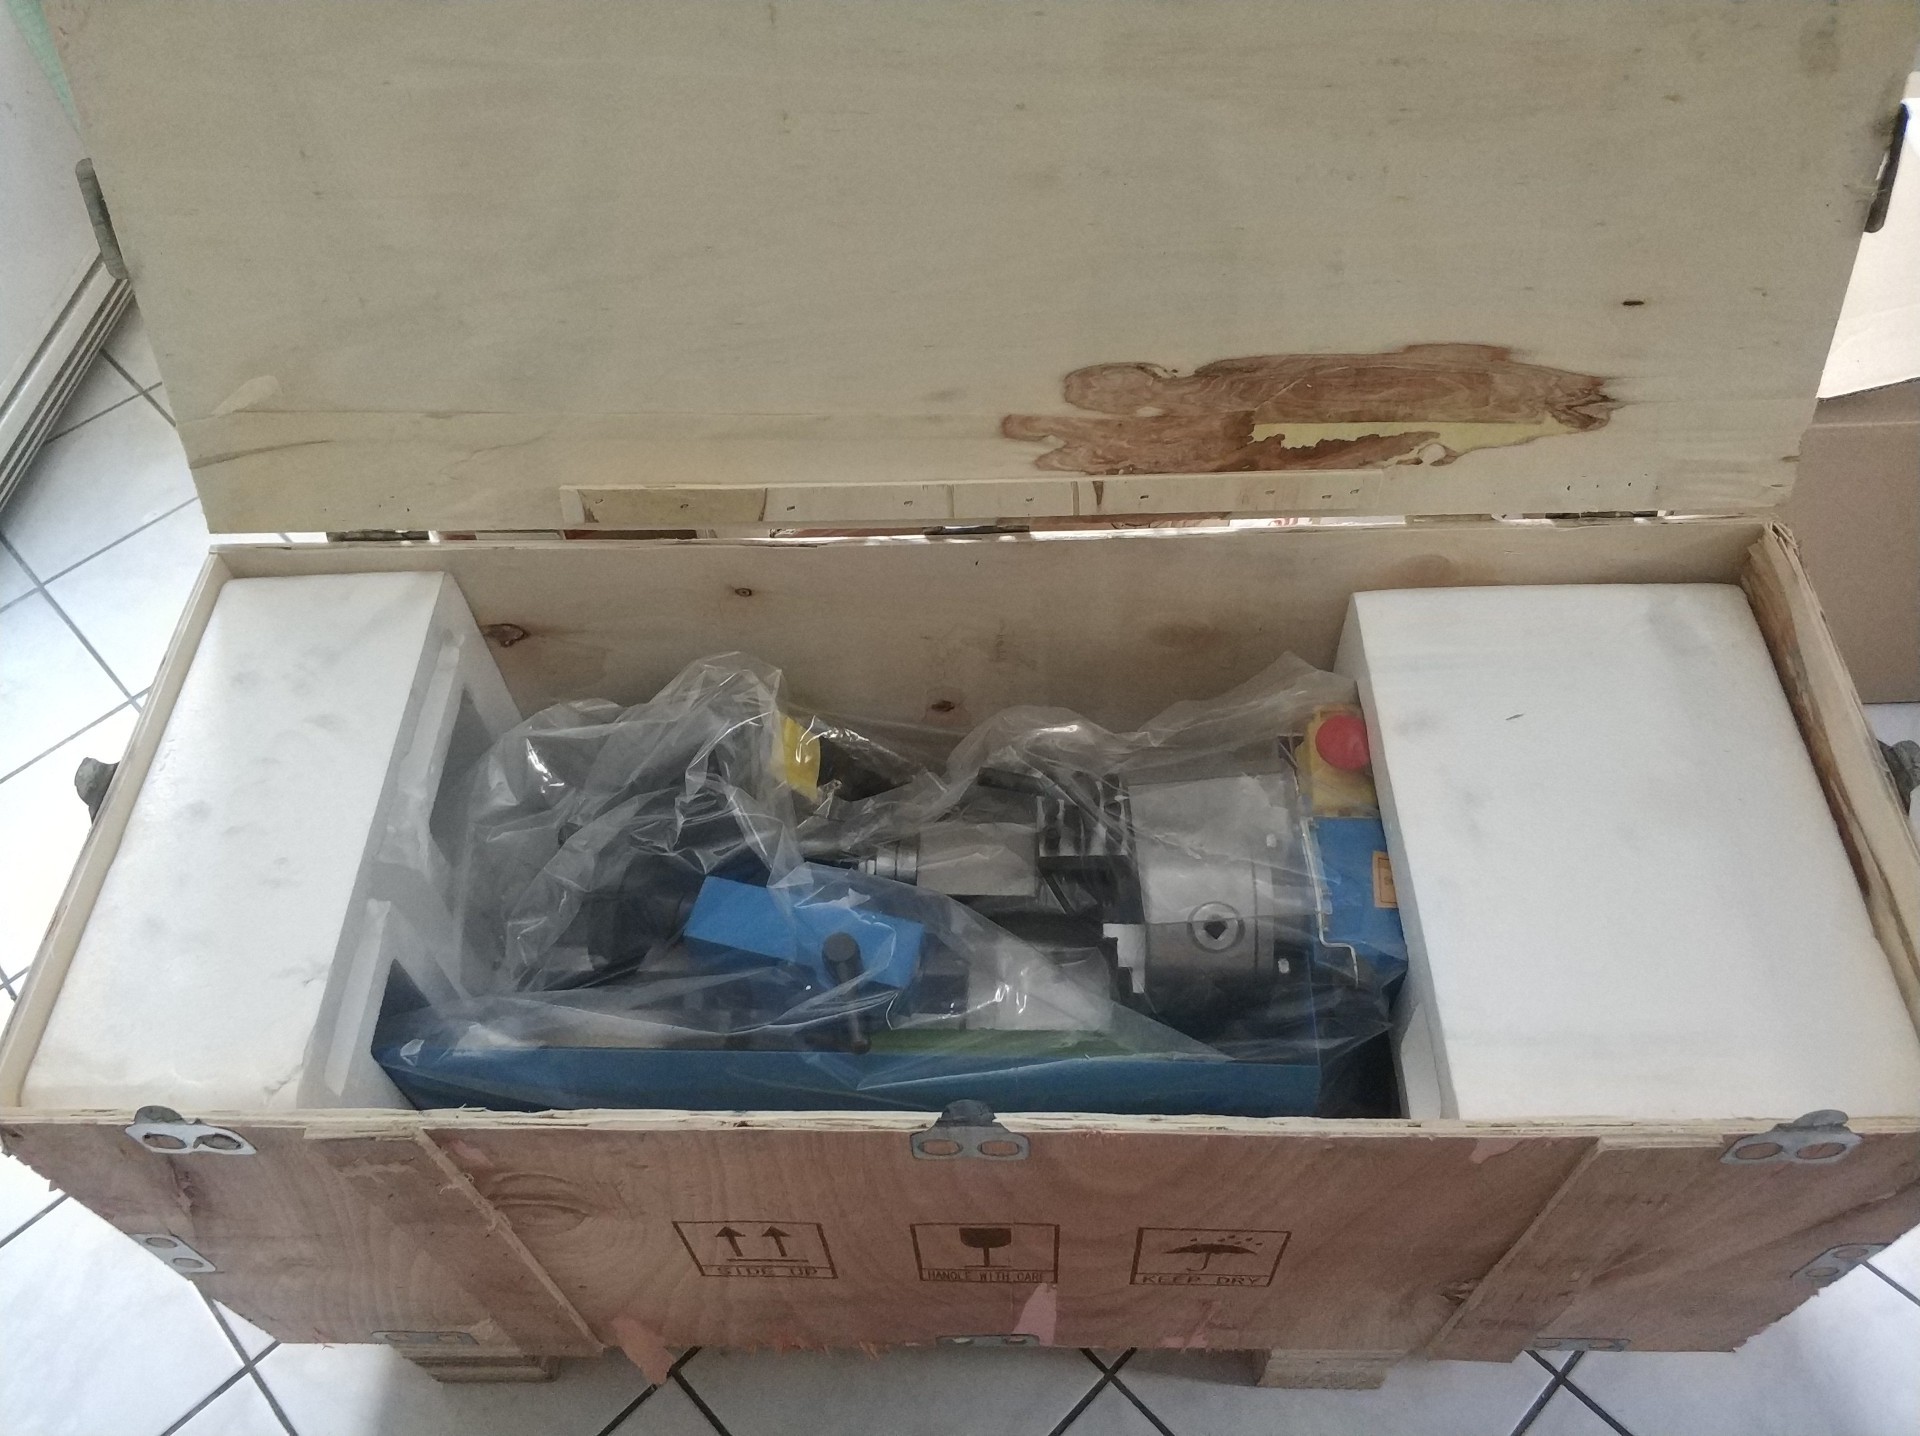
1.) The lathe that I need to improve the design of my direct granule extruder has arrived:
![]()
While the first two versions were build with less expensive machinery, sometimes you have to make a more expensive investment to drive machine evolution...
2.) I am trying to fight warping. I took two spools of ABS that are in my workshop for years now, to check if warping can be minimized by changing the print sequence. While printing flat, 2mm plates works indeed fine, I am still struggling with printing my 50mm high test object, which is a simple 100x50x50mm box. My personal challenge is to print that box without a printer enclosure (which is the common way to fight warping).![]()
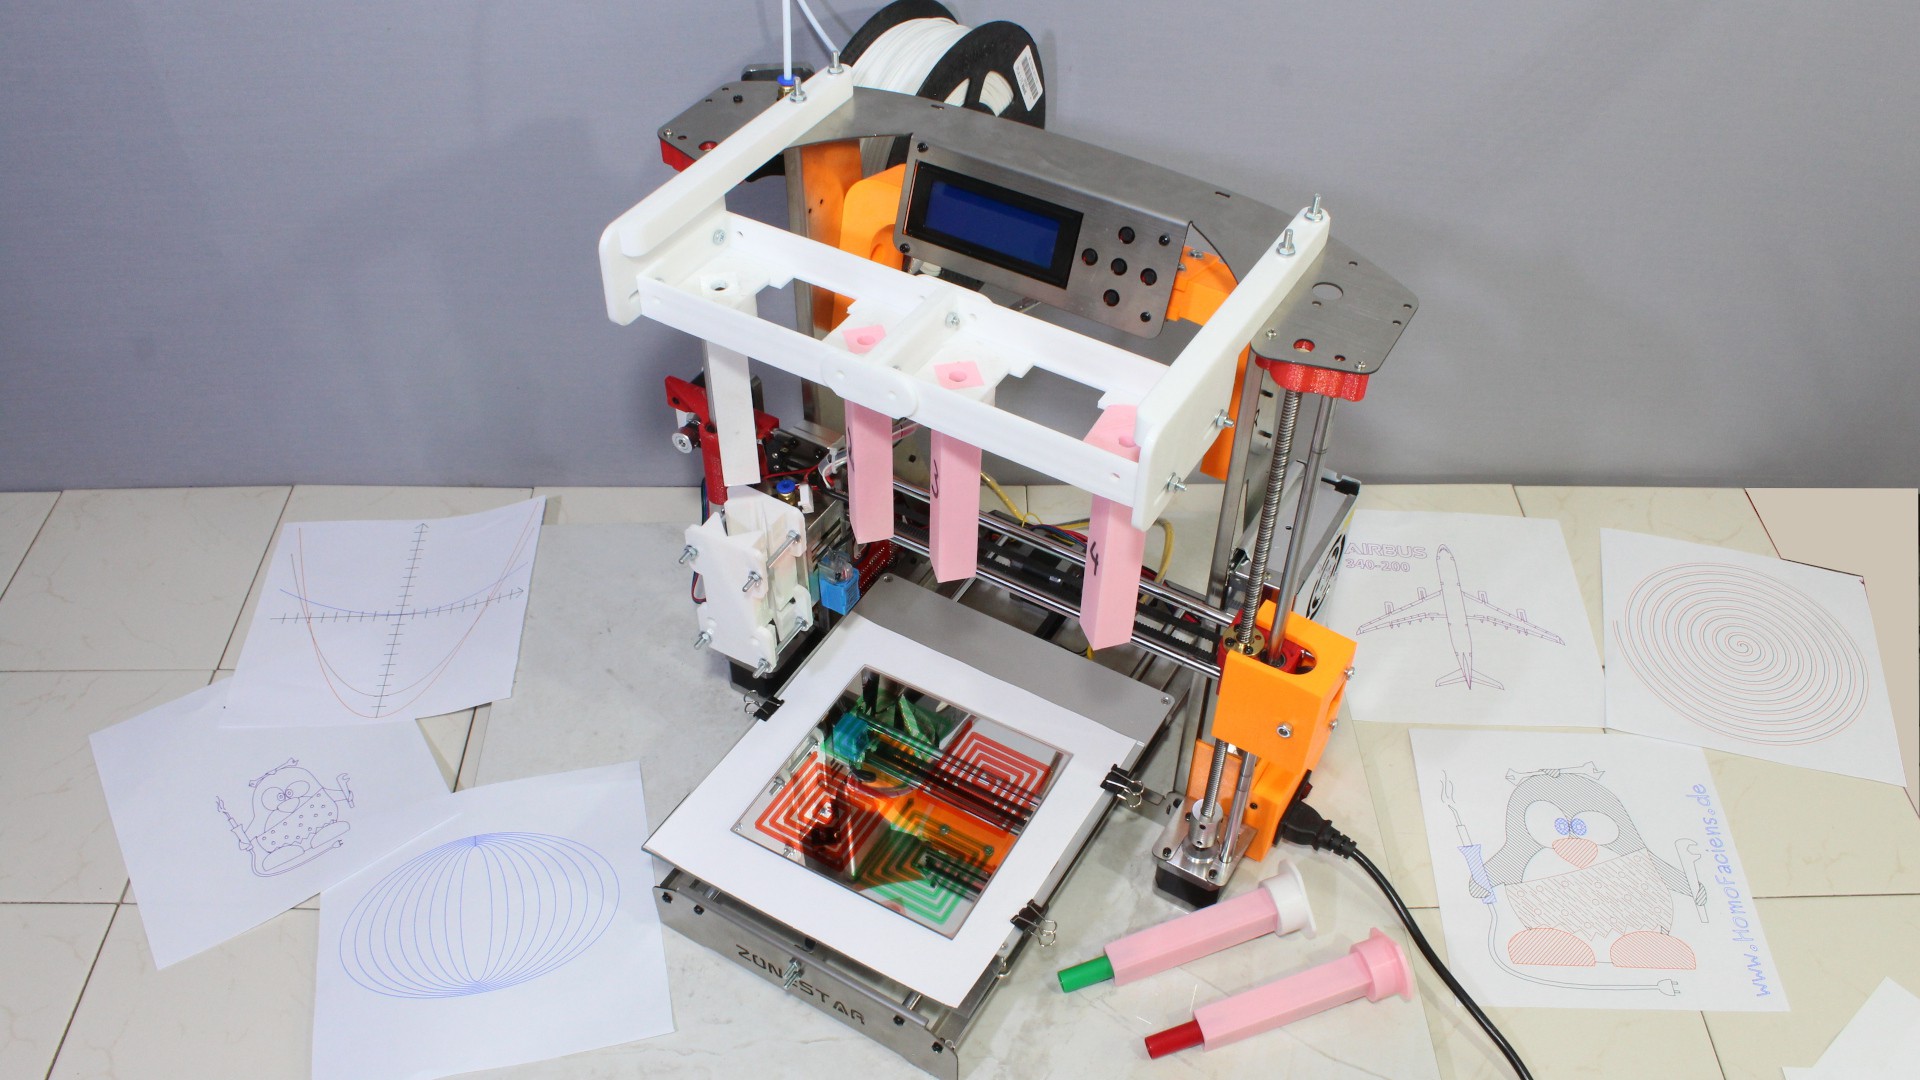
3.) I am doing some coding to give you a new kind of access to your machinery, because a tool with a built in microcontroller is just as good as the software that runs on it. 3D printers with a pen attached to the print head are great devices to teach coordinate systems and basics of Gcode and machine control.
![]()
My machinery 2021: Direct Granules Extruder
Waste plastic turned into raw material for 3D printing.