Close
0%
0%

Sol-20 Reproduction

I am making a full sized Sol-20 reproduction, the first fully assembled microcomputer with a built-in keyboard and television output.

Similar projects worth following
The Sol-20 was an interesting machine. It was introduced in July 1976, appearing on the cover of Popular Electronics magazine. With its 8080 microprocessor and S-100 bus, it had more in common with the Altair 8800s and IMSAI 8080s of the day, than it did with the Apple and Commodore computers that were soon to follow, despite looking more like the latter.

I distinctly remember seeing a Sol-20 in the wild. It would have been the fall of 1977 or perhaps the summer of 1978. I had just started at the University of Waterloo and was visiting my cousin in Toronto. While walking along Queen Street we passed a small computer store and the Sol was prominently displayed in the front window. What a great looking machine with it's bright blue case and walnut sides, but at roughly $1650 (CAD) it was out of my poor student price range.

Because only 12,000 were ever produced, Sol-20s are virtually unobtainable today, so I guess I'll have to build one. Talk about delayed gratification.

The Game Plan

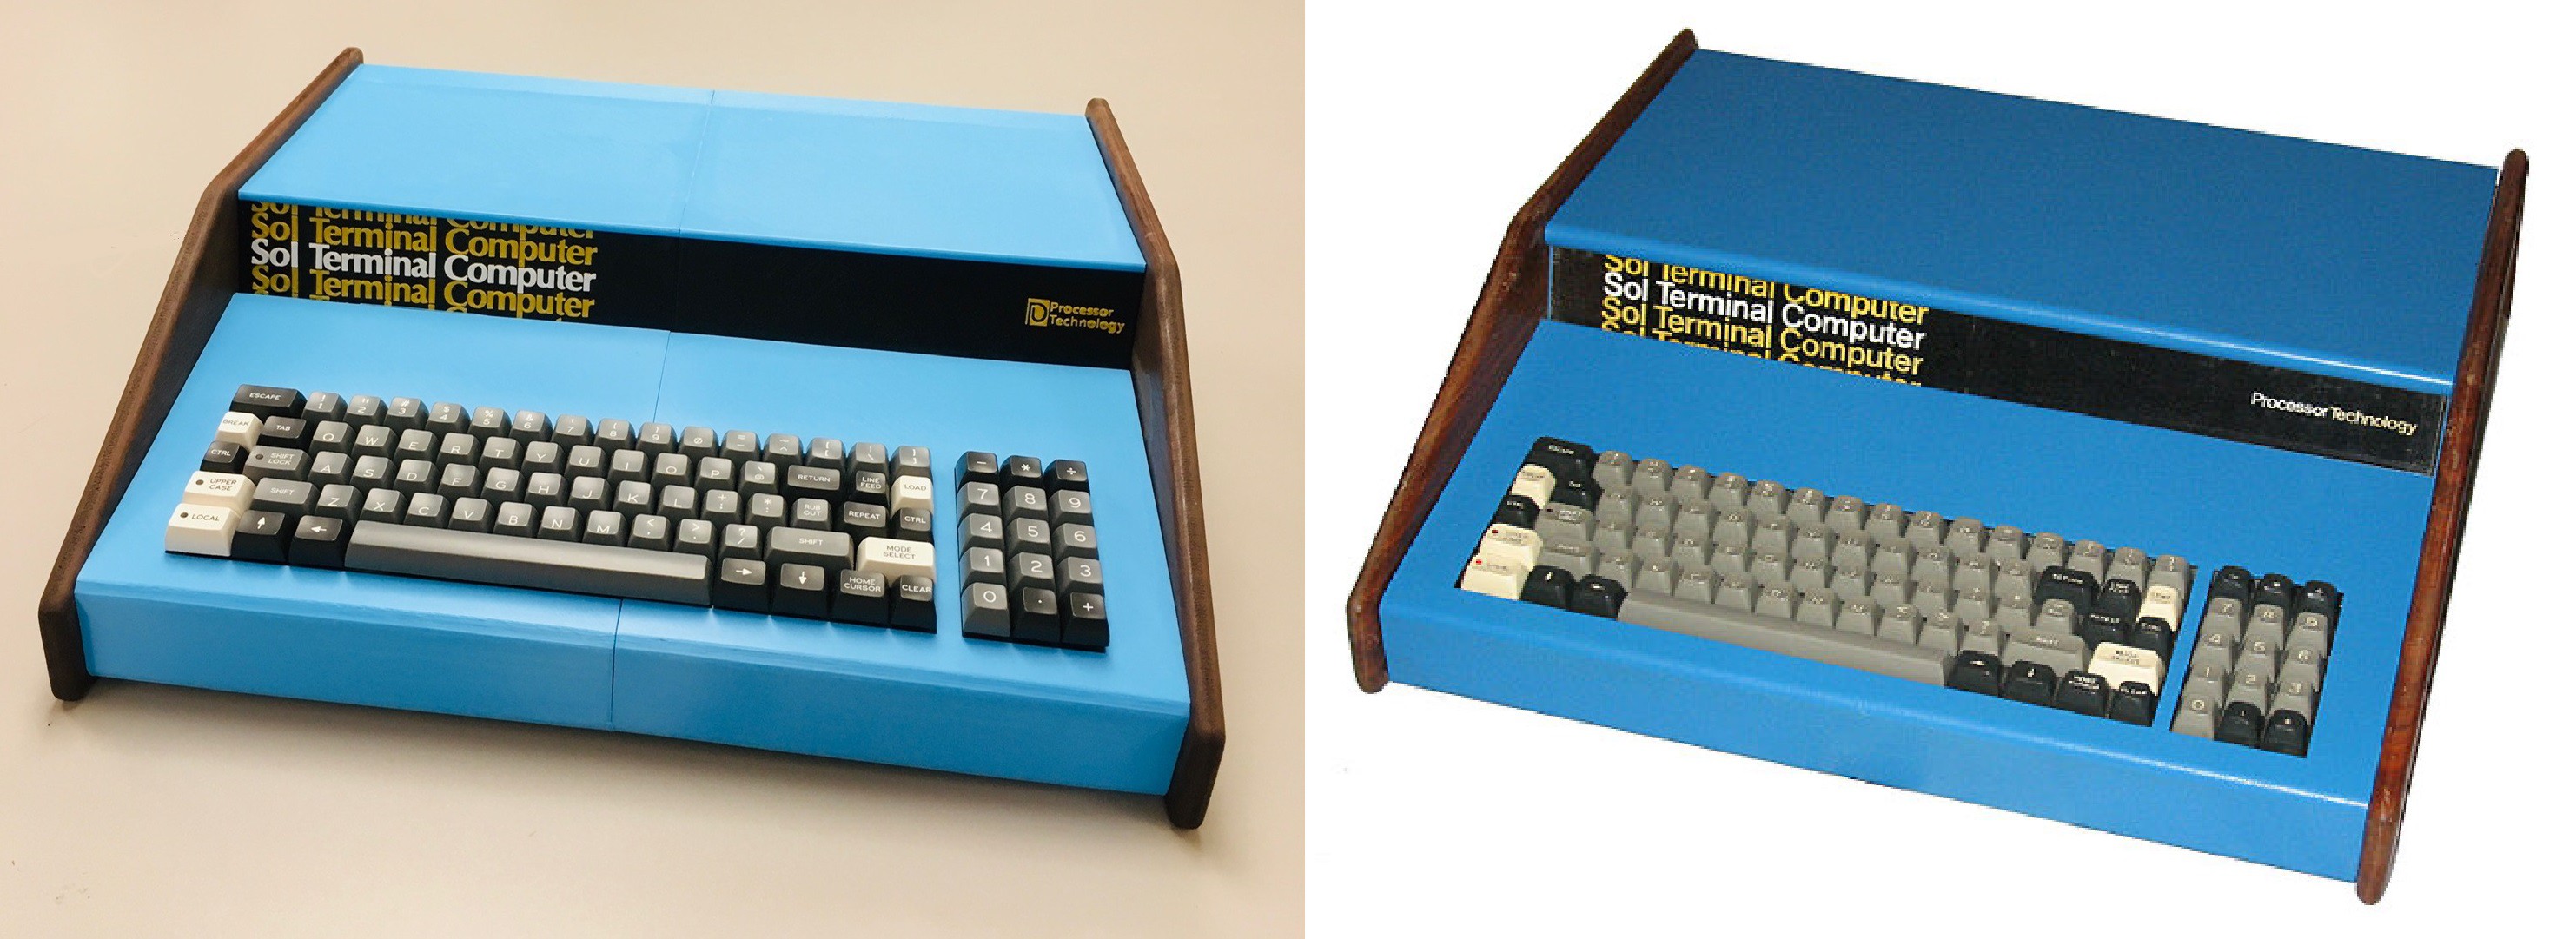
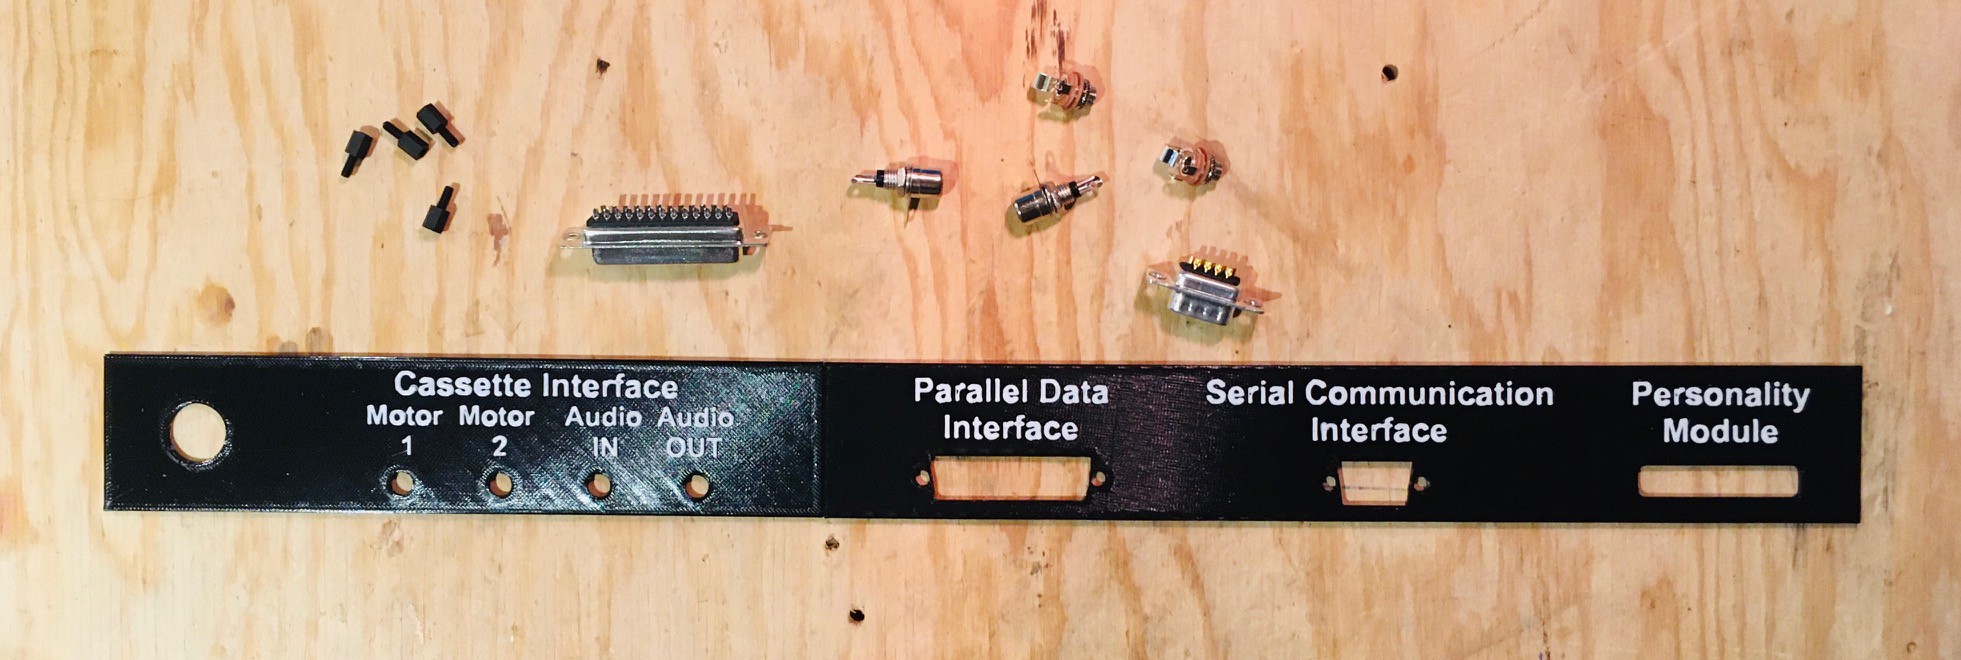
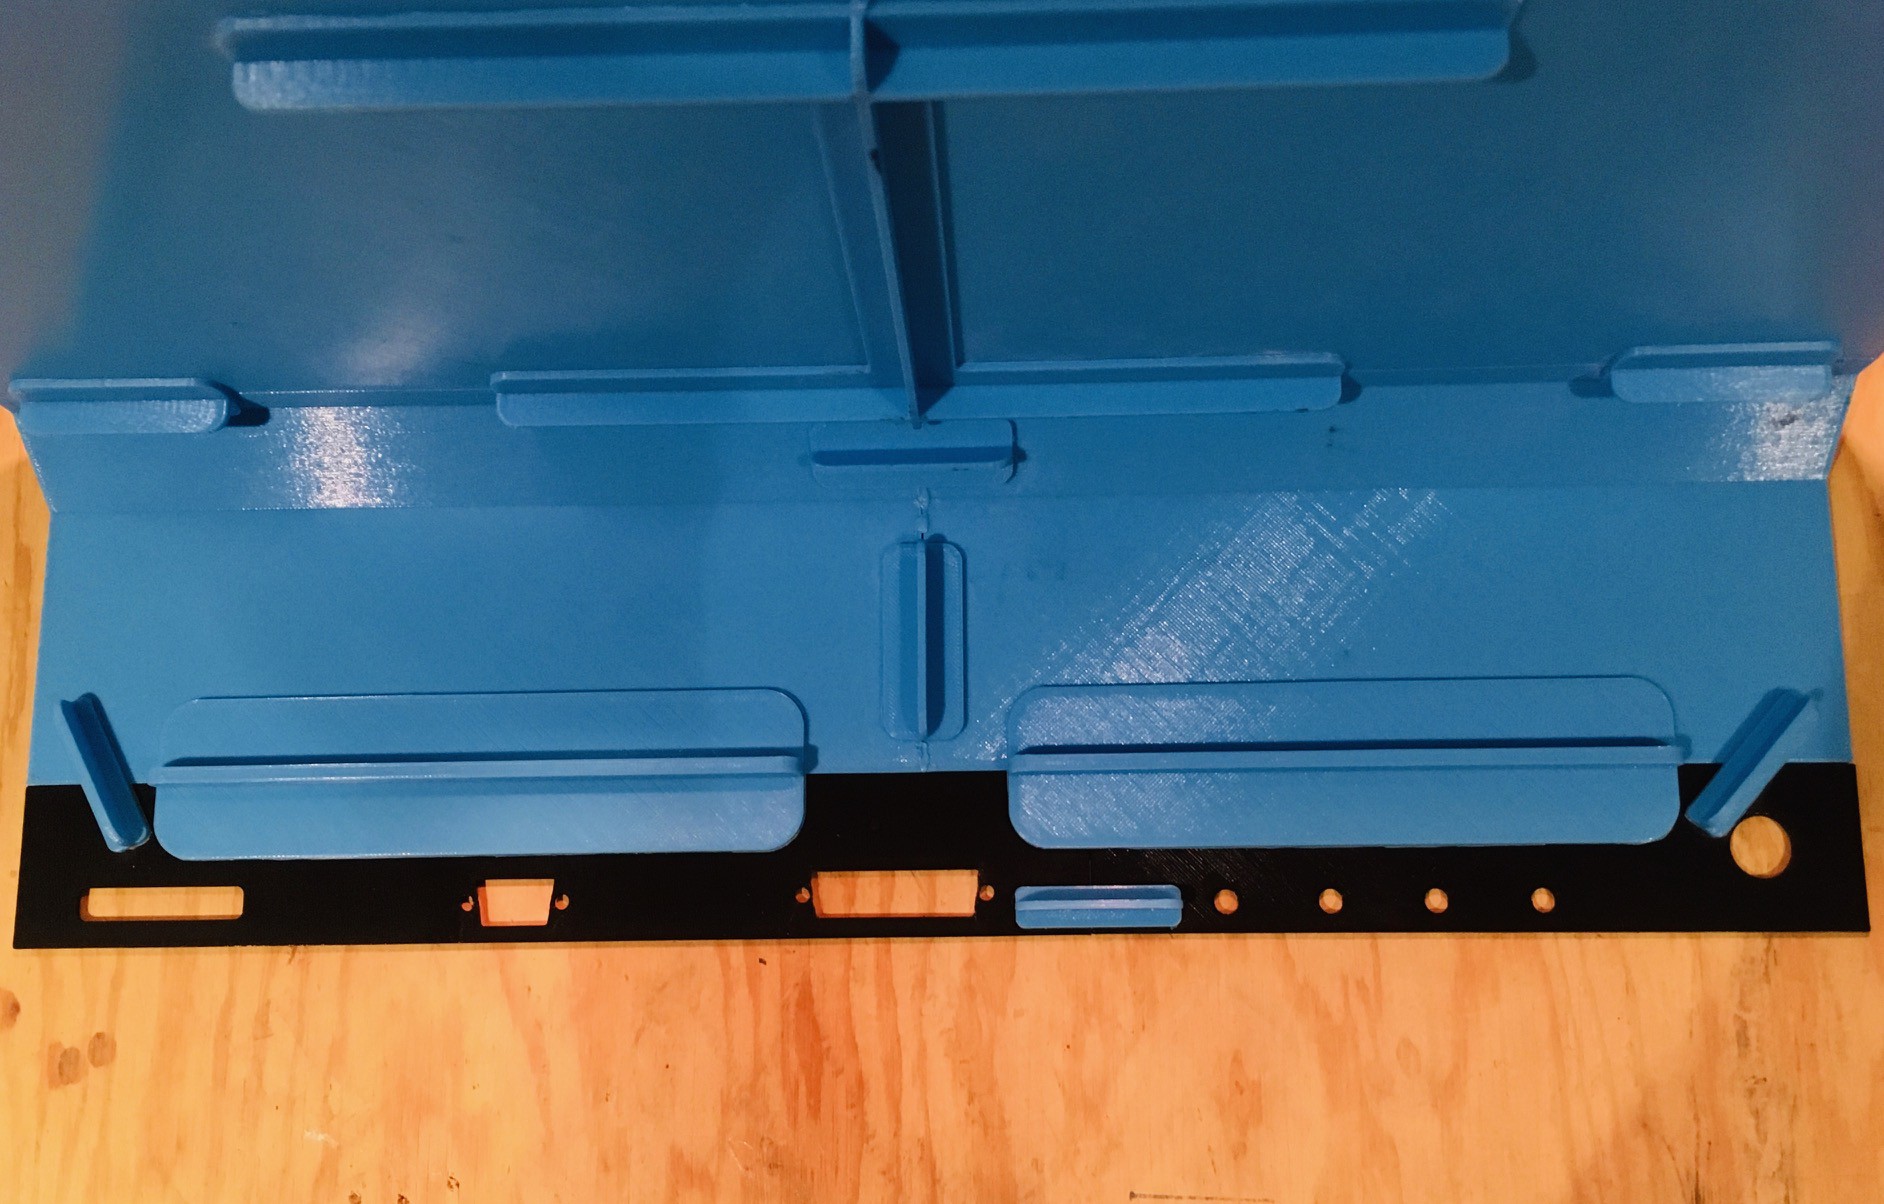
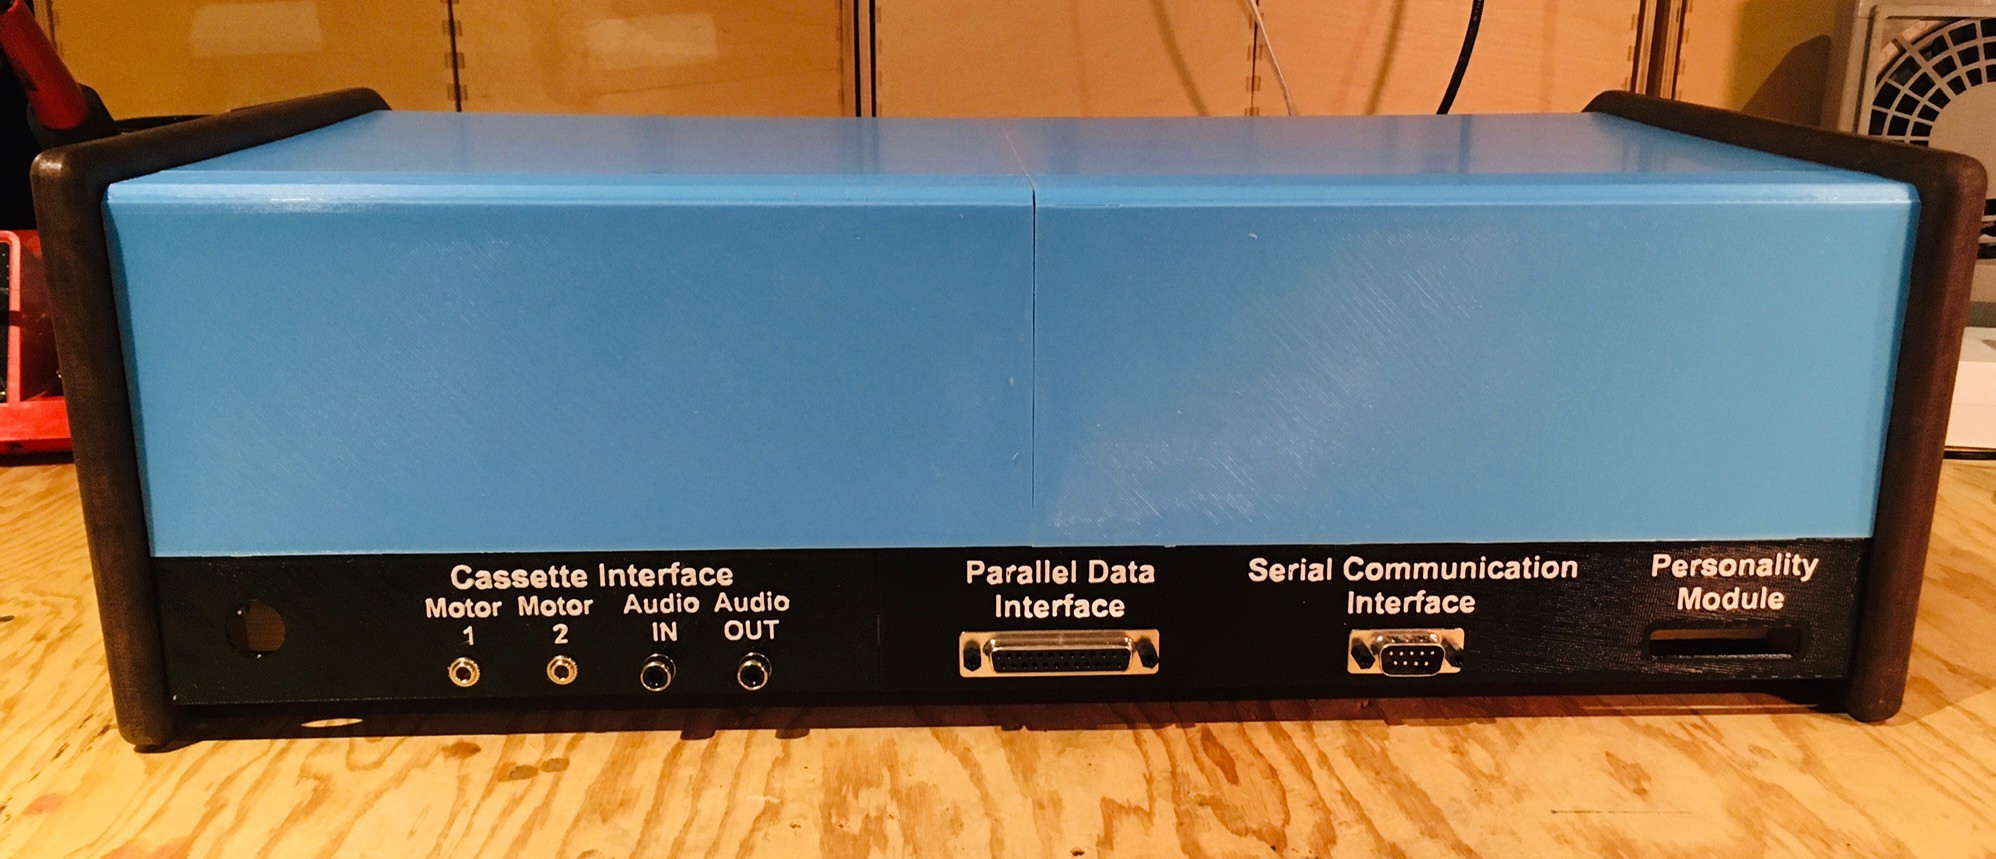
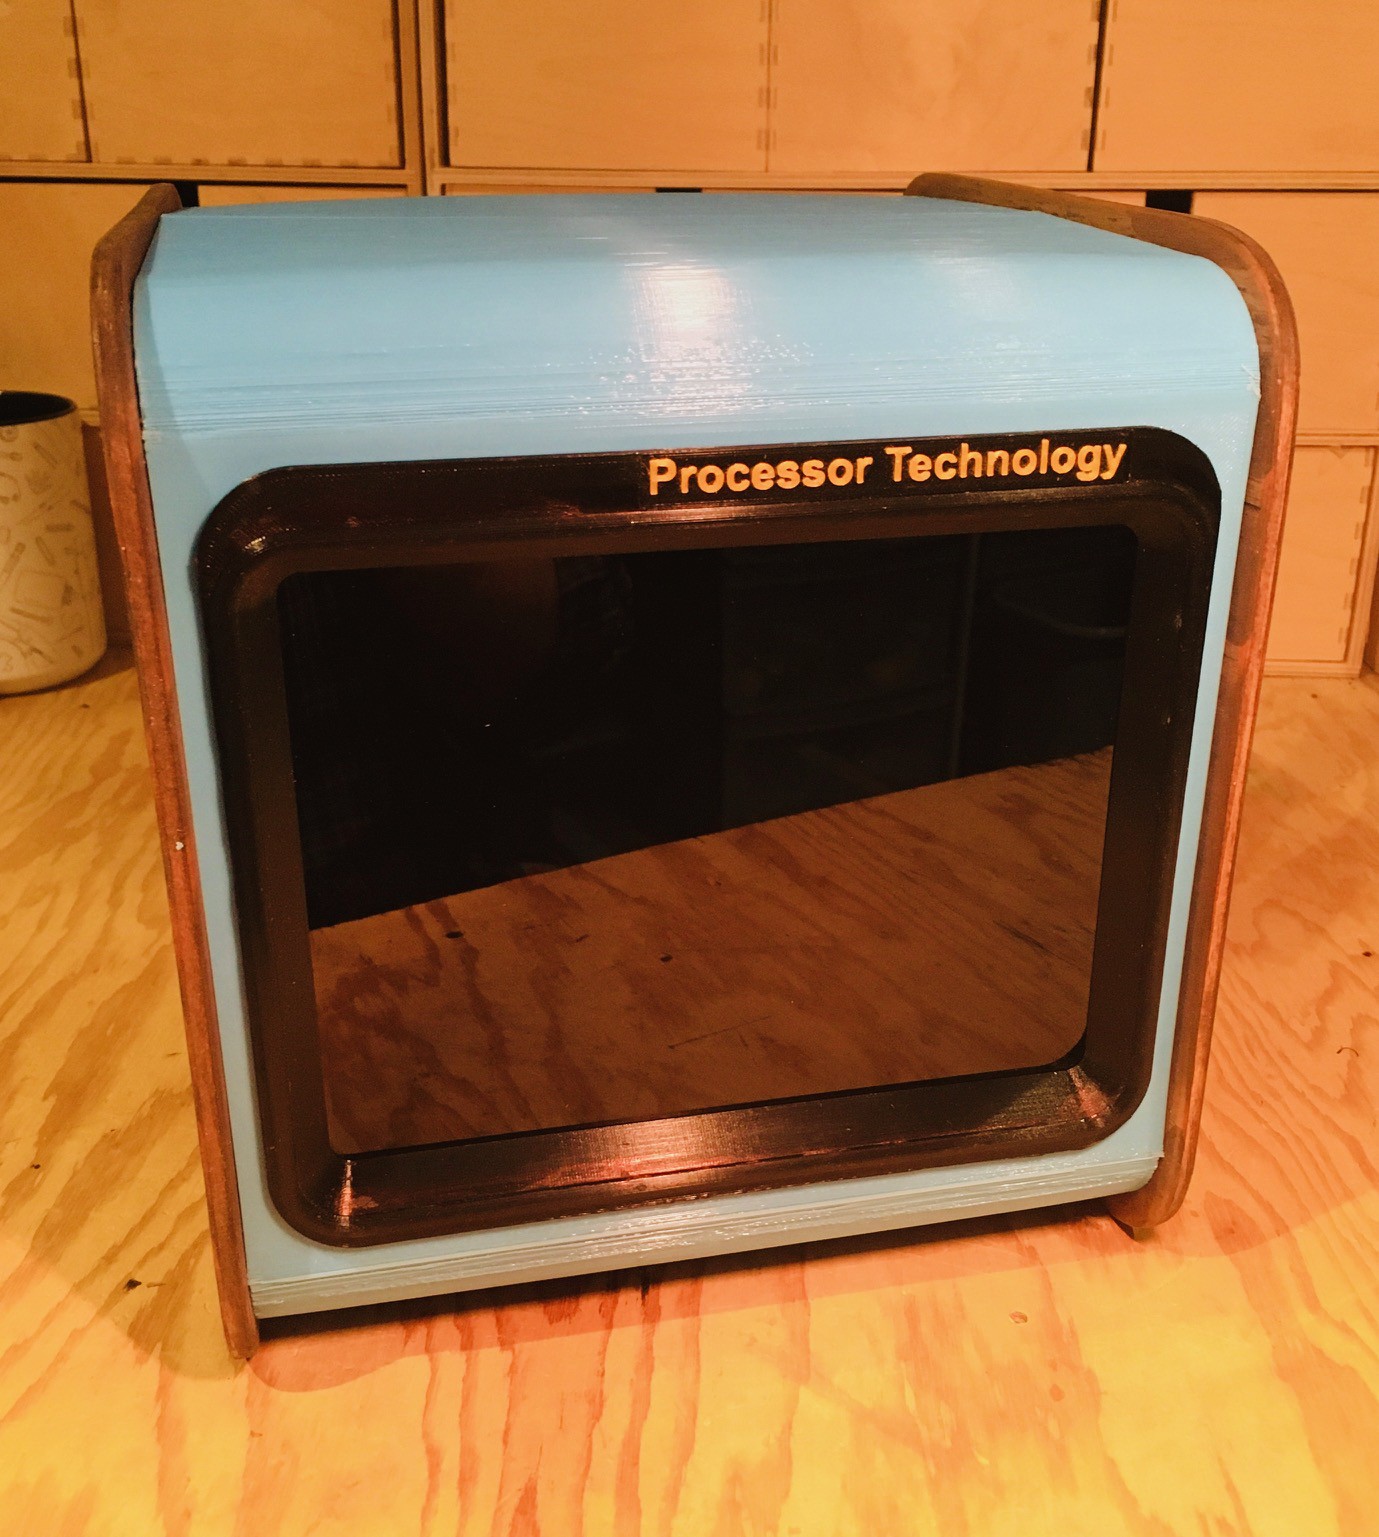
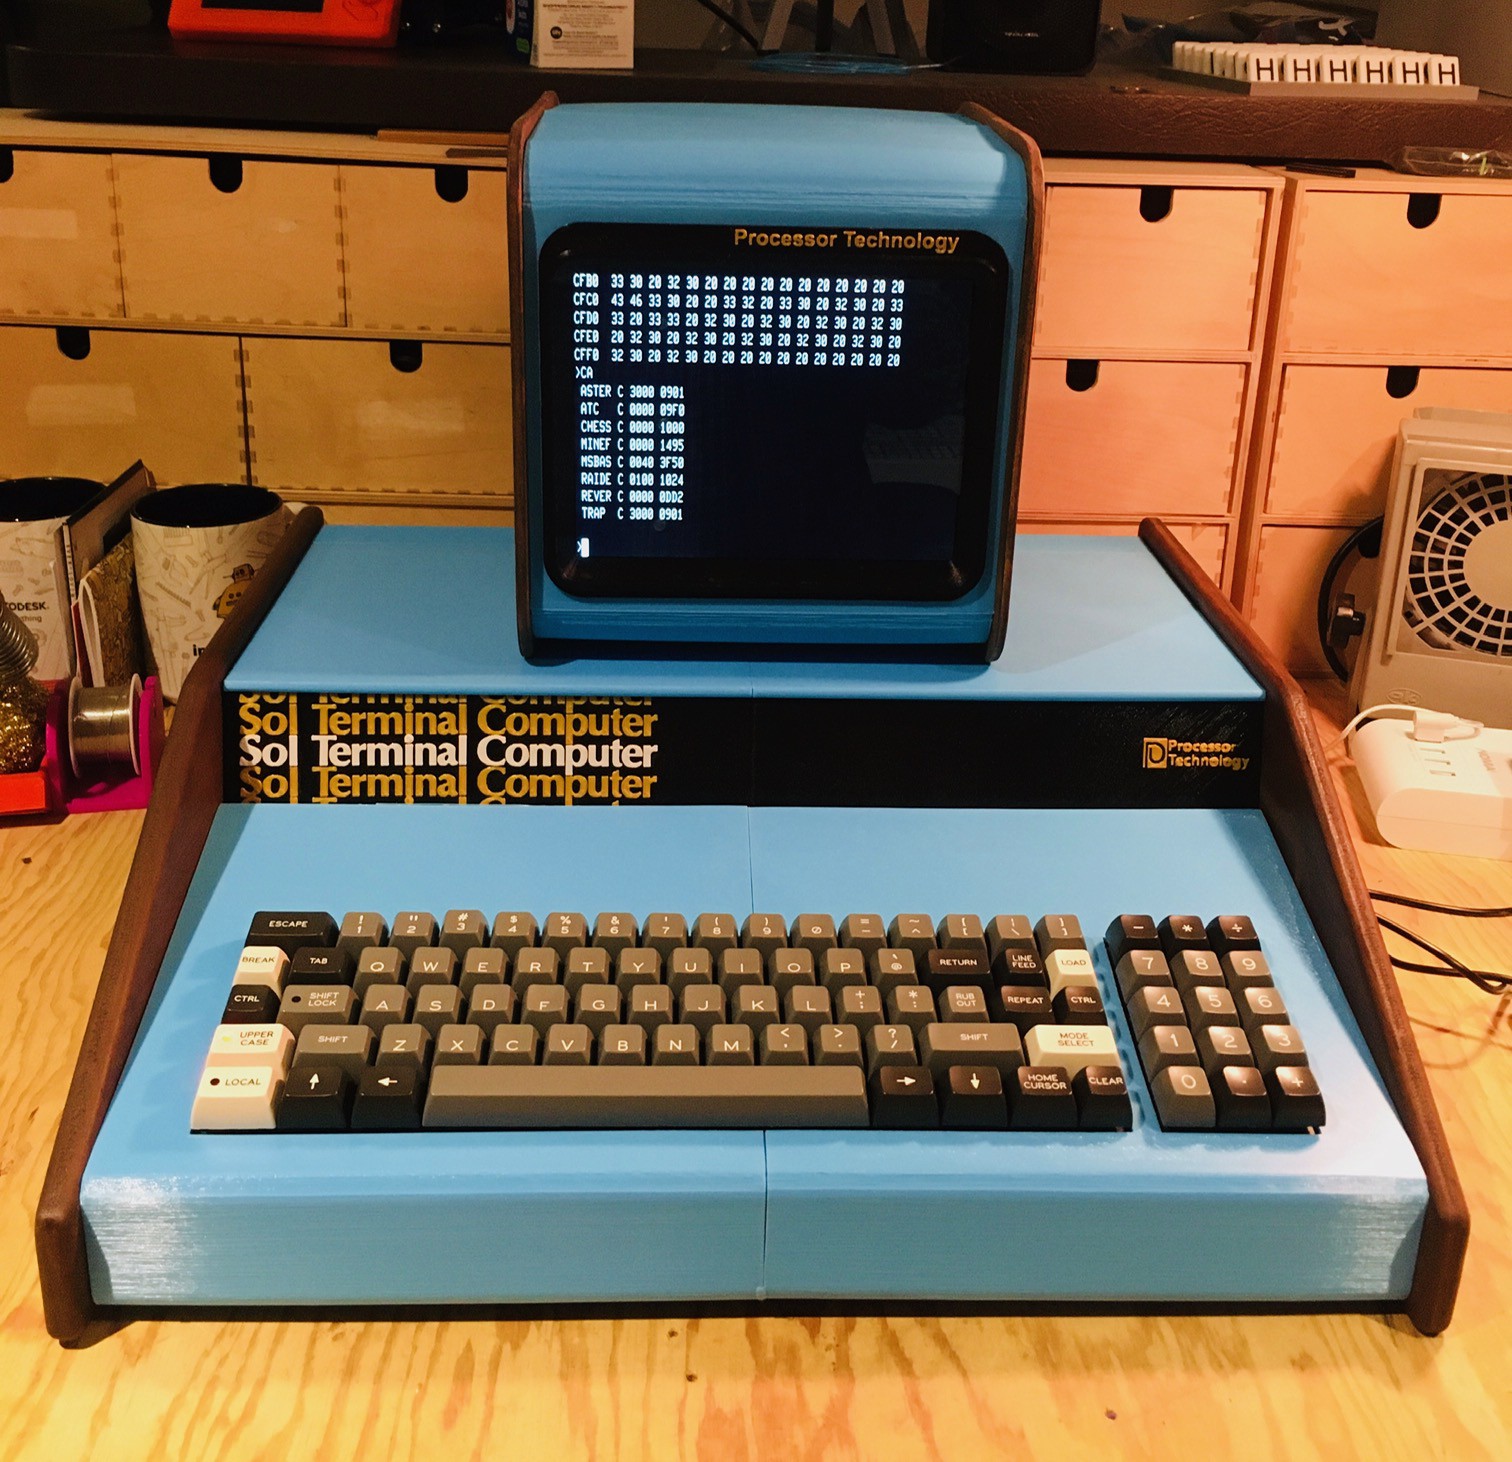
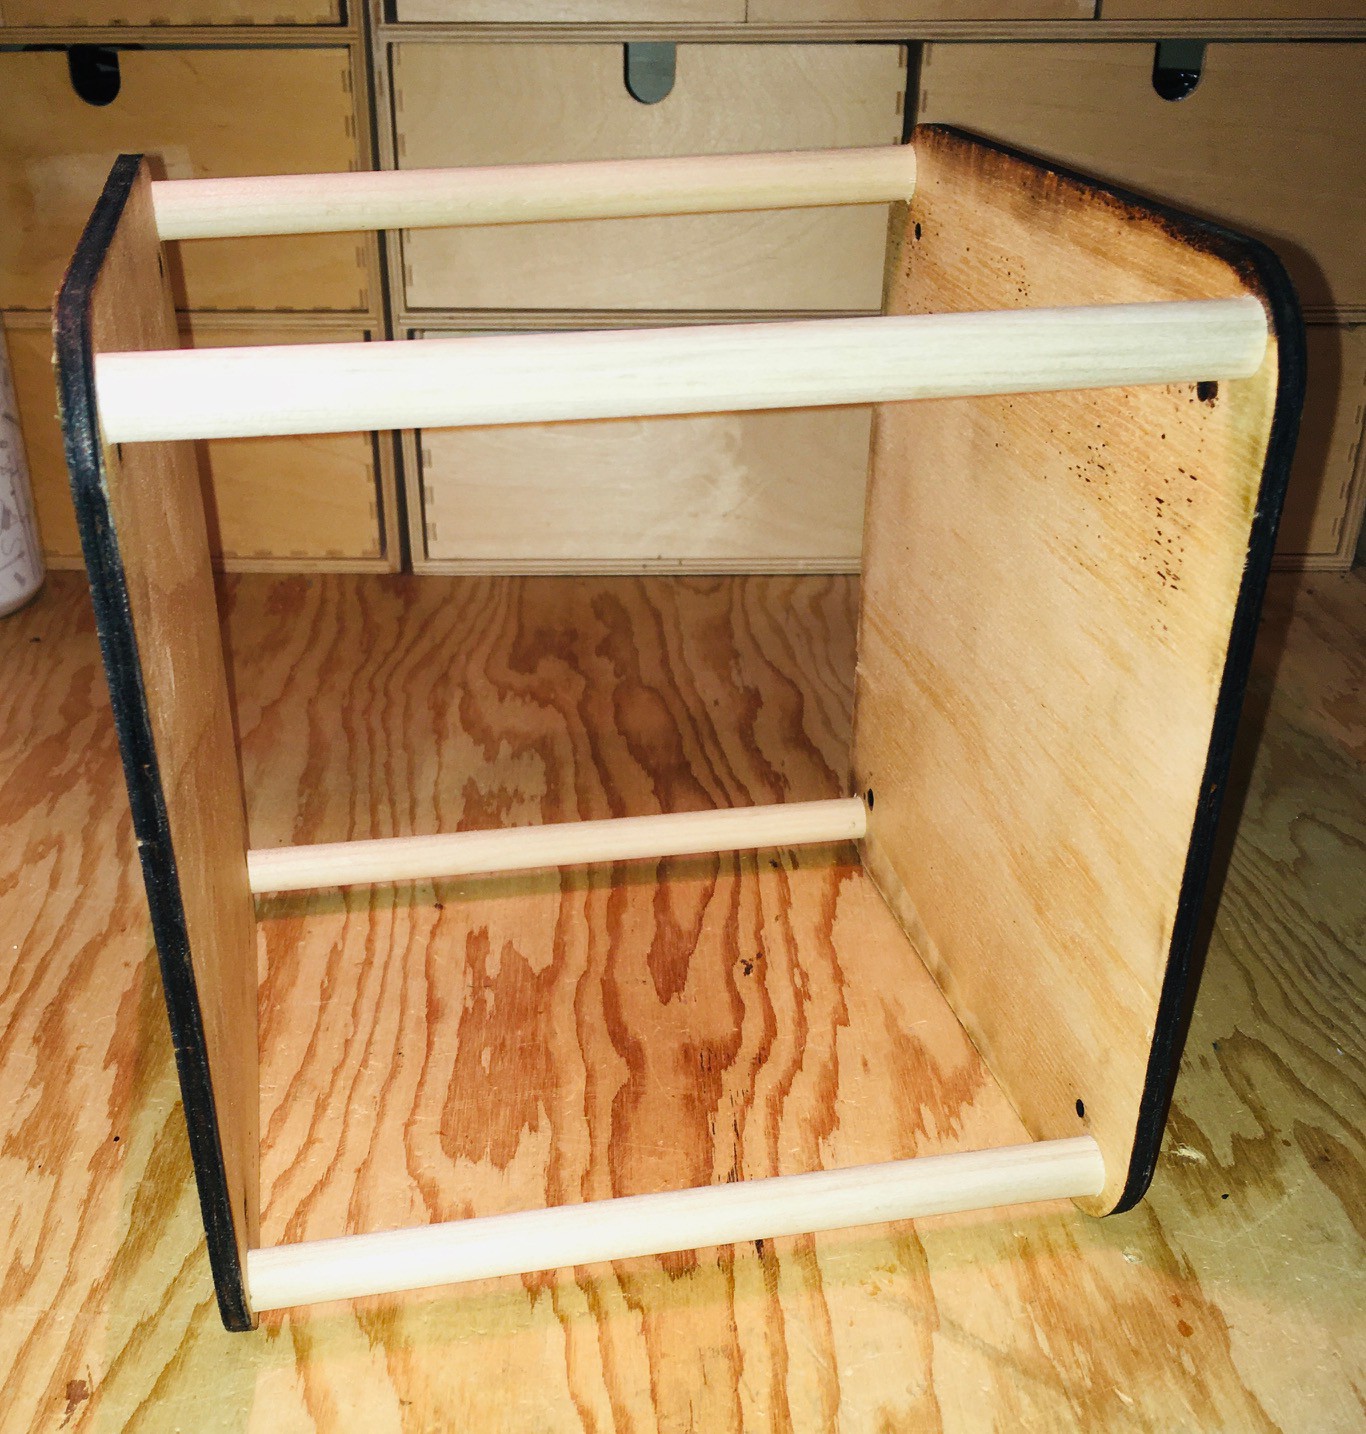
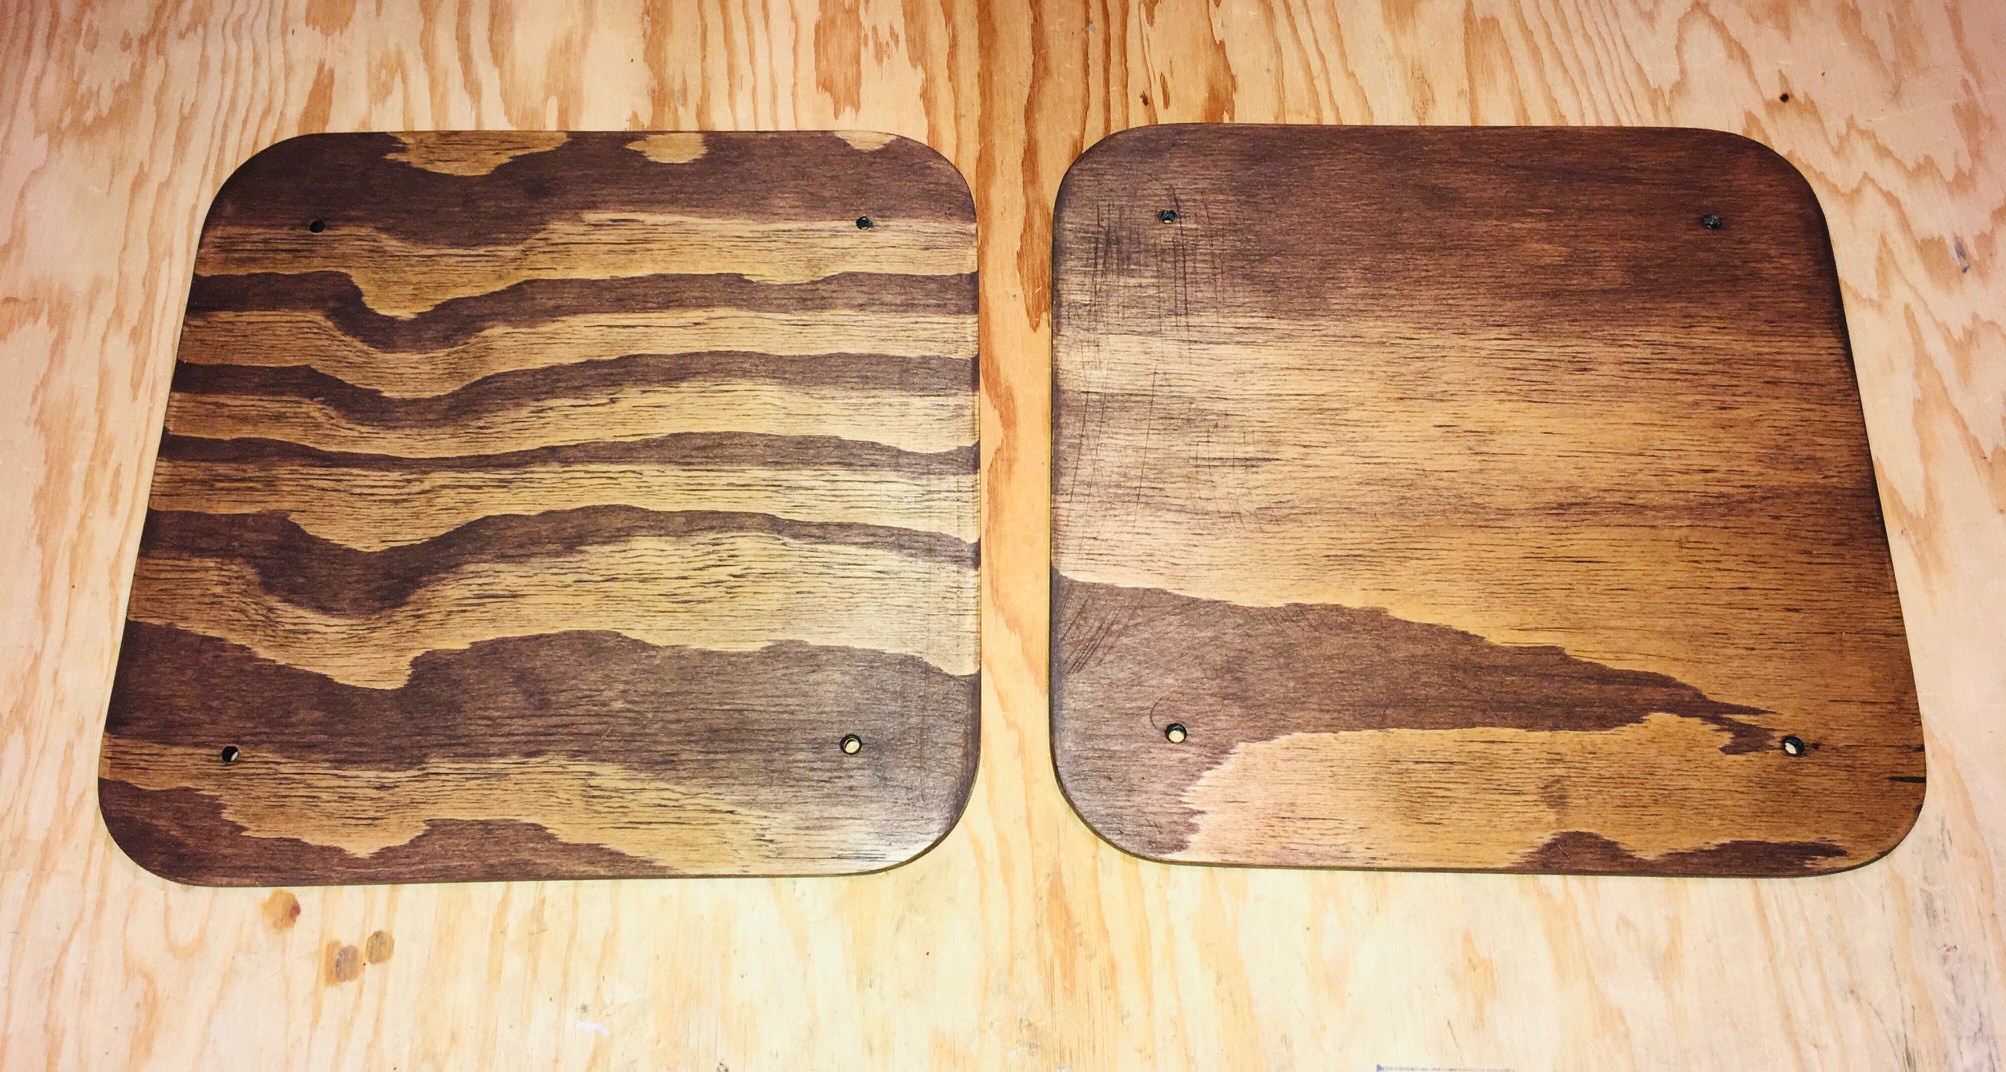
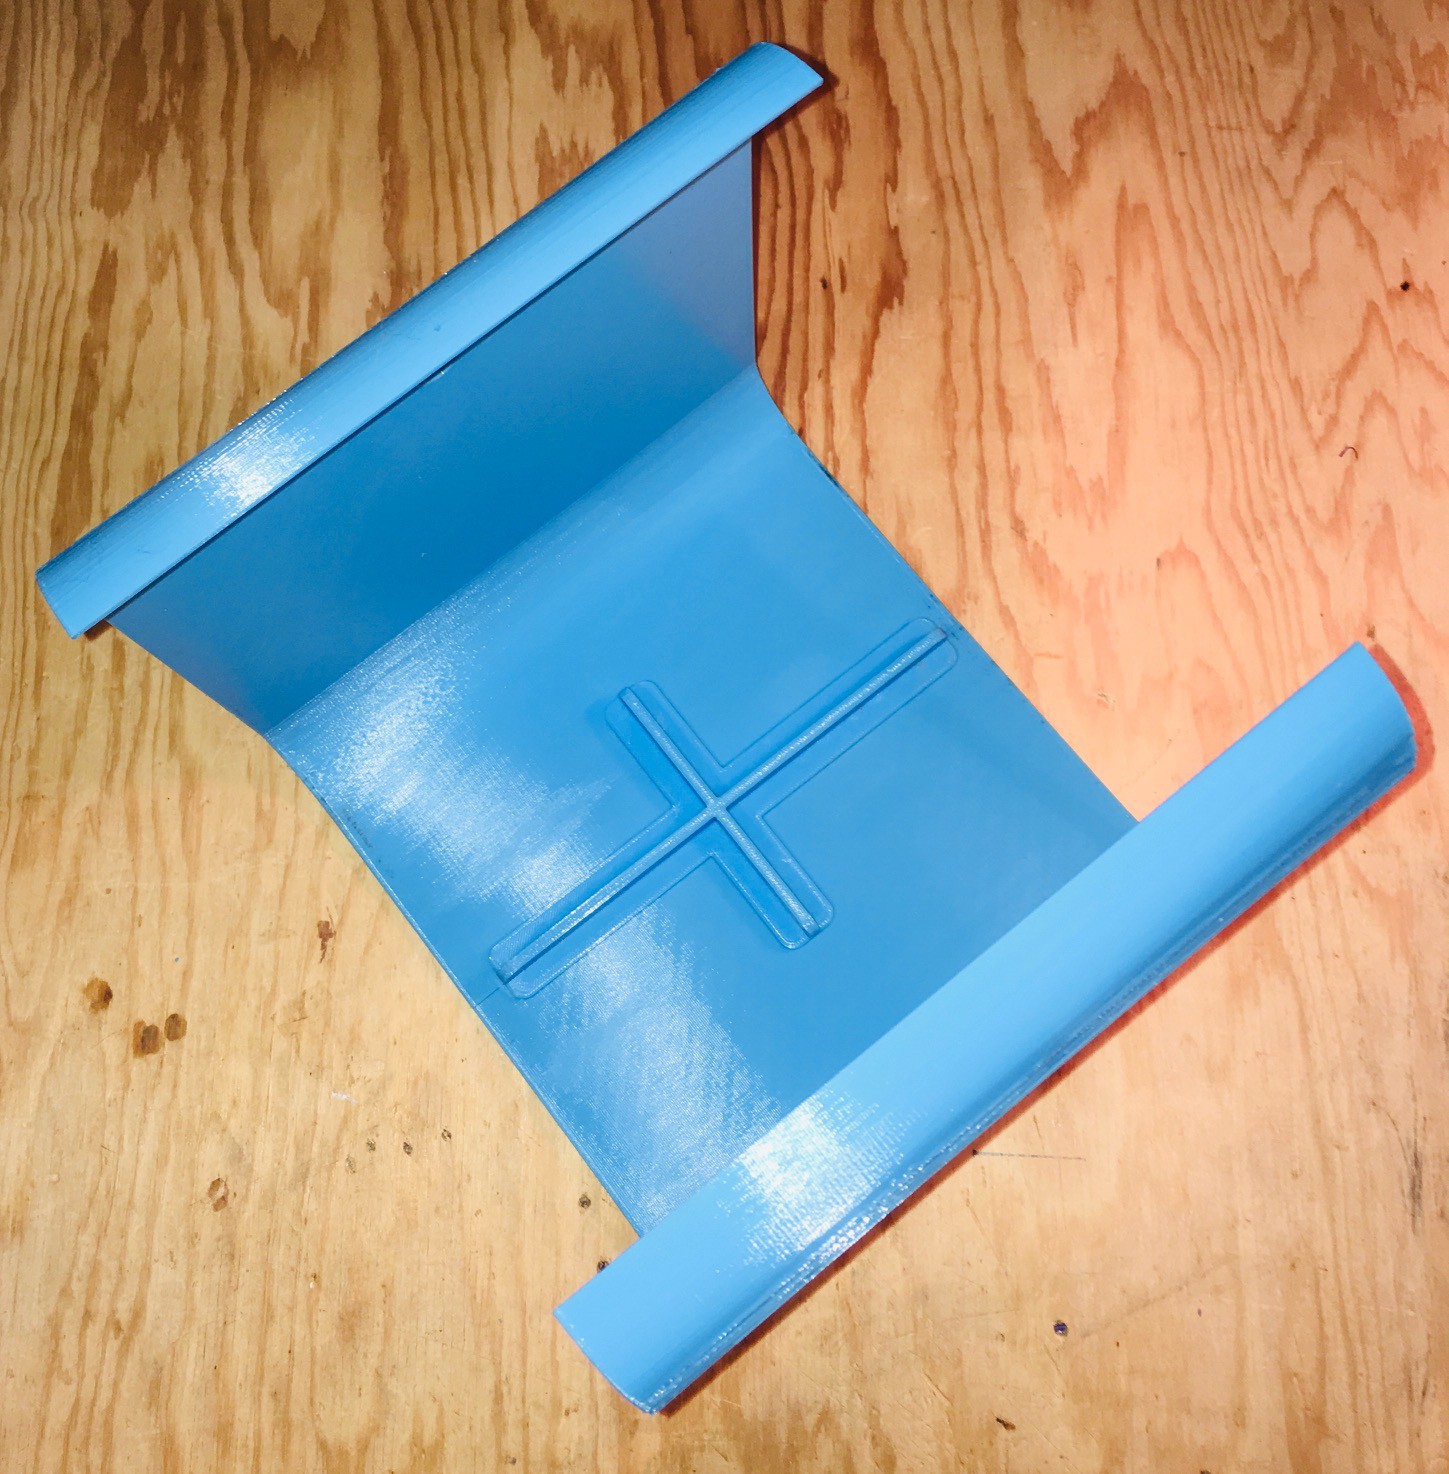
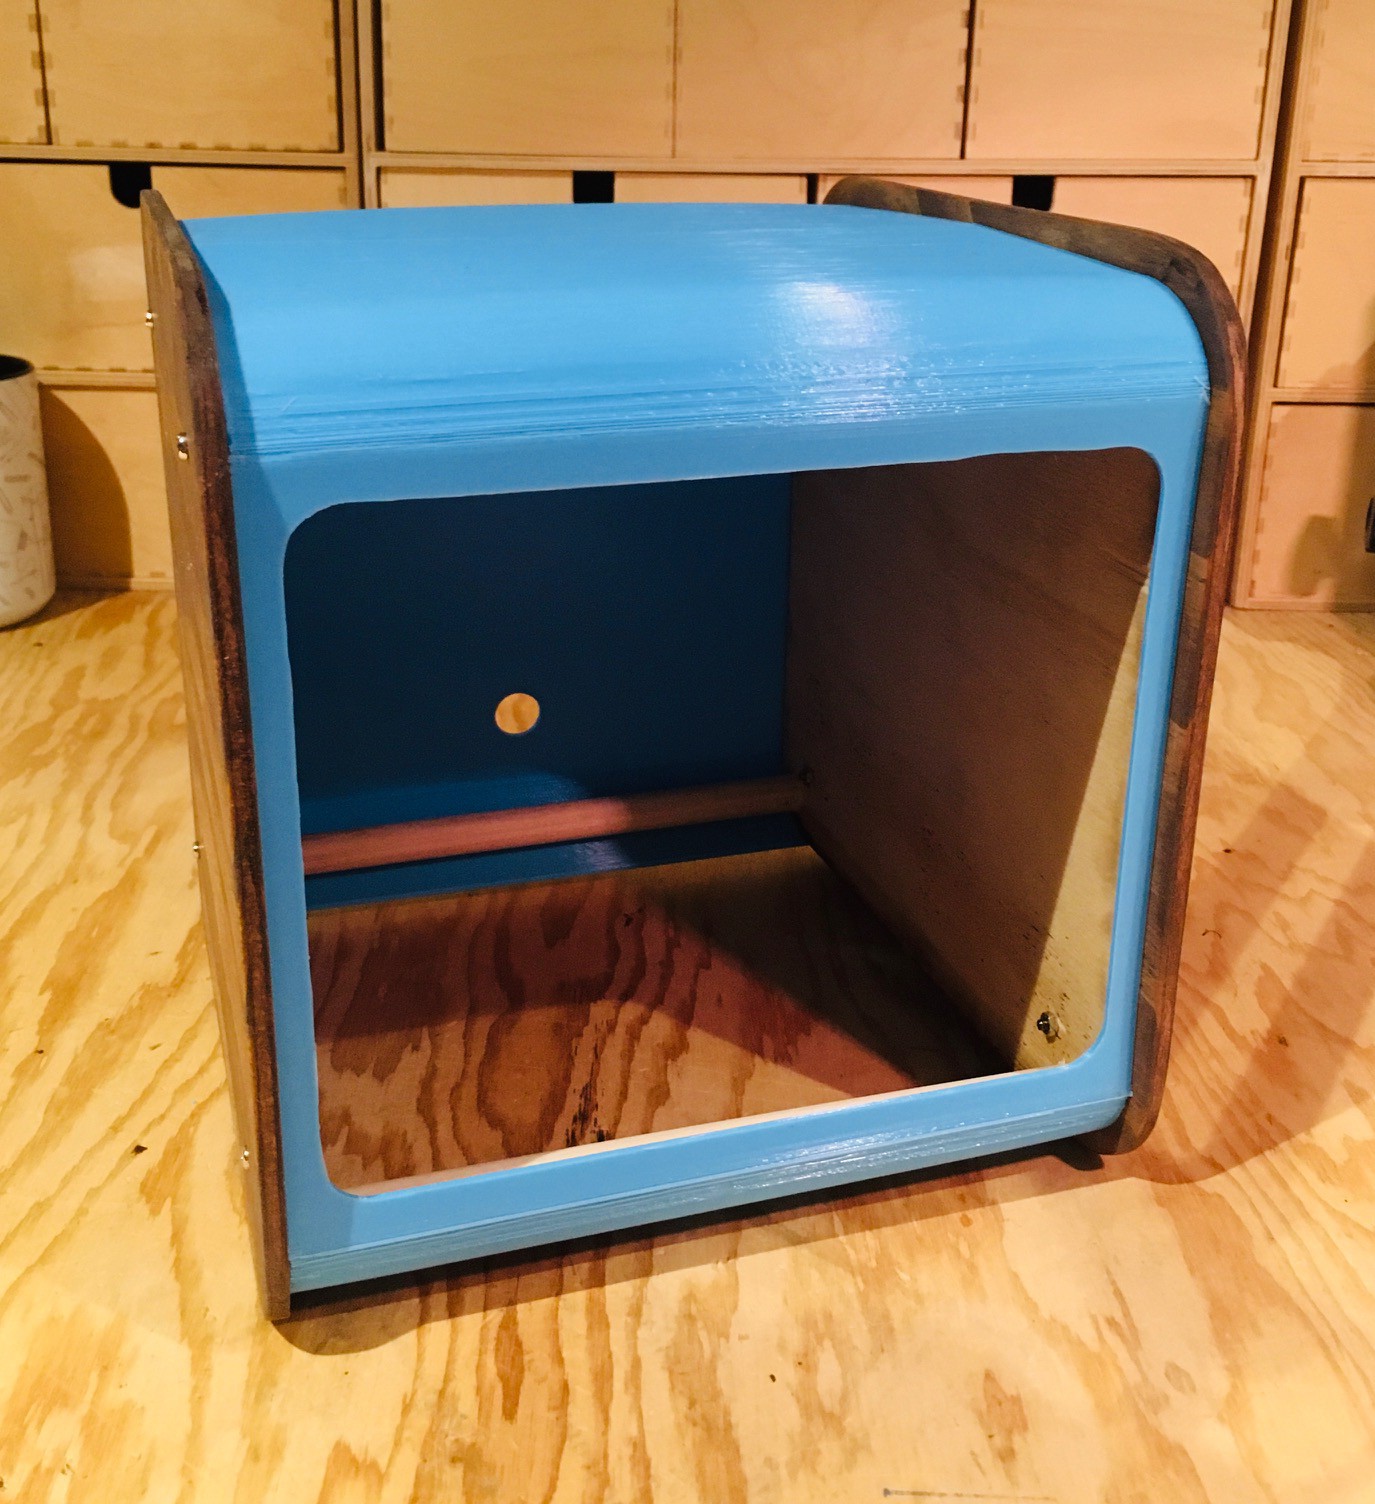
So my plan is to make a full size case that will be as authentic looking as possible, with beautiful walnut sides for sure. I will 3D print the blue panels instead of using sheet metal so the build will be accessible to more people should they decide to make one.  

For the keyboard I have been in touch with Dave from osiweb.org who has designed a complete replacement keyboard for the Sol-20 using modern Cherry key switches. From the Unified Retro Keyboard Project:

The keyboard is not a replica of the original. It doesn't use the same capacitive circuit or keys. But it does have exactly the same layout with the same functionality, including the 3 LEDs (UPPER CASE, SHIFT LOCK, LOCAL) and 3 outputs (RESET, BREAK, LOCAL). It uses cherry MX or Futaba MD-4PCs keys. Neither has quite the same feel as the capacitive keys, but the Futaba keys approach the travel of the keytronic switches, and do have a nice feel.

I'm getting the keyboard as a kit and looking forward to putting it together.

On the inside I'm going to emulate the Sol-20 hardware on a Raspberry Pi 4. To that end I have a working (very basic at this point) Python based emulator I'm going to post to GitHub shortly. 

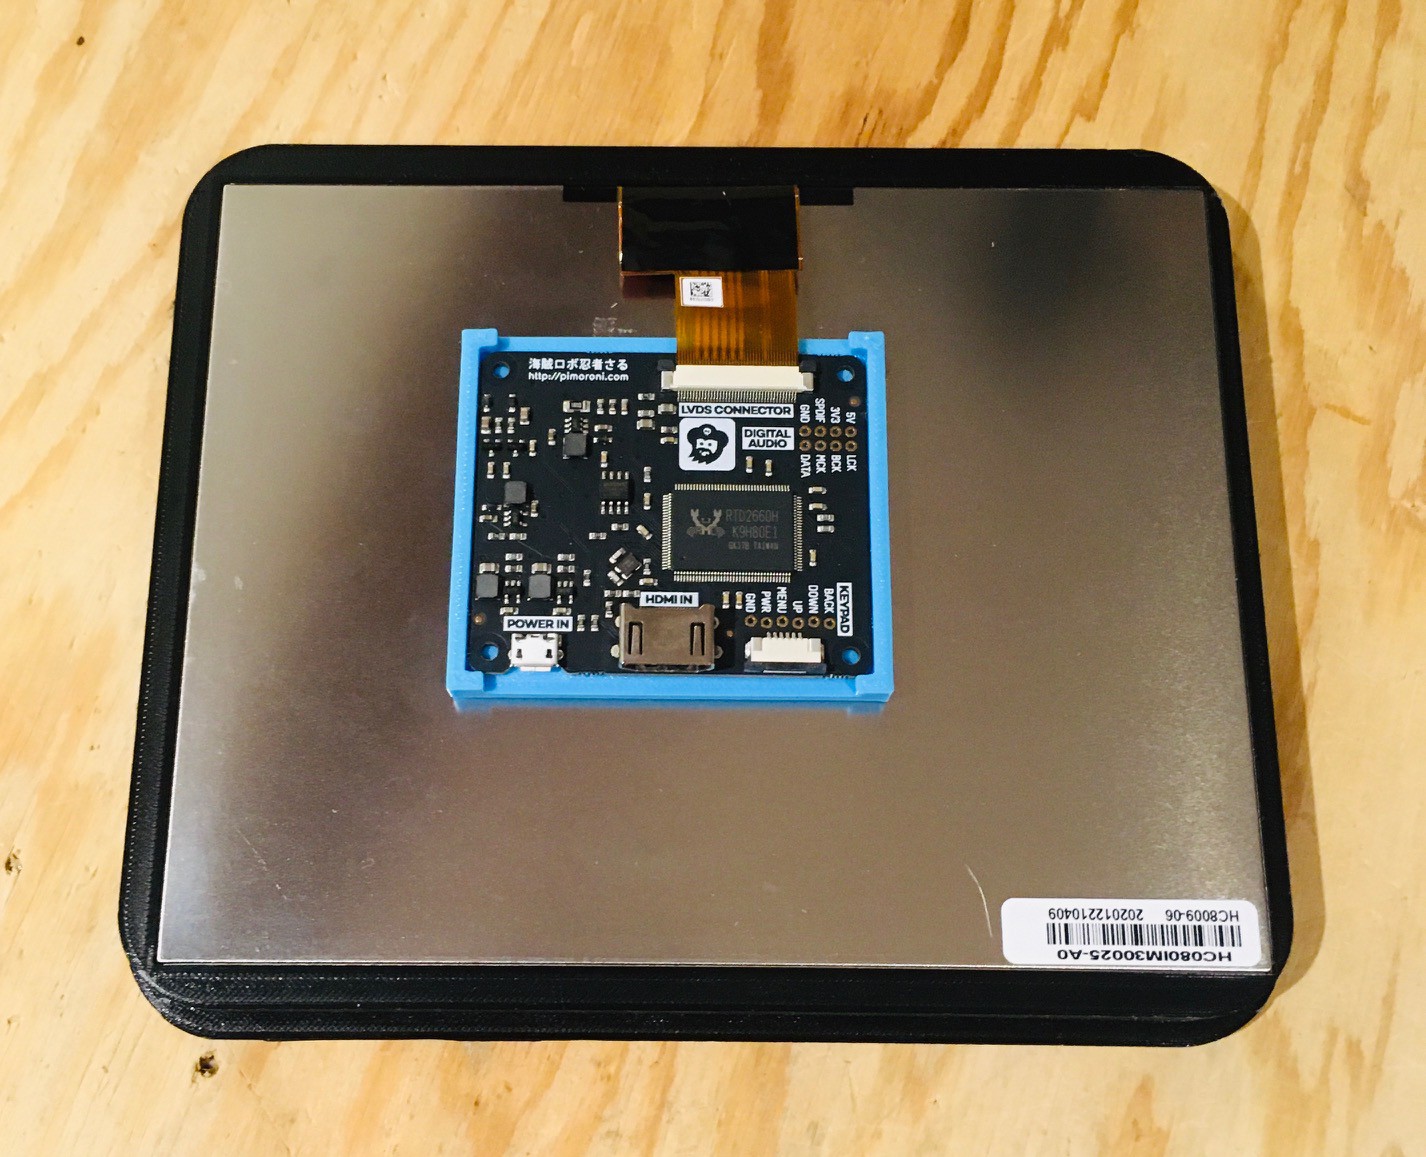
I haven't decided what to do for a monitor yet. Certainly a CRT of some sort would be ideal, but I may have to go with a LCD.

Is Emulation the Sincerest Form of Flattery?

While I was researching the project and planning the build I was working a Sol-20 emulator. I thought about using Jim Battle's Solace emulator, but it is Windows based and ultimately I hope to run my Sol-20 reproduction on a Raspberry Pi 4. 

Since the Sol-20 was based on the Intel 8080 microprocessor I thought that would be the logical place to start. Fortunately for me, Space Invaders and some of the other early arcade machines also used the 8080.  Because there is a very active gaming community helping to preserve these retro classics, there are a number of great 8080 emulators to be found on GitHub.  I ended up cloning py8080 because it's Python based and I'm more comfortable right now with Python than I am with C++.

So with a working virtual 8080 processor it was a pretty easy task to allocate some memory for it (64K because why not), load a monitor program (Solos since it was the default shipped), set the instruction pointer to the start of the program (0xC000), and run the emulator. Success! Technically I had a Sol-20 running in emulation, but it was pretty boring since I had no way to interact with it. Time to create some virtual devices.

The Display

The system memory used by the Sol-20 is as follows:

C000-C7FF - System ROM. Sol-20 "Personality Modules" like Solos are mapped here.
C800-CBFF - System RAM. Reserved by the system.
CC00-CFFF - Display RAM. Shared memory between the CPU and VDM-1 video circuit.

Although most systems shipped with only 8K or 16K of memory (or less) in those days, I have to wonder why they didn't map these addresses up into the F000-FFFF space to allow a contiguous 60K memory space for user programs. At any rate the important thing to note for display purposes is the CC00-CFFF shared video RAM.  This 1K space was used to store 16 lines of text each of which is 64 characters long. Any text written to this memory would automatically be displayed on the screen.

Using PyGame I created my virtual screen. I could have written the characters from the shared video memory directly to the screen but the Sol-20 used a lot of unique character glyphs.

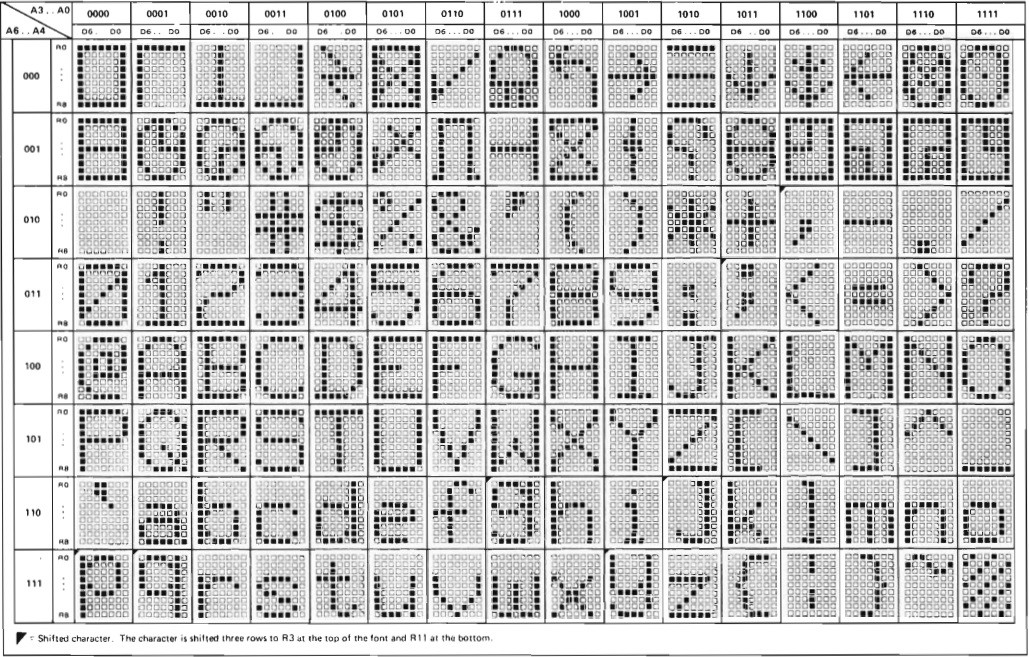
So based on the original 6574 character ROM I created a set of character tiles that I could easily "blit" to the screen. I wrote a function to iterate over the 64 x 16 array of characters in the shared video memory and write them out to the screen and added this function to the main loop of my emulator. When I did that I was rewarded with this. I know the aspect ratio is off here....

Read more »

  • My Sol-20 Reproduction Featured in The MagPi Magazine

    Michael Gardi03/03/2022 at 19:08 0 comments

    Here is a link: https://magpi.raspberrypi.com/articles/sol-20-terminal-computer to the online version of the article.

  • DELeting the RUB OUT Key

    Michael Gardi02/20/2022 at 16:30 0 comments

    I've mentioned Dave from osiweb.org many times in this project. His complete replacement keyboard for the Sol-20 is a big part of this build. Dave noticed that the SOL-20 specific DEL key had not been included in the keycaps that he sent me. Ever the perfectionist he mailed me the replacement keycap which I received this week.  Thanks Dave.

  • Running BASIC

    Michael Gardi02/20/2022 at 16:16 0 comments

    While I had tested my Sol-20 emulator on many programs (mostly games) I had not gotten around to running BASIC on the machine. Recently I found the MS_BASIC seemed to work fine, but the two Processor Technology offerings BASIC-5 and Extended BASIC had issues. With the help of some 8080 test programs I was able to track down a couple of 8080 instructions that I had not implemented quite right.  The changes were subtle but obviously significant. 

    Once I had the BASIC interpreters running correctly I was keen to try out some of the many cool BASIC programs that can be found on Jim Battles great Sol-20 site. Most of these programs are quite long. Typing them in was not a viable option, so I added a new feature that allows you to "load" a text file as though it were being typed into the keyboard. 

    Pressing ALT-L on a regular keyboard, or pressing the LOCAL key on Dave's SOL-20 keyboard will pop up a file finder dialog.  Once an appropriate text file is selected the characters in the file will be "typed" in via the keyboard interface. When the whole file has been entered manual control will be returned to the keyboard. 

    The latest fixes and some BASIC programs to try out have been added to GitHub.

  • Tetris on the Sol-20

    Michael Gardi02/13/2022 at 22:14 1 comment

    Nino Porcino has written (in 2021!) a Tetris game in C, using the z88 C compiler. In fact, he has ported it to multiple 8-bit computer platforms. The source code is available on his github repo. This is so cool running new software on a 45 year old machine.  Tetris runs fine on my Sol-20 emulator. Lots of fun.

  • Final Thoughts

    Michael Gardi11/28/2021 at 22:06 0 comments

    Well it's been about 45 years since that poor college student version of me saw his first Sol-20 at that small computer store on Queen Street in Toronto. It was something that I never forgot. For me the wait is over. I now have a working Sol-20 and have been having a ball running all of the cool programs that were written for it those many years ago. 

    I have to thank Dave from osiweb.org who designed the complete replacement keyboard for the Sol-20 using modern Cherry key switches. He was a great help throughout the project. Without this great piece of kit to build on I may not have even attempted this project. 

    This was the first project I can remember where I didn't have to scour the far corners of the internet for information about the Sol-20. Jim Battle has done an amazing job of gathering a huge treasure trove of Sol-20 materials into one site, Sol20.org. A one stop shop for the would be Sol-20 replicator, or anyone with an interest in this wonderful retro computer. 

    Rick Downs (redjr16), who actually owns a Sol-20 (I'm totally jealous), was kind enough to take the time to answer my many questions, take pictures, and more. Thanks Rick!

    When he saw my project Nyles sent me a huge pile of original manuals that he had been keeping. 

    Once the hardware and emulator were done, these have been invaluable resources for helping me figure out how to run the software that's out there. Thank you Nyles.

    It's been a lot fun learning about this wonderful machine. I'll leave you with a side-by-side of my Sol-20 reproduction and the original. 

  • Wrapping Up

    Michael Gardi11/28/2021 at 21:30 0 comments

    One of the finishing touches I wanted on this project is to make the Raspberry Pi boot directly into the Sol-20 emulator on startup. 

    I created an autostart folder on my Pi and switched to that folder.

    mkdir /home/pi/.config/autostart
    cd /home/pi/.config/autostart

    Into the autostart folder just created I added the following two files.

    runSol-20

    cd /home/pi/Sol-20
    /usr/bin/python3 main.py

    Sol-20.desktop

    [Desktop Entry]
    Type=Application Name=Sol-20
    Exec=/home/pi/.config/autostart/runSol-20 

    In addition the runSol-20 file must be made executable with the following command:

    sudo chmod 777 runSol-20

    Now if you reboot the system, you should briefly see the desktop appear, and shortly after Sol-20 emulator will load.

  • Wiring Up a Serial Port

    Michael Gardi11/28/2021 at 21:17 0 comments

    I felt that it was important that my Sol-20 reproduction work with a real HW Serial port. It is the Sol Terminal Computer after all.  I thought that adding an RS-232 Serial hat like I did for my VT100 reproduction would complicate things since I was already using a Voltage-Level Shifter Module hat for the keyboard. So I purchased a USB to Serial Converter from Amazon.

    I found that the version of Raspberry PI OS that I was using recognized this device without having lo load any drivers. I did have to figure out what the device name was. I did this by listing all of the USB devices.

    pi@raspberrypi:~ $ ls /dev/*USB*
    /dev/ttyUSB0
    pi@raspberrypi:~ $

    Then it was a pretty simple process to integrate /dev/ttyUSB0 into my emulator using the Python serial library.

    pip install pyserial

    I won't go into too many details here, but on a Sol-20 the serial port works just like keyboard. When the Sol-20 monitor program is waiting for a character from the serial port, it will make repeated IN requests to port 0xF8 to fetch the Serial Status Port. If there is a character in the port's input buffer I return the 8-bit status result with the Serial Data Ready (SDR) bit (0x40) "set" otherwise that bit will be "cleared". When it "sees" that there is a character ready, the monitor program will make a subsequent IN request on port 0xF9 to fetch the character which I then returned from the serial port's buffer.  Similarly if the monitor wants to send a character to the serial port, it checks port 0xF8 with an IN to see if the Serial Transmit Buffer is Empty (STBE) bit (0x80) is "set" and if so an OUT to port 0xF9 is issued with the character to send which I write to the serial ports output buffer.

    I wired the TX, RX, and GND from the USB Serial Converter to the DB9 connector.

  • Soft Switches

    Michael Gardi11/25/2021 at 19:15 0 comments

    The Sol-20 had 4 banks of DIP switches on the motherboard to control various aspects of the machine's operation. Here's a photo of three of them. 

    I didn't see an advantage to using physical switches for my emulated hardware so I created a configuration file instead.

    # SOL-20 SWITCH FUNCTION DEFINITIONS
    #
    # This configuration file replaces the four physical setup switch banks on the Sol-20.
    #
    # Display Control
    #
    S1-1 = 0   # 0-Run  1-Restart to Zero.  (N/A for emulator.)
    S1-2 = 0   # Not used.
    S1-3 = 0   # 0-Show control characters. 1-Blank control characters (ASCII values < 32).
    S1-4 = 0   # 0-Colored characters on black background. 1-Black characters on colored background.
    S1-5 = 0   # 0-Solid or NO cursor. 1-Blinking cursor. (NOTE: Requires apscheduler - "pip install APScheduler")
    S1-6 = 1   # 0-Blinking or NO cursor. 1-Solid cursor.
    S1-7 = 0   # 0-White screen. 1-Green screen. 2-Amber screen. (Emulator extension.)
    S1-8 = 0   # 0-6574 character ROM. 1-6575 character ROM.     (Emulator extension.)
    #
    # NOTE: No cursor if S1-5 and S1-6 are off at the same time.
    #
    
    #
    # Sense Switch
    #
    S2-1 = 1   # Sense switches in LSB to MSB order. Read by the system with an IN 0xFF instruction.
    S2-2 = 1   # Not used by many applications.
    S2-3 = 1
    S2-4 = 1
    S2-5 = 1
    S2-6 = 1
    S2-7 = 1
    S2-8 = 1
    #
    
    #
    # Serial I/O Baud Rate Switch
    #
    S3-1 = 0   # 1-75 Baud.
    S3-2 = 0   # 1-110 Baud.
    S3-3 = 0   # 1-150 Baud.
    S3-4 = 0   # 1-300 Baud.
    S3-5 = 0   # 1-600 Baud.
    S3-6 = 0   # 1-1200 Baud.
    S3-7 = 0   # 1-2400 Baud. 2-4800 Baud. (Emulator extension.)
    S3-8 = 0   # 1-9600 Baud.
    #
    # Do not turn on more than one switch at a time.
    #
    
    #
    # Serial I/O Control Switch.
    #
    S4-1 = 0   # 0-Parity even if S4-5 set to 1. 1-Parity odd.
    S4-2 = 0   # Data word length.  | 0        | 1         | 0         | 1
    S4-3 = 0   #                    | 0-8 Bits.| 0-7 Bits. | 1-6 Bits. | 1-5 Bits.
    S4-4 = 1   # 0-2 stop bits(1.5 if 5 bit words). 1-1 stop bit.
    S4-5 = 0   # 0-No parity. 1-Parity.
    S4-6 = 0   # 0-Full duplex. 1-Half duplex. (N/A in Emulator)
    #
    

    This file switches.cfg is loaded when the emulator starts up, so if you make any changes to the file you will have to restart the emulator to pick them up. I have posted this file and the updated code that implements these changes to github.

  • Interfaces

    Michael Gardi11/22/2021 at 02:04 0 comments

    Here is a photo of the back of an original Sol-20.

    You can see that the whole left side is taken up with power supply components: power button, fan, fuse, and  power cord connection. Since my reproduction does not require any of these I chose to focus on and highlight the interface section in the lower right part of the rear panel.

    So I designed and printed my own "interface" panel and dug through my parts box for the components to populate it.

    I then attached the interfaces panel to the rear panel with glue and braces.

    Then I added the connection hardware. Here is what the back of my reproduction look like.

    Understand at this point these ports are mostly for show. I already have a "virtual" cassette so I'm unlikely to implement a physical one. I do plan to get the serial interface working, but since I have nothing with a parallel interface to connect to, I probably won't wire that one up. While I don't plan to support real Sol-20 personality modules, I do have an idea that I might simulate a personality module with perhaps RFID tags to have the Sol-20 reproduction load different software modules on system startup.  Right now the personality module slot is just a simple hole.  

  • A View Into the Soul of the Sol-20

    Michael Gardi11/21/2021 at 17:03 2 comments

    From the beginning of my work on the Sol-20 reproduction I wondered what kind of display I would use with it. Of course a small CRT based TV or monitor would be ideal. To that end I put out feelers with my maker mates and even had someone at a local electronics recycling depot keeping an eye out for me. But after a couple of months and no success I realized I needed a Plan B.

    I started thinking "What if Processor Technology had sourced and branded a monitor for the original Sol-20?". What would that look like? Well it might have looked something like this.

    This design takes its cues from the Sol-20 with the wooden sides and color scheme. It has a retro CRT look while using a period correct 4:3 aspect ratio LCD panel. I my humble and somewhat biased opinion it looks great sitting on top of the Sol-20 reproduction.

    The build for this was pretty straight forward. I started by laying out the side panels in Fusion 360.

    I used the DXF file to laser cut from 1/4 inch plywood two of the smaller side pieces with both sets of holes and two of the larger side pieces with only the one set of holes closest to the center. Using four 1/2 inch wooden dowels cut to 188 mm and with pre-drilled starter holes in the ends I assembled the inside frame (smaller panels) with No. 6 x 1 inch wood screws.

    The larger panels I sanded down and stained with the same Minwax Walnut gel that I used on the Sol-20 sides.

    The funky grain patterns were a bit of a surprise but I'm kind of liking it. I could have used walnut here but balked a bit at the additional cost. Then I attached the outer panels to the inner frame with M3 x 14 mm bolts.

    For the display I repurposed the screen frame that I used in my 2:3 Scale VT100 Reproduction

    I had to tweak the design a bit and I added the logo but overall it saved me a lot of time to repurpose the design. I used the same display as the VT100's a PIM372 (Digi-Key part number 1778-1225-ND), an 8 inch 1024x768 XGA display. 

    Th display panel just snaps into the frame. Be sure to get the orientation right with the display connector at the top of the screen frame. I printed a "caddy" for the driver board and after I connected the ribbon cable attached the board and caddy to the back of the display panel with two sided tape. 

    Next I designed and printed the "skin" used to wrap the monitor.  

    I attached the two pieces with glue and a brace for support.

    Then I wrapped the monitor frame with the skin. If you loosen the bolts holding the larger side panels in place the skin should slide in easily. Then tighten the bolts again to hold the printed panels in place.

    Finally insert the screen frame and display into the monitor.

    I connected the display to the Raspberry Pi with an HDMI cable. I was also able to power the display panel via a micro USB cable from one of the Pi's USB ports. 

    It was fun to imagine an alternate timeline where Processor Technology sold a branded monitor with their Sol-20s. 

View all 27 project logs

Enjoy this project?

Share

Discussions

Walt Perko wrote 08/12/2022 at 21:00 point

I'm wondering if the Raspberry Pi Zero W2 could be used for this?

  Are you sure? yes | no

Michael Gardi wrote 08/13/2022 at 15:00 point

Well it has sufficient I/O ports. My only reservation is that the W2 runs at 1.0GHz whereas the Pi4 runs at 1.5GHz, so the W2 might not be able to run the emulator at full speed.  

  Are you sure? yes | no

dudleyhenderson wrote 05/01/2022 at 10:53 point

Greetings Michael, love the project.  I had 3 Sols at one time.  Did the computer work for a group in Asia using them and with 3 usually kept 2 working.  All ended up with 4 disk drives, 48K cp/m.  I have enjoyed Jim Battle's Solace and have been able to bring some things back to life.  I have one app I used working on your emulator.  I have found the cassette read routines, but don't see anyway to write data out.  Maybe I am missing something.  Is there a way to write to virtual tape or plans to do so?

  Are you sure? yes | no

Michael Gardi wrote 05/01/2022 at 14:42 point

Hello. First I'm envious that you had 3 Sol-20s ;-)  I love hearing about people's experiences with the machines that I reproduce. Jim Battle's great sol20.org site saved me days of research and his Solace implementation of the cassette drives was awesome.

To answer your question, I did implement write to tape via the solos/cutter SAVE command (ie. SAVE NAME CC00 CCFF for example) however when I went to verify this just now I found a small bug. I have updated github with the fix but it would probably be easier for you to just change ".HEX" to ".hex" on line 200 of io8080.py. 

Let me know if this fixes the problem.

  Are you sure? yes | no

dudleyhenderson wrote 05/04/2022 at 11:15 point

Hi Michael, changed the HEX to hex.  Then some experimenting.  Entered 3 bytes into a location in solos and  did SAVE STUFF/1 A000 A002.  It worked and I was able one time to GET STUFF/1 A000 to read the bytes back to memory, but only once after than if I try again, it hangs.  Haven't figured out why.  Interesting enough an 8080 program I have in .ent can be loaded using GET PTP/1 100.  And I can execute it and everything I tested on it works.  I can even XEQ PTP/1 100 and it will auto execute.  It has SOLOS I/O and it tries to write to tape, but doesn't write the correct data.  Could be the drivers in my program as I usually wrote out to floppies, tape drivers were seldom used.  For some reason the . (period key) and , (comma key) are reveresed on my mac keybaord while in SOLOS. Strange.  So great work..I will enjoy tinkering and trying to solve some of the problems.

  Are you sure? yes | no

Michael Gardi wrote 05/17/2022 at 14:42 point


Hey Dudley. I just tried SAving a block of memory then GEtting it back multiple times. I did not have a problem. Were there any messages in the python window when the program hung? I have not implemented virtual floppy drives so I'm not surprised your application doesn't save correctly.

  Are you sure? yes | no

Michael Gardi wrote 05/01/2022 at 08:51 point

According to Dave who has a Sol-20 and made the replacement keyboard “I think the futaba keys are not too far off the feel of the original, and they're cheap, so I used futabas in this build.”

  Are you sure? yes | no

Peabody1929 wrote 05/01/2022 at 00:23 point

The Living Computer Museum  in Seattle is closed.  The Computer History Museum in Mountain View, CA is open and has several SOL-20's on display.  Unfortunately, one can not touch them.

  Are you sure? yes | no

David S. Brown wrote 04/30/2022 at 13:44 point

I was an even poorer junior/high school student during the Sol heydays; but our school district had one and I got to use it to program Basic. I loved the walnut and blue metal. I don't remember at all what the keyboard action was like. I will have to stop by the Computer Museum in Seattle and see if I can try it out to see how it differs from the old Cherry keyboards.

  Are you sure? yes | no

Dave wrote 12/10/2021 at 16:30 point

Very nicely done.  It has been a pleasure to see this project take shape from the ground up.  Bravo!

  Are you sure? yes | no

Michael Gardi wrote 12/10/2021 at 19:51 point

Thank you Dave. I appreciate your following along.

  Are you sure? yes | no

J. Peterson wrote 12/07/2021 at 20:24 point

I actually built an actual Sol back in the day, from the kit. I really wanted blinkenlights on it though, so I cut slots in the panel above the keyboard, and made a perfboard with address, data and status lights. This was wired to a sawed-off S-100 connector placed into the top S-100 slot. I wish I had a photo of it handy, I do plan to restore it someday.

In the mean time, I've posted a lot of old Sol / S-100 memorabilia to my Archive.org library:

https://archive.org/details/@j_peterson

  Are you sure? yes | no

Michael Gardi wrote 12/07/2021 at 21:39 point

Thanks for sharing!  I would love to see your machine in action again.

  Are you sure? yes | no

Dan Maloney wrote 11/30/2021 at 21:14 point

Hey Mike, another beauty of a build. I wrote this up for the blog, should publish soon. Great job!

  Are you sure? yes | no

Michael Gardi wrote 11/30/2021 at 21:36 point

Thanks Dan. 

  Are you sure? yes | no

llcameron wrote 10/24/2021 at 18:32 point

You're work on this is amazing!  Its great to see the SOL-20 finally get the love it deserves!  I'm hoping you will make kits avaiable so we can build one of these beauties ourselves!

  Are you sure? yes | no

Michael Gardi wrote 10/24/2021 at 20:34 point

Thank you. I’m not sure about a kit, but I will be creating an Instructable with all the steps necessary to make one.

  Are you sure? yes | no

D2 wrote 10/16/2021 at 00:59 point

all this is awesome.  Well-done, and I’m eager to see your progress. 

  Are you sure? yes | no

Michael Gardi wrote 10/16/2021 at 04:41 point

Thank you.

  Are you sure? yes | no

Atsushi Takahashi wrote 10/04/2021 at 17:00 point

I built an S-100 bus computer or two in the early 80s... My friend had an EPROM programmer running on a SOL-20! They were so cool because of the integrated S-100 bus slots and the built-in video and keyboard! Another friend had an IMSAI with the cool blinky light front panel.

  Are you sure? yes | no

Michael Gardi wrote 10/04/2021 at 23:25 point

Wow. That’s pretty neat. Was the EPROM programmer running on a card in one of the slots or using the serial or parallel ports?

  Are you sure? yes | no

redjr16 wrote 09/22/2021 at 03:47 point

Did you know that Les Solomon only agreed to publish the article if his name was on it.  Hence Sol-20

  Are you sure? yes | no

Michael Gardi wrote 09/22/2021 at 14:36 point

From Lee Felsenstein 's account about making the Sol-20: "

And somewhere in the midst of all this I looked up at Bob and said: "Let's advertise it as having 'the wisdom of Solomon."' From the comment came the name Sol, which is meant to be written in biblical-movie-poster letters chiseled out of stone. Les will never live it down. " (Maybe he was just being politically correct?)

  Are you sure? yes | no

redjr16 wrote 09/22/2021 at 03:43 point

I’ll be following with much interest.  I built the original and it basically helped to launch my  professional career.    I used it for many years and learned a lot.  I even bought a 2nd one.  The original has been boxed up since the late 80s and remains in great condition.  I do not if it will even fire up.  Sadly, the main manual got discarded years ago by accident, and I don’t remember how I booted it.  I know I had a NorthStar disk subsystem attached(floppy of course).  It was a great machine in its day.   Great project Michael. 

  Are you sure? yes | no

Michael Gardi wrote 09/22/2021 at 14:43 point

Thanks for following.  I really like hearing how some of these machines affected the course of people lives in a positive way. 

  Are you sure? yes | no

Dave's Dev Lab wrote 09/16/2021 at 19:58 point

are the schematics available for the original? i am curious as to how hard it would be to design a modern pcb....

  Are you sure? yes | no

Michael Gardi wrote 09/16/2021 at 20:36 point

The Sol System Manual has the schematics, PCB artwork, and mechanical drawings. Here is a link to the starting page: 

https://archive.org/details/Sol20SystemsManual/page/n251/mode/1up

Looks like we have @J. Peterson  to thank for them.

  Are you sure? yes | no

Dave's Dev Lab wrote 09/16/2021 at 20:59 point

ahh dandy! i will have a look!

  Are you sure? yes | no

Rod Rowley wrote 09/16/2021 at 19:56 point

I have one that i build in '77-'78. Hand assembling programs for it taught me tons.

  Are you sure? yes | no

Michael Gardi wrote 09/16/2021 at 20:37 point

Just out of curiosity is it still in running condition? I did a fair amount of hand assembly in my day too but mostly 6502 stuff.

  Are you sure? yes | no

Rod Rowley wrote 09/16/2021 at 22:09 point

I have not even tried to fire it up in 40 years, so i doubt it.  Did you have a little slide rule thingy to tell you the hex codes to enter for the various flavors of the instructions?  I still have mine.

  Are you sure? yes | no

Michael Gardi wrote 09/17/2021 at 00:26 point

I can remember a well worn paperback size 6502 Assembly Language Instruction manual and of course one of those folded reference cards ;-)

  Are you sure? yes | no

J. Peterson wrote 09/17/2021 at 23:35 point

The Sol-20s used foam "springs" for the keyboard. Google "Sol-20 keyboard repair". After a decade or two, these usually turn to dust, and need to be replaced. There's also the usual issues with capacitors failing, etc.

  Are you sure? yes | no

J. Peterson wrote 09/15/2021 at 21:14 point

Built one of the kits back in the day. I scanned in the manual and other documentation at

https://archive.org/details/@j_peterson?and[]=subject%3A%22S-100%22

I recall I really wanted a computer with blinkenlights, so I modified my SOL by cutting away a couple of slots above the keyboard and mounting LEDs behind it. I then cut the edge connector off a proto board, stuck that in the top slot, and used the signals to drive the LEDs. It worked, but probably not ideal for signal integrity on the S-100 bus.

  Are you sure? yes | no

Michael Gardi wrote 09/16/2021 at 02:27 point

I love hearing stories like this. One of the reasons I like making reproductions. Thanks for sharing.

  Are you sure? yes | no

Syd Kahn wrote 09/15/2021 at 18:42 point

This is the first microcomputer I ever got paid to program - when no one was wanting to watch the tv that is - the wood sides allowed the hertz out - it radiated like a small star - Had an 8K board in it - a lot for the time - brings back fond memories ...

  Are you sure? yes | no

Michael Gardi wrote 09/16/2021 at 02:32 point

Thanks for sharing Syd. Not sure if I'll have the same radiation problem with a Raspberry Pi 4 inside. My only memory is seeing a Sol-20 in that computer store those many years ago. Now I'll get a chance to make more memories.

  Are you sure? yes | no

Andrew Wasson wrote 09/15/2021 at 17:40 point

Cool! I'm more of a CDP1802 enthusiast but I was also drooling over 8080 computers in Popular Electronics / Radio Electronics / ETI / etc... in the mid-late 70's. 

BTW I too have one of Oscar's PiDP-8/Is and I love it. It hangs on my network just waiting for a game of adventure or some old school programming.

  Are you sure? yes | no

Ken Yap wrote 09/15/2021 at 08:12 point

>Talk about delayed gratification.

I know the feeling. I remember those ads in computer magazines I used to compare and drool over. More power to you, and looking forward to updates.

  Are you sure? yes | no

Nyles wrote 09/14/2021 at 18:18 point

I have several software manuals for the SOL-20 if you're interested.

  Are you sure? yes | no

Michael Gardi wrote 09/14/2021 at 20:25 point

I do have PDF copies of the manuals, but I love having the originals if I can get them. What manuals do you have? Of course I'd be happy to pay for shiipping.

  Are you sure? yes | no

Nyles wrote 09/14/2021 at 22:46 point

User's Manuals, in no particular order:

Music System

Gamepac1

Gamepac2

Extended Cassette BASIC

Cassette PILOT

BASIC/5

ALS/8

SOLOS CUTER

Software #1 Resident Assembler

ASSM 8080 Assembler

DEBUG 8080 Debugger

TREK-80

8KRA

  Are you sure? yes | no

Similar Projects

Does this project spark your interest?

Become a member to follow this project and never miss any updates