Michael Gardi
-
Homework
09/27/2021 at 21:52 • 0 commentsWhen I was working on the virtual display I skipped a couple of improvements in the interest of finishing some of the other stuff like keyboard and virtual cassette tapes. The first was the aspect ratio which was more like 16:9 than the period 4:3. This has been adjusted by altering the character ROM images, basically by doubling every scan line.
I have also added an optional virtual blinking cursor, the original's display hardware took care of this. The original Sol-20 also had a bank of 8 dip switches that controlled display options like SOLID and BLINK cursor. I'll be adding a similar set of switches to my reproduction, but for now the BLINKING_CURSOR option is a Boolean in my Python code.
-
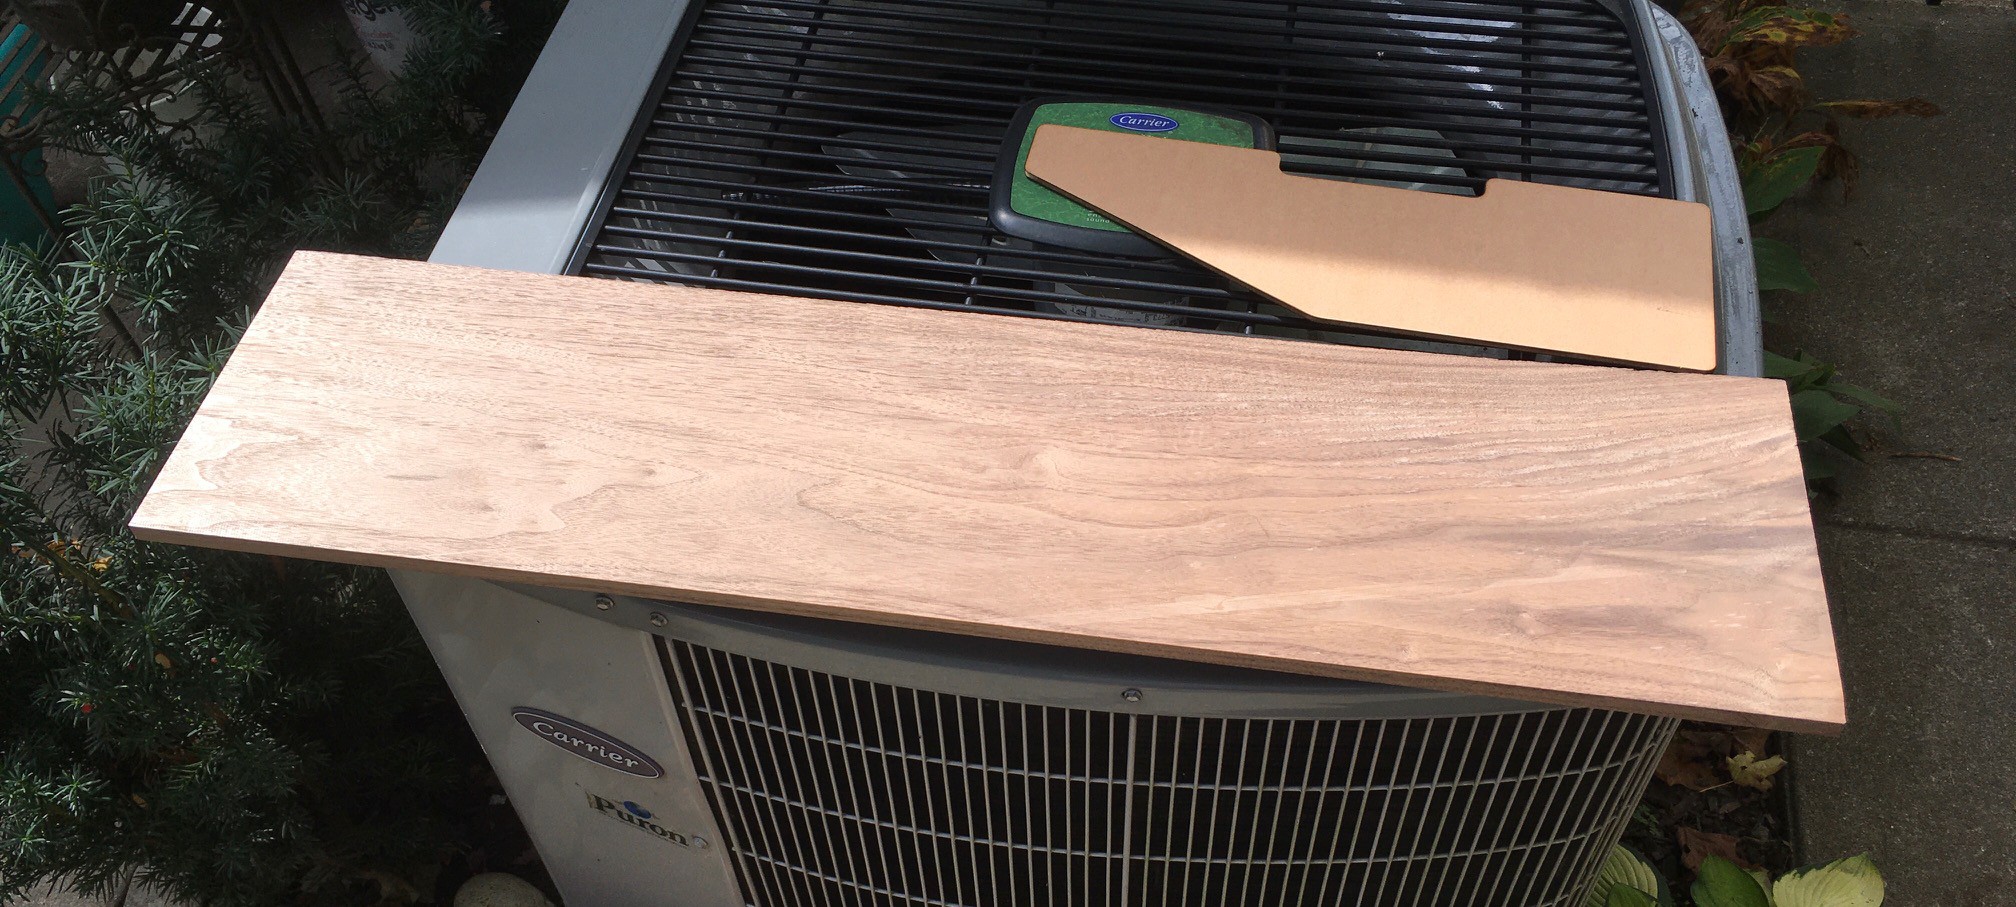
Walnut Sides
09/21/2021 at 15:19 • 0 commentsMy local fine wood place (A & M Wood Specialty) hooked me up with a beautiful 1/2 inch walnut slab.
![]()
You can also see a template for the side panels that I have laser cut. My woodworking skills are limited so I'll be leaning heavily on some of my makerspace mates for advice and guidance.
-
Is Emulation the Sincerest Form of Flattery?
09/17/2021 at 16:15 • 0 commentsI've been working on this project for a few weeks now. In that time I did a fair amount of research, but mostly I was writing a Sol-20 emulator. I thought about using Jim Battle's Solace emulator, but it is Windows based and ultimately I hope to run my Sol-20 reproduction on a Raspberry Pi 4.
Since the Sol-20 was based on the Intel 8080 microprocessor I thought that would be the logical place to start. Fortunately for me, Space Invaders and some of the other early arcade machines also used the 8080. Because there is a very active gaming community helping to preserve these retro classics, there are a number of great 8080 emulators to be found on GitHub. I ended up cloning py8080 because it's Python based and I'm more comfortable right now with Python than I am with C++.
So with a working virtual 8080 processor it was a pretty easy task to allocate some memory for it (64K because why not), load a monitor program (Solos since it was the default shipped), set the instruction pointer to the start of the program (0xC000), and run the emulator. Success! Technically I had a Sol-20 running in emulation, but it was pretty boring since I had no way to interact with it. Time to create some virtual devices.
The Display
The system memory used by the Sol-20 is as follows:
C000-C7FF - System ROM. Sol-20 "Personality Modules" like Solos are mapped here.
C800-CBFF - System RAM. Reserved by the system.
CC00-CFFF - Display RAM. Shared memory between the CPU and VDM-1 video circuit.
Although most systems shipped with only 8K or 16K of memory (or less) in those days, I have to wonder why they didn't map these addresses up into the F000-FFFF space to allow a contiguous 60K memory space for user programs. At any rate the important thing to note for display purposes is the CC00-CFFF shared video RAM. This 1K space was used to store 16 lines of text each of which is 64 characters long. Any text written to this memory would automatically be displayed on the screen.
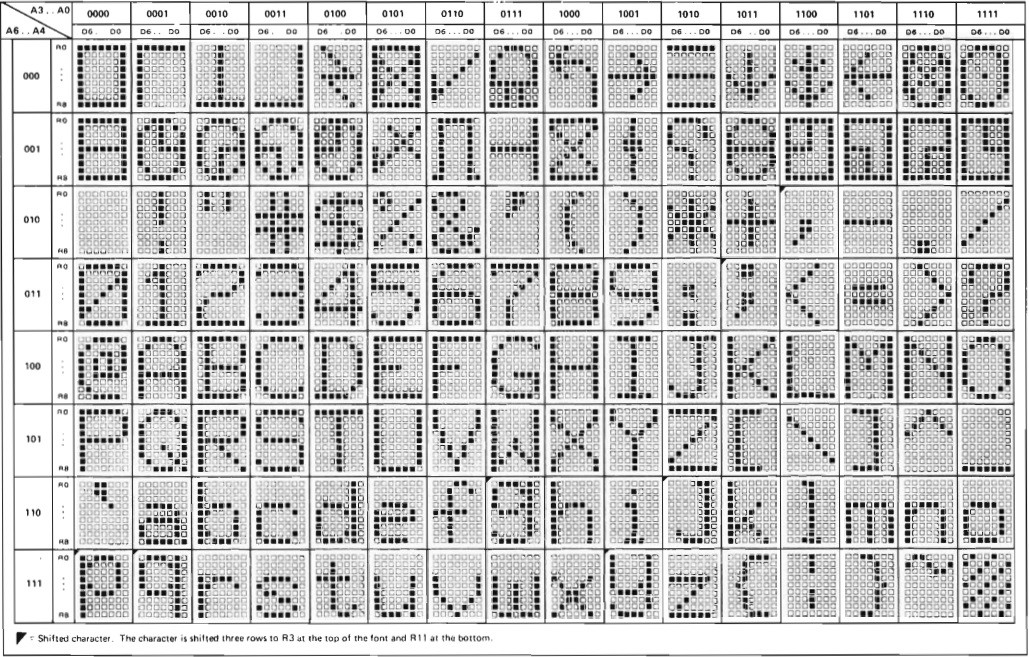
Using PyGame I created my virtual screen. I could have written the characters from the shared video memory directly to the screen but the Sol-20 used a lot of unique character glyphs.
![]()
So based on the original 6574 character ROM I created a set of character tiles that I could easily "blit" to the screen. I wrote a function to iterate over the 64 x 16 array of characters in the shared video memory and write them out to the screen and added this function to the main loop of my emulator. When I did that I was rewarded with this. I know the aspect ratio is off here. I'll deal with that later.
![]()
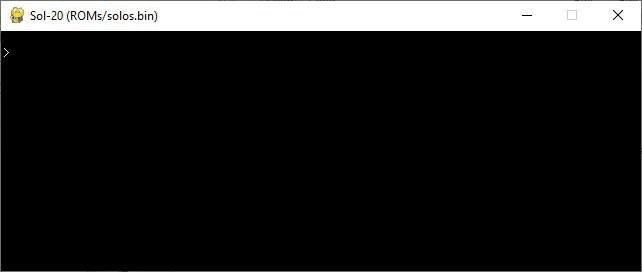
Wow. Still super boring but I see a > prompt so progress. I realized that the display was being updated every time through the main loop so I added a check in the 8080 emulator to set a dirty flag whenever the shared video memory was written to and now only update the screen when the dirty flag is set. Good enough for now.
The Keyboard
The 8080 can communicate with peripherals through shared memory locations like the Sol-20 display does, or through I/O ports. I/O ports are accessed via the 8080 op codes IN and OUT. There are 256 possible ports numbered 0x00-0xFF. When an IN instruction is executed the 16-bit address bus is set with the port number of the request in both the upper and lower bytes of the address, the IORQ (Input/Output Request) line is held high, and a data byte is retrieved from the 8-bit data bus. Similarly, for an OUT instruction, the 16-bit address bus is set with the response port number in both the upper and lower bytes of the address, the IORQ line is held high, and a data byte is written to the 8-bit data bus. You can think of this block of ports as a separate "memory space" for the 8080.
For the exception of the memory mapped display, all communication between the Sol-20 and peripherals is accomplished via I/O ports. I have added code that "handles" the IN and OUT op codes and emulates device interaction. Let's look at the keyboard implementation as an example.
I created a small keyboard buffer to store key presses that are mapped from my "modern" keyboard to keys that the Sol-20 is expecting. 95% of the key codes are the same but some are different and the Sol-20 has a few extra keys like LOCAL and CLEAR. When I get Dave's keyboard working this mapping will no longer be required.
When the Sol-20 monitor program is waiting for a key to be pressed, it will make repeated IN requests to port 0xFA to fetch the General Status Port. If there is a key in my local buffer I return the 8-bit status result with the Keyboard Data Ready bit (0x01) "set" otherwise that bit will be "cleared". When it "sees" that there is a key ready, the monitor program will make a subsequent IN request on port 0xFC to fetch the key which I then returned from the head of my buffer.
More Screen Stuff
With the virtual keyboard running I can now enter commands to Solos.
![]()
A little more interesting. But something is missing. There is no cursor. It turns out that the Sol-20 marks the cursor position on the screen by setting the high bit of the character the cursor is on. The video hardware on the original machine uses this bit indicator to inverse the character at that position (black character on white background) and optionally blinking that character. I added a cursor by doubling the size of my character table with the characters 0-127 as normal white on black background characters and the corresponding characters in the 128-255 range as inverted black on white background characters. This gets me the block cursor that I want. I'm leaving the blinking part as an exercise for future me.
![]()
One more thing I noticed was that the display did not scroll as expected with long command results, but instead wrapped from the bottom to the top of the screen.
![]()
Sol-20 had a solution for this too. A "start display line" value is continuously output from port 0xFE via the OUT op code. The VDM-1 hardware would use this value to implement scrolling behavior by emitting the lines from the shared video memory beginning with the start display line and ending with the last line to the top of the screen first, then it emits the lines from the start of the shared video memory and ending with the start display line to the bottom of the screen. My display implementation does the same. For the above example the start display line value would be 4.
![]()
Virtual Cassette Tapes
With just keyboard and display you can view and enter values into memory but not much else. I guess you could hand assemble a program, enter it into memory, then execute it were you so inclined. But to be truly useful and interesting you need the ability to load and save programs. The Sol-20 and Solos had built in support for two cassette tape drives. I have mentioned Jim Battle's excellent Solace Virtual Tape Drive and it's faithful reproduction of the cassette tape experience. My goal here is not nearly as lofty. At least initially I just want to support the Solos commands for loading (GET), saving (SAVE) and listing (CATALOG) "files" from "tape".
A Sol-20 file on tape has the following format.
Lead-in: At least 30 null (0x00) characters followed by a 1 (0x01).
Header: 16 byte header followed by a Cyclic Redundancy Check (CRC) byte.
   * 6 bytes - file name. Actual name maximum is 5 bytes. Named padded out to 6 bytes with 0s.
   * 1 byte  - file type.
   * 2 bytes - data length excluding CRCs.
   * 2 bytes - starting memory location to load data.
   * 2 bytes - execution address in not the same as the starting address.
   * 3 bytes - padded with 0s.
   * 1 byte  - CRC byte.
Data: The file contents with length defined by the header. After every 256 bytes there is a CRC
      byte that is not included in the header length.
When the emulator starts up it looks for a couple of special files TAPE1.svt and TAPE2.svt and uses them to load into memory virtual tape images for cassette 1 and 2 using the format defined above. These .svt files use a subset of Jim Battle's Solace Virtual Tape Format 1 to define the tape's content. The commands implemented are:
H NNNNN TT LLLL SSSS XXXX

    Create a header with name NNNNN, type TT, date length LLLL, start address
    SSSS, and execution address XXXX. All parameters except name are assumed
    to be in hex notation.

D AABBCCDDEEFF...

    Specifies a sequence of data bytes, as hex digits. There can be up to 32 bytes
    on one line.

F [file name]
    Load the file from [file name]. There are two types of files supported.

         .HEX files are assumed to be binary images of a properly formatted tape
         file and are loaded "as is".

         .ENT files are text files whose first line is an ENTER command with the
         starting address and subsequent lines have the format

                  AAAA: HH HH HH HH HH HH HH HH HH HH HH HH HH HH HH HH

                      where AAAA: is a memory address followed by 16 hex encoded
                      bytes to load at that address.
All other SVT commands are ignored for now.
OK so I have virtual tape images now, how does Solos access them? As with all devices through ports of course. When Solos wants to read from or write to a tape the first thing that it does is attempt to turn the tape drive on by performing an OUT byte to port 0xFA with the TT1 bit (0x80) set for tape 1 or the TT2 bit (0x40) set for tape 2. Sol-20 had a hardware connection to the cassette players AUX jack to accomplish this. My emulator uses this signal to prepare for tape activity. Since I don't know if the operation will be a read (LOAD) or write (SAVE) I prepare for both. For reading I set the tape head to 0 to start reading from the beginning of the tape, and switching to virtual tape 1 or 2 depending on what TTx bit was set. For writing I prepare a empty buffer to accept tape writes from Solos. A tape on flag is also set at this point.
Once the tape is started, Solos will perform an IN on port 0xFA to see the tape ready status. For reading if the tape head is less than the length of the current virtual tape the status byte will be returned with the TDR (Tape Data Ready - 0x80) bit set. Solos will then issue INs on port 0xFB to retrieve consecutive bytes from the current virtual tape. For writing a TTBE (Tape Transmitter Buffer Empty - 0x40) bit will be set. Solos will issue OUTs to port 0xFB with the bytes to save which get appended to my output buffer.
Finally when the LOAD or SAVE operation is complete Solos will turn off the drive by sending an OUT to port 0xFA with a null byte clearing the TDR and TTBE bits. For reads there is nothing more to do here, but for writes (SAVEs) at this point if tape on is set, the output buffer is written to a file with the tape filename used in the SAVE command and .HEX extension. At the same time a "F filename.HEX" entry is added to the appropriate TAPEn.svt file (if it's not there already) then the virtual tape is reloaded to pick up the changes.
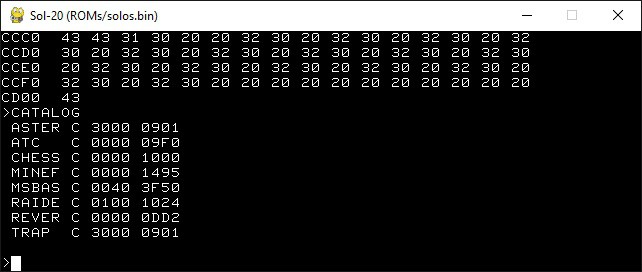
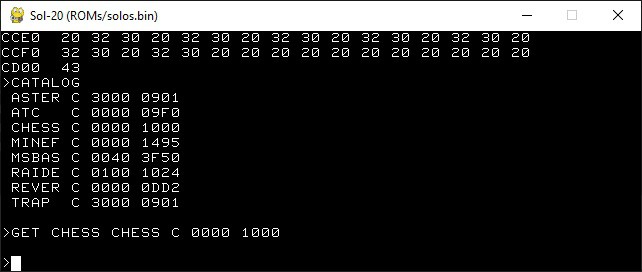
So with the default TAPE1.svt that looks this:
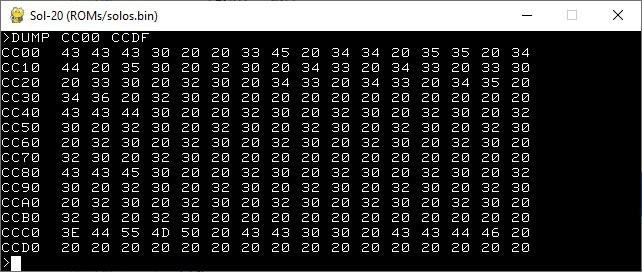
SVT1: Solace Virtual Tape Format 1

F aster.ent
F atc.ent
F chess.ent
F minefield.ent
F msbasic.ent
F raiders.ent
F reversi.ent
F trap.ent
You can now issue the CATALOG command.
![]()
Then GET the CHESS game.
![]()
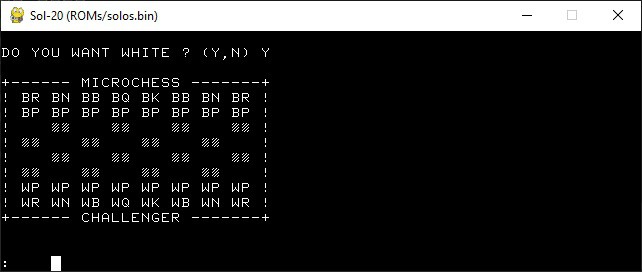
And EXECUTE it with an >EX 0000 command.
![]()
Finally something interesting.
Wrapping Up
This post ran longer than expected. I think there is a fair amount of functionality in the emulator already. Serial and parallel port support is not there yet. I have posted the code to GitHub. You should check out the Solos User's Manual to see what commands are possible.
I think I'll do some work on the case next.
-
Who's Your Daddy
09/17/2021 at 00:22 • 0 commentsIf you are interested in the details of how the Sol-20 came to be, I highly recommend you read Lee Felsenstein's own story published in ROM magazine, July 1977. Here I want to focus on the people involved all of whom are luminaries in the early personal computer era.
Lee Felsenstein was the principal designer of the Sol-20. The design was based on a Tom Swift Terminal concept he had been working on and the VDM-1 graphics card he had developed for Processor Technology. There is also some reports that Gordon French, founder of the Homebrew Computer Club, was also involved in he development. Lee would later go on to design the Osborne 1 in the early 80s.
Processor Technology Corporation was a personal computer company founded in April 1975 by Gary Ingram and Bob Marsh in Berkeley, California. Based on their relationship with the development of the VDM-1 graphics card and other projects, Bob Marsh commissioned Lee Felsenstein to design and build the Sol-20. Bob and Lee were also founding members of the Homebrew Computer Club.
The design was originally suggested by Les Solomon, the editor of Popular Electronics. Les Solomon was instrumental in getting the Altair 8800 launched with a featured article on the cover of the January 1975 issue of Popular Electronics. He asked Bob Marsh if he could design a smart terminal for use with the Altair 8800. So the Sol-20 was initially positioned as a smart terminal to satisfy Les Solomon's request, but of course was a capable stand alone computer under the covers.
One final thought. This is an excerpt from a March 31st, 2014 Engadget article:
Many readers won't be aware of the importance of the SOL-20 to Apple's legacy. According to legend (aka Walter Isaacson's book Steve Jobs) in 1976 at the first annual Personal Computer Festival, held on Labor Day weekend, Steve Jobs and Steve Wozniak arrived with the Apple I in a cigar box. While Jobs walked around the exhibition hall, he was reassured that the Apple I was better than the competition in terms of functionality.
There was just one thing nagging at him; the SOL-20. According to Isaacson, Jobs was confident that his product had the best circuitry, but the SOL-20 was better looking. It came in a beautiful metal case, with a built-in keyboard and power supply. When compared to the scrappy Apple I, the SOL-20 looked more like a professional machine.Funny coincidence that the Apple II also looked more like a professional machine with a built-in keyboard and power supply.
-
All Things Sol-20
09/16/2021 at 16:29 • 0 commentsNormally when I undertake a reproduction project like this, I spend a lot of time on the internet researching my intended target. Usually the information I need is scattered across many sites and is often hard to find. Not this time though.
![]()
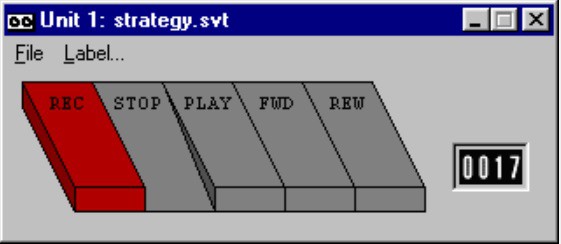
Jim Battle has done an amazing job of gathering a huge treasure trove of Sol-20 materials into one site. A one stop shop for the would be Sol-20 replicator, or anyone with an interest in this wonderful retro computer. Not only that, Jim created a great Sol-20 emulator Solace which stands for Sol Anachronistic Computer Emulation. I especially like his virtual cassette interface.
![]()
With much attention to detail it faithfully simulates reading tapes at either 300 or 1200 bits per second and will complain if data was "saved" at 300 and you try to read it back at 1200 :-) Of course you can turn these "features" off. Very cool.
Thanks Jim for all your hard work.
-
WOW!
09/15/2021 at 20:30 • 0 commentsWhen I announced my fledgling Sol-20 project a couple of days ago, the last thing that I expected was to appear in Featured Projects let alone be mentioned in a Hackaday-IO Bits email blast. There is so much work yet to do. Thanks to the editors for their confidence in my ability to deliver on my promise. As of this writing there are 30+ people following this project. To all of you thank you. I'll be posting my progress as I go. I hope you enjoy the ride.
Mike
-
The Game Plan
09/14/2021 at 22:49 • 2 commentsSo my plan is to make a full size case that will be as authentic looking as possible, with beautiful walnut sides for sure. I may 3D print the blue panels instead of using sheet metal so the build would be accessible to more people should they decide to make one.
For the keyboard I have been in touch with Dave from osiweb.org who has designed a complete replacement keyboard for the Sol-20 using modern Cherry key switches. From the Unified Retro Keyboard Project:
The keyboard is not a replica of the original. It doesn't use the same capacitive circuit or keys. But it does have exactly the same layout with the same functionality, including the 3 LEDs (UPPER CASE, SHIFT LOCK, LOCAL) and 3 outputs (RESET, BREAK, LOCAL). It uses cherry MX or Futaba MD-4PCs keys. Neither has quite the same feel as the capacitive keys, but the Futaba keys approach the travel of the keytronic switches, and do have a nice feel.
I'm getting the keyboard as a kit and looking forward to putting it together.
On the inside I'm going to emulate the Sol-20 hardware on a Raspberry Pi 4. To that end I have a working (very basic at this point) Python based emulator I'm going to post to GitHub shortly.
I haven't decided what to do for a monitor yet. Certainly a CRT of some sort would be ideal, but I may have to go with a LCD.
Sol-20 Reproduction
I am making a full sized Sol-20 reproduction, the first fully assembled microcomputer with a built-in keyboard and television output.