 f4hdk
f4hdk
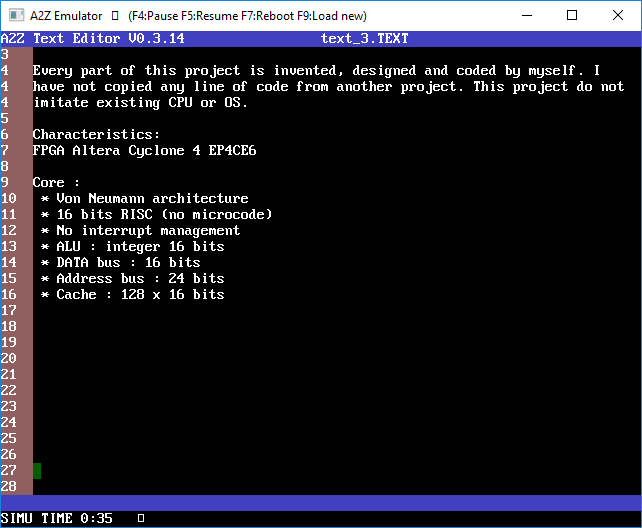
Every part of this project is invented, designed, and coded by myself. I have not copied any line of code from another project.
Characteristics:
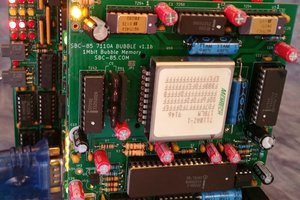
FPGA Altera Cyclone 4 EP4CE6
CPU:
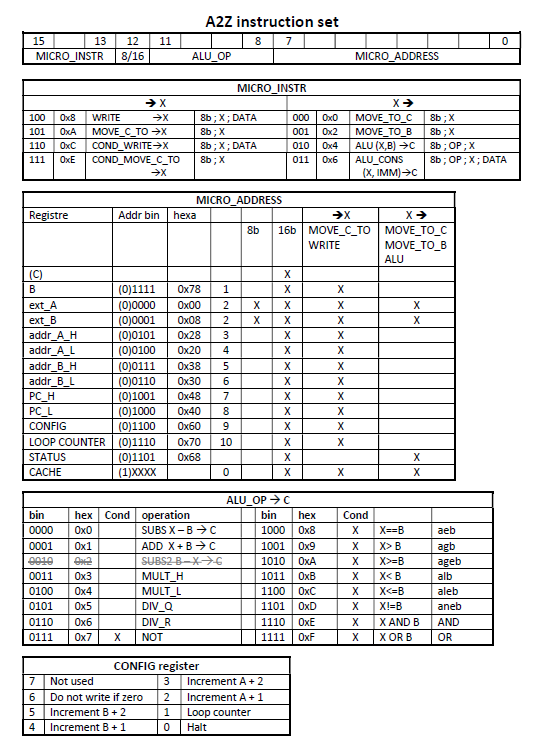
- Von Neumann architecture
- 16 bits RISC (no microcode)
- No interrupt management
- ALU : integers 16bits
- Data bus : 16bits
- Address bus : 24 bits
- Cache : 128 x 16bits
- Performances close to 80286
Peripherals:
- 2MB SRAM (accessible by 8 or 16bits)
- 2kB boot ROM (inside FPGA)
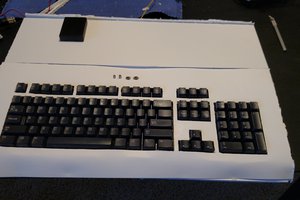
- PS/2 interface for keyboard
- SPI interface for 16MB Flash SPI (mass storage)
- Serial interface emulated via bit-banging on GPIO
VGA video card (inside FPGA):
- graphic part : 640 x 480 x 8bits.
- Shared RAM with the core
- double buffering (for fluid animations)
- text overlaid: 80 col x 30 lines
What I have done:
- Custom CPU, with it's own instruction set. The CPU is coded in Verilog.
- Some peripheral listed above, all programmed in Verilog.
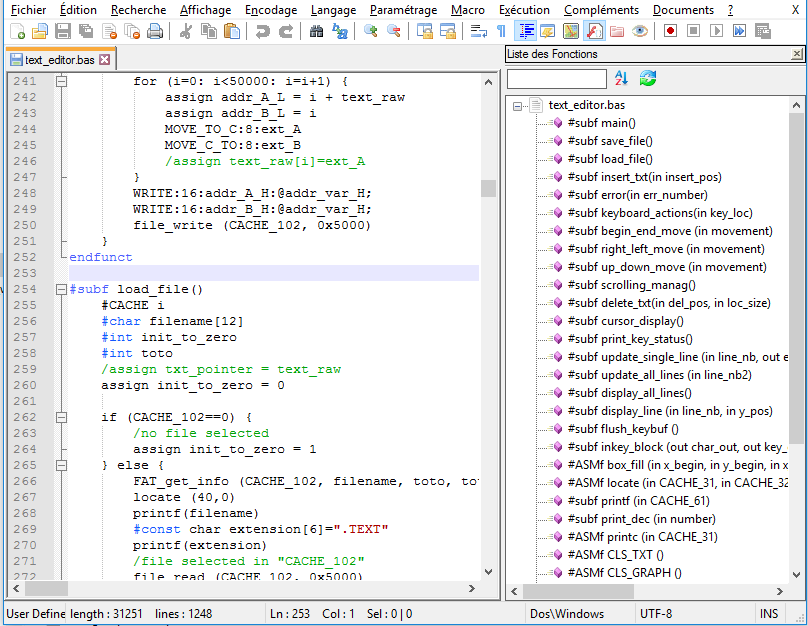
- Custom assembler, coded in C, with it's own assembly language
- Cross-compiler fully coded by myself, in C. This compiler takes A2Z_Basic language for input, a custom language, which is a mix of C and Basic. The compiler is the most difficult part of this project.
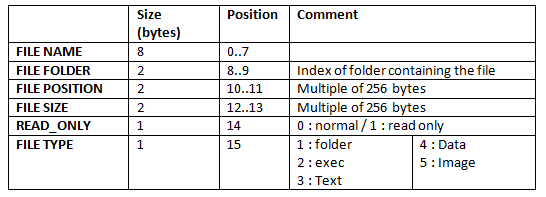
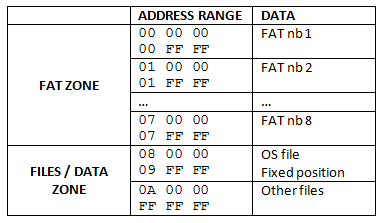
- A simple filesystem, without fragmentation management
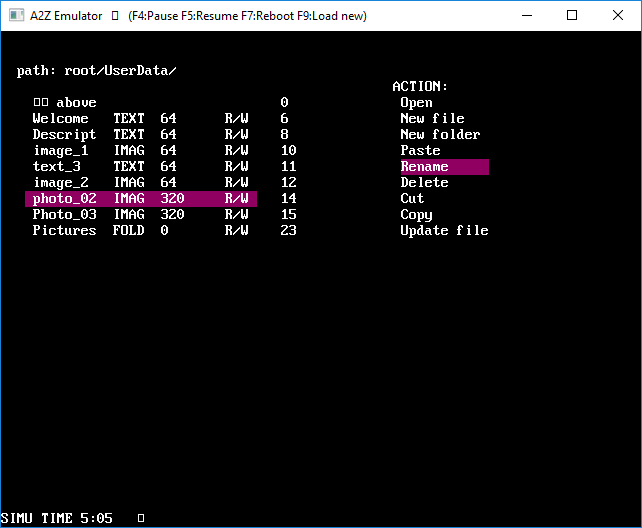
- A simple OS : a file explorer capable of managing files and folders
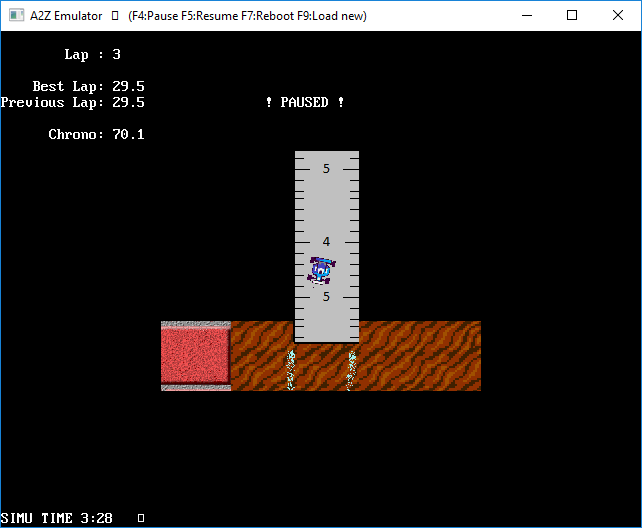
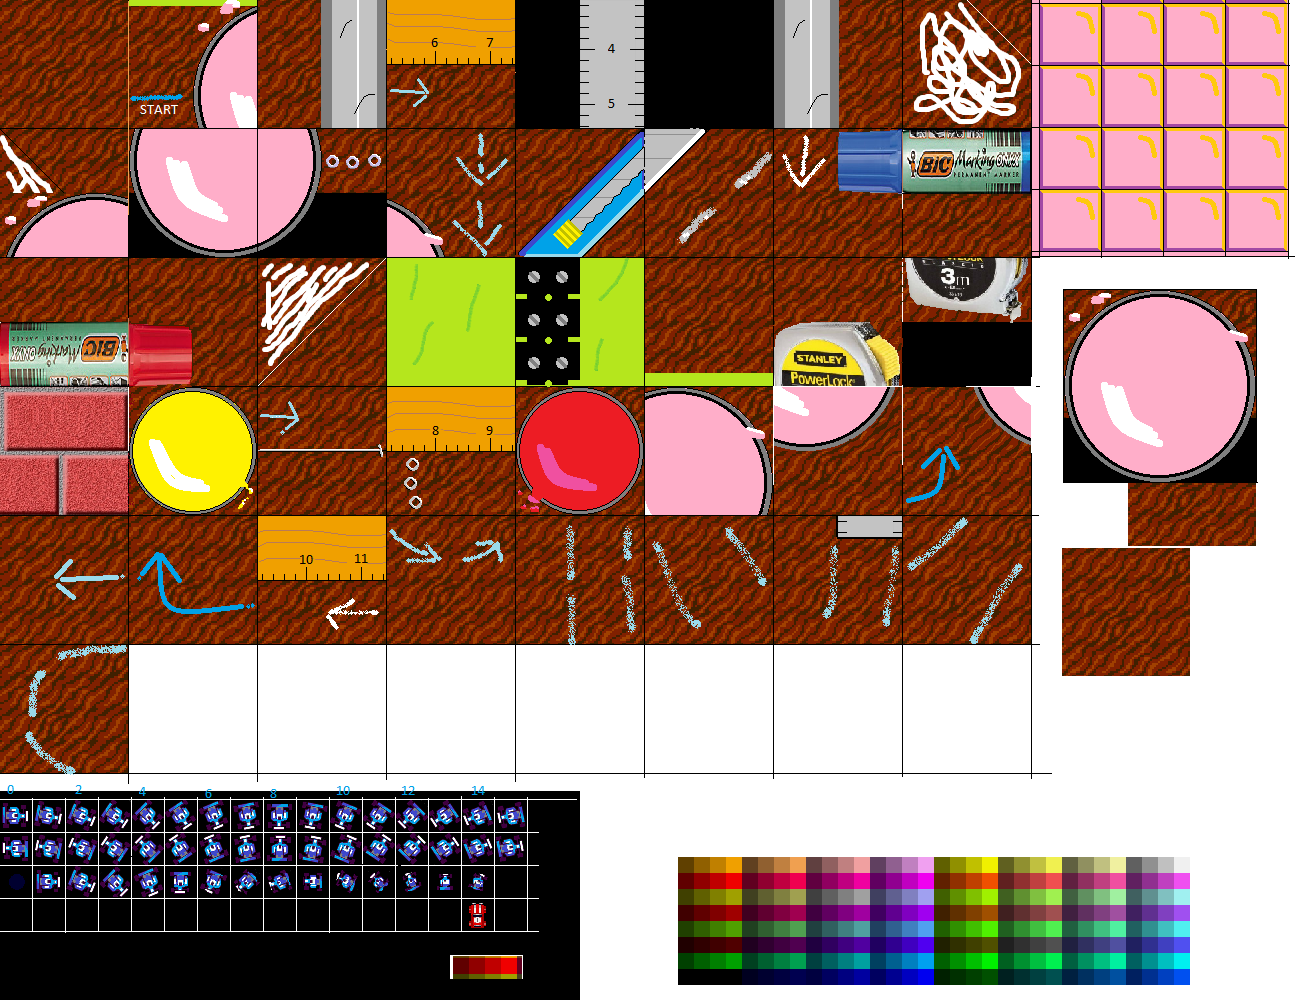
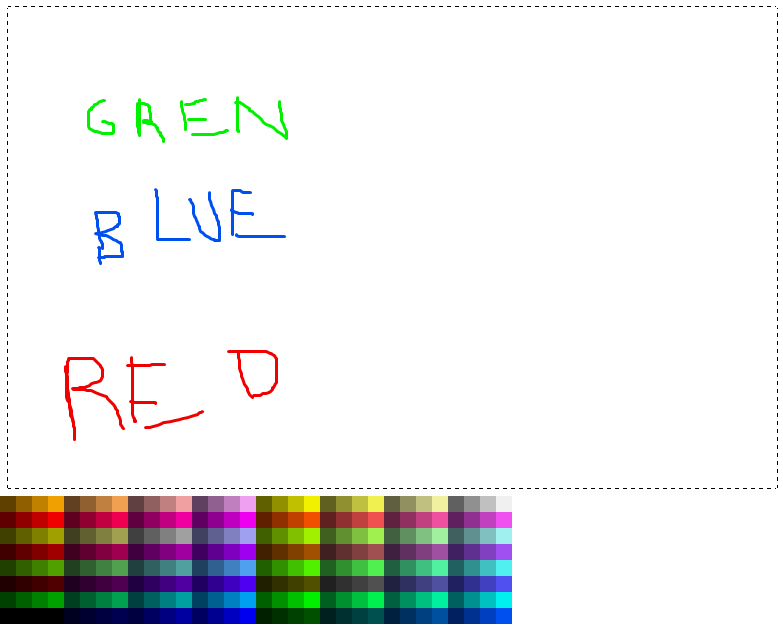
- Some programs : a text editor, an image viewer, a map viewer, and a car game
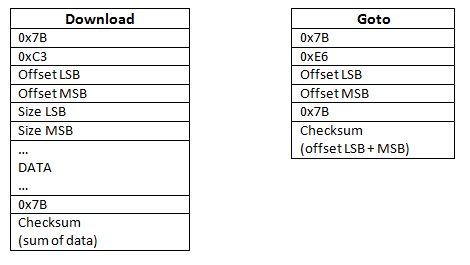
- An emulator, that runs on PC. With this emulator, you can work on this project without hardware
All details are in the Blog, one entry for each chapter.
Table of Contents:
1) General description
1.2) Personnal vision of the project
2) Hardware
2.2) FPGA-Verilog: global overview
2.4) FPGA-Verilog: VGA video card
2.5) FPGA-Verilog: other peripherals
3) Custom software development tools:
4) A2Z software
4.2) File System and Operating System
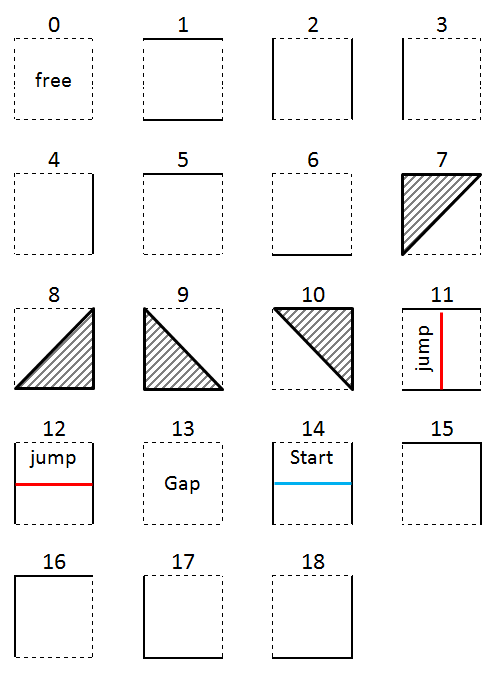
4.4) Image viewer and Map Viewer
5) And after, what’s going next?
Description en Français


 Denver
 land-boards.com
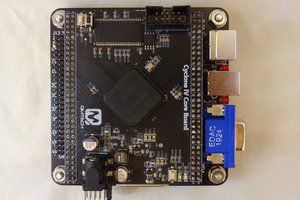
 Alex Bowen
This is great, thanks for sharing. The emulator using SFML was a nice touch too and I was able to get it to run in OSX pretty easily. Have you looked at using Verilator for simulation? I just started looking at it after finding ZipCPU's vgasim. It seems like it would be pretty easy to connect it and and continue with SFML for the I/O.