Close
0%
0%

retroCART enclosure

Desktop 'drives' using retroCART with an Atari look.

Similar projects worth following
I saw the retroCART (https://hackaday.io/project/177861-retrocart-usb-cartridge-system) and realized it'd help me with some accessibility problems - and scratch some retro itches. I set out to create an enclosure system that mimics the look of the old 5.25 and tape drives of my old atari systems.

I have a hard time manipulating small usb devices and a harder time getting to them into the back of my PC. They keep making them smaller and my disability makes my hands keep getting number and clumsier. Slapping in an old atari xl cart with a satisfying clunk AND its a modern usb device? Sign me up!

I've never used openscad in my life and the few shots i've taken at making a 3d printable cad designs have ended badly.. because i'm really bad at it. But I had an openscad and an idea... 

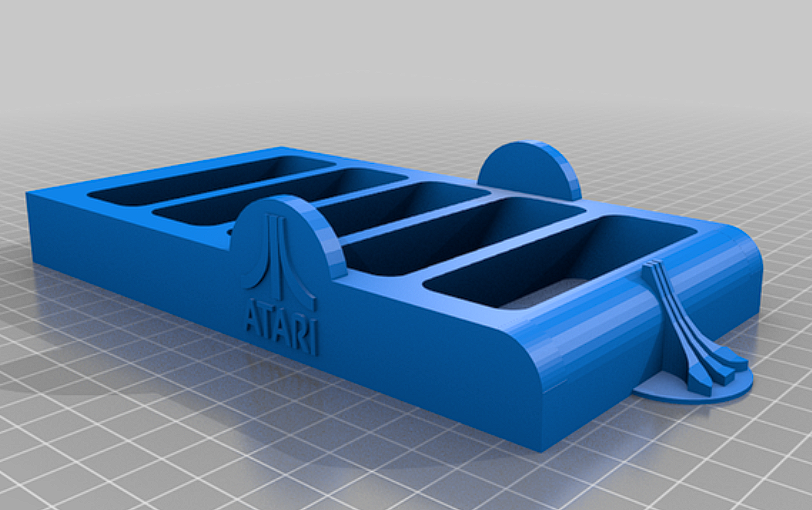
The first gen cart enclosure up on thingiverse now used the 'ultimate parametric box' things openscad and a few of its remixes that let you put holes in the front plates and a lot of dirty hacks to the scripts to get 'useable' exported stl files making the modified openscad unusable and unpublishable...  

a lot of wasted filament, filing, and sanding later and i had a 'working' desk drive.. i also modded the retroCART  slot itself a little cause it was too tight a fit on my printer so i fudged in a little - uh whats the word - slack? shit whatever. 

One side load cartridge drive made.. yay. 

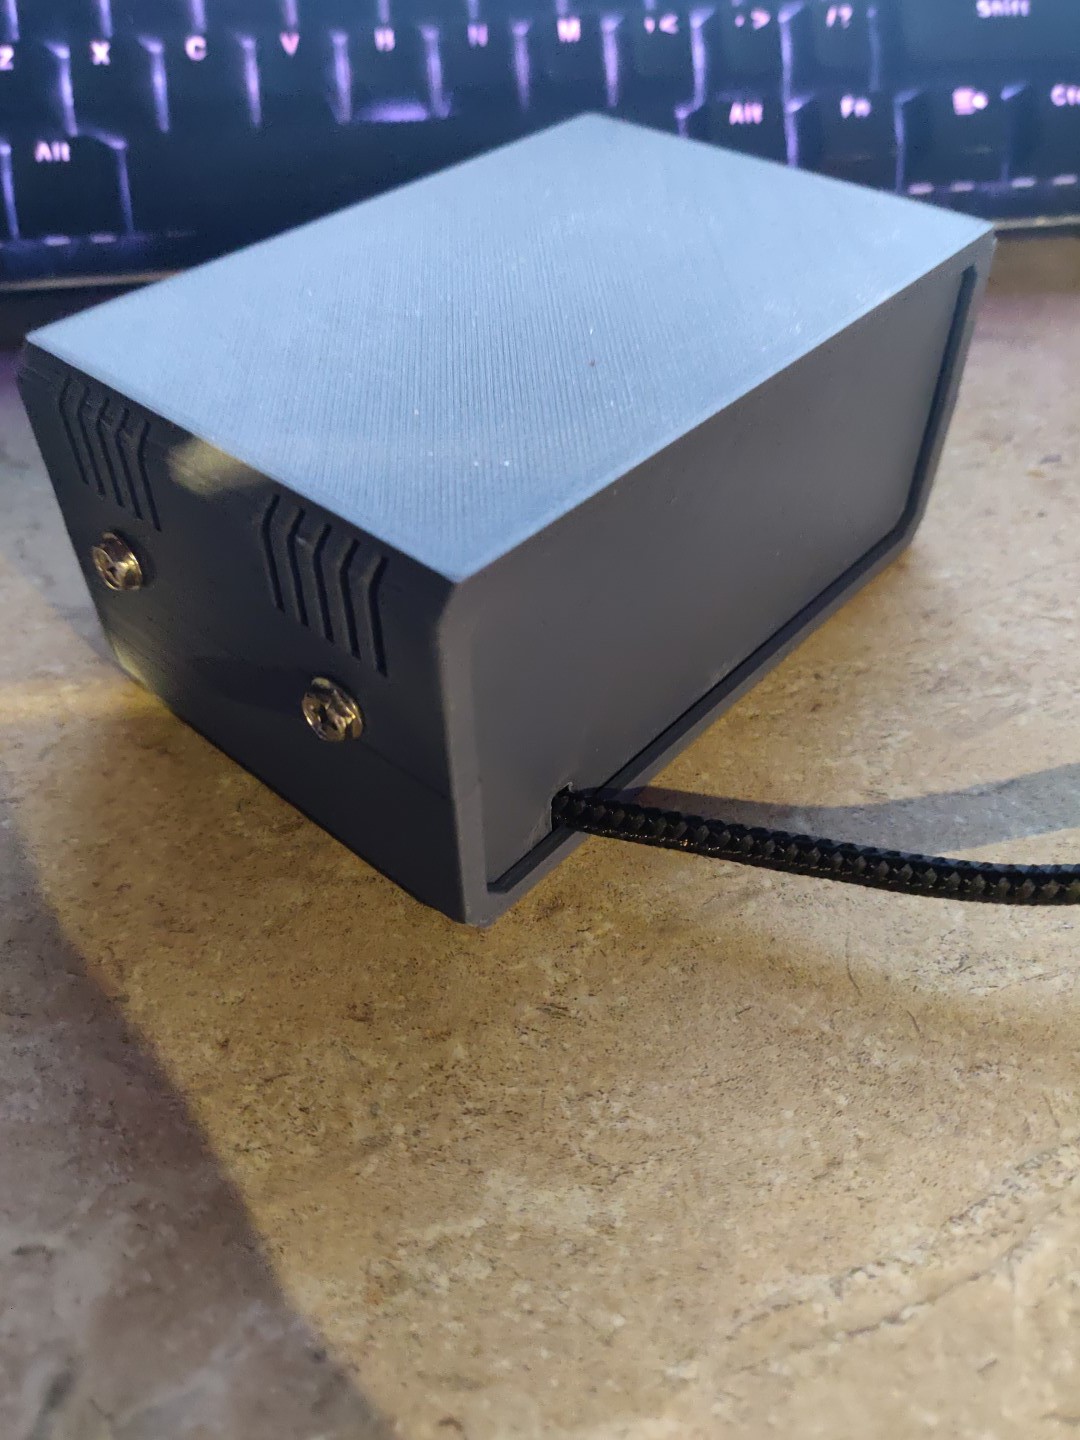
made carts for a usb wifi6 adapter, a too-damn-small 64gb usb stick i got for a chromebook but never used on it cause id lose it or break it, and an empty default sized one to measure with that i'll stick something in eventually.

so it works and usb3 and really does help me with my problem getting stuff plugged in and out and stuff

super yay!

but

hrm.. really want this to be a top load like the atari.. and look better...

and i still have ideas... ugh effort

retroCART top frontload v3.2.stl

Top Half for Frontloader Type

Standard Tesselated Geometry - 85.82 kB - 11/07/2022 at 16:05

Download

retroCART topload v3.2.stl

Top Half For Toploader type

Standard Tesselated Geometry - 86.80 kB - 11/07/2022 at 15:56

Download

retroCART frontload v3.2.stl

Front panel for a Frontloader type

Standard Tesselated Geometry - 48.91 kB - 11/07/2022 at 15:56

Download

retroCART front Large Text v3.2.stl

Large Atari Regular - Blank ffront panel for Toploader type

Standard Tesselated Geometry - 28.40 kB - 11/07/2022 at 15:56

Download

retroCART rear tall hole v3.2.stl

Tall hole for cable fit

Standard Tesselated Geometry - 2.23 kB - 11/07/2022 at 15:56

Download

View all 13 files

  • 1 × 13 dollar roll of almost unusable matte 3d filament i want to like it because it feels neat.. but it was half the roll to figure out how to get it to stick.
  • 4 × Old Computer screws you picked out of the carpet or the vacuum bag
  • 4 × Longer machine screws of undeterminable type those 'other' kind from that one weird computer part you bought that one time a decade or two ago
  • 1 × 3d Printed clever hand drill off thingiverse you know the one
  • 1 × "Close enough" sized drill bit cause if your 3d printer prints holes the right size then you're out in your bmw and not reading this

View all 11 components

  • Lets Grow an Ecosystem (?)

    luxotek11/14/2022 at 03:30 0 comments

    Got tired of having a growing collection of carts getting scattered and tipped over and stuff and things.. my hands gowing numb and various levels of pain from day to day just make this untenable in the long run so.. lets make a holder I guess

    hours of pouring over sites looking something already atari or close (cause lets not mix themes at this point right?) that had an openscad or something that I could figure out how to work and I did find a few and https://www.thingiverse.com/thing:5614597 this one had the unfortunate chance to get mangled by my sub-pedestrian abilities. 

    demolition88 made a great doohickey model and I hate that the only thing I could figure out to change the size on an .stl ruined the logo on the front - but it is what it is and meshmixer is discontinued for a reason I guess - but I wanted to just more than rescaling it in cura and to be able to share it. 

    now I got me a stand. 

    woo

    then I tried to pick it up with it fully loaded

    WHY YOU NO MAKE BOTTOM?!!!@112 fuuuuuuuuu

    ok. well.. after making a mess out of it a half dozen times in a handful of free whatevers out there for 3d goofiness and a day or two of rocking and crying in the fetal position I accidentally stumbled upon the edit stuff in prusa slic3r.. and holy what? you can save it out as an stl? ...........dude

    dude

    just... dude.. game.. changer..

    so now v2 and short of taking some kinda pic of it all printed and loaded up with carts all pretty like, i'm pretty happy with this little guy sitting on my desk

    heres me cheating on actually having to clean my desk and taking fashion photo's of  my prints

    ADDITIONAL THOUGHTS:

    Got the day to day stack all nice - would still like a vertical one - saw a couple of atari ones that I liked and even one that was modular so you could expand it with some pretty nice dove tail kinda things but with my level of skill i'm relatively sure they wouldn't work anymore after being resized to the retroCART spec. MAYBE SOMEONE GOOD AT COMPUTER CAN HELP DO A THING hint hint nudge nudge 

    also have a cricut I stuffed into a closet so I was talking to someone about making a template for it to do like a wrap or label type thing you could cut out and stick on them which really seems like the long way to around just cause i don't own a paper printer or paper or stickers or artistic talent to make a neet sticker like in tom's examples (no mild jealousy here.. nope.. ) - really regret throwing away all my floppy sitckers and stuff a few years ago.. I get why people end up hoarders every time I need something I held onto for years and years and finally tossed.. but I digress.. again

    i keep seeing more and more people using tom's carts for what they were intended for and honestly jealous of so many cool cyberdecks so i'm hoping we can get a little ecosystem going of retroCART holders and designs and cart uses cause it really does help with people accessibility problems too. like in the short time i've made these stilly drives it's made a big impact of how I use my computer and how I use them from day to day.. any one with chronic pain for years and years will tell you how even simple things take big decision making to decide on spoon usage and how easy it is to just not do simple somethings cause you fear the pain spikes.

    this got too long.. sorry I guess

    here's the link to the thingiverse thing of both versions I remixed (cause I almost forgot the point of this log)

    https://www.thingiverse.com/thing:5614597

  • tl;dr

    luxotek11/07/2022 at 16:49 0 comments

    NOW I remember why I started over with a new enclosure box remix thingy... it had the ability to add a hex pattern to the top half of the shell and iirc the vent script was different, or the front panel was... 

    So, I had a clue on where to change stuff to make the top load hole and how to mod the vents to make them go across (i think)

    It was still a "learning" process because it was like the third time i'd ever opened an openscad in openscad.. still alot of dirty hacks that made the file unpublishable cause i'd change the sctipt and render and export an stl and then mod it again for the next stl file... Think I spent an entire two days figuring out why it was only rendering half one side of the vents and then leaving a notch on the last vent on the other side instead of centering the whole thing to leave a solid corner - but I eventually kinda figured it out.

    I still need to get some stick on or screw on rubber feet for the stack in the pic but I spent the last of my money on an almond roll of that cursed filament I hate because it was 'close enough' to the real polymaker matte color that I think would have matched either the darker 400xl color or the 800/1050 color.

    Side Note:

    I saw that one episode of third rock from the sun where dick goes nutso on the computer with some old - uh - looks like apple or ibm xt stuff stacked with the old ass scsi cables everywhere... and now I kinda wanna do one where it's the old steel box drive style - and do a 'base' where it's a usb hub with some magic inside to adapt the usb to work over either 5 pins of the old flat mobo cables for floppy or the 40/80 pin pata hdd cabels daisy chained between the retrocart drrives - which I figured would be easier to find than going full nerd and using full blown scsi cables --- or parallel printer cables.. something beefy and chunky and totally impractical and a pain to manage LIKE THE GOOD OL' DAYS /sigh

    To Do Doo's :

    I still want to add a bevel to the openings of the cart slot so they slide into place with my sloppy and clumsy hand movements. 

    i'd like a solid front and back where the vents continue across the beveled top edge like the atari floppy drives

    The rear of the atari drives have different vent styles that are deeper/taller.

    The bottom of the drive needs an entire redesign cause the atari style has a second level bevelled out - take a look at an atari tape or floppy drive and you'll see what I mean.. i'm not good at explaining visual details like this. 

    The top and bottom shell seam needs redesign along with screw positions relocated to bottom into the top rather than the sides like it is now.

    Make the openscad useable and publishable so things like the length and height of the drive can be customized to taste - so if you want a full 5 1/4 drive wasting space and filament you can

  • V3.2 and things

    luxotek11/01/2022 at 20:03 0 comments

    I've spent the week(?) since v1.0 (i'm late making this project page cause i wasn't sure i wanted too) pouring thru thingiverse to find a better enclosure openscad to start with to make it look closer.. and i already forgot why i used different files to start with but it's the same parametric box thing but someone elses remix but its more better and closer to what i saw in my head                      

    and bought some more of the same terrible cheap filament i hated but in 'almond' because i figured out how to make it stick and it's weird formula makes it feel different when printed.. like i dunno how to explain it.. its less plastic-y and almost like a clay kinda feel? i dunno it's different and i like its feel enough to cope with its 'special low density formula' gimmick

    BUT(t).. i don't have the energy to take pics of the two new ones i printed up and made - or post the new files everywhere - after two days of printing and assembly (i'm slow) so.. 

    when i'm feeling better, i'll get my desk cleared off enough to take some fashion photos of my progress and put the new and improved files up on thingiverse and thangs.com 

    and if i'm feeling squirrely, see if the timelapse movies of the print are useable enough to toss them in openshot and maybe score some horrible dark ambient industrial soundtrack type shit over them and toss those up too.

    wheres harsh noise wally when you need him?

  • V1.0 and stuff

    luxotek11/01/2022 at 19:43 0 comments

    one day i'll learn how to (read: care) to resize pics to fit places - and take product pics? ugh.. sorry?

    so this is the first gen one to see if i liked using it before i put another entire days (week) worth of yelling at openscad to start making the 'hard' changes to get it closer. 

    i never figured out how to add the pre-existing holes in the front plate in the right places to get the retrocart slot attached so i just put a cart in thru the plate and plugged it in all lose and stuff and used a smaller drill bit thru the holes and eyeballed it 'center' and marked on the back where. real precision work i know but.. 

    i used a hand drill and alot of twisting to make holes to fit the screws i had on hand cause a power drill just chews up pla like crazy and i also do not own one. /thanks ex wife/ but i kinda like the look.. originally i wanted to use those ugly dull self tapping plastic screws like everything from the 70's had but i didn't have any so.. 

    the seams and screw positions are completely wrong (alots completely wrong at the moment) to make it really in the atari style if we're gonna be technical about it but i'm a rando from the internet and not some talented engineering team working at a major corp with an injection molding plant.. sooo..  

    i also didn't have any pig iron to weigh it down or chunky huge black rubber feet so at the moment it slides around way more than i want. but thats a future luxoteks problem for now... but this was a week ago now so now its my problem and past luxotek is a dick... needs feet.. or an eject button.. ooooo eject button. now its future luxoteks problem again.. jerk

    i feel like someones gonna get real mad in the comments that i'm not taking this write up seriously. oops

    here's a couple more way too big pics to get madder about

  • Captains log.. heh..

    luxotek11/01/2022 at 19:16 2 comments

    I think i put it all in description cause i dunno how computer work.

View all 5 project logs

Enjoy this project?

Share

Discussions

Similar Projects

Does this project spark your interest?

Become a member to follow this project and never miss any updates