Intro
Some people would call me lazy for building this, but I would like to think of it as innovation.
This project was a lot of fun to make. It challenged me in many different ways, and I was able to learn a lot from working on it.
Demonstration Video
Design Choices
Turning the doorknob:
My first challenge was to figure out how to mechanically turn a knob when the device was at ground level. This resulted in designing a handle since it can be linearly pulled to form a roation. This was done by 3D printing a handle to fit on the knob.
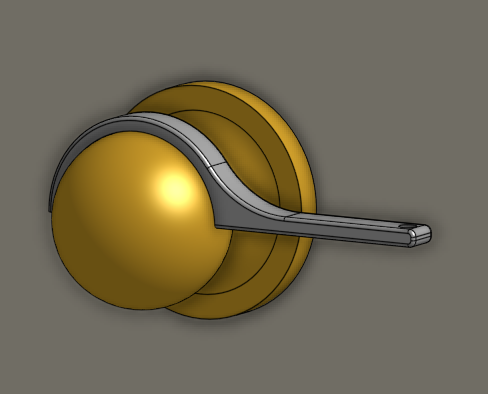
Secondly, I used a fishing line that would pull the handle down. A spool is fixed to a continuous servo motor, then coils the string, pulling the door handle and retracting the inner door latch.
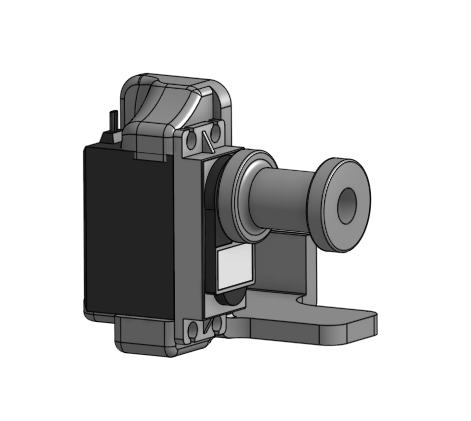
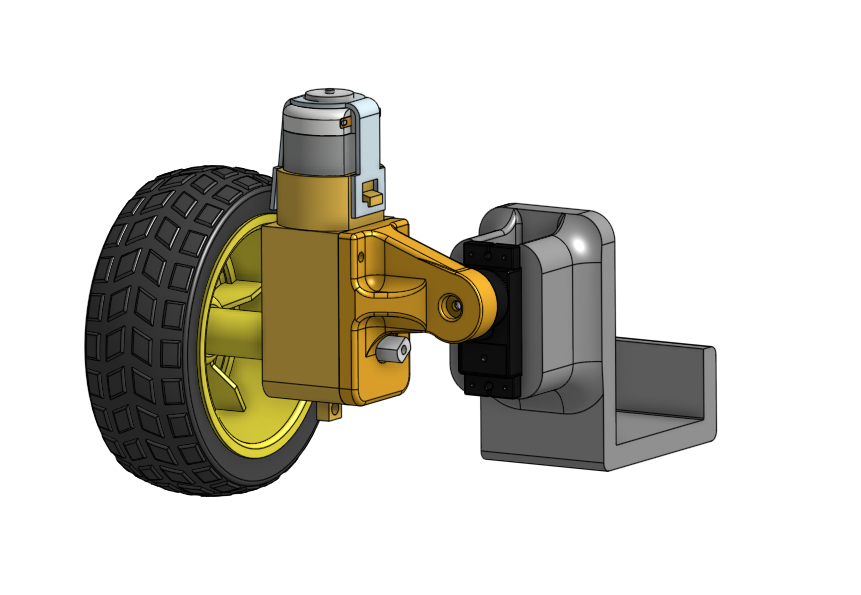
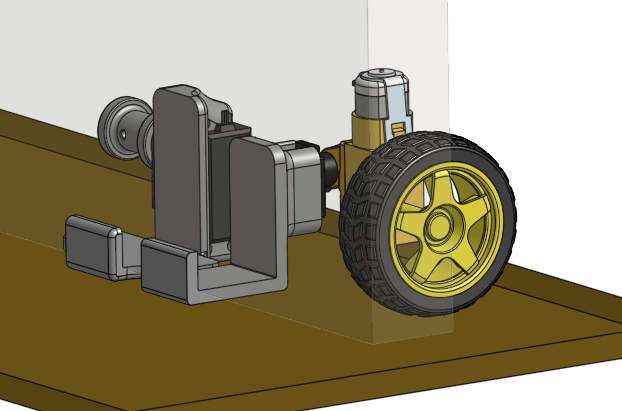
Lifting of the drive wheel:
You may wonder why the wheel is lifted at an angle when it stops moving. This is because when the door is not opening to the device, the wheel would roll on the floor when being manually opened. This is bad for two reasons. The first is that the wheel would drive the motor, generating current and potentially back powering the Arduino, which could fry it. Secondly, I still want to be able to open my door without the need for the device. Thus the wheel rolling on the ground would slow down the door being opened. Therefore, I made the design choice of lifting the wheel off the ground with a servo motor.
IR Remote:
The device uses an IR remote and sensor to control.
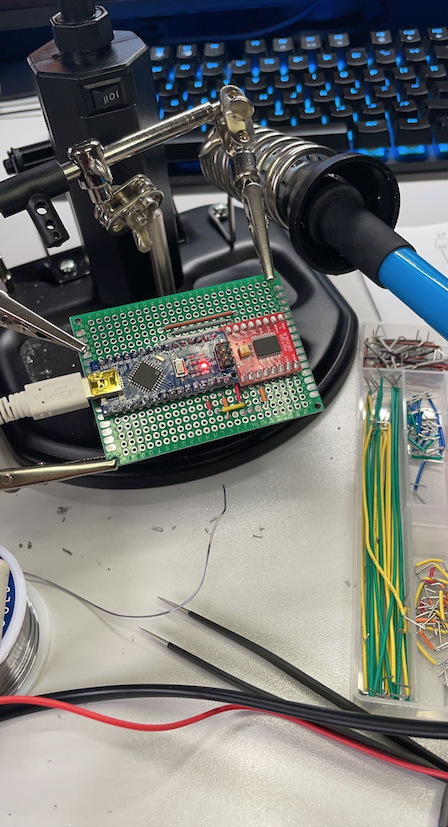
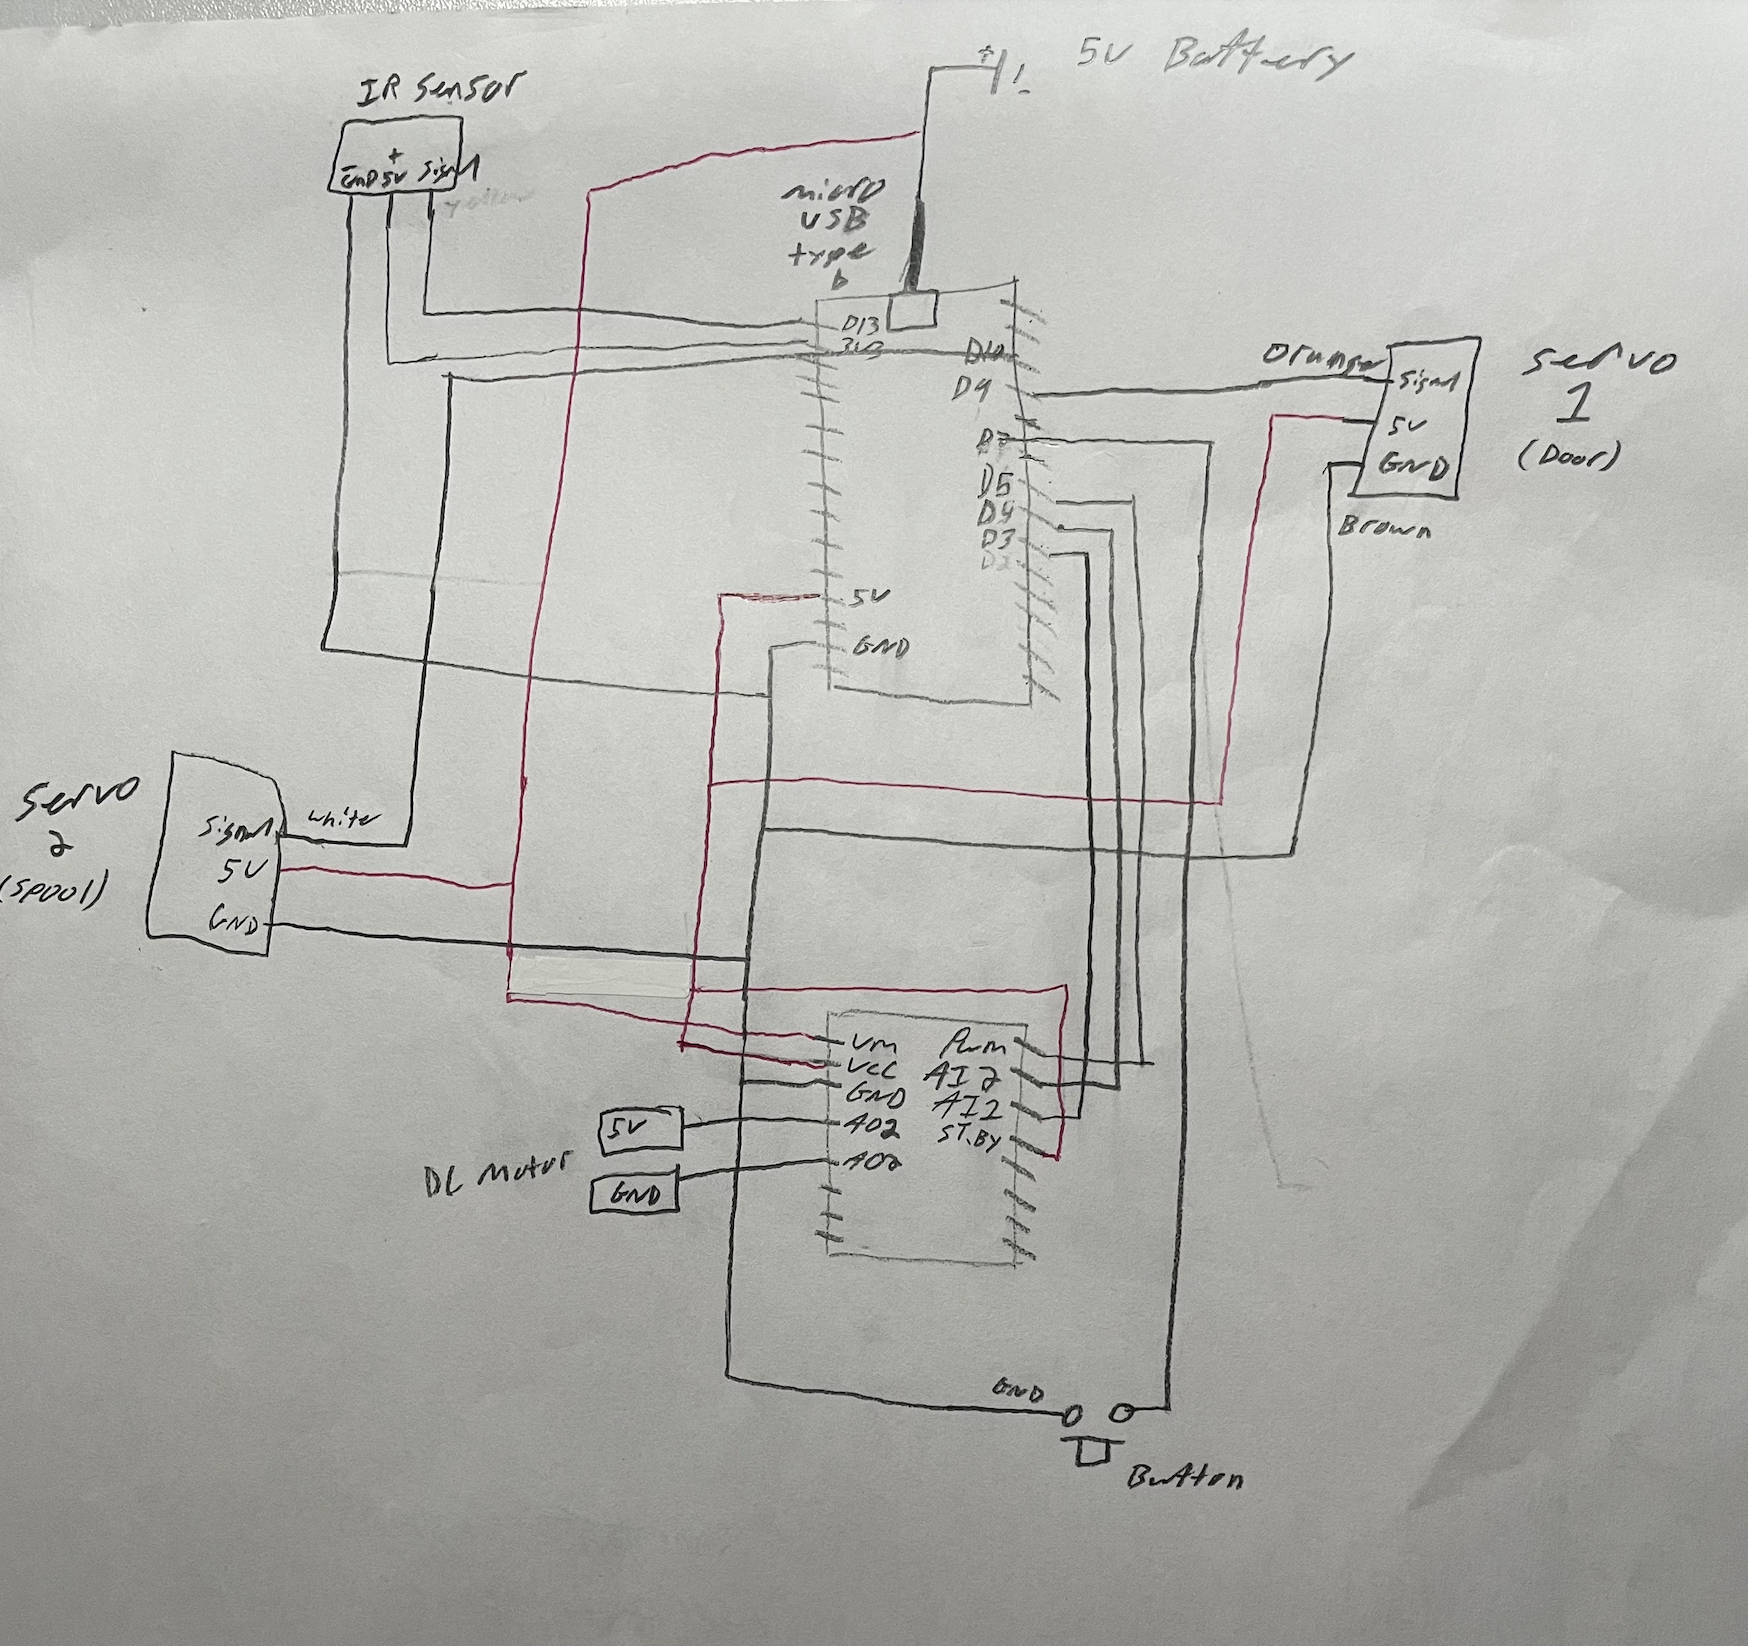
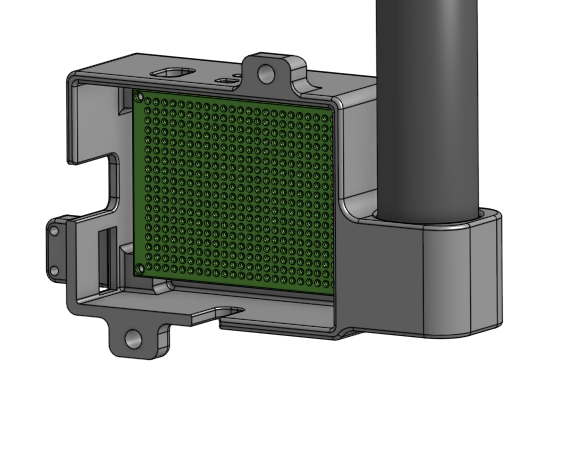
All electronic components are then fed into a main electronic housing. This project is powered by an Arduino nano attached to a protoboard.

Door Mounts:
All parts/mounts of this design were made in a way where it did not permanently attach to or damage the door in any way. The main housing used velcro to mount on the door (this way, it could be easily removed if further work was needed).
The motor mounts slide onto the underside of the door and fit by tight tolerance to hold it in place.
Code
//By Matteo Fazio 2022
#include <Servo.h>
#include <IRremote.h>

#define RECEIVER_PIN 12
IRrecv receiver(RECEIVER_PIN); // create a receiver object of the IRrecv class
decode_results results; // create a results object of the decode_results class
unsigned long key_value = 0; // variable to store the pressed key value

// Motor A
int pwmA = 5;
int in1A = 3;
int in2A = 4;

// Motor Speed Values - Start at zero
int MotorSpeed1 = 0;

Servo servoWheel;
Servo servoSpool;

int servo_position = 0;

int button = 8;

void setup() {

  Serial.begin(9600);

  CLKPR = 0x00; //set power to normal useage

  servoWheel.attach (9);
  servoSpool.attach (10);
  servoWheel.write(servo_position);


  receiver.enableIRIn(); // enable the receiver
  receiver.blink13(true); // enable blinking of the built-in LED when an IR

  //for motor controller
  pinMode (pwmA, OUTPUT);
  pinMode (in1A, OUTPUT);
  pinMode (in2A, OUTPUT);

  pinMode(button, INPUT_PULLUP);

  liftWheel();

}

void doorLatchOpen(){
  //turn the door knob open
      servoSpool.attach (10);
      servoSpool.write(180);
      delay(4500);
      servoSpool.detach();
  }

void doorLatchClose(){
  //turn the door knob closed
      servoSpool.attach (10);
      servoSpool.write(0);
      delay(4100);
      servoSpool.detach();
  }

void forward(){ //to close door when open

   MotorSpeed1 = 255;
   digitalWrite(pwmA, MotorSpeed1);

   digitalWrite(in1A, LOW);
   digitalWrite(in2A, HIGH);
   delay(500); //drives door to door latch

   doorLatchOpen();
   delay(1300); //wait till door is in closed postion

   MotorSpeed1 = 0;
   digitalWrite(pwmA, MotorSpeed1);

   doorLatchClose();

  }

void backwards(){ //to open door when closed

   doorLatchOpen();
   delay(1000); //wait till latch is open

   MotorSpeed1 = 200;
   digitalWrite(pwmA, MotorSpeed1);

   digitalWrite(in1A, HIGH);
   digitalWrite(in2A, LOW);

   delay(1300); // wait till door has cleared latch postion

   doorLatchClose();

   //delay(100); //drive till door is fully opened

 MotorSpeed1...
Read more »

 Arnov Sharma
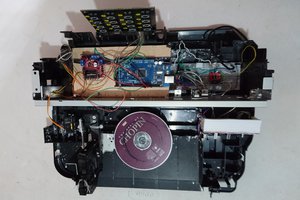
 Guillermo Perez Guillen
 jeromekelty
 Electroniclovers123