Supplyframe DesignLab
This lamp is a spinoff of the original PCB lamp project. Now, we explore hardware manufacturing, firmware, and mechanical design with a more hands-on approach.
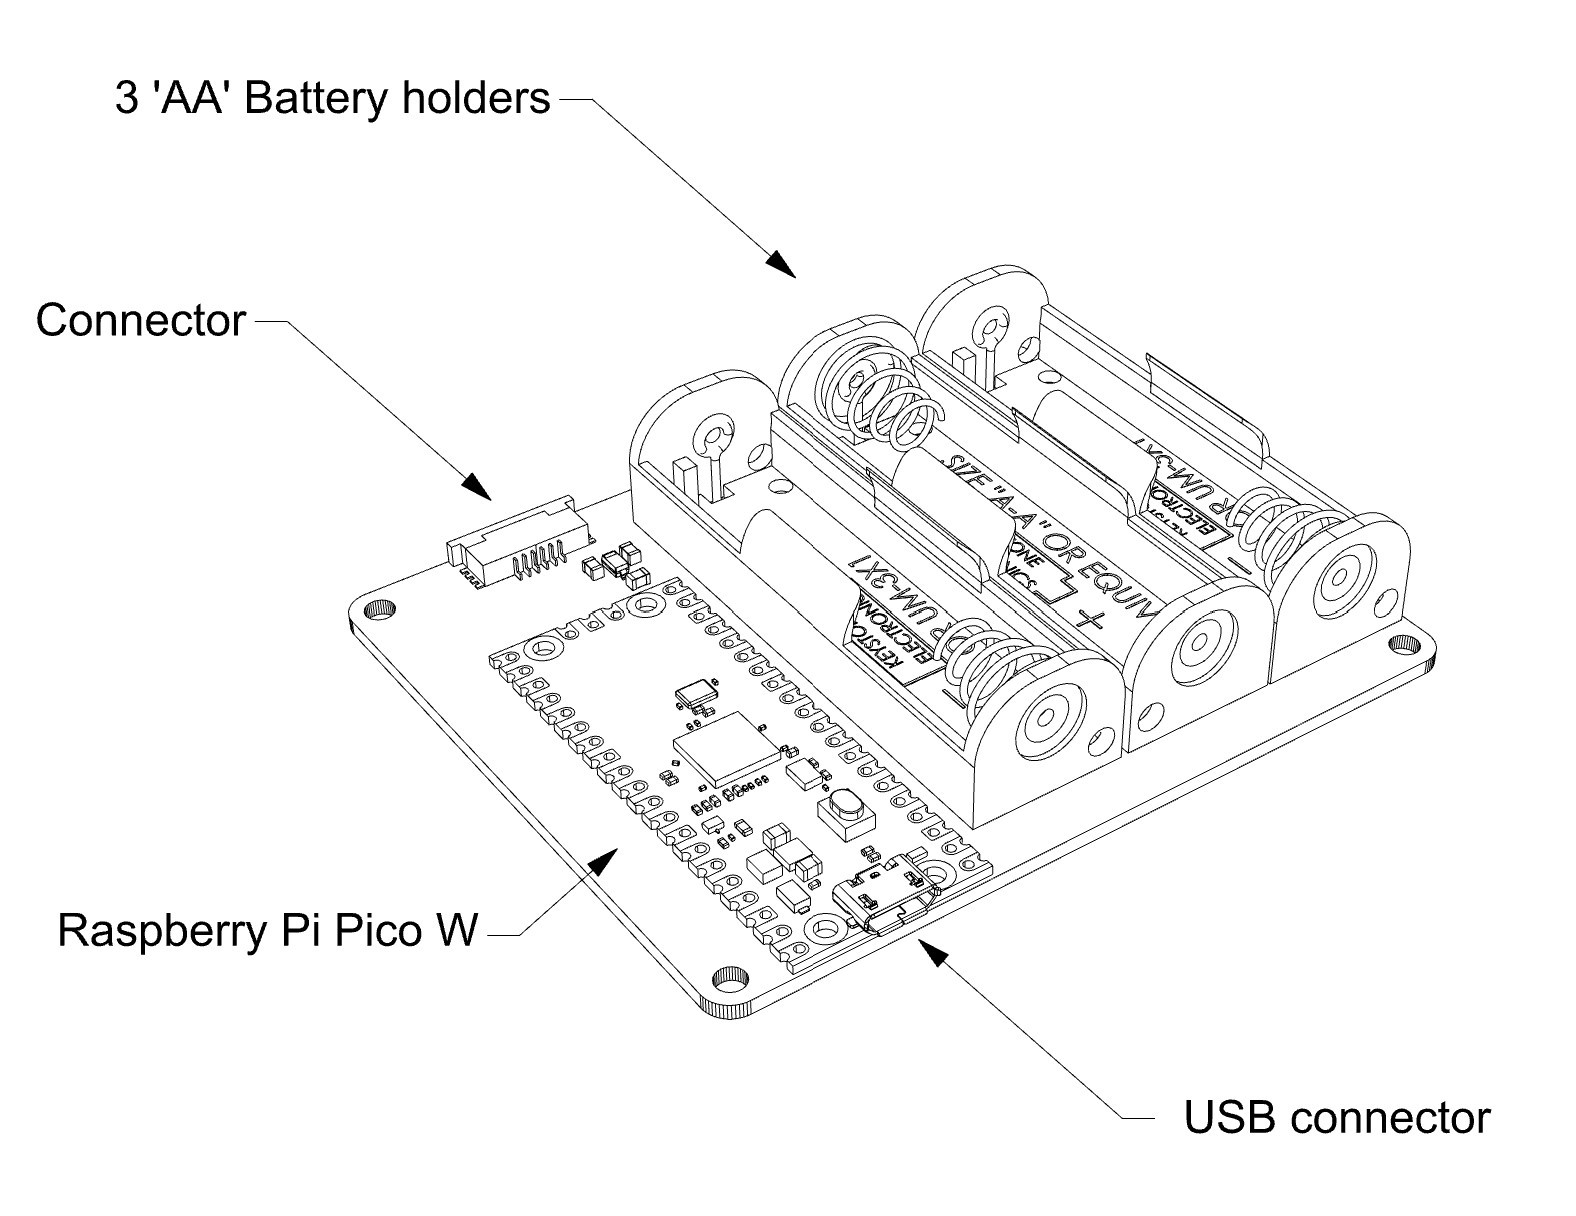
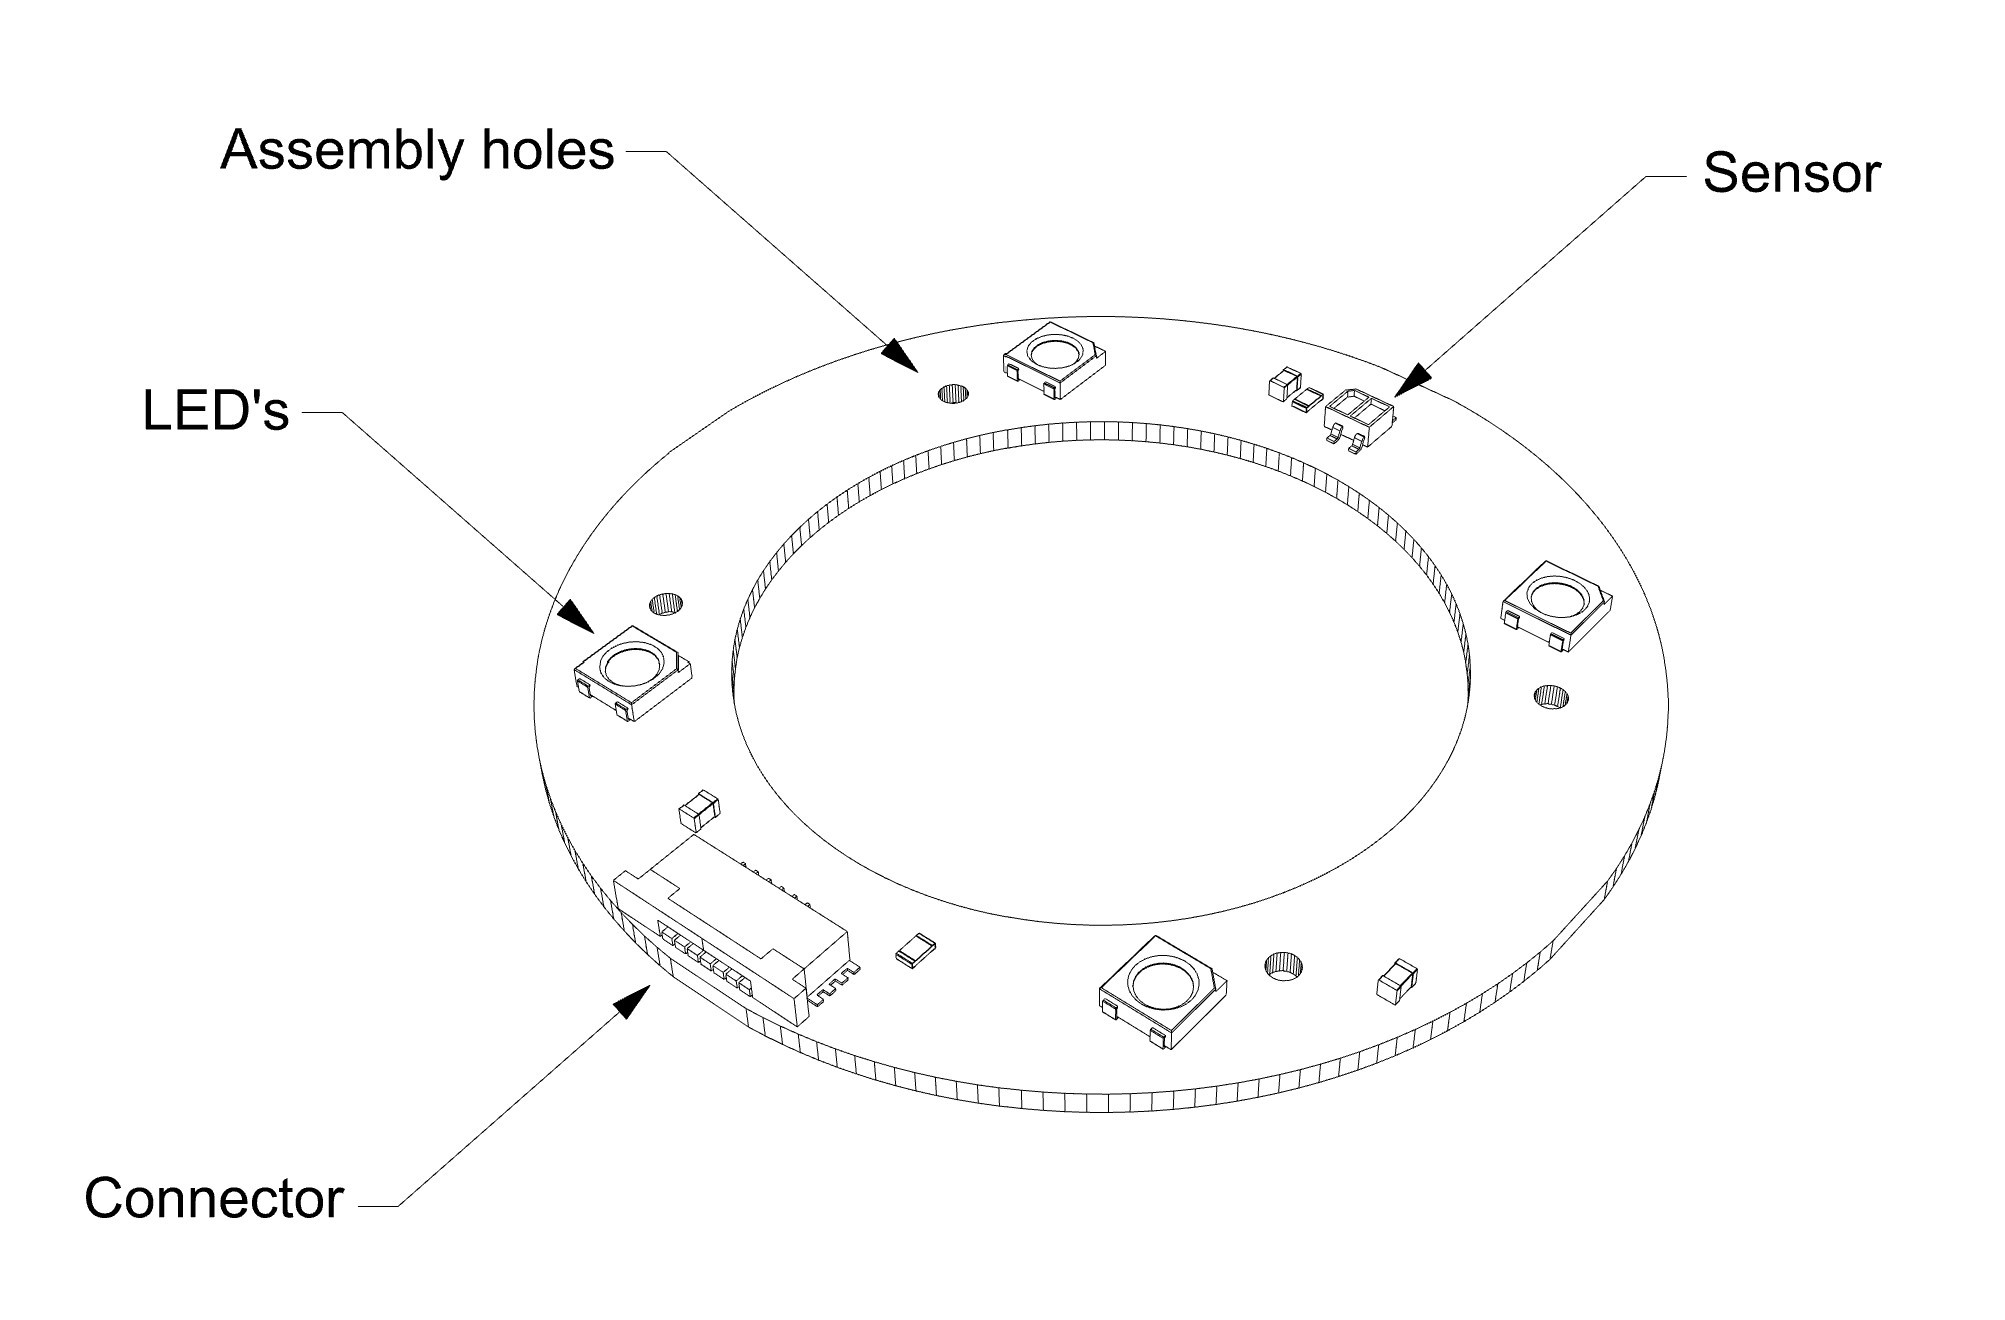
The Hardware
There are two main hardware components:
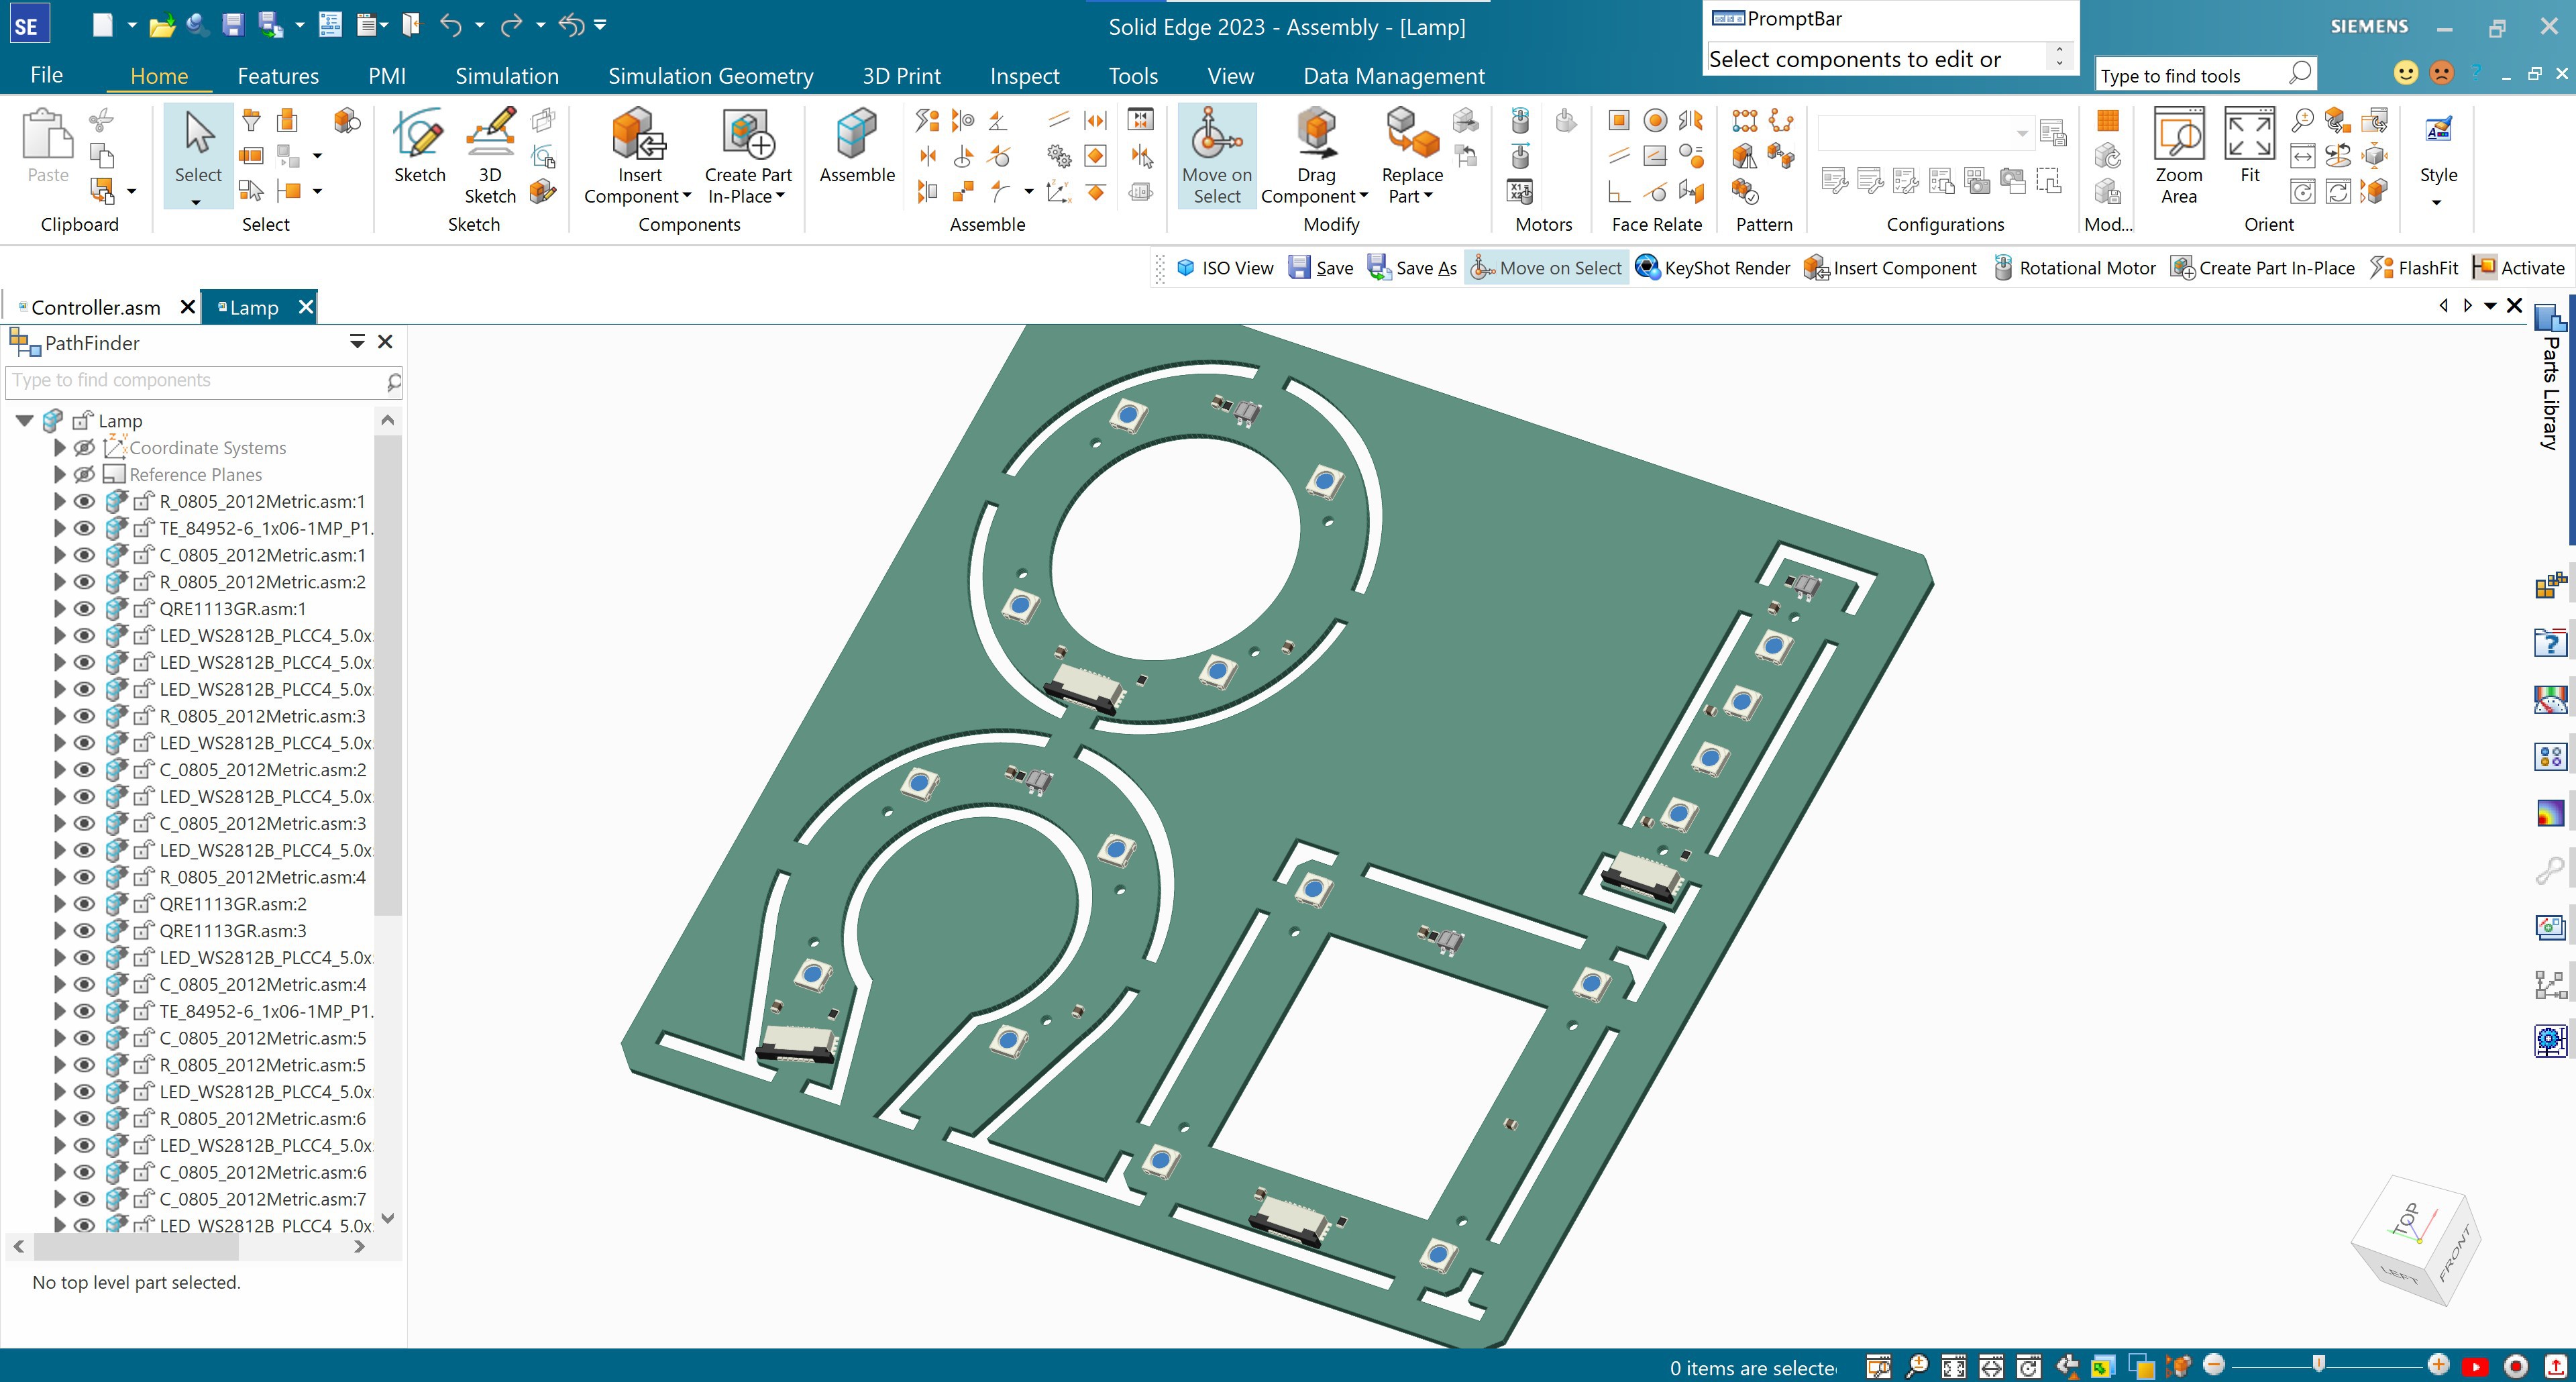
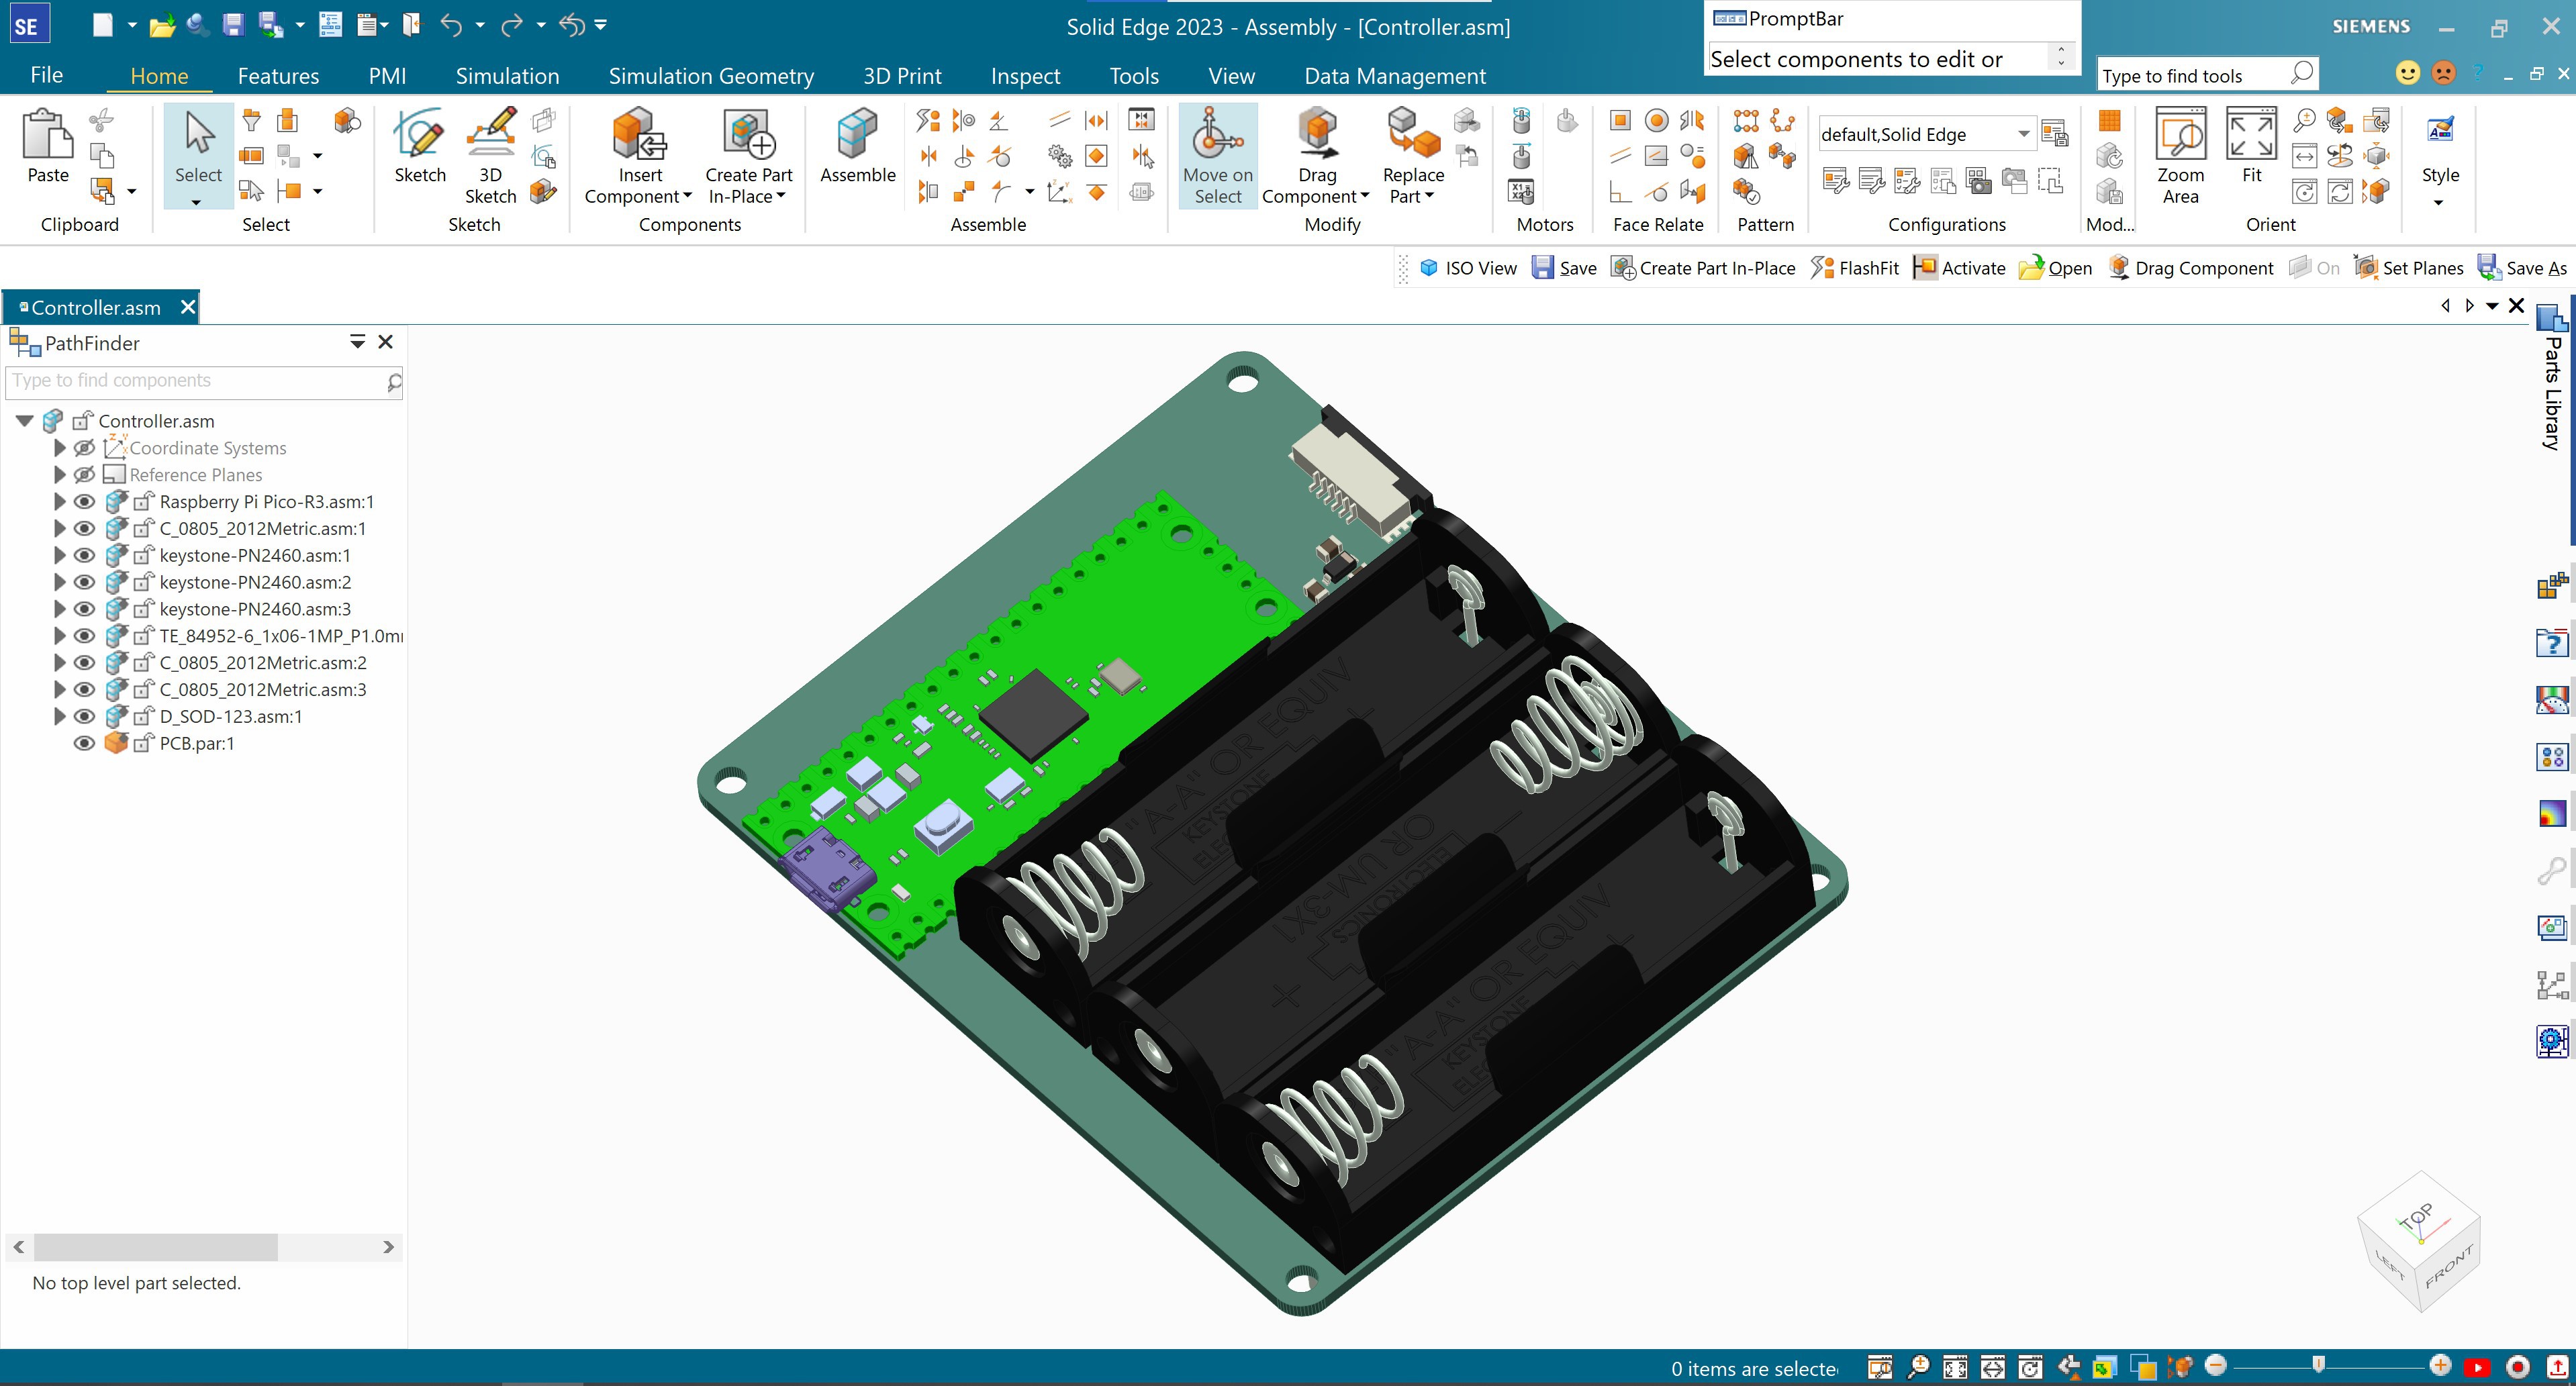
- Controller Board: The "brains" and power source
- Lamp Board: the lighting element
- Ribbon cable to connect Base and Lamp (6" and 10")
The Firmware
Raspberry Pi Pico runs on C++, Arduino IDE, or MicroPython. For this project, we will be using MicroPython with Thonny Editor.
The Design
There are four different versions of the Lamp to choose from. They all include four LED's, and other components that will be detailed later.
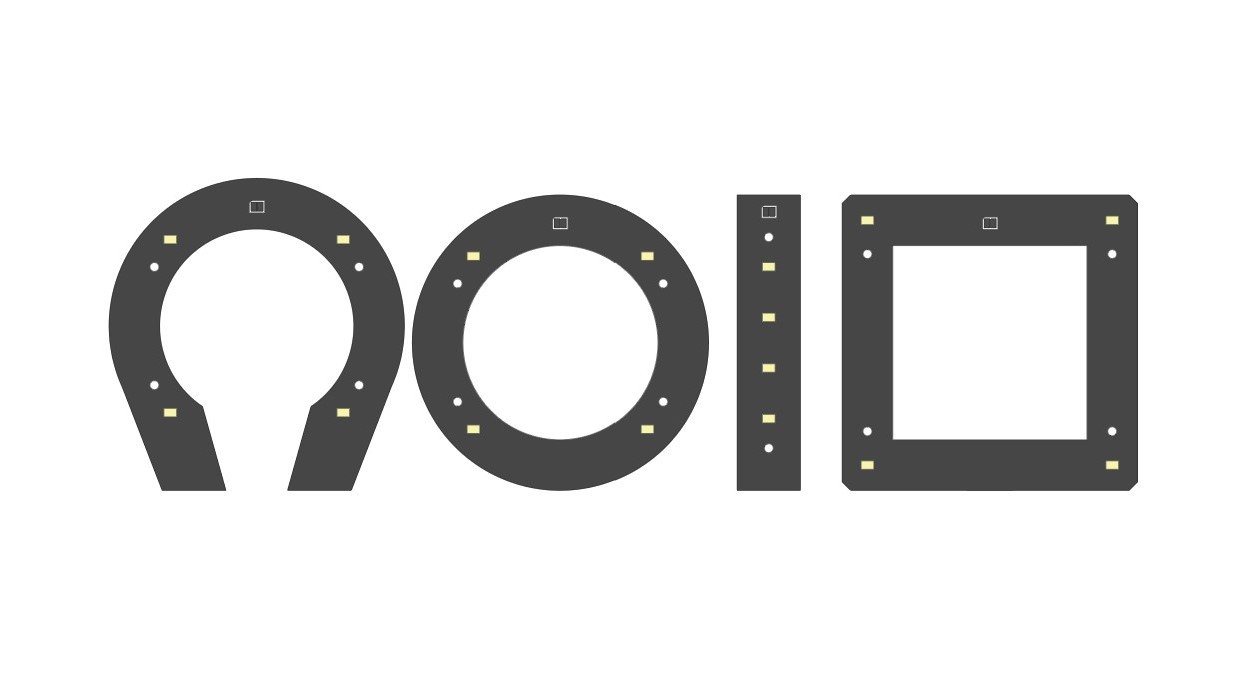
The Base is one standard design, and it can be placed as close or far from the lamp as needed. We will be using 6" or 10" long ribbon cables.
Please see Build Instructions for detailed information about downloads, templates, etc

 AVR
AVR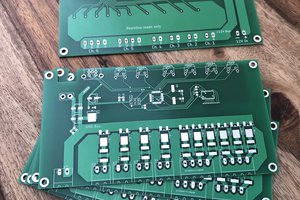
 s0
s0