 Jallson
-
1Prepare Data / Photos
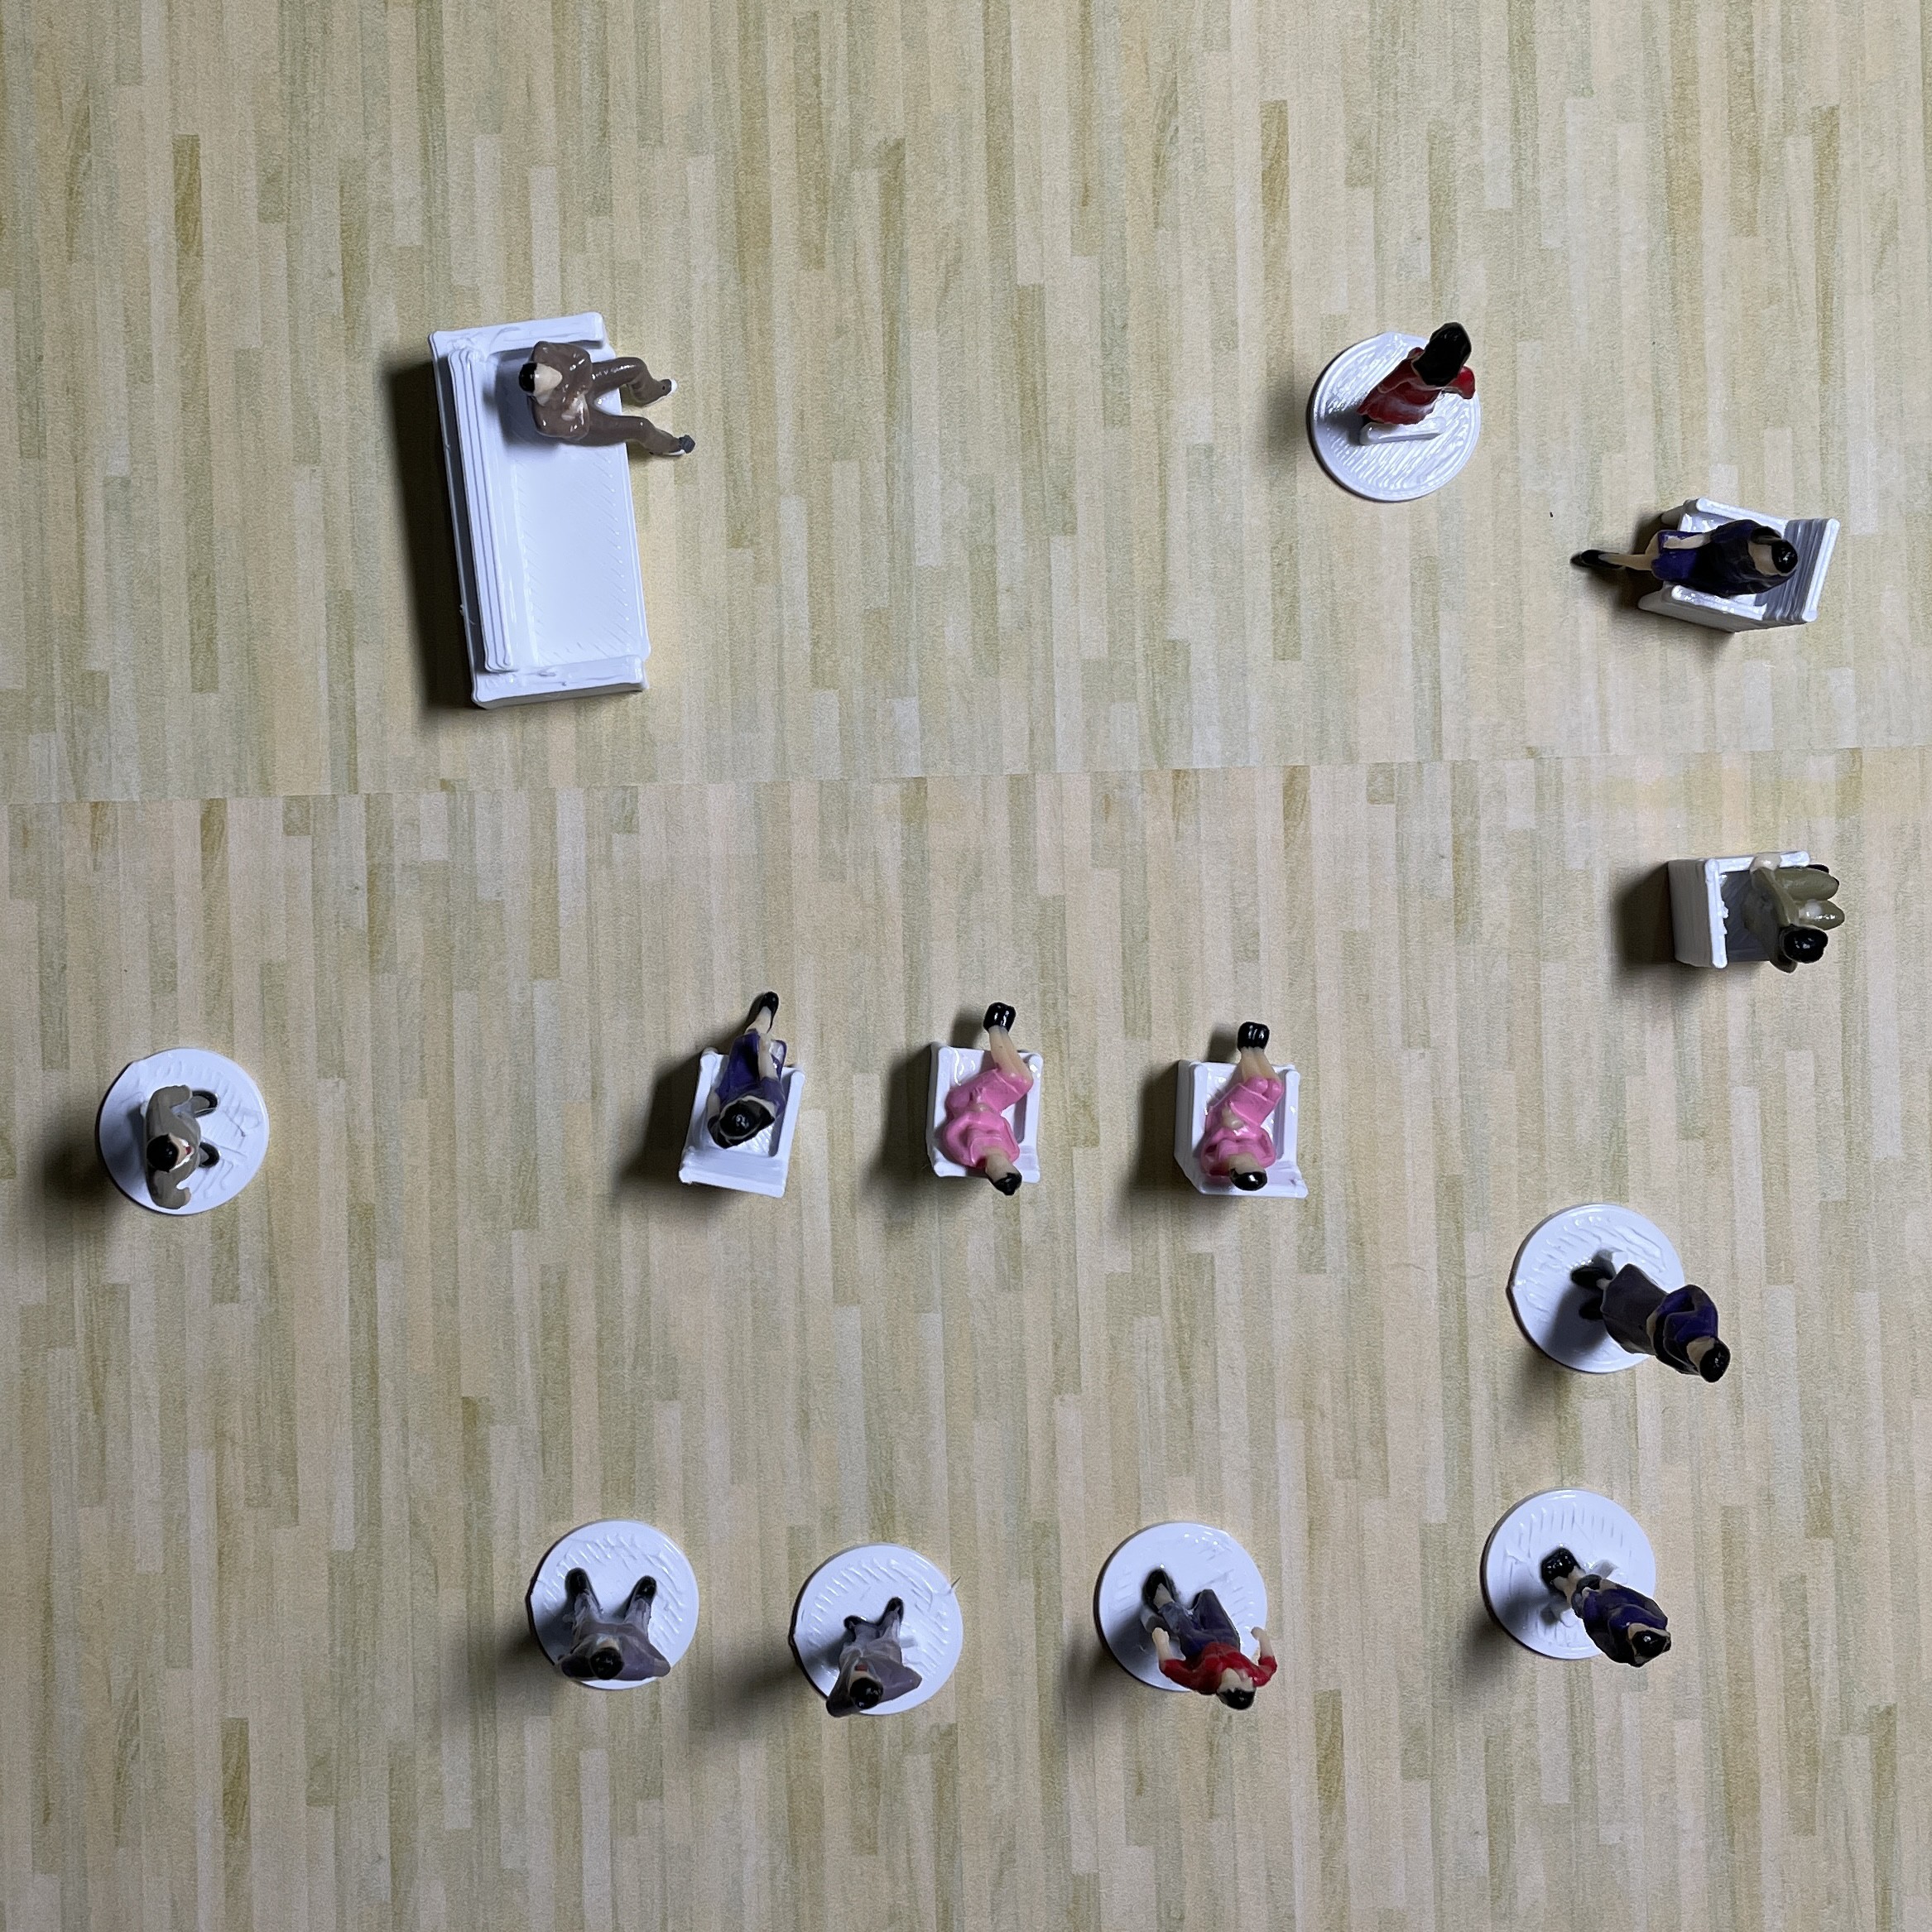
In this project we will use a smartphone camera to capture the images for data collection for ease of use. Take picture from above in different positions with backgrounds of varying angles lighting condition to ensure that the model can work under slightly different conditions (to prevent overfitting). FYI, lighting and object size are crucial aspect to ensure the performance of this model.
![]()
Note: Keep the size of the objects similar in size in the pictures. Significant difference in object size will confuse the FOMO (Edge Impulse Faster Objects More Objects) algorithm.
-
2Data acquisition, and labelling
Open studio.edgeimpulse.com , login (or create an account first) then create a new project.
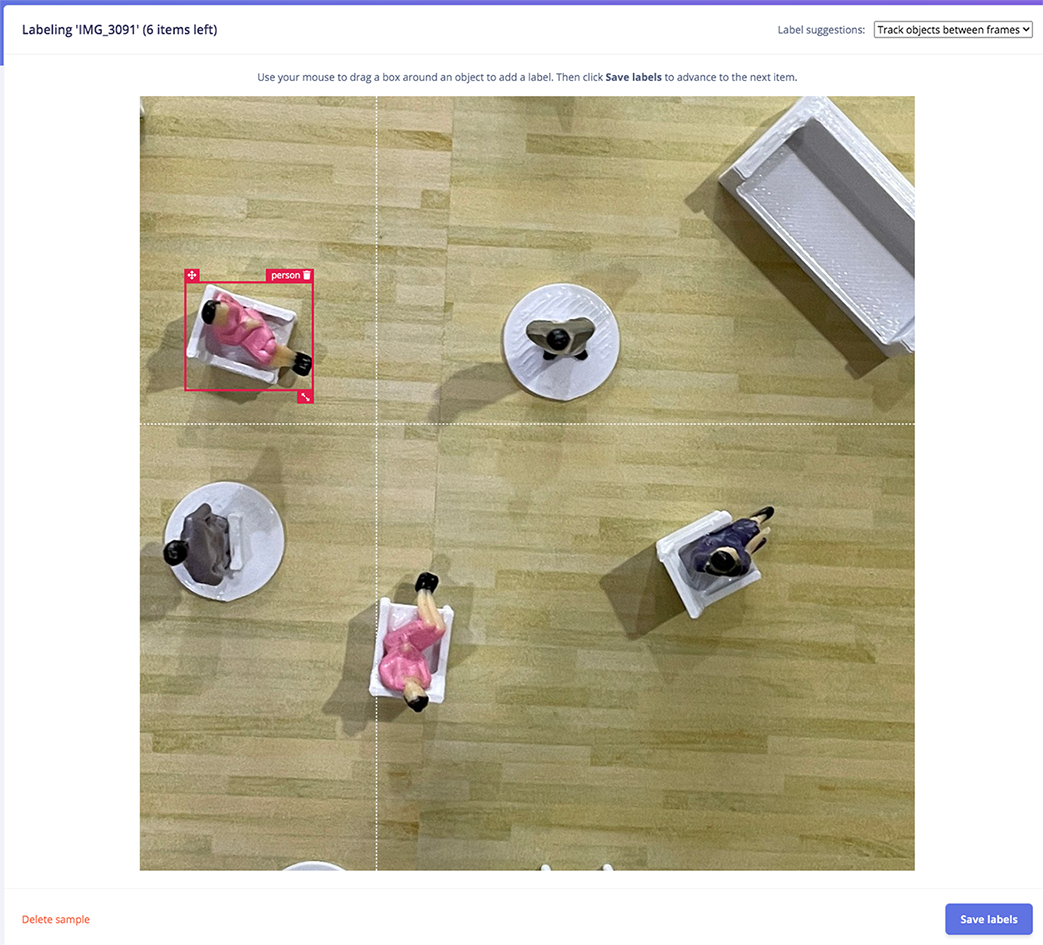
Choose Images project option, then Classify Multiple Objects. In Dashboard > Project Info, choose Bounding Boxes for labelling method and Nicla Vision for target device. Then in Data acquisition, click on Upload Data tab, choose your photo files, auto split, then click Begin upload.
Click on Labelling queue tab then start drag a box around an object and label it (person) and Save. Repeat.. until all images labelled.
Make sure that the ratio between Training and Test data is ideal, around 80/20.
![]()
![]()
-
3Training and building model using FOMO Object Detection
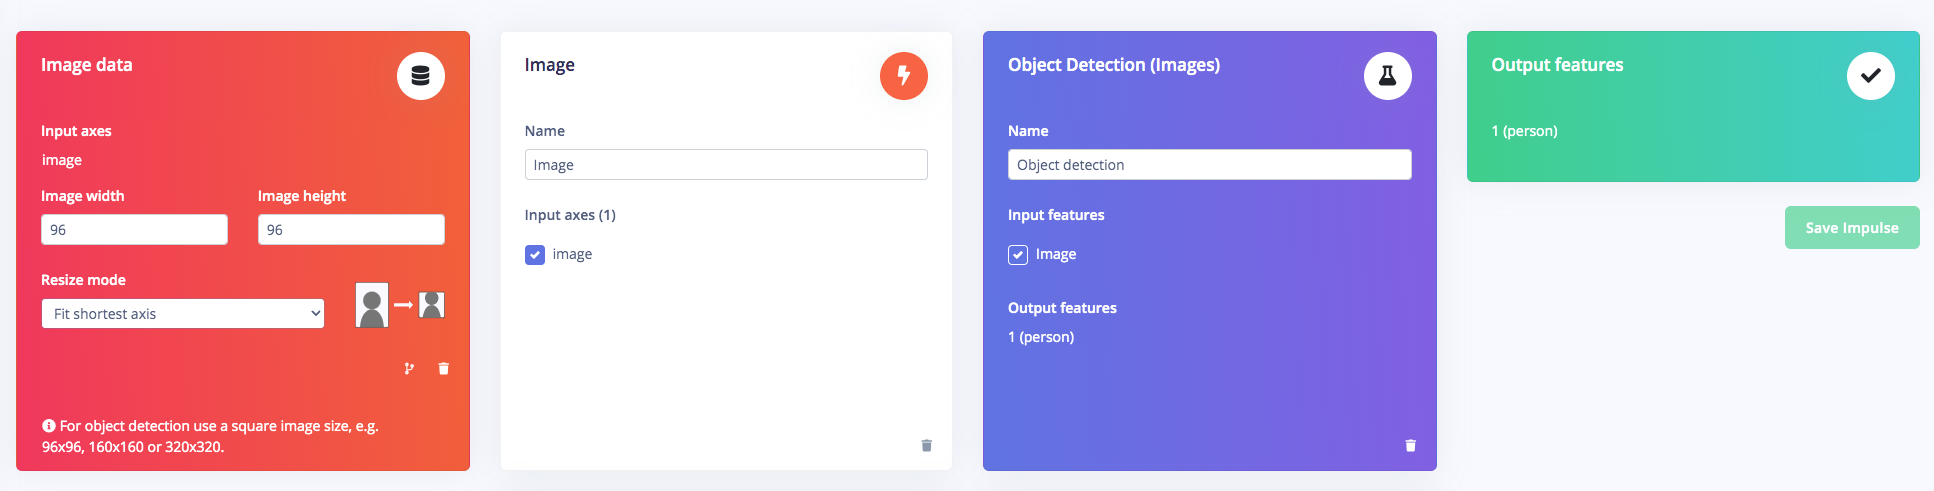
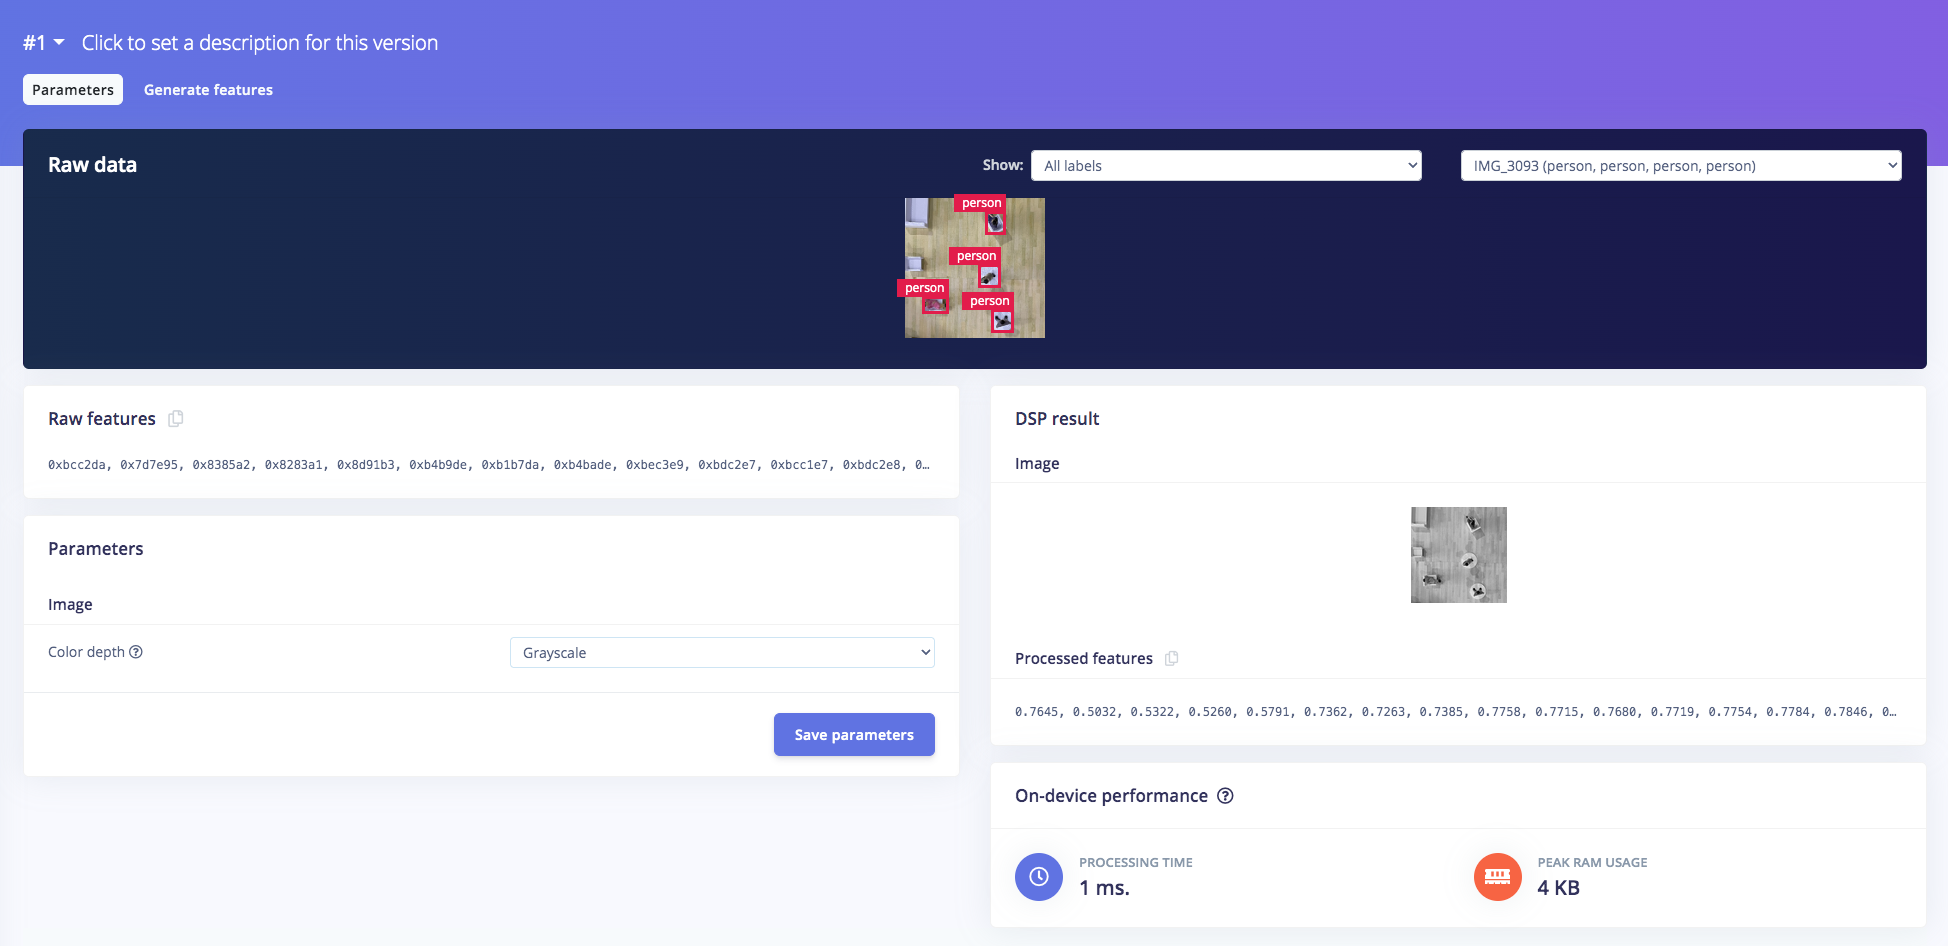
Once you have the dataset ready, go to Create Impulse and set 96 x 96 as image width - height (this help in keeping the ML model small in memory size). Then choose Fit shortest axis, and choose Image and Object Detection as learning blocks.
Go to Image parameter section, select color depth as Grayscale then press Save parameters. Then click on Generate and navigate to Object Detection section, and leave training setting for Neural Network as it is — in our case is quite balanced pre-trained model, then we choose FOMO (MobileNet V2 0.35). Train the model by press the Start training.. and you can see the progress.
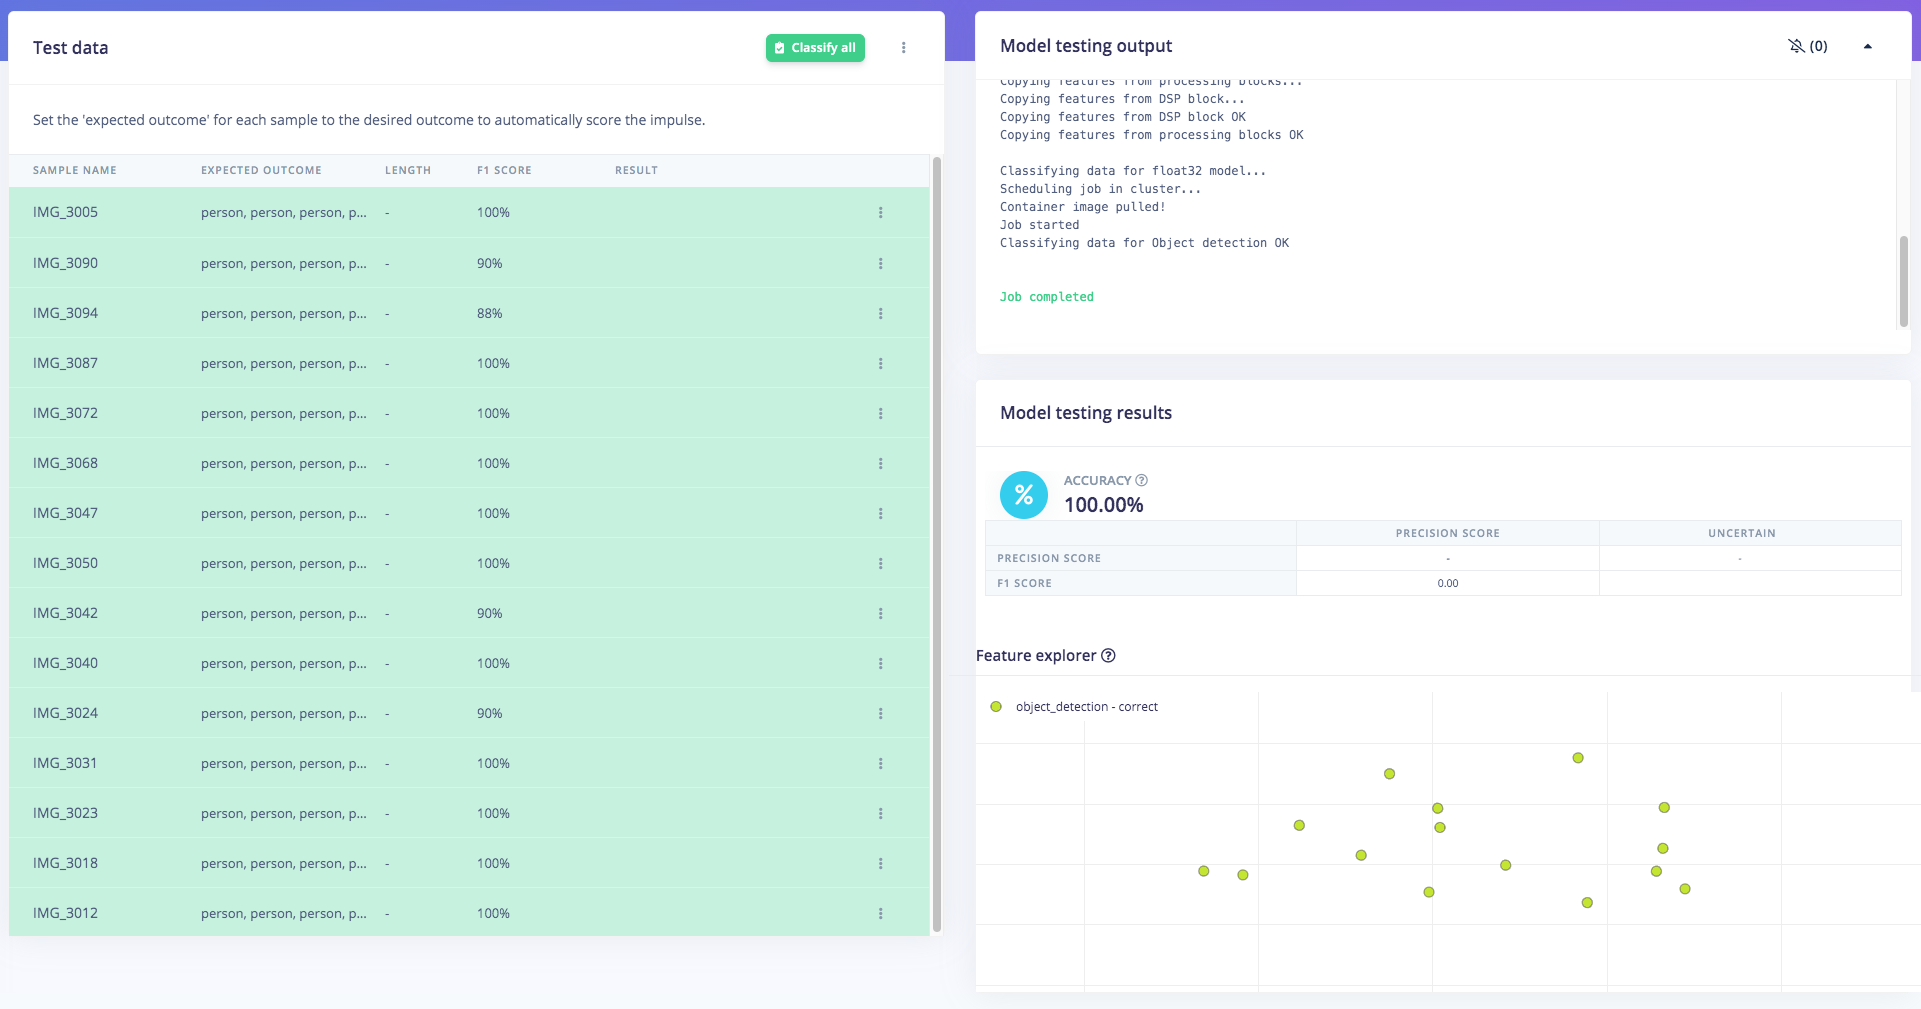
If everything is OK, then we can test the model, go to Model Testing section and click Classify all. Our result is above 90%, then we can move on to the next step — deployment.
![]()
![]()
![]()
-
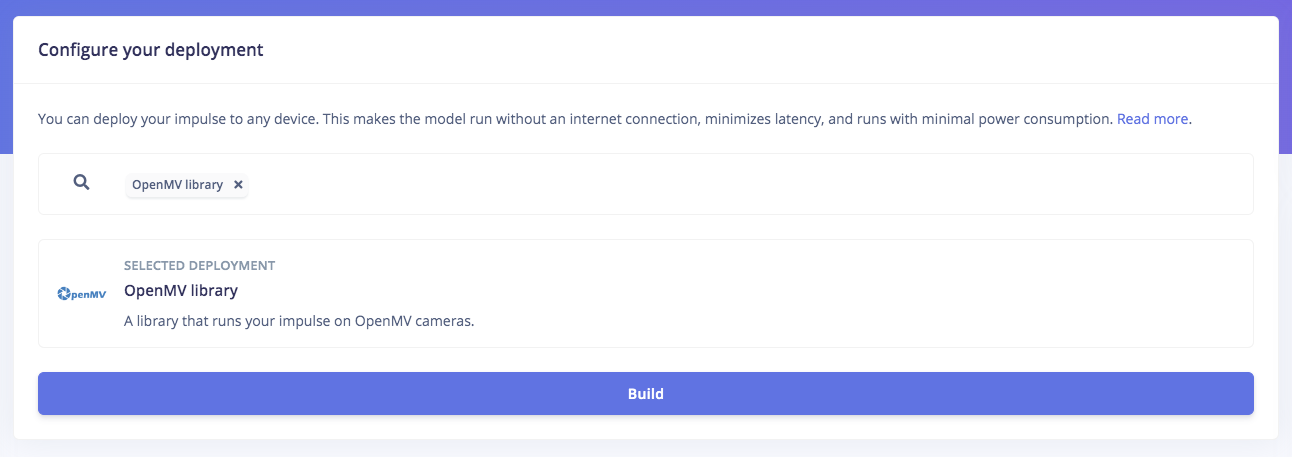
4Deploy to OpenMV firmware and test it
To use the OpenMV firmware, you will need the OpenMV IDE installed in your computer. Once you have the IDE ready, if you check the downloaded zip folder you will find a number of files. We will need the following files: edge_impulse_firmware_arduino_nicla_vision.bin and ei_object_detection.py.
The next step is loading the downloaded firmware containing the ML model to the Nicla Vision board. So go back to OpenMV and go to Tools -> Run Bootloader (Load Firmware), select the .bin file in the unzipped folder, and click Run.
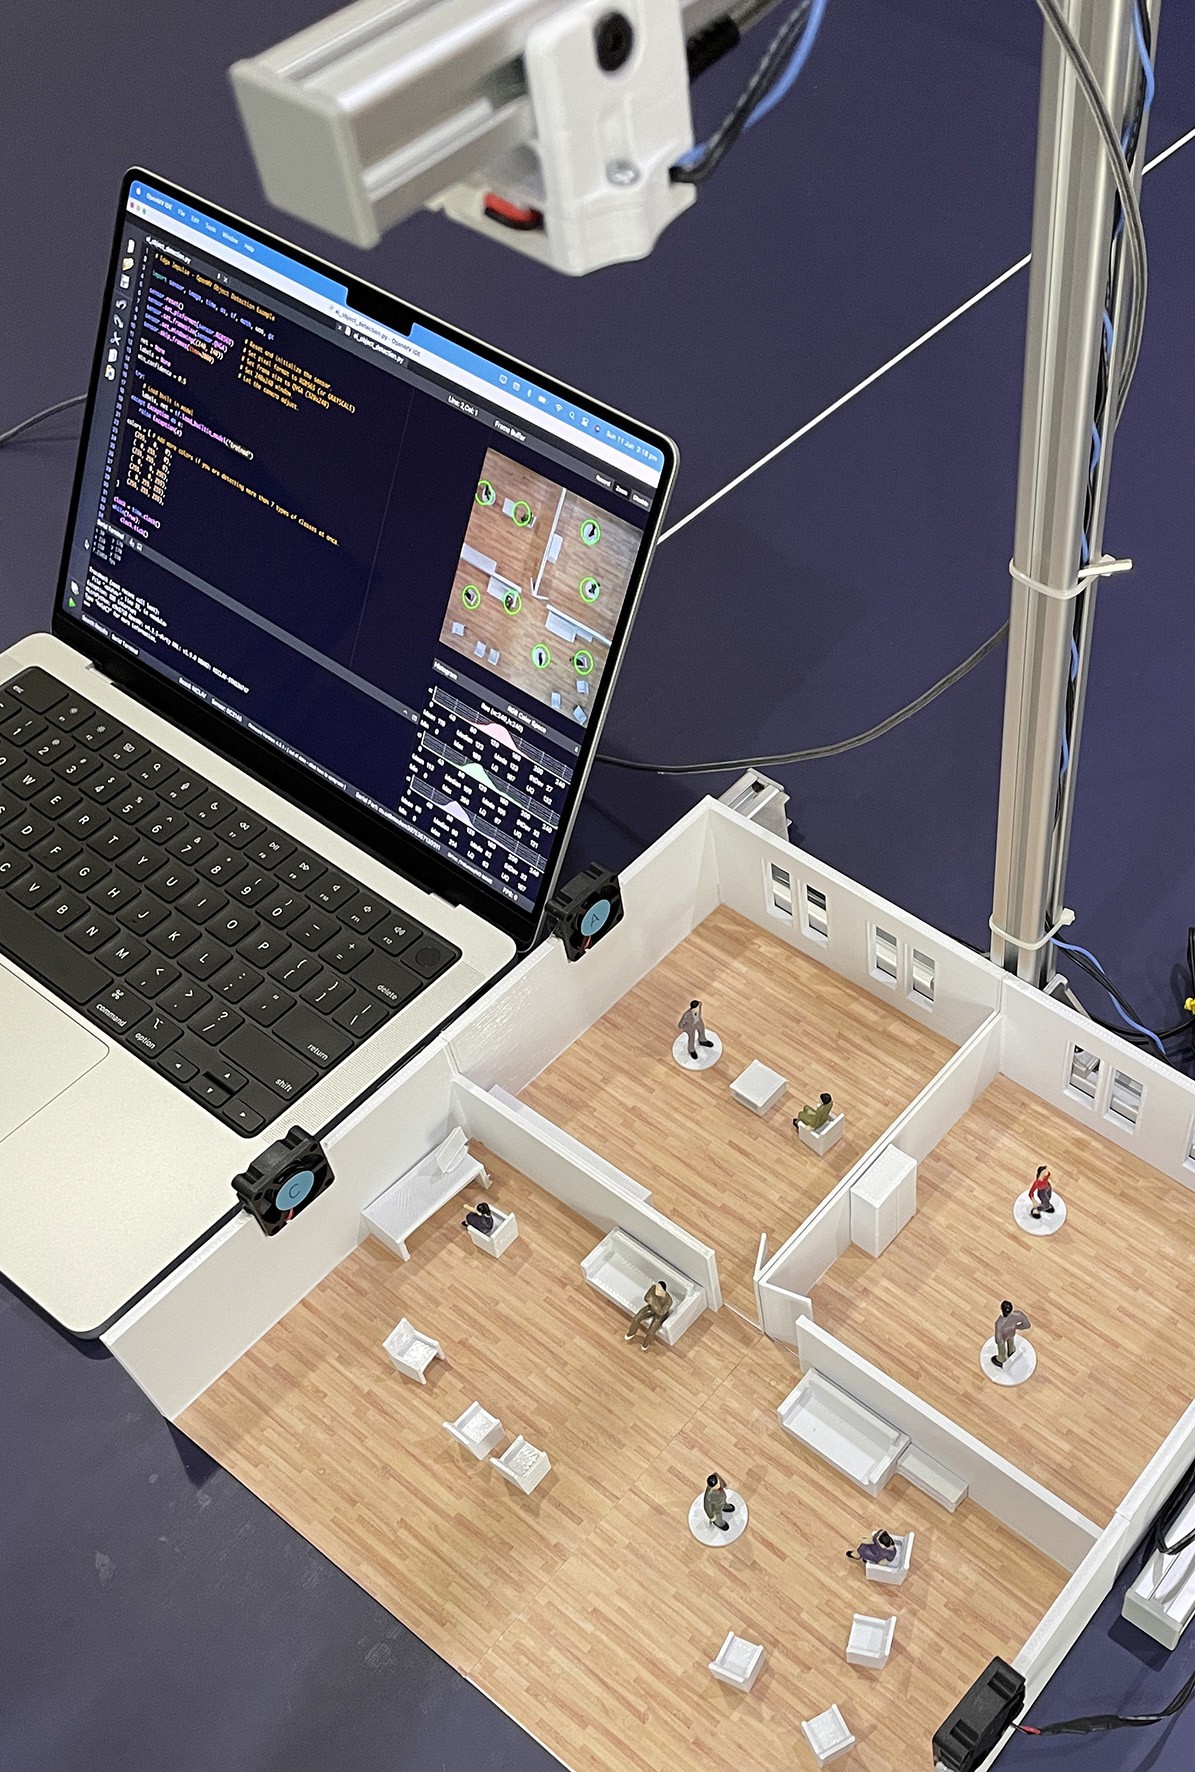
Next, we will run the python code. Go to File -> Open File and select the .py python file from the unzipped folder. Once the file is opened, connect the Nicla Vision board, select the serial/com port and click the green “play” button. The program should be running now and you can see the FOMO object detection will run live on a small window.
![]()
![]()
![]()
-
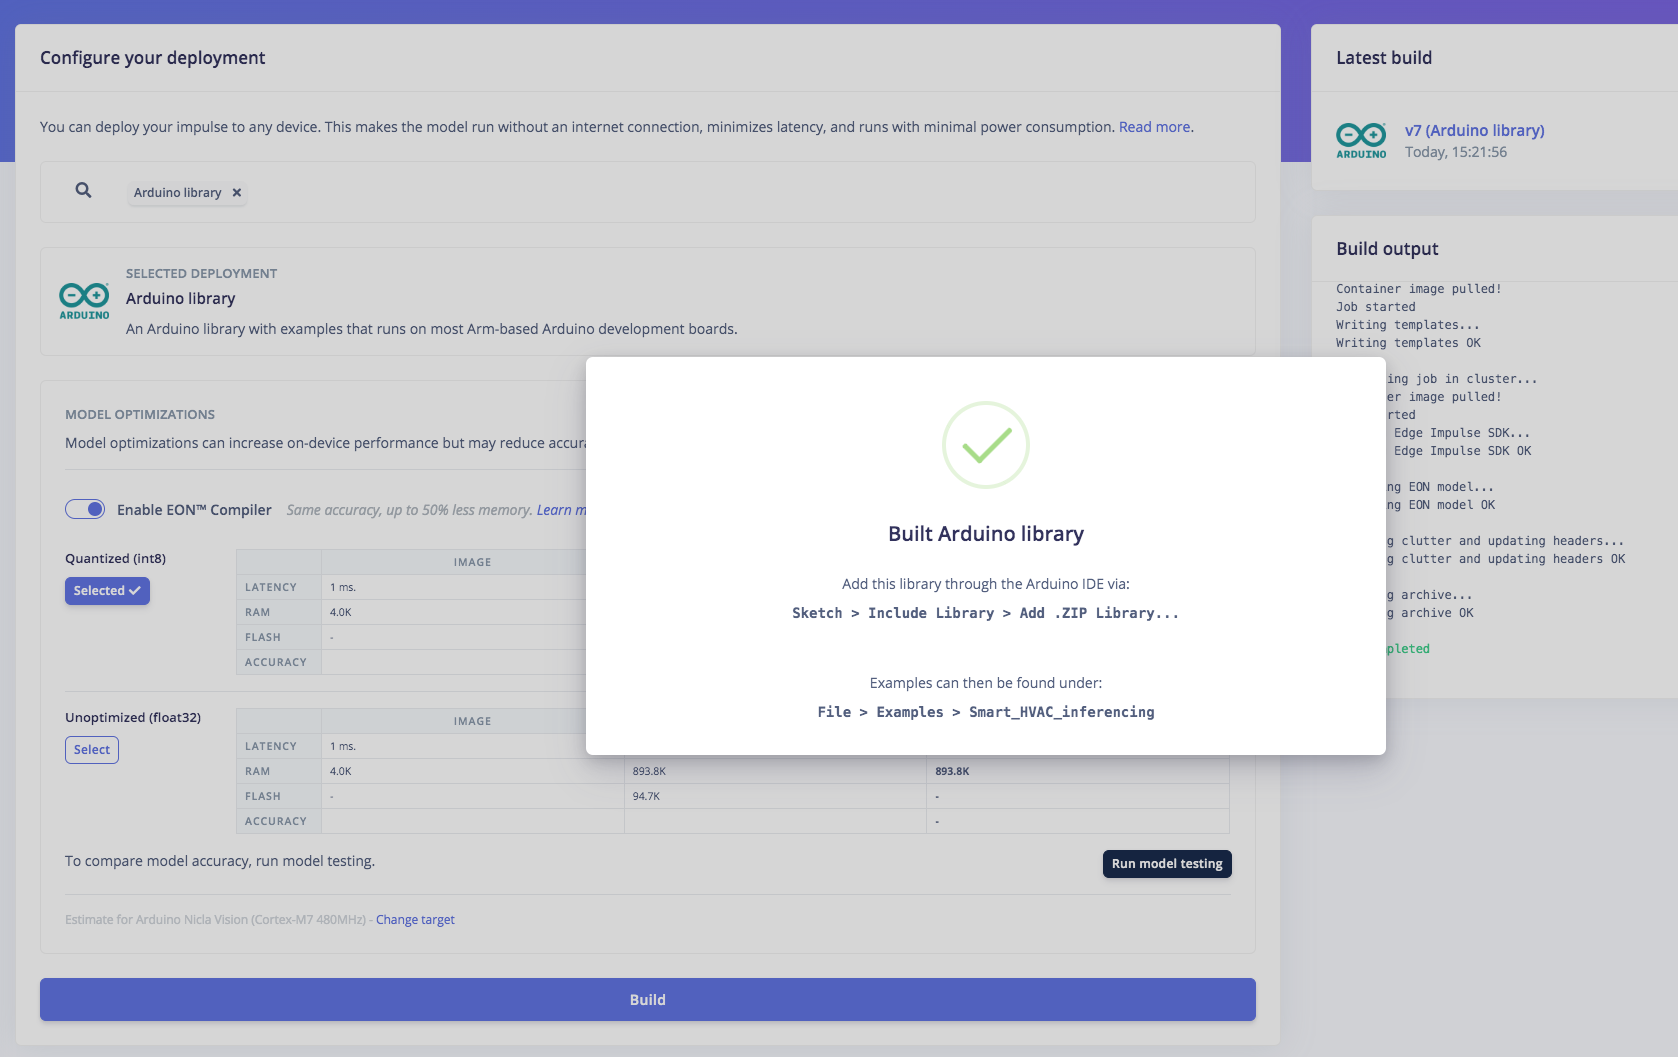
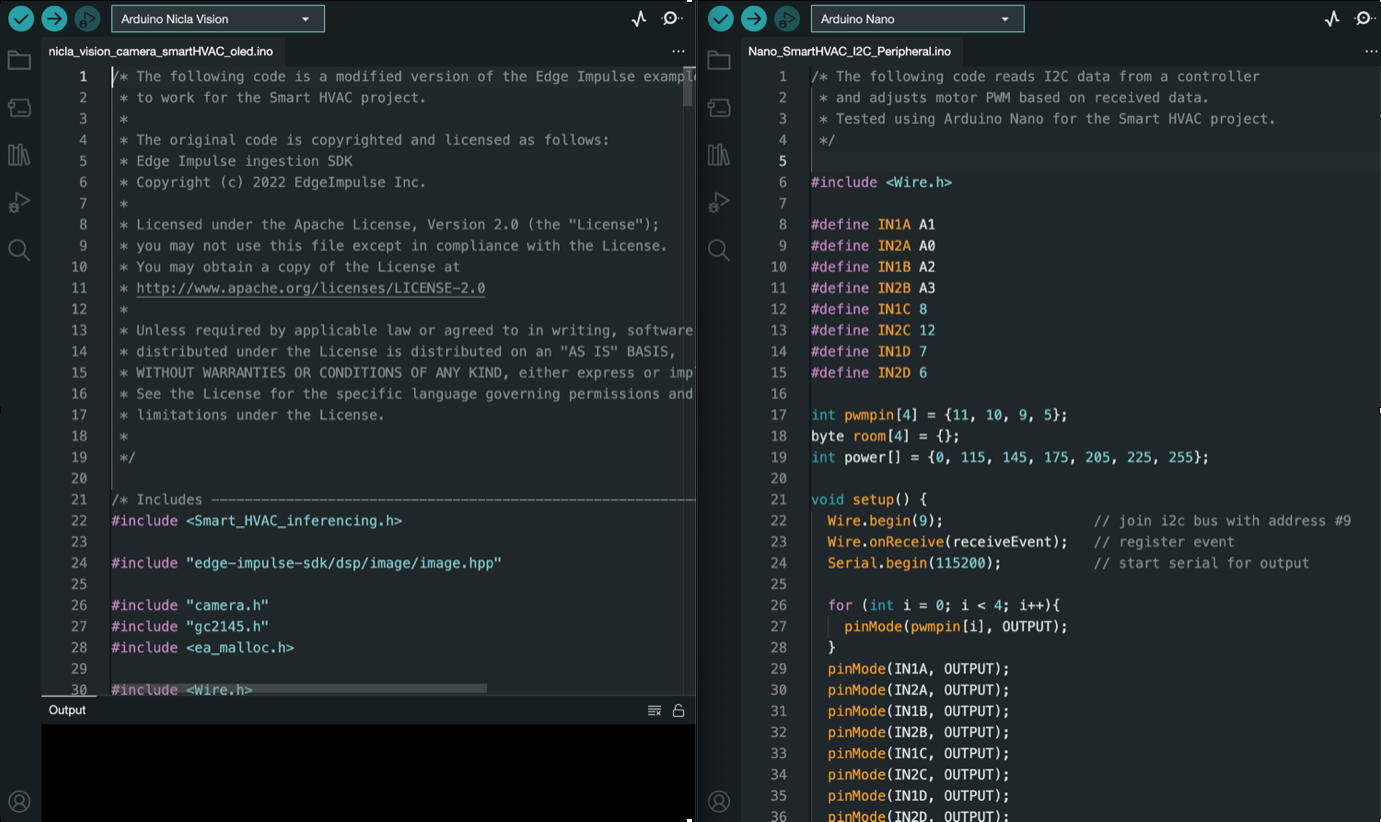
5Deploy and Build an Arduino program
You should have the Arduino IDE installed on your computer for the following step. Once the Edge Impulse Arduino Firmware is built, downloaded and unzipped, you should download the nicla_vision_camera_smartHVAC_oled.ino code which can be download in the Files Tab and place it inside the unzipped folder from Edge Impulse. Once the .ino code is inside Edge Impulse unzipped folder, move it to your Arduino folder on your computer. Now you can upload the .ino code to your Nicla Vision board via the Arduino IDE.
The .ino code is a modified version of the Edge Impulse example code for object detection on Nicla Vision. The modification adds capability to display person count on each room to the OLED screen and act as the controller to the Arduino Nano I2C peripheral. The code distinguishes the four rooms using four quadrants and by knowing the X, Y coordinates of the object’s centroid we can locate the person. The Arduino Nano adjusts the fan motor using PWM based on the number of person present in the room.
Nano_SmartHVAC_I2C_Peripheral.ino also can be download in the Files Tab above.
![]()
![]()
Implement this to breadboard prototype:
-
6Conclusion
Finally, we have successfully implemented this object detection model into Arduino Nicla Vision and use the data captured from the camera to automatically control the HVAC system’s fans’ power intensity and then display the occupancy number and power meter for each zones. I believe this Proof of Concept project can be implemented in the real world HVAC system, so that the goal of optimizing room temperature and saving energy can be achieved for a better more sustainable future.
Check again our complete demo video:
Smart HVAC System
Smart HVAC System that can optimize energy consumption by adjusting the air conditioning power intensity in different zones inside an office


Discussions
Become a Hackaday.io Member
Create an account to leave a comment. Already have an account? Log In.