 Ricardo Sappia
-
1Adapting the ESP 32 S3 Mini module
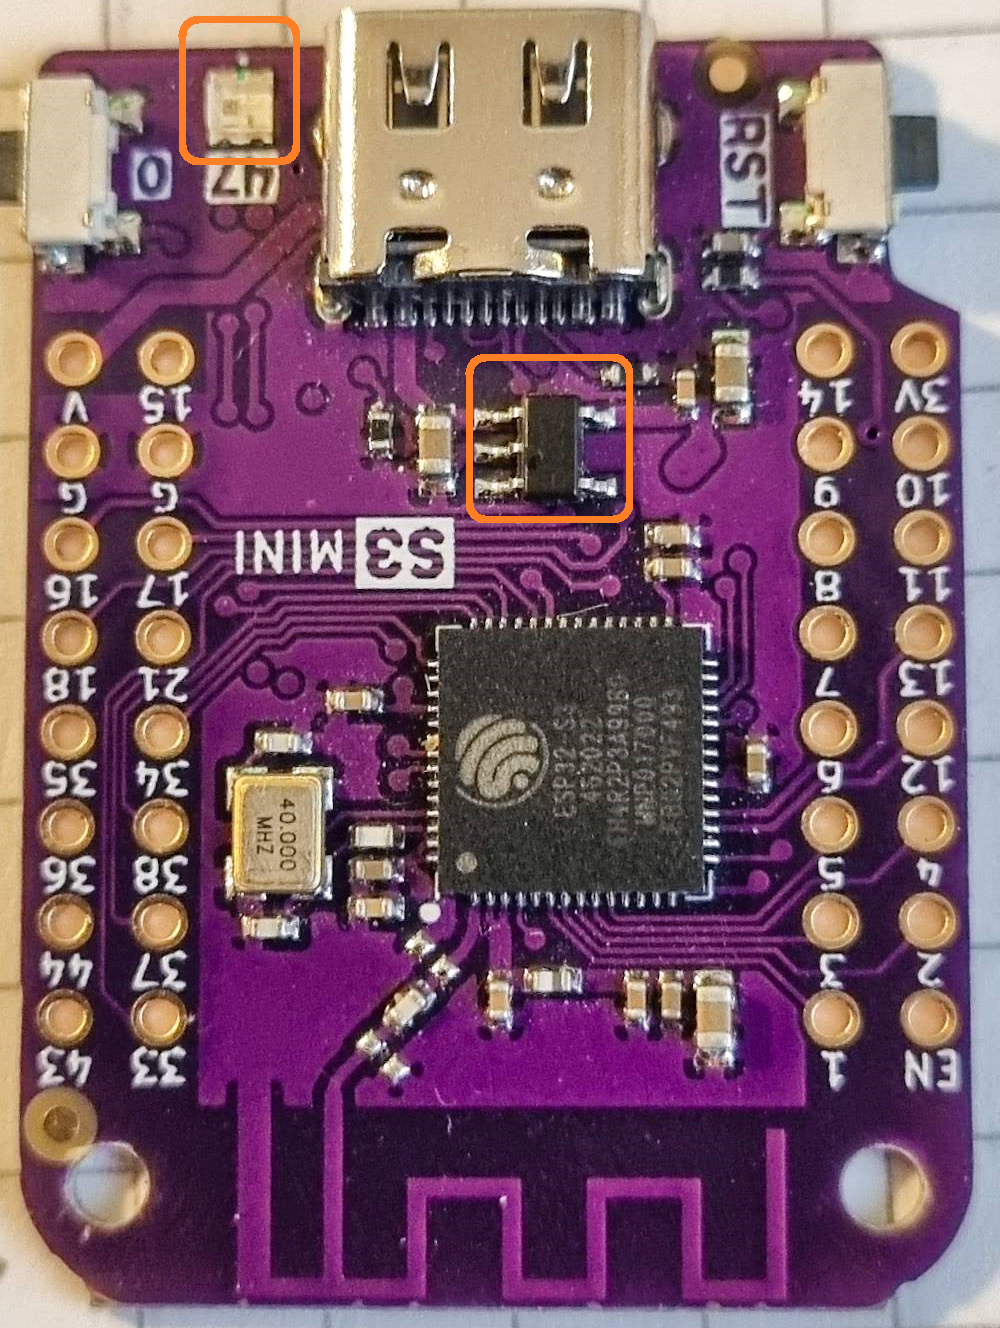
Let us begin by removing both components marked in the picture below.
![]()
By removing the integrated RGB LED we are saving some precious mA and by upgrading the voltage regulator (next step) we are expanding our battery range by using a better regulator with a lower LDO.
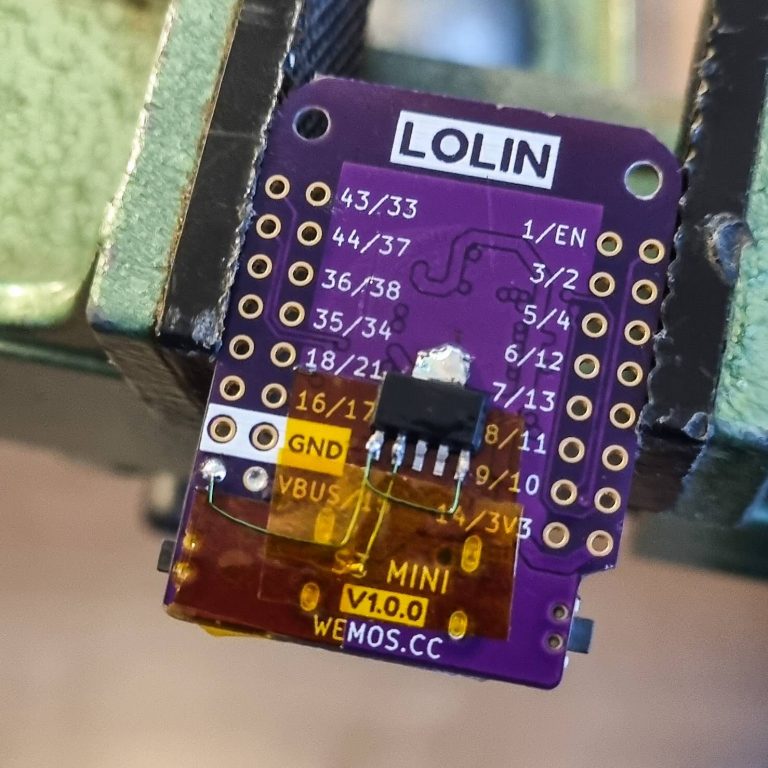
Once both components have been removed, our board should look like in the following picture
![]()
-
2New voltage regulator
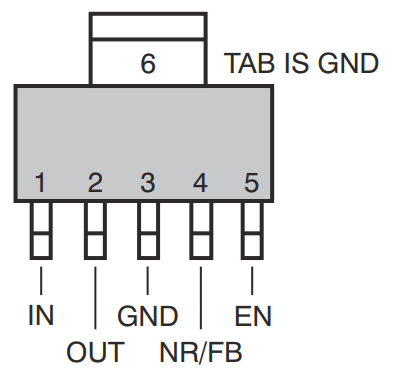
Our next step will be to solder the new voltage regulator. For this step, I am using the TPS73733DCQR Low-Dropout Regulator . To integrate it into our module, a little surgery will be required. Here I am sharing what worked for me, but I am sure there might be a lot of more (and elegant) options ;) .
The following pinout applies to the TPS73733DCQR:
![]()
![]()
One important point to mention is that at the end, I replaced the VBUS and the +3V3 with a thicker wire.
-
3Cabling
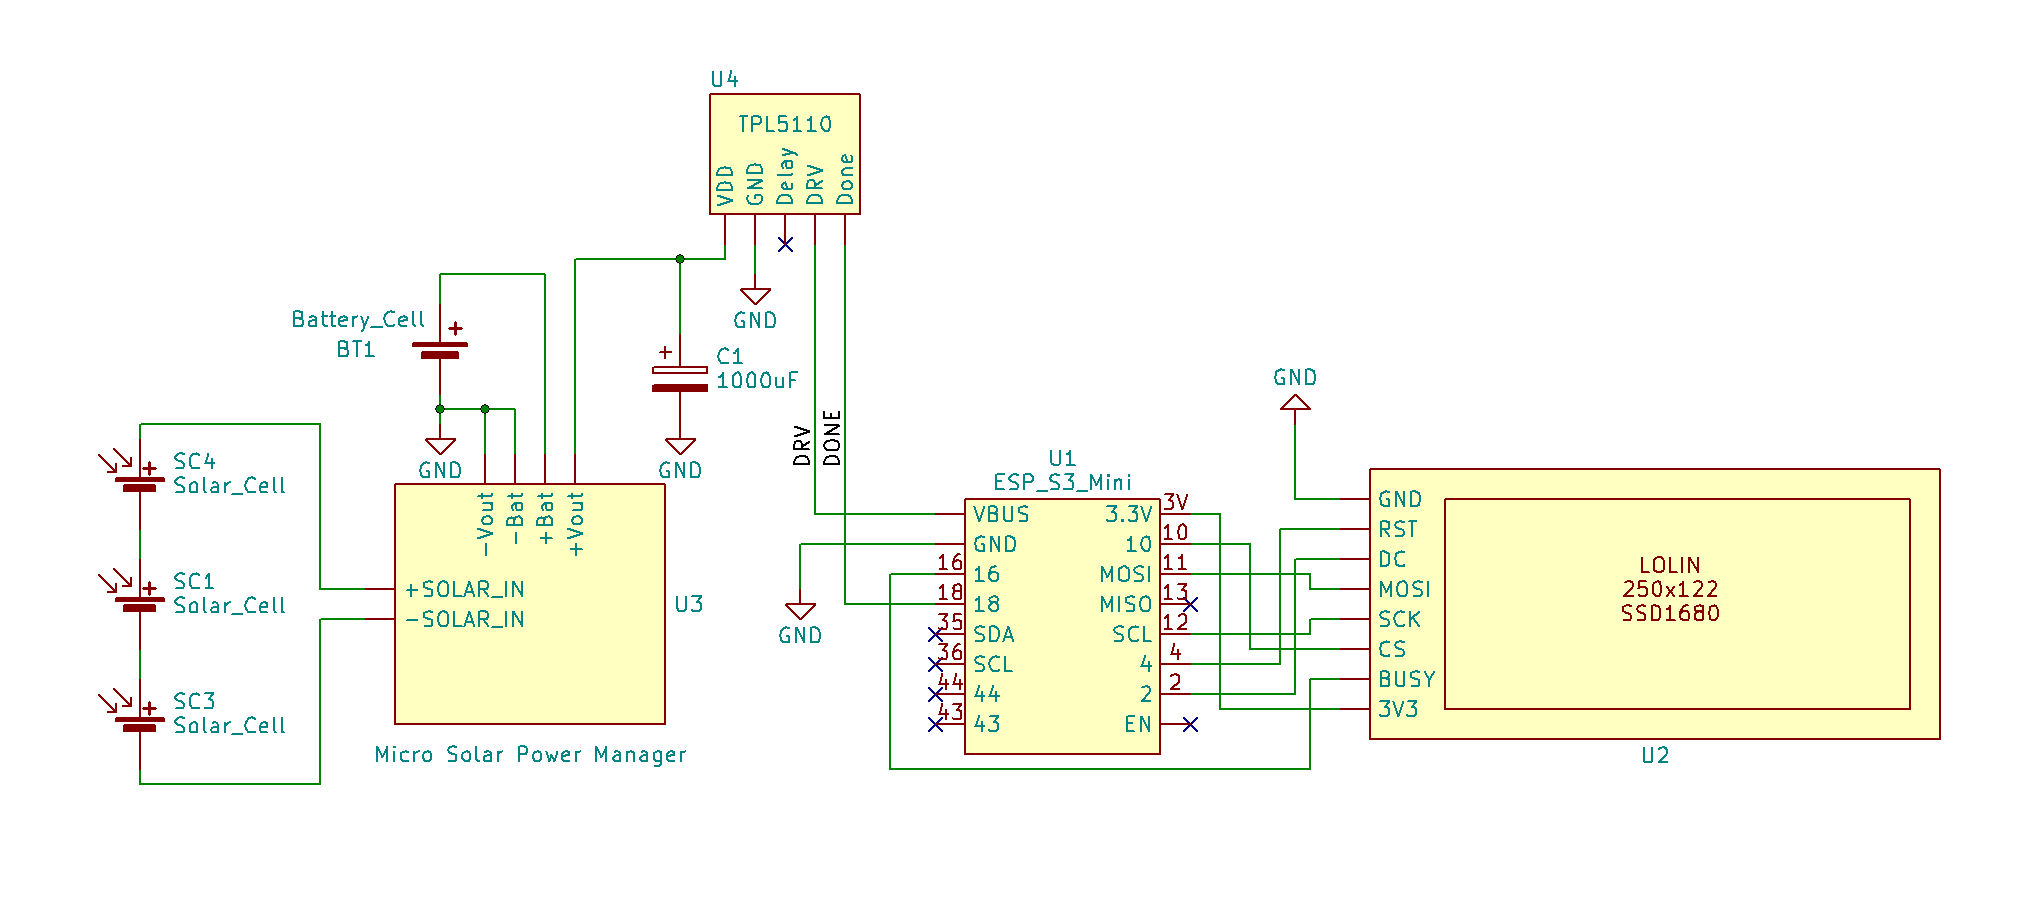
Once this step has been done, we can proceed to interconnect the modules as shown in the following schematic:
![]() For the cabling, it was helpful to have the chassis already printed so the cable lengths could be better estimated with all modules in place.
For the cabling, it was helpful to have the chassis already printed so the cable lengths could be better estimated with all modules in place.![]()
![]()
![]()
![]()
The ESP is a power-hungry component, mostly when it is trying to establish a WiFi connection. Once I mounted everything together I faced some issues with the TPL5110 not being able to keep the MOSFET switched on. After trying several fixes for this issue I ended up adding a 1000uF capacitor directly to the battery connector (see schematic). I tried with smaller values but 1000uF was the only one that provided a stable and reliable performance.
-
4Software
I don't take any credit for the software running on this project. The original source was written by David Bird and the code can be found on his GitHub repo.
An adapted version of the code for this project can be found under the following repository: Solar_E-Ink_Weather_Station
Make sure owm_credentials.h is properly configured so the weather information can be retrieved from www.openweathermap.org
-
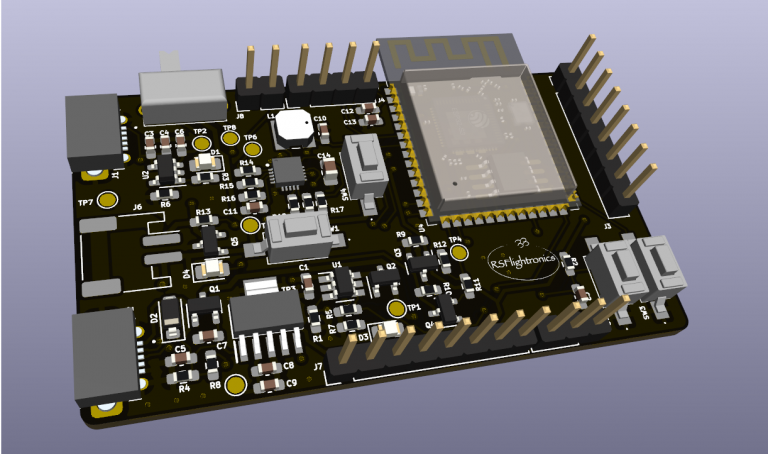
5Next steps
A dedicated PCB with an even more optimized power consumption and several additional features is almost ready. Here is a preview:
![]()
Solar E-Ink Weather Station
A little solar E-Ink weather station that fits in a window frame

 For the cabling, it was helpful to have the chassis already printed so the cable lengths could be better estimated with all modules in place.


Discussions
Become a Hackaday.io Member
Create an account to leave a comment. Already have an account? Log In.