Close
0%
0%

Escalibur

Four adventurers craft a knightly game where you challenge destiny to become the chosen one by extracting Excalibur from its stone.

Public Chat
Similar projects worth following
215 views
0 followers
"We've crafted a game centered around Excalibur. The goal is to extract the sword from the stone to become a knight. Yet, it's no easy feat; a series of three intricate trials will challenge you. To determine if you're the chosen one, you'll be tested on your generosity, sense of direction, and warrior spirit."

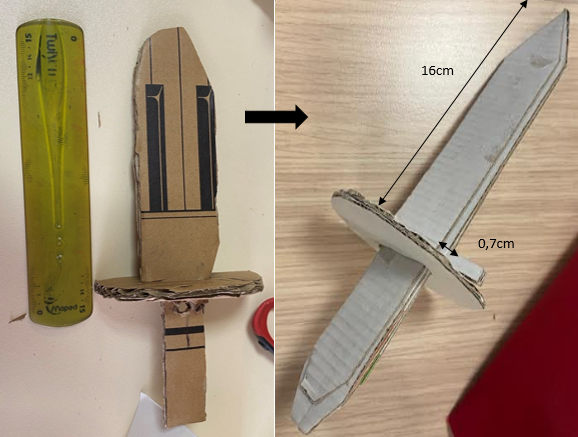
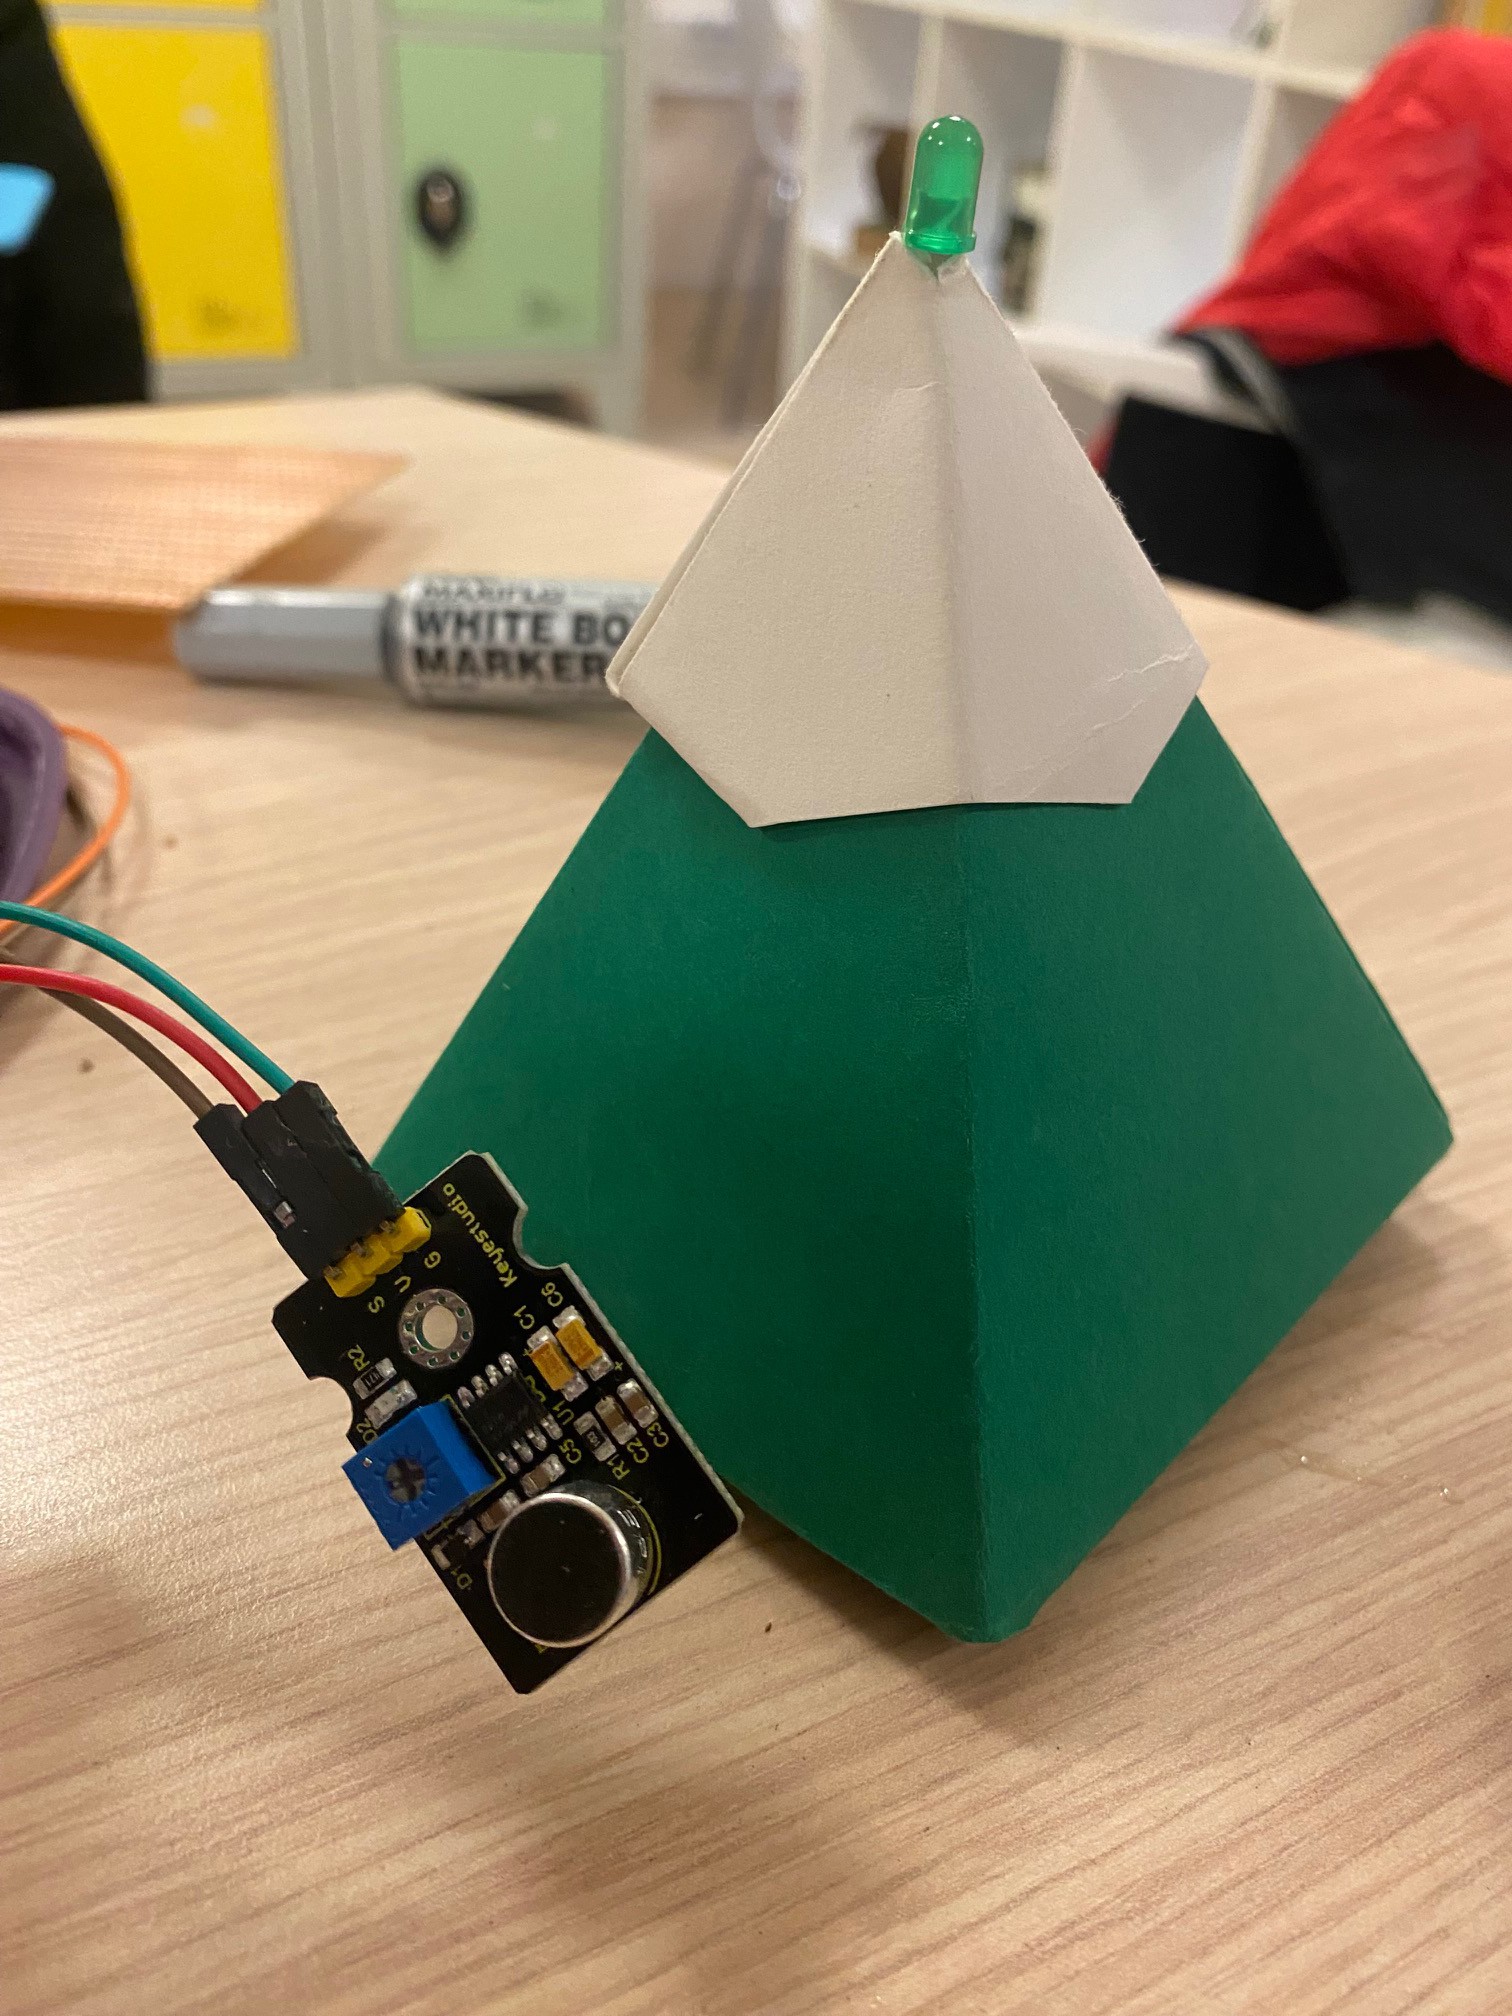
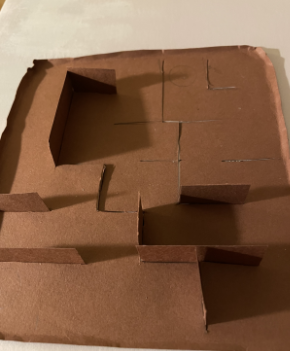
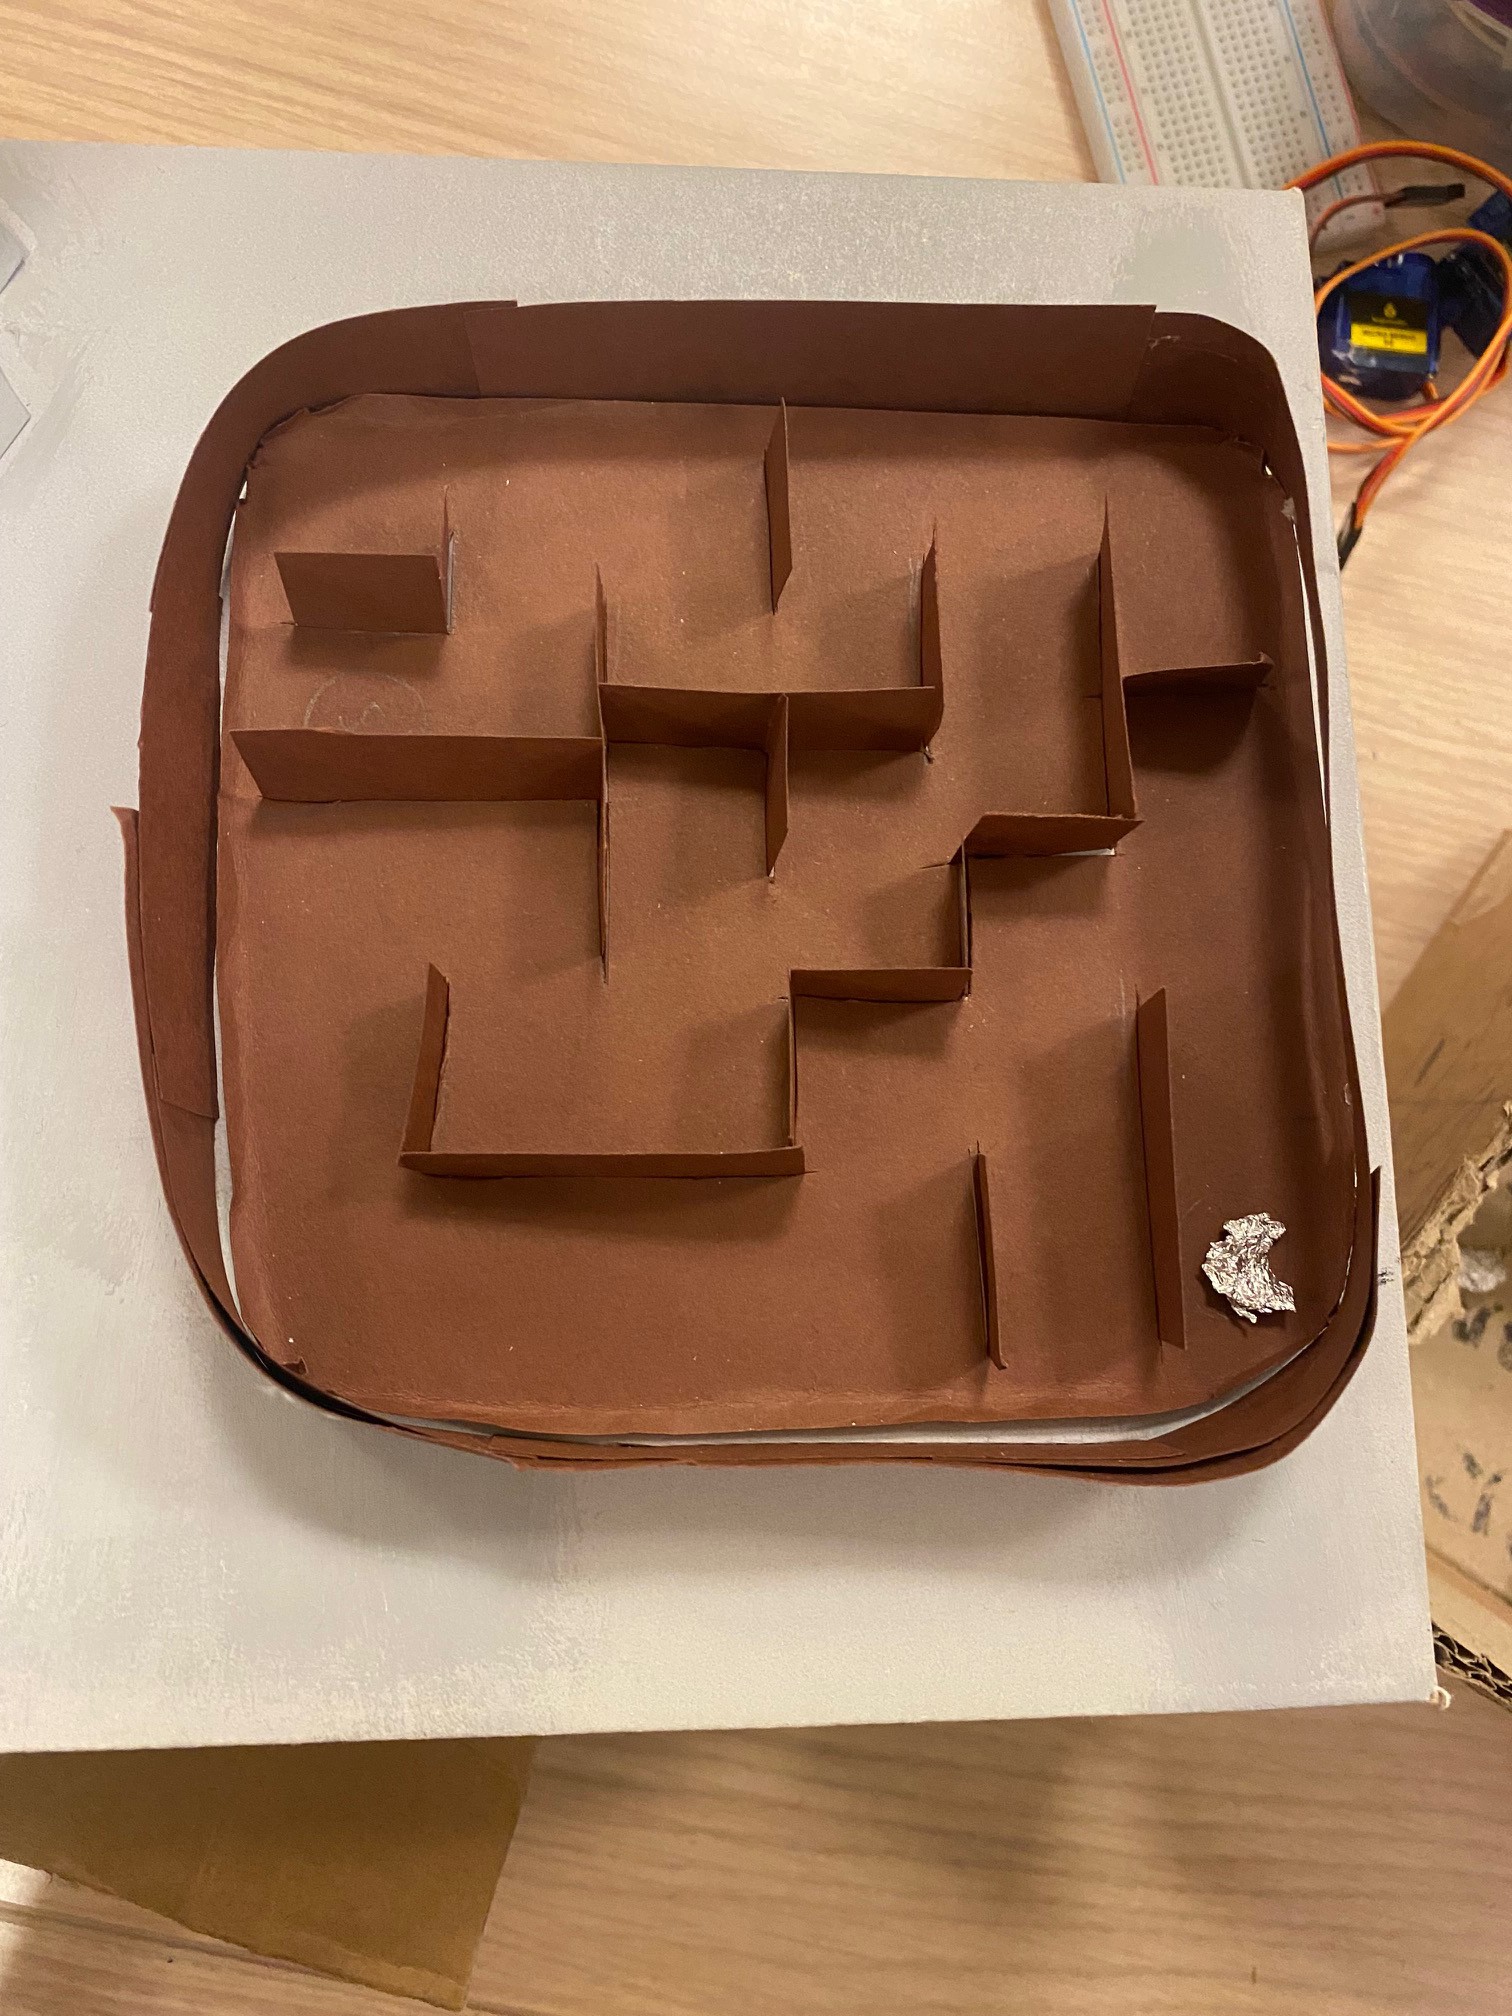
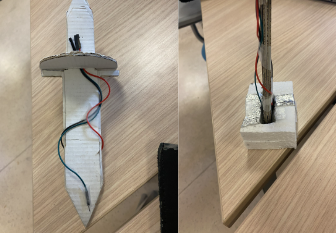
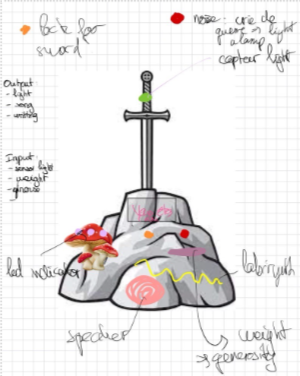
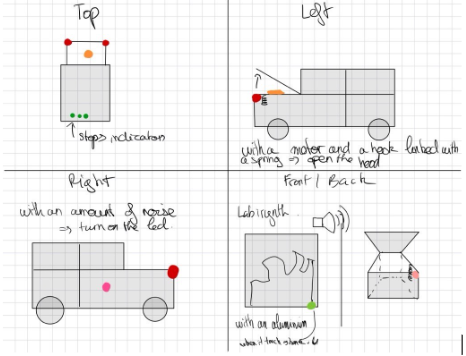
After numerous changes in our project, the final game unfolds in three major stages. To solve the puzzle and release Excalibur from its stone, you must successfully light up three LEDs. A room and a magnet are at your disposal. Also a voice will give you a riddle to give you the three themes. The first LED illuminates by solving a hidden labyrinth using a ball and a magnet. The goal is to blindly guide the ball with the magnet to a specific point, triggering the first LED. The second LED lights up by shouting loudly. Finally, the last one lights up by remembering to place a coin on the balcony. Now, the sword is free!

Code1.png

We did all our coding on Arduino. We did them all separately according to the different steps, that is, for the voice, the collision sensor, the LEDs, the LCD screen, the weight sensor, and the motors.This code snippet includes several libraries and defines constants and variables for various sensors and components. It sets up connections for sound, collision, and load sensors, as well as an OLED display. The specific functionalities include monitoring sound levels, detecting collisions, and checking the load level, while utilizing the Adafruit SSD1306 library for controlling the OLED display. The pin assignments and threshold values for each sensor are also specified in this part of the code.

Portable Network Graphics (PNG) - 39.49 kB - 01/11/2024 at 19:19

Preview
Download

Code2.png

The setup() function configures the initial settings of the program. It declares pins for components such as sound, collision, and load, initializes serial ports, and sets up the OLED display. Additionally, it initializes default values and briefly displays a startup screen on the OLED display. In summary, this part establishes the initial conditions and connections required for the proper functioning of the program.

Portable Network Graphics (PNG) - 44.53 kB - 01/11/2024 at 19:20

Preview
Download

Code3.png

The loop() function in the code continuously monitors sound, collision, and load sensors. For the sound sensor, it turns on an LED if the sound level exceeds a predefined threshold. For the collision sensor, it activates an LED when the sensor is triggered. Regarding the load sensor, it illuminates an LED if the load level surpasses a specific threshold. Detection states are continuously updated. In summary, this continuous loop monitors and responds to changes in sensor readings, indicating different conditions through LEDs and the serial output.

Portable Network Graphics (PNG) - 32.75 kB - 01/11/2024 at 19:20

Preview
Download

Code4.png

This code segment introduces a delay of 500 milliseconds (0.5 seconds) before performing a conditional check. If both the collision state (`collisionState`) and the load state (`loadState`) are HIGH, a victory message is displayed on the OLED screen. The text includes congratulations, identifying the player as "Arthur," and references elements such as "keyes" and "keyestudio." Finally, there is an additional delay of 250 milliseconds to allow the display to remain visible for a brief period.

Portable Network Graphics (PNG) - 23.60 kB - 01/11/2024 at 19:20

Preview
Download

Cables.jpg

We tried to make clean connections to avoid getting too confused.

JPEG Image - 135.76 kB - 01/11/2024 at 19:31

Preview
Download

View all 6 files

  • 3 × Led Fiber Optics / Emitters
  • 1 × Collision sensor
  • 1 × Weight sensor
  • 1 × speaker
  • 1 × motors

View all 10 components

  • The final EscaliGame

    monteilagathe01/12/2024 at 15:58 0 comments

    To conclude, our project was long and challenging.

     It's important to note that the four of us had almost no prior experience with Arduino and were not familiar with this type of project. Despite this, we are still satisfied with our result, although there are some regrets. The major issue was the lack of components due to significant delays, such as the speaker, the MP3 module, and the load cell. While we couldn't proceed without the speaker, we attempted to address other issues. For instance, we replaced the load cell sensor with an alternative when facing difficulties with its availability. Another challenge involved the motors; one out of two was operational, while the other didn't function. Unfortunately, due to the delayed arrival of sensors, we didn't have sufficient time to resolve this issue and opted to overlook it.

    Finally, we will discuss together whether we want to pursue this project, consolidate everything, and potentially learn to use the 3D printer to create the game with a slightly better aesthetic.


  • Congratulations on becoming the chosen one

    monteilagathe01/12/2024 at 15:47 0 comments

    Victory, LCD display :

    The final step after removing the sword was the victory display for the player, congratulating them on their hard work. 

    For this, we decided to use a screen that activates when the three LEDs are lit and displays the message 'Congratulations, you are Arthur,' referencing the legend of King Arthur as a nod to emphasize our theme. 

  • The strength to pull out the sword.

    monteilagathe01/12/2024 at 15:44 0 comments

    The sword, motors :

    The goal of our game is to release the sword locked by a structure. For this structure to activate, all three LEDs associated with each stage must remain lit simultaneously. We encountered an issue that prevents it from working, which we will address shortly after showing you the evolution of the sword.

    Try to find how to take off the sword : 

    For the selection of our final sword, we based it on a cardboard prototype that we gradually refined over time to achieve a size suitable for our box and the notch to fit it. In the end, we made our sword from a sturdier and neutral (white) cardboard for aesthetic reasons.  The final thickness at the widest part of the blade is 0.7cm, and its length is 16cm.

    As we built the system during the long weekend before the holidays we also tried to see if it works on the box. For this system we thought about 2 disks that would have ¼ removed so the guard of the sword could go inside of it. Thanks to the 2-servo motor that we have we can make the 2 disks move so they will unlock the sword and move it upward a little. We had an issue with the motors because they should be moving together but we didn’t managed to do it. We wanted to hide this system in a fake rock but we didn’t have time to do it.

    Creation of the blocking infrastructure and release mechanism : 

    Final infrastructure :

  • Third challenge: The generosity of a warrior.

    monteilagathe01/12/2024 at 15:31 0 comments

    Balcony, weight sensor :

    We chose to represent this quality through a balcony, referencing the well-known balcony scenes in children's tales where the knight courts his princess. His generosity is expressed through his love for the princess, but we chose a room setting as it signifies affluence.

    The generosity test involved placing a coin on the balcony, activating the final LED with a weight detector. However, we encountered issues with it. Due to the coin not being heavy enough, the sensor failed to detect it. We also considered using a conductive copper material that could have been detected by our sensor. However, due to time constraints, we opted to stick with our weight sensor.

  • The second challenge: The echo of the mountain

    monteilagathe01/12/2024 at 15:27 0 comments

    Mountain, sound sensor : 

    The war scream step involves the player shouting, and if it's loud enough, the sound sensor recognizes it and lights up the lamp. For this step, we did not encounter any issues, and thanks to the Arduino code, we were able to select the required decibel level.

  • The first challenge: finding one's way.

    monteilagathe01/12/2024 at 15:20 0 comments

    The labyrinth :

    The labyrinth challenge featured a collision detector, and the objective was to guide the ball through the maze, activating the LED by touching the collision sensor. Successfully completing the challenge signaled progress in the quest for Excalibur.

    We encountered some difficulties and changed our idea along the way. Initially, we wanted to create a hidden labyrinth, meaning placing a ball within the course and a piece of aluminum at the finish, then sealing the labyrinth. The objective was to blindly guide the ball using a magnet until it reached the aluminum, and, through its properties and a code, illuminate the LED. In the end, we decided to keep our labyrinth open as it aligned better with our theme. We chose to make it necessary to touch the collision sensor with the ball to illuminate the LED associated with that step.

    We also had to create our labyrinth twice because the first one was too large in relation to the box we used as a rock.


  • Second step of the game : Fail of the riddle

    monteilagathe01/12/2024 at 15:06 0 comments

    Speaker :

    Initially, the idea was that a voice would activate when someone placed their hand on the sword, presenting a riddle to guide the knight.

     The riddle : "To be the best knight, Excalibur has to be removed. But it will not be an easy task because you will have to prove that you're qualified for it. We will train you on the three major points to become a knight. At first, you will have to show us that you can always find your way, even if you're totally lost. Then you will have to show us how determined you are to become one; for this, you must make the mountain resonate. At least, a knight has to be generous towards the person he protects."

     In the end, the speaker was never integrated, because unfortunately it never arrived.

    We couldn't use it due to the absence of surrounding components such as the speaker's motherboard.

  • First step of the game : The fail of light sensor

    monteilagathe01/12/2024 at 15:03 0 comments

    Light sensor :

    At first, we wanted to be able to take the sword fully out of the rock. But one problem persisted: we had the light sensor at the top of the sword that needed cables to be able to work properly. We tried to fix cables on the sword and to put 3 distinct parts of aluminium in a receptacle inside of the box. However, this system is not perfect and fails often. As we did not have time to work more on it, we came up with one solution to improve the project in the future. We could use magnet instead of aluminium so that the cables would be attracted to the magnet and therefore connect properly to the rest of the system.

  • Starting from the 5th session, the final theme.

    monteilagathe01/12/2024 at 15:01 0 comments

    EscaliGame :

    After exploring various ideas, we settled on the Excalibur sword game for our final project. The concept involved creating a game with different mini-games, a little bite as an escape game. 

  • From the third to the fifth week, ideas are flowing.

    monteilagathe01/12/2024 at 14:59 0 comments

    Car and spider ideas :

    3rd week: 
    We made a small car using cardborad. The car will make noise when it collides with a wall, and it is going to light the car headlights when the sensor catch the noise. 

     
    4th week: 
    During this class we wanted to upgrade our car by implementing more inputs and outputs. We wanted to create a little game on the car with three obstacles. When a minigame is done, a light is lit. For the first one, we kept the noise sensor that turn on le led of the car when we make a certain amount of noise. Then we wanted to create a labyrinth at the back of the car, by using alluminium and retracing the fire design of the car. The last step was to find a way to open the hood of a car. When the three lights are lit, the player won!

    But we needed to make the car move, and focusing on the engine would consume too much time. Being Arduino beginners, we chose to invest this time in training and ensuring good inputs and outputs as required in the end. We explored new ideas, including a giant spider, but it didn't become our final project. The idea was to preserve our basic challenges for the car, such as the ultimate goal of illuminating the spider's two eyes. However, we abandoned this idea because we also desired movement, and the spider's intricate form seemed too complex for our current skill level.

View all 11 project logs

Enjoy this project?

Share

Discussions

Similar Projects

Does this project spark your interest?

Become a member to follow this project and never miss any updates