 WJCarpenter
My design for the tiles around the faucet, shower arm, and tub spout is a blend of aesthetics and pragmatism.
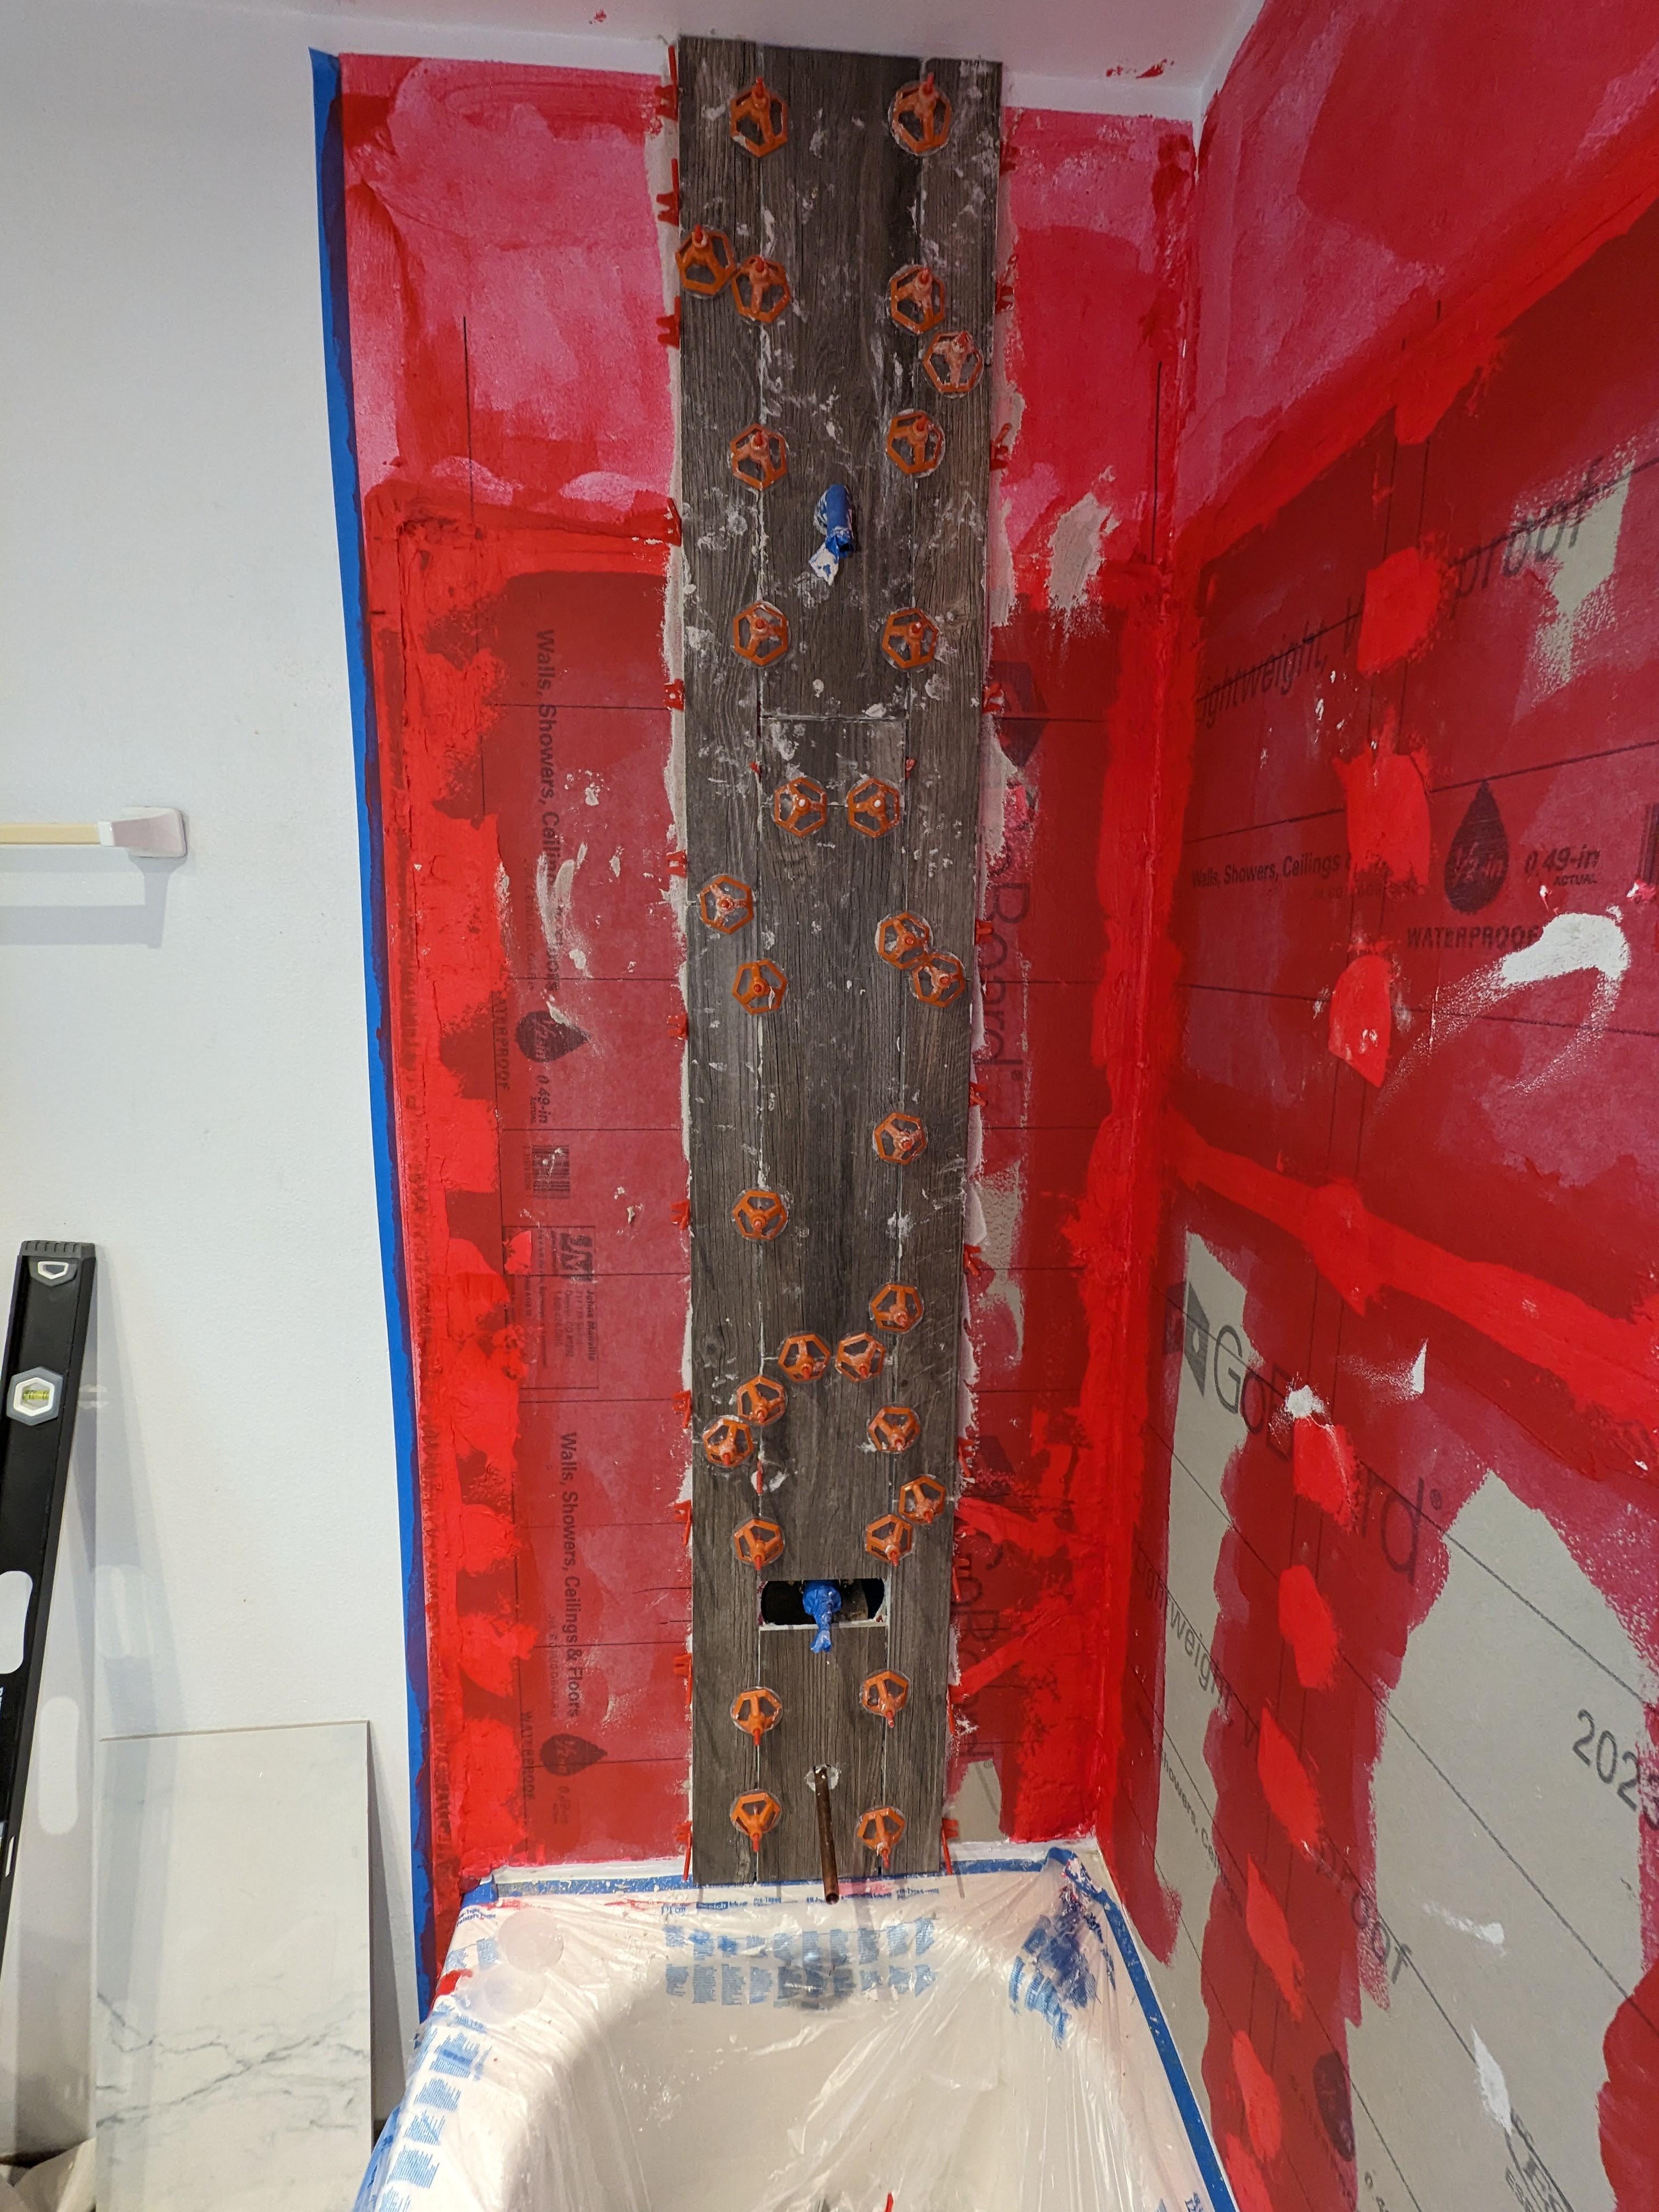
The openings for the shower arm and tub spout tube were simple enough. I made them with a 1 3/8 inch diamond-tipped hole saw. The installation instructions for the faucet called for an approximately six inch circular cut-out. I didn't know how well I could do that with the tools that I have (a wet tile saw and a grinder with a diamond blade). So, I chose contrasting 6x24 inch tiles mounted vertically. These are the same wood-look tiles that I used in the back face of the two niches, With a smaller opening for the faucet, I could use a rectangular opening in the tiles. With six inch wide tiles above and below that opening, I only had to cut the tiles to the right length. The cover plate for the faucet will cover the entire opening. On both sides of that six inch wide tile are three inch wide tiles made by cutting the six inch tiles length-wise. I staggered them so that none of the horizontal seams would line up. The rest of that wall will be the Carrara marble tiles used on the other walls.
Here's a photo. Excuse the messy thinset fingerprints. I'm using the spinny type of spacers with the idea of minimizing lippage. The idea is that you put those red parts in as spacers between tiles. The red parts have a threaded spike coming out of them. The orange parts screw onto the threaded spikes and clamp down on the tiles to force them to be even with each other. They are a bit hard to see, but there are also transparent plastic circles between the orange parts and the tiles. That's to prevent the orange parts from scuffing the tiles as you tighten them down. I'm not sure they are necessary with the tiles I am using, but better safe than sorry. I'm still not perfect at this scheme, but I'm getting better.
Here's a picture after a little clean-up (but still no grout). After unscrewing the orange part and removing the transparent washer, you break off the red parts by wacking them with a hammer. I used a rubber mallet just in case I missed and hit the tiles. For this area, I only had one of the red spacers break off in a way that needed digging out. I (genlty) used my oscillating multi-tool for that.

In the middle column, there is a short piece of tile a little more than half-way up. I don't like the look of it right now and wish I had put it at the top of the column, but we'll see how things look when the grout is put in place. If I still don't like it, maybe I'll cover it up with a framed set of instructions for how to take a shower.
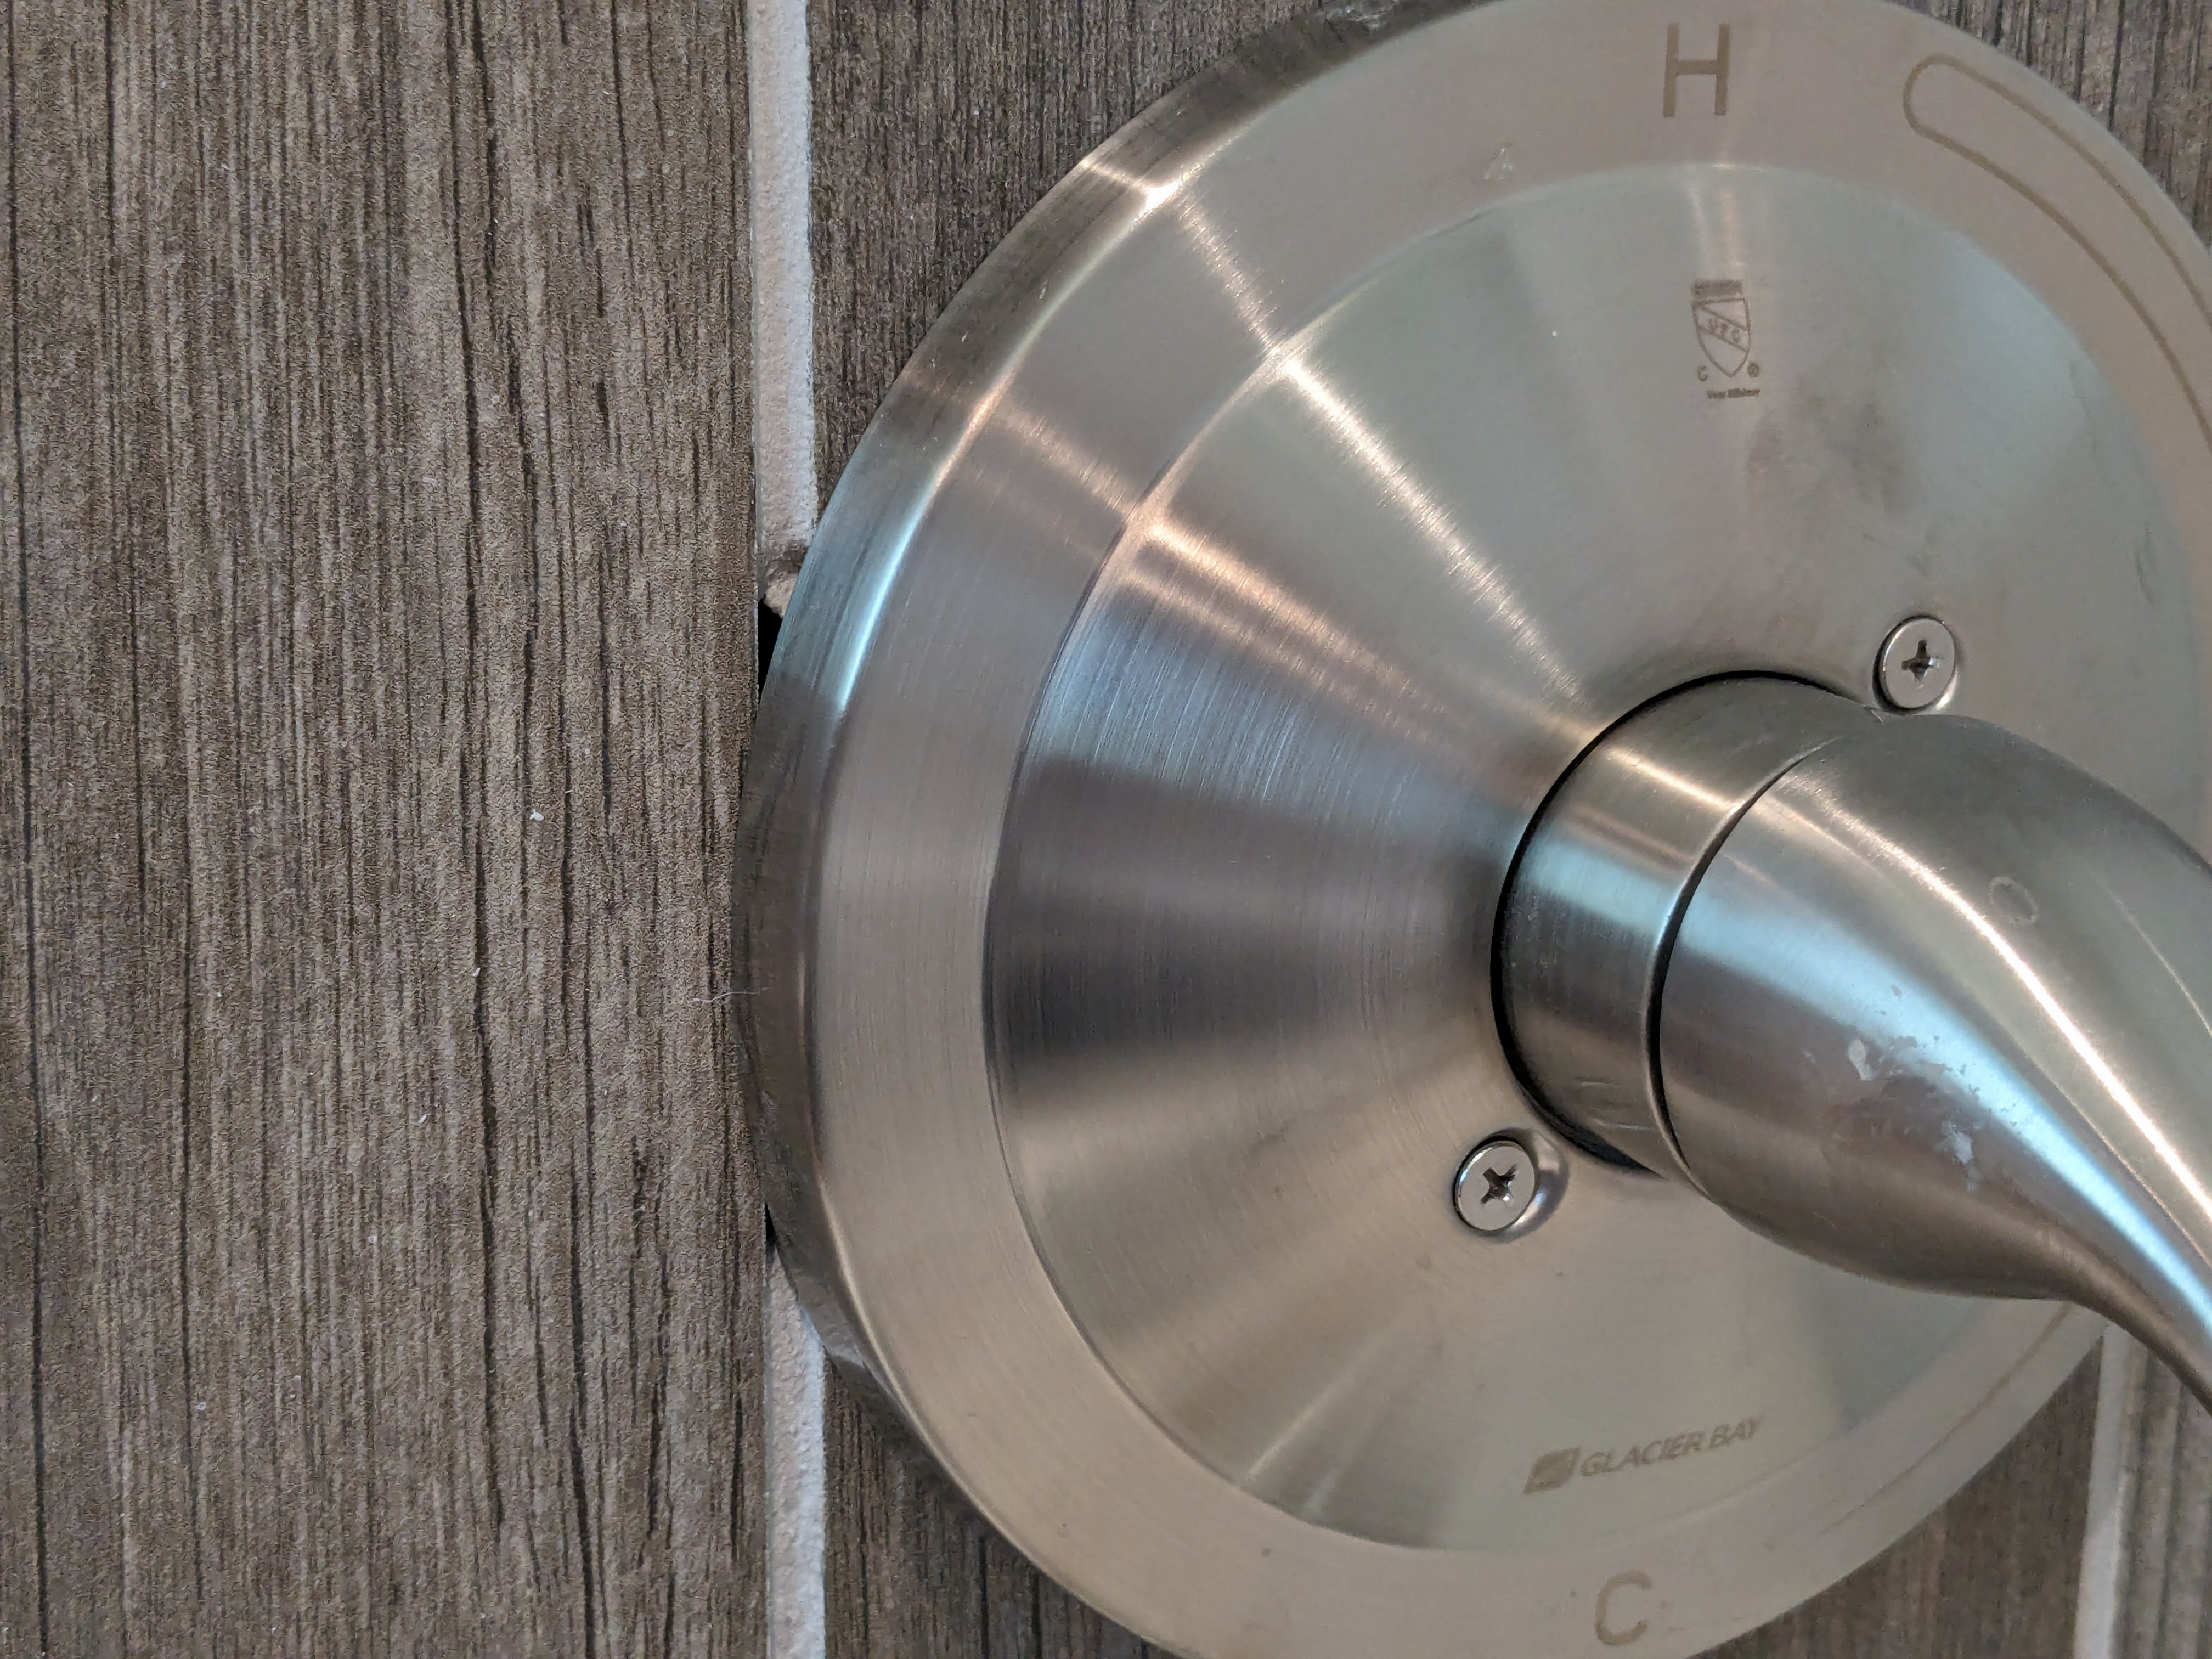
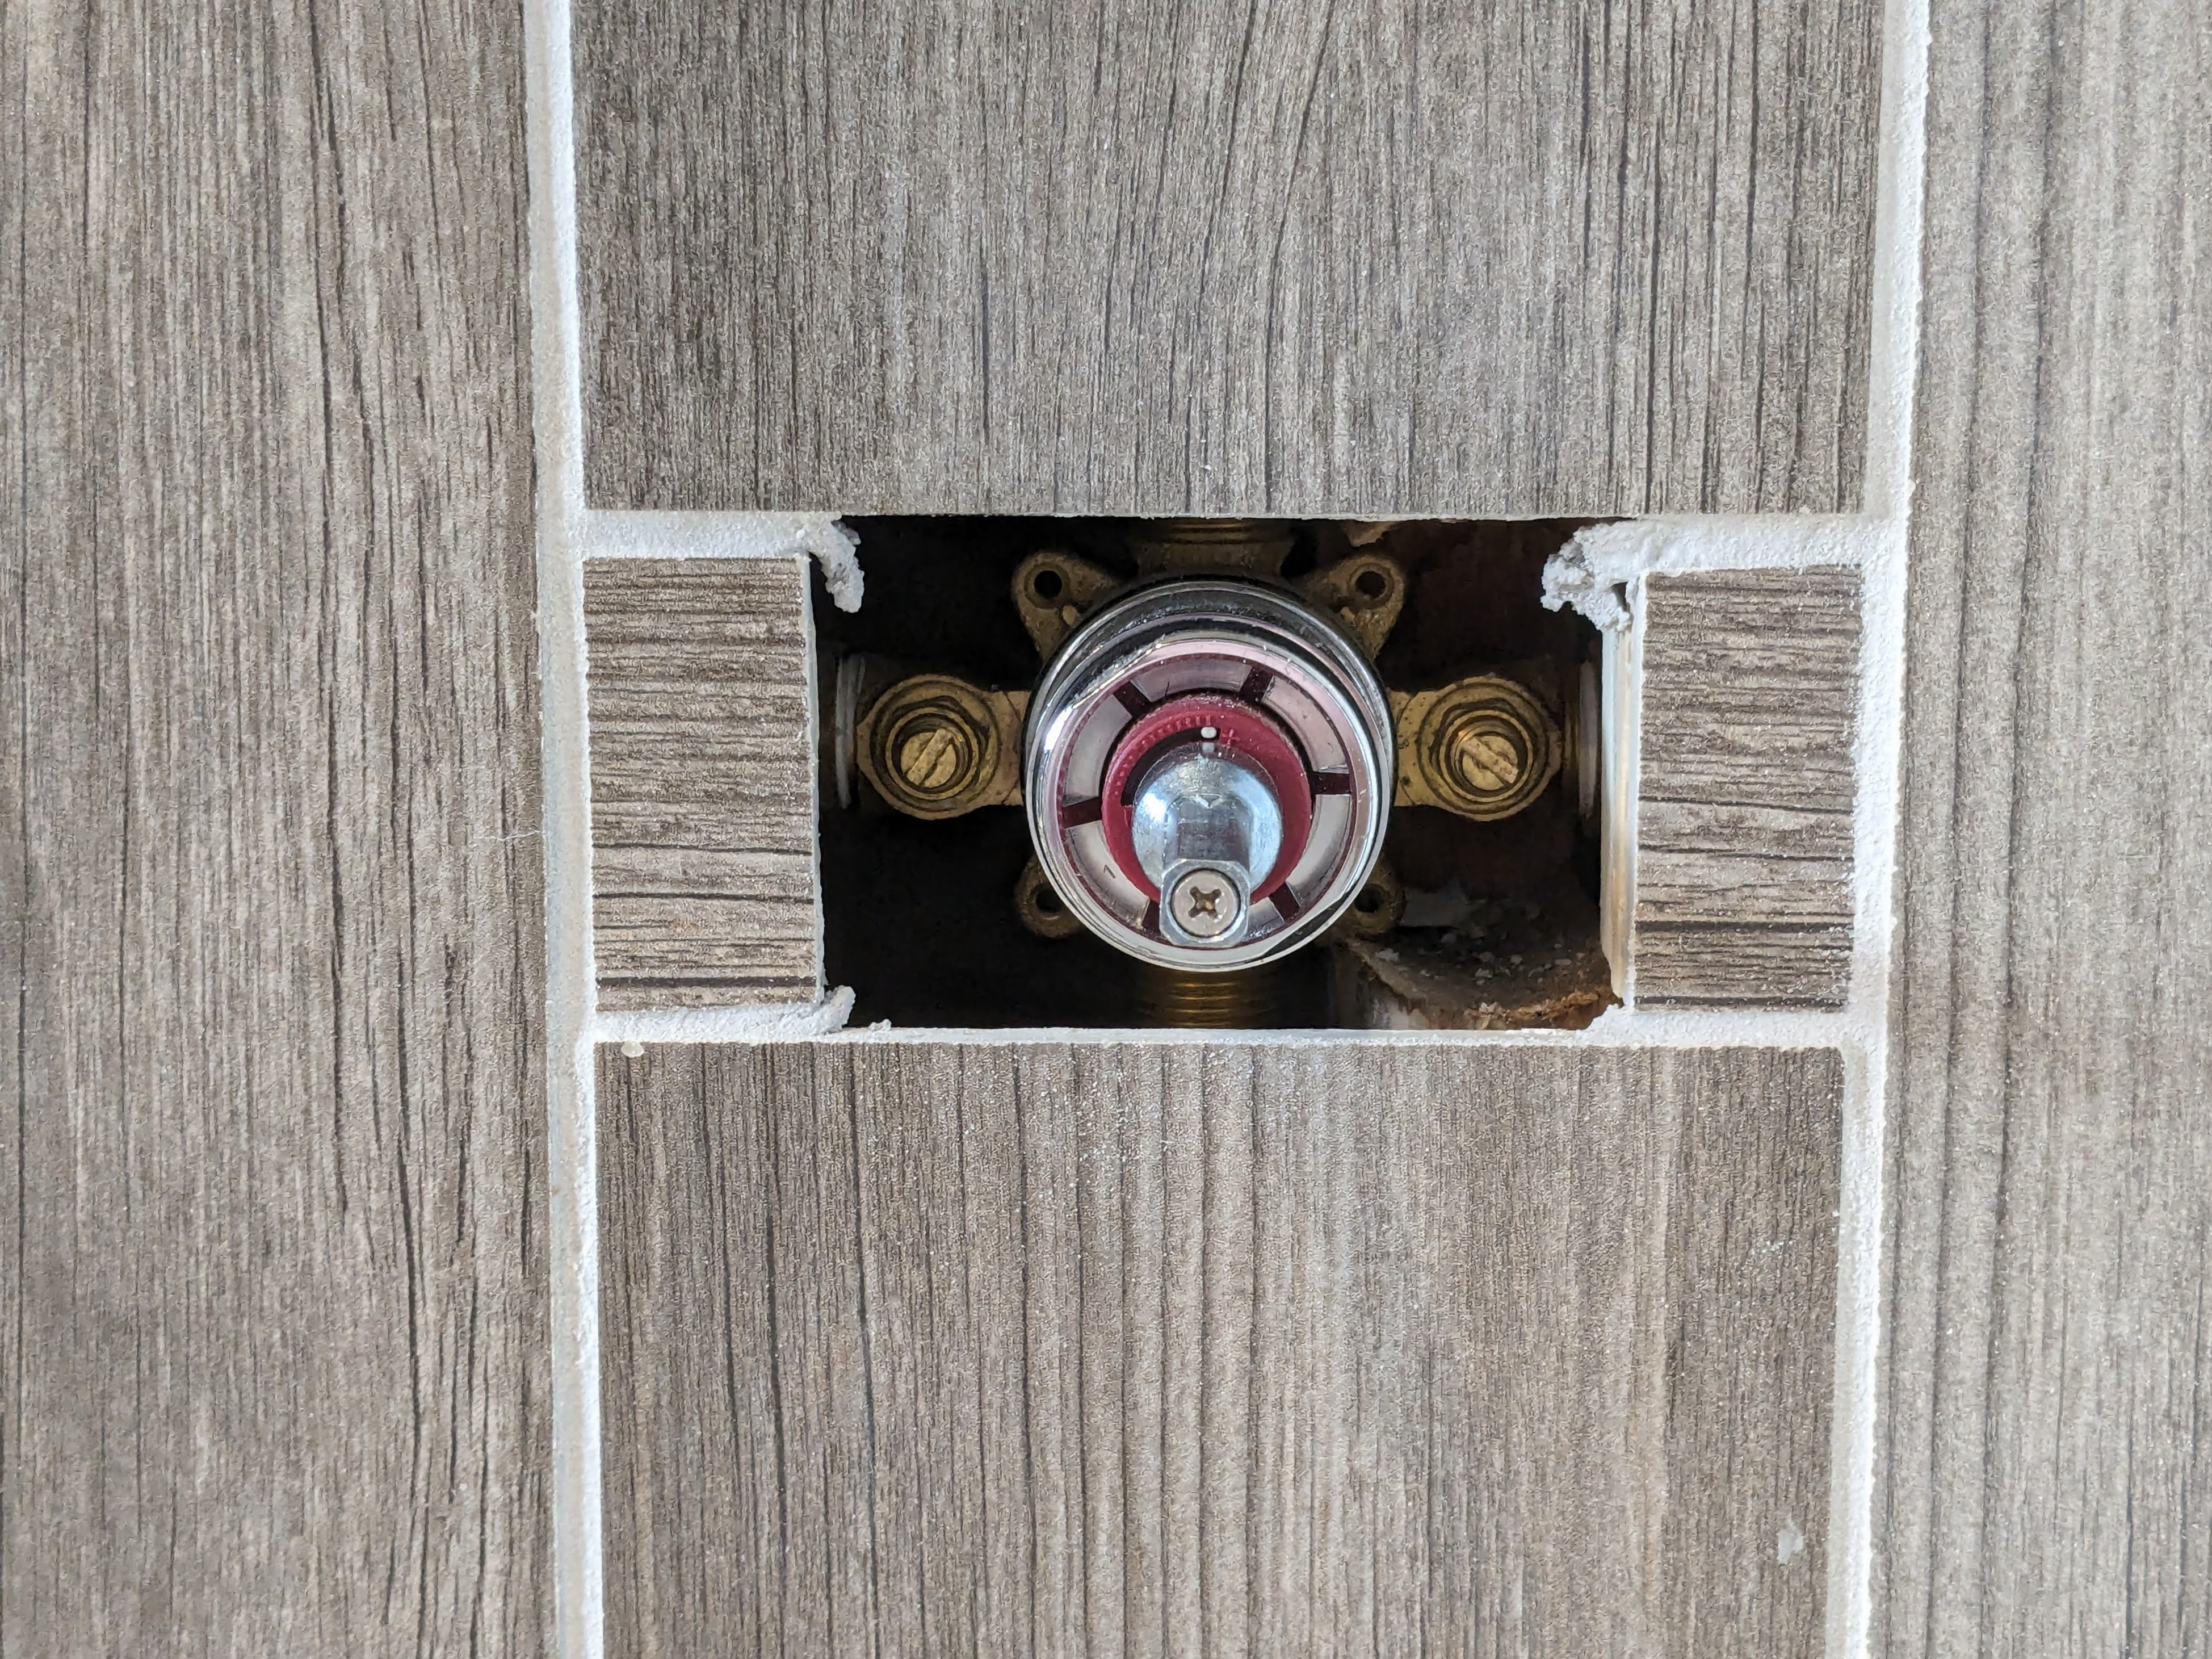
Update: Despite measuring, calculating, and ruminating, the shower valve plate does not quite cover the rectangular hole I left in the tiles. The upper left corner is slightly open, and the other corners are borderline close.
I considered several options for sealing things up. Since the gaps are so small, I thought I might use plumber's putty or caulk to just fill in. Here's what things look like behind that plate:
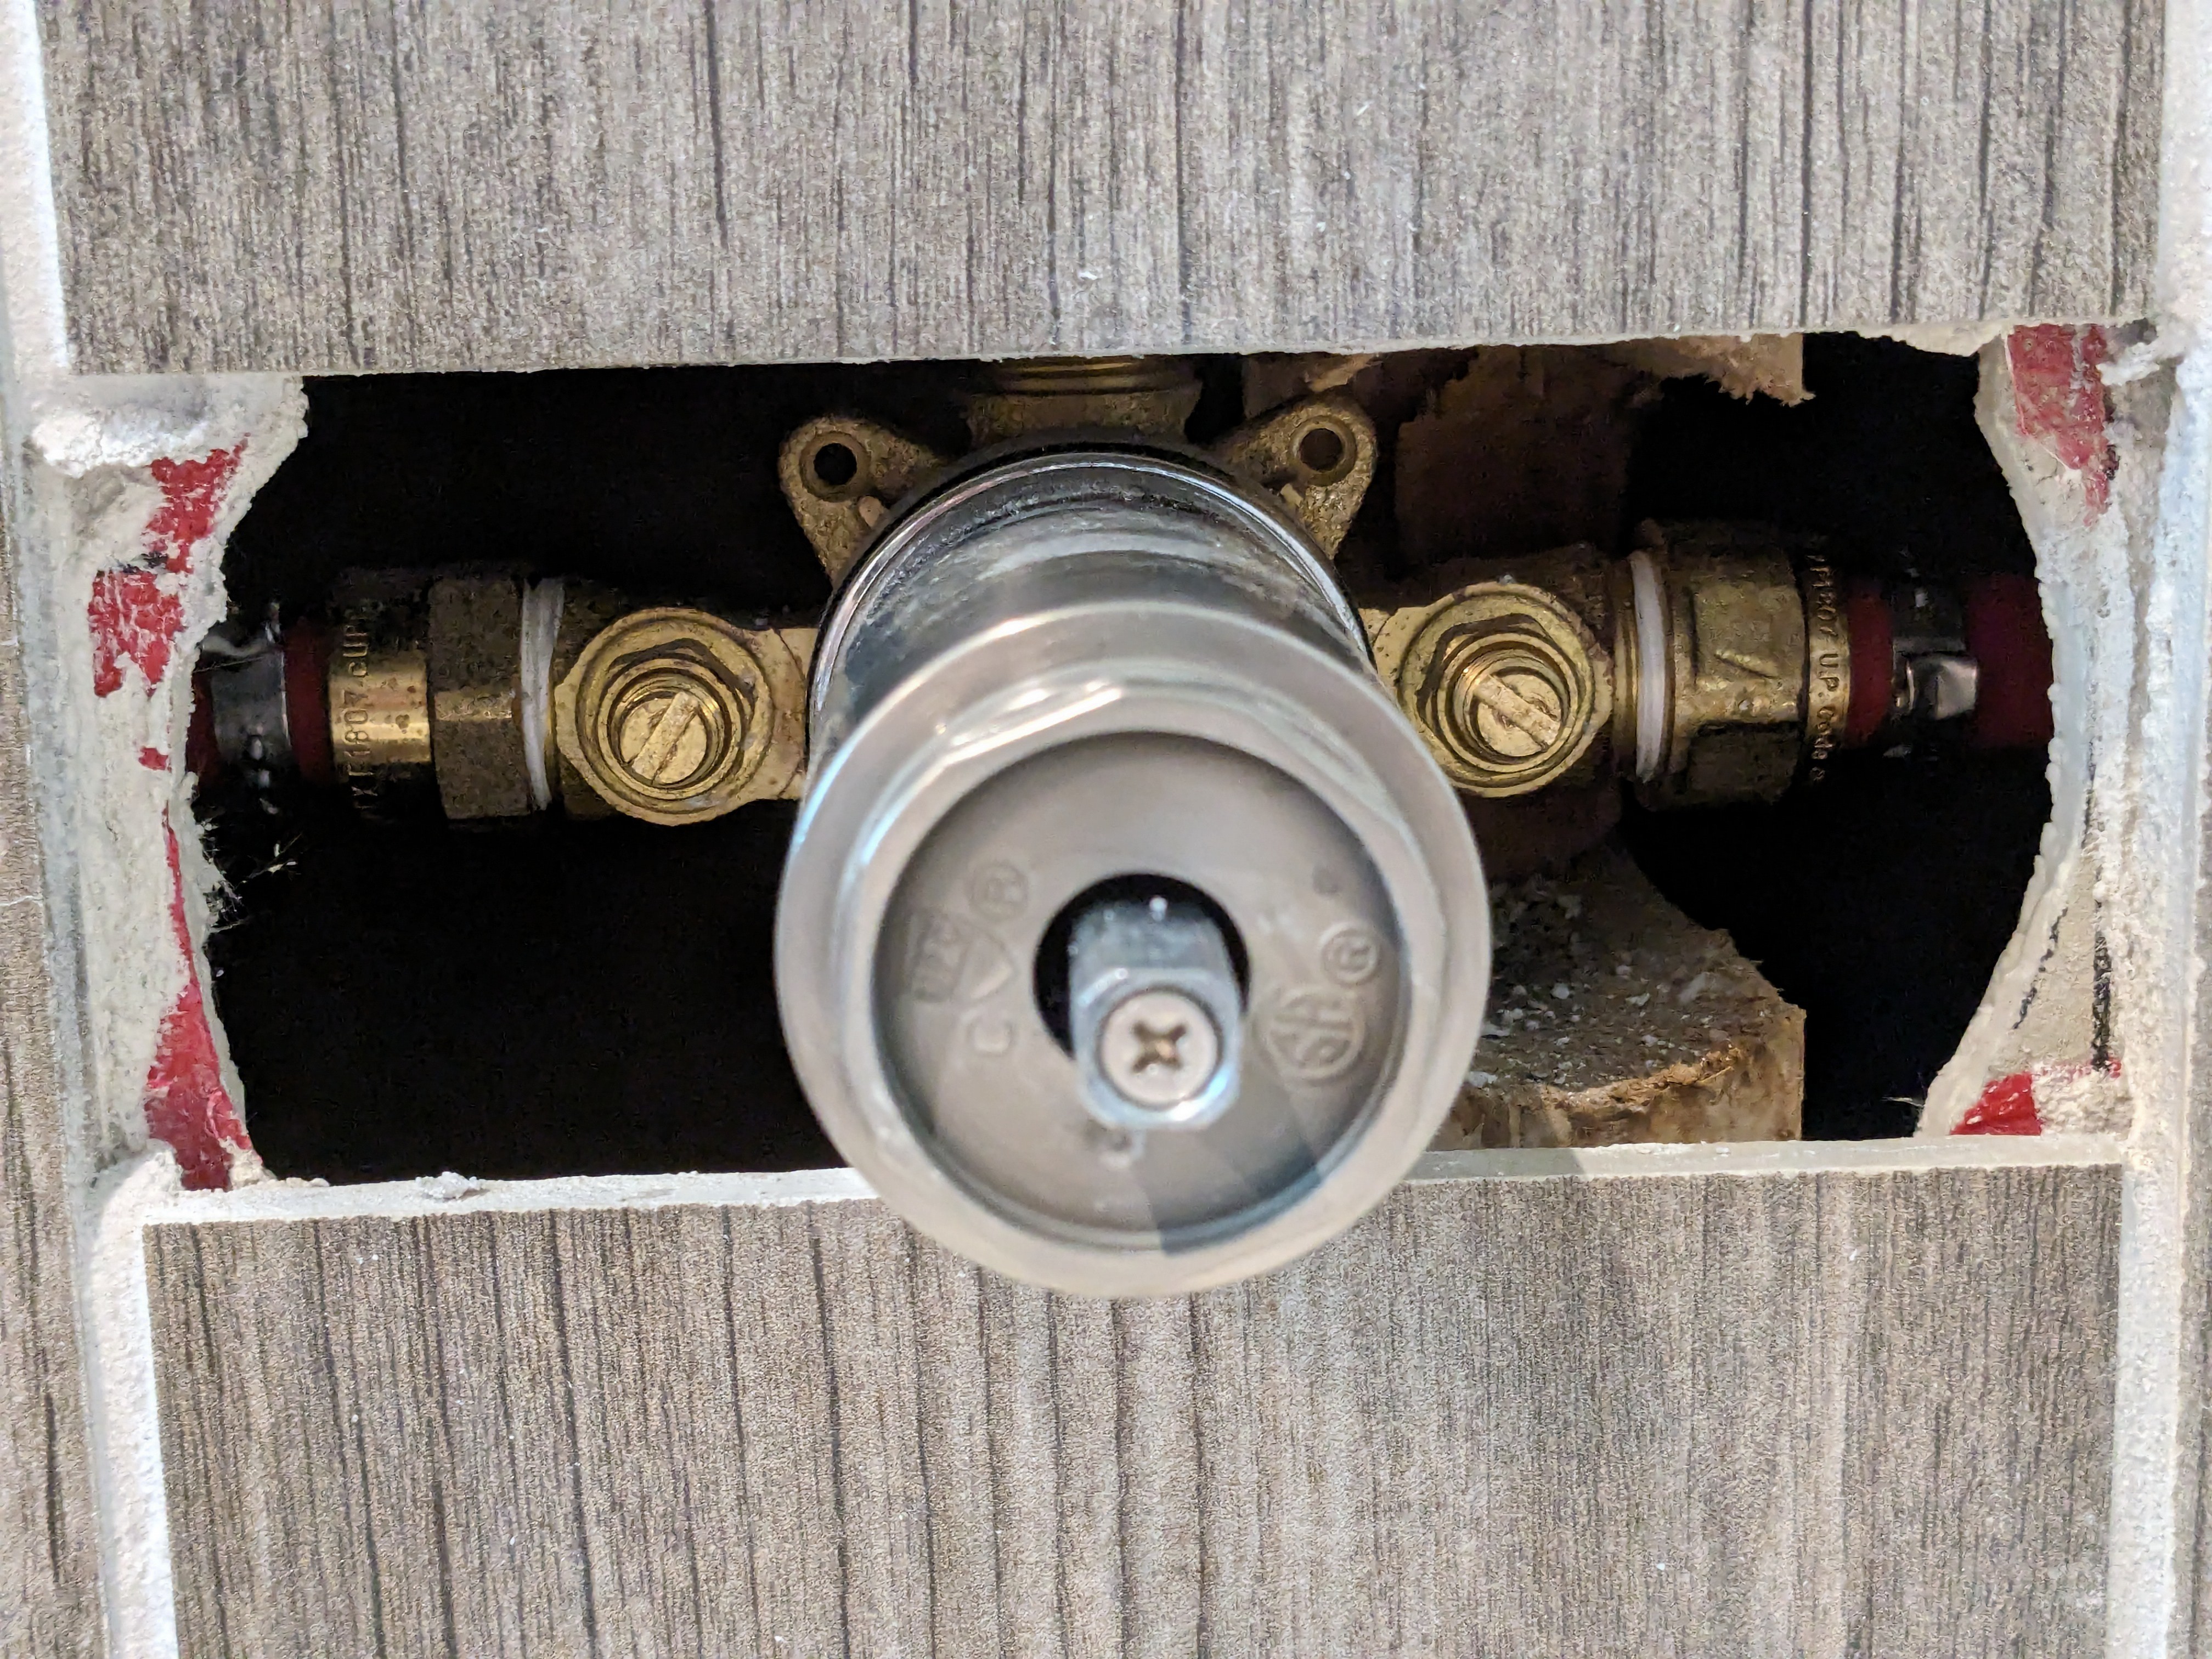
There is plenty of room to the left and right of the integrated stop valves, so I decided on a less funky approach. The things you see in red in the above photo are GoBoard with RedGard coating. I trimmed those away to match the rectangular opening in the tiles. I used Liquid Nails adhesive to attache some fragments of paint sticks as a base behind the main GoBoard. Because of the stud location, I had to use a narrower piece on the right side.
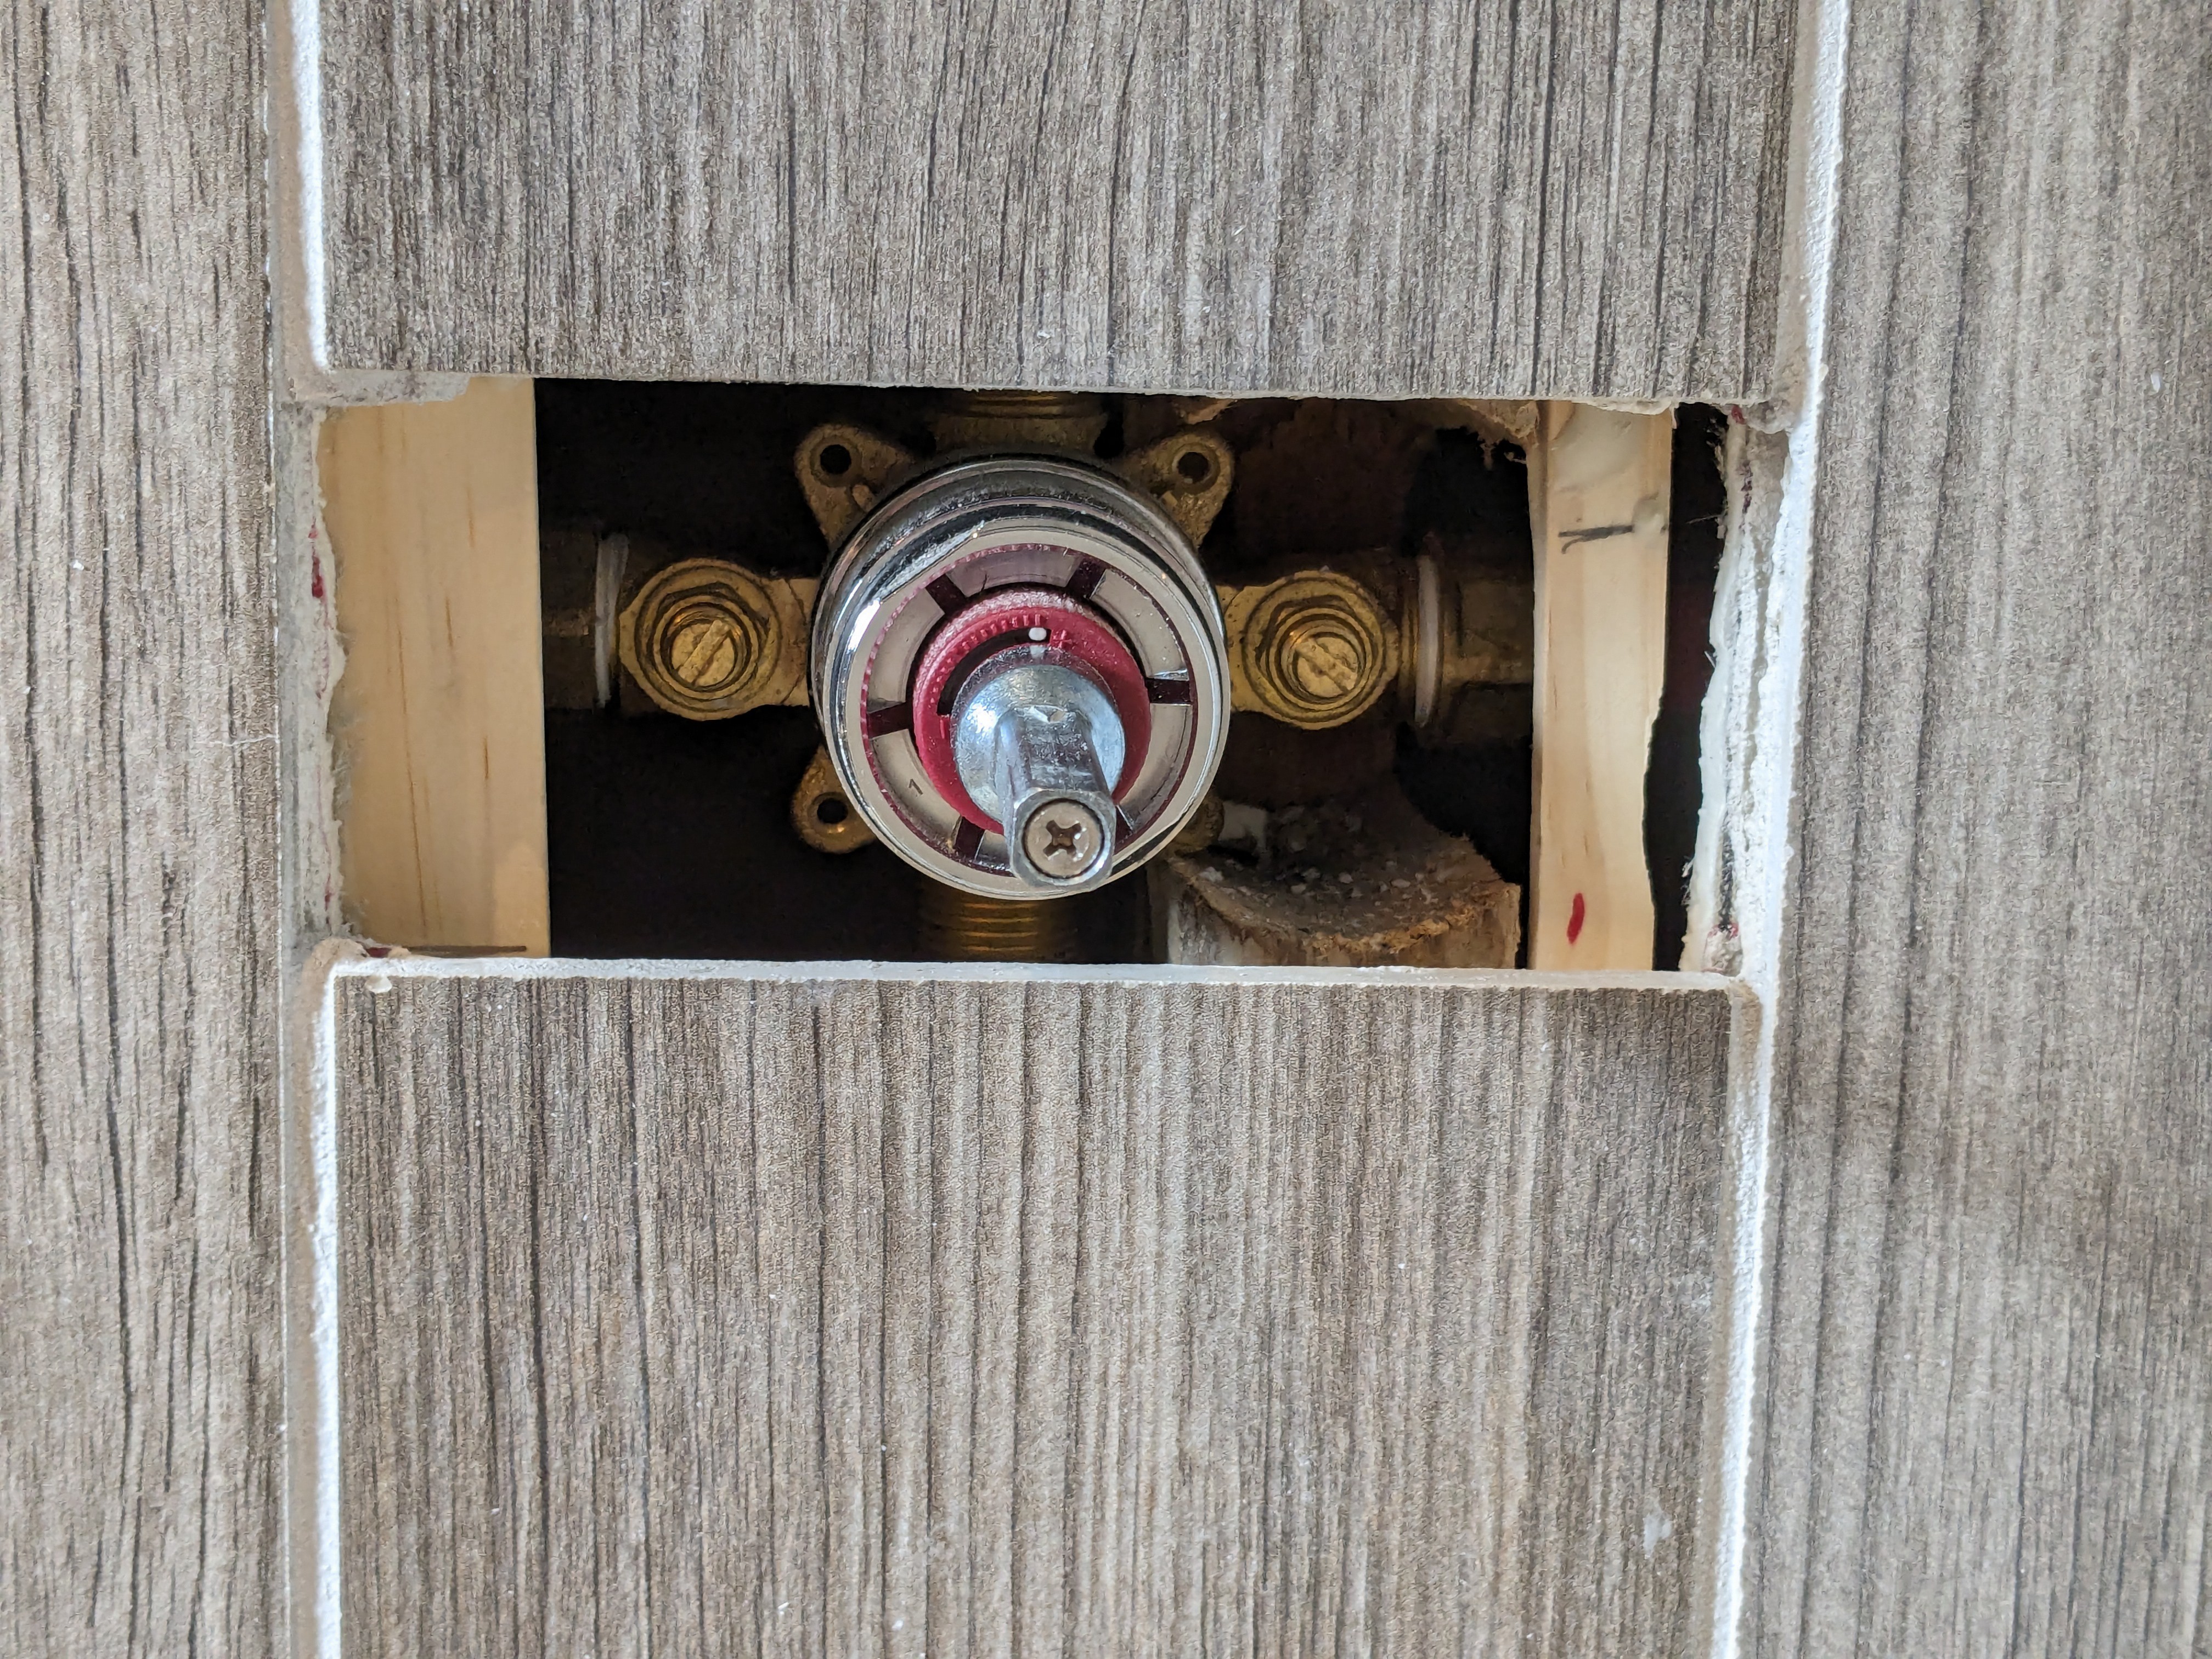
I made these delicious looking sandwich cookies. The layers are GoBoard, paint stick, and tile, and they are glued together with Liquid Nails. (I didn't notice until looking at this picture that I had cut the tile pieces with the grain pattern in the wrong orientation. Since one of them will be completely invisible and the other nearly so, I didn't re-cut them.) The paint stick layer stands in for the thinset layer of the existing tiles.
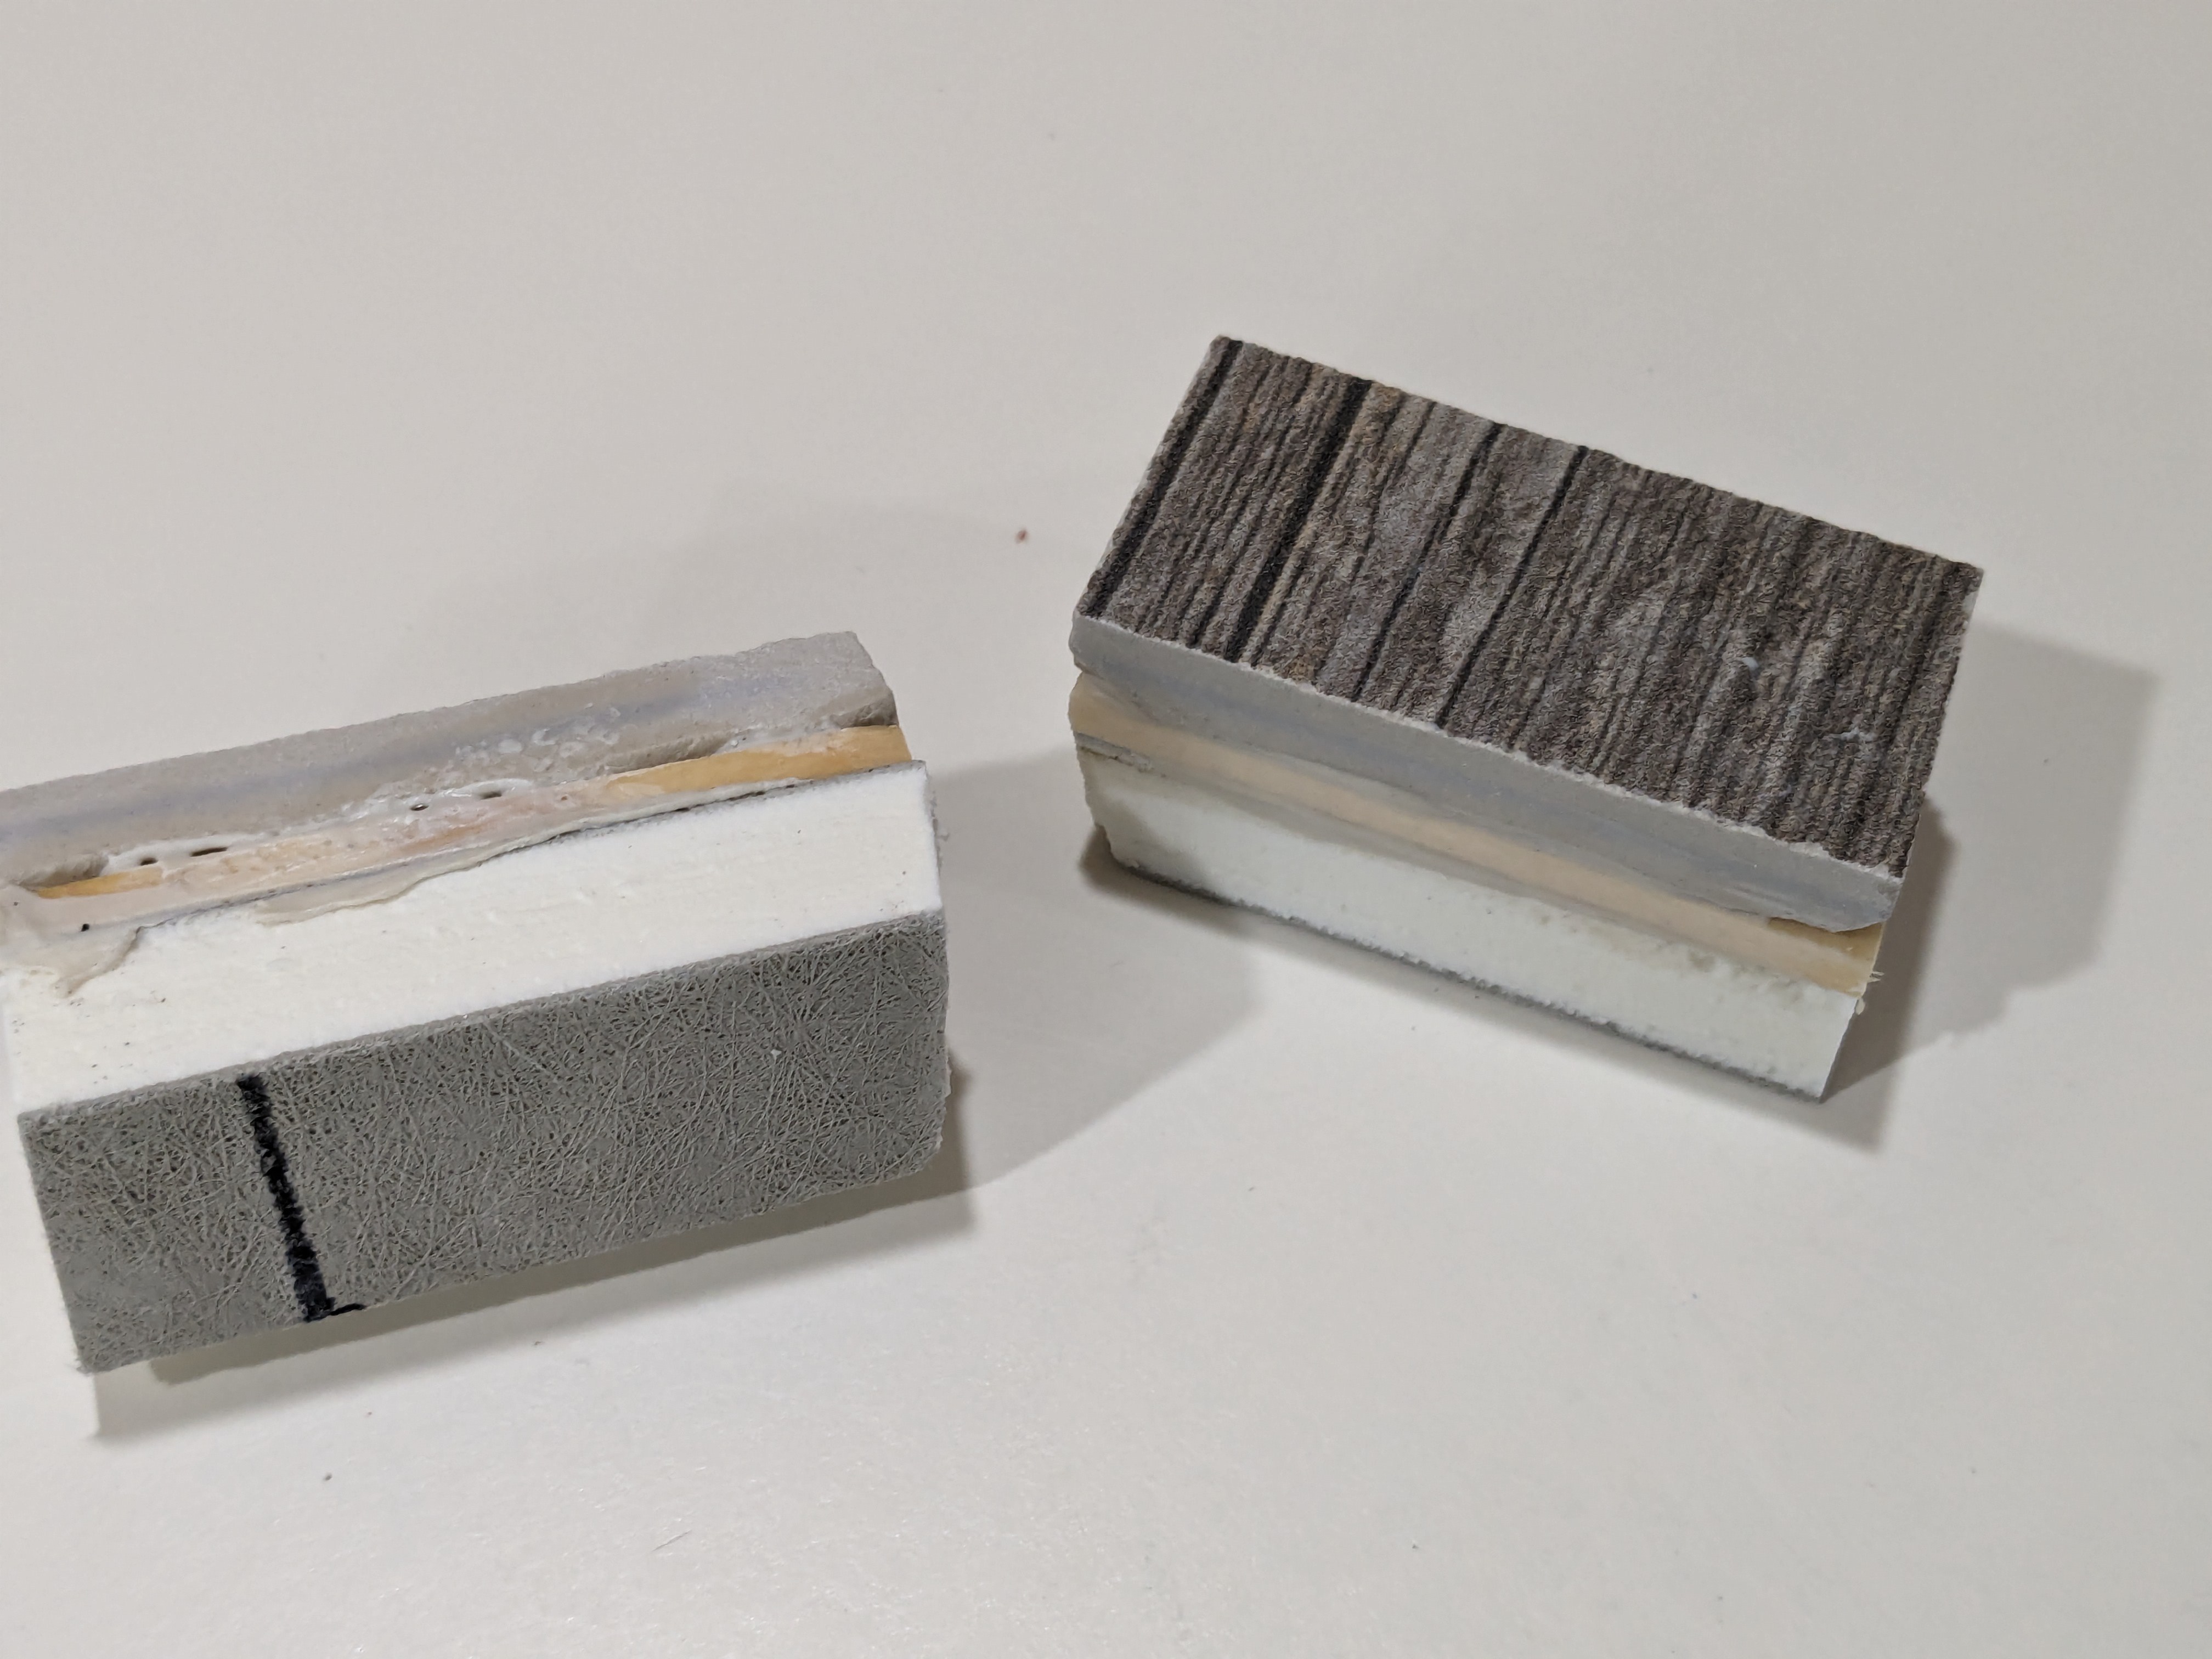
I used Liquid Nails to glue the GoBoard surface to the paint sticks previously affixed in the rectangle. After that, I applied grout to make it water-tight.
Update: I wasn't happy with the mounting of the tub spout. There are two types of spout attachments. One type threads onto a fitting at the end of the copper stub coming out of the wall. The other type slides onto the copper stub and is held in place with a set screw. With the fixtures I bought, it was the second type.
There's a little bit of flex in the mounting of the copper stub, so it's difficult to get the spout all the way against the tiles without having it spring back a little bit. If I had thought about that before I closed up the wall, I probably could have done something about it, but that's water under the, uh, spout. My copper stub is also a small number of degrees away from perpendicular to the tiles. I blame the person who did the copper plumbing (aka, me). Both of those things add up to there being a small gap between the back of the spout and the wall.
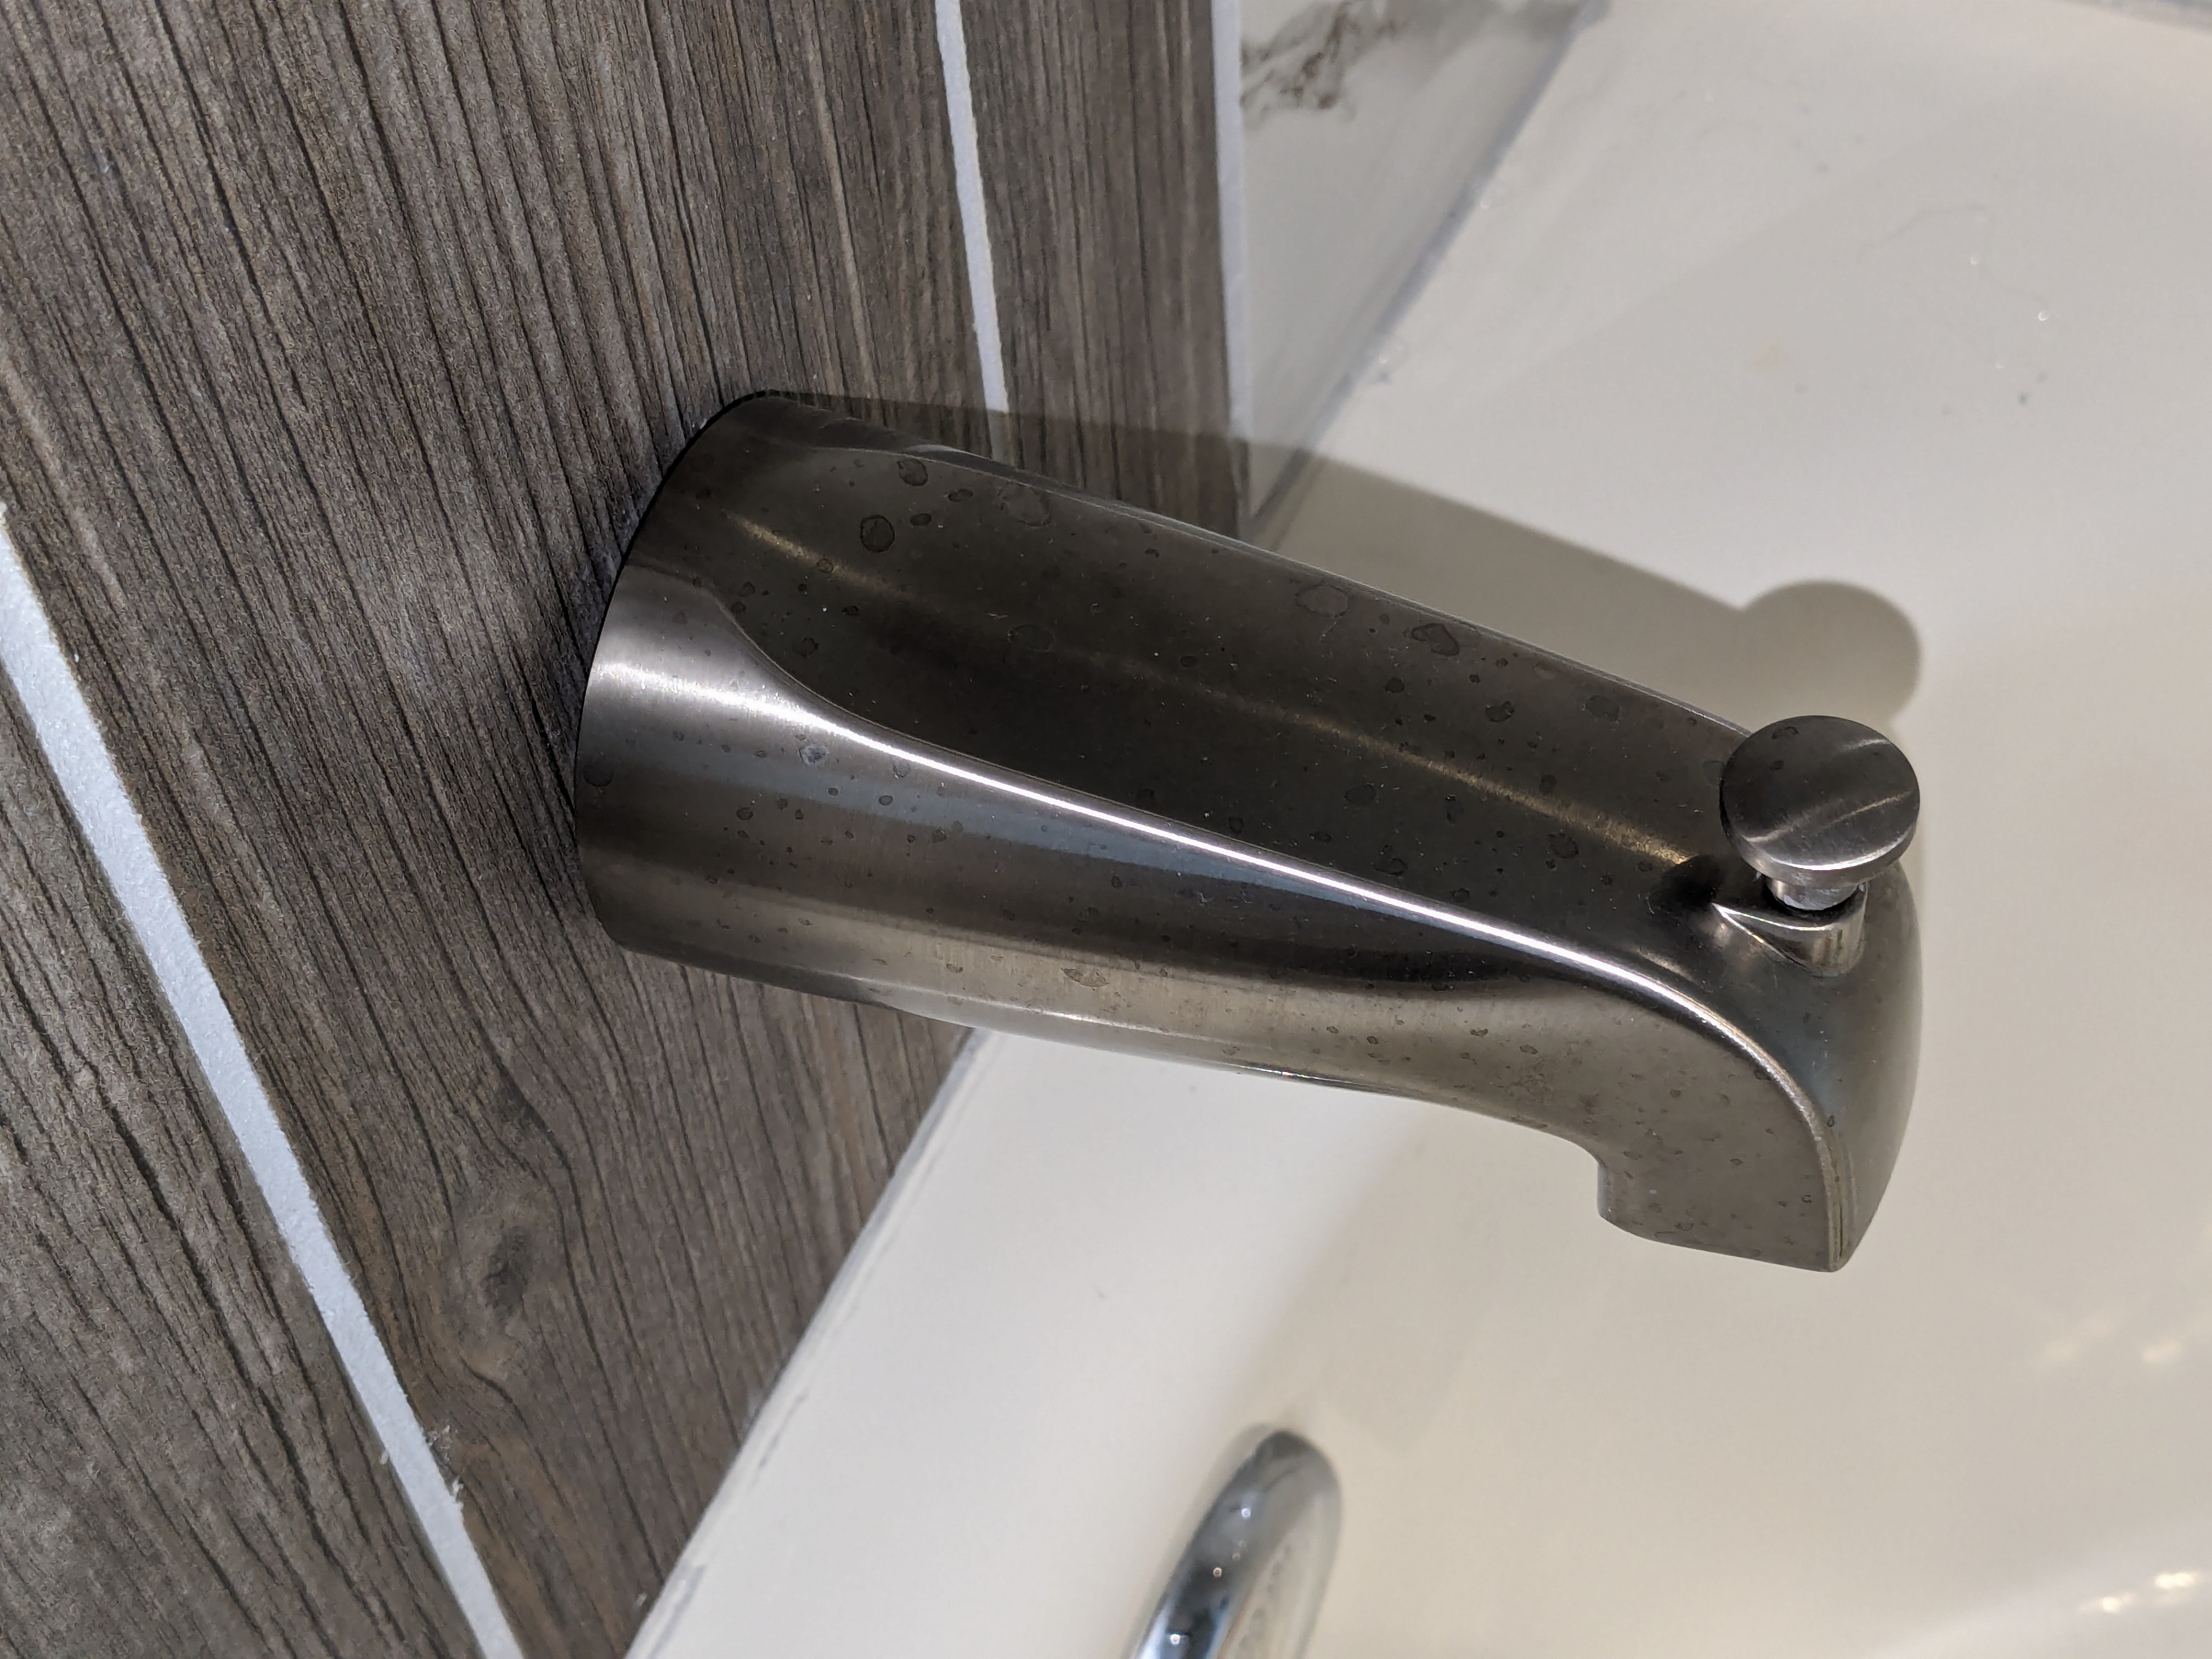
This is purely an aesthetic thing. I already sealed the opening around the copper stub with plumber's putty, so I'm not worried about water leaks getting behind the tiles. I just don't like the look of it.
I've spent some time looking at commercially available flanges. They are mostly designed to cover up irregular holes in the wall that the spout doesn't cover. I don't have that problem. I decided to see if I could fabricate my own flange on my 3D printer. There are lots of free models for flanges and escutcheons of various flavors. I ultimately chose General Flange Designer! because it's a customizable OpenSCAD design. That allows me to vary things to get a precise fit for my needs. Besides customizing with my own sizes and so on, I made one tiny change to the design file. The design expects the base of the flange to be some kind of polygon, and it can be customized to have up to 60 sides. I changed that to allow up to 360 sides because I really wanted a true circle. With 60 sides, some of those vertex artifacts were still visible.
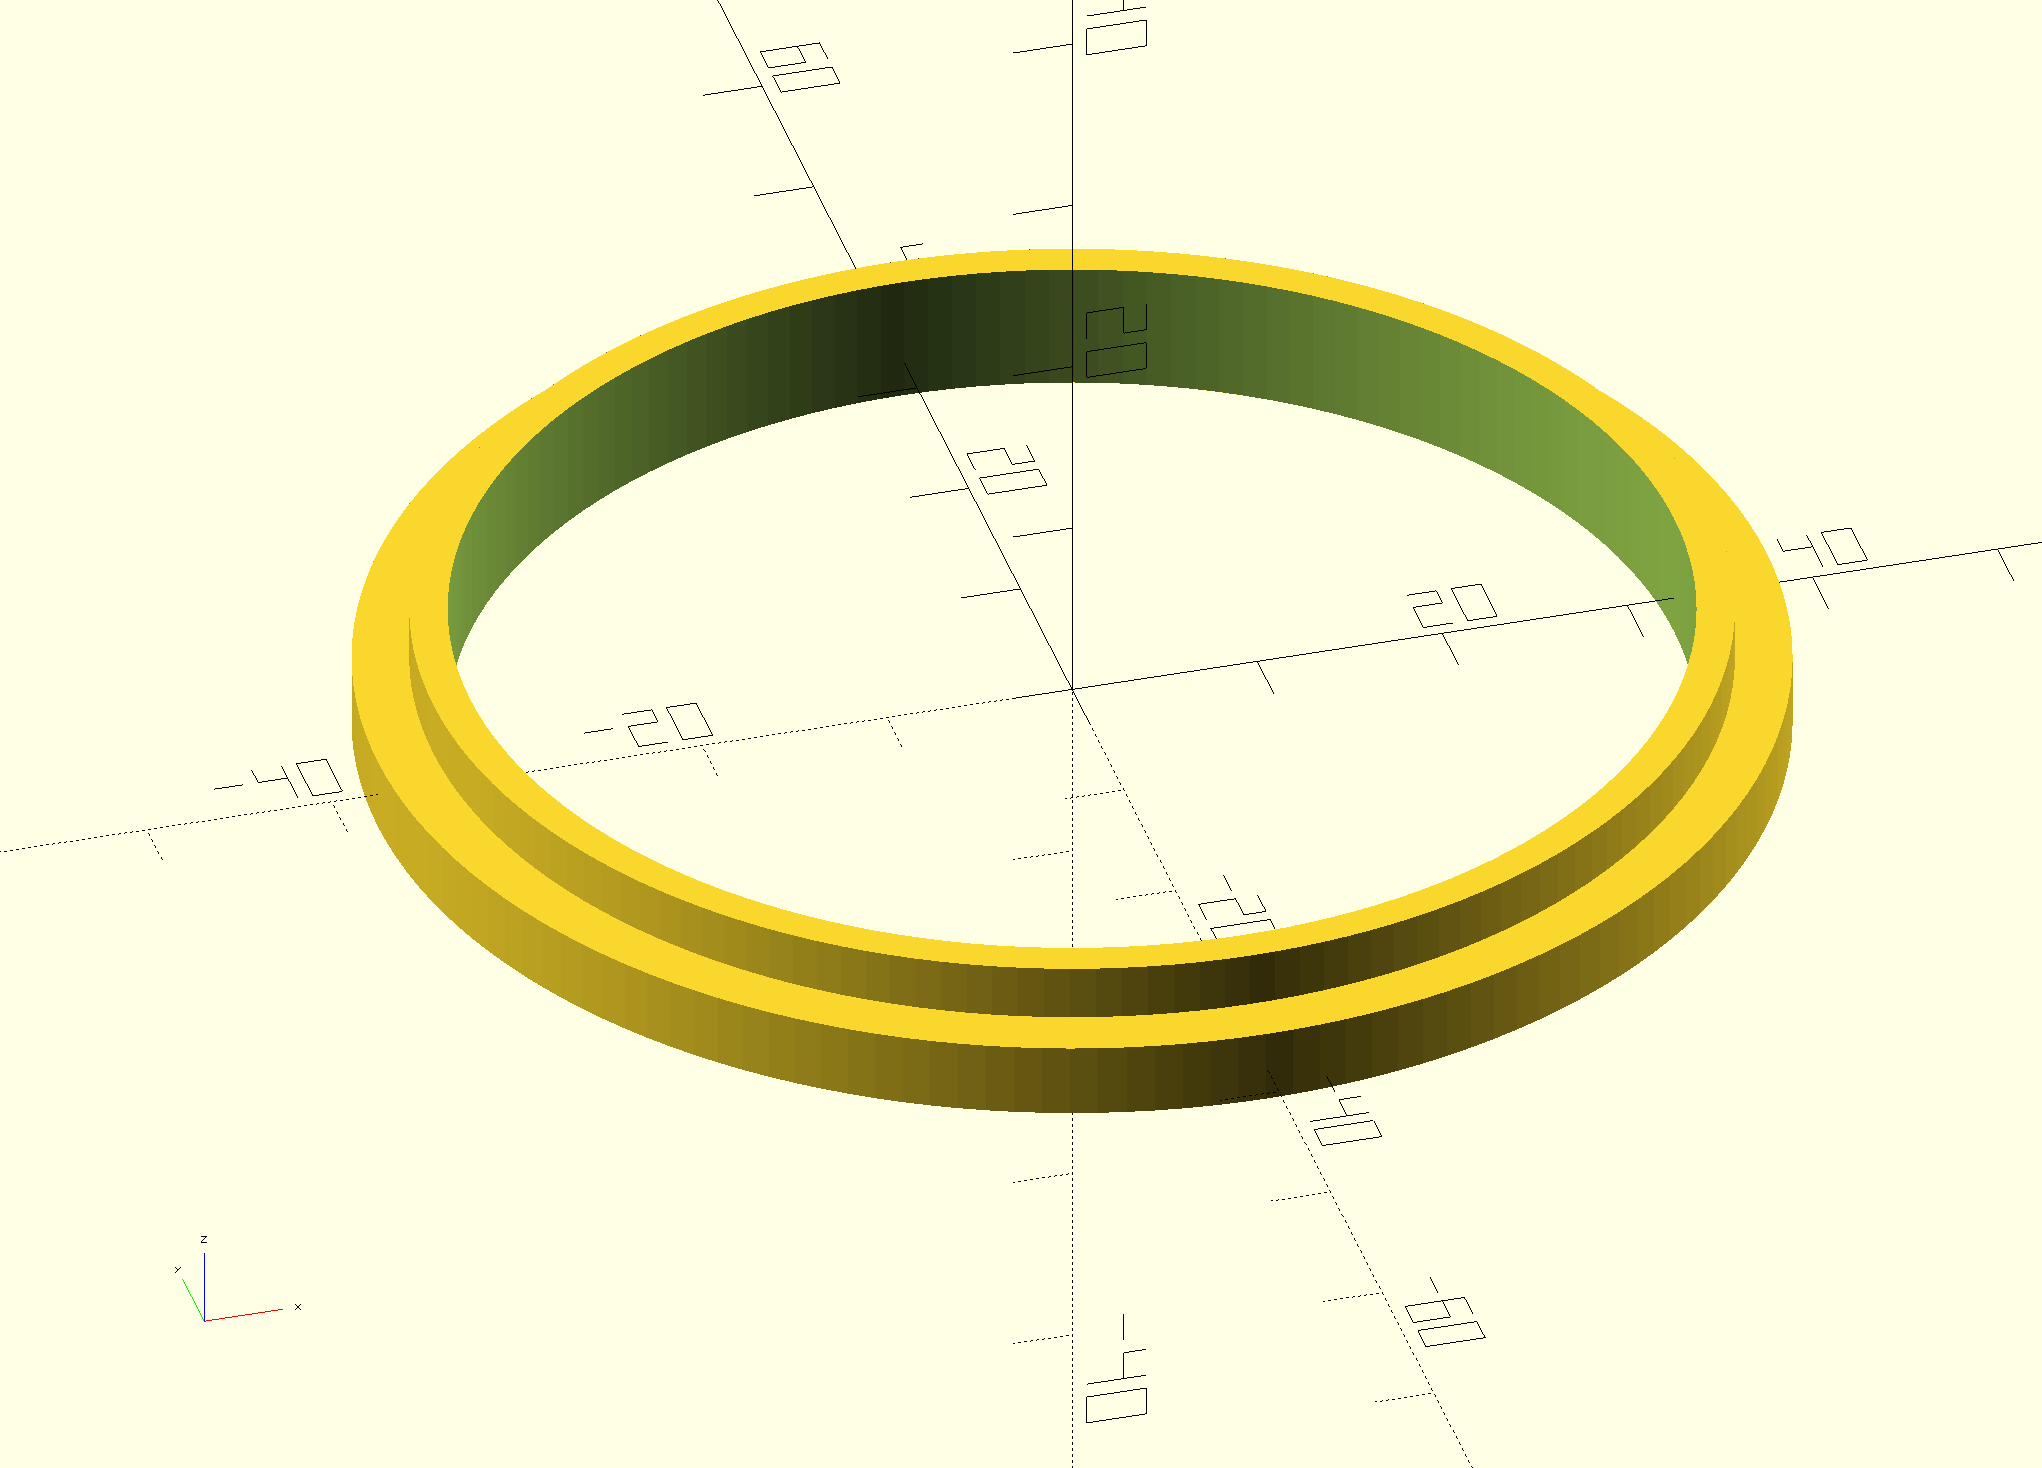
As far as I know, there is no such thing as brushed nickel 3D printer filament. Instead, I used silver metallic "silk" PLA. I used this one because it was cheap and quickly available. I never used that brand before, but I'm happy with the results.
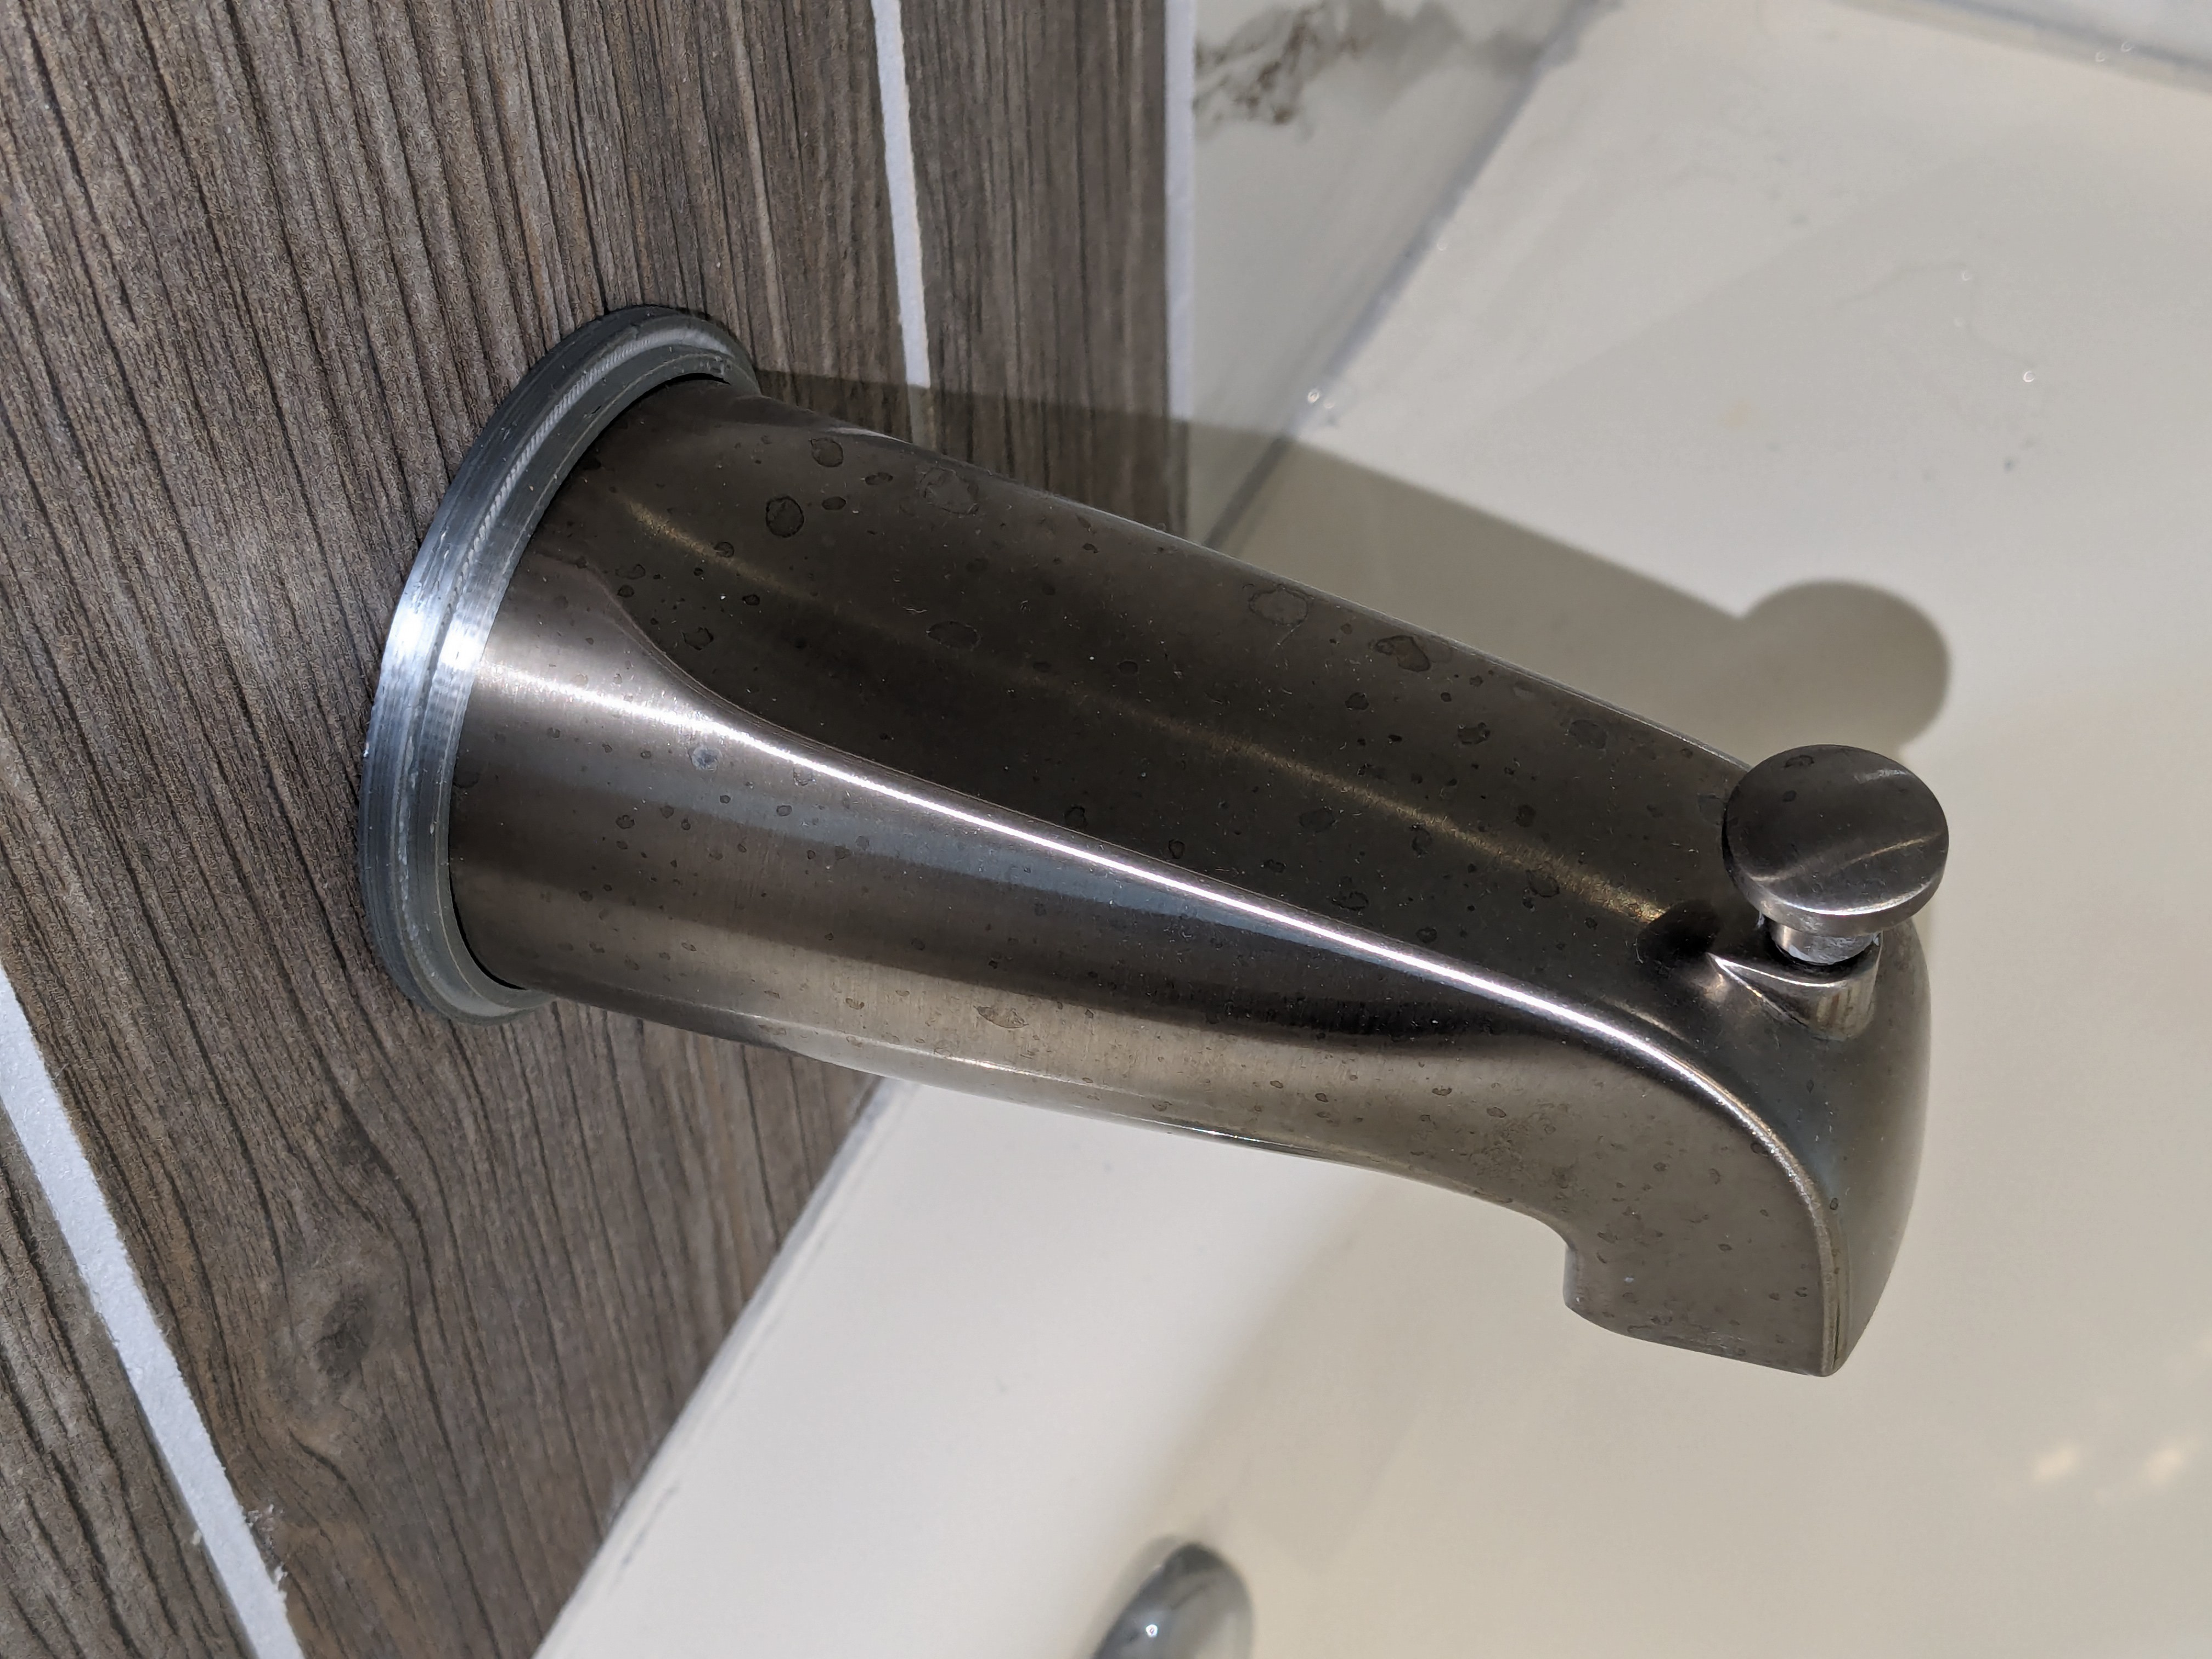
In this close-up, it does not really look like an excellent color match. From a reasonable distance and with the normal room lighting, it's OK. The shape of the spout itself let me slip the ring on without unfastening the spout. PLA has some shrinkage factor that varies by manufacturer, so I did a few trials to dial in just the size to fit snugly on the base of the spout. For now, that mild pressure is what hold it in place. We'll see how that goes. If it comes loose over time, I'll probably caulk it.
The other things in the see-how-it-goes department are whether the PLA will degrade over time and whether any tub gunk will accumulate on it
Discussions
Become a Hackaday.io Member
Create an account to leave a comment. Already have an account? Log In.