 Steve
Steve-
1Checking all the Parts
Before doing anything with soldering and gluing I would test if everything works, so that includes the display, buttons or atleast the pads, and sound. You can do all that later but just checking for hardware faults is always going to save you some later headaches.
-
2Modify the Shell
Now affter testing everything, try fitting the screnn into the shell, if nessesary remove some plastic with an exacto knife. If it fits try around with the other parts:
The Speaker should fit if you're using an original GBA one, or a little cut on one side for the GBA SP speaker.
The USB will be placed where the external port usually resides, but it is larger so cut the opening wider and deeper till it fits.
For the Volume control take two of the tactile buttons, glue them together and use them as a template ot make the opening for the volume wheel bigger, so them can later be glued in place there.
If you also want to add the "X" and "Y" Button cut into the inner side of the recessed holes on the top so the wire for the buttons can route through. (See top of picture)
![]()
Now for the usb charging plug, either cut a hole into the battery door or the shell right where the bottom middle screw would be placed(See Videos)
If anything is not described enough or you are unsure of locations check the videos:
-
3Connecting the Screen
Now solder the screen to the Raspberry Pi as show here and solder two wires for usb like here:
![]()
And fold the Pi over so it sits like this:
![]()
-
4Connect the I2S Amp
Now Connect the I2S Amp
VCC to 5V PIN(2/4)
GND to any Ground
BCK to Pin 12
LRCK to Pin 35
DIN to Pin 40
-
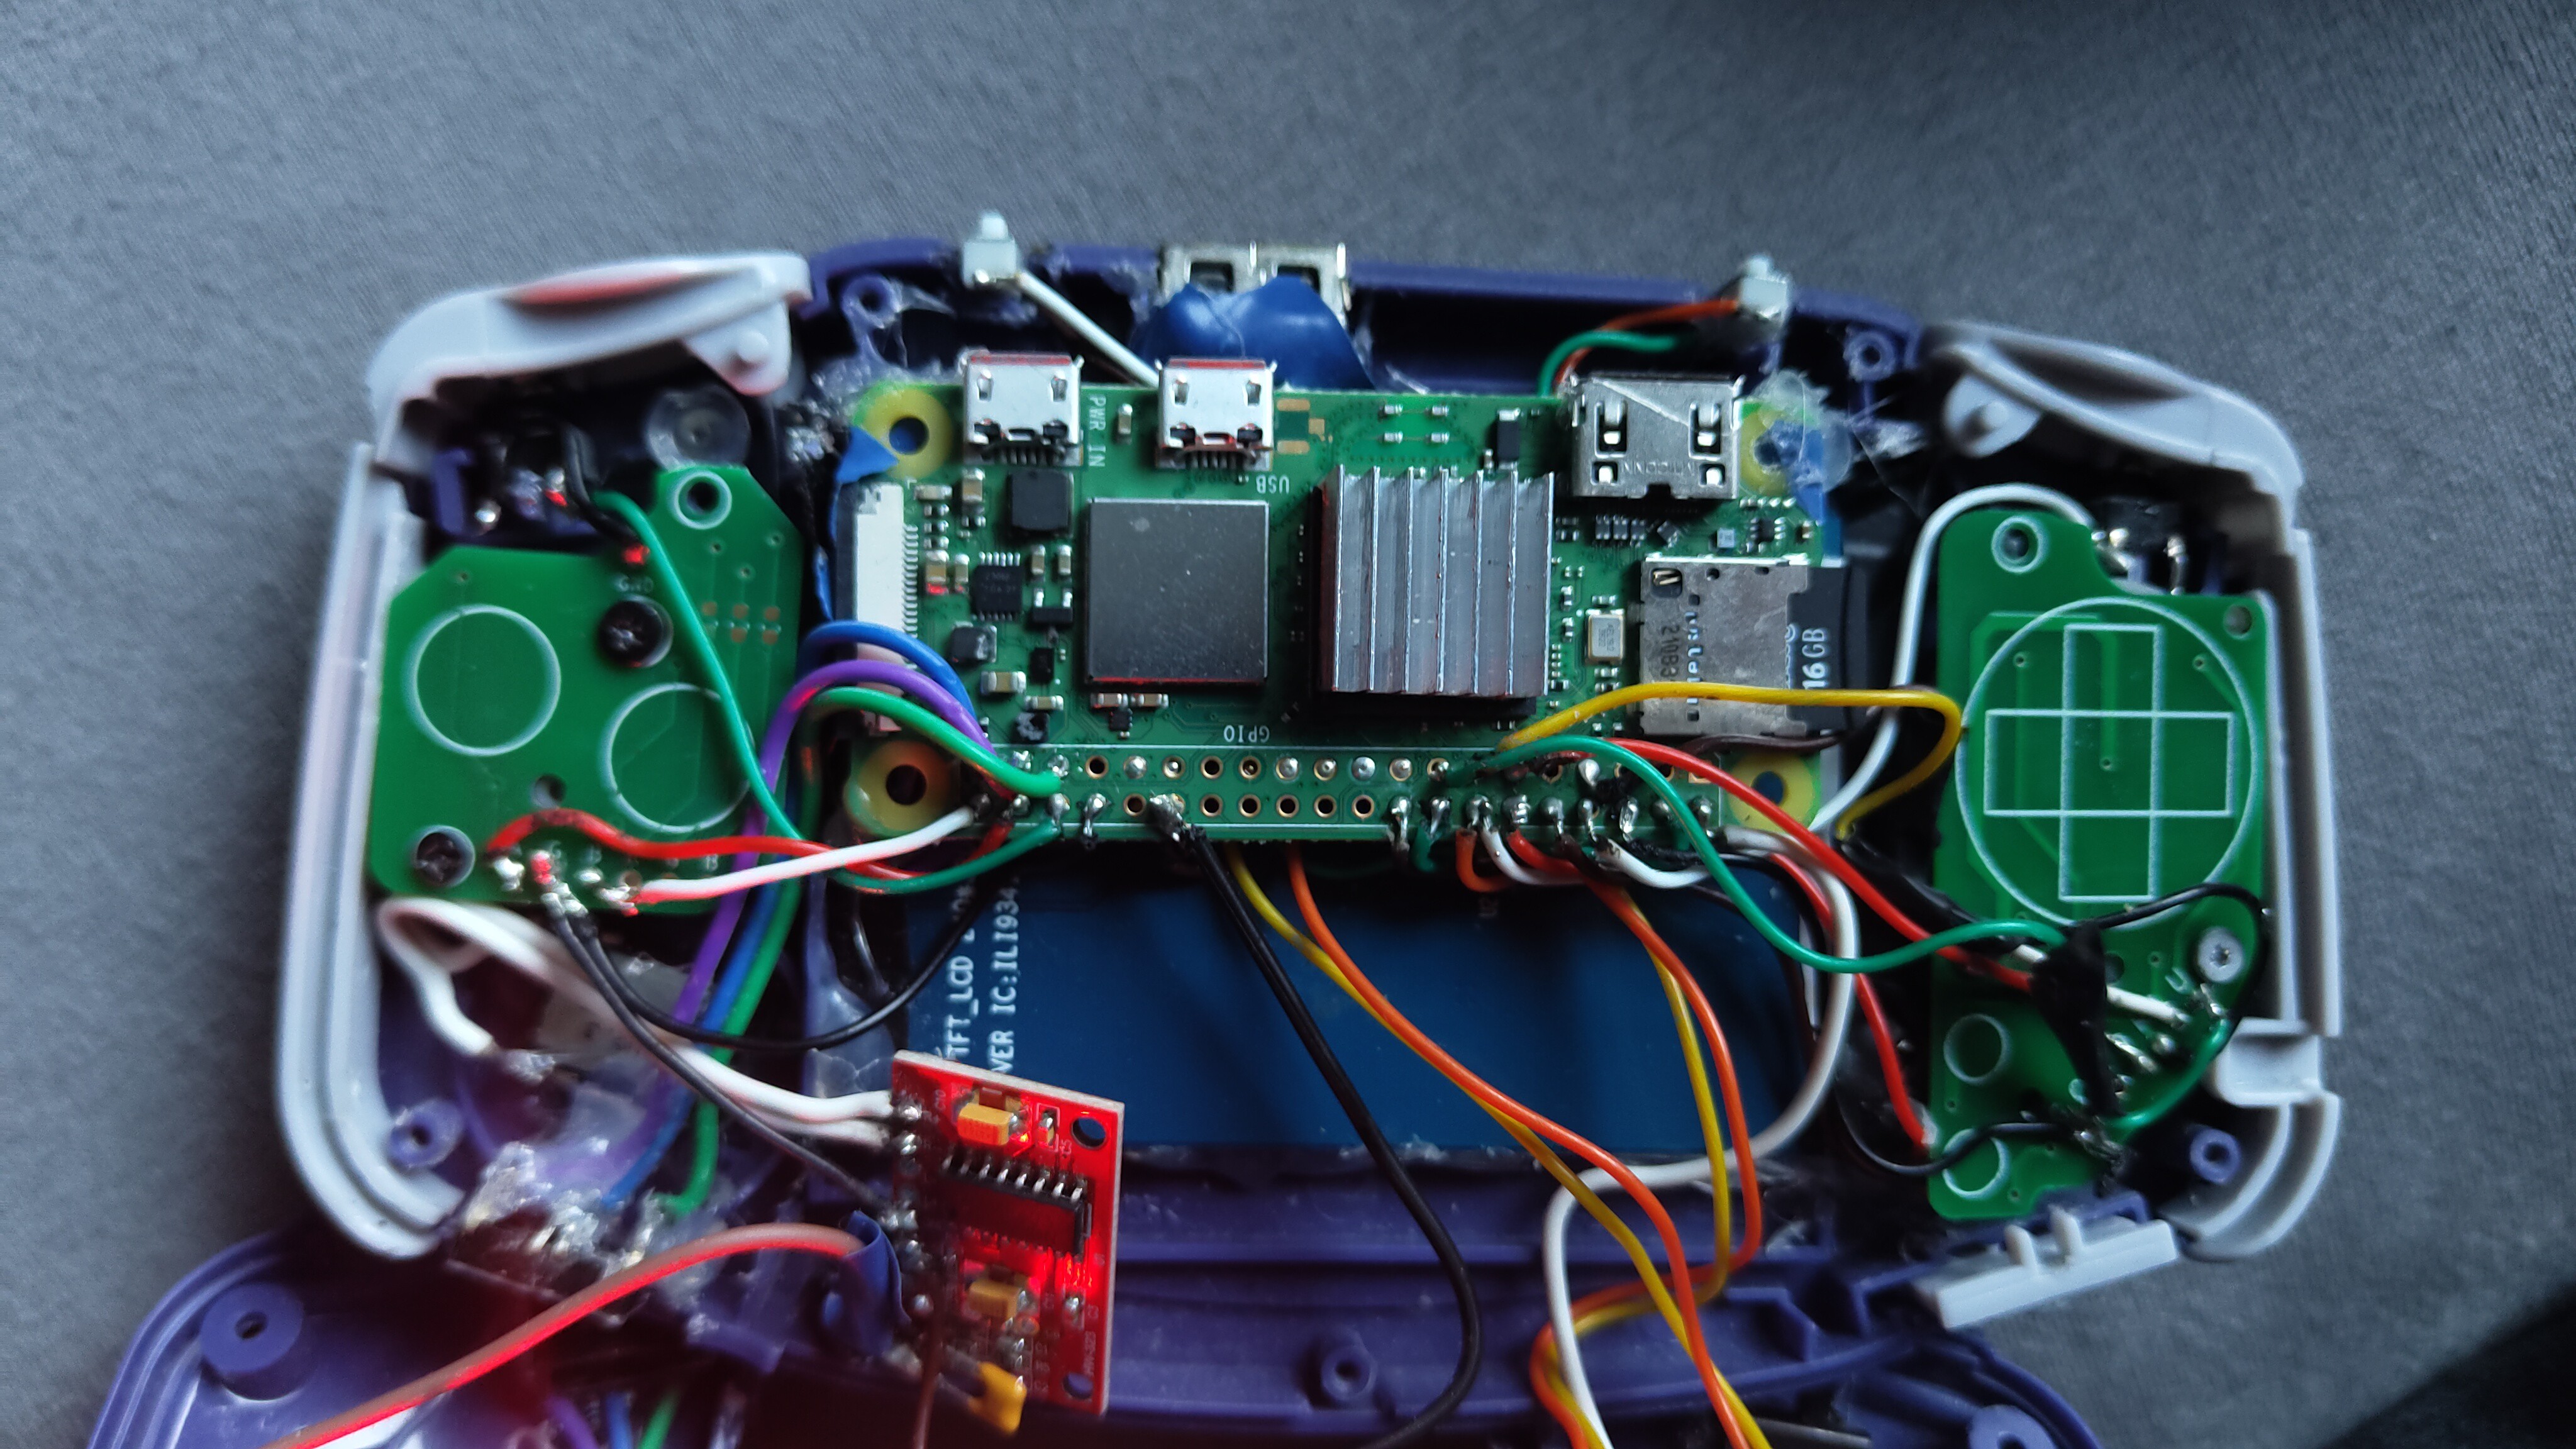
5Buttons
Place the Buttons, Dpad, Shoulder button, etc in their places and add the rubber domes, lastly screw in the Button PCBs in and glue two tactile buttons bellow the triggers in their respective place:
![]()
Lastly solder them to the PI not forgeting to not solder them to the pins the Display is soldered to.
-
6Last connections
Lastly connect the Caharger Module to the battery the usb charging port and through the power switch to the Pi
-
7Software
Now Flash the sd Card with.....


Discussions
Become a Hackaday.io Member
Create an account to leave a comment. Already have an account? Log In.