 mircemk
There are many arduino clock projects with temperature and humidity readings where the results are usually displayed on some kind of display. This time I will show you how to make such a device, where instead of a display, an Addressable WS2812B pixel ring with 12 LEDs is used.

This is another in my series of Unusual Clocks which you can see in the given playlist. The reading of the values is conceived in a very intuitive way with the help of various color combinations.
Even the clock has a resolution of 1 second on only 12 LEDs. Otherwise, the code is taken from the ChrisAsi github site, and is called tux-clock, but I couldn't find a video presentation, so I decided to make the device myself and check its functionality. Another curiosity is the way to enter commands with just one button with the help of single click, double click and long click.

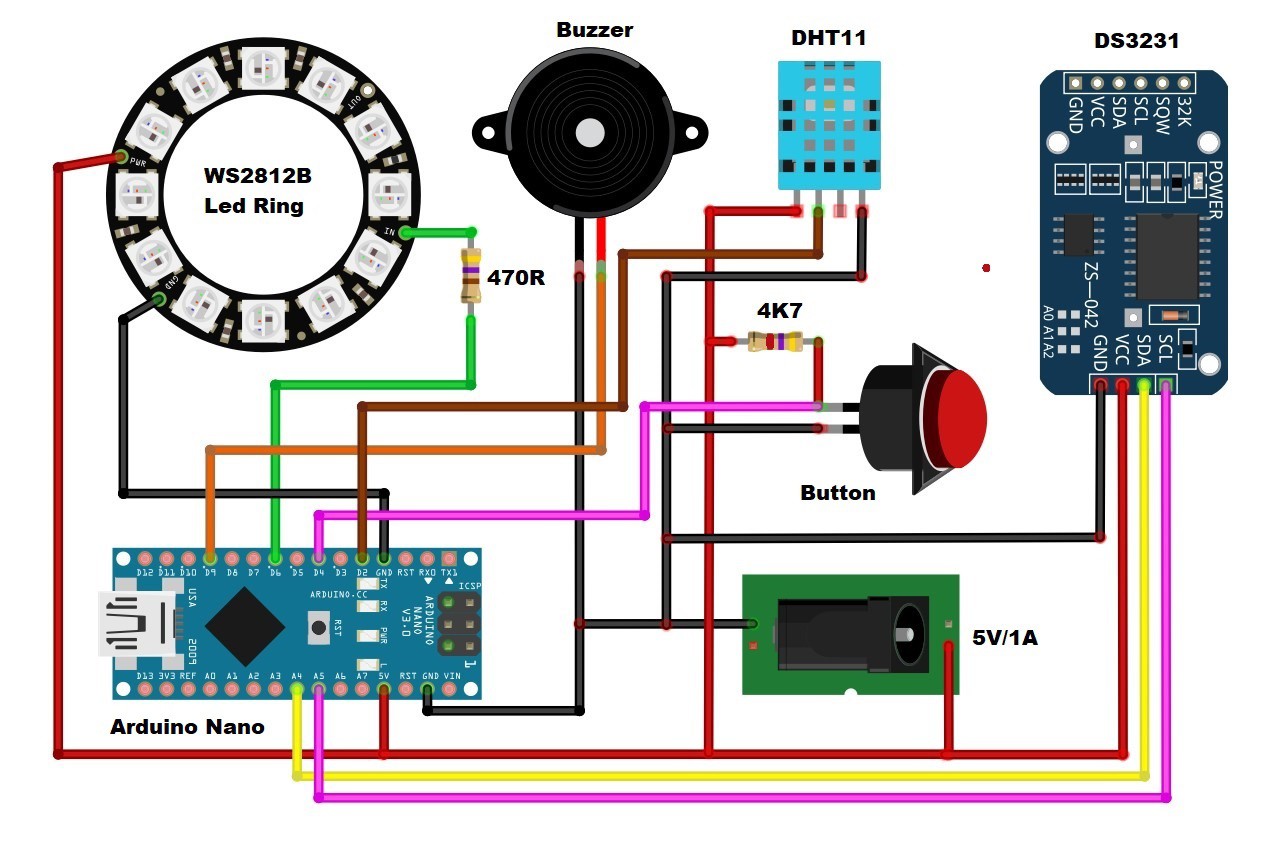
Otherwise, the device is extremely simple to build and contains only a few components:
- Arduino Nano MCU board
- Addressable WS2812B pixel ring with 12 LEDs
- DS3231 Realtime clock module
- DHT11 Temperature + humidity sensor
- A button
- Resistor
- and Buzzer
The buzzer signals the push of the button.
This project is sponsored by PCBWay. They has all the services you need to create your project at the best price, whether is a scool project, or complex professional project. On PCBWay you can share your experiences, or get inspiration for your next project. They also provide completed Surface mount SMT PCB assemblY service at a best price, and ISO9001 quality control.

And now let's see how the device works in real conditions.
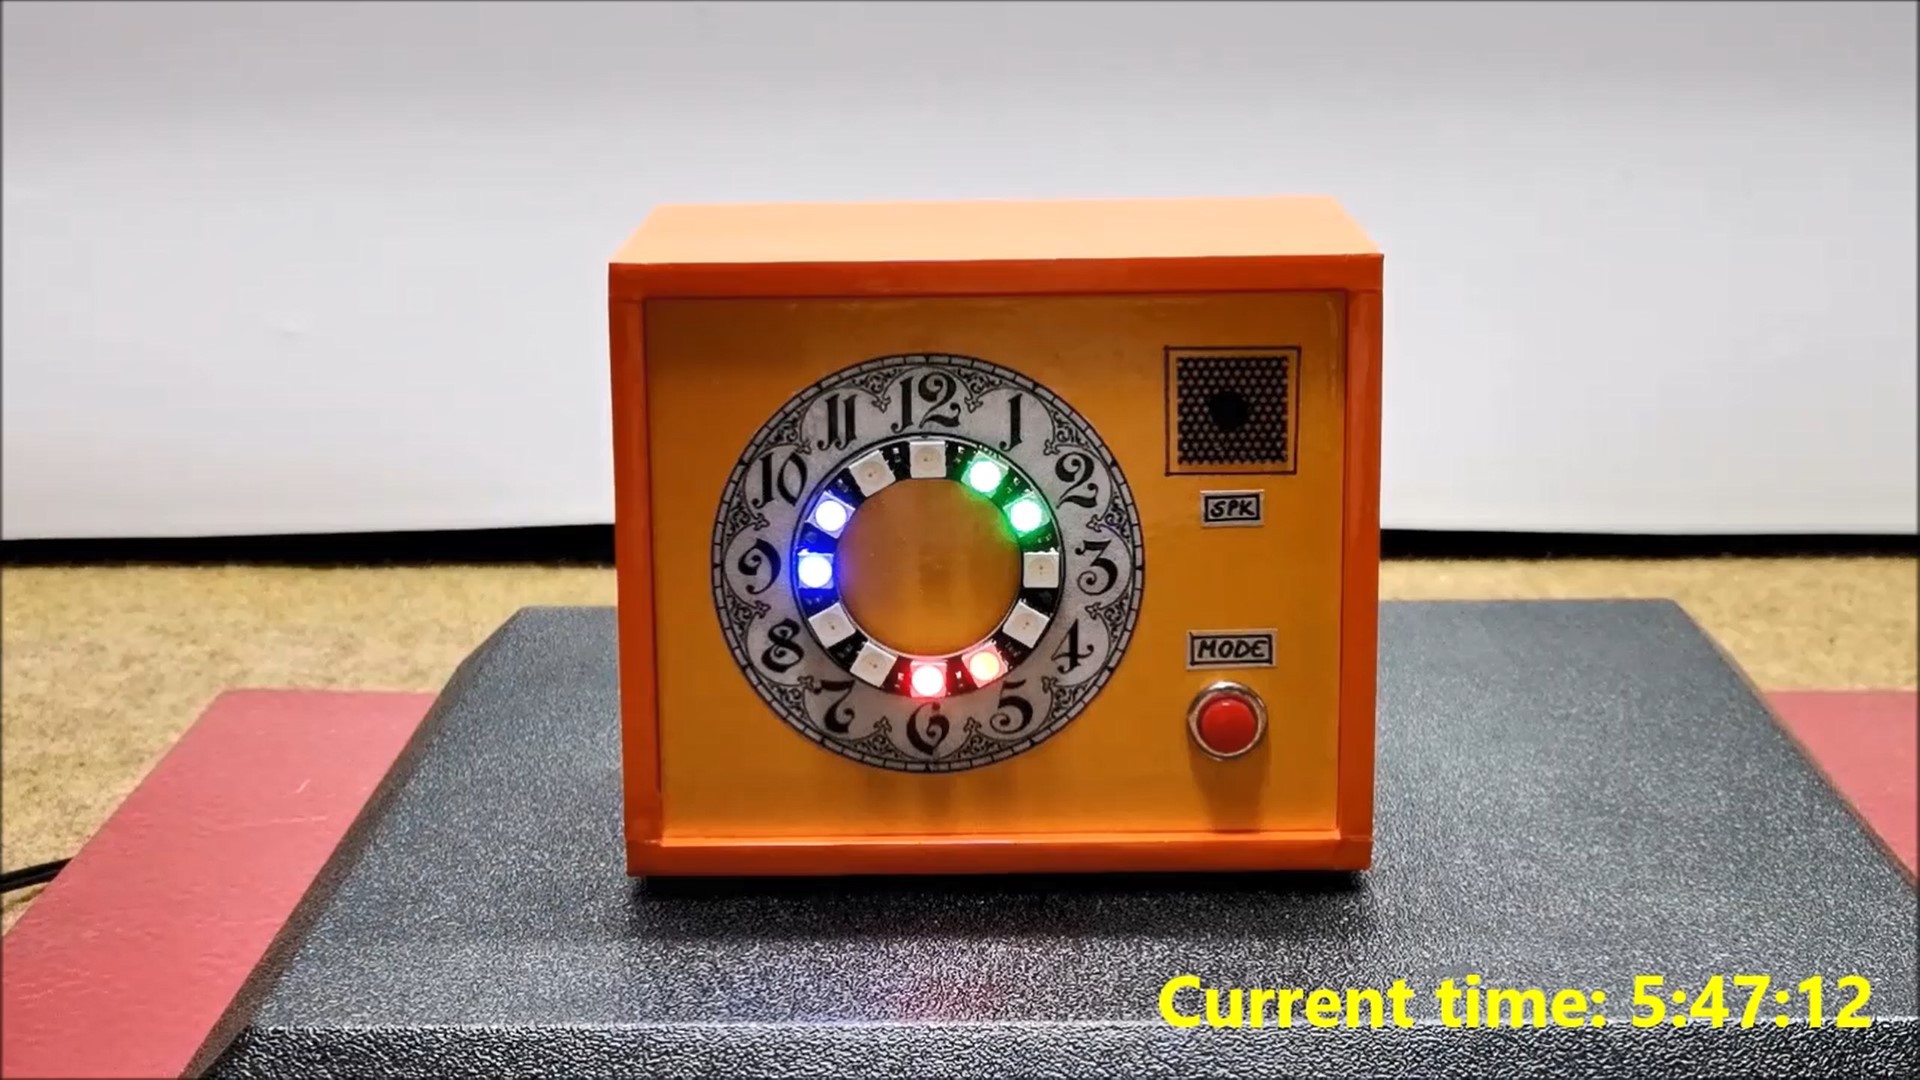
Immediately after switching on after testing the diode ring, the clock starts in the current time setting position. With short kicks on the button, we set the hour, which is the pink or red LED(AM or PM). When we set it, we wait for a certain time and now the blue LED that indicates the minutes is lit. We adjust the minutes in the same way, and after a few seconds the correct time appears.
We read the exact time in the following way:
- The Red Led indicates the Hour specifically it is 5
- The blue LED shows the minutes, specifically 47 minutes
- both green LEDs indicate the seconds. As you can see, with each passing second, the intensity of the Led gradually increases, and every five seconds, the next Led is turned on. The same principle applies to minutes and hours.
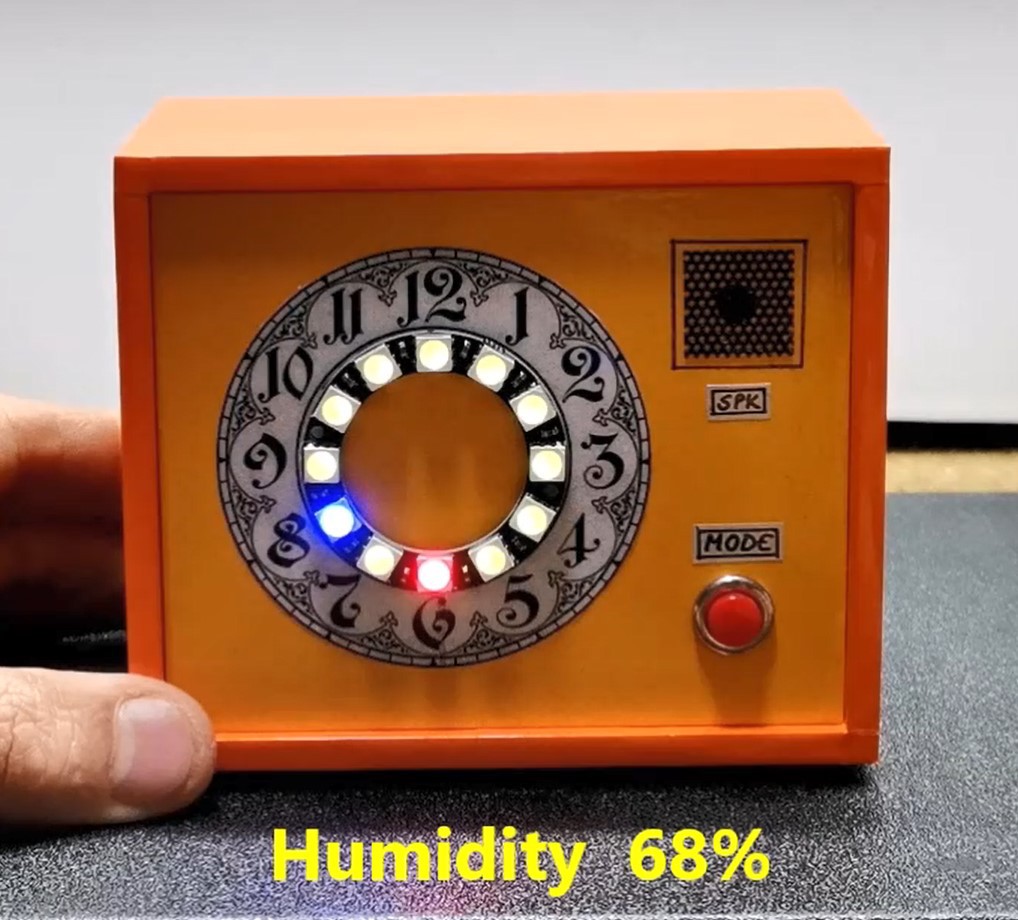
Now with a double click the following state appears on the display and actually represents the current humidity measured by the DHT11 sensor. Currently it is 68 degrees Celsius, the red LED represents the tens and the blue the units.
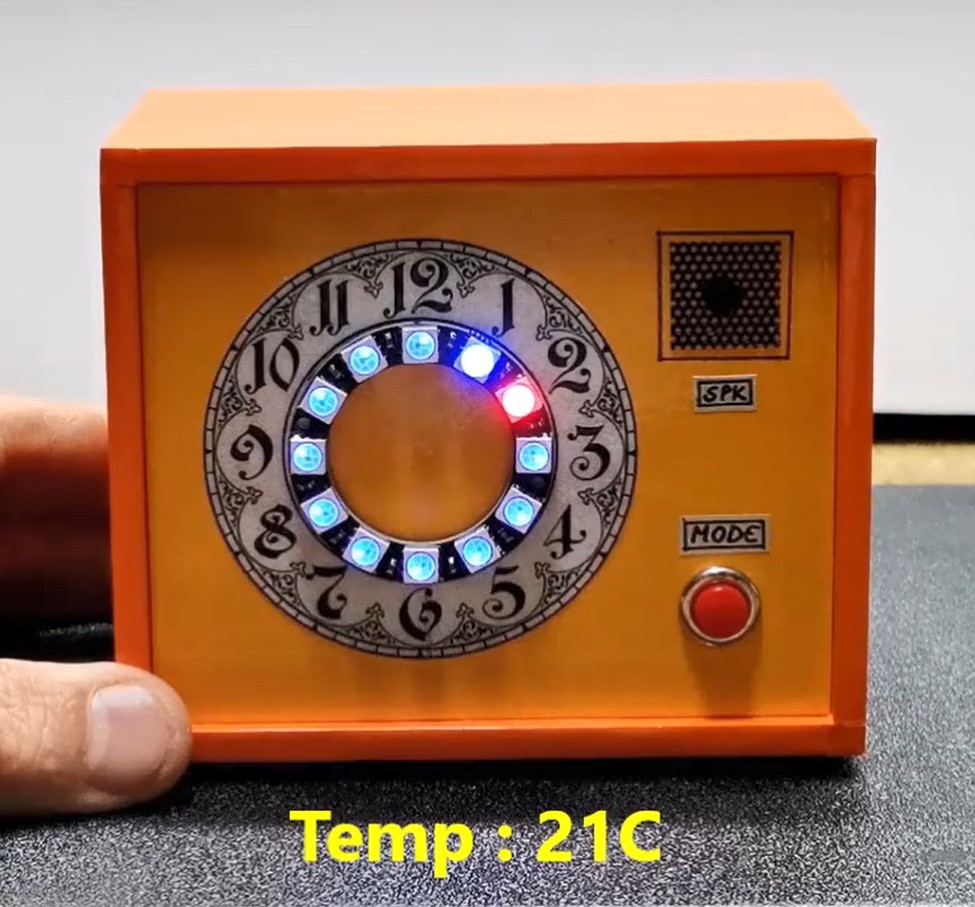
With the next double click I displayed the temperature also measured by the DHT11 sensor, and currently it is 21 degrees Celsius. Analogous to the previous case, the red LED represents the first digit, and the blue the second digit.
Also, the device even has the ability to adjust the intensity of the LEDs. This menu is entered with the next double click, and the desired intensity is adjusted with short clicks on the desired value. Then that value is remembered with a double click.

Now device is returned to the first menu for setting the correct time and if it was previously set at the beginning, now we just single click to houyrs and minutes show the previously set time.

And finally a short conclusion
Although this is a very simple Arduino project, it contains more
different options, as well as a very intuitive way to show a lot of information on the "Display" consisting of only 12 LEDs.
For the sake of a better visual impression, I made a suitable case for the device from PVC boards with a thickness of 3 and 5 mm, and then covered it with colored self-adhesive wallpaper.
 Marius Taciuc