Frederic
-
Building a new one
04/17/2020 at 13:23 • 0 commentsSince the first one, I've made some changes to the design, and built a new one on this. With my son we also worked on a mobile app to drive it from bluetooth, and we even added a Raspberry PI (3b+) to handle reading midi file and implement a accompaniment mode and learn mode.
I'll publish information about these changes during the coming weeks.
Next week will be hardware stuff.
Basically replacement of arduino with mega 2560 (to use 2 hardware serials) and adding level shifter between arduino and mpr121.
You can see first tests here :
https://www.youtube.com/watch?v=QrhrvHwBTaA
https://www.youtube.com/watch?v=lHdwECdyA4Q
And a google album here :
-
Keypad as first start before bluetooth connection
10/14/2018 at 07:06 • 0 commentsHi,
I added a keypad on the master. allowing to enter a number for octave height and to change tone played by each note.
Hardware : One more arduino inserted on the serial bus between the master and the first piano keyboard. This arduino has a keypad and a 4digit LED attached to it, but the end goal is to also add a bluetooth module that would be driven by an app in the end.
Software : I uploaded the ino file that control the keypad. I already prepared the Master.ino file, so no update on this side. You have 2 command, A and B, A will change tone, B will change pitch.
How it works :
Instrument :
Press 'A' and type the number of the instrument in General Midi code (01 for grand piano, or 67 if you want a sax to play pink panter for example). Then touch a note on the piano. then press '#'. After that, all notes below the one touched will use the instrument you choosed.
You can repeat the process as many time as you want, you can basically have one instrument per touch if you want...
You just need to start by lowest note as all subsequent will be changed by a new command.
Pitch:
Press 'B', then the number of the octave you want to use. then touch a note, then '#' and all notes below will be changed according to your modification.
In Master, there is a table for each note fixing its pitch and its instrument. At initialization, the first octave number is computed depending on the number of octaves found attached (for exemple, with 4 octaves, the first note will be a "C3".
Thanks to this method, you can change it even in the middle of and octave: You can have the first octave starts on "C2", then on the second octave, you can keep C3 & D3, then change to E4 depending on your needs.
You can also have multiple players that will play different instruments on different tones.
As general Midi also allow drums, you can even define some drums...
I started to work on the version 2, I will take more pictures, will try to explain more the different parts of the build and to add more pictures.
The other goal is to have Master driven with a RasPI instead of the arduino to allow for it to play a midi file, and display keys that should be played at the same time (tutor mode).
With my colleague, I also plan to create better PCB to remove plenty of wires.
Expect new posts along the way.
-
Playing now...
09/05/2018 at 08:40 • 0 commentsMy son was home for few days, so we decided to take on this piece, some guys played it on their piano (BTW they do far more elegant playing than we do) and lots of friends asked us to do it too. This is done, even if we would have needed more time to really work on it. We don't really see the lights because of the sun, and because this is outside with a small amplifier, the sound is not very good too.
-
First part of project completed
09/01/2018 at 07:22 • 0 commentsThe project in its first state is now completed. It's been used for more than one year in music school with no real problem (only e few leds on one led strip that were dead).
Each octave is less than 20kg, and with a finished size of 105x100 each, it can fit very easily in most of the cars.
The Ethernet connection is very simple to plug in and the full piano is assembled in less than 5 minutes.
The master part can be drastically improved (and will be).
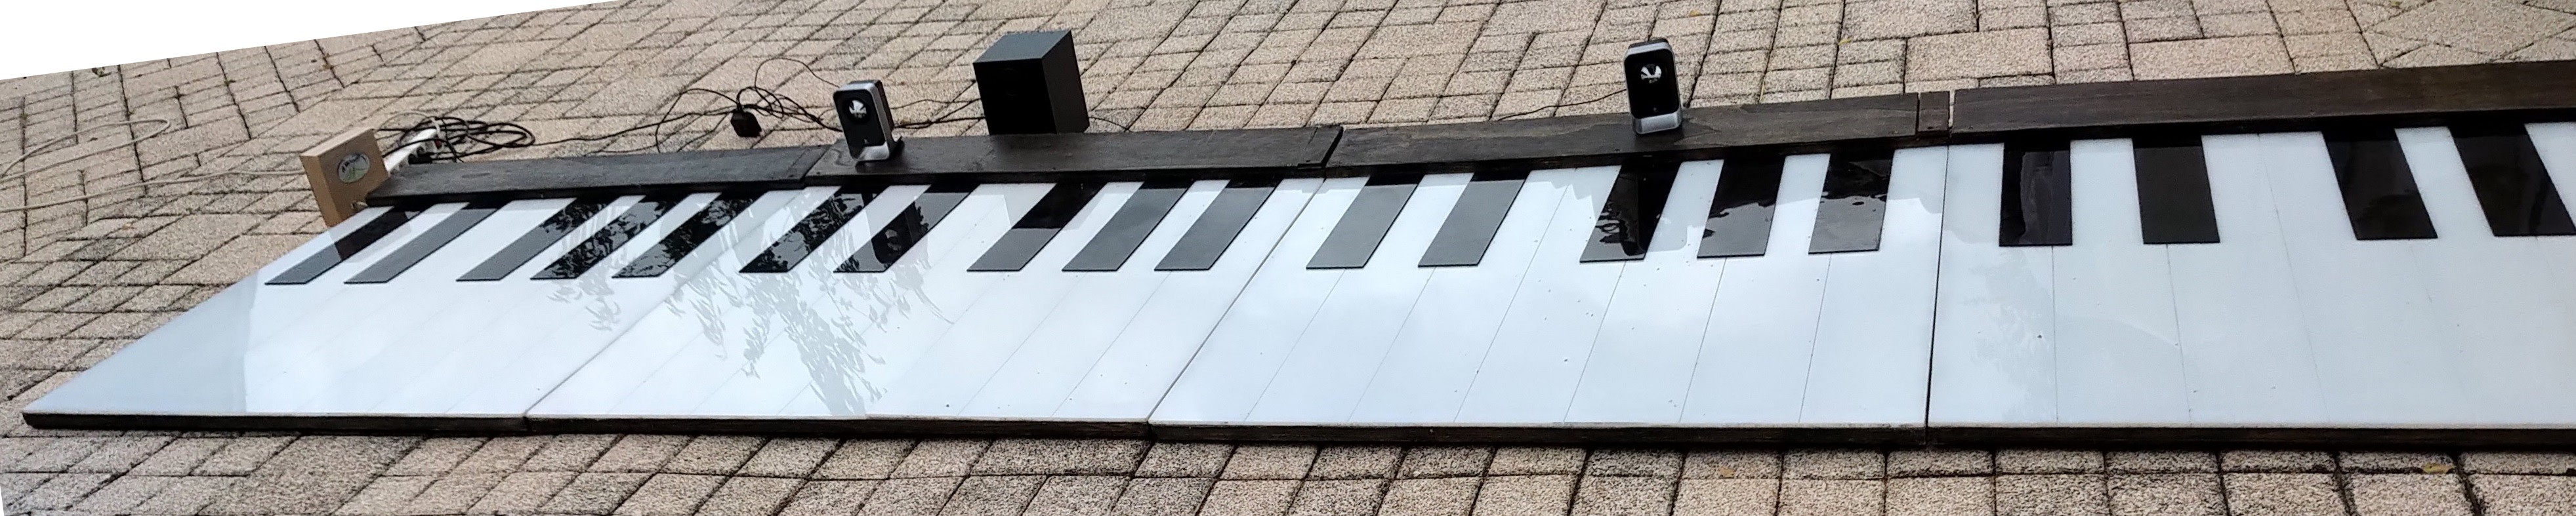
You can see on this last picture the whole 4 octaves keyboard, The small box on the left is the Master. I created a site http://www.grand-piano.fr/ and will create soon a blog for further discussions and explanations. It's not ready yet, but I also have a daily job that I need to do.
Feel free to make any suggestion about how to improve and what functionalities you'd like to see added.
My friend was also saying that we may sell it or at least sell kits when electronic boards will have a better design.
Thanks
![]()
-
Electric/Electronic and a bit of software
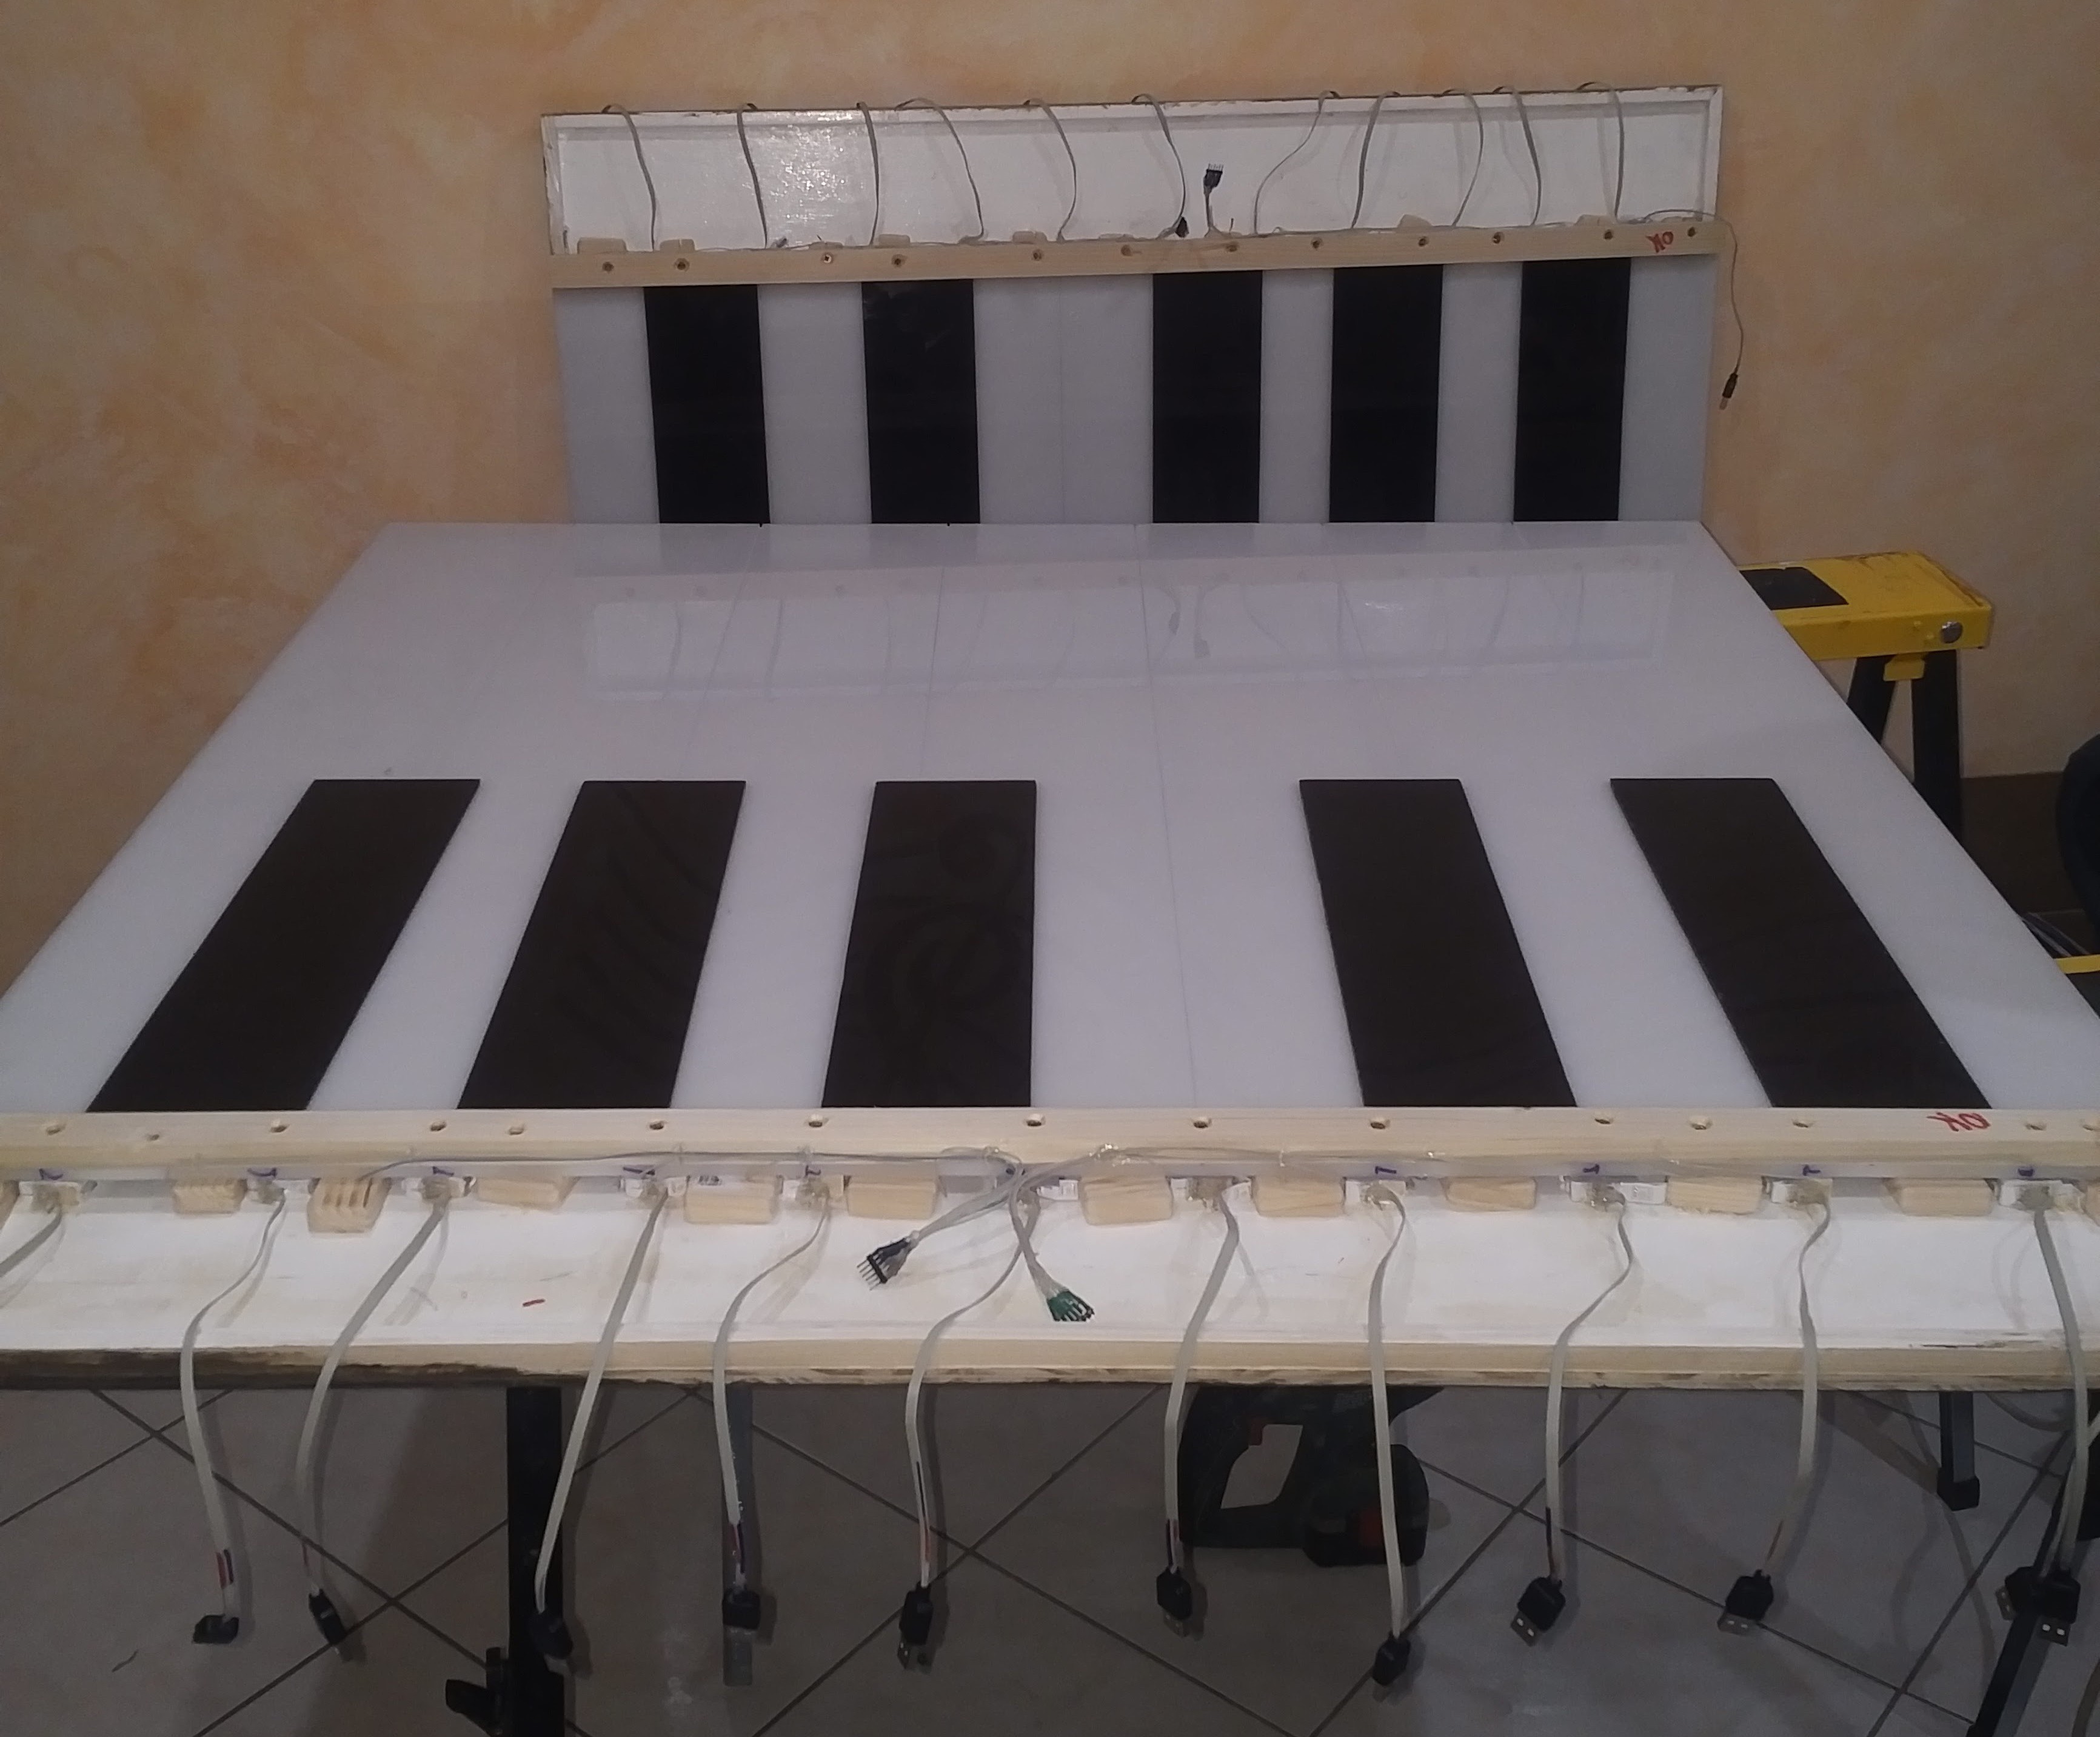
09/01/2018 at 07:12 • 0 commentsHere is a picture of one octave assembled. I'll cover more in detail each parts.
![]()
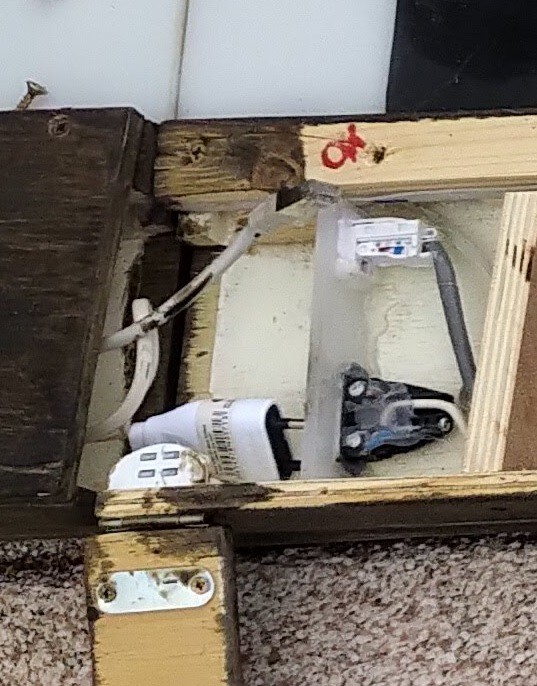
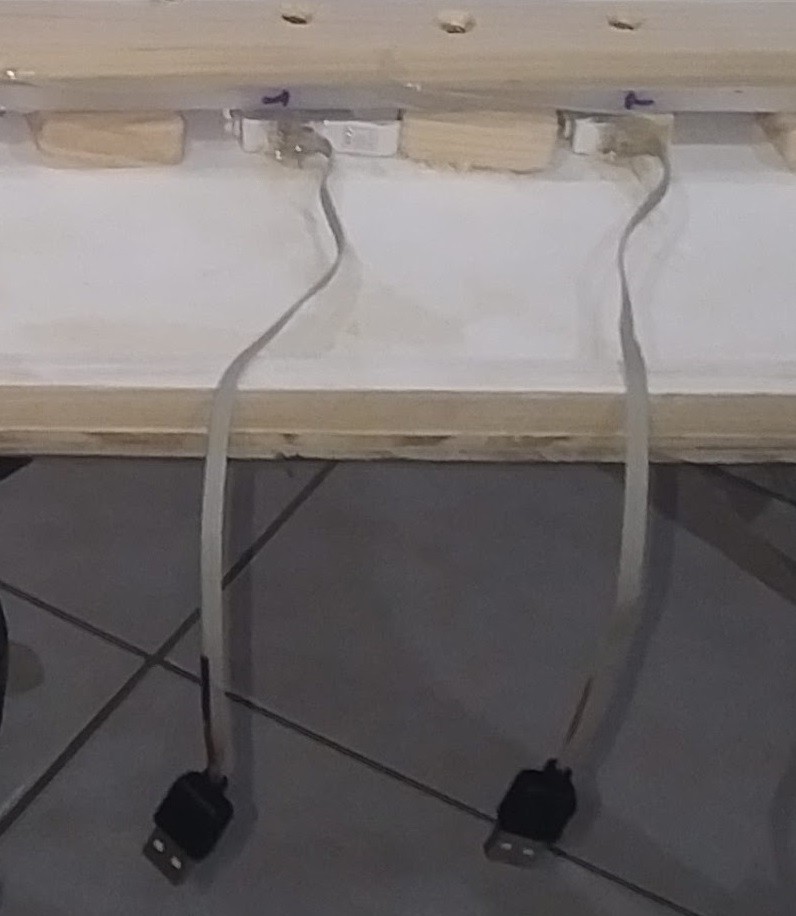
Below is each extremity of the thing. You can see the Main Power line that is used to bring power to the Leds, and the Category 5 cable and outlets that are used to bring 5V, Ground, RX0, TX0, RX1, TX1. A Small door allow access when the keyboard is assembled.
![]()
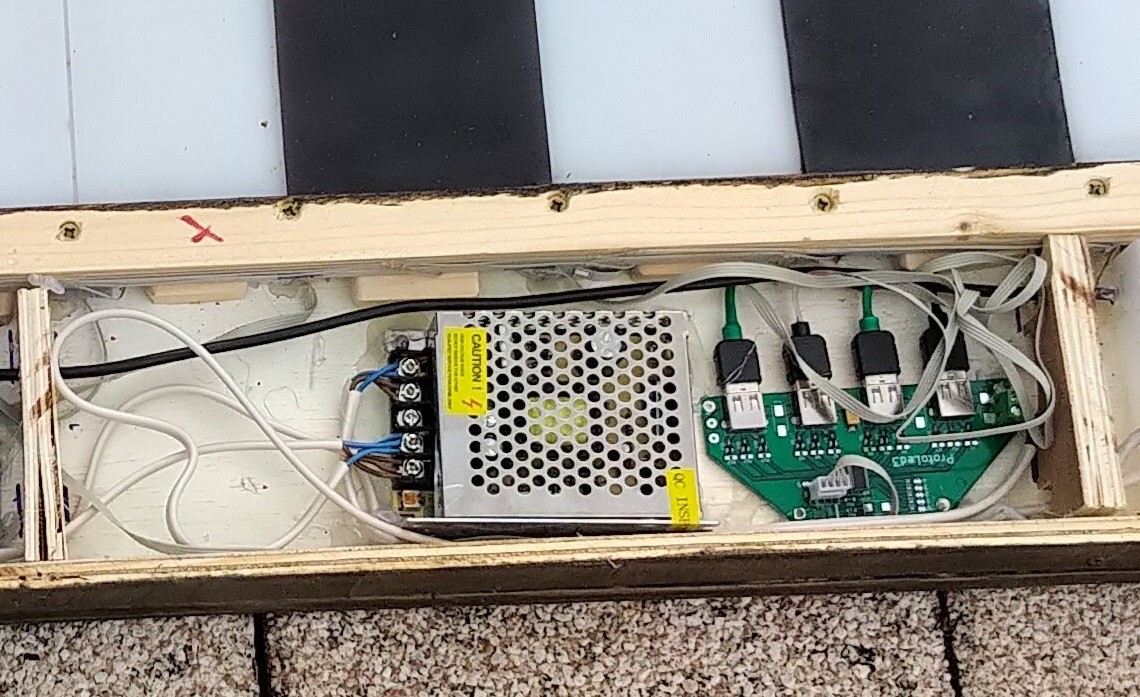
Below is the Power source and a Led driver. The Power source is 12V/5A, This is by far more than I need to lit all LEDs.
The Led driver has been replaced, At first I had TLC5940, then a friend of mine created a new prototype card with another chip PCA9685 AFAIR. My friend wanted to do CMS, I can tell he succeeded as all 12 boards he provided me are fully functionnals. The point is it can drive 12 lines (actually 16 but only 12 are used), 4 notes each x 3 colors for RGB. By reading the arduino sketch, you can tell it's using "Adafruit_PWMServoDriver" library.
![]()
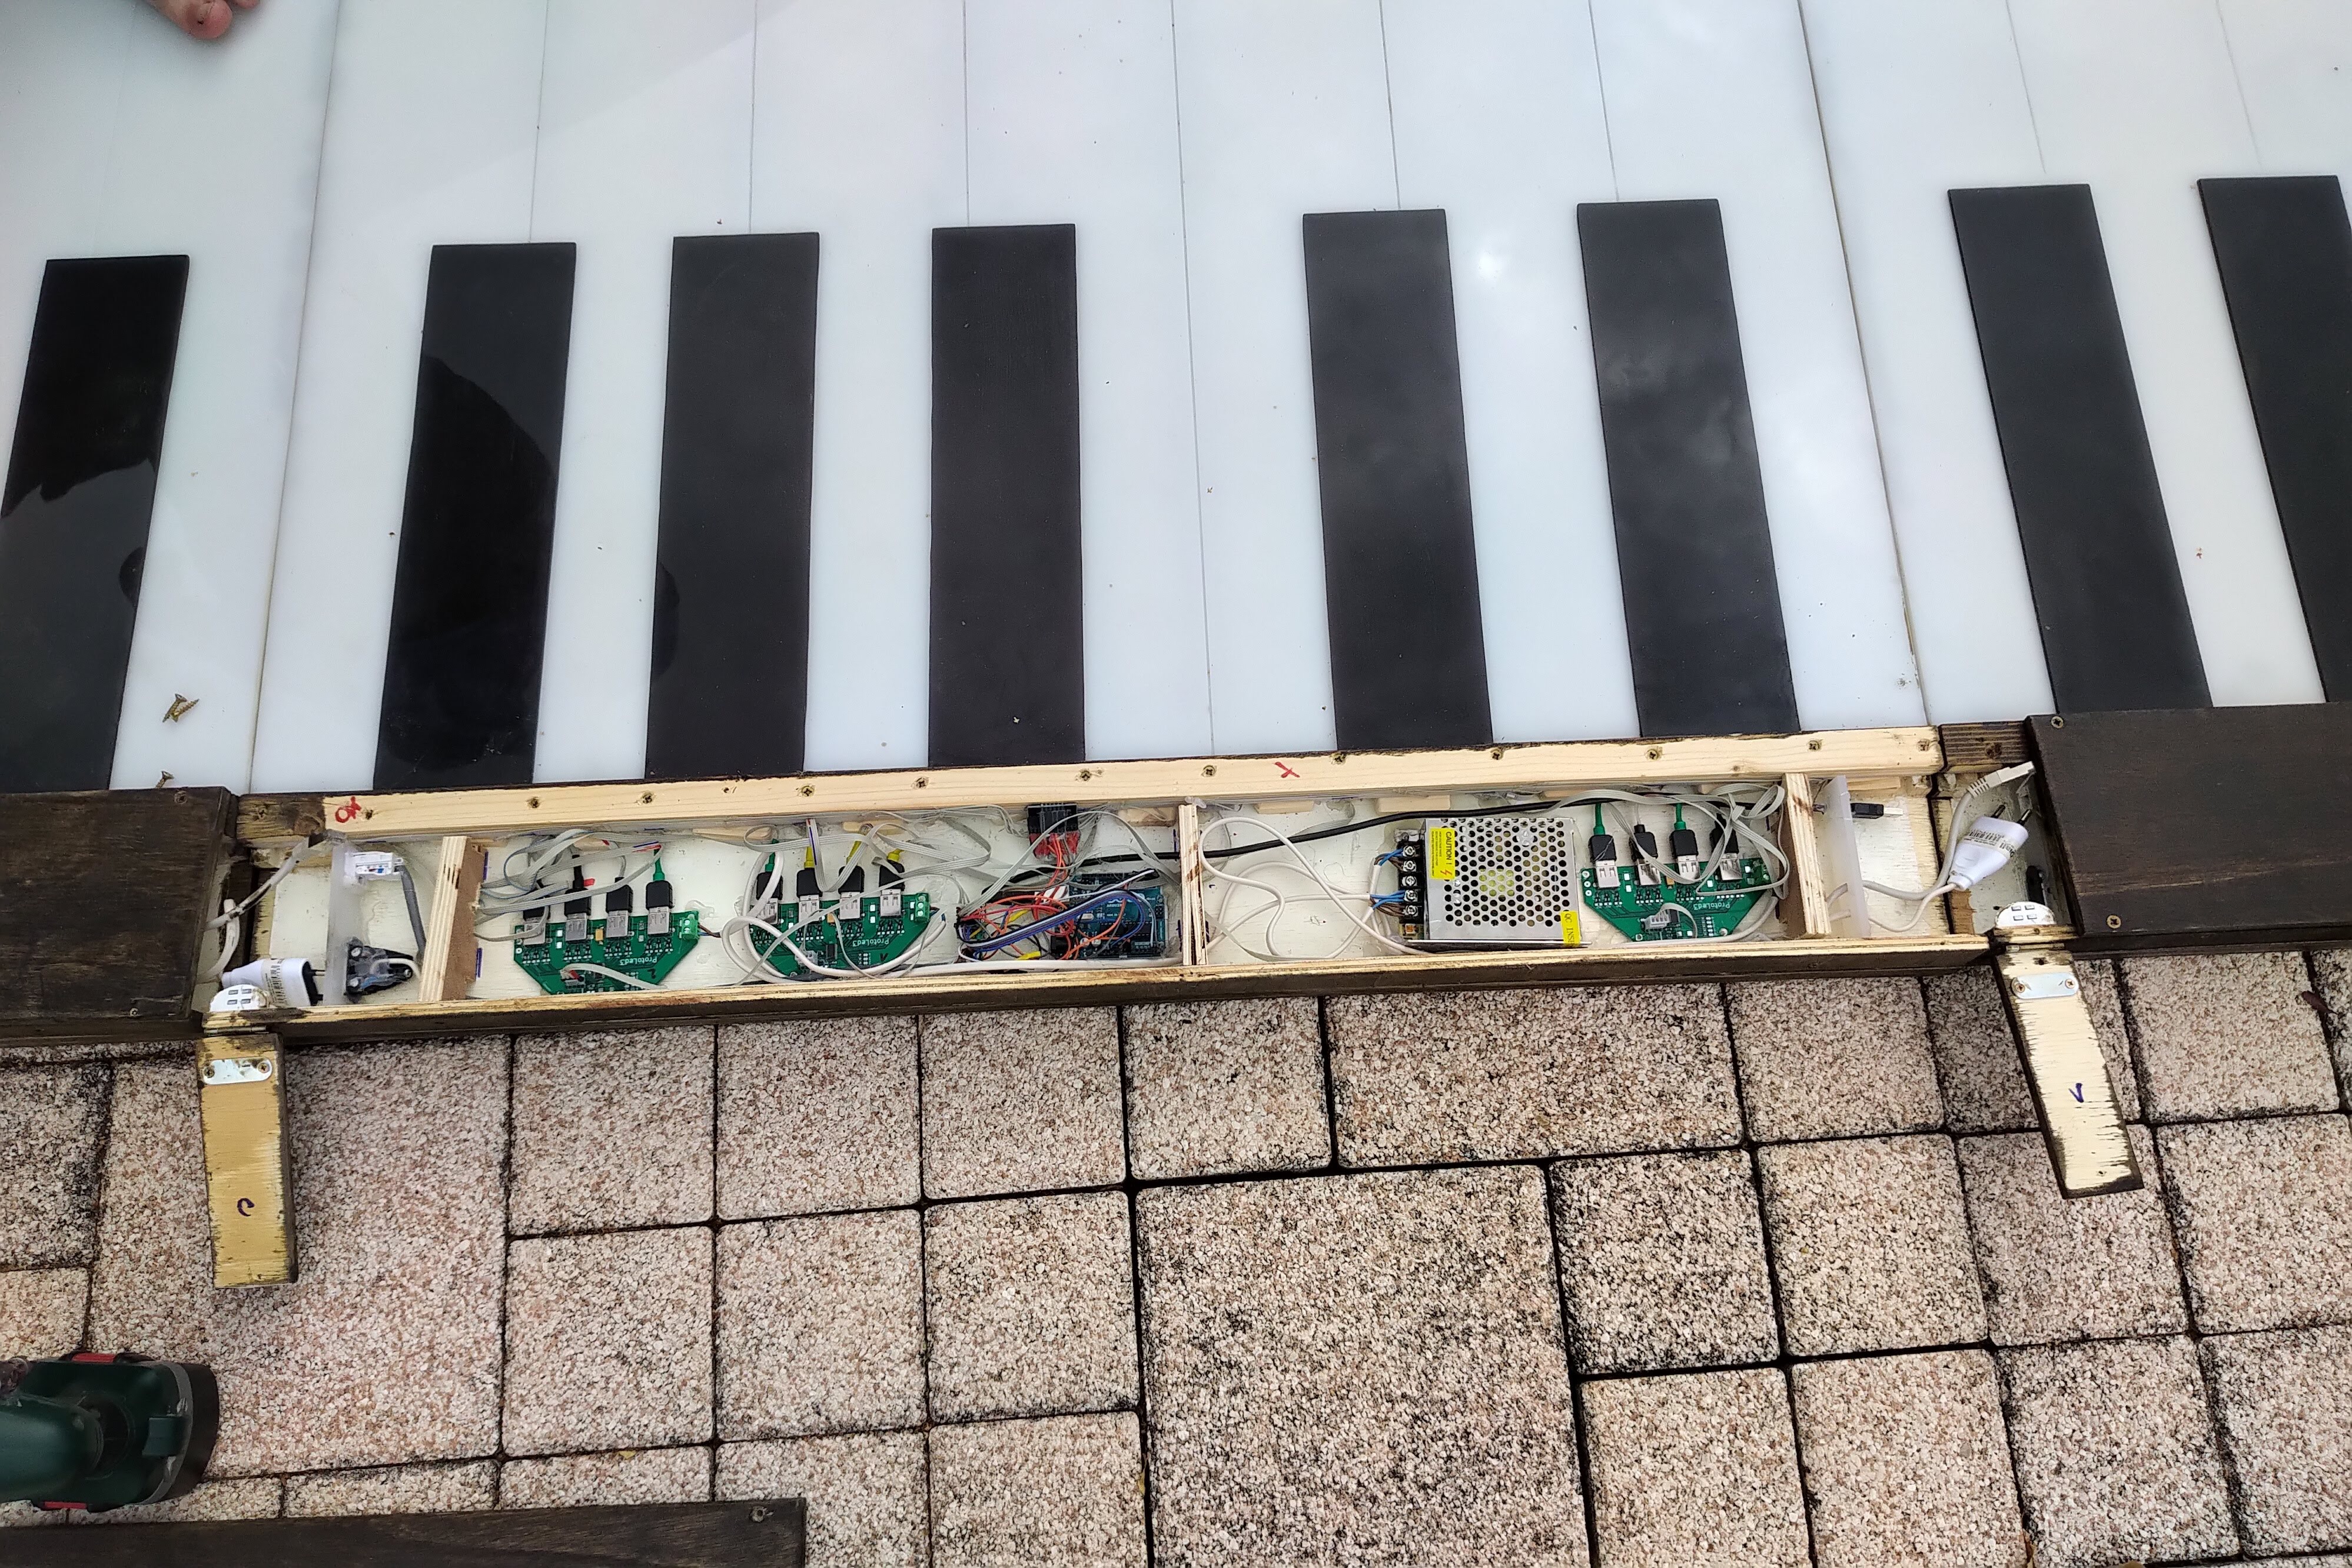
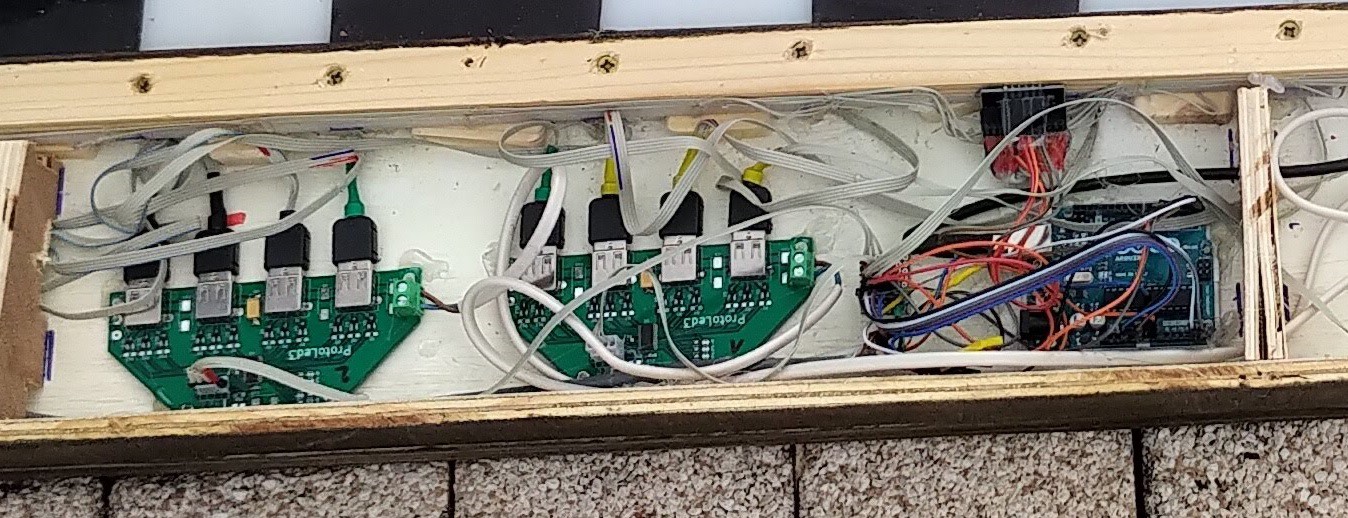
Then Arduino + MPR121 + 2 remaining Led Drivers
![]()
Things are very messy here, and I need to create board of my own to remove all this cables. You can see on top of the arduino on the picture, the MPR121 with cables coming from all keys.
One more Thing, You can see that the arduino has a USB cable going to the visible part of the octave so that I can flash it without even need to open it.
That's pretty much it now. I could describe how Arduino is tied to MPR and PCA or keys, but they are plenty of tutorials explaining it on the net.
Last Software point. I do not use the "official" MPR121 libray, instead, I'm using the one of the BareConductive Touch Board that is easier to use with good predefined functions (I actually kept it from my first tests done with Touch Board).
-
Time to move to electronic part of the project
08/31/2018 at 06:36 • 0 commentsSo, I told you already, I'll use master/slave method to drive this thing and already explained a bit of the technic. what does it translate to when we move to electronic...
Right now, I'm using arduino for control box and keyboard simply because it was cheapest and fastest way to have something working.
In the future to expand capabilities I will indtroduce RasPI for that mater allowing the ability to select midi music, play all staves but one that should be played by the kid, also using training mode where the key will light before the note should be played... but this is for later.
So Arduino for all.
You'll find in project file list the slave, and master files. For me, they are self explainable, but I'll give you some hint to understand them.
Slave :
- Setup is initializing the MPR121, and Led driver.
- Loop is :
1 - checking MPR
When Interruption arise, it will create a message NoteOn/NoteOff that will be sent on master bus.
2 - Check for message on Slave Bus.
First message received should be "init" with octave number. When octave has been associated, there are only 2 other messages. LedOn and LedOff.
Master :
Setup is initializing VS (midi driver) and send message "Init Octave" on Slave Bus till there is no more answer.
At the time, it will know how many octave are plugged to it, and will use an array to define notes and instrument associated to keys in each octave.
About this, I also have a part that will allow changing note, instrument and pitch. It's done thanks to another arduino that will send message to master too, but I can also create an app that can use bluetooth to drive the piano. Let's get this for later, but you can already see the code for it in the master.ino file.
Once all keys have been setup, the master is just waiting for data.
When an octave send a noteOn message it will simply send a midi message to play it, and when the note is released, it will receive a noteOff message.
Simple enough.
-
The inspiration and the tests...
08/30/2018 at 10:43 • 0 commentsSo for the record, I saw in around 1994 a movie called "Big" with Tom Hanks, and abolutely loved this part of the movie.
When I saw that, I said myself I will do one for my house at some point. And now is the time.
My son playing
And with me...
Sorry for the "added percussions". These are my son's key.
-
Building
08/30/2018 at 09:49 • 0 commentsYou can see a few steps from the pictures.
Basically, there is a bottom made of wood. I will layout the sketch later with all dimensions I used. but it's pretty straightforward.
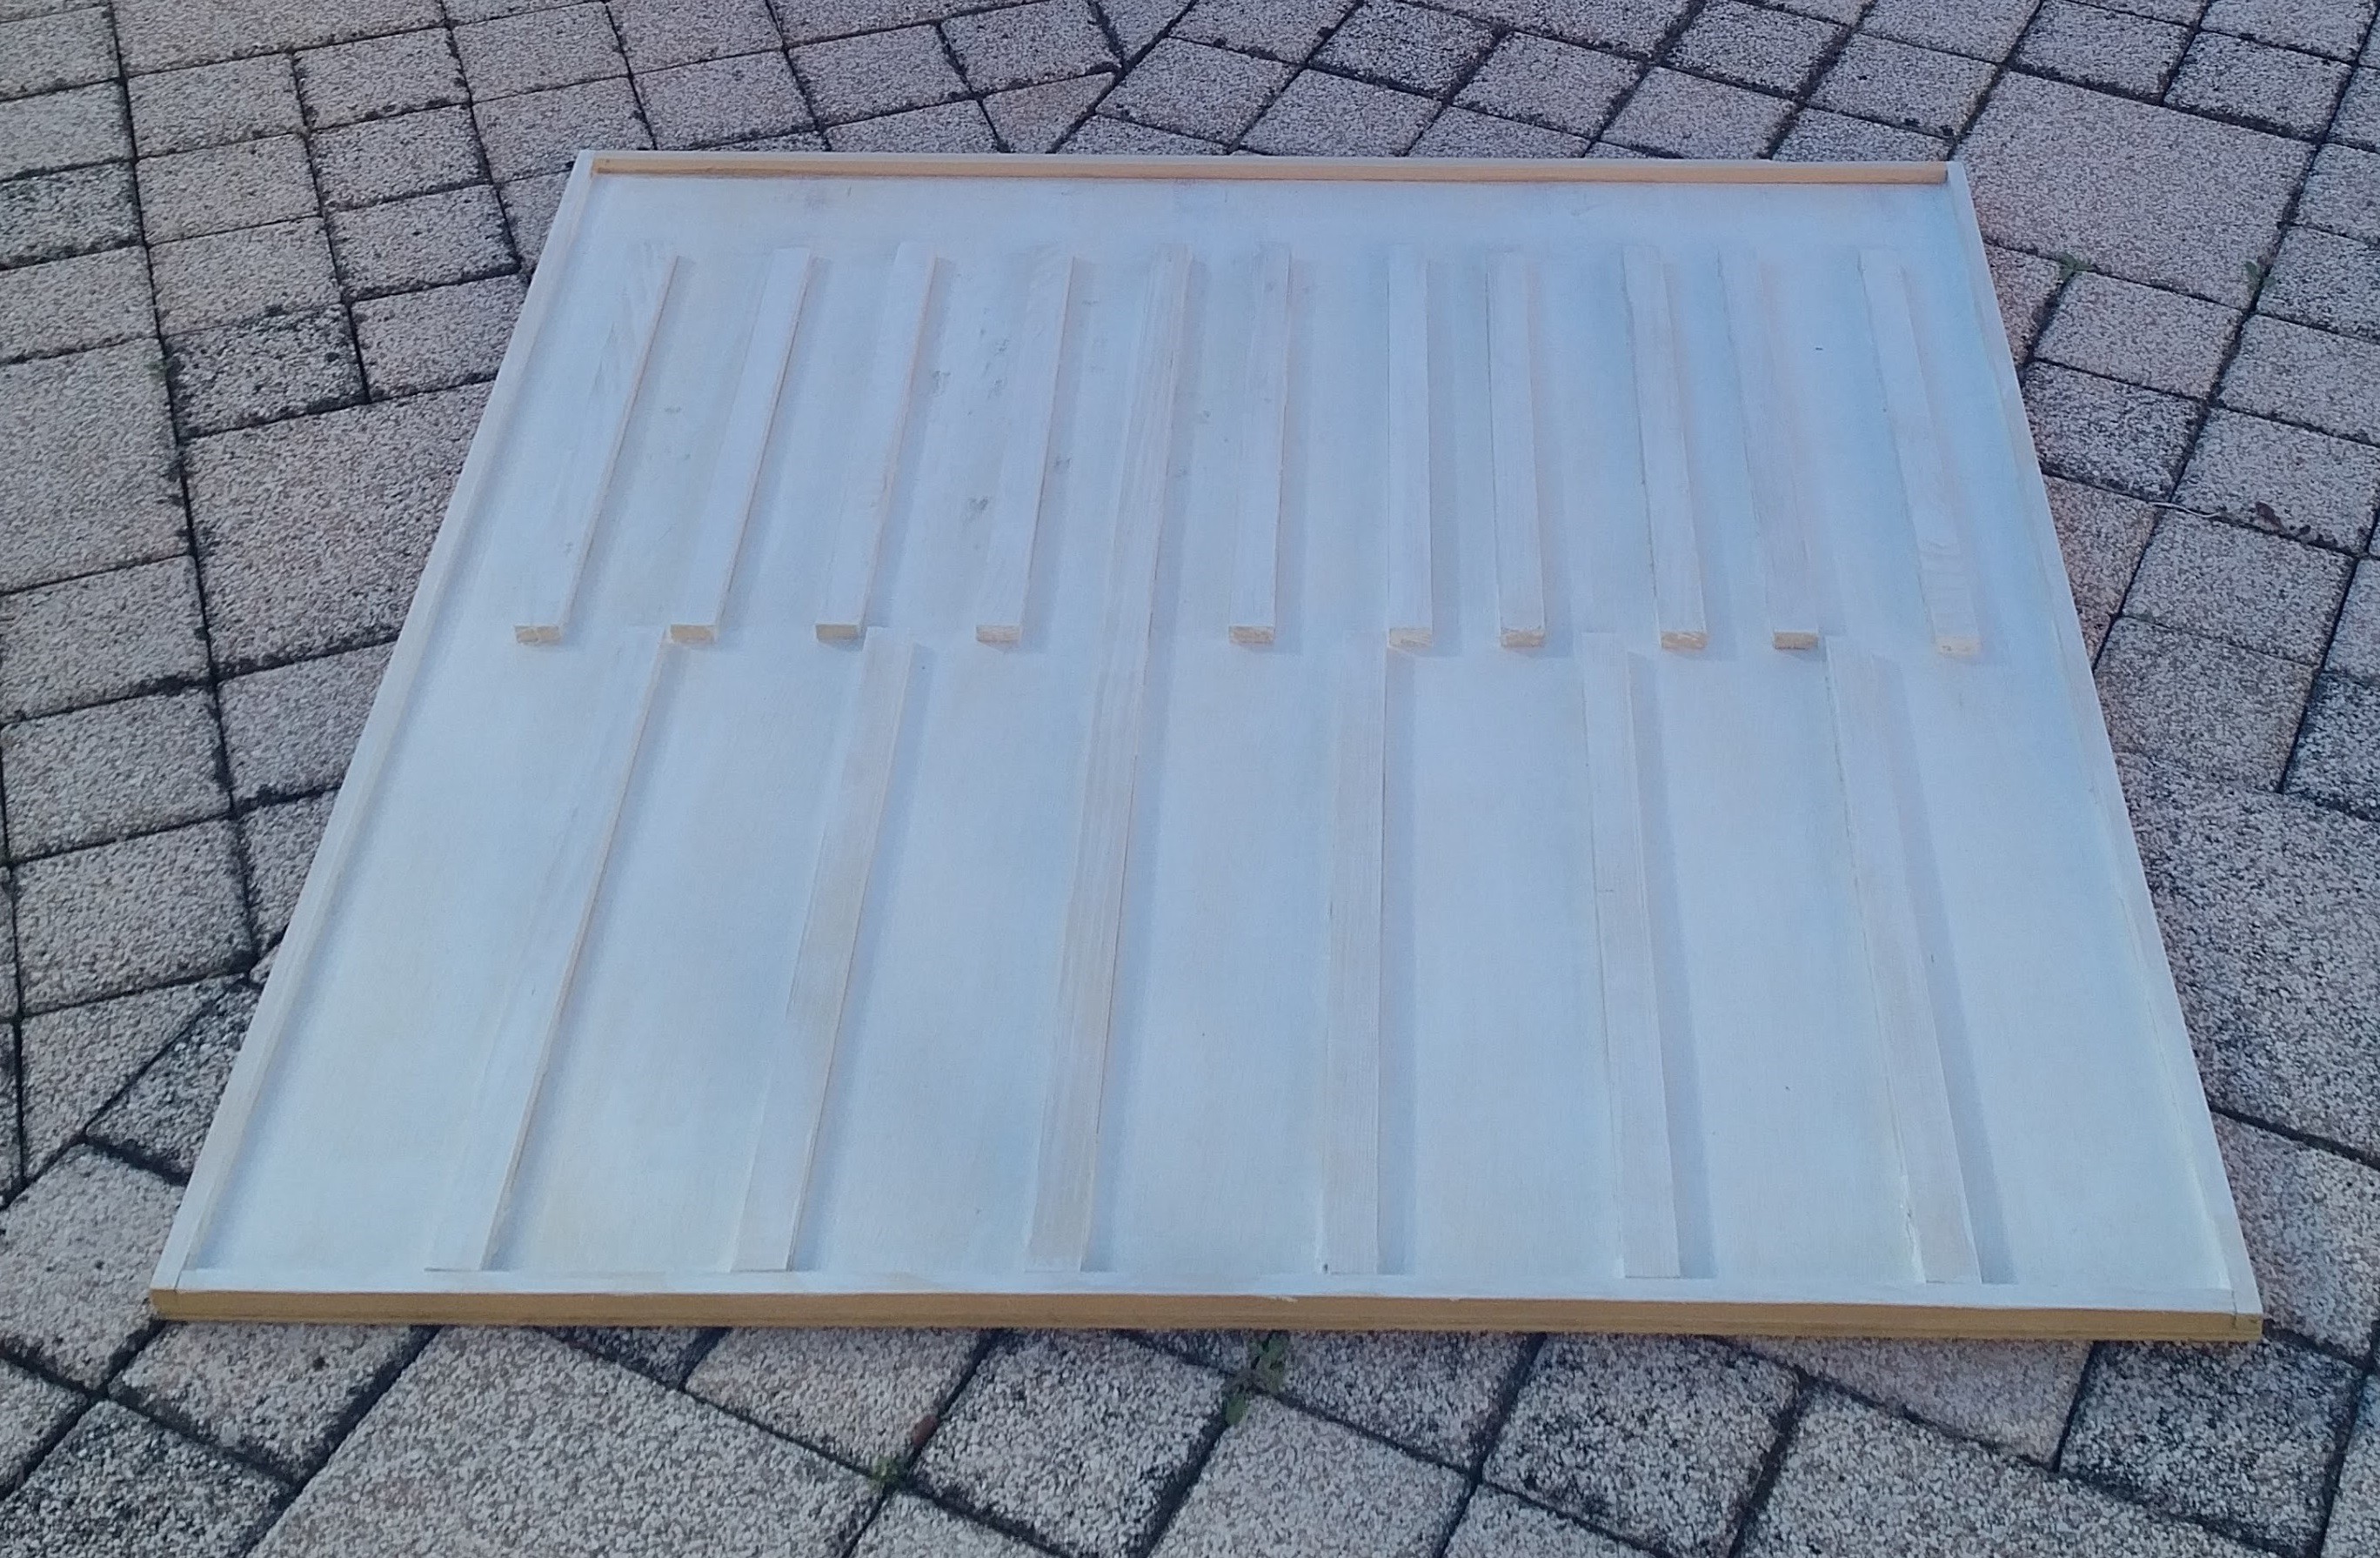
A sheet of plywood (105x100), on it is glued support for each note (each note has 15cm width).
on the side, the supports are 1.3 cm width, and for each note, the supports are 2.5 cm. The height is 1cm.
The notes will be 90 cm in height, so there is a 10cm gap for the electronic on top of the octave.
![]()
![]()
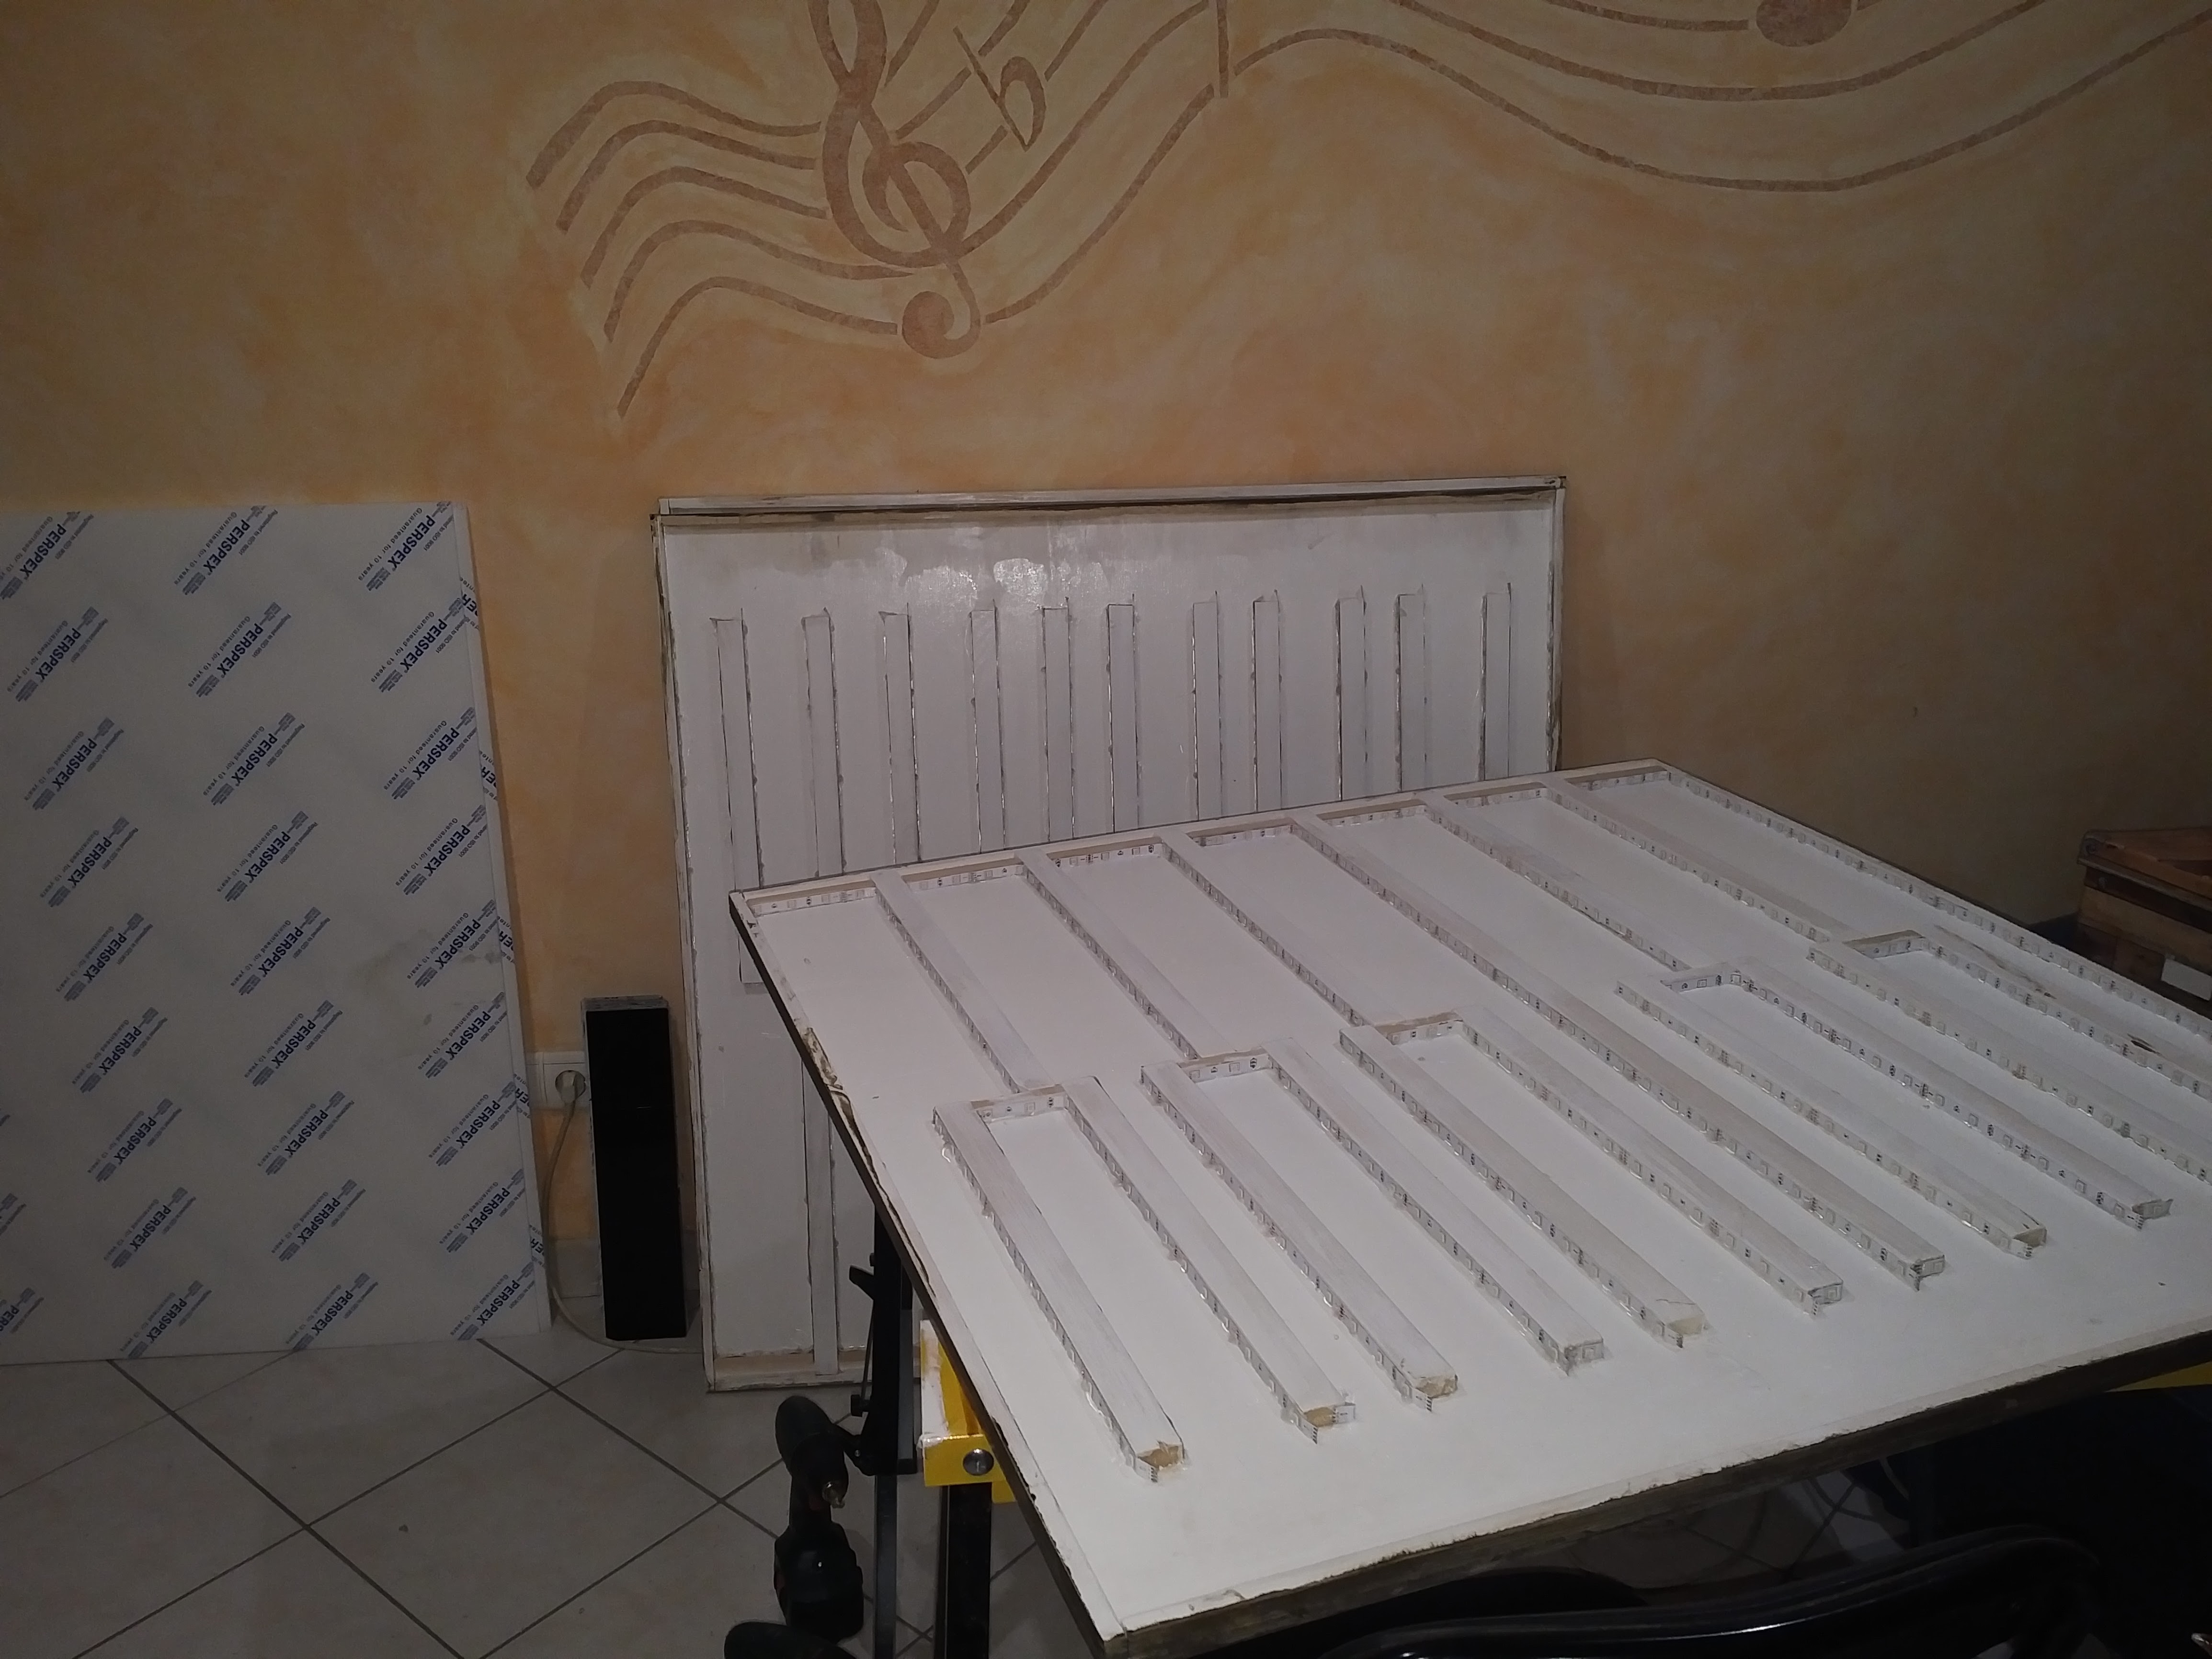
Then we need to add leds. These are simple RGB non adressable 5050 led strips. You need about 25 meters for each octave. This is with the Acrilyc the most expensive part of the piano, but thanks to alibaba, I was able to source 200 meters for a very good price (to build 8 octaves).
![]()
BTW, you can see the acrilyc in the background with the white sheets and already cut black sheets
Then we need to add cloth felts on each support to attenuate the noise made by the jumps on the acrilyc.
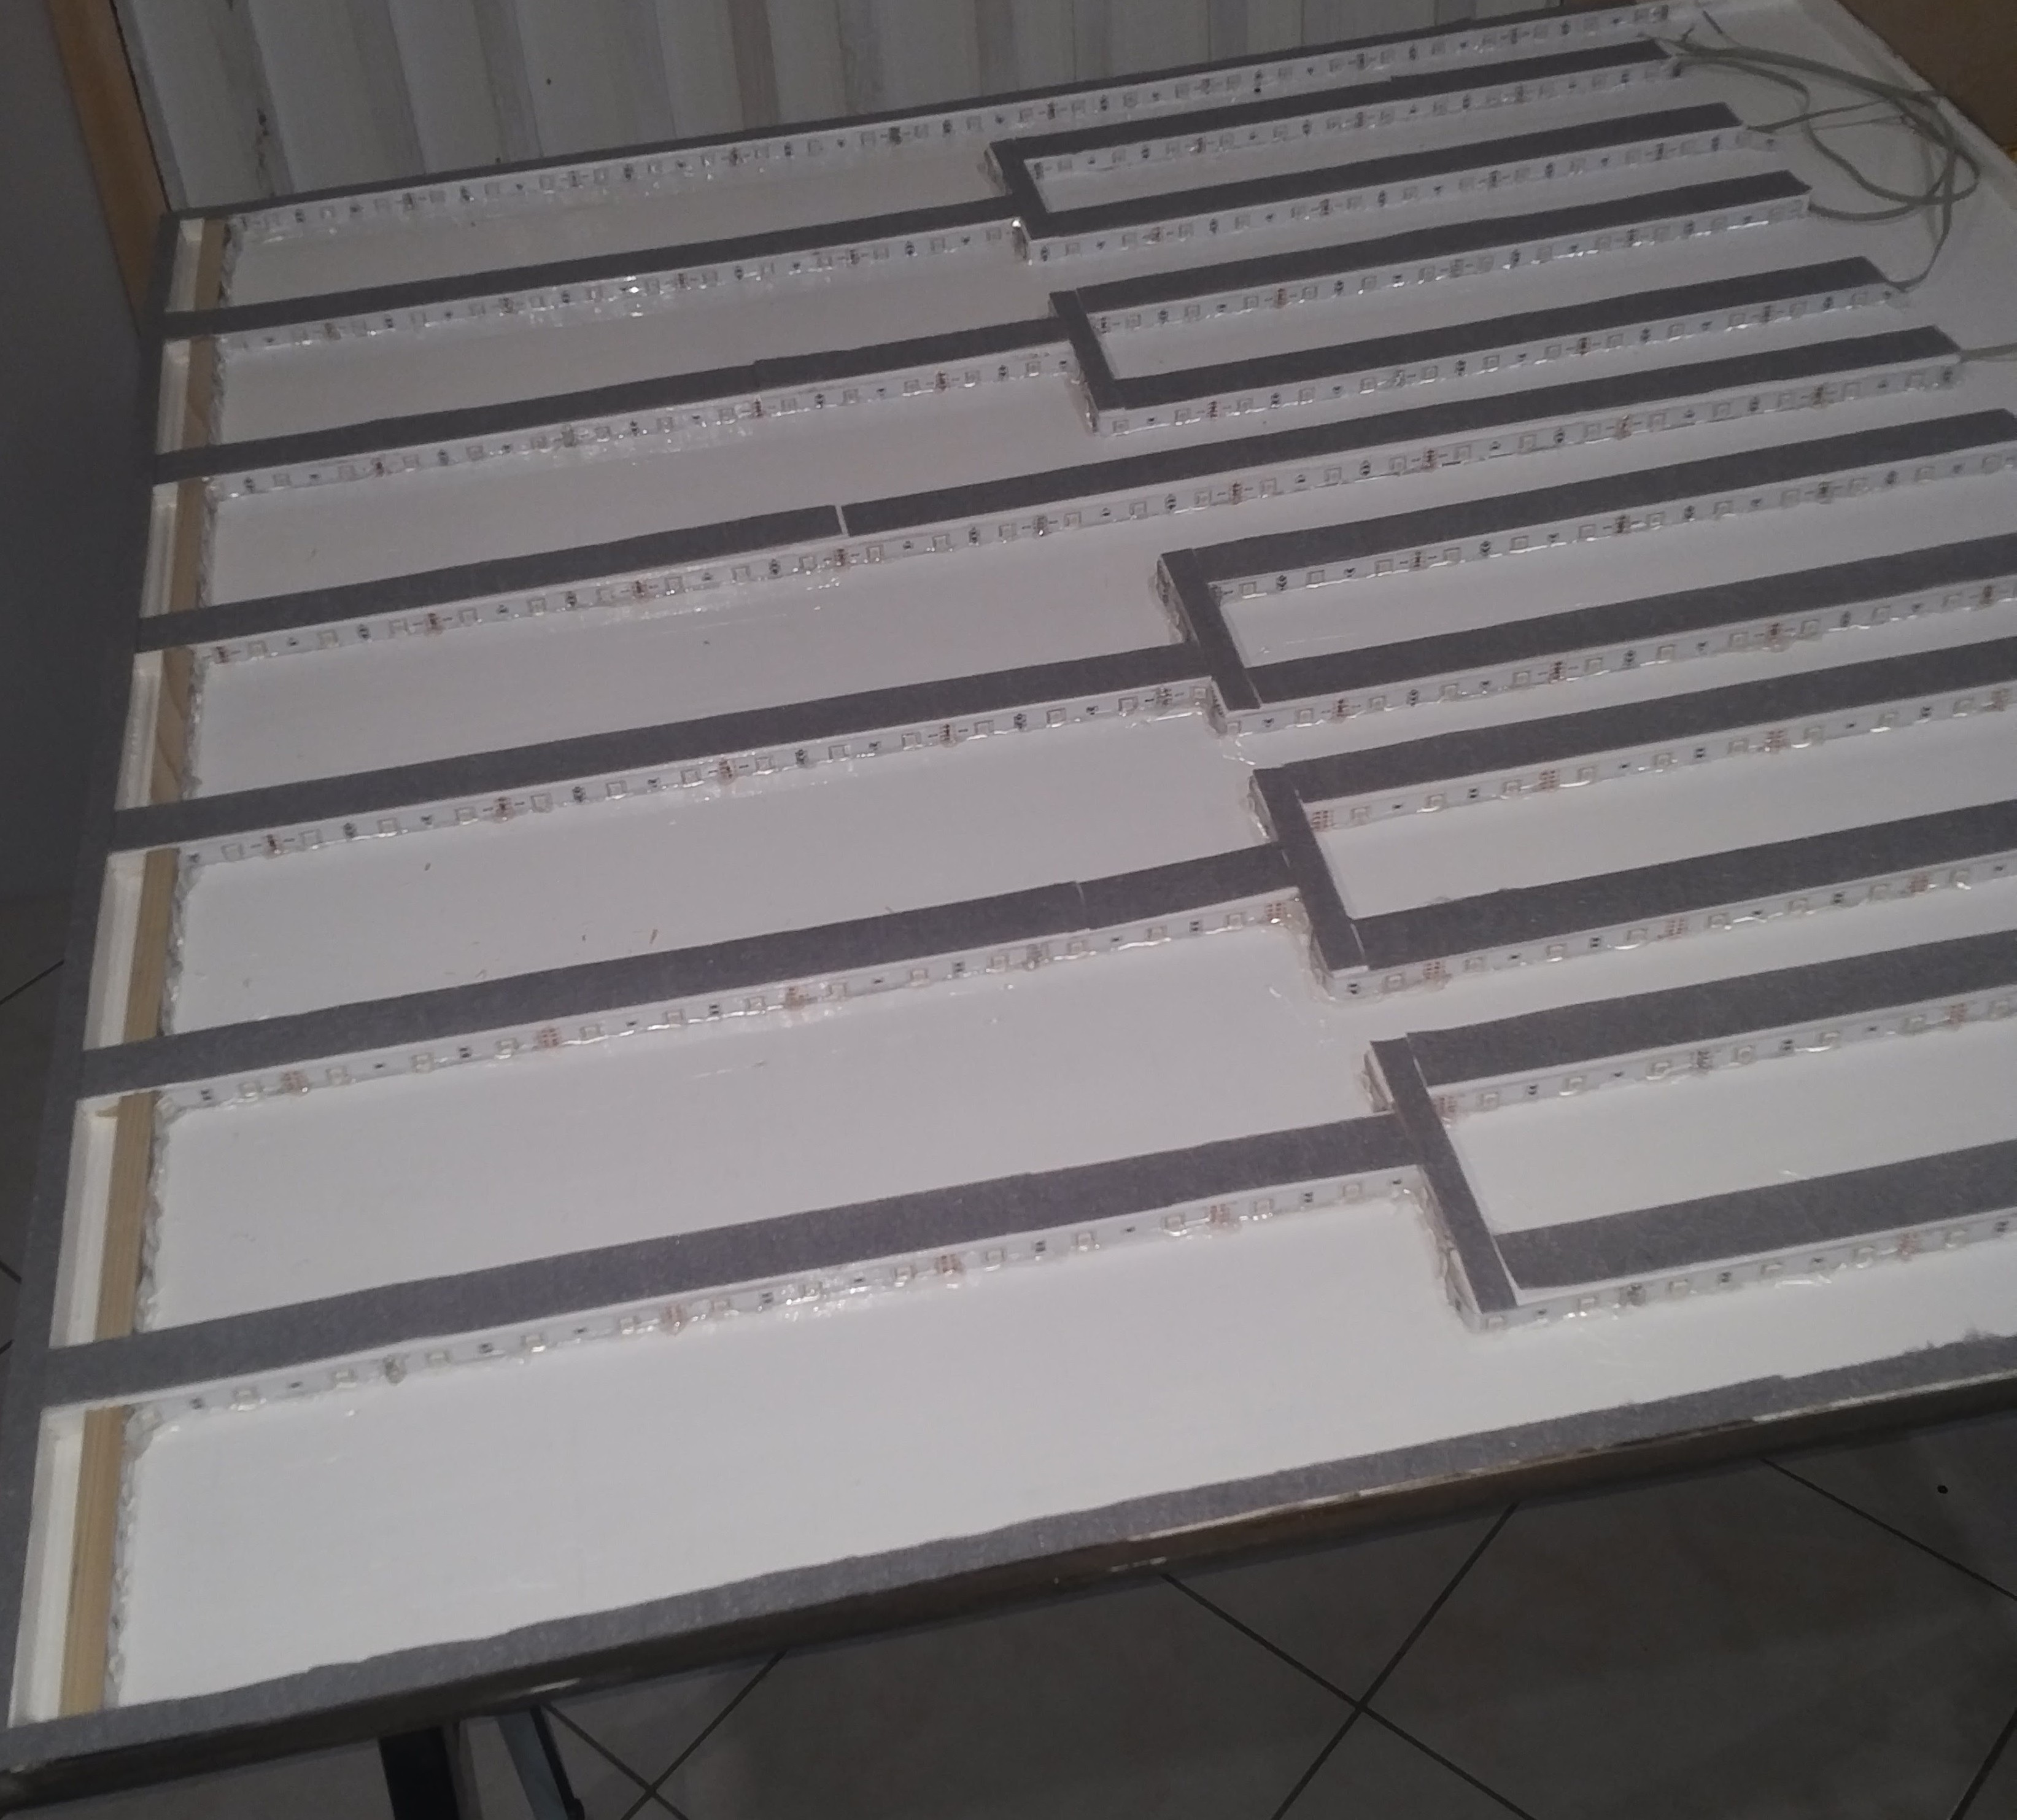
![]()
You can also see I already soldered the wire for LEDs.
On the picture, you can see that the leds are not going to the lower part. It's because I'll glue wood on the Acrilyc and use this to fix the acrilyc on top of this.
Bottom is done now. moving to the acrilyc part.
I don't really have pictures of the process. I simply mark a cut in the acrilly (1 mm depth) to create the white notes, and glued the black ones on top of the white acrilyc.
here it is :
![]()
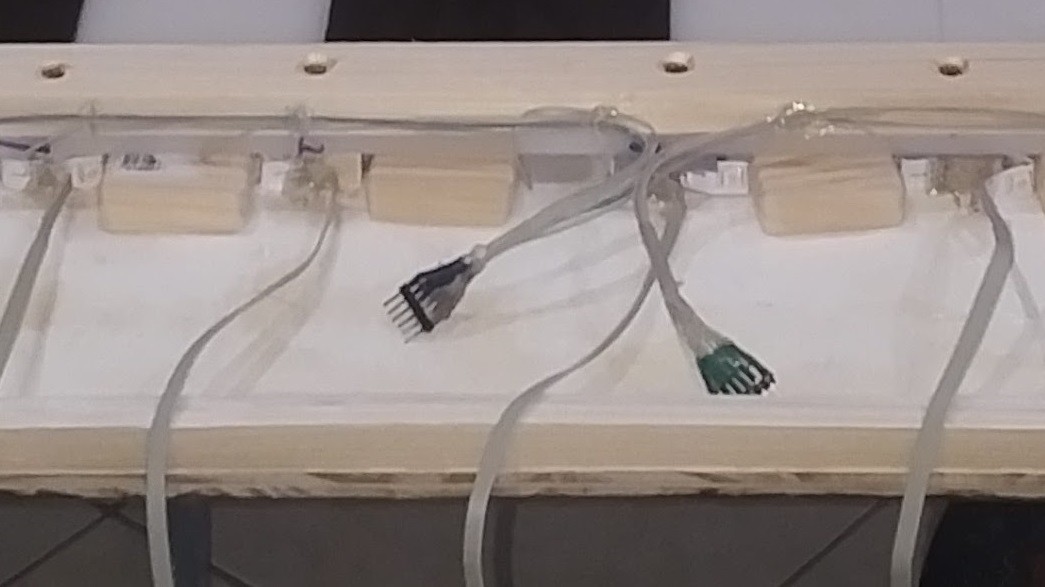
You can see on the picture, I used USB connectors for led strip connections (4 wires).
![]()
I forgot to mention, I also glued on the bottom of the acrilyc (not visible here, the silver fabric that will be used for detection. Each note as its own sheet cut to size. You can also see the wires in the center of the picture.
![]()
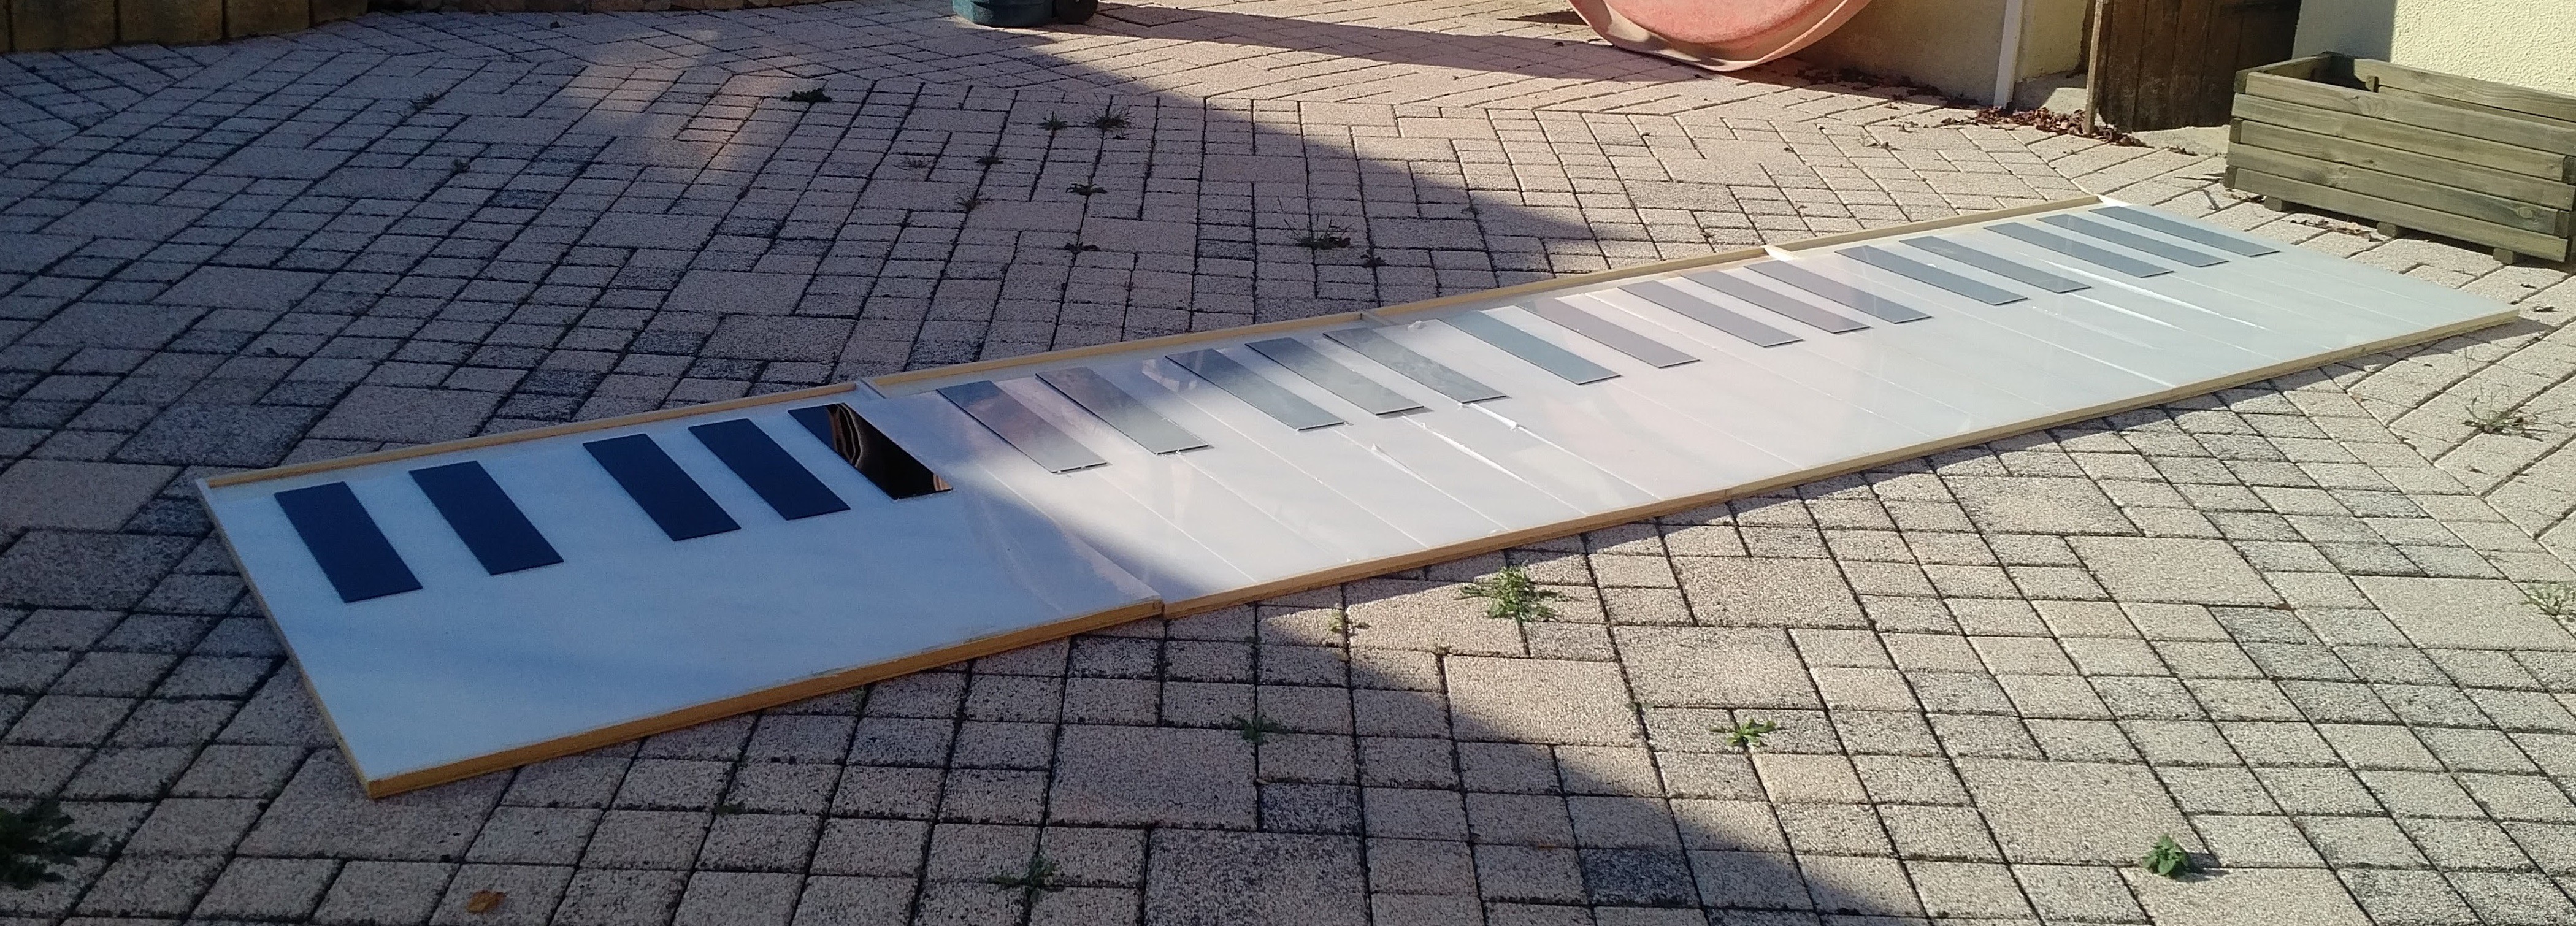
and the full thing. Only first octave had acrilyc protection removed hence the strange color, but you can see the cut line on the acrilyc giving a sense of real piano with notes instead of a flat sheet.
![]()
-
Next step, expandable...
08/30/2018 at 09:07 • 0 commentsSo I wanted to have something as modular as possible. If you look at the pictures you can see all octaves are independant. How did I achieve that?
First I put in place a master/slave system. I want a master that in the end will play notes, so each octave need to bring its information to the master.
Given the tests from the touch board, I was thinking to use Arduino + MPR in each octave. I2C was taken by MPR, So I thought about using serial as my communication bus.
I will create 2 serials one up to the master, and one down to the slave, so that the master can drive leds. The arduino has only one serial so I'll use SoftwareSerial library for the second one.
BTW, I can also use less cheaper arduino with 2 hardware serials. I may do this for future ones.
For the communication to be as reliable as possible, I used Category 5 ethernet cable. between each octave and the master.
Instead of having all cable that start from the master to each slave, the serial bus is used to pass data from one octave to the next (or the prev depending the way data are flowing). I'll add picture of the workflow when I have more time.
The process is :
During the init phase, the master send a message to the bus. the first octave that respond will get n°0, then the master send the same message. the first octave already have an Id, so it passes the message to the next one that will answer it took number 1, and so on till there's no more answer.
At this time each octave has a number and know where it fits in the chain.
When master want to light a note, it will send a message on the down bus. this message will have a letter saying light note, the number of the octave (between 0 and 8), and the number of the note in the octave (between 0 and 11). A message looks like "L1310". L is for light, 1 is for on, the the 3 means octave 3, and finally, the 10 is for note 10.
The first octave will receive this message, look at octave number, it's not for it, so it will pass it to next till the message reach its destination and is processed accordingly.
For note playing it's the same but the other way. when a note is touched, the octave will send a message on up bus. this message will be something like "N1202" meaning N:Note, 1:On, Octave:2, Note:02.
It works pretty well even if I had to tweak speed on serial bus.
The master is also an arduino, with a midi board attached to it and a alphanumeric keyboard attached to it. Keyboard allow selection of music instrument and a few other stuff. but basically when it get the message as described, it process it by sending a midi code (So, Yes the big piano can also be used as a midi input and drive a full fledge midi synth).
-
First feedback from kids
08/30/2018 at 08:10 • 0 commentsSo I had my first octave working and I put it in a music school for kids to play with it and have some feedback.
Actually the feedback was far better than expected, kids absolutely loved it.
The remarks were mostly on hardware design : basically the noise...
There was no protection between acrilyc and wood creating kind of tick-tick noise, the fact that all notes were separated were also adding to this each one touching others.
The detection was a little bit odd sometimes (for adults, having the foot at 3cm of the note was already playing it where for younger children they had to remove their socks for it to work)
And biggest complaint from the kids, it was not big enough. Sometimes they were 3 kids on these 12 notes...
Overall the test was good: after 3 month of abuse by the kids, there was nothing broken and it was still in very good shape and working as day one.
Now I need to take this into account and move forward.
Cheap Expandable Floor Piano
Fully functional floor piano, with midi in/out, leds and training mode.