 The Big One
-
1Step 1
Disassemble PS2 Controller. Remove vibration motors (this is where the AVR / XBee will reside). Cut the controller cable which plugs into the actual console; this is no longer needed (depending on the layout inside the controller, you may be able to reuse a portion of this cable for step 2).
-
2Step 2
Solder wires onto the Blue, Brown, Orange, and Yellow wires, plus GND / VCC (Red and Gray). Solder to a 6 pin female header. (Or, if you have enough room inside the controller, you can use the last couple inches of cable, and just solder this directly to the 6 pin female header).
-
3Step 3
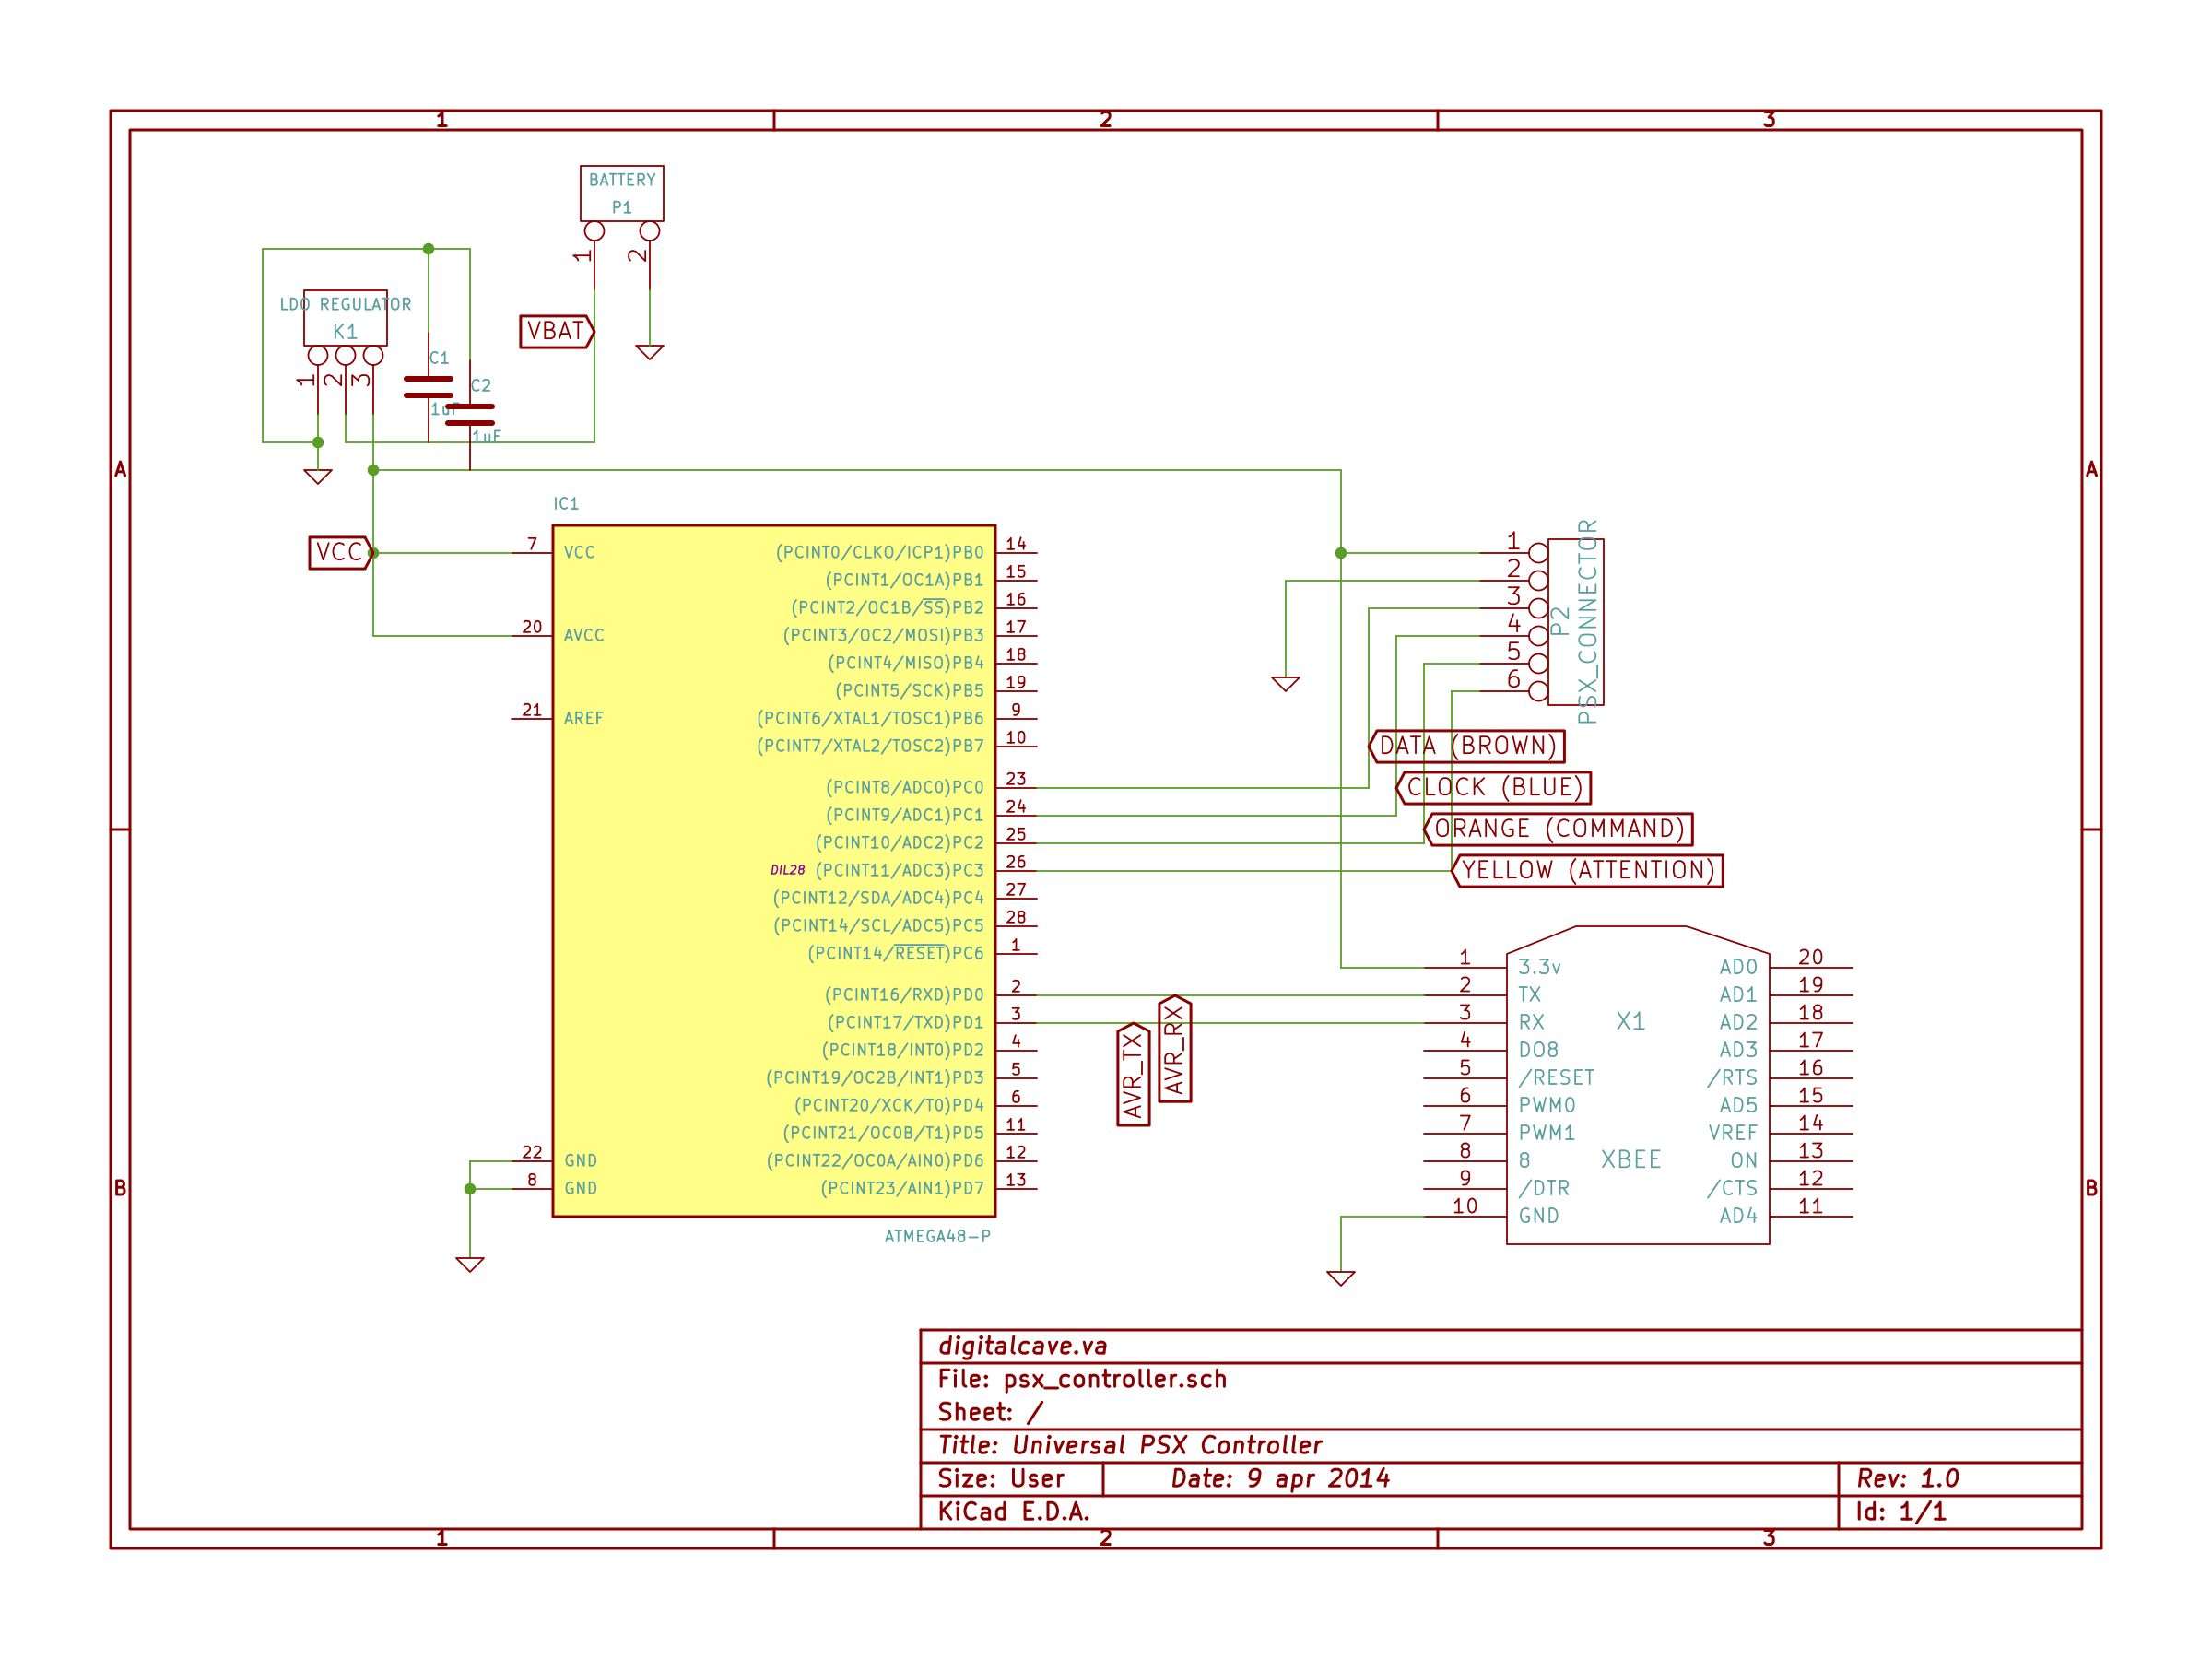
Solder up the AVR + regulator onto a perf board, according to the schematic. Include programming headers (MOSI / MISO / SCK / RESET) and a 6 pin breakout for the PS2 controller wires you soldered last step.
The schematic for this is below:
![]()
-
4Step 4
Program the AVR. The analog light should turn on once the AVR is talking to the PS2 controller. When you press a button, you should see data on the receiving serial port link.
-
5Step 5
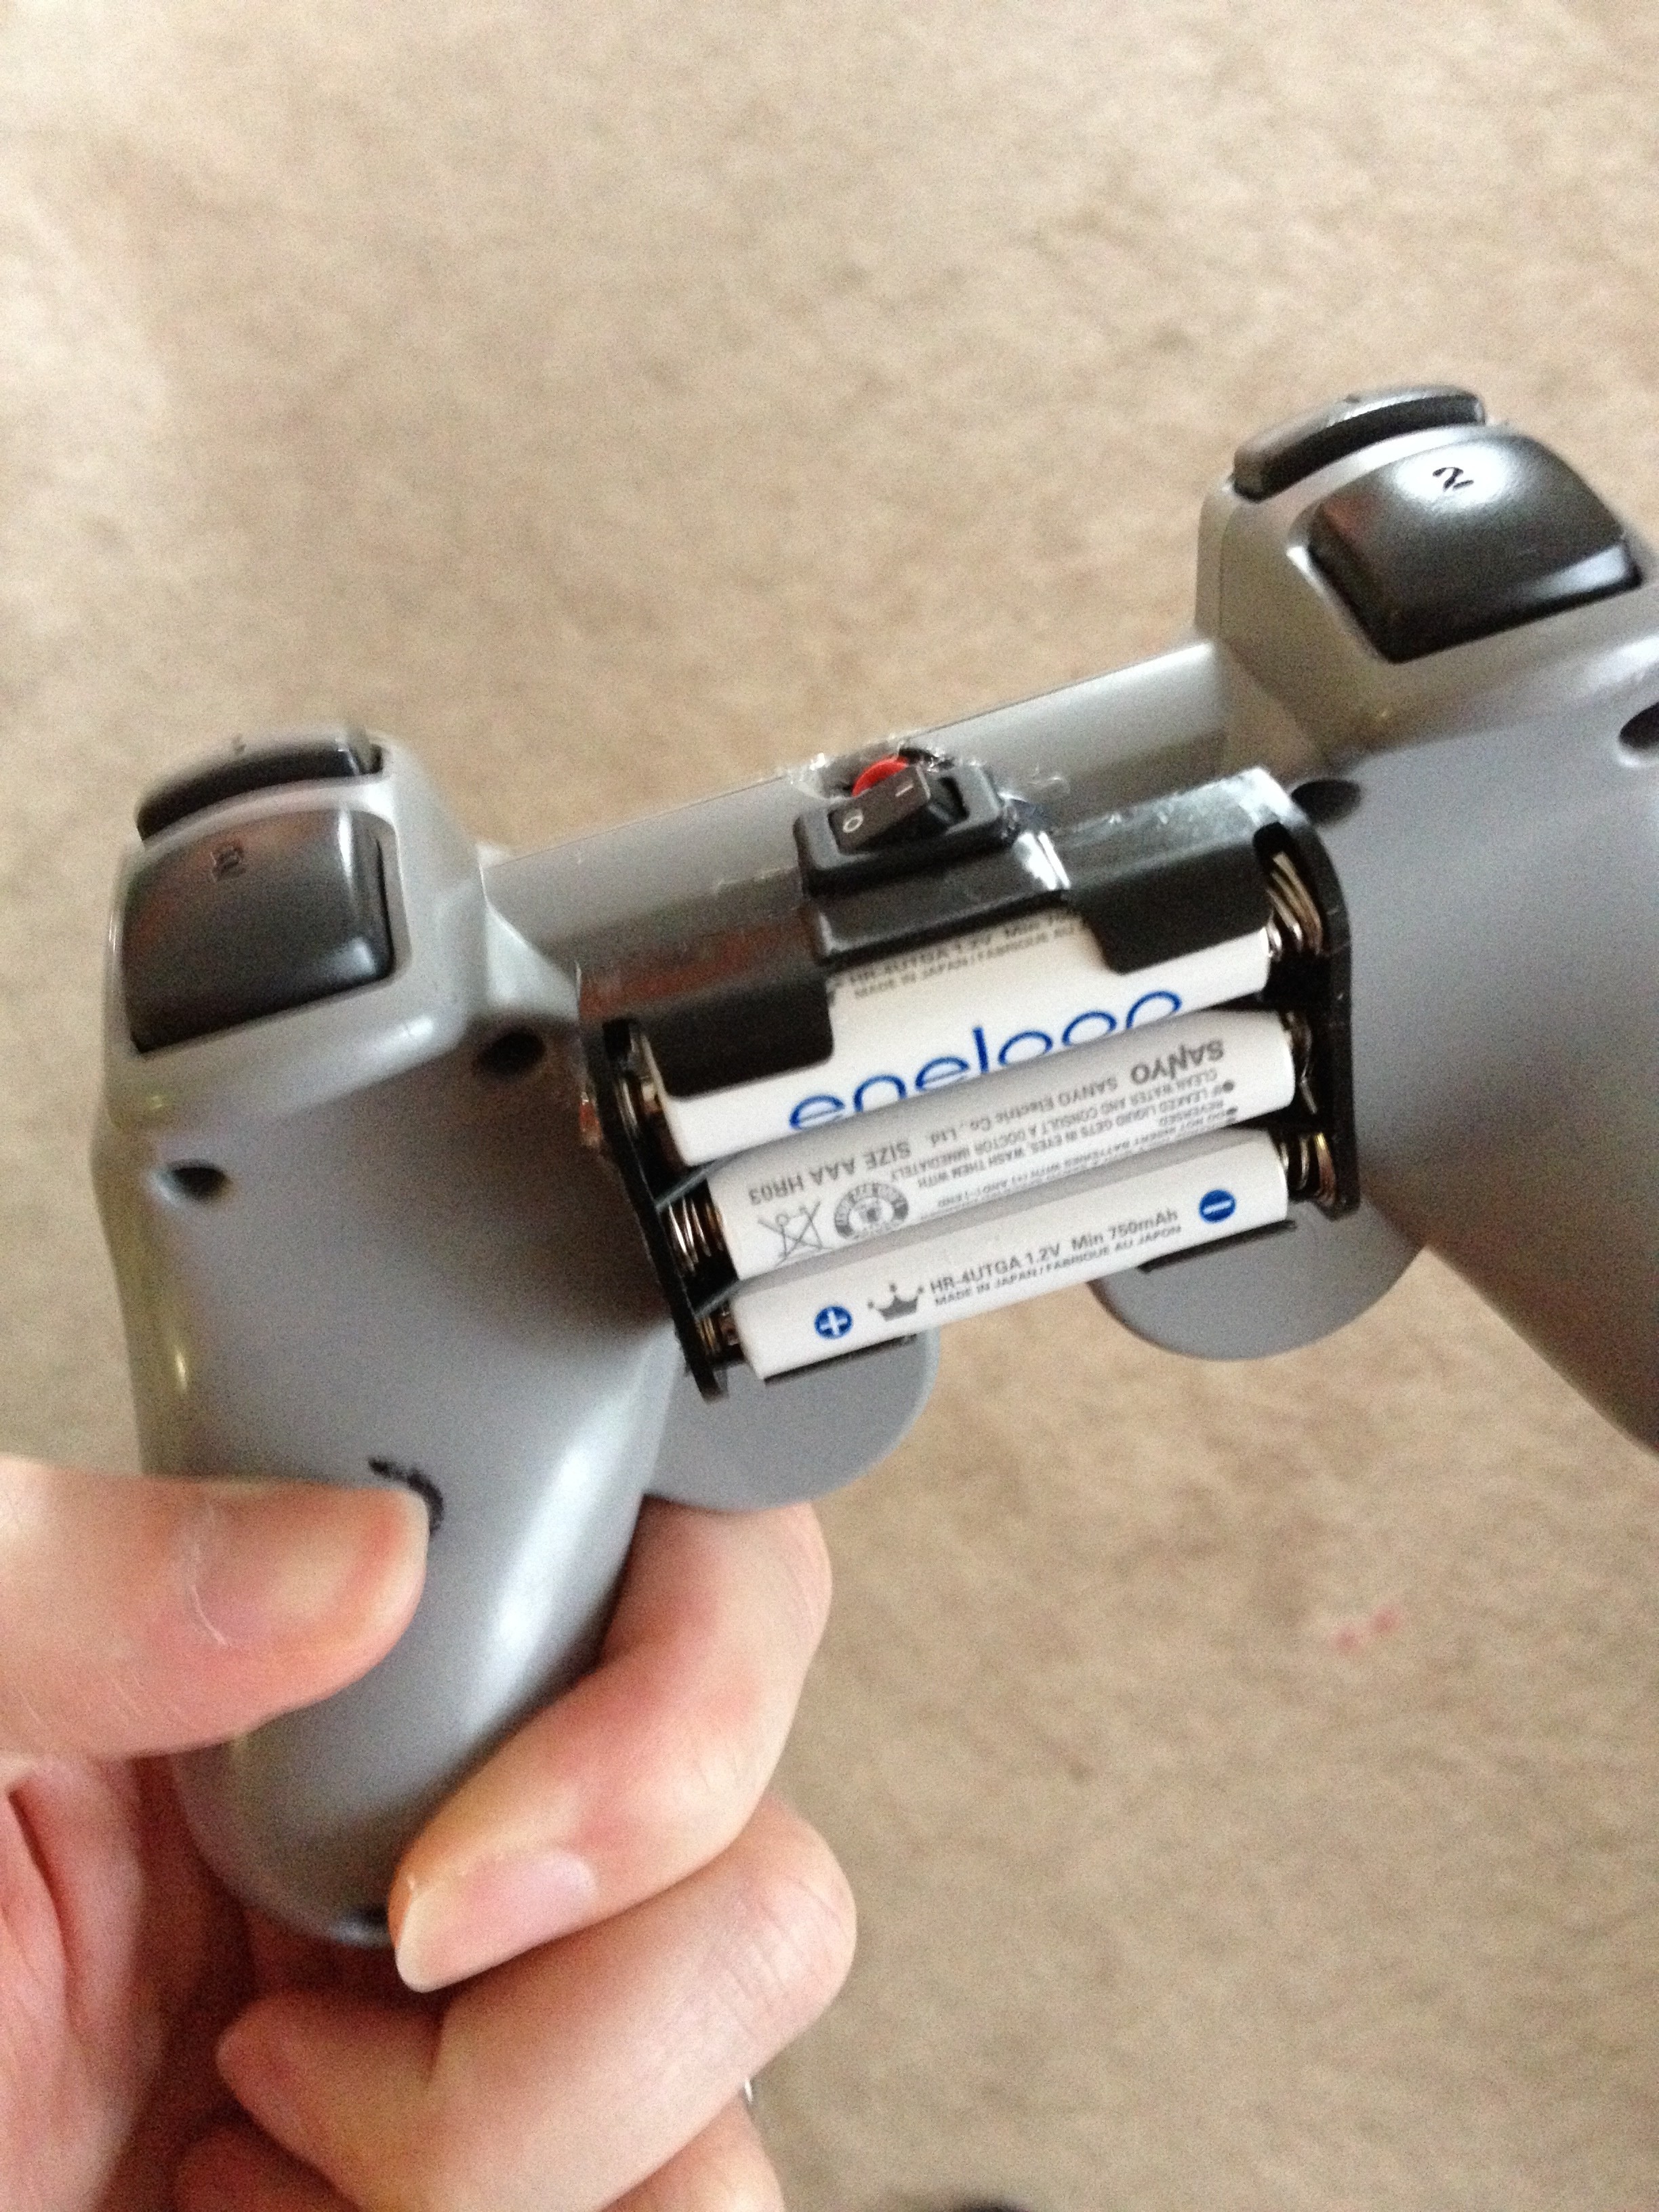
Glue a 3xAAA battery holder to the outside of the case. Connect the power switch in series with the positive side of the battery. Re-assemble the case. You should now have a self contained unit with batteries on the outside and a switch.
![]()
Universal Controller
One controller to rule them all! A PS2 controller crossed with an AVR and XBee / Bluetooth, to use in multiple physical computing projects.
Discussions
Become a Hackaday.io Member
Create an account to leave a comment. Already have an account? Log In.