 Jeroen van der Velden
Why build a Home Truck Simulator?
Because we can (thanks to Vos Truck Parts Hedel NL)!
Feel free to ask "anything"!
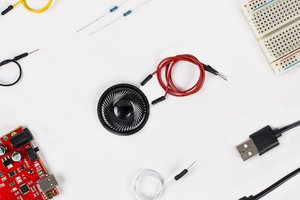
The Scrapyard and Arduino make a great combination!
Already have an account? Log in.
To make the experience fit your profile, pick a username and tell us what interests you.
Why build a Home Truck Simulator?
Because we can (thanks to Vos Truck Parts Hedel NL)!
Feel free to ask "anything"!
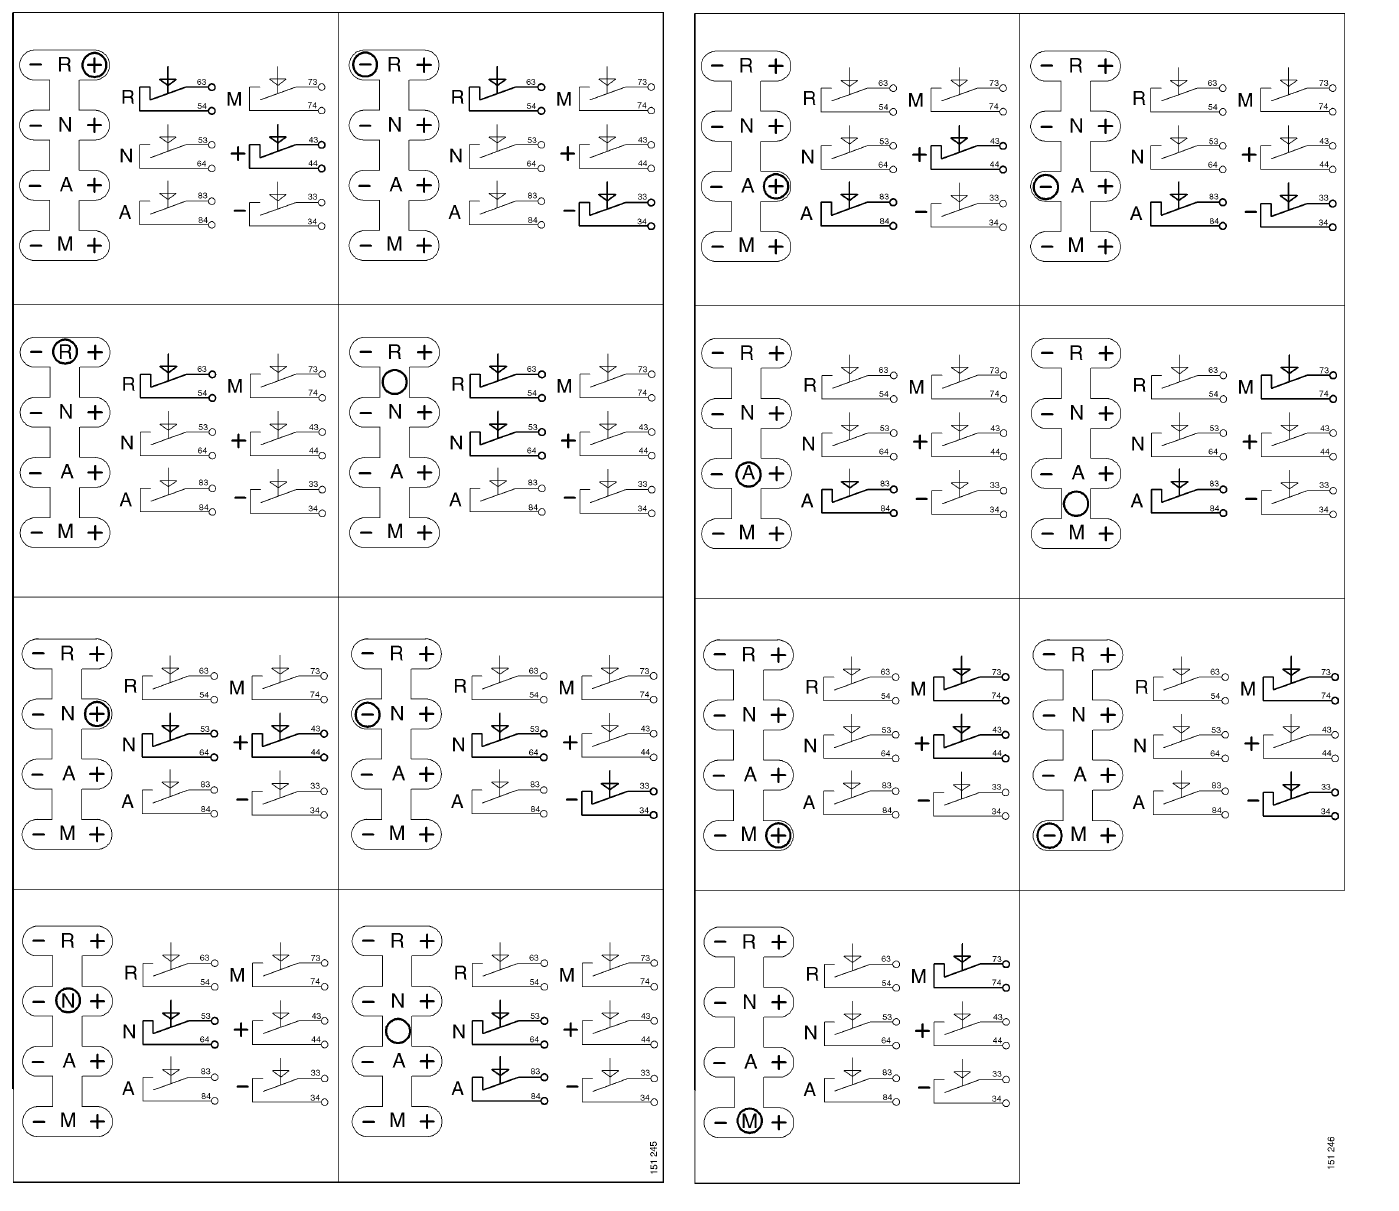
switch1.pngLightswitch diagram 1Portable Network Graphics (PNG) - 84.63 kB - 03/29/2020 at 06:27 |
|
|
svet_2.jpgLightswitch diagram 2JPEG Image - 32.53 kB - 03/29/2020 at 06:26 |
|
|
svet.jpgLightswitch diagram 3JPEG Image - 68.81 kB - 03/29/2020 at 06:26 |
|
|
ETS2_124L_NUCLEO_F446RE.binProgram for running on a Nucleo FR446RE for the Scania Cluster and ETS2 with the 64-bit silas Parker Plug-In.octet-stream - 35.02 kB - 11/08/2019 at 08:56 |
|
|
component list.docxPCB for cluster list of componentsdocument - 11.82 kB - 10/14/2019 at 19:47 |
|
|
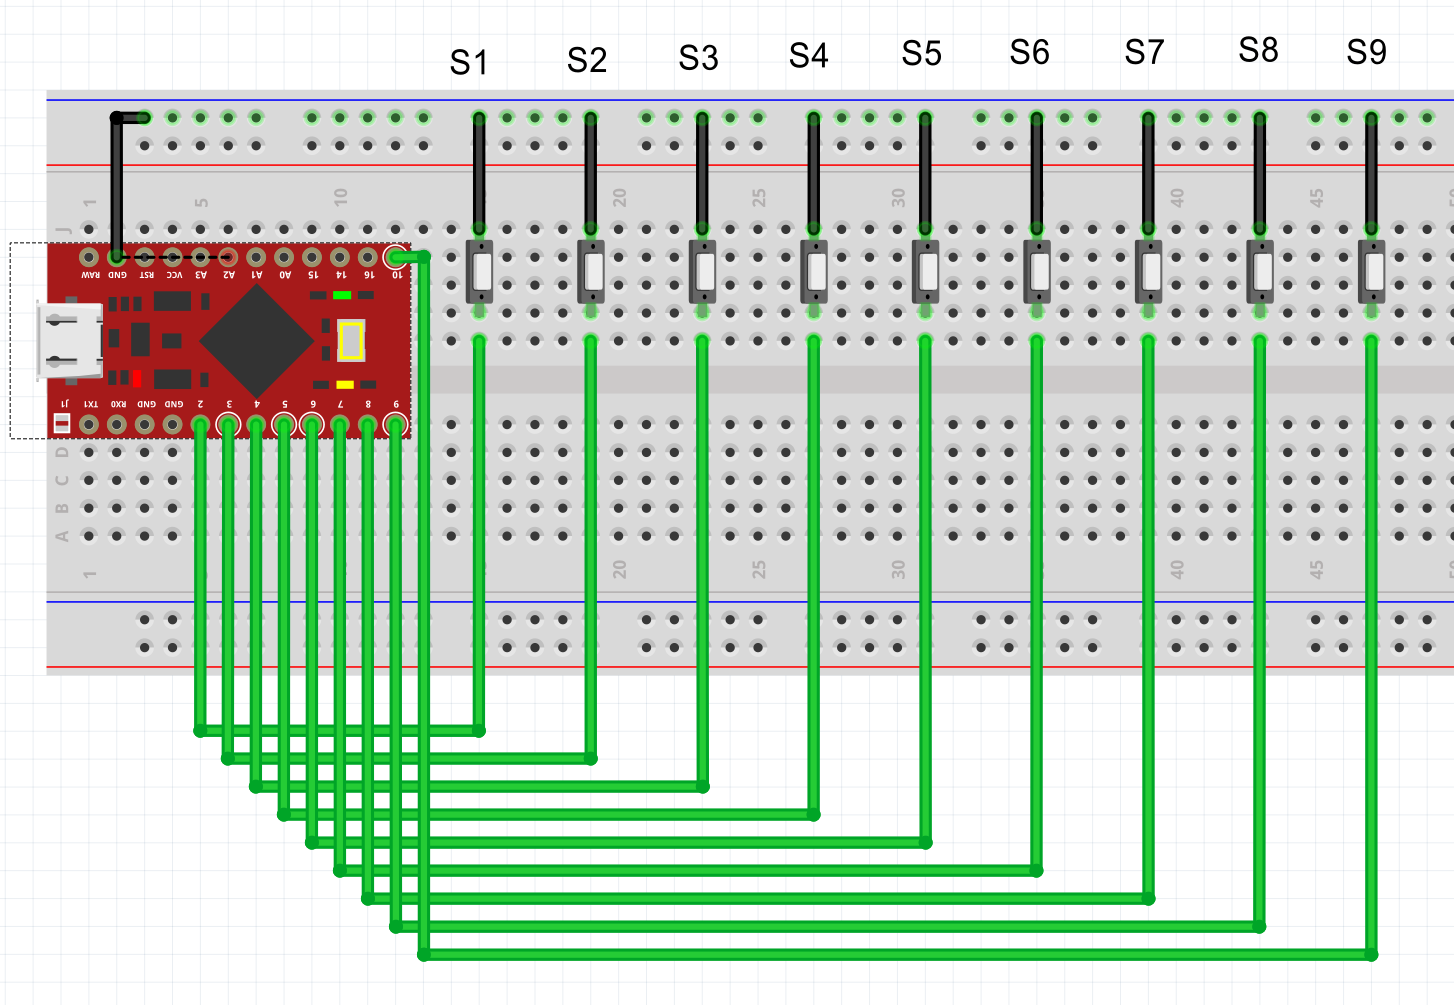
Use this code to connect a Toggle Flip Switch to an Arduin Pro Micro or Leonardo.
The pin to connect is Digital PIN 8 and GND
ON will output "a"
OFF will output "b"
Change if you like!
#include <Keyboard.h>

const byte switchPin = 8;
byte oldSwitchState = HIGH;  // assume switch open because of pull-up resistor
const unsigned long debounceTime = 10;  // milliseconds

void setup ()
  {
  Serial.begin (9600);
  pinMode (8, INPUT_PULLUP);
  }  // end of setup

void loop ()
  {
  Keyboard.begin();
  // see if switch is open or closed
  byte switchState = digitalRead (switchPin);

  // has it changed since last time?
  if (switchState != oldSwitchState)
    {
    oldSwitchState =  switchState;  // remember for next time
    delay (debounceTime);   // debounce
    if (switchState == LOW)
       {
       Serial.println ("Switch closed.");
       Keyboard.press('a');
       delay(100);
       Keyboard.releaseAll();
       }  // end if switchState is LOW
    else
       {
       Serial.println ("Switch opened.");
       Keyboard.press('b');
       delay(100);
       Keyboard.releaseAll();
       }  // end if switchState is HIGH
    }  // end of state change

  // other code here ...

  }  // end of loop
Hi folks!
Today I show you my Scania 4-Series Opticruise working in ETS2. In fact, it will work on any Simulator due to the use of an Arduino Leonardo which Windows will recognize as a HID device (keyboard). I programmed Shift up to "Right Shift" and shift down to "Right CTRL" which are the ETS2 default keys for shifting gear!
Have fun!
Arduino Leonardo Code:
#include "Keyboard.h"

#define SHIFTUP_PIN   2
#define SHIFTDOWN_PIN   3

// Works on the Leonardo board
// Build by Jeroen van der Velden
// https://hackaday.io/project/8448-real-scania-truck-home-simulator

static void ShiftUp(void)
{
    Keyboard.press(KEY_RIGHT_SHIFT);
}

static void ShiftDown(void)
{
    Keyboard.press(KEY_RIGHT_CTRL);
}

void setup(void)
{
    Keyboard.begin();

    // Set pin to input
    pinMode(SHIFTUP_PIN, INPUT);
    // Enable pullup resistor
    digitalWrite(SHIFTUP_PIN, HIGH);

    // Set pin to input
    pinMode(SHIFTDOWN_PIN, INPUT);
    // Enable pullup resistor
    digitalWrite(SHIFTDOWN_PIN, HIGH);
}

void loop(void)
{
    static uint8_t shiftUpStateLast = 0;
    static uint8_t shiftDownStateLast = 0;
    uint8_t shiftState;

    shiftState = digitalRead(SHIFTUP_PIN);
    if (shiftState != shiftUpStateLast) {
        shiftUpStateLast = shiftState;

        if (shiftState == 0) {
            ShiftUp();
            delay(100);
            Keyboard.releaseAll();
        }
    }

    shiftState = digitalRead(SHIFTDOWN_PIN);
    if (shiftState != shiftDownStateLast) {
        shiftDownStateLast = shiftState;

        if (shiftState == 0) {
            ShiftDown();
            delay(100);
            Keyboard.releaseAll();
        }
    }

    delay(50);
}
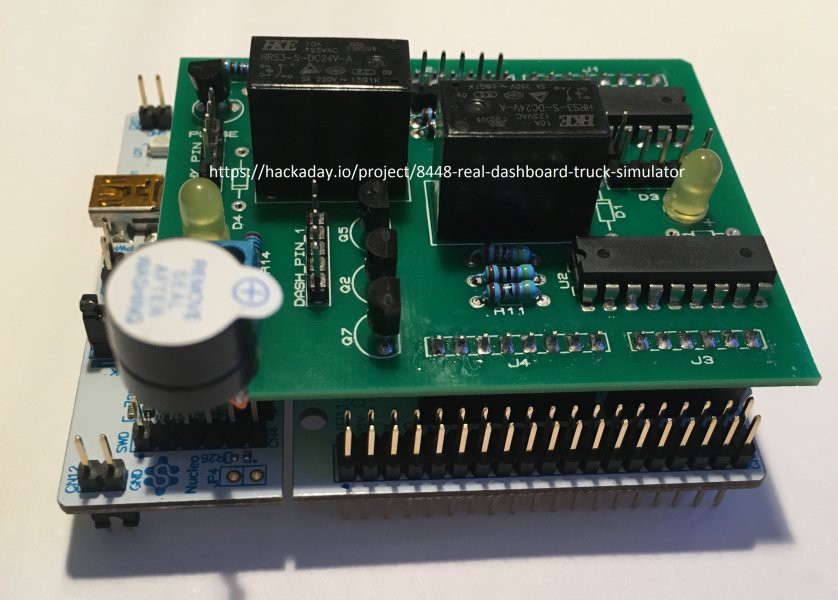
My very first test with our new PCB for original 4-Series Clusters.
This film shows how the board below works:
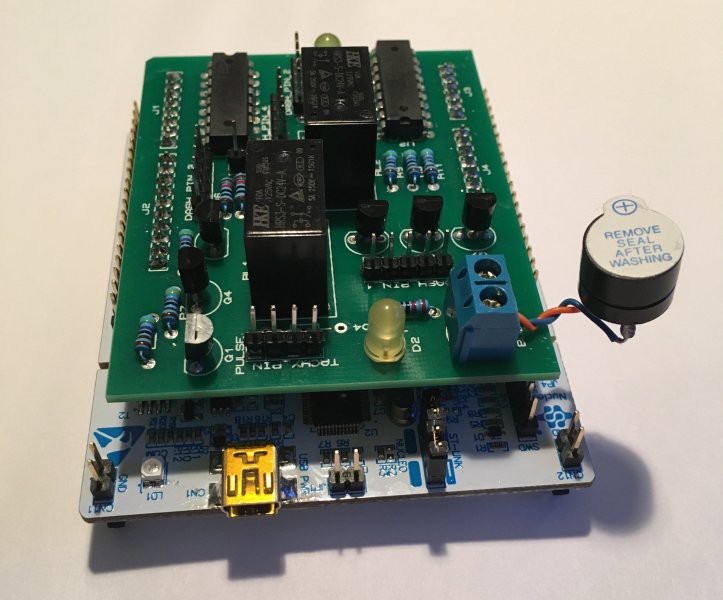
Below is the final result of the PCB on top of the Nucleo. If you are interested in the PCB, please contact me. I do have some spare boards.
Credits for Arcannae who developed the Nucleo integration and code. Check his YouTube for more info:
Many thanks to HEX173 ("Ad") who has send me new PCB`s for our Scania Cockpit Cluster.
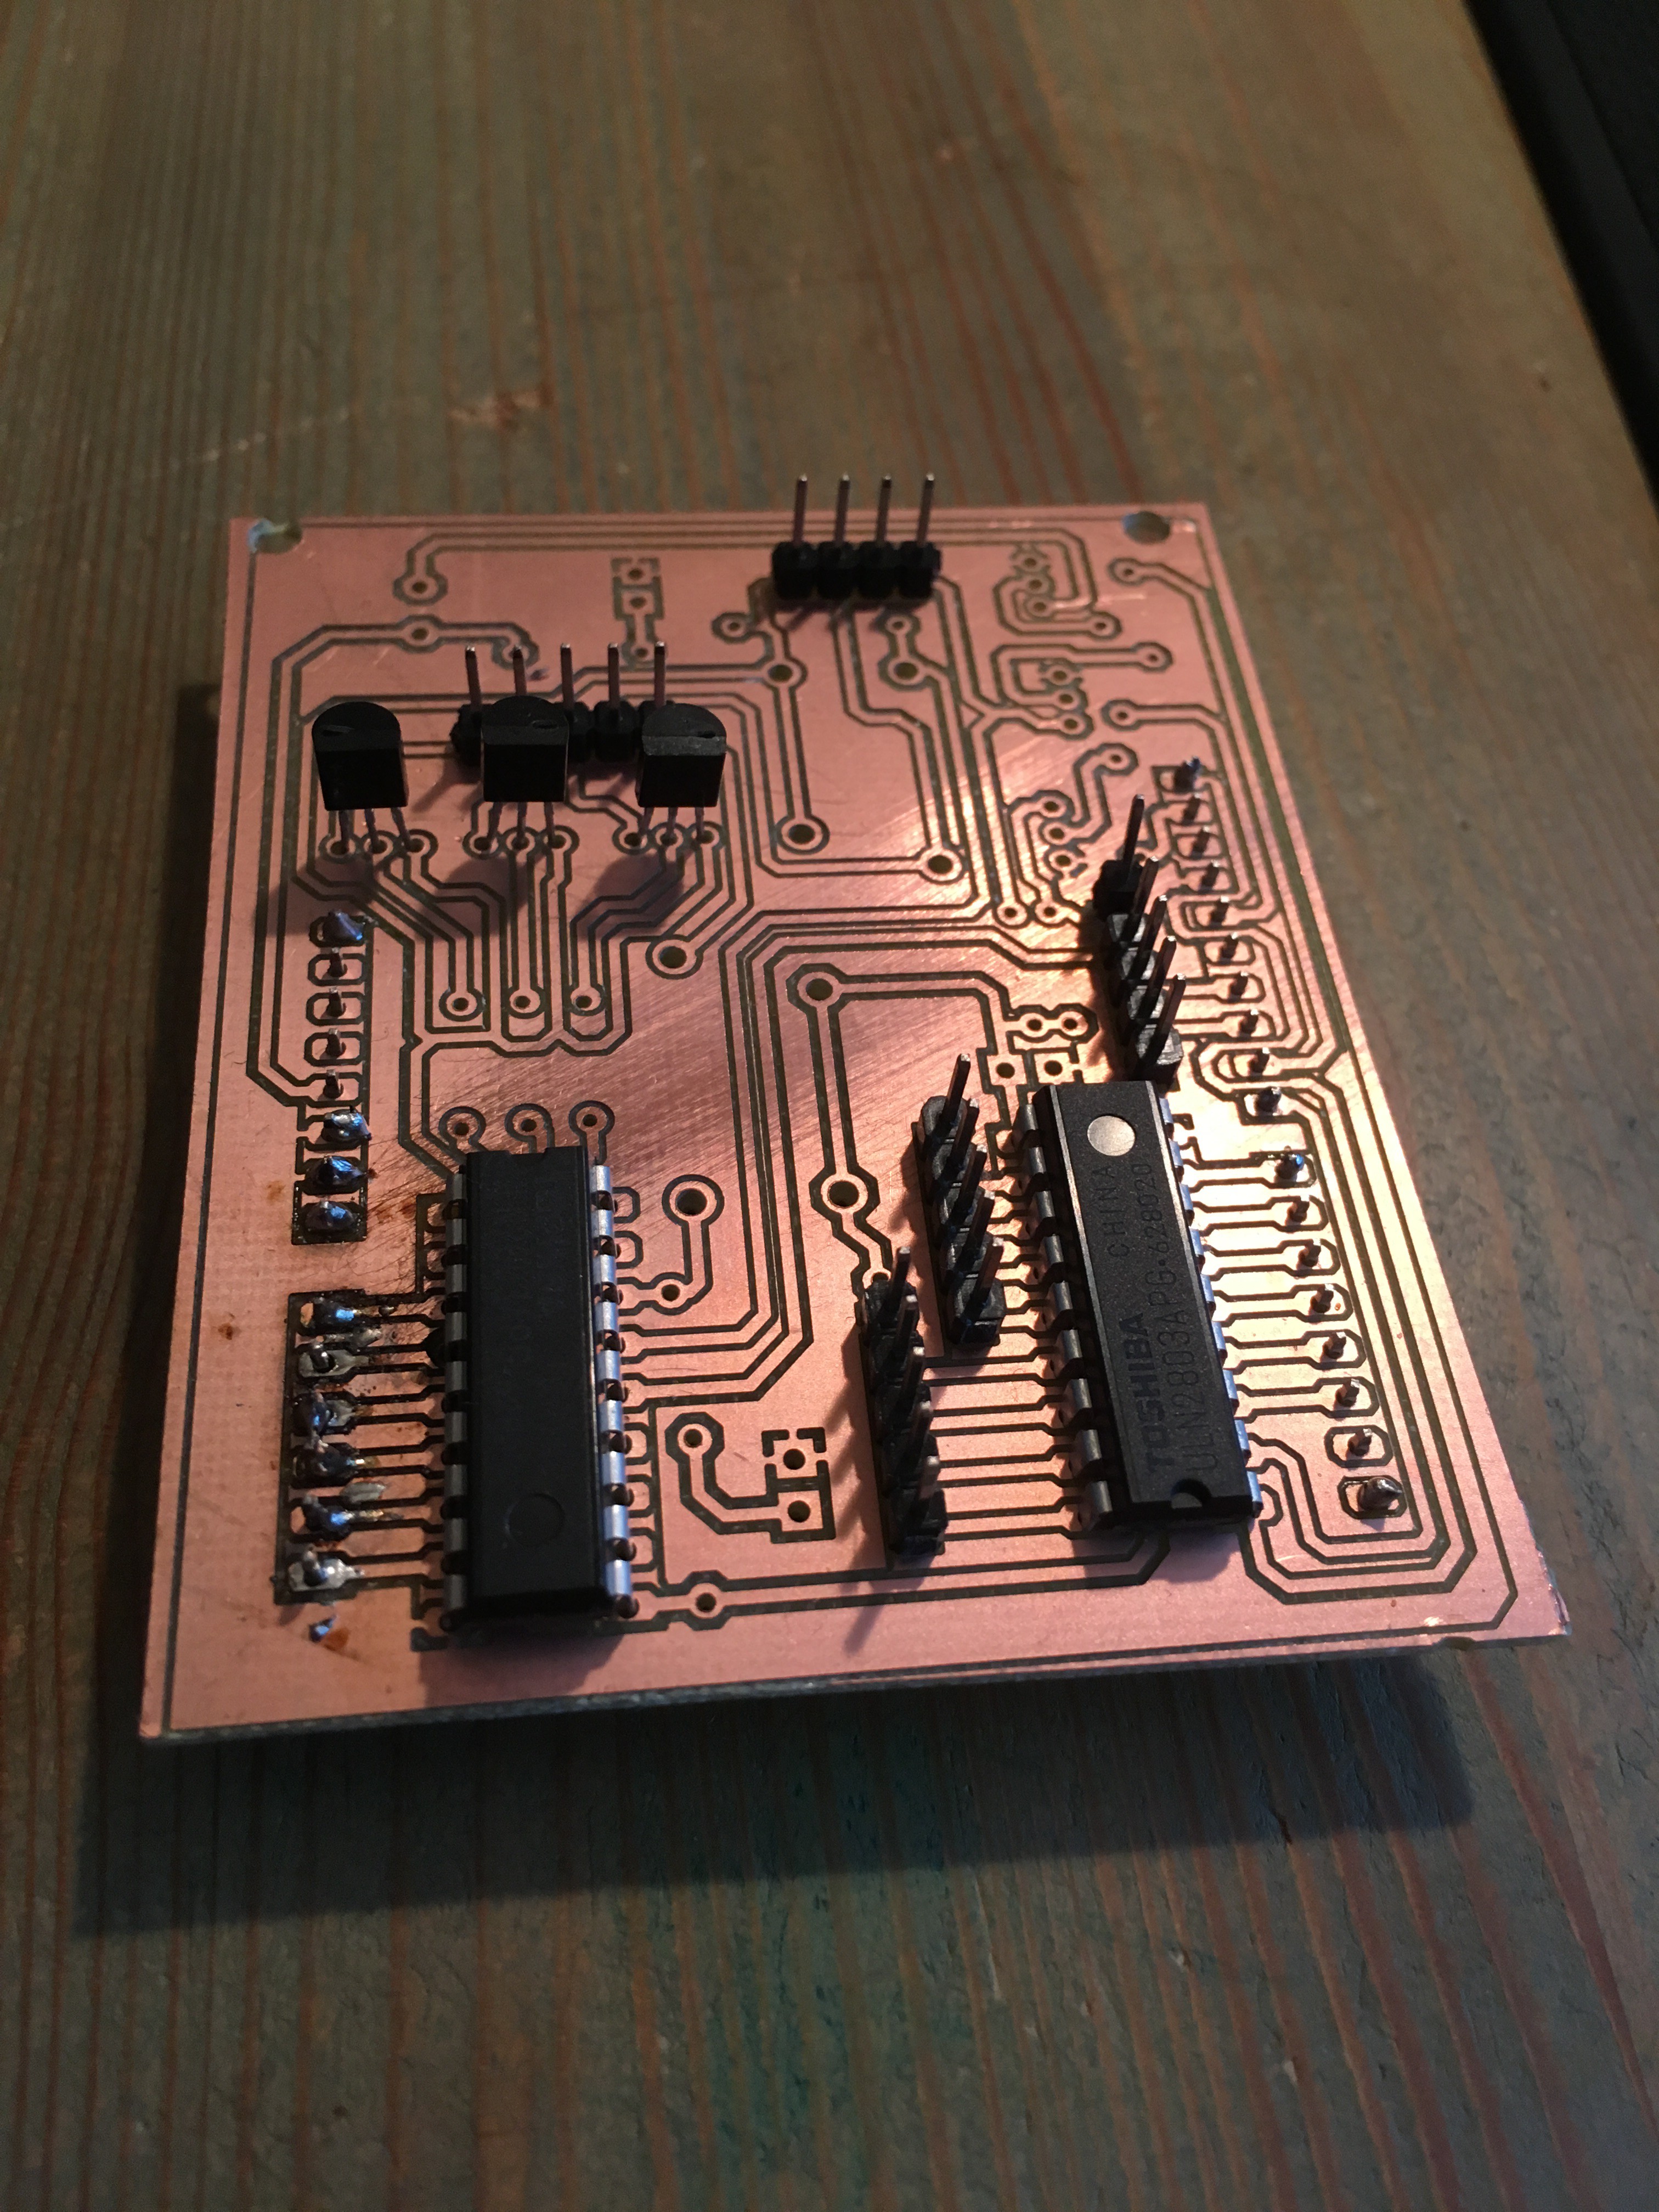
I`m struggling very hard to get all the components required to complete our board. I also struggle mastering the required Soldering Skills.
Here`s a picture of the progress:
End Result:
Hi all,
We got the Gerber files for our PCB and a first sample has been made:

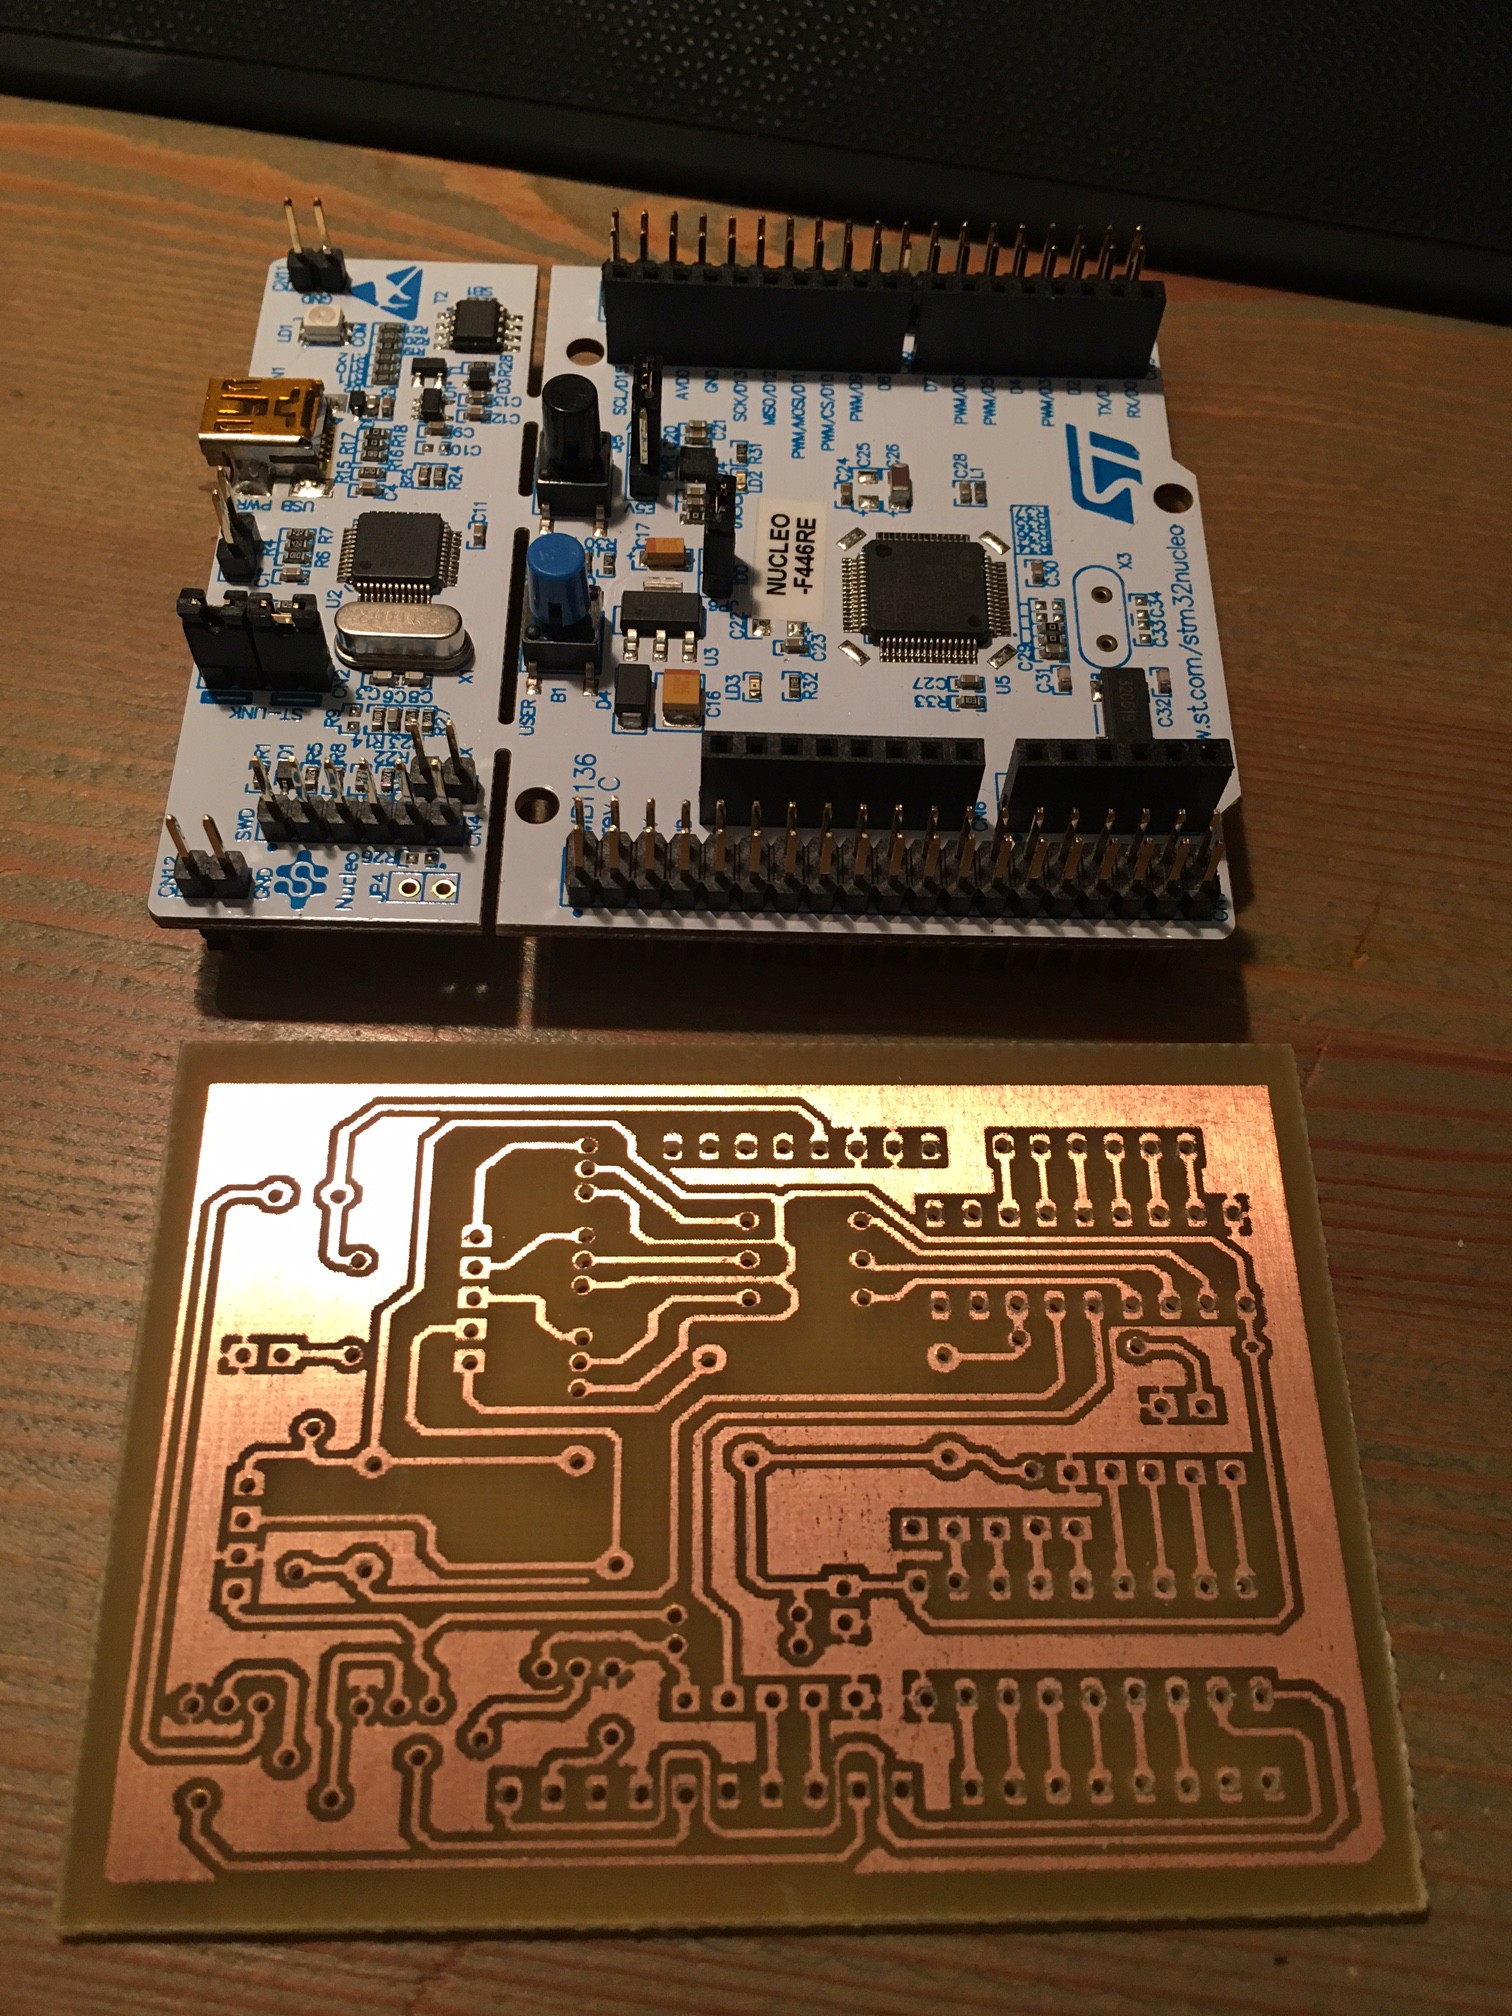
We are going to use a "Nucleo F446RE" board along with this print to get our cluster up and running.
Keep following!
We have a Cluster! Keep following!!
Hi folks!
Now Mr. Blom has made some beautiful pieces for our Scania Steering Wheel we have started working on the Steering Again.
If you have read my old Steer Part 1 you have noticed that we started all over. We warn`t satisfied with our results so I have spoken to our new sponsor and he made me a disc that fits over our Logitech Drivingforce Pro wheel.
This is the result:
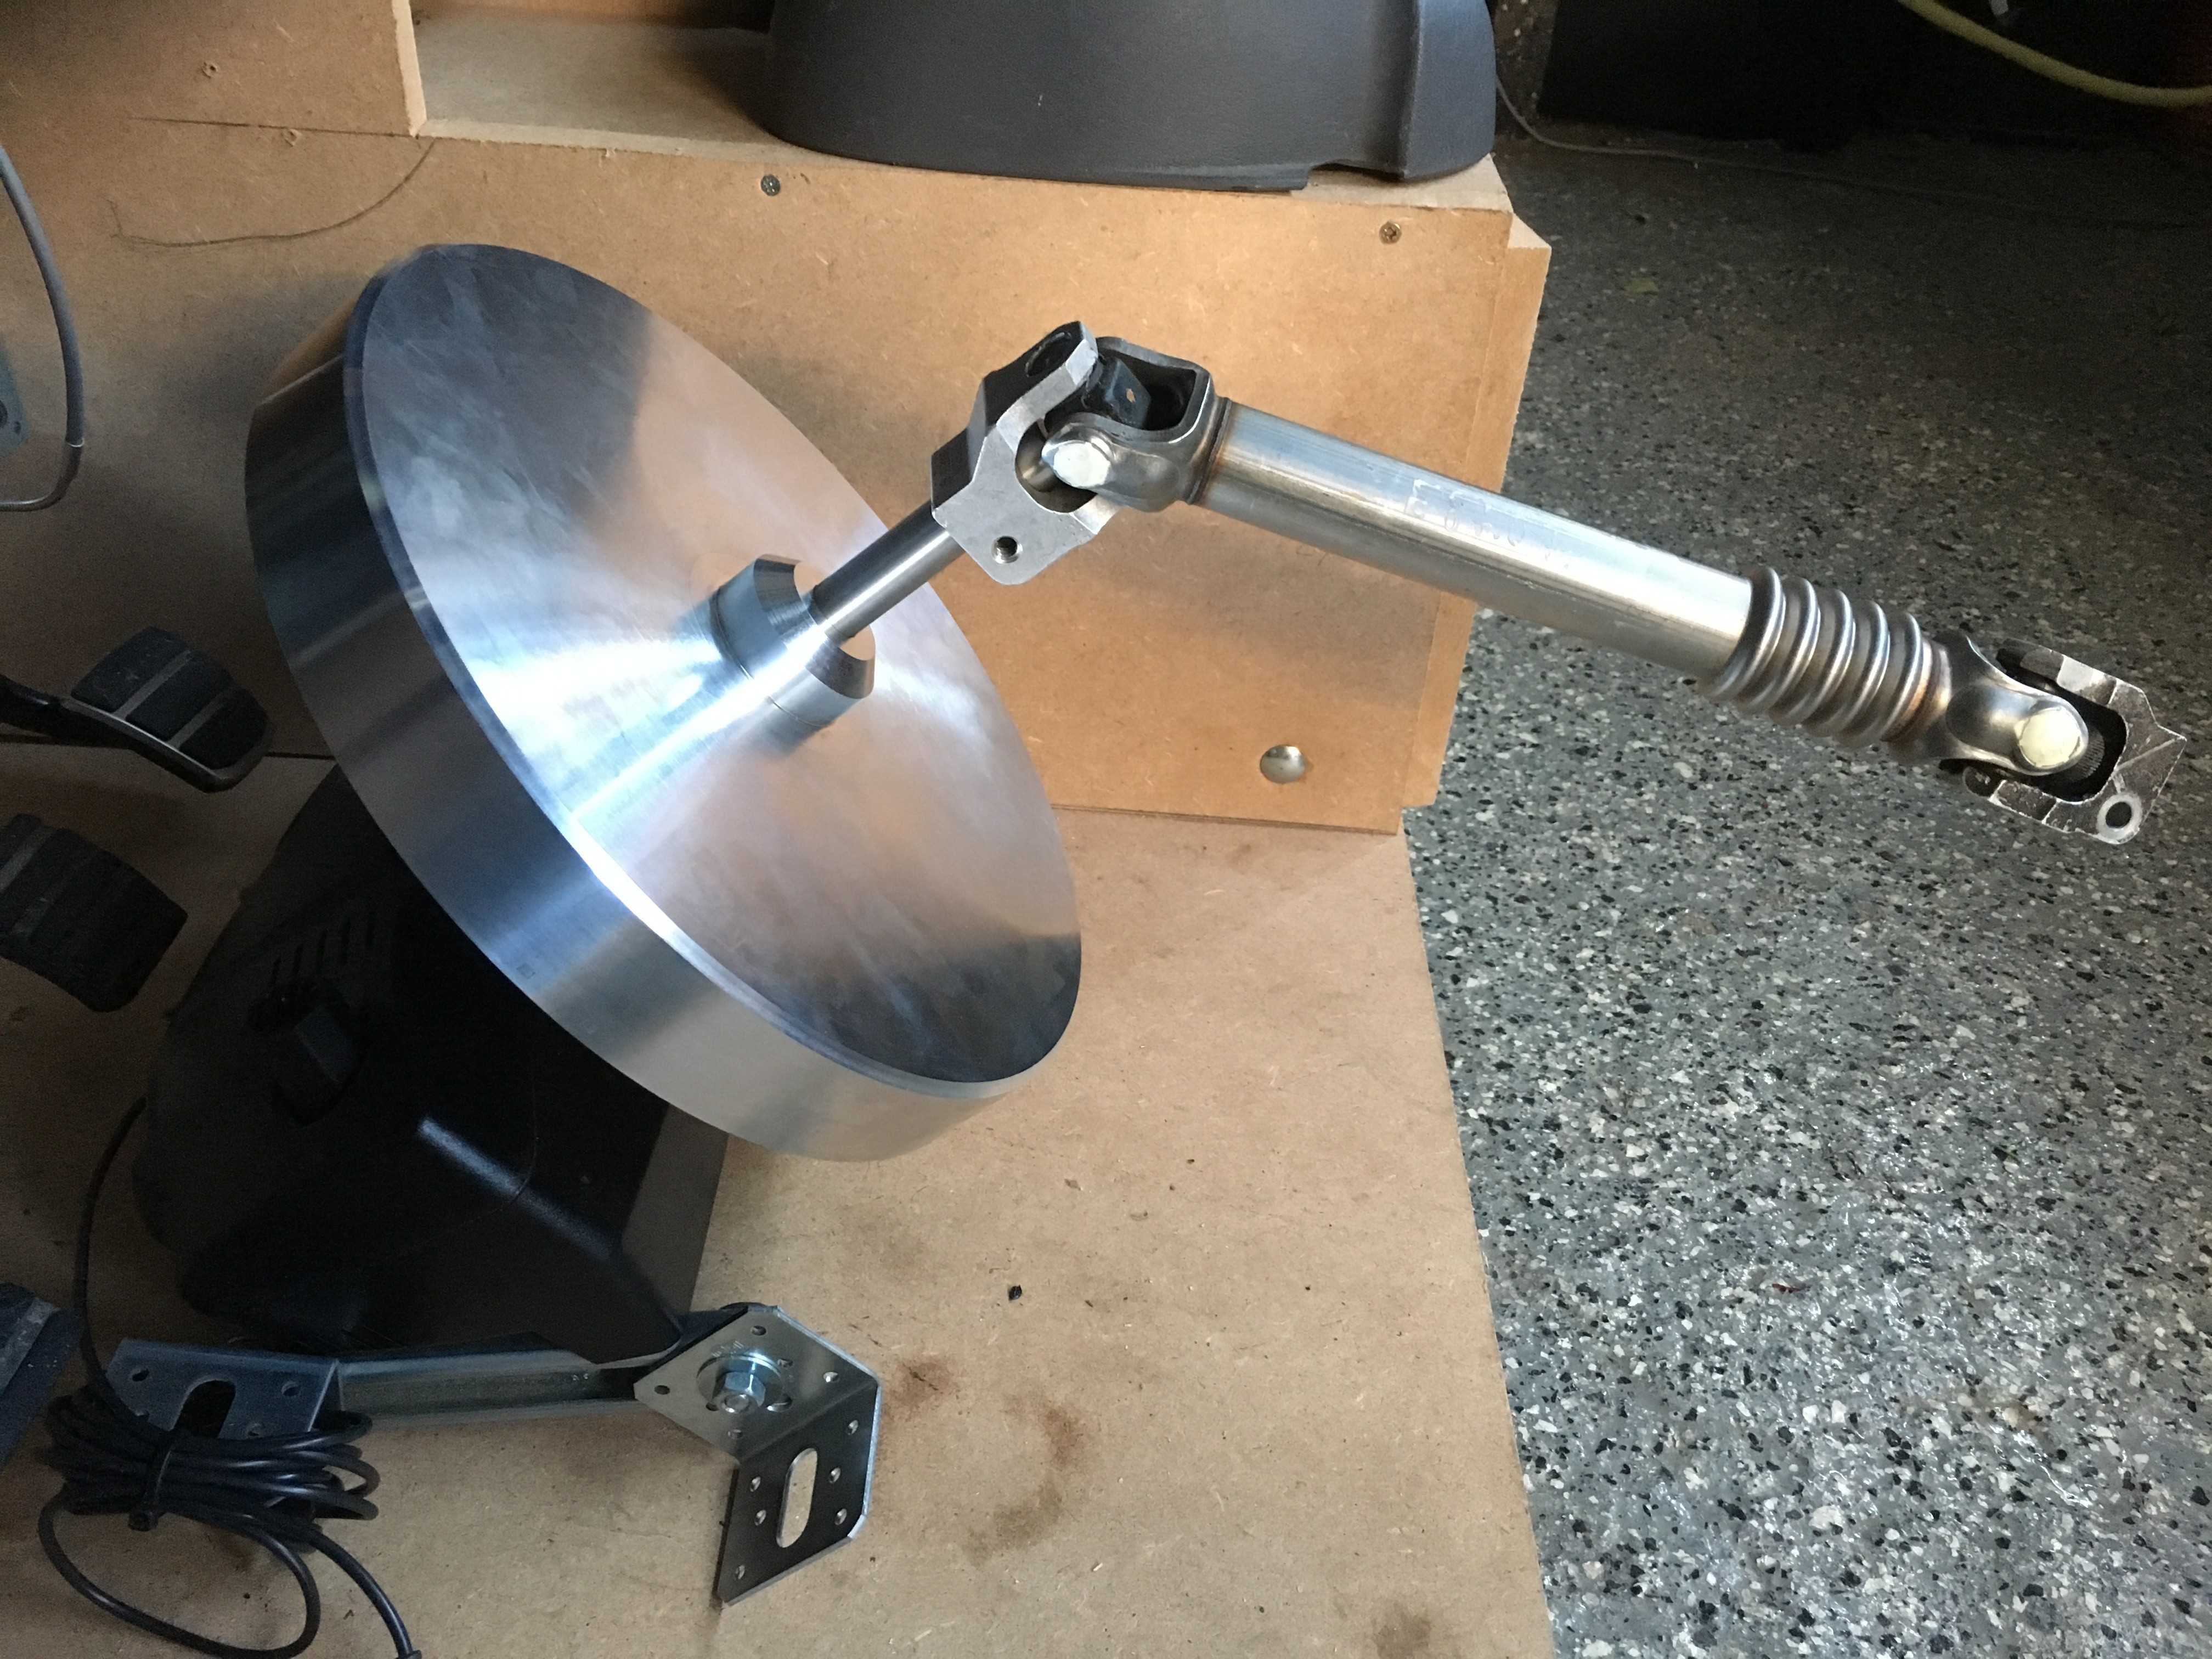
The Steering Shaft in the picture is a BMW Steering Shaft, very lightweight and cheap on Ebay and perfect for our simulator. The disc is quite heavy weight but its perfectly tune-able for our sim and if it causes trouble we will cut some slices pizza out of it.
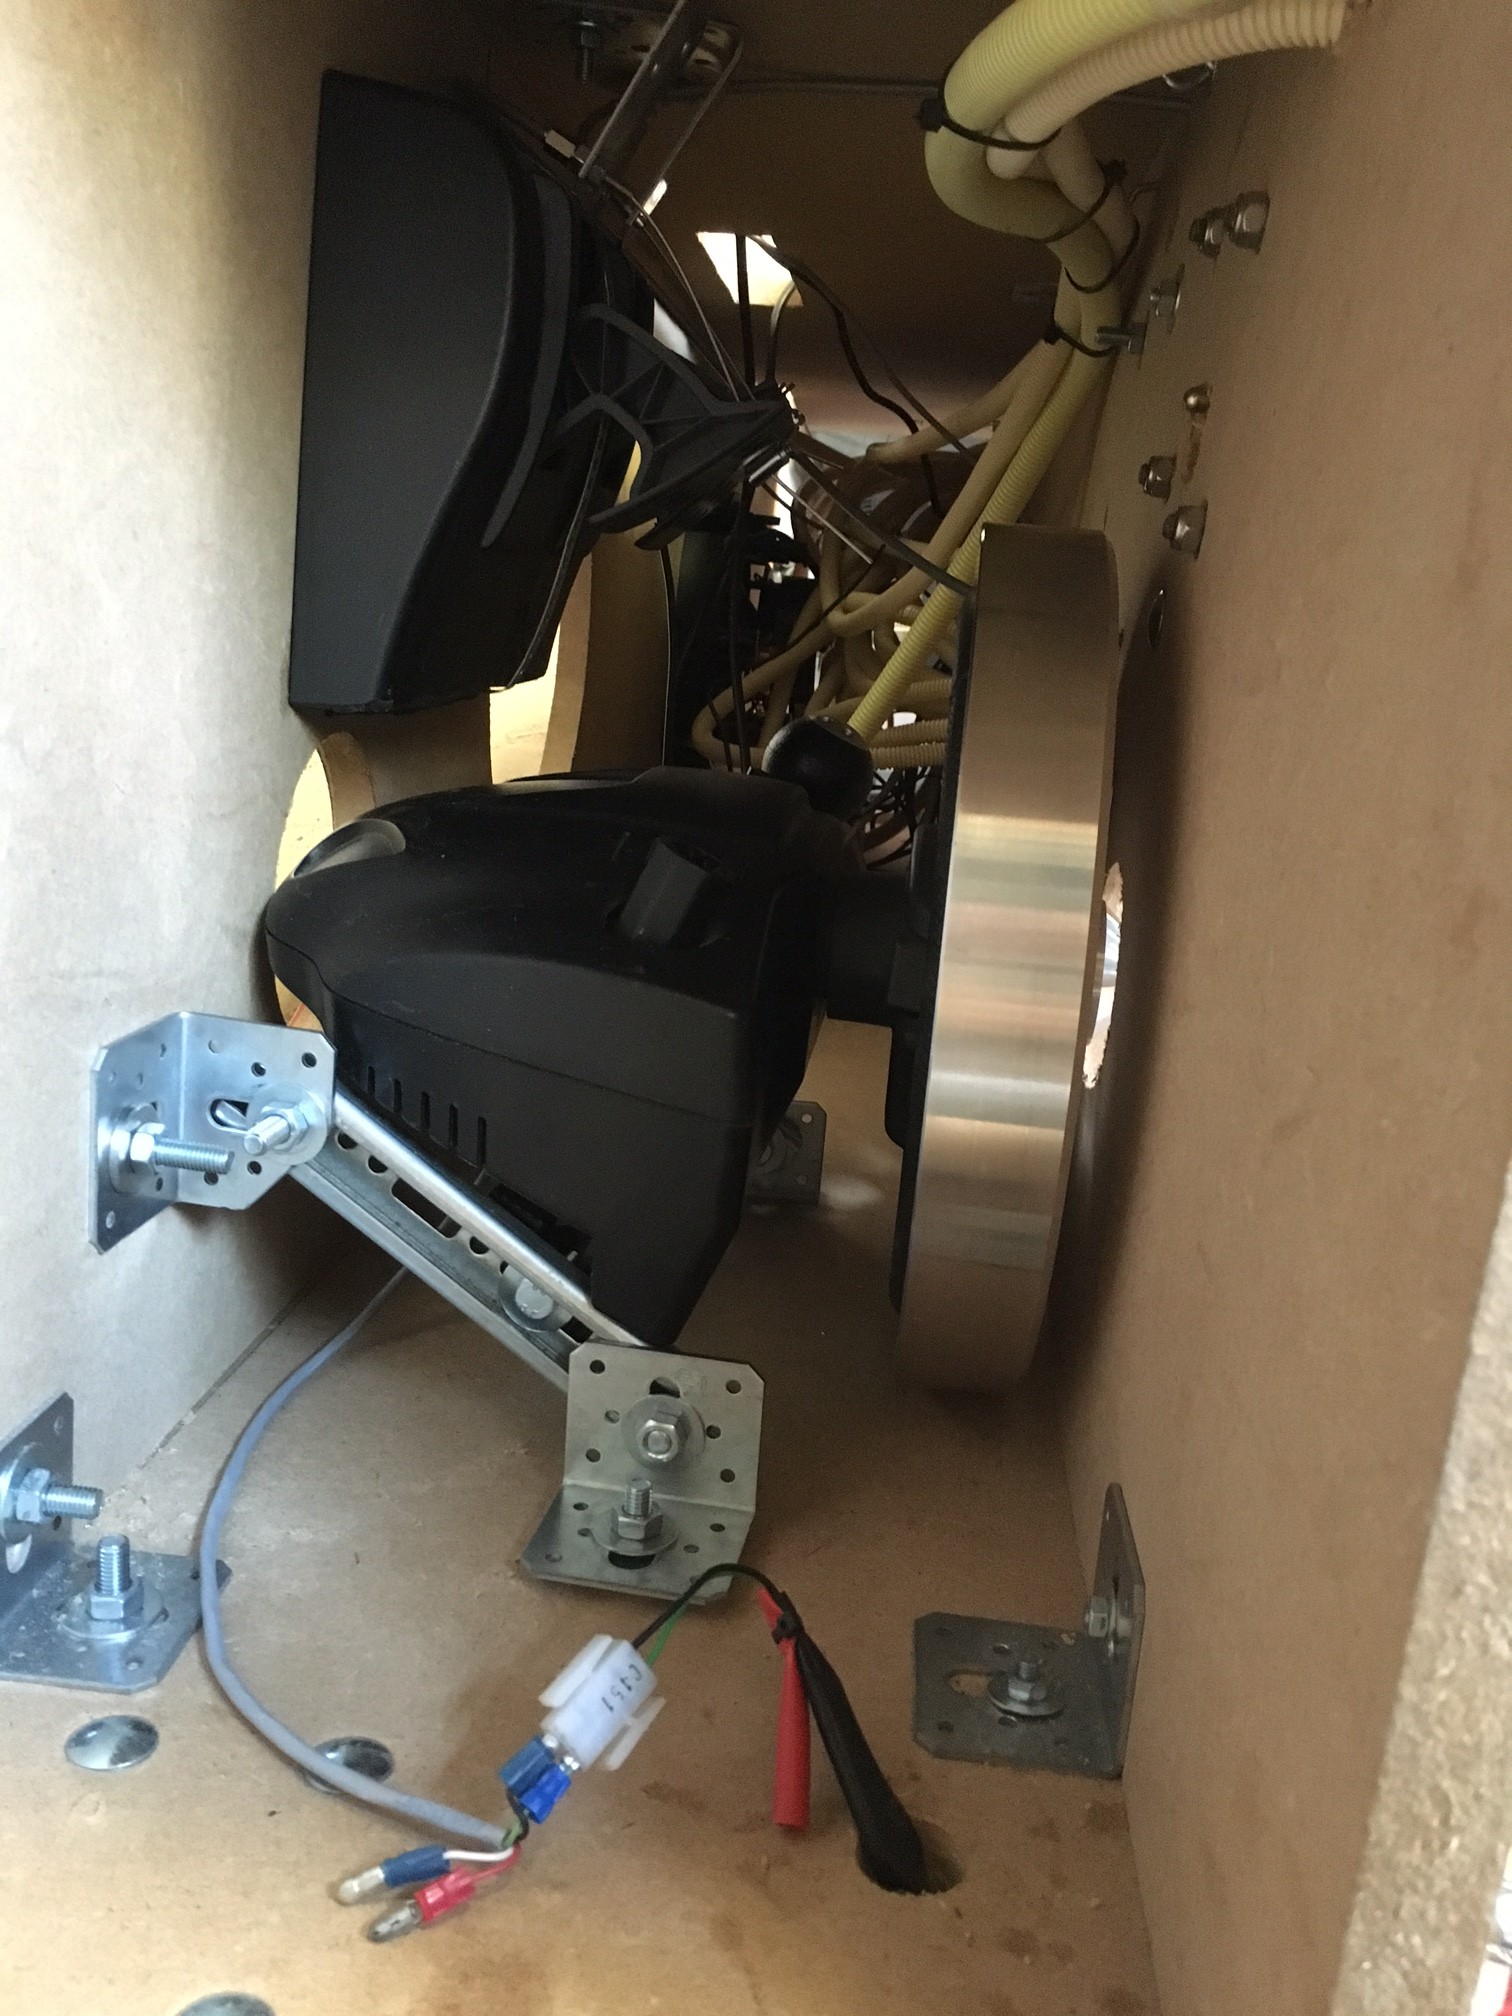
Mr. Blom is now working on the top part of the steering shaft and a bracket to hold it all into place. Keep following for more updates!
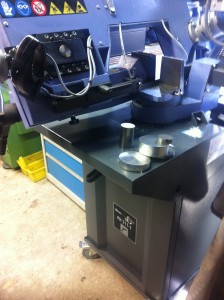
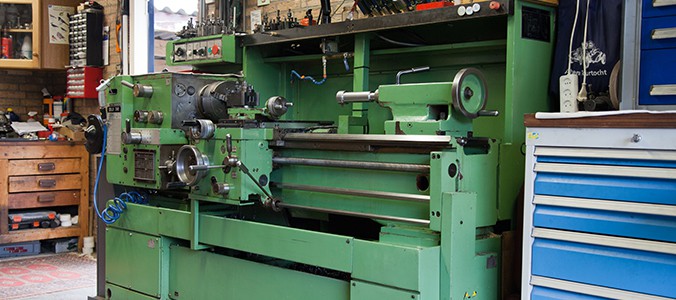
Hi folks,
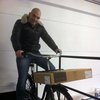
After a long summer-stop we are back in business and this time we are proud to announce our new sponsor "Blom Eethen". Mr. Blom is helping us with some of the metal parts required to get the steering wheel connected to our USB Racing Wheel. Mr. Blom is very skilled and he has over 45 years of experience and just about all the right tools for any kind of metalwork job !!
If you need some "Custom" metal work for you DIY simulator, he`s the person you should talk to!
Mr. Blom Eethen and his tool shop (pictures and video below):

Feel free to have a look at his website for more information: http://www.blomeethen.nl/
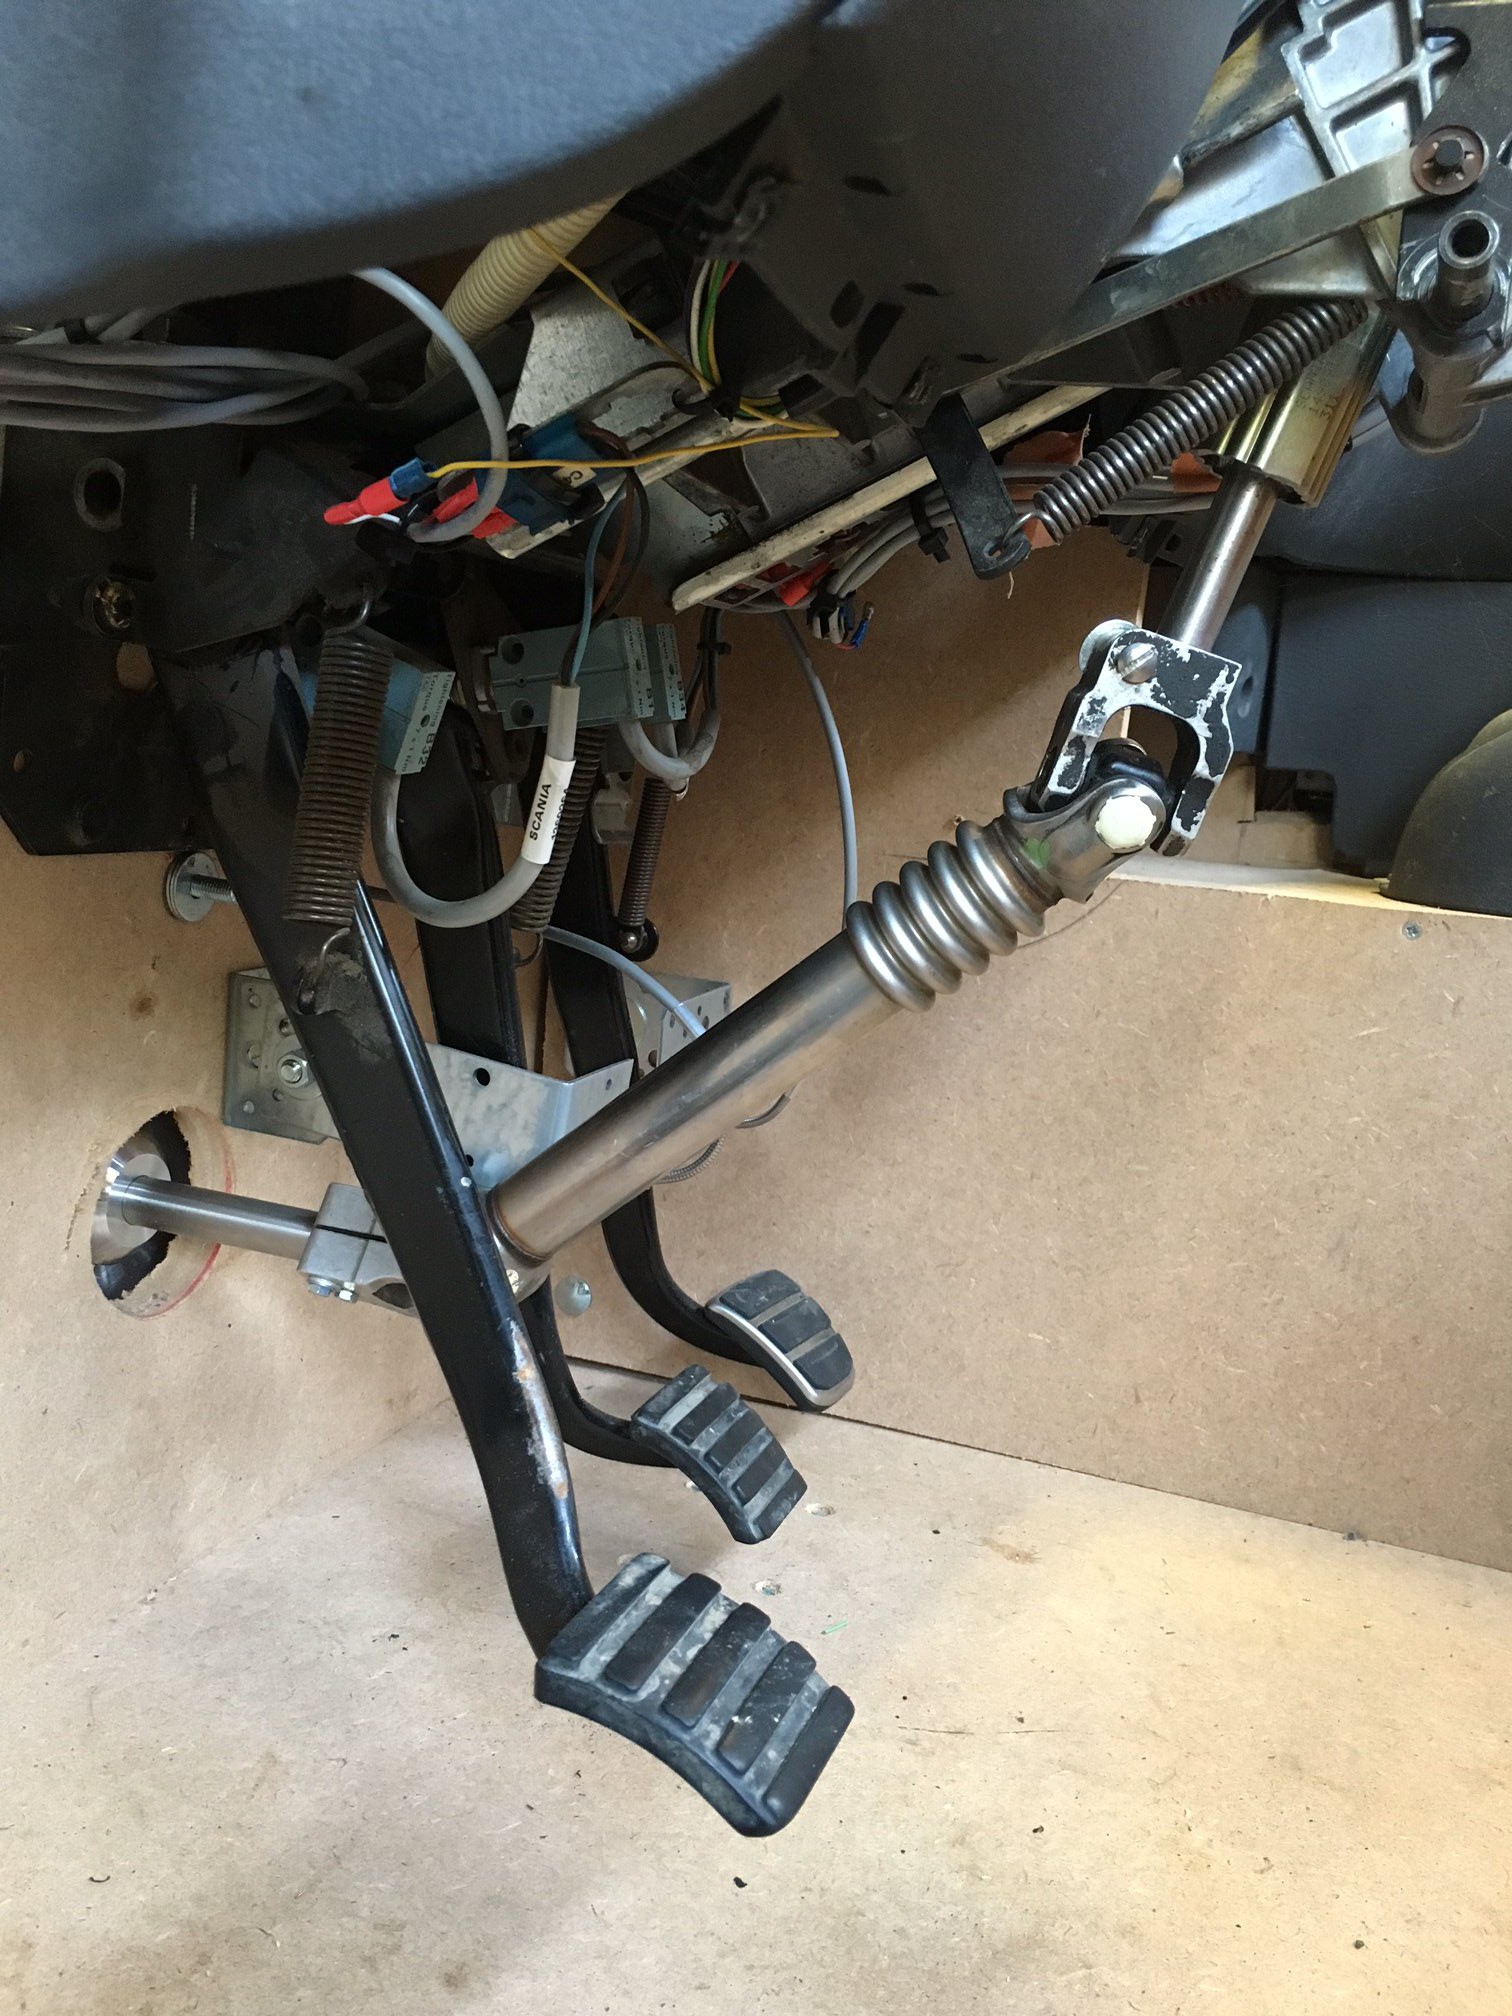
Progress with our Pedals!
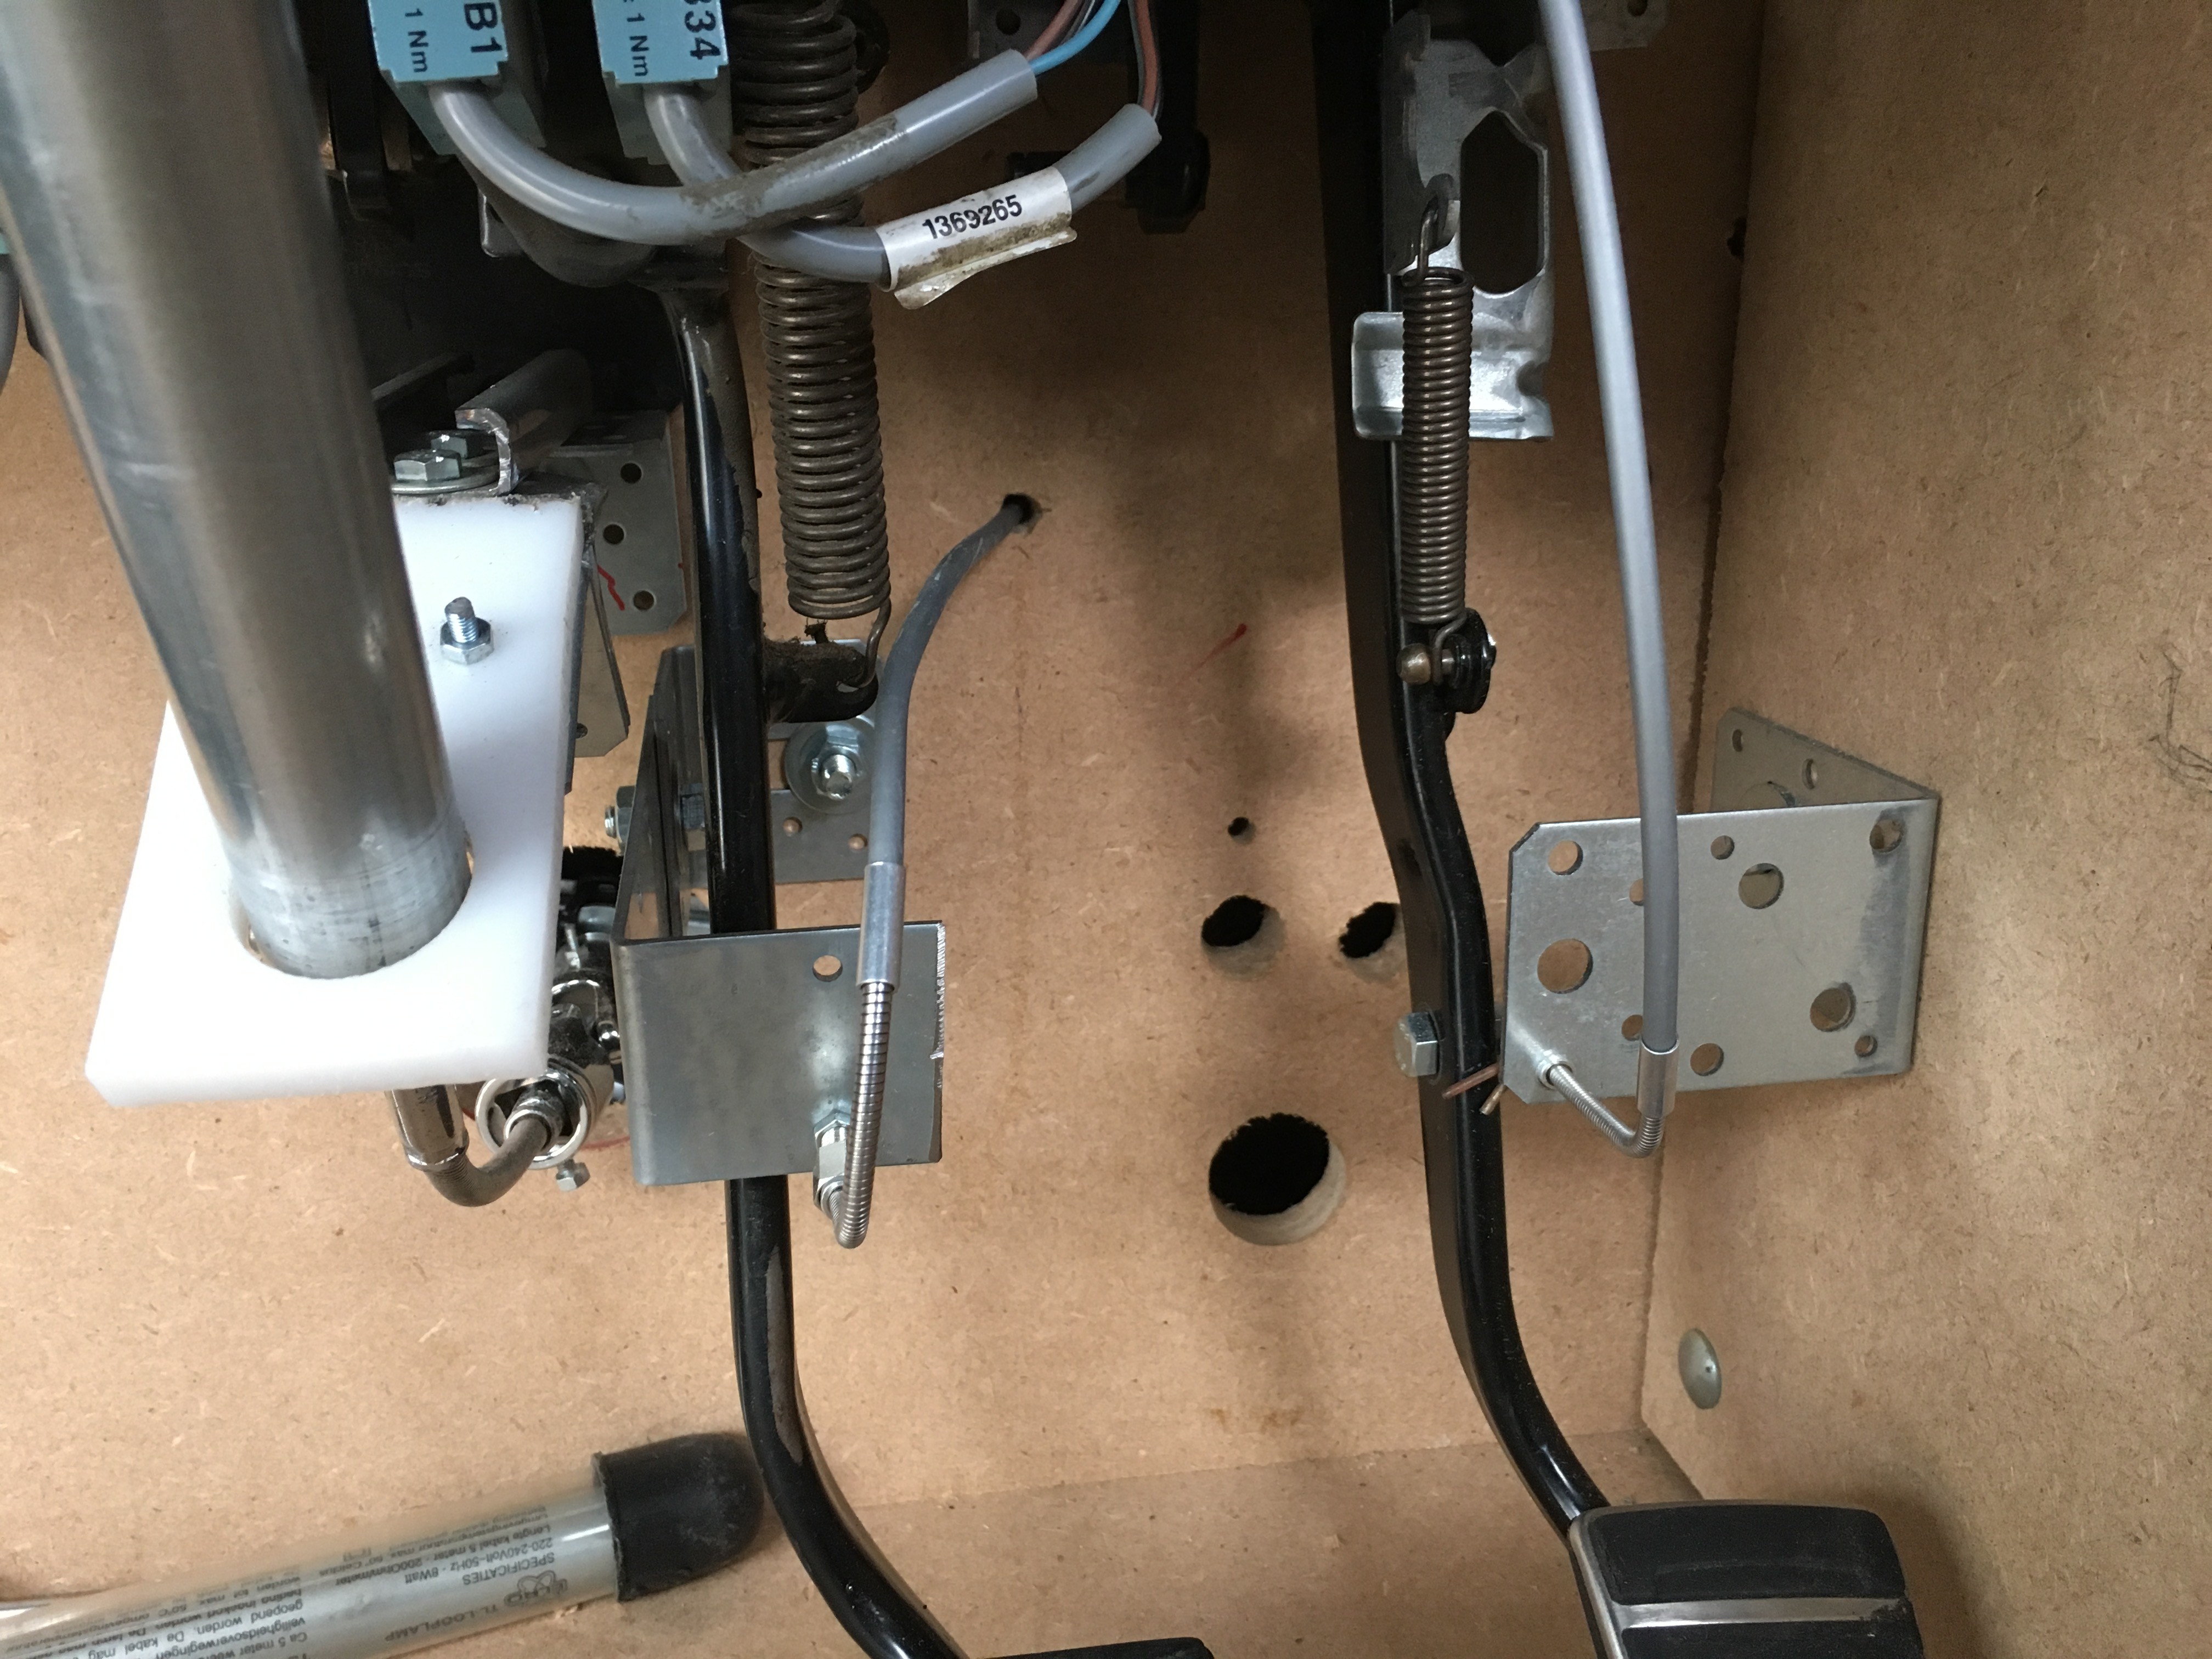
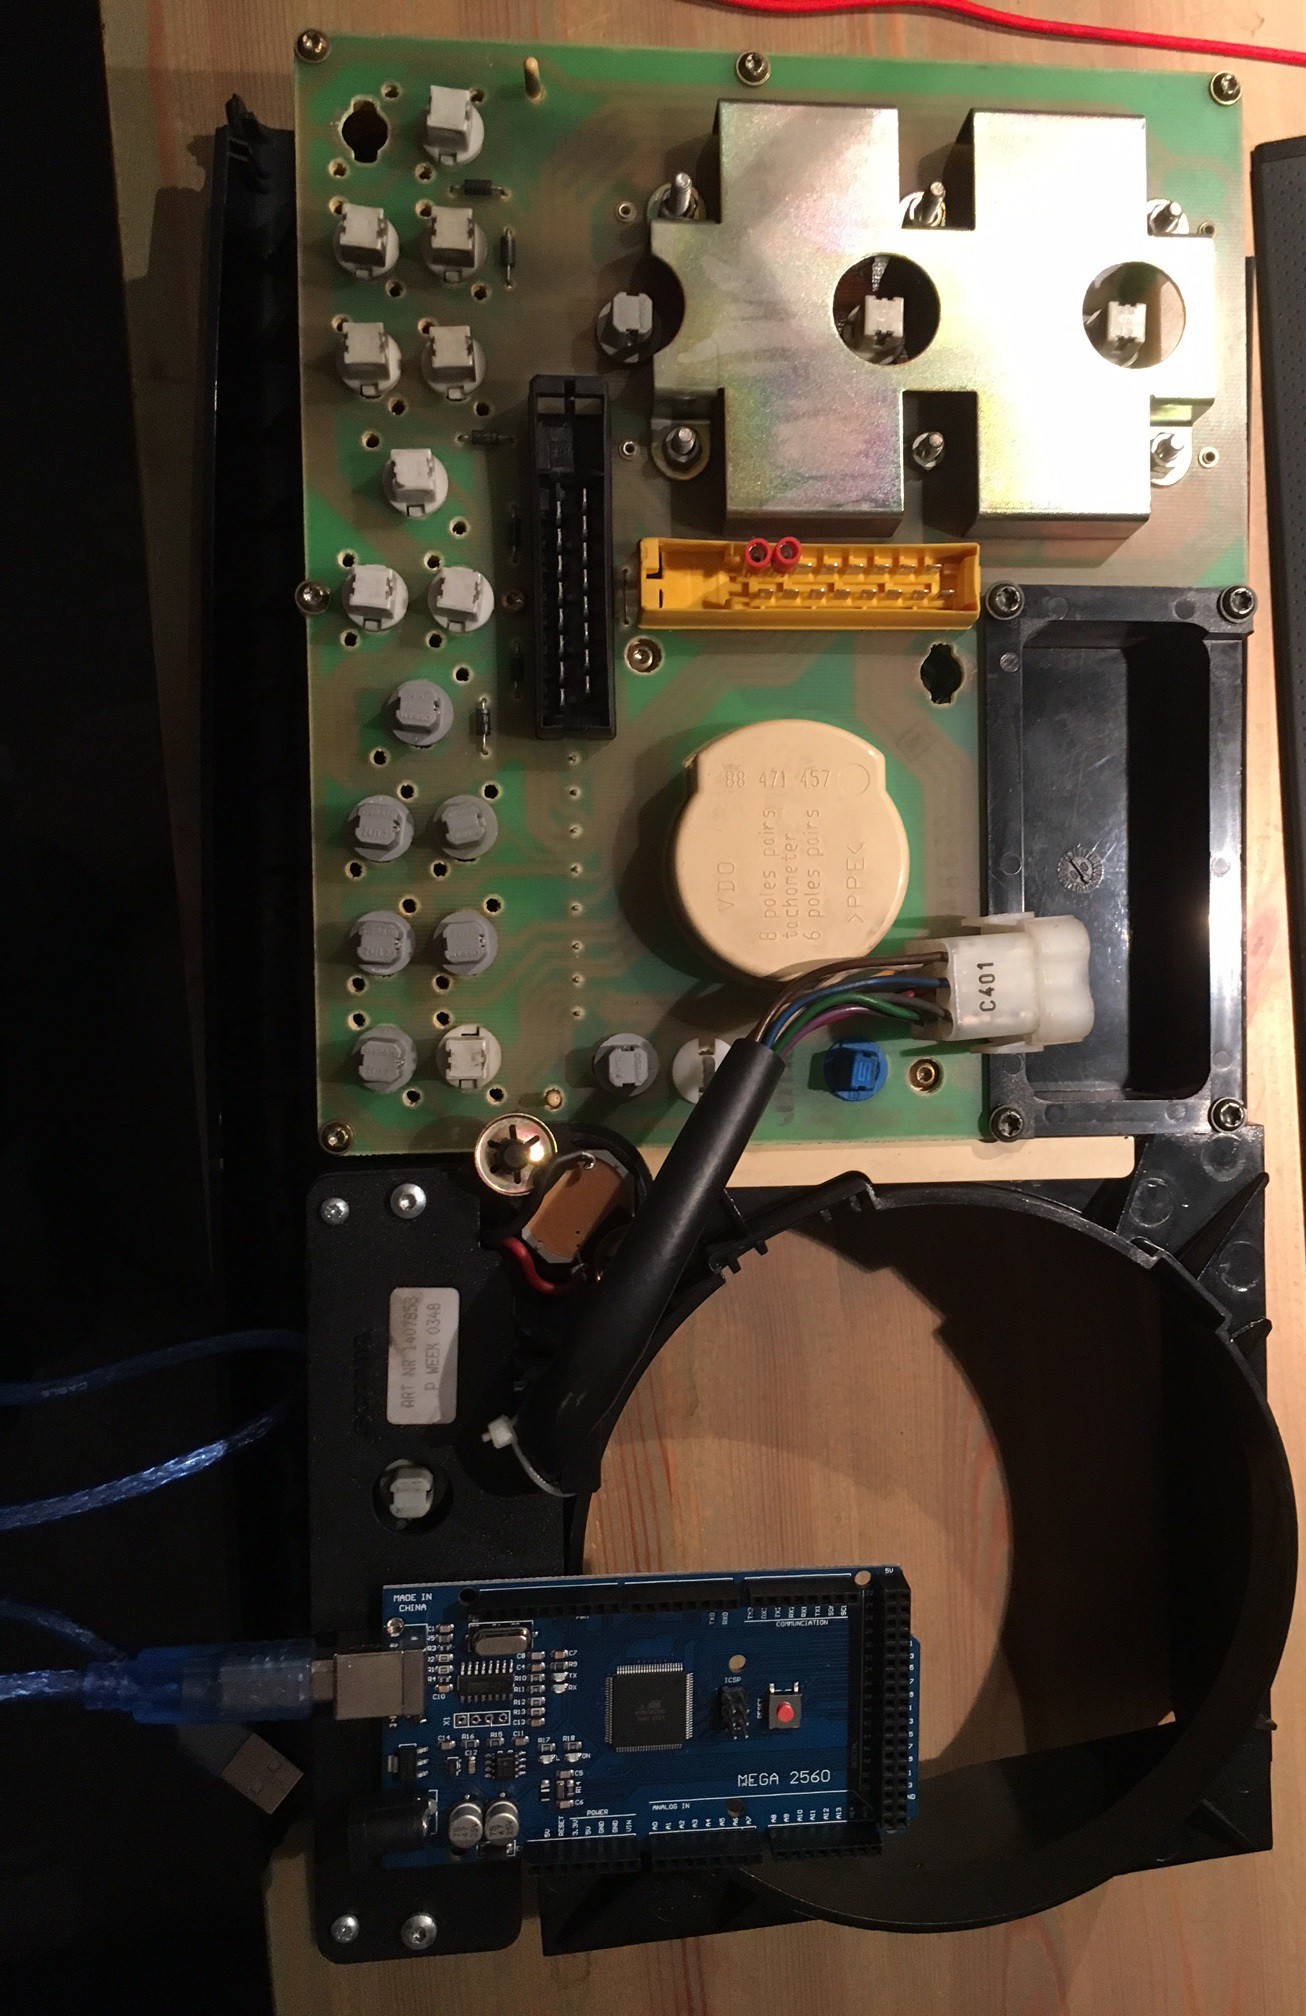
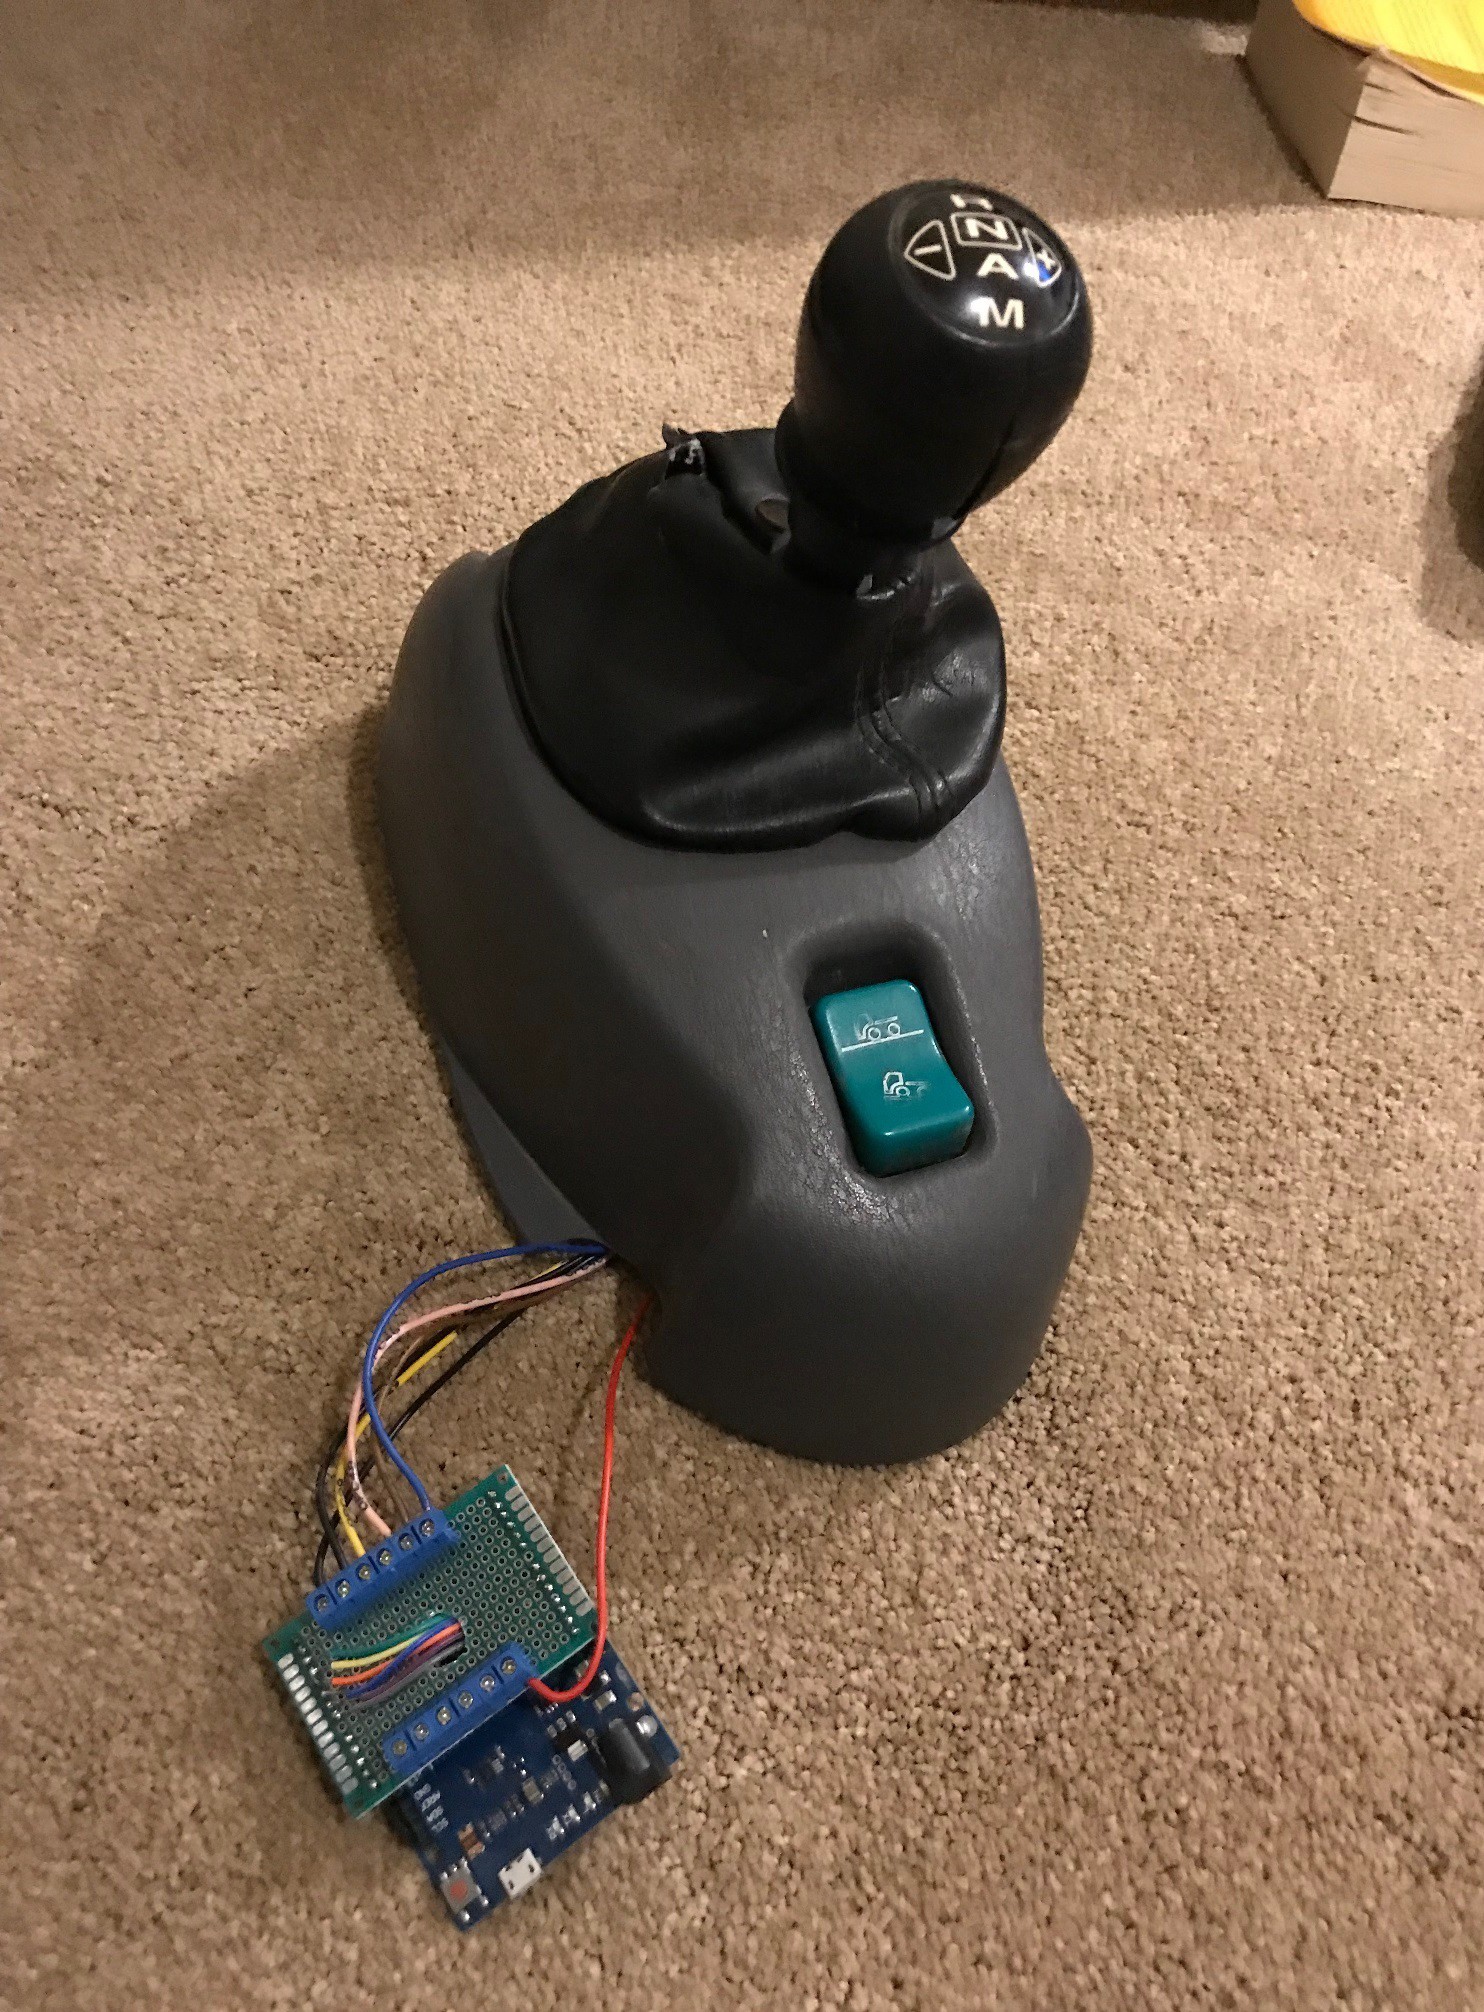
To learn how Scania Components are used, connected and wired, please folow this page. I will publish as much information as possible.
Click here for my video channel

think they do sell https://www.vostruckparts.nl/en/?gclid=EAIaIQobChMI3pbNh_Su5AIVQ7TtCh1gbwNaEAAYASAAEgJ64vD_BwE
But eBay SCANIA 4-series parts should work.
Bonjour, Je suis le propriétaire original de "votre" travail concernant la mise en application du tableau de bord avec une carte nucleo. j'aimerai vous dire que déjà la moindres des choses lorsque on utilise le travail de quelqu’un d'autre, on site la source ou la personne qui en est le propriétaire... ça fait toujours plaisir et ça évite certains malentendu...
Ensuite je vois également que vous vendez un travail qui ne vous appartient pas. sachez que je pourrais engager des poursuites judiciaire et demander un dédommagement pour atteinte au droits de propriété intellectuelle. MON travail est a disposition GRATUITE sur ma chaine YouTube et en aucun cas il est autorisé a être utilisée a des fins de revente par tierce personne. Vous voila prévenu.
Cordialement,
Arcannae
Sorry Arcannae, I’m not selling your code. I did sell a few of my PCB’s at cost but no profit was ever made or intended. Anyway I’m no longer selling. Sorry if I disappoint you and thank you for your great work.
Great work! I've been working on a Kenworth Simulator Cockpit, myself for American Truck Simulator, since February, 2016. I've always liked Scanias, too though!

Very cool simulator, any plans to make one for a regular or may be a sport car? :)
Thanks Roman! Who knows what may be next! Nobody did a Truck and I have seen cars so for now I stick with Trucks ;0
Awesome project
How much did it cost you ? Are all the codes available in your post ? can you make a tutorial on wiring and programming it ? I am thinking of making something similar to your project . I will be starting with Arduino and I am having no idea about its coding please help me with it ?
check my logs! It's all there my friend! Both Instructions and code. If you need specific help, send me a note and I will share my knowledge with you.
thank you very much I will be starting it by end of this March.
Yes Arduino UNO R3 or UNO Rev3 (its the same). The UNO is only used for the VW Polo Cluster Instrument Panel. I used Arduino Pro Micro and Leonardo R3 for all the Scania parts.

Really good looking project! Keep going!
Is there any way to contact some of developers? I`ve trying to create by myself, but have some problems :)

 SunFounder
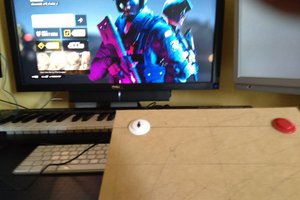
 Juan M. Casillas
 Alpenglow Industries
 Sagar 001
Over here in America, we do not have access to a "Vos Truck Parts." Is there any alternative that we can use? Is there any other way to get the Scania dashboard? Or will this work with any other truck dash?