 zakqwy
As you may know if you have read previous project logs, I am currently working with a local rep to obtain a 60vdc-->12vdc 600w DC:DC converter. The guy was on vacation for a week but he got back to me yesterday and today to let me know that a few units are on the way. Extremely exciting bonus: the manufacturer is providing them as samples, free of charge. Not a bad deal, given the units are $225ish apiece in quantity. I'm quite fortunate to get this deal, so I'm making sure to account for that cost in the BOM.
In any case, I'm holding off on other mechanical stuff until I can run thrust tests while powering the motors via batteries through the inverter. I want to figure out maximum thrust:weight ratio and also see how long I can operate at a steady ~1500g or so, as that will give me a rough idea of total flight time (well, minus power consumption by the theta servo, rho motor, and ARM...). I did draw a simple diagram of GimbalBot on my whiteboard:
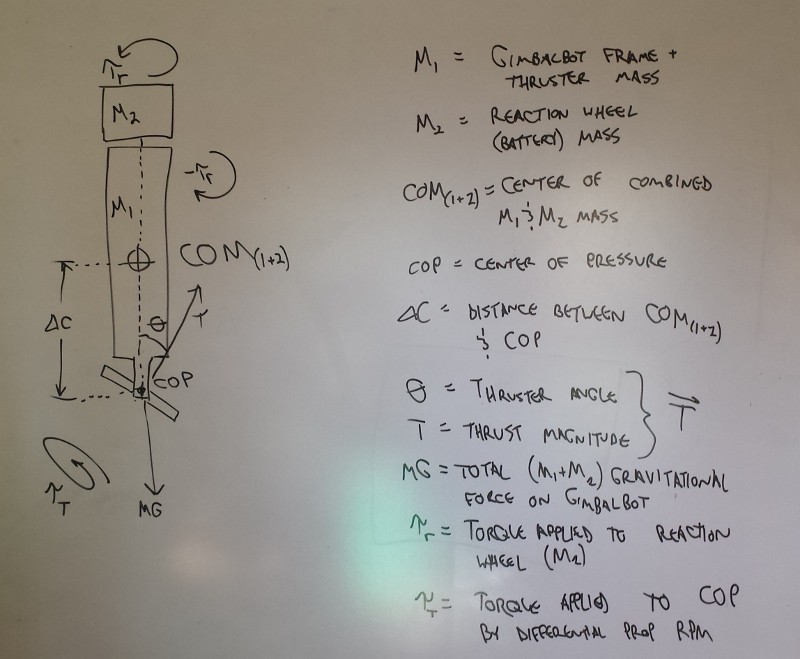
(note: my whiteboard is pretty shiny and my office catches the evening sun, so you can see my green shirt. I'll get a better curtain someday.)
... then I decided to change gears and solder a few connectors, as I'll need them for the test. By the way--I'd love some advice on diving in to the physics; I didn't take any kinematics or controls classes, so I'm going on the stuff I learned in basic Newtonian mechanics and statics (and this project is distinctly not "static").
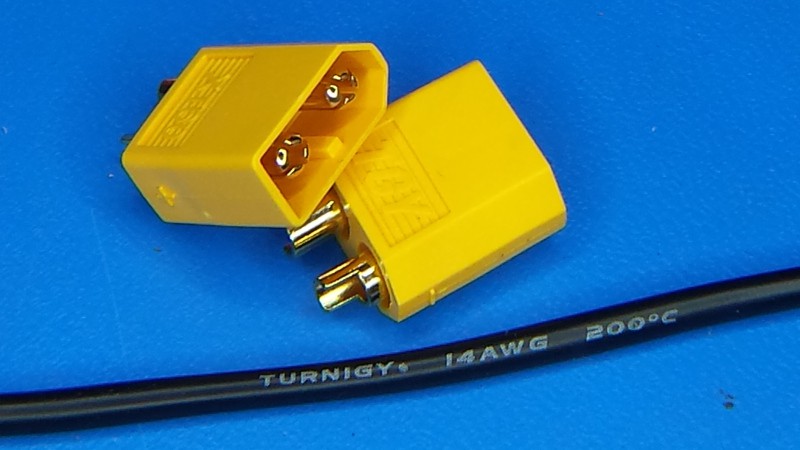
Soldering X160 Battery Connectors
I did a bit of research and found that most of the batteries in the range I'm using (4S, 850mA or a bit bigger) use X160 connectors. I grabbed a few bags of male/female connectors along with some high strand count 14-gauge silicone insulated wire. The wire is super flexible, which takes a bit of getting used to; it feels like 28-gauge wire that's really heavy:
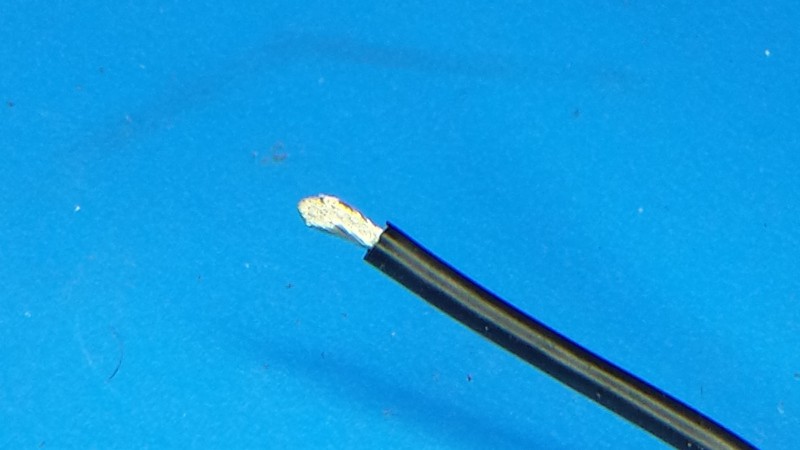
I stripped a bit of insulation off:
and then tinned the exposed wire:
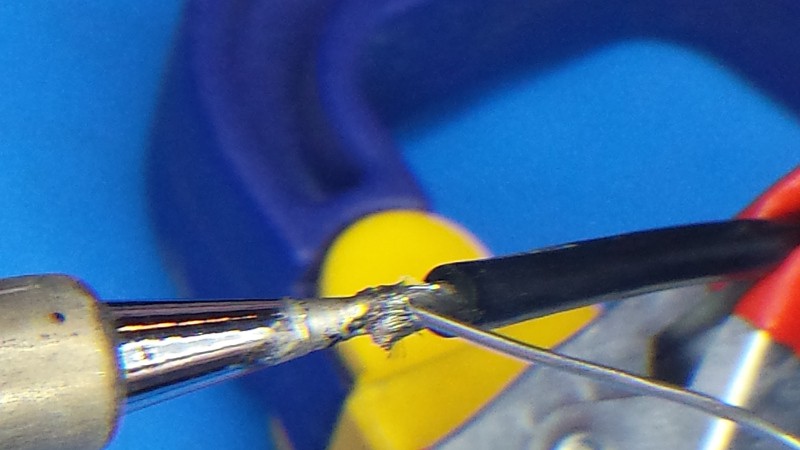
Not pictured: a dab of no-clean flux. My solder is cored with it too, but extra flux makes RoHS work a lot easier. I blobbed some on to the wire prior to soldering it.
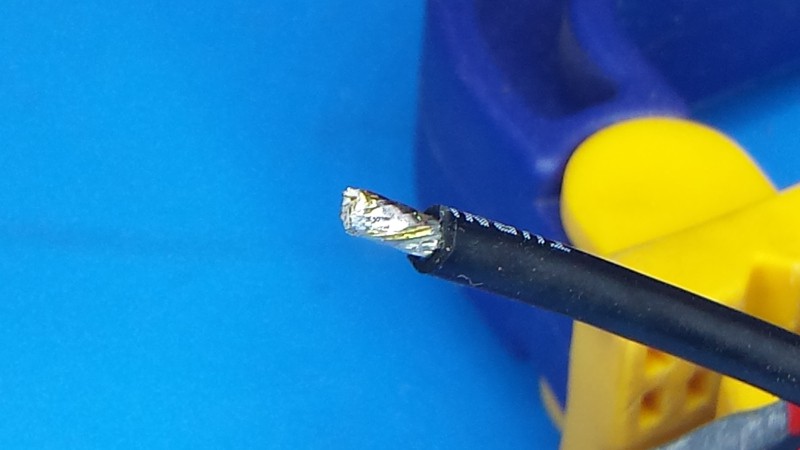
I tinned the wire enough to nearly hide the strands. If you do the same, don't be afraid to trim off a stray wire or two; there are enough in the bundle that a couple missing strands won't matter for current capacity.
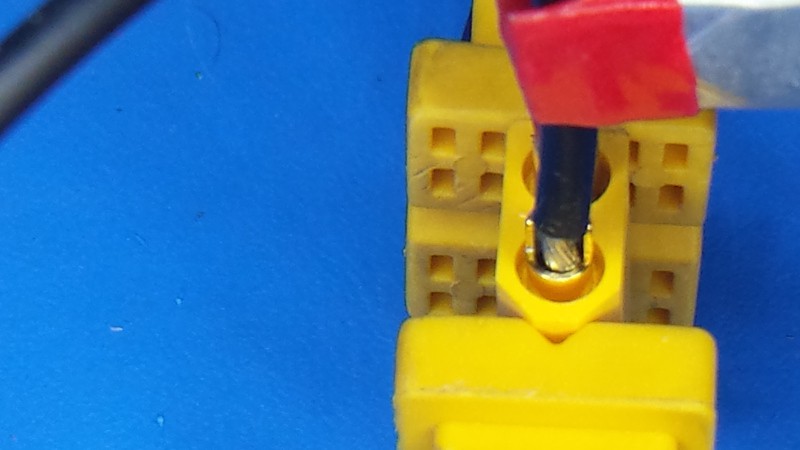
After prepping the wire, I set the X160 connector up in a makeshift vice (the red lead had been soldered earlier):
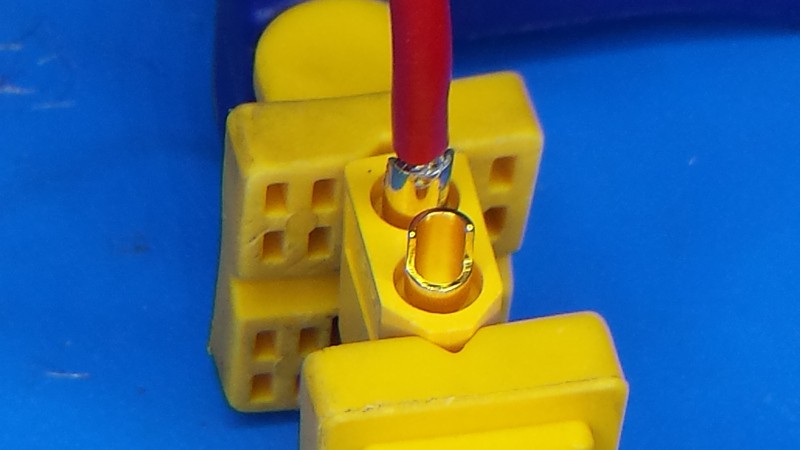
Nothing fancy, just a ratcheting hand operated clamp. I warped the casing on one in an earlier soldering run since I was holding it with an alligator clip-based helping hand device; soldering the connectors heats the housing up quite a bit, so it's worth clamping them with that in mind (and avoiding point stresses).
I coated the inside of the terminal cup with a bit more flux:
... then I heated it up and added some solder. Note the iron position; I used a clean, well-tinned tip and made sure to heat the metal up enough to melt the solder completely:
Good adhesion is key! So why did I tin the wire AND the cup? Two reasons: (a) it's tough to have enough hands to add solder to the joint when one is actually inserting the wire, and (b) it prevents oxidation from being an issue in the joint's integrity. I've used flux on both surfaces, so now it's just a matter of remelting the solder and sticking the bits together.
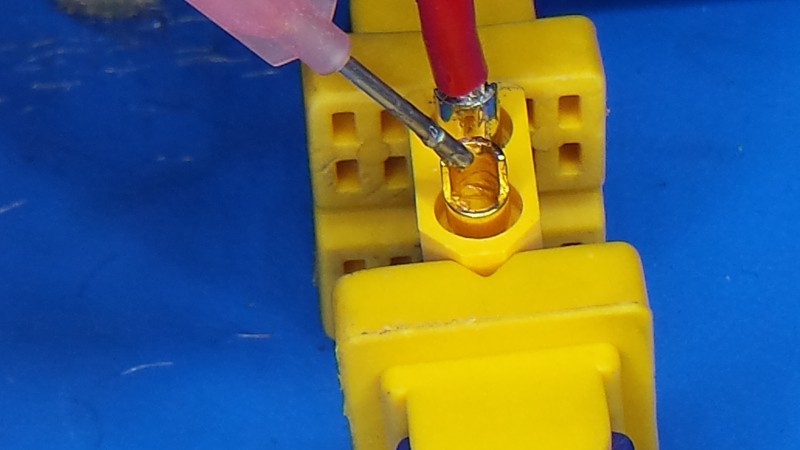
I inserted the wire first:
Note the clip to hold the wire. I'm holding it with my free hand (the other hand holds the iron), and the wire gets HOT. I don't want to be tempted to drop the wire before the solder has cooled completely; any movement as the alloy drops between the liquidus and the solidus line would result in a cold solder joint.
(sub-tangent: that's why 63/37 solder is nicer than 60/40 when you're dealing with leaded stuff. 63/37 is a bit closer to the alloy's eutectic, meaning the solidus and liquidus lines are closer together and full solidification occurs over a smaller cooling range--less time for movement causing cold joints. See the Pb-Sn phase diagram for more info.)
This was the toughest picture to get:
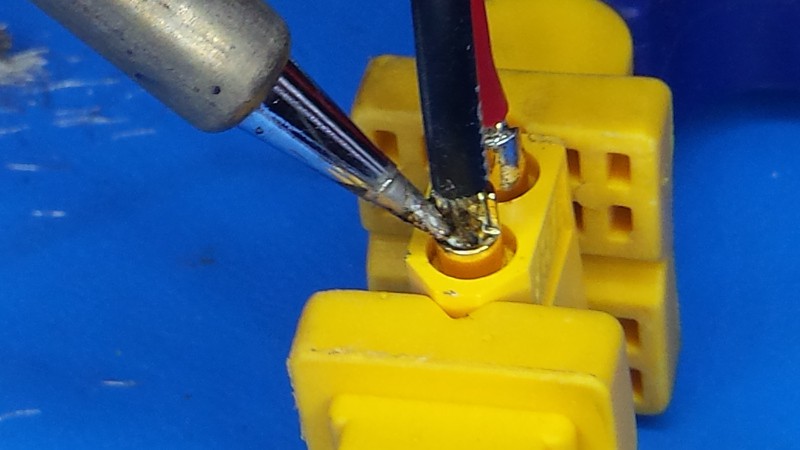
This shows the final joint after everything has heated up and flowed properly; notice the fillet of solder that runs all around the wire. Not pictured here is prep: after getting everything positioned, I pulled the wire out and remelted the solder on the terminal. Shoving the cold wire in solidified it a bit, but the cup was still preheated to a few hundred degrees. The iron position shown above allowed me to heat the pot up enough to remelt the solder, while also liquifying the solder I'd applied to the wire earlier.
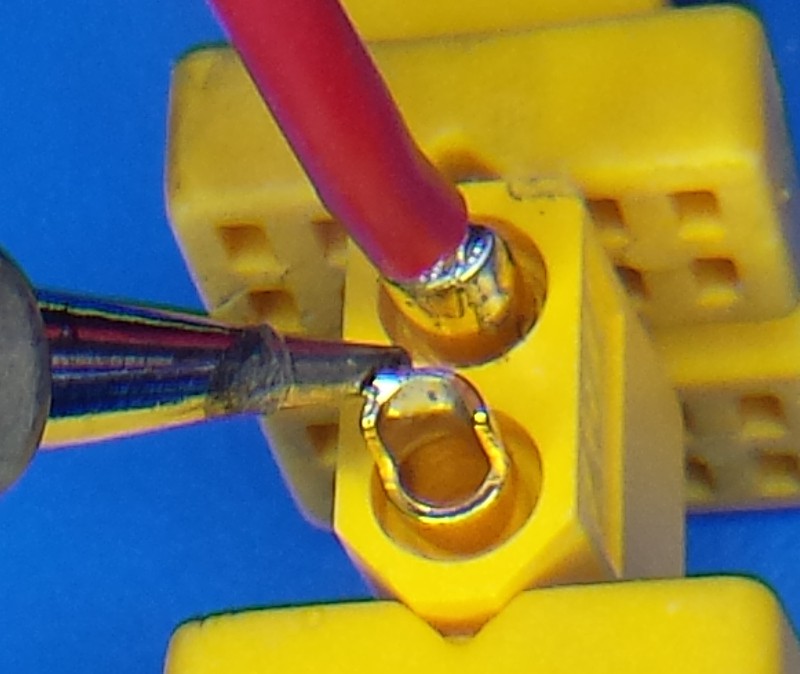
Note: This is the tricky part. If you're using lead-based solder, you'll have a bit more leeway since its melting temperature is lower. With the RoHS stuff, you can't keep the iron on too long or you'll start to melt the plastic housing for the connector (as me how I know!). Keep the iron on long enough to see the solder flow completely into all the gaps, then remove the iron and keep the wire still for at least ten seconds.
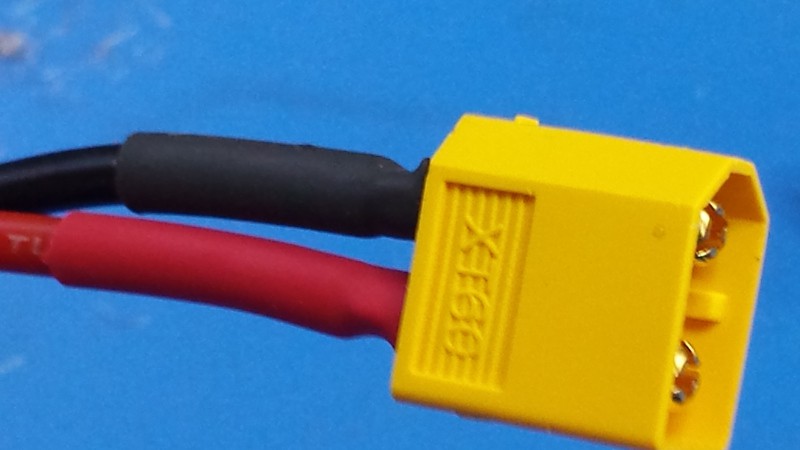
Boom:
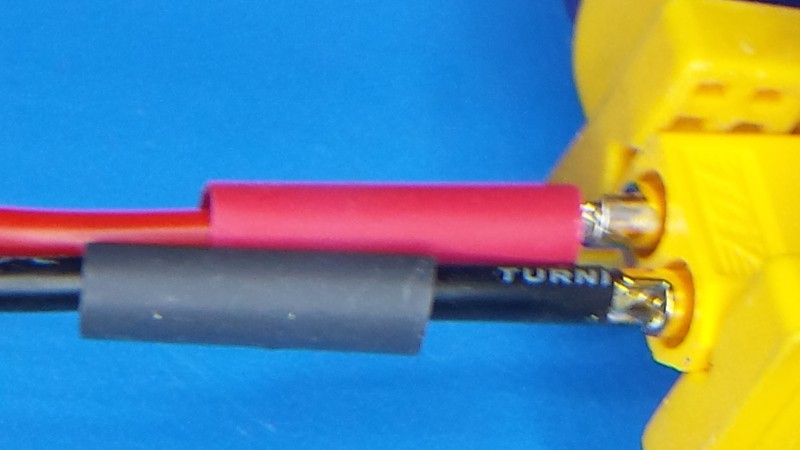
You didn't forget the heat shrink, did you? Well, I did--fortunately I'm building 1-sided cables for now, so I just strung it on from the other side. I'm using 1/4" stuff, but slightly smaller (4mm or so) would be ideal; this stock is a bit too thick to fit into the groove in the plastic, so there's a small ring of metal exposed. Either way, this will do the job nicely:
So... that's how I'm doing these connectors, but I'm brand new to them. I'd love some words of advice from anyone that has experience with X160-style connectors. How did you reliably solder them without damaging the plastic?
Discussions
Become a Hackaday.io Member
Create an account to leave a comment. Already have an account? Log In.
Also, I may be able to send you a few PDFs that might help with learning control theory (even though I don't actually know it myself).
Are you sure? yes | no