 vincentmakes
Current Status
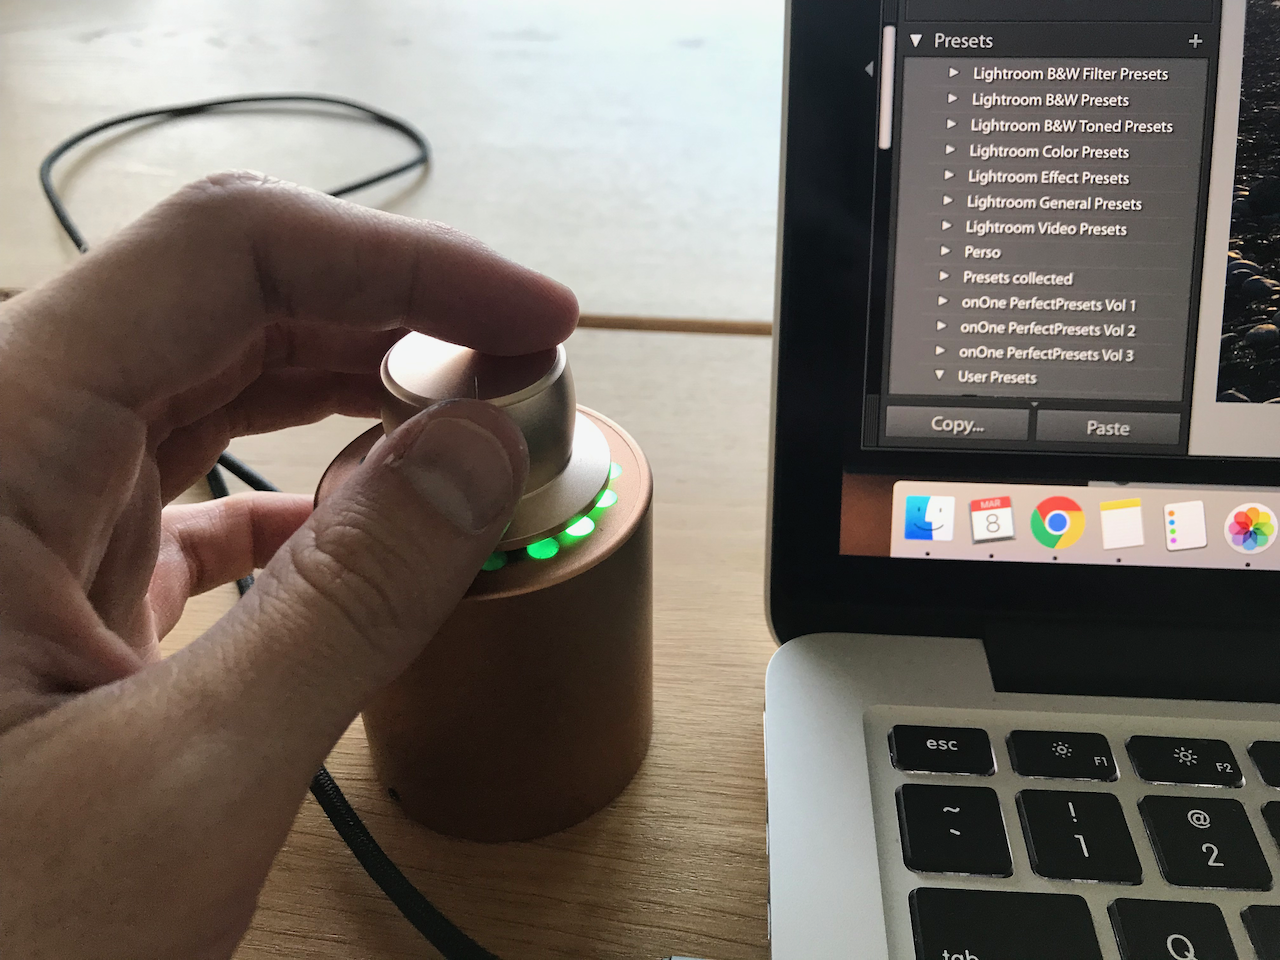
Project completed !
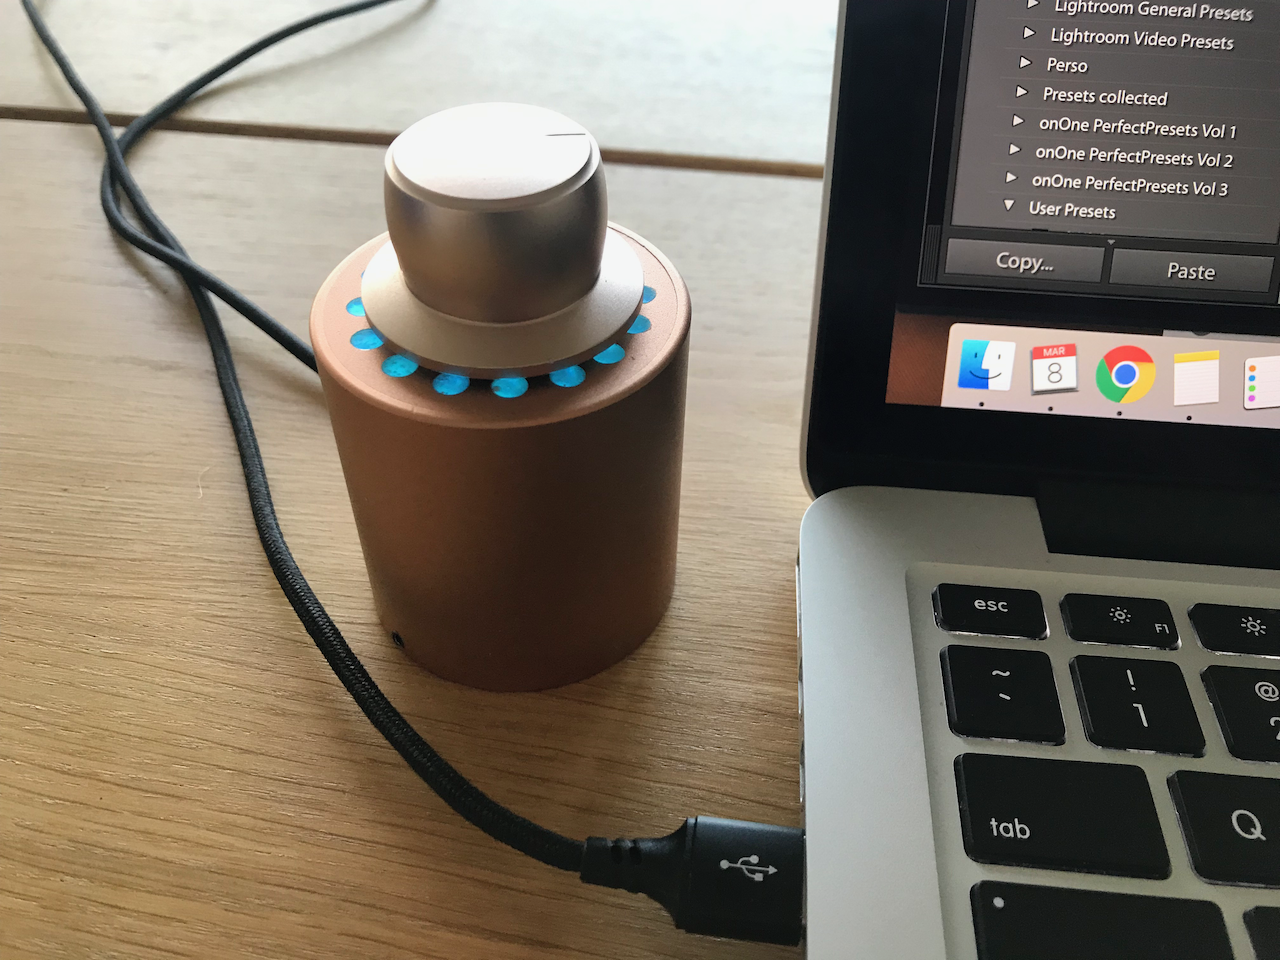
The Knob in action :
The code is here: https://github.com/vincentmakes/InfinityUSBKnob
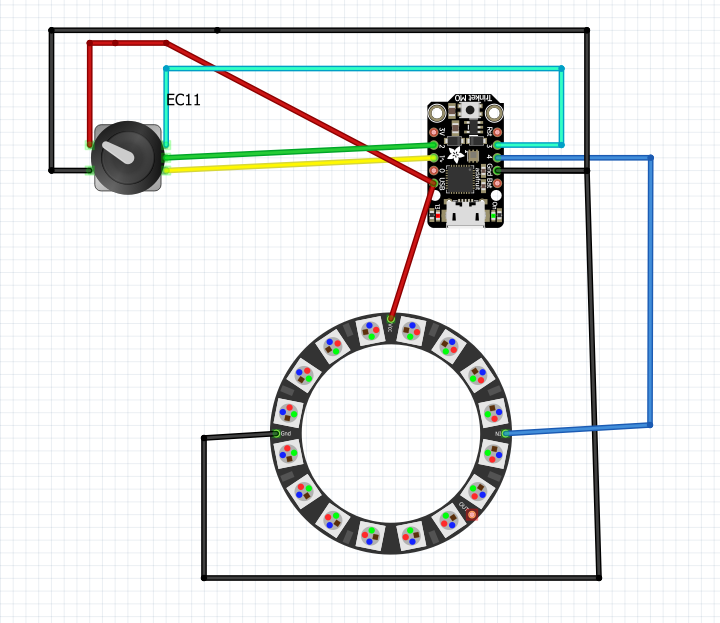
Hardware
This is the hardware we will use for this project:
A Trinket M0, EC11 rotary knob, a neopixel ring, a nicer knob and an aluminium case from audiophonics.
What I want to achieve
Several mode will be available at each push of the rotary knob, allowing to switch between shortcut possibilities :
| Mode | Action | Shortcut (MacOs) | LED Colors |
|---|---|---|---|
| 1 | Undo/Redo Lightroom or Photoshop | Cmd+Z/Shit+Cmd+Z | Blue |
| 2 | Volume | HID Volume +/- | Green |
| 3 | Close/Reopen tab Chrome | Cmd+W/Cmd+Shift+T | Purple |
| 4 | 10s Forward/Backward in VLC | Cmd+Alt+Left/Cmd+Alt+Right | Orange |
Connections
The connections are quite straightforward. The A,B,C pin of the encoder are going to the pin 1,2 and 3 of the Trinket.
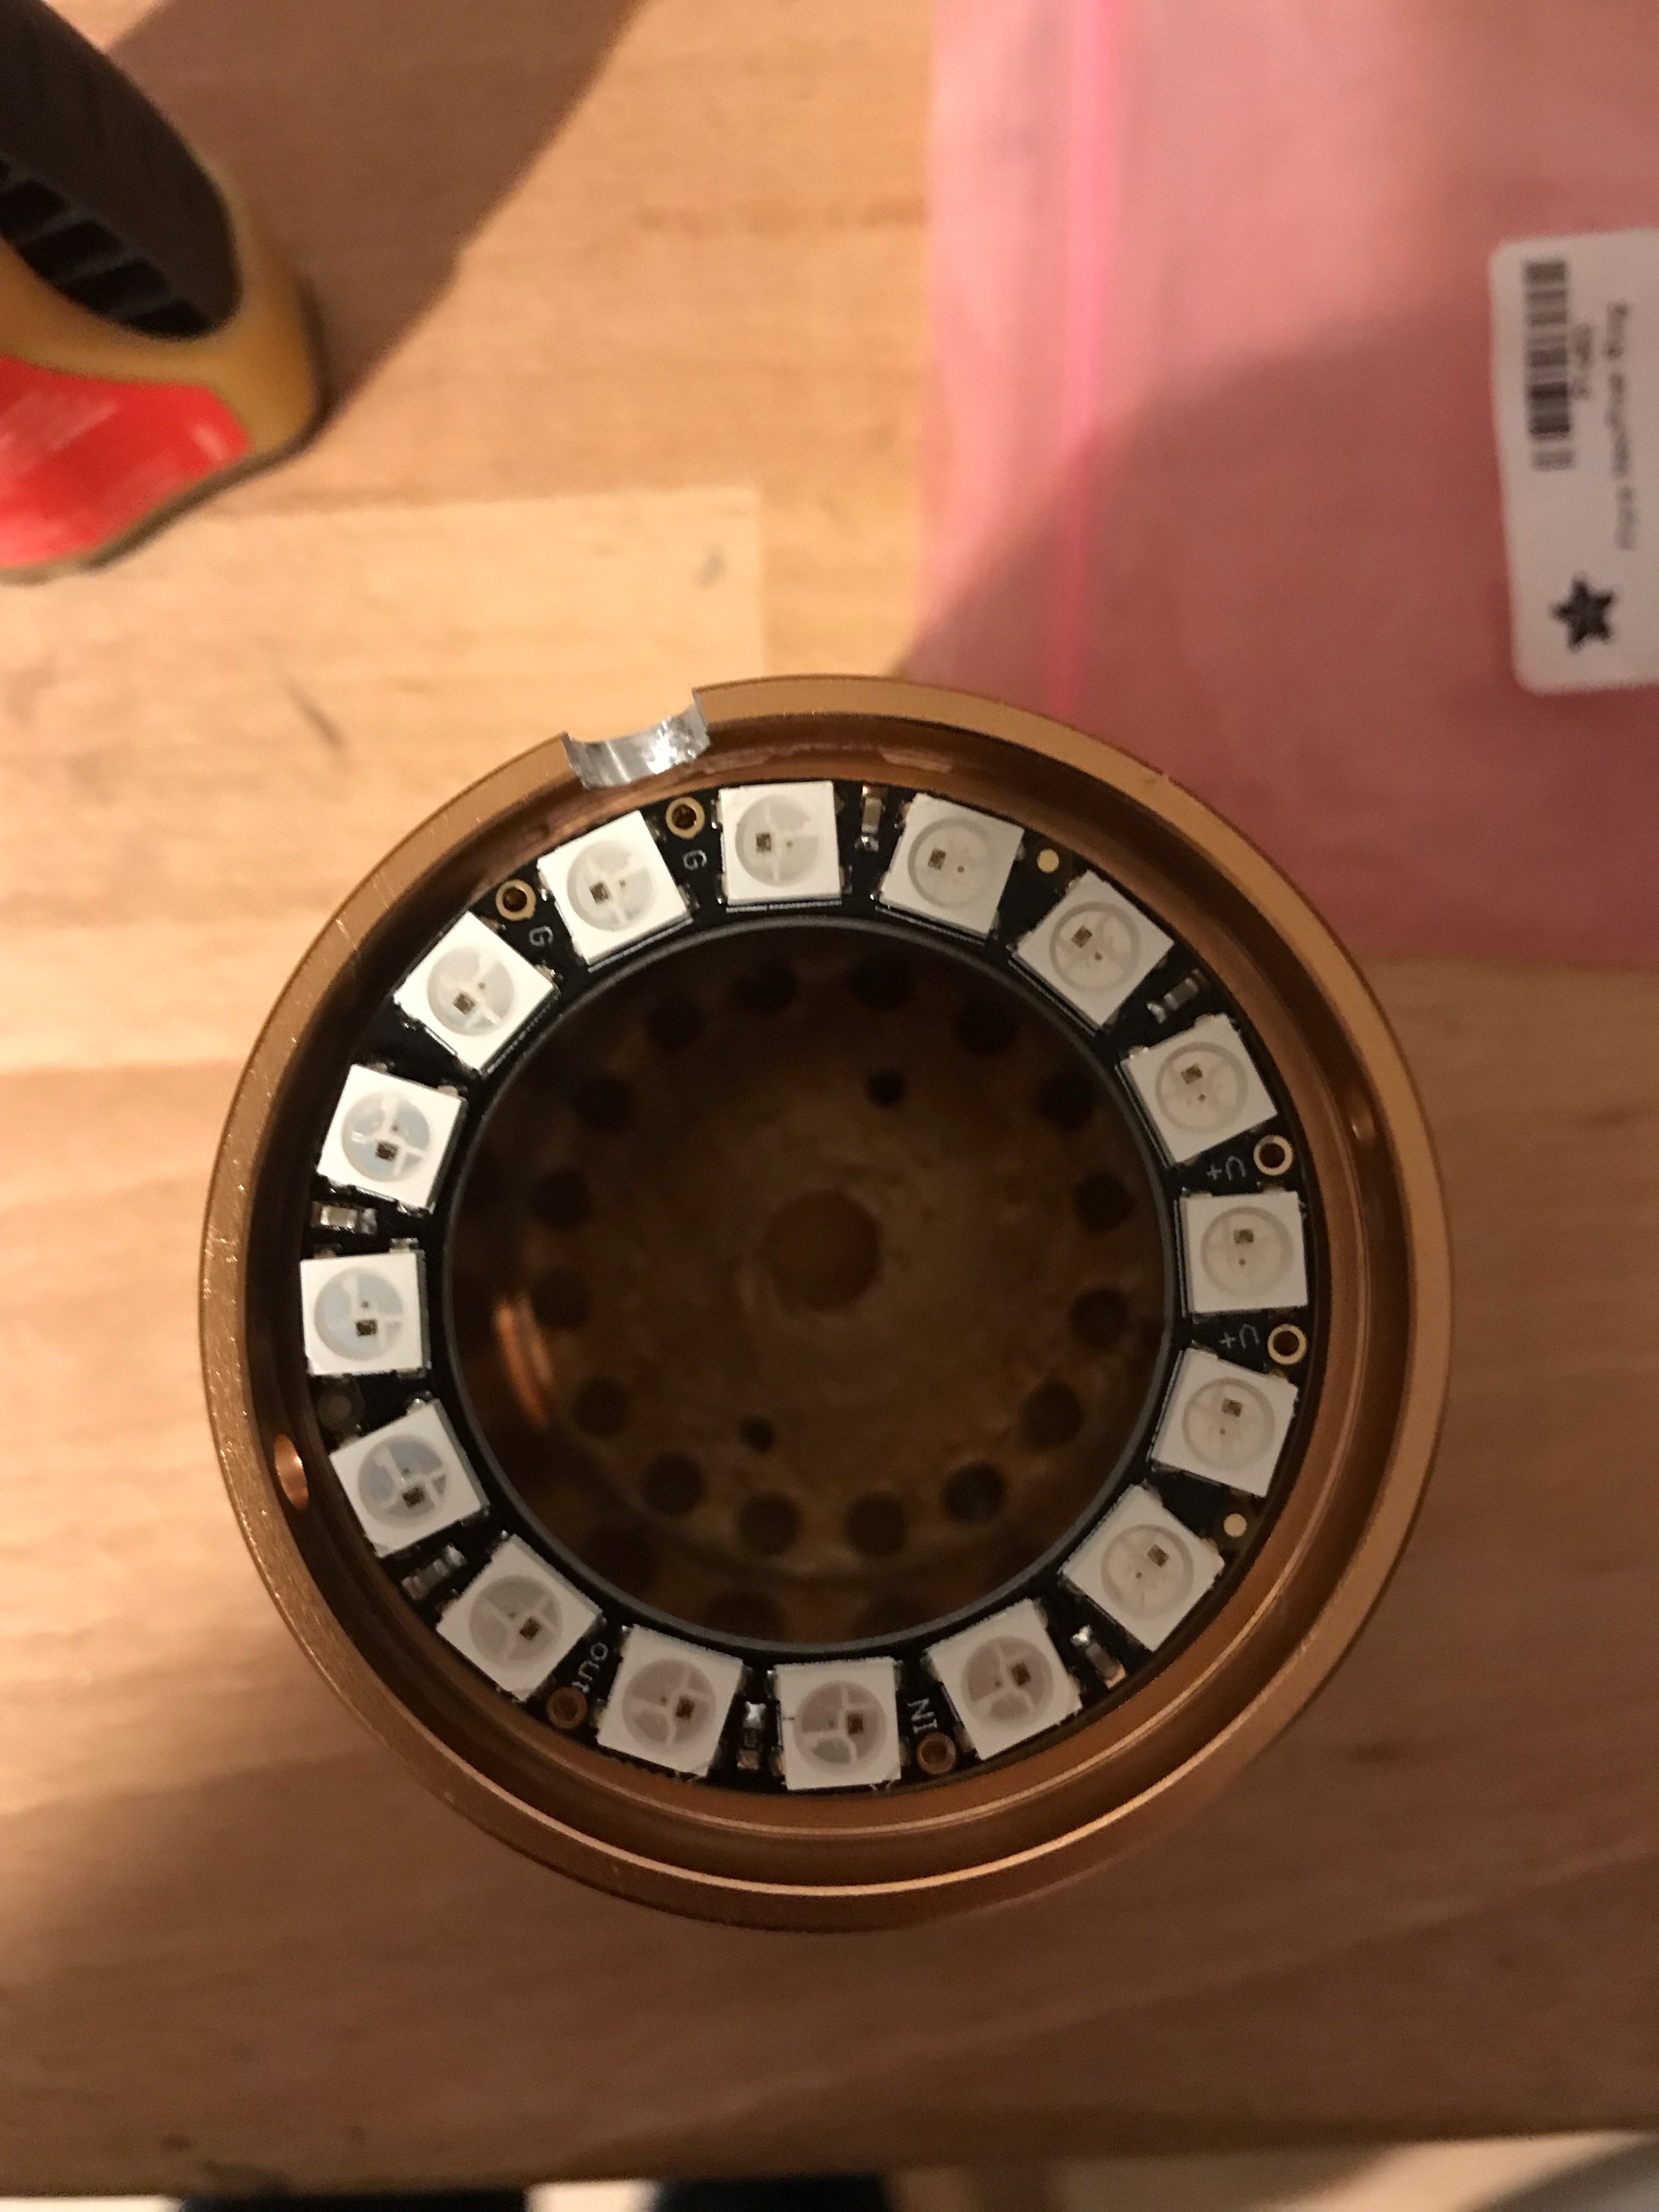
Pin 4 is connected to the DI of the ring.
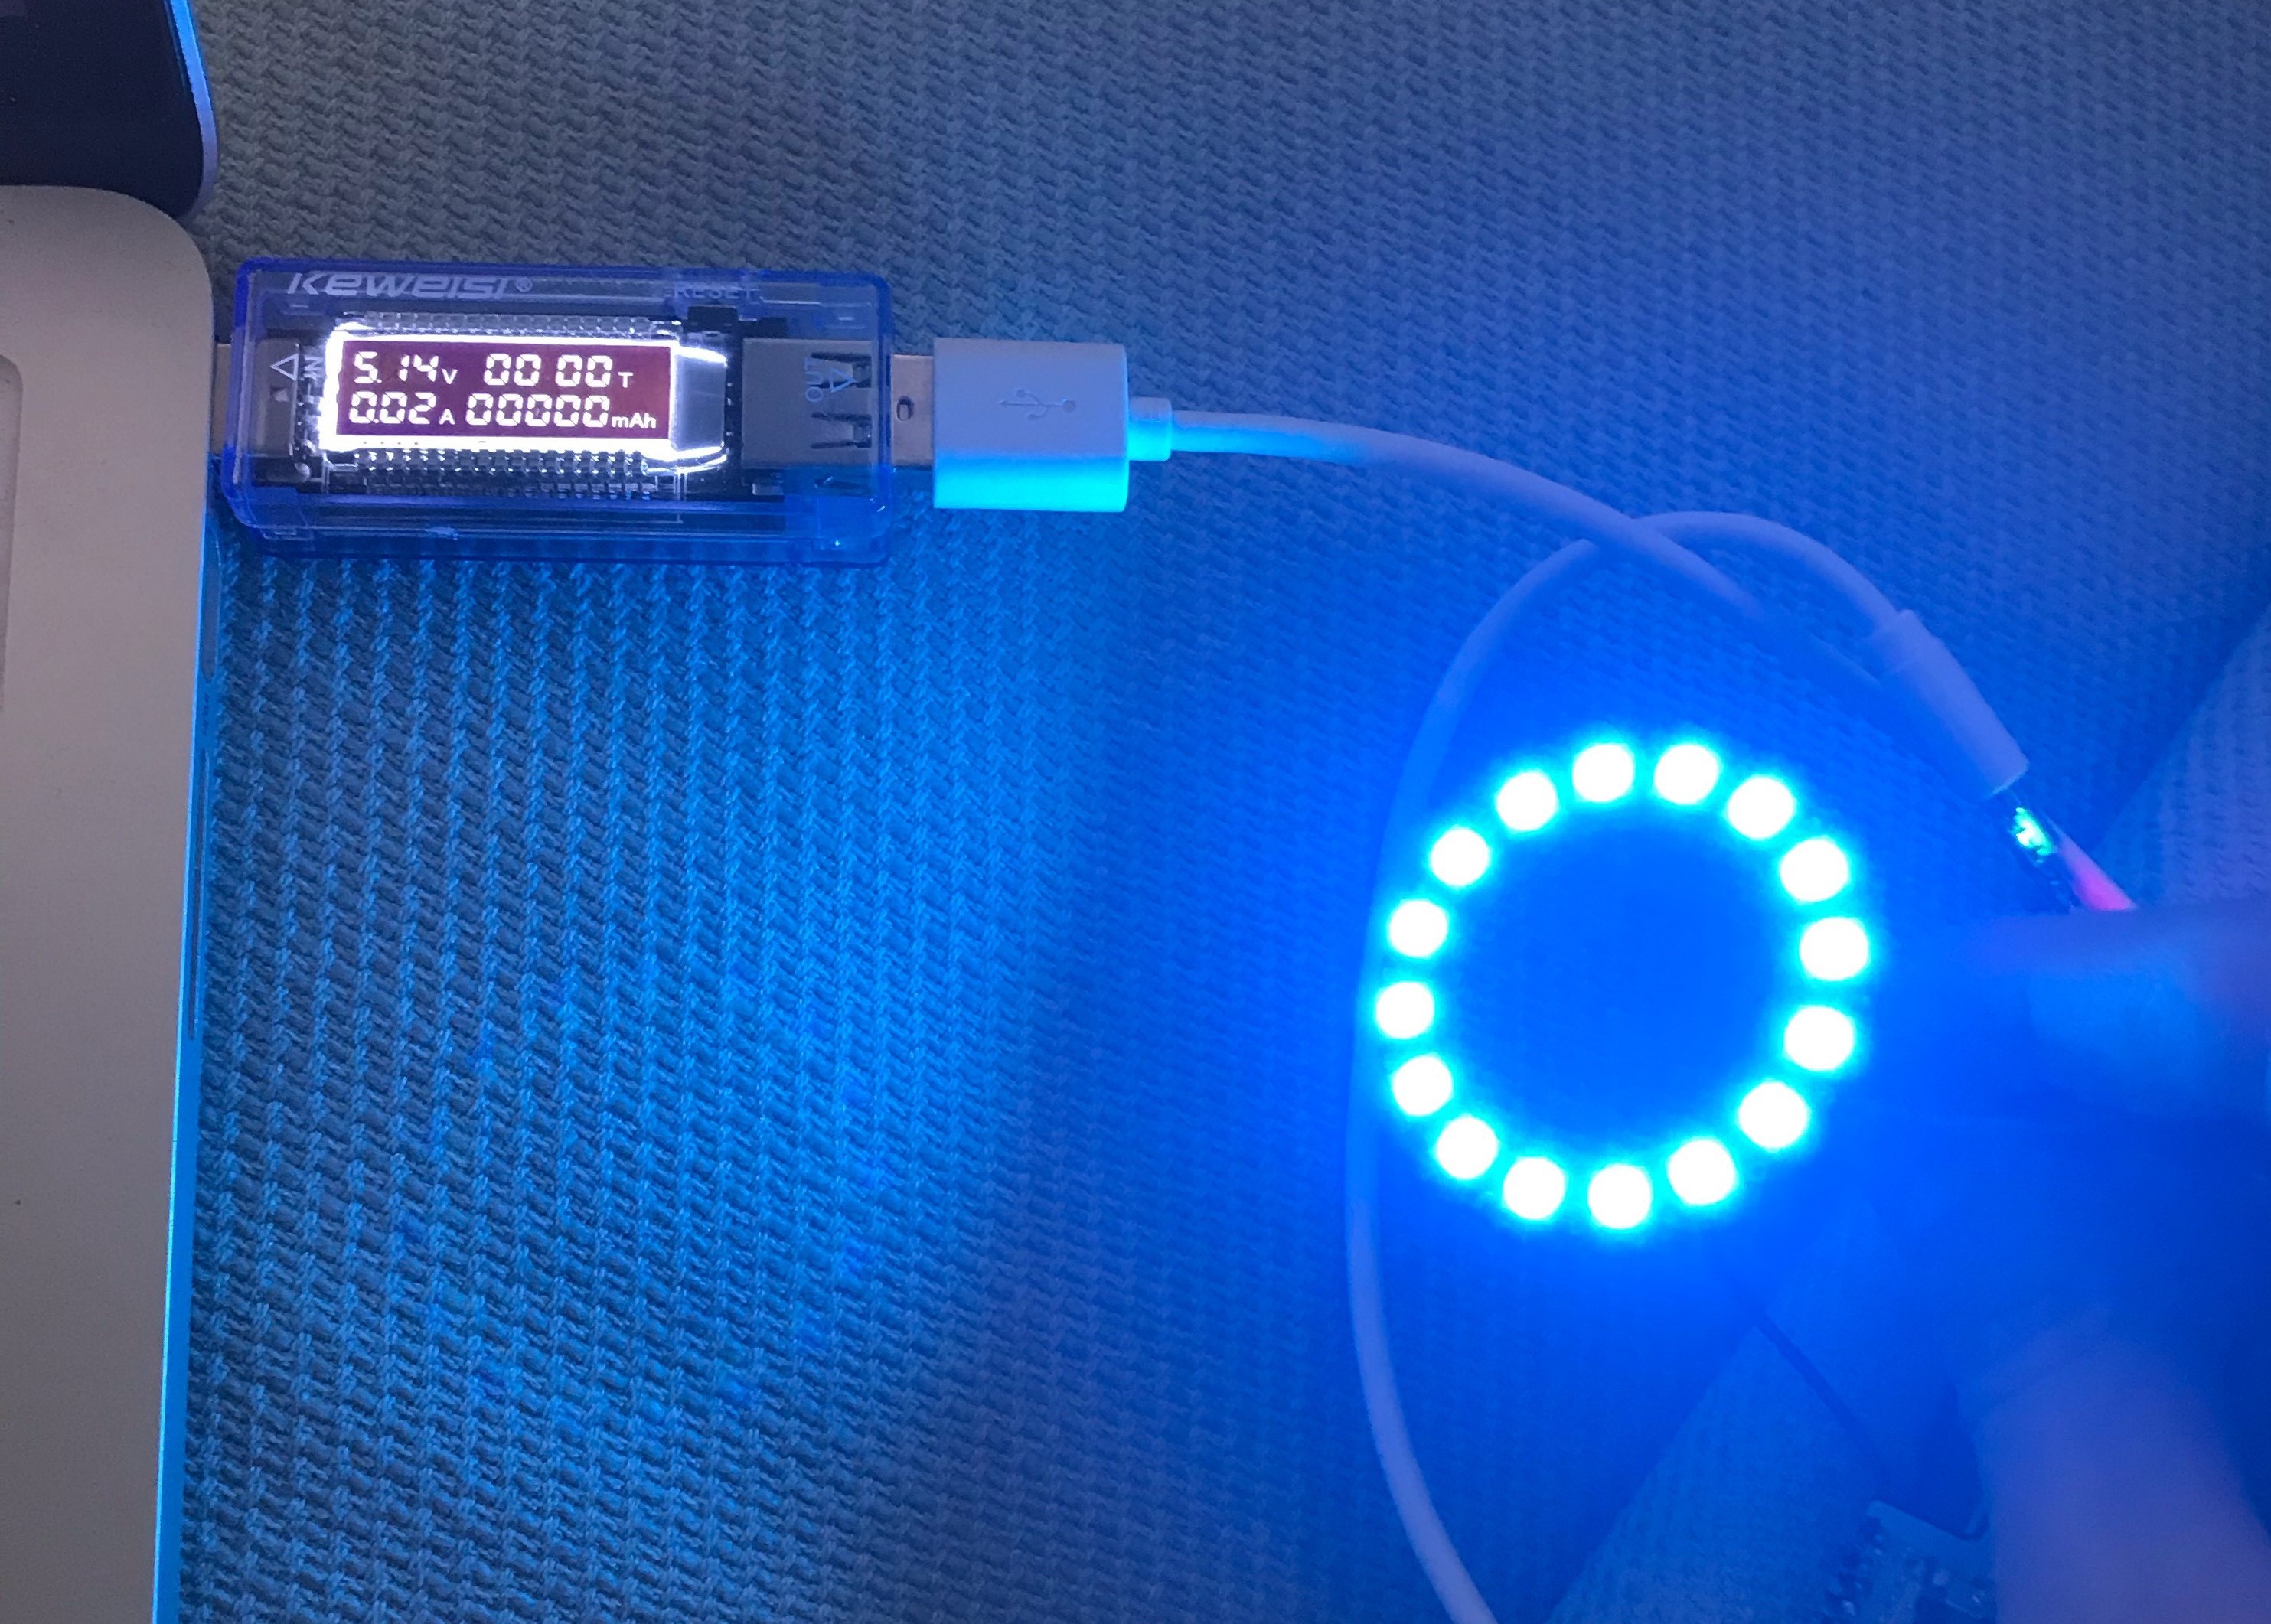
The power consumption is not very high when the brightness is set to 24
The code
Here's what I'm using and the challenges I faced:
Controlling the LED: Just using the Neopixel Library for Arduino. There are two types of animations I want to cover:
1. Turning on LEDs clockwise, turning off LEDs counterclockwise until one LED only is on. Stopping at LED of origin. This is for Undo/Redo actions with finite history.
2. Turning on LEDs clockwise, turning off LEDs countreclockwise but also turning on LEDs further counterclockwise if it passes the LED of origin. This is for volume up/down or any "unlimited" action.
Reading the encoder: the trick is to trigger an action on interrupt to detect when the knob is turned. Therefore the main code will not be in the loop() function but rather in the function called on interrupt.
Sending keyboard commands: I will be using the HID-Project Library. This is important to not use the default Keyboard.h library provided by Arduino because the HID library already includes it. The difference is that some actions are not just keyboard shortcut but requires to interact with the HID. The volume up/down is one of them for example and triggering F11/F12 will not work.
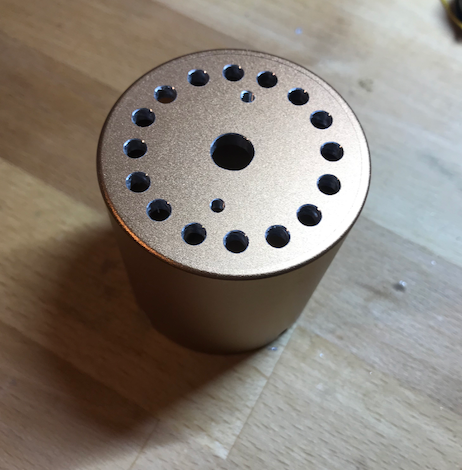
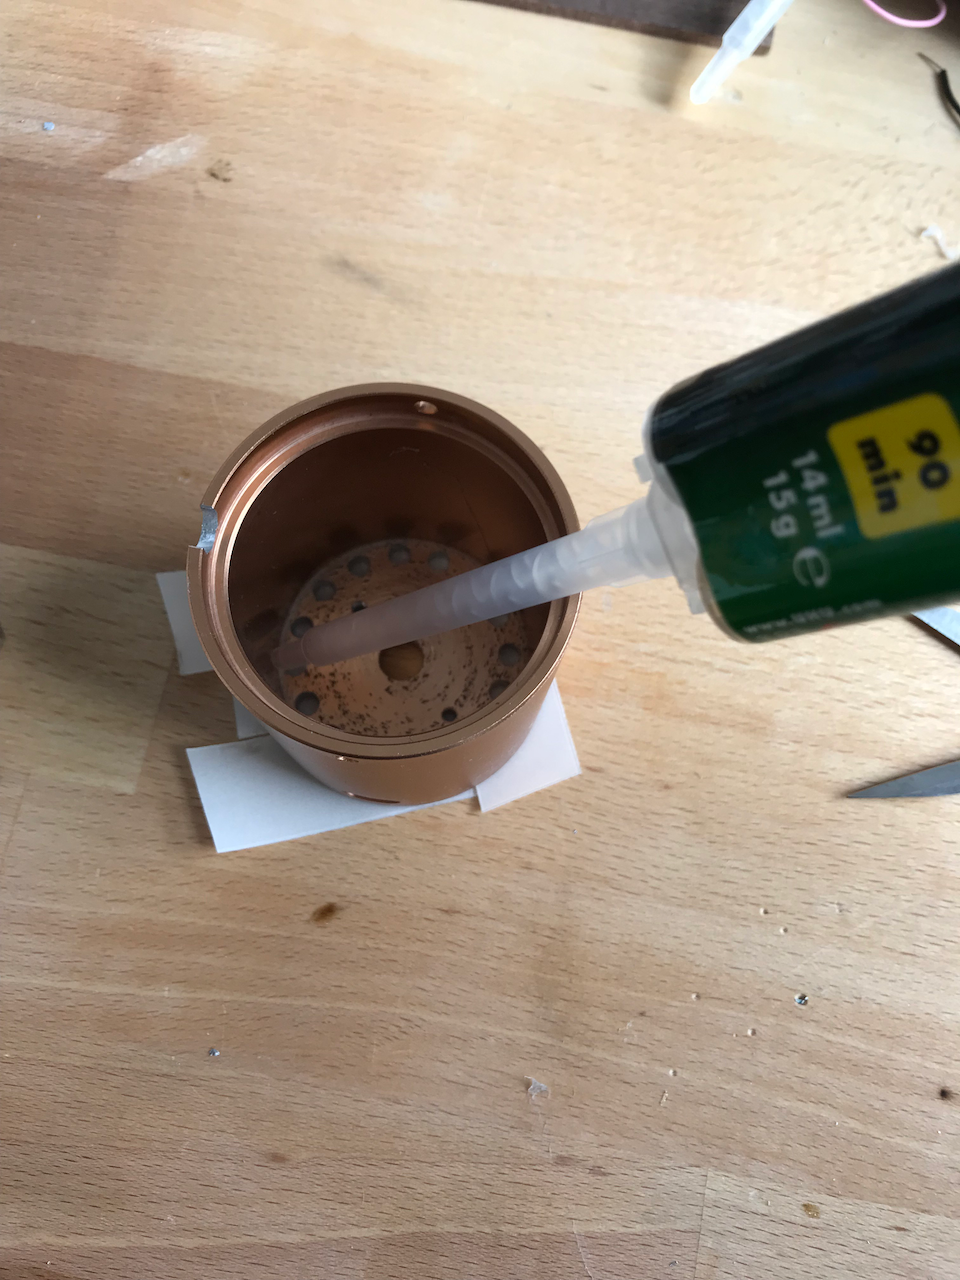
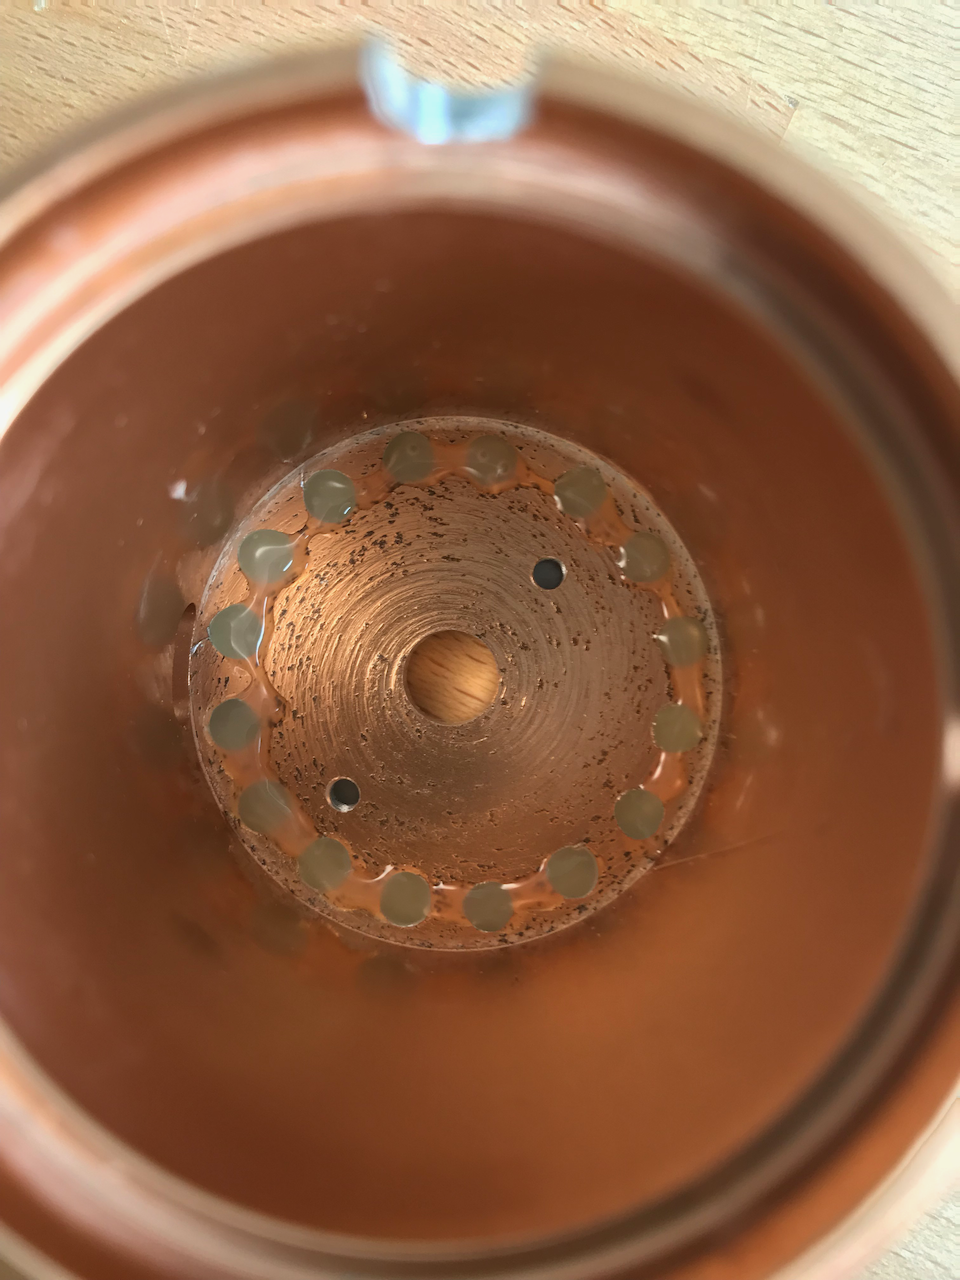
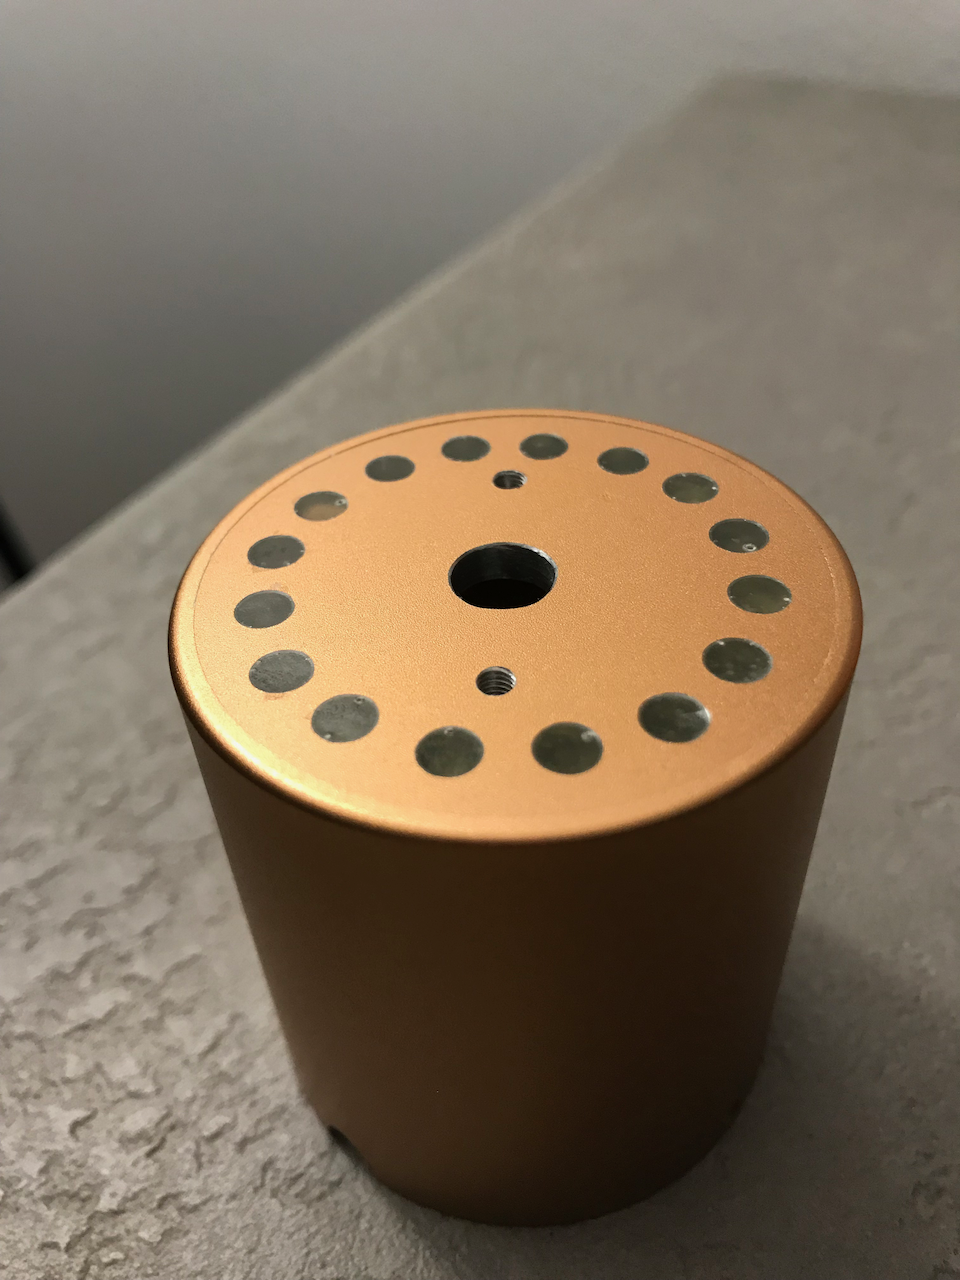
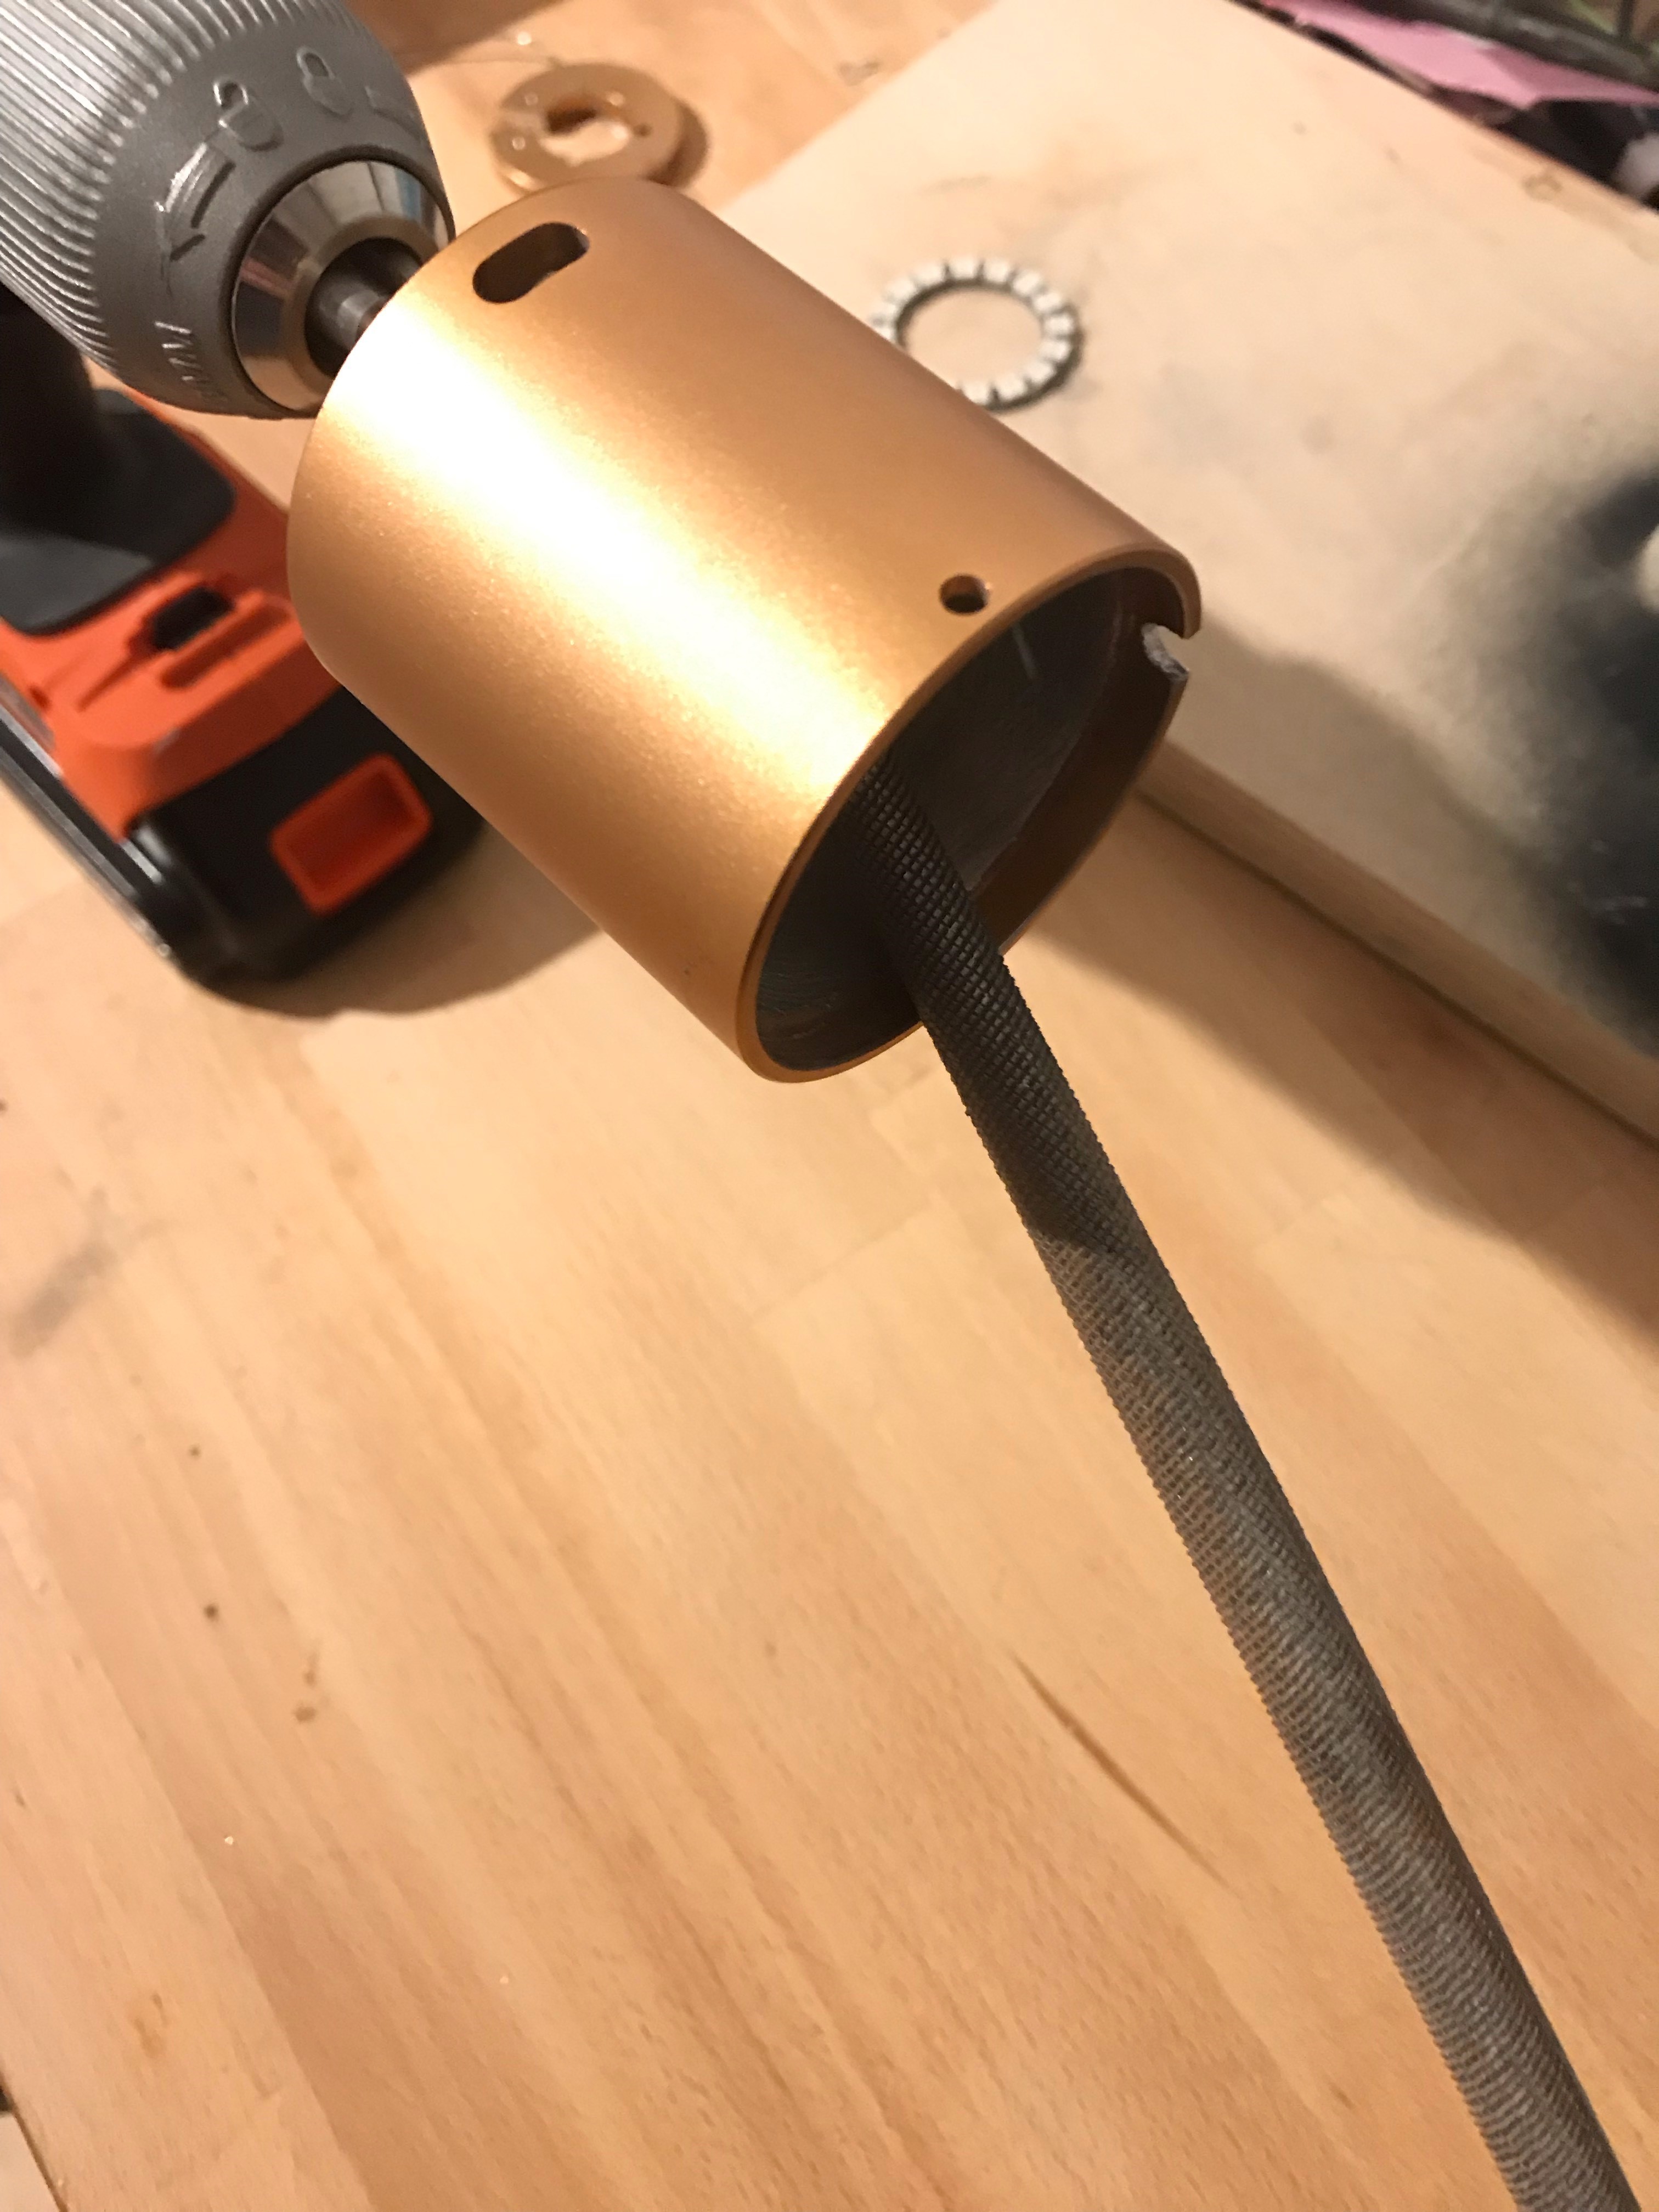
Casing
Anything will work here but I stumble upon this aluminium case that I will re-purpose for the project. I will simply drill holes to mount the knob and be able to see the LEDs. I have attached a template to mark the holes.
Here's some measurement for the drilling/tapping:

After drilling and tapping
Filling the holes with epoxy
The neopixel ring fits into the casing after machining the inside (see project log, for a poor's man lathe using a drill and a file)
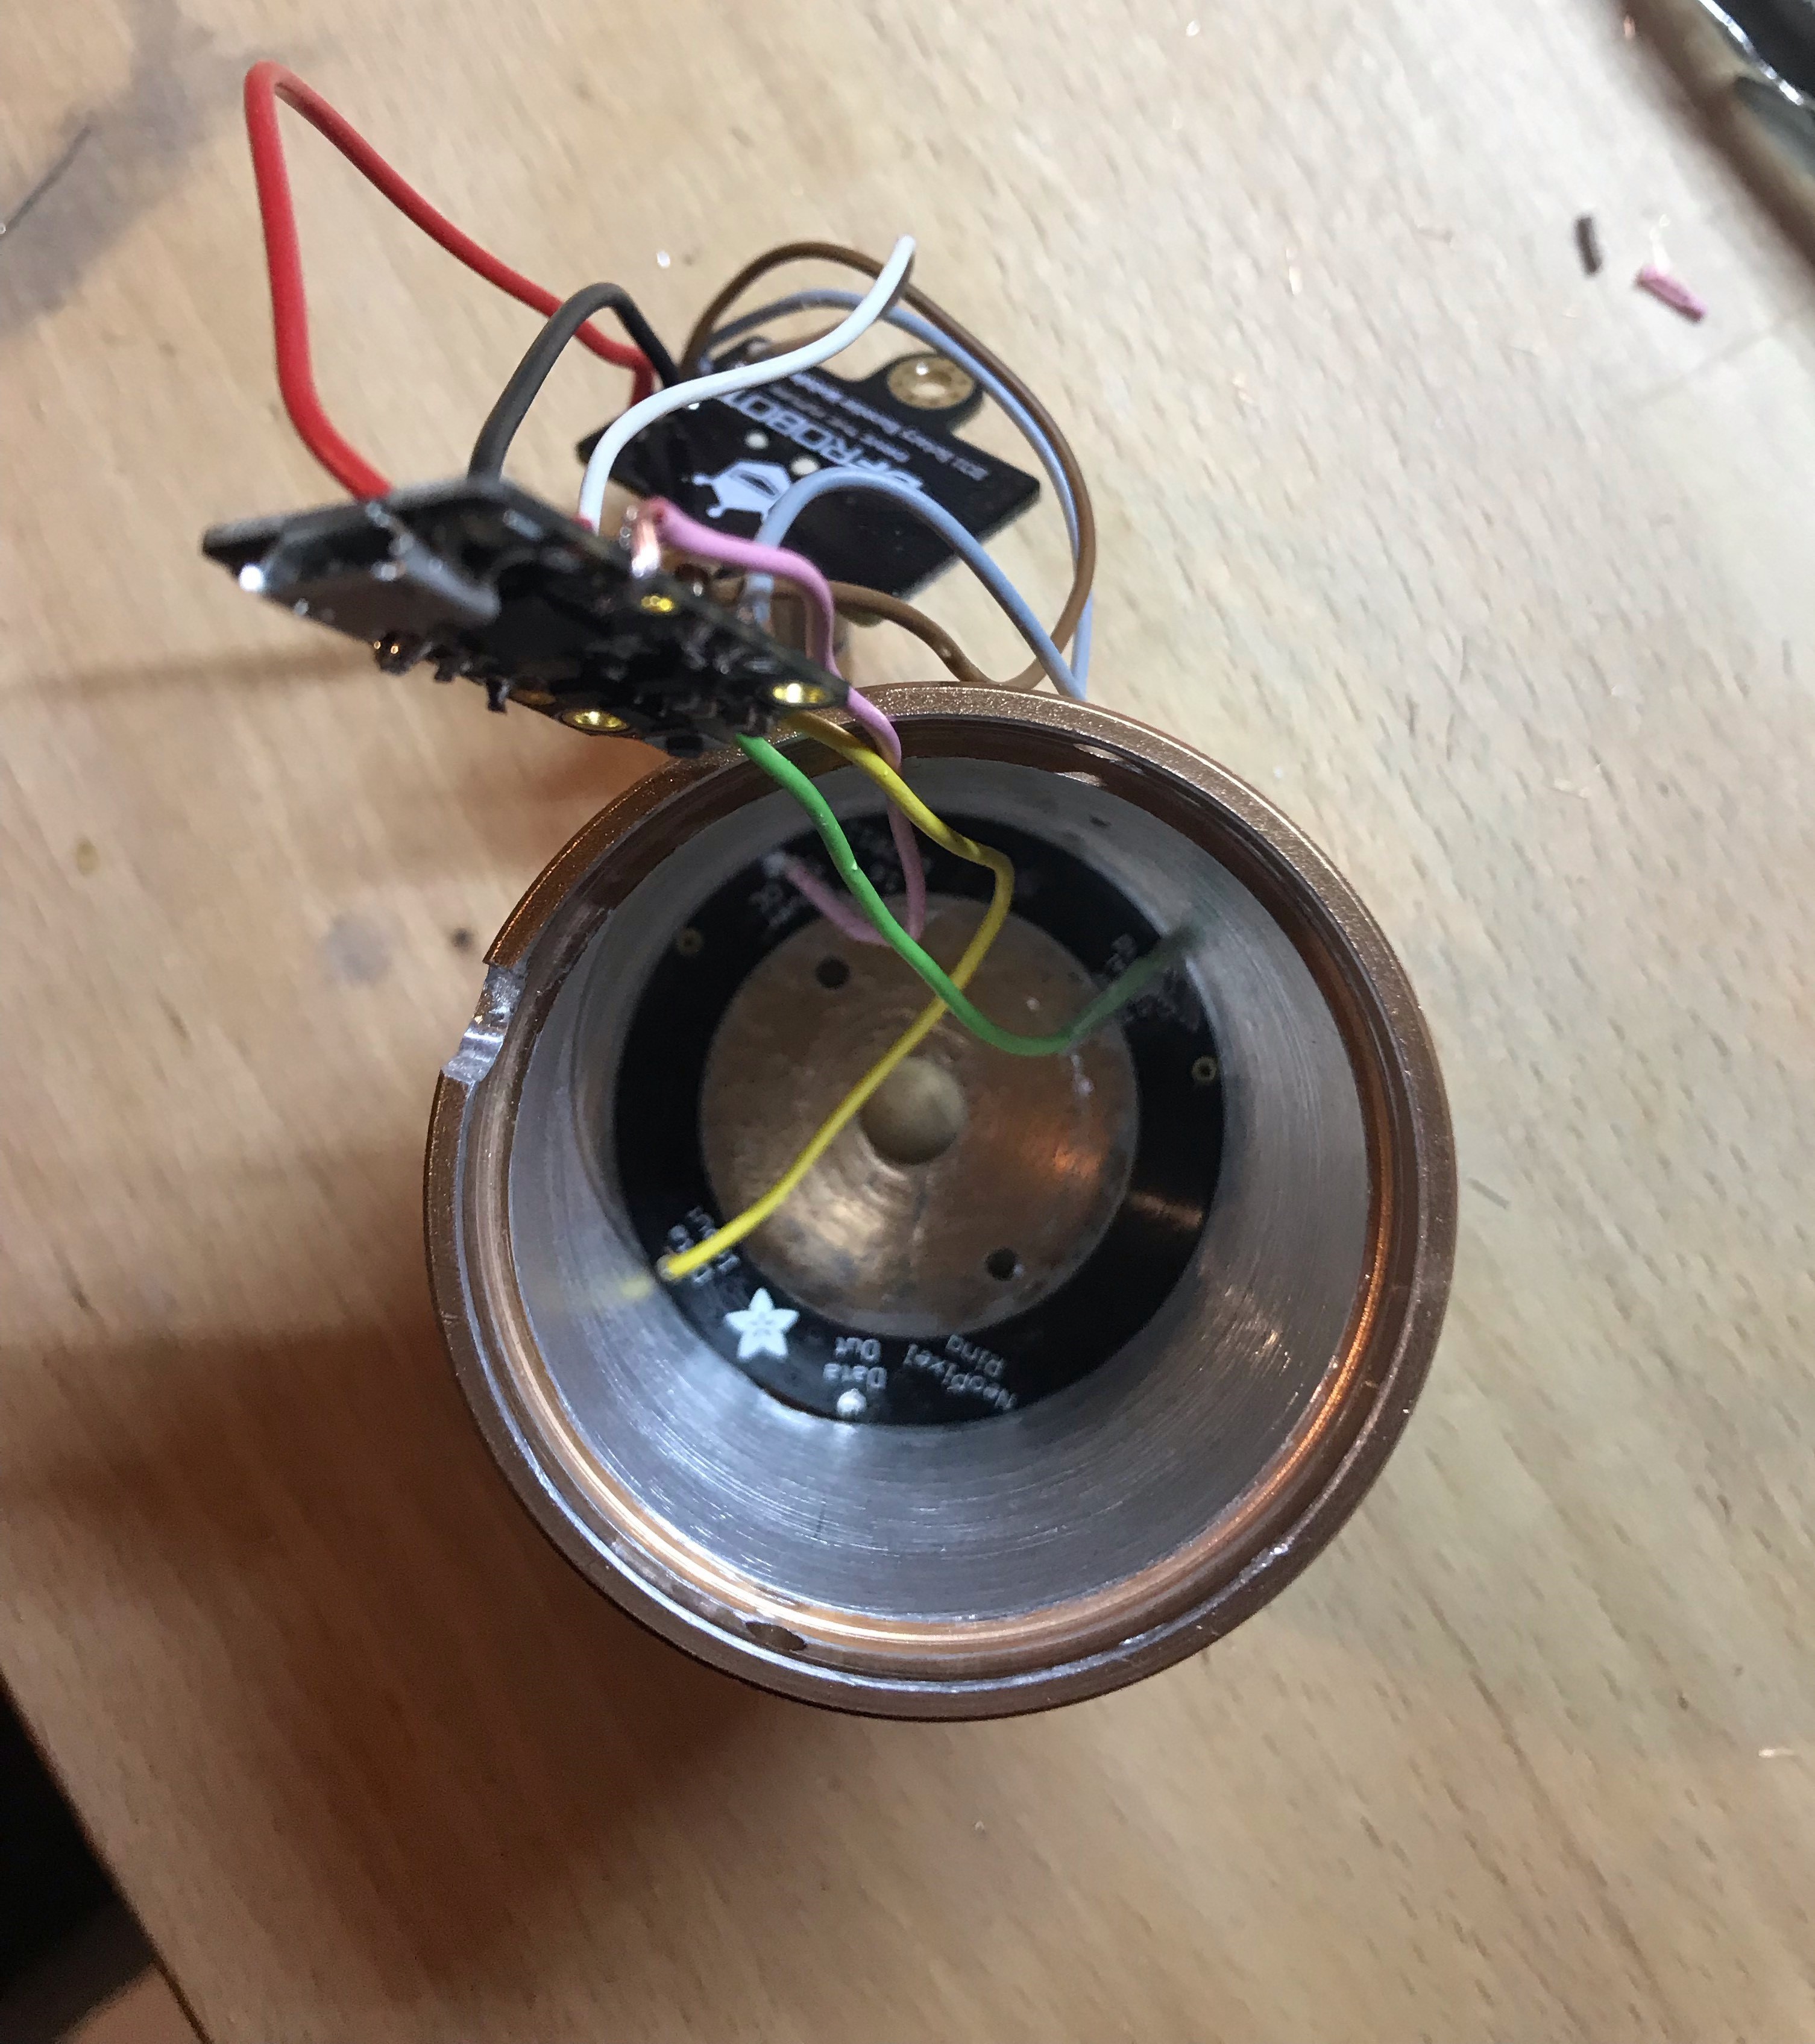
and here it is after jamming everything in there and closing it


 Thomas

 AdroitConfusion
 Chris
Chris
Having just helped someone who failed to get this working: you should redraw the schematic as a real schematic, and make clear what's inside the dfrobot encoder breakout board. Because as drawn, it's wrong. The dfrobot board's idiotically named "A, B, C" terminals aren't the A, B, and C terminals of a bare encoder, and the bare encoder shown in the "schematic" leads one to mistakenly believe a bare encoder wired that way will work.
Dfrobot's "C" terminal is the active-low pushbutton, not the common terminal of the encoder.