Stephen Chasey
-
More efficient remote monitoring
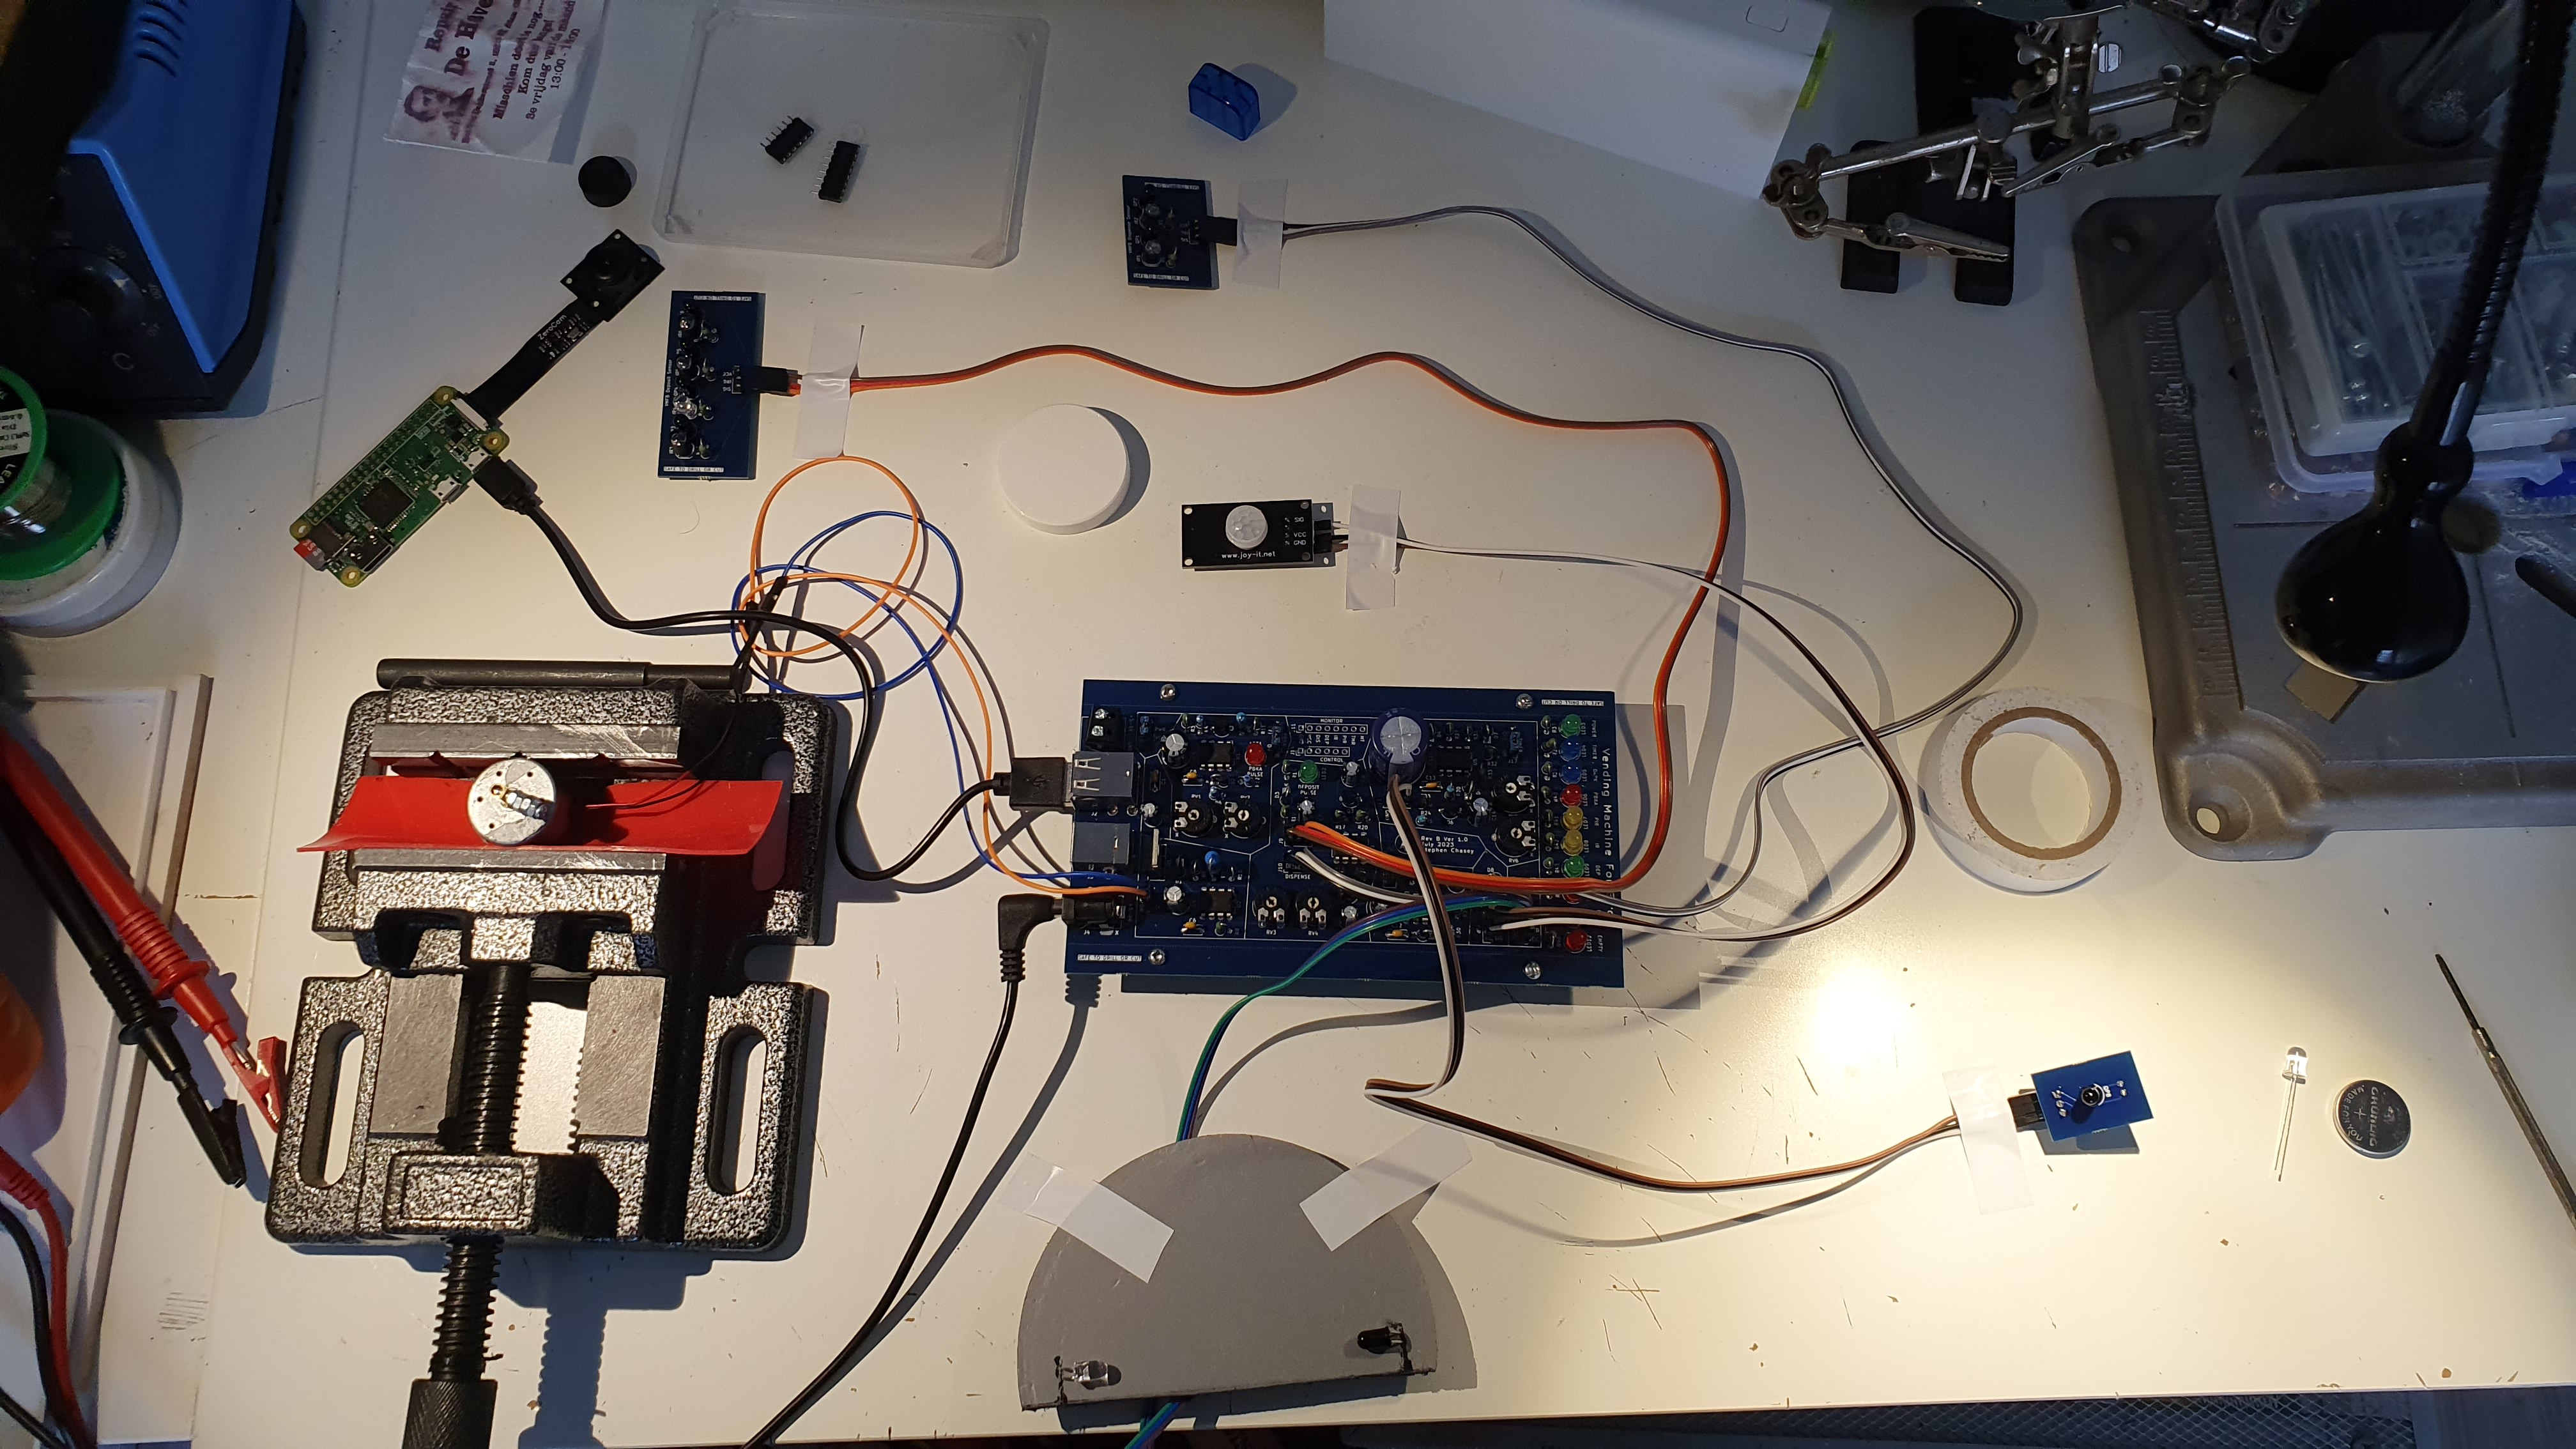
11/07/2023 at 16:01 • 0 commentsI have been experimenting with ESP32 and RPi camera modules to record video and pictures as well as log events in log files. While cameras typically demand 100-150 mA,, the boards themselves can make due with ~80mA and can be put to sleep to consume less power when nothing is happening.
Since the ESP32 is less power-hungry than an RPi I will use one to make a simple event logger that is accessible over wifi and bluetooth so experimenters will have an easy way to monitor activity without video. The parts to do this with an ESP32 cost about 10EUR.
This would also make it more practical to run the vending machine off of batteries/solar and allow remote log collection via the internet, internal network, or when in proximity of bluetooth.
UPDATEAfter looking more into it I could use an ESP32 and provide the ability to monitor, get logs, do some simple graphing, configure and control the vending machine via wifi or bluetooth using just a few additional parts. I could even integrate one of the ESP32 CAM modules without more wires. Even with an ESP32 dev board and an ESP32 CAM board, all the electronic components (there would be a lot less of them) would cost ~25 EUR.
This would be a big shift away for the current all-analog approach, but since ESP32 boards are pretty inexpensive, have radios, have lots of GPIO and are not too difficult to program I think this would make this project much more functional and more attractive to people that just want to use the thing without spending an hour or so soldering.
-
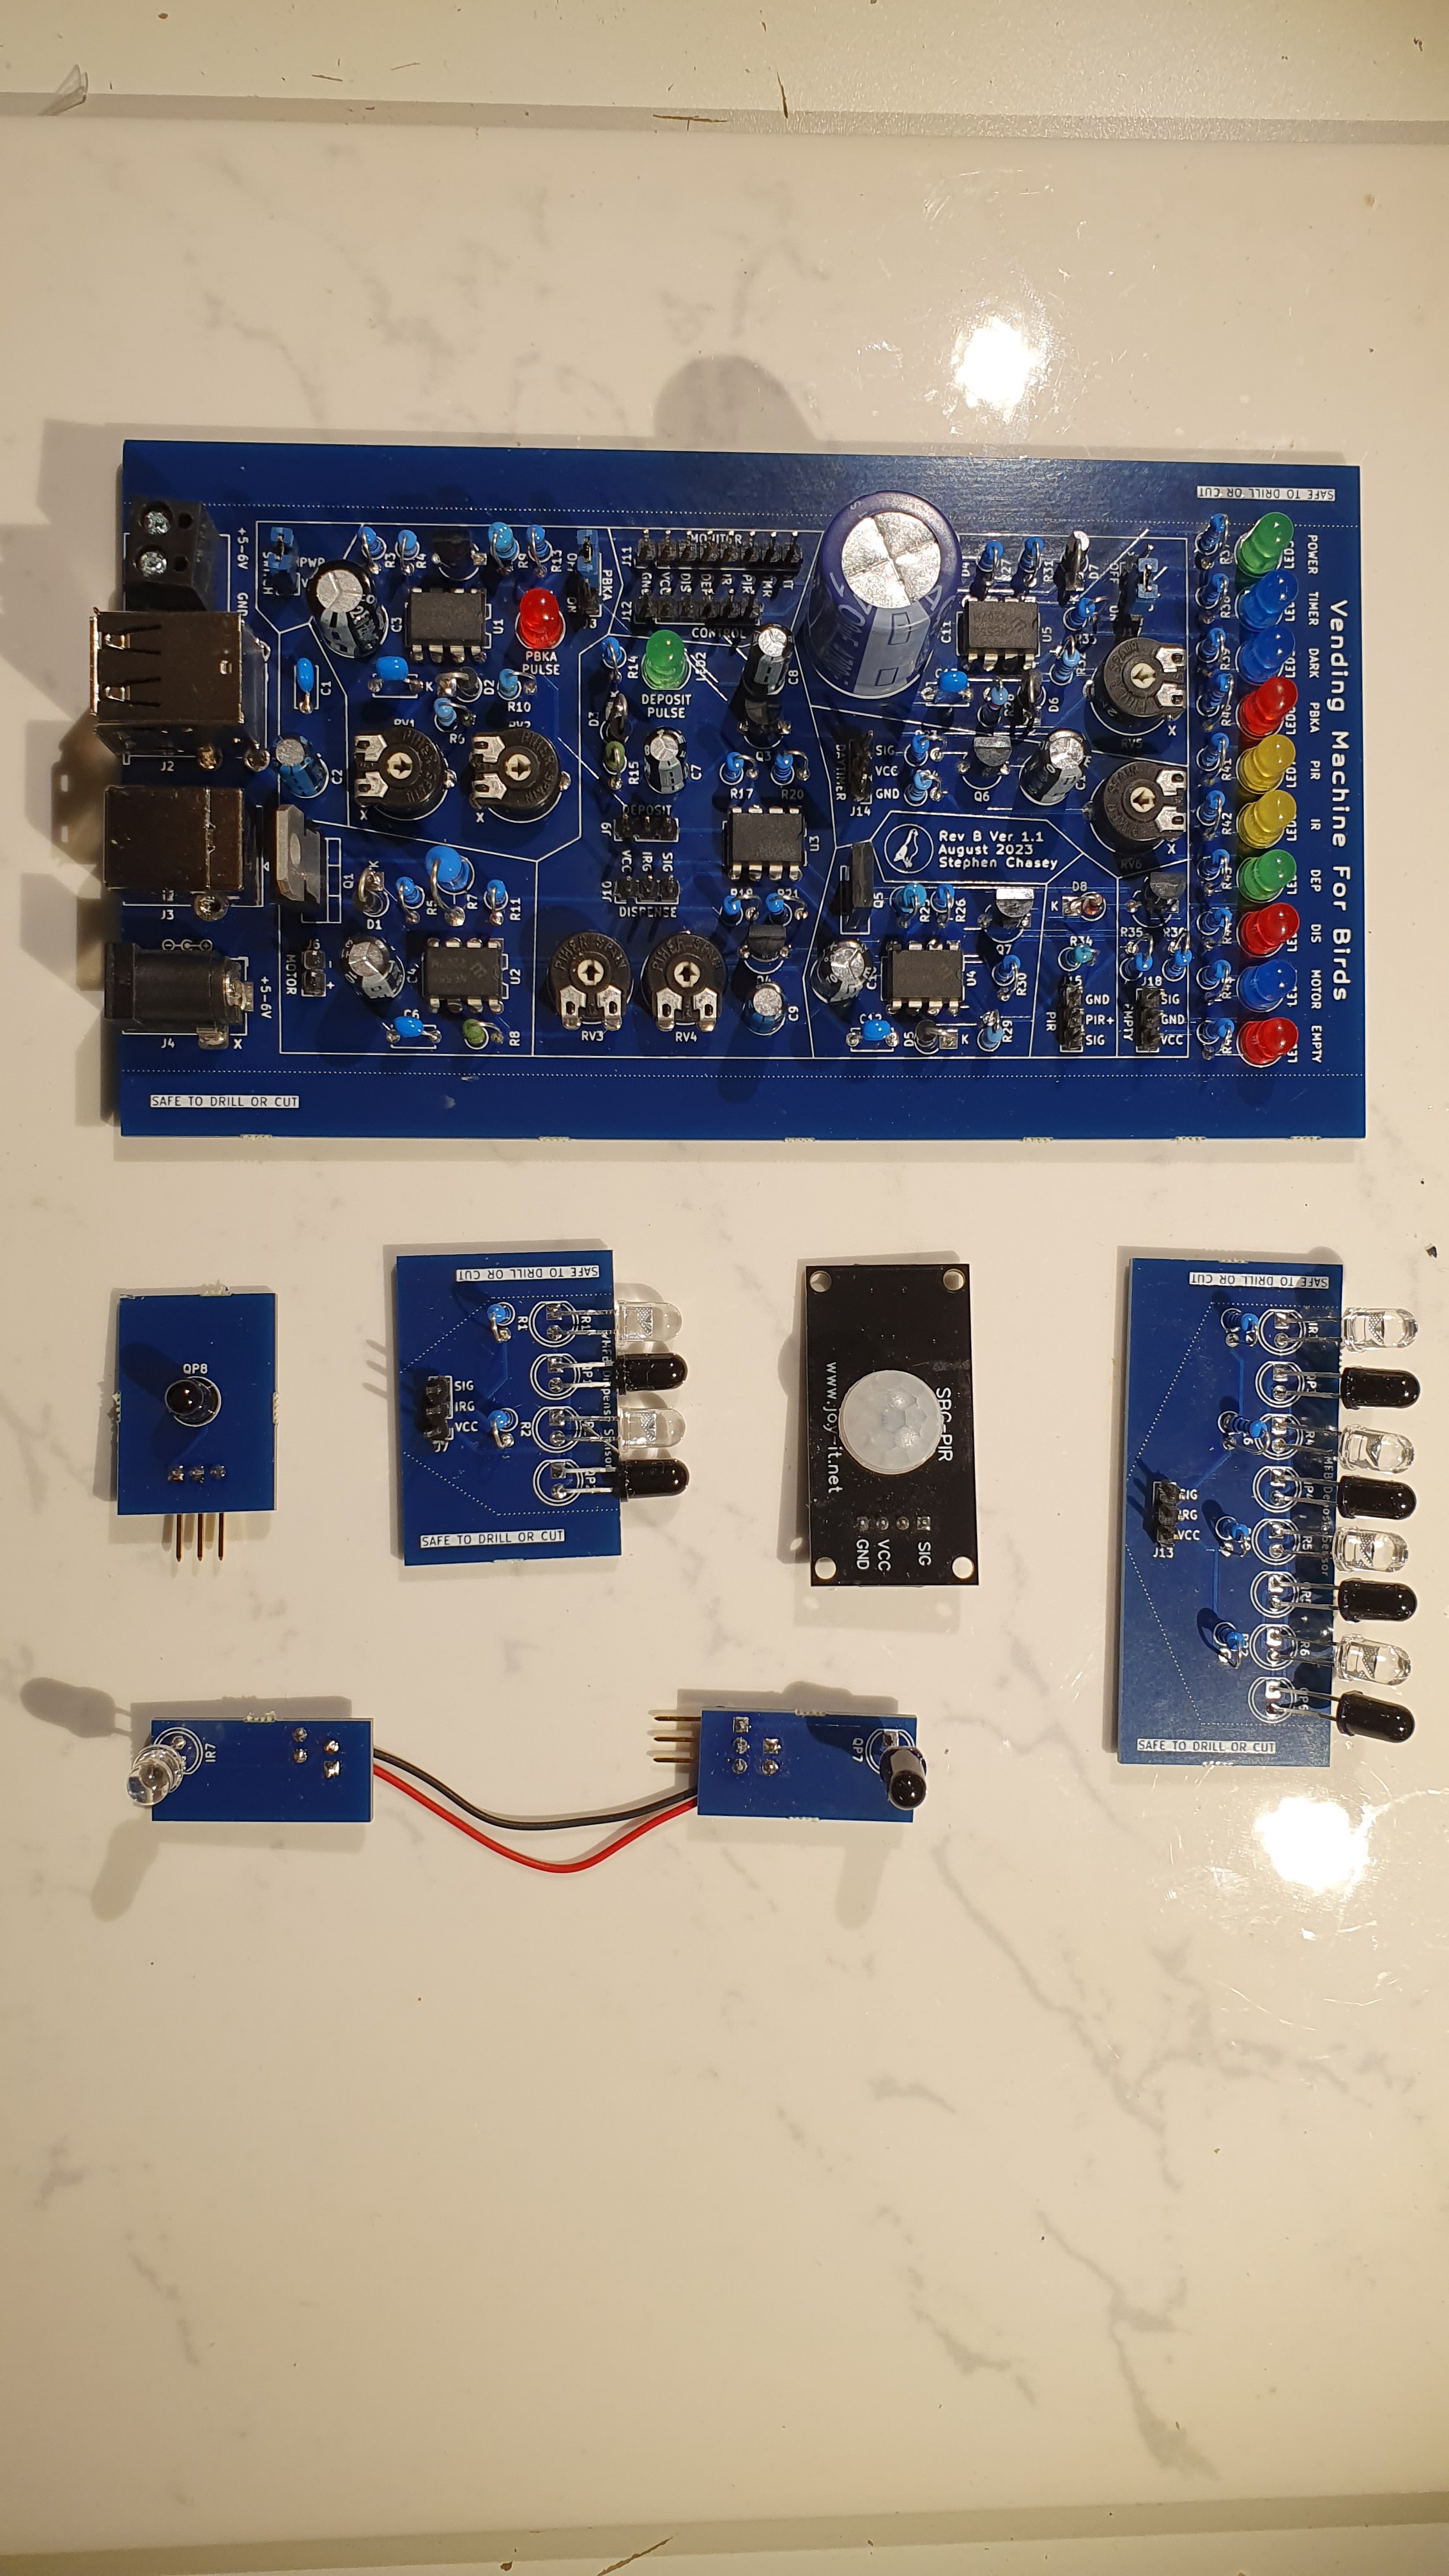
Rev B V 1.1 PCB, improved dispenser, simplified enclosure,
10/29/2023 at 20:07 • 0 commentsI offered to build a vending machine for a university student who wants to use it for a study. I had to think about optimizing for shipping, simple setup and mounting, and for reliable operation by someone not familiar with the electronics and mechanisms.
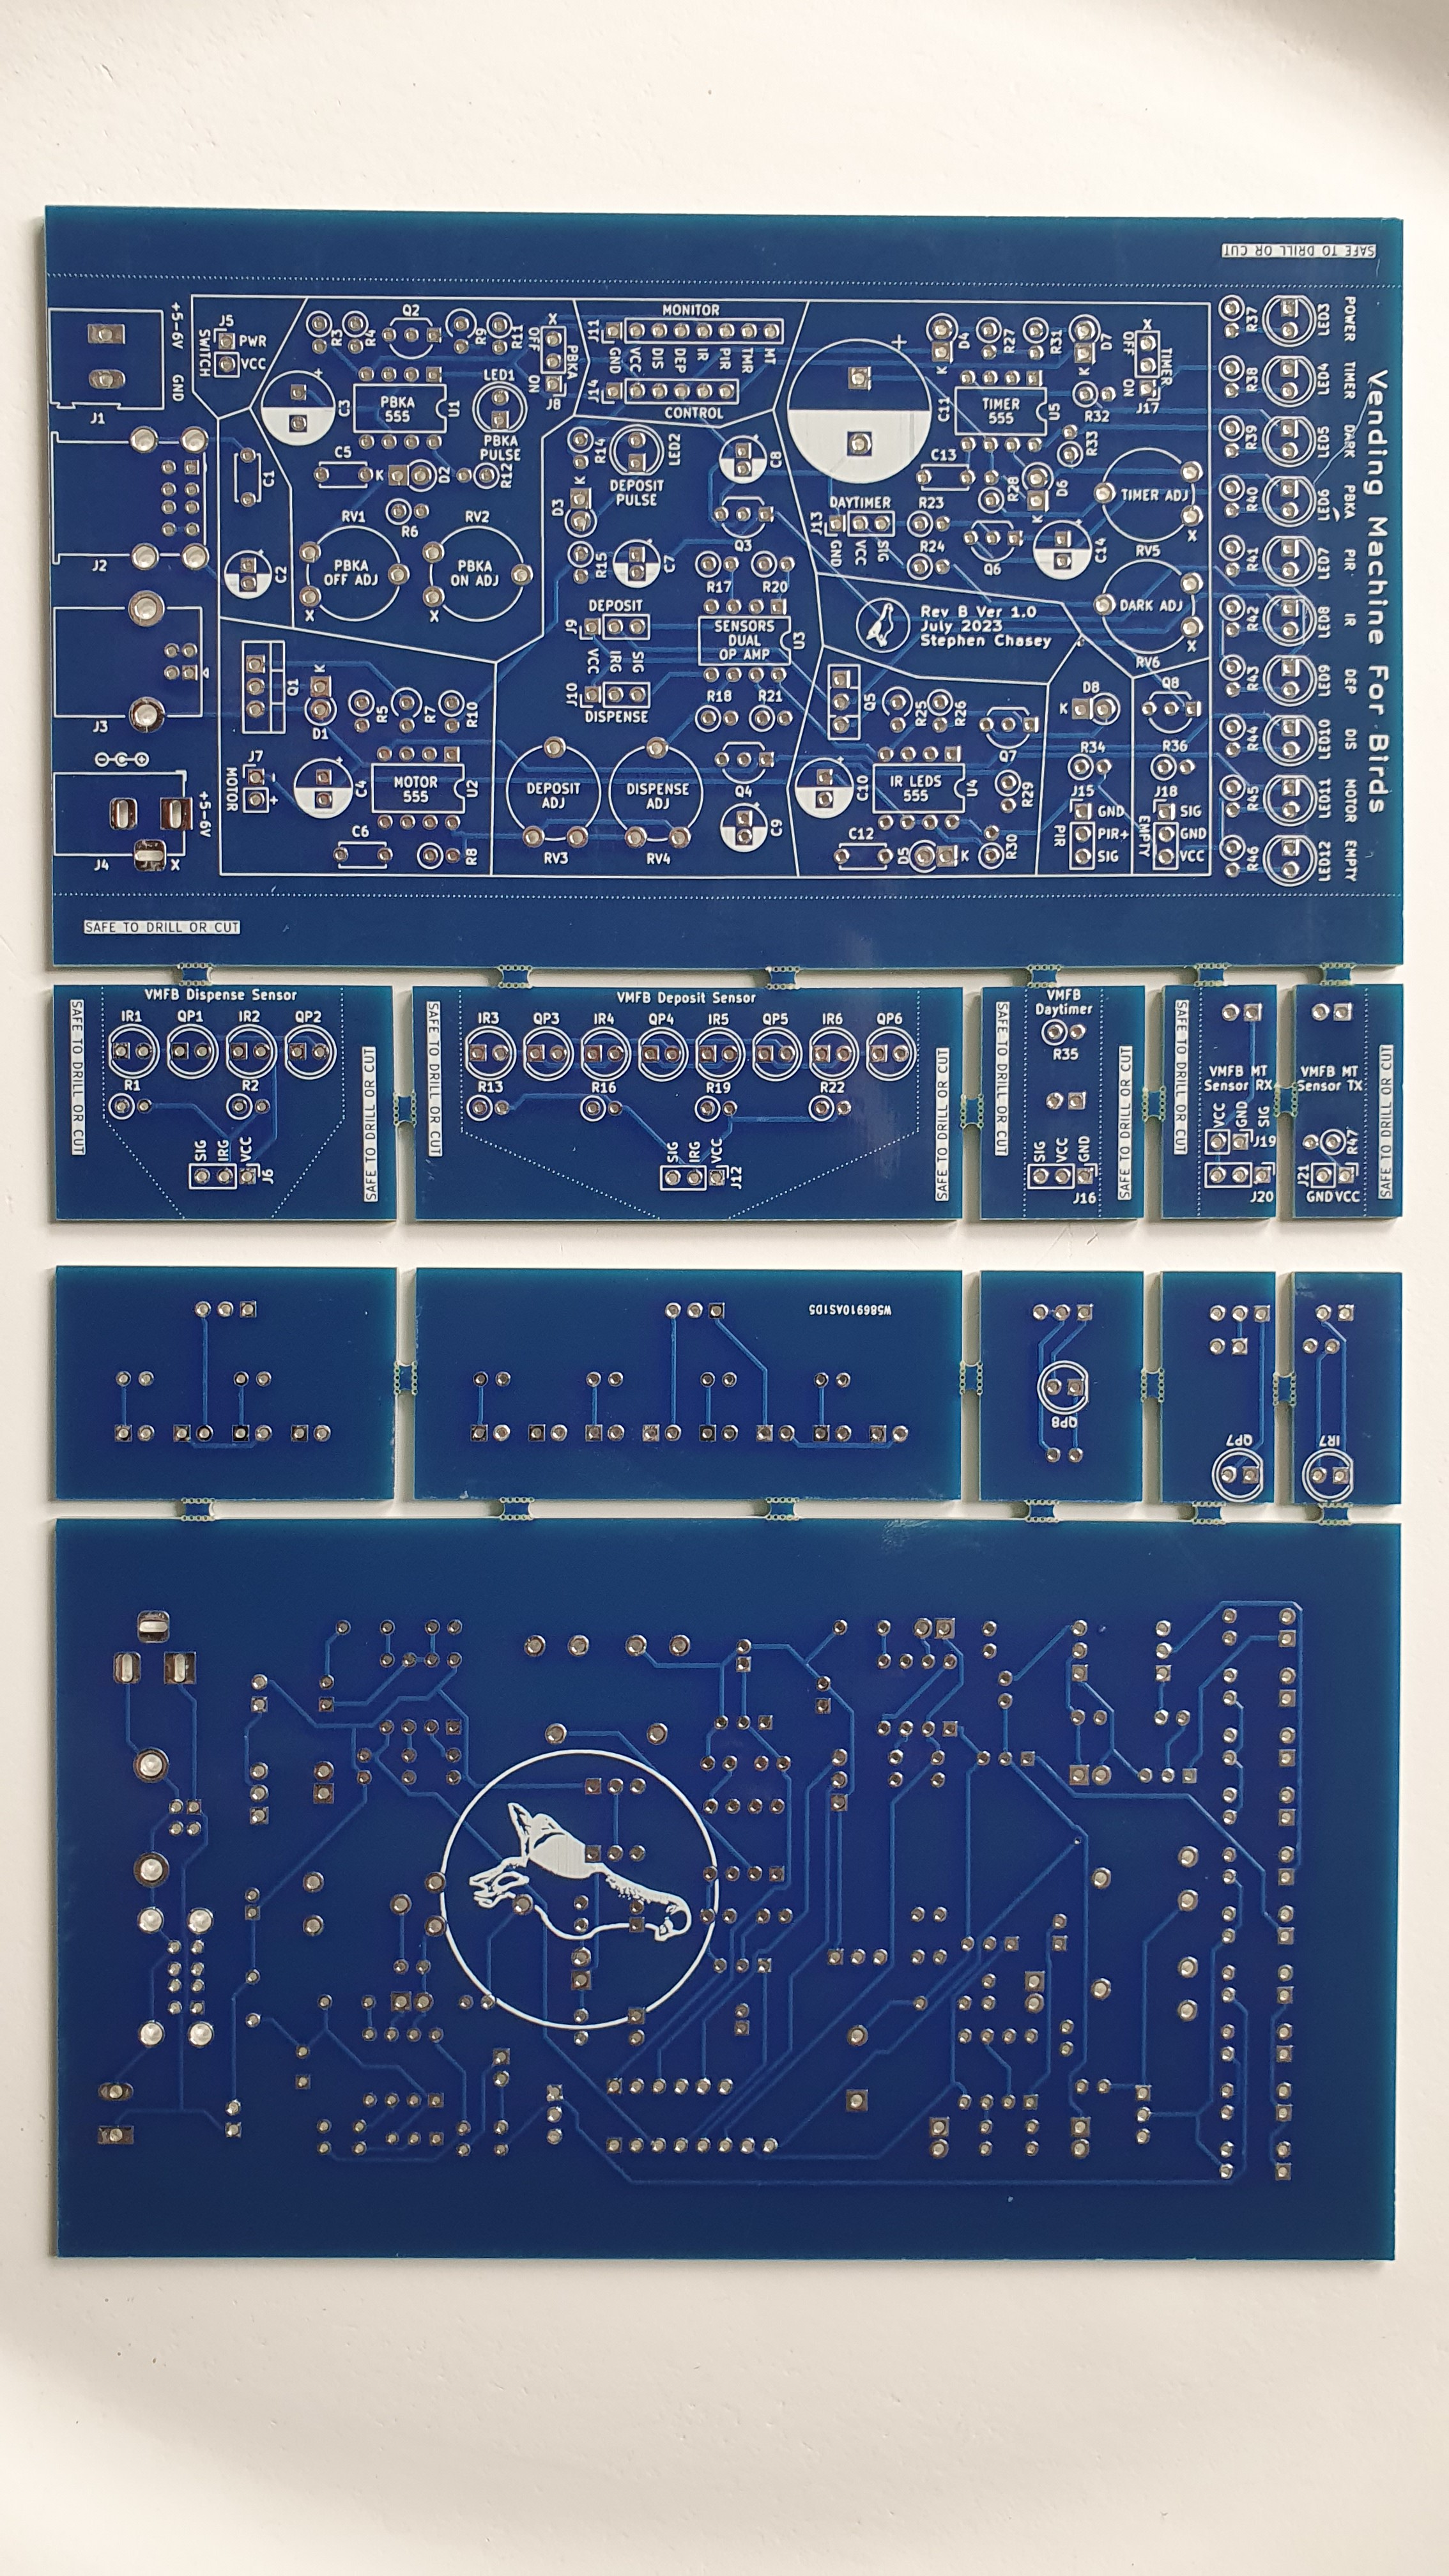
Rev B V 1.1 PCB
Finally - works as intended with no bodges! I'm so happy about this. You can find it at PCBWay here: https://www.pcbway.com/project/shareproject/Vending_Machine_for_Birds_11f2a4da.html
The Kicad files are on GitHub: https://github.com/src1138/VMFB
![]()
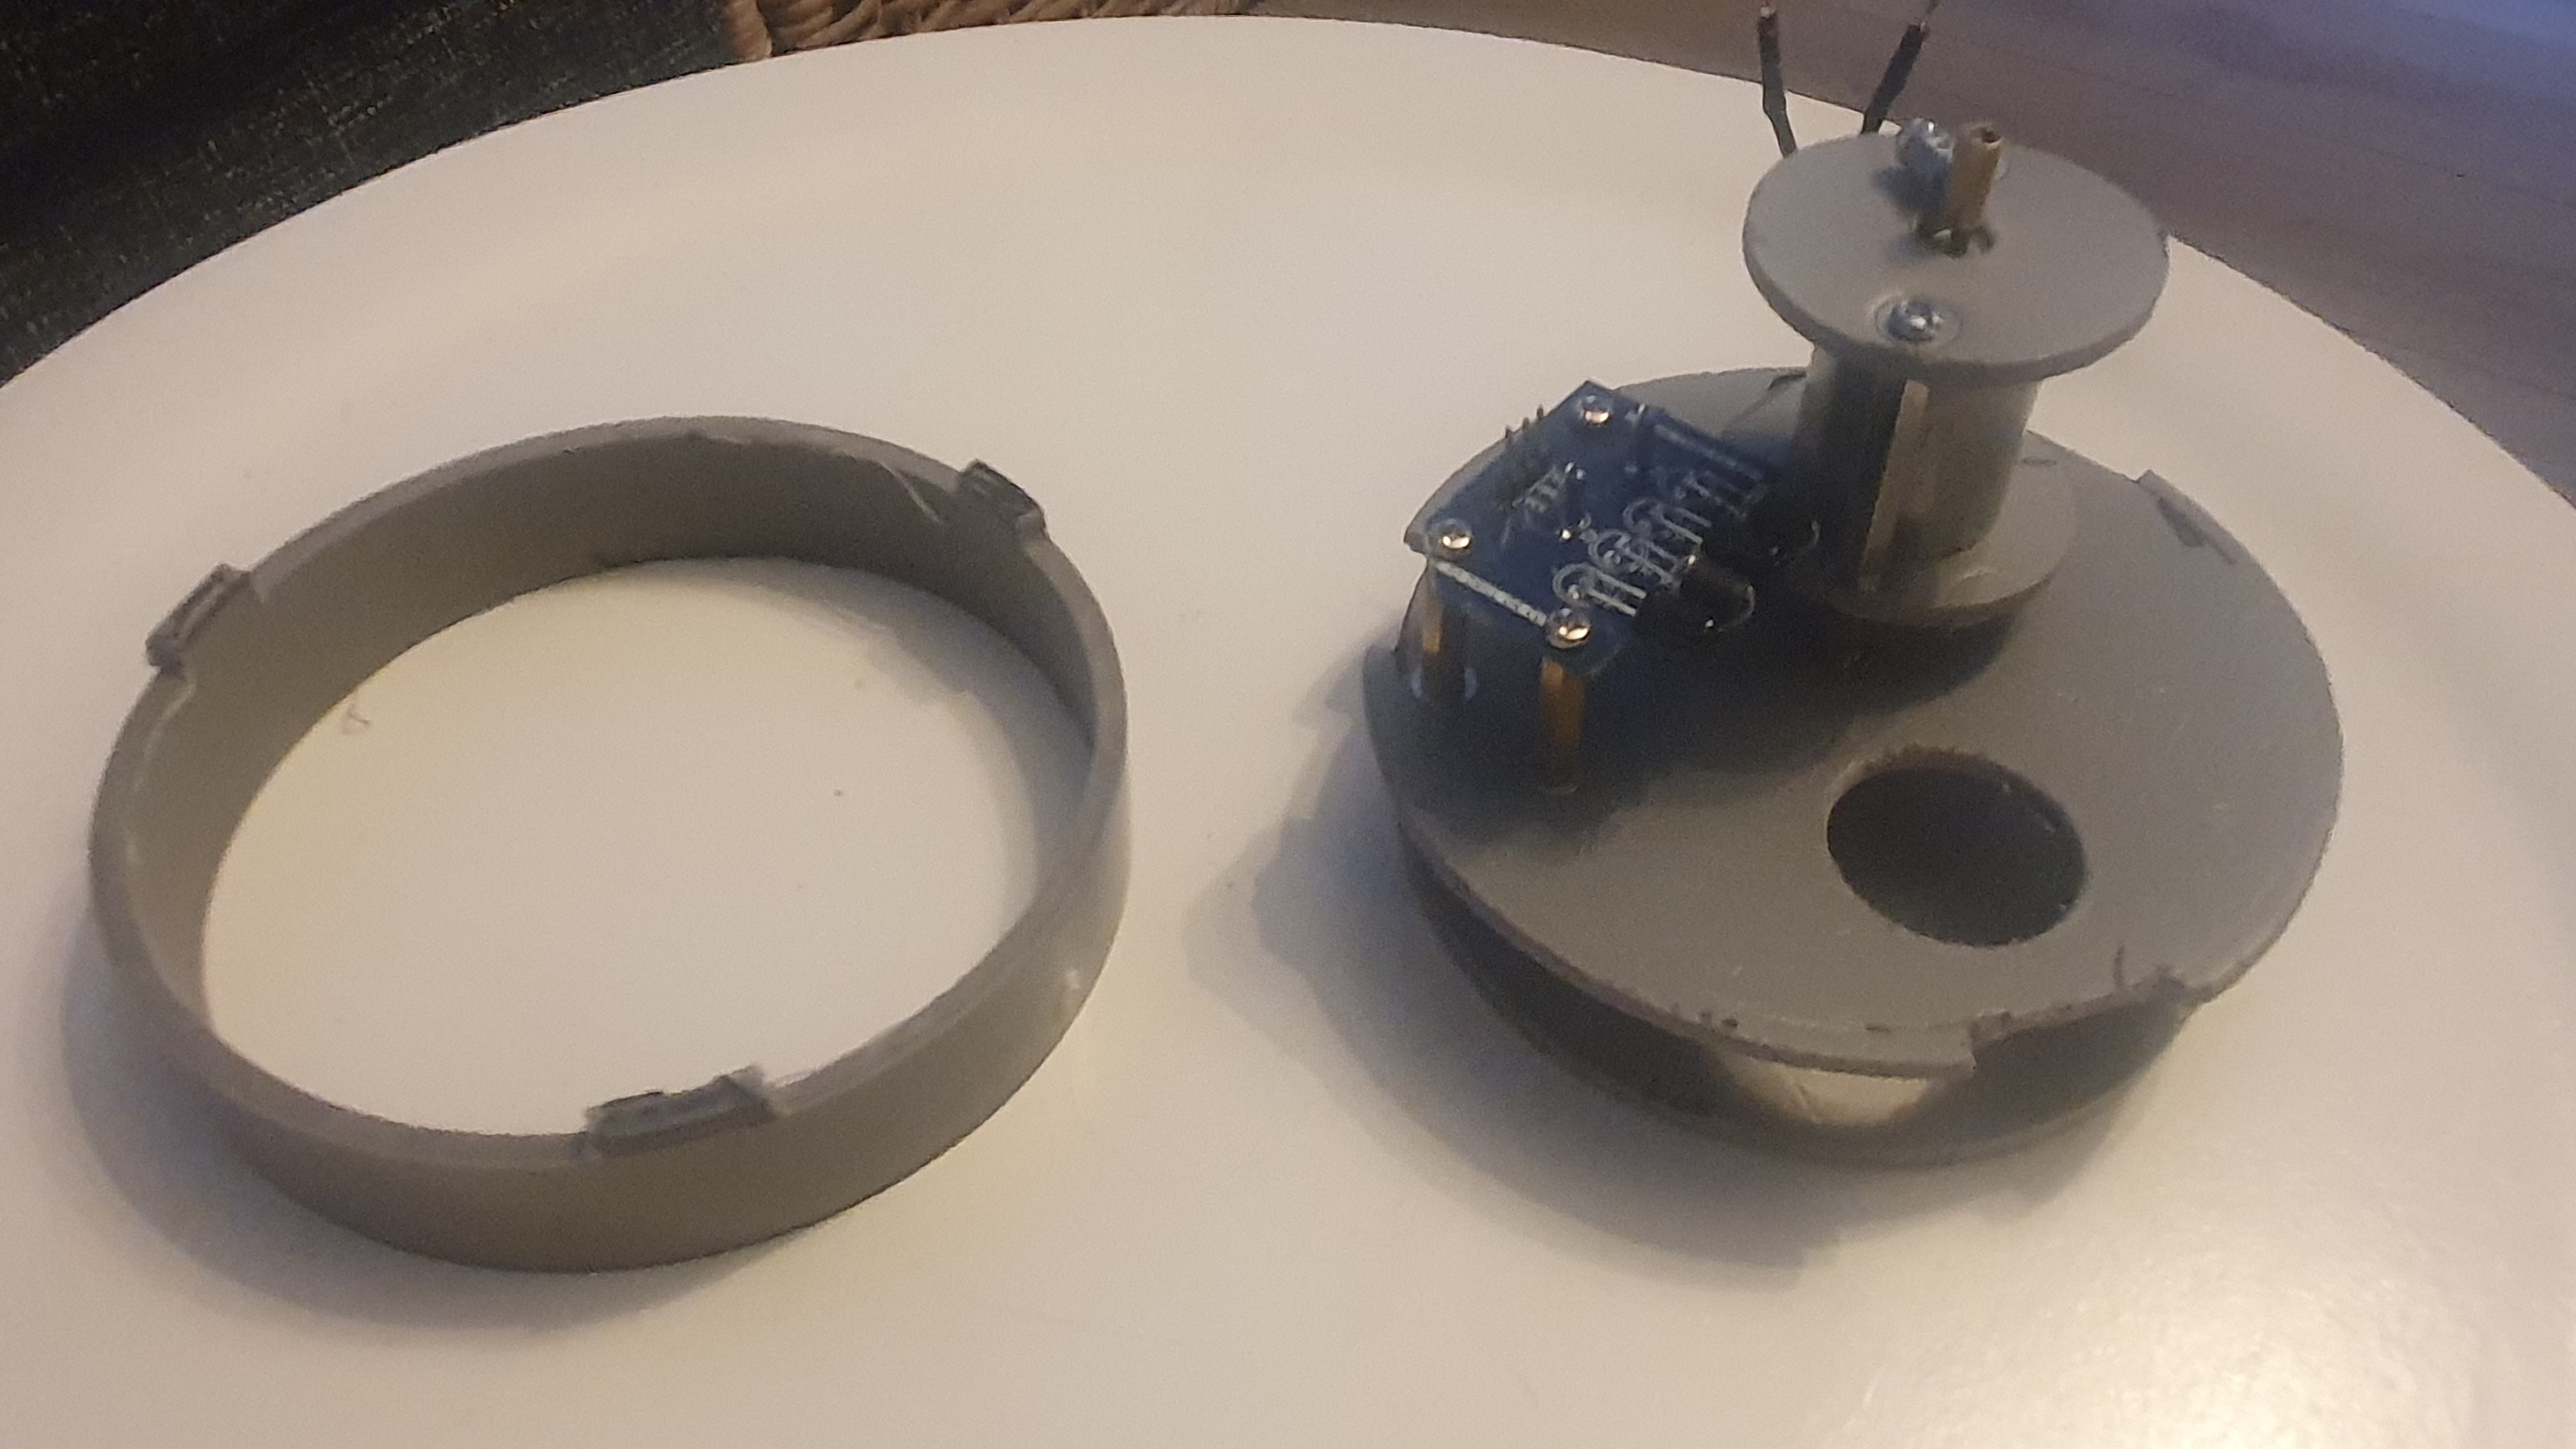
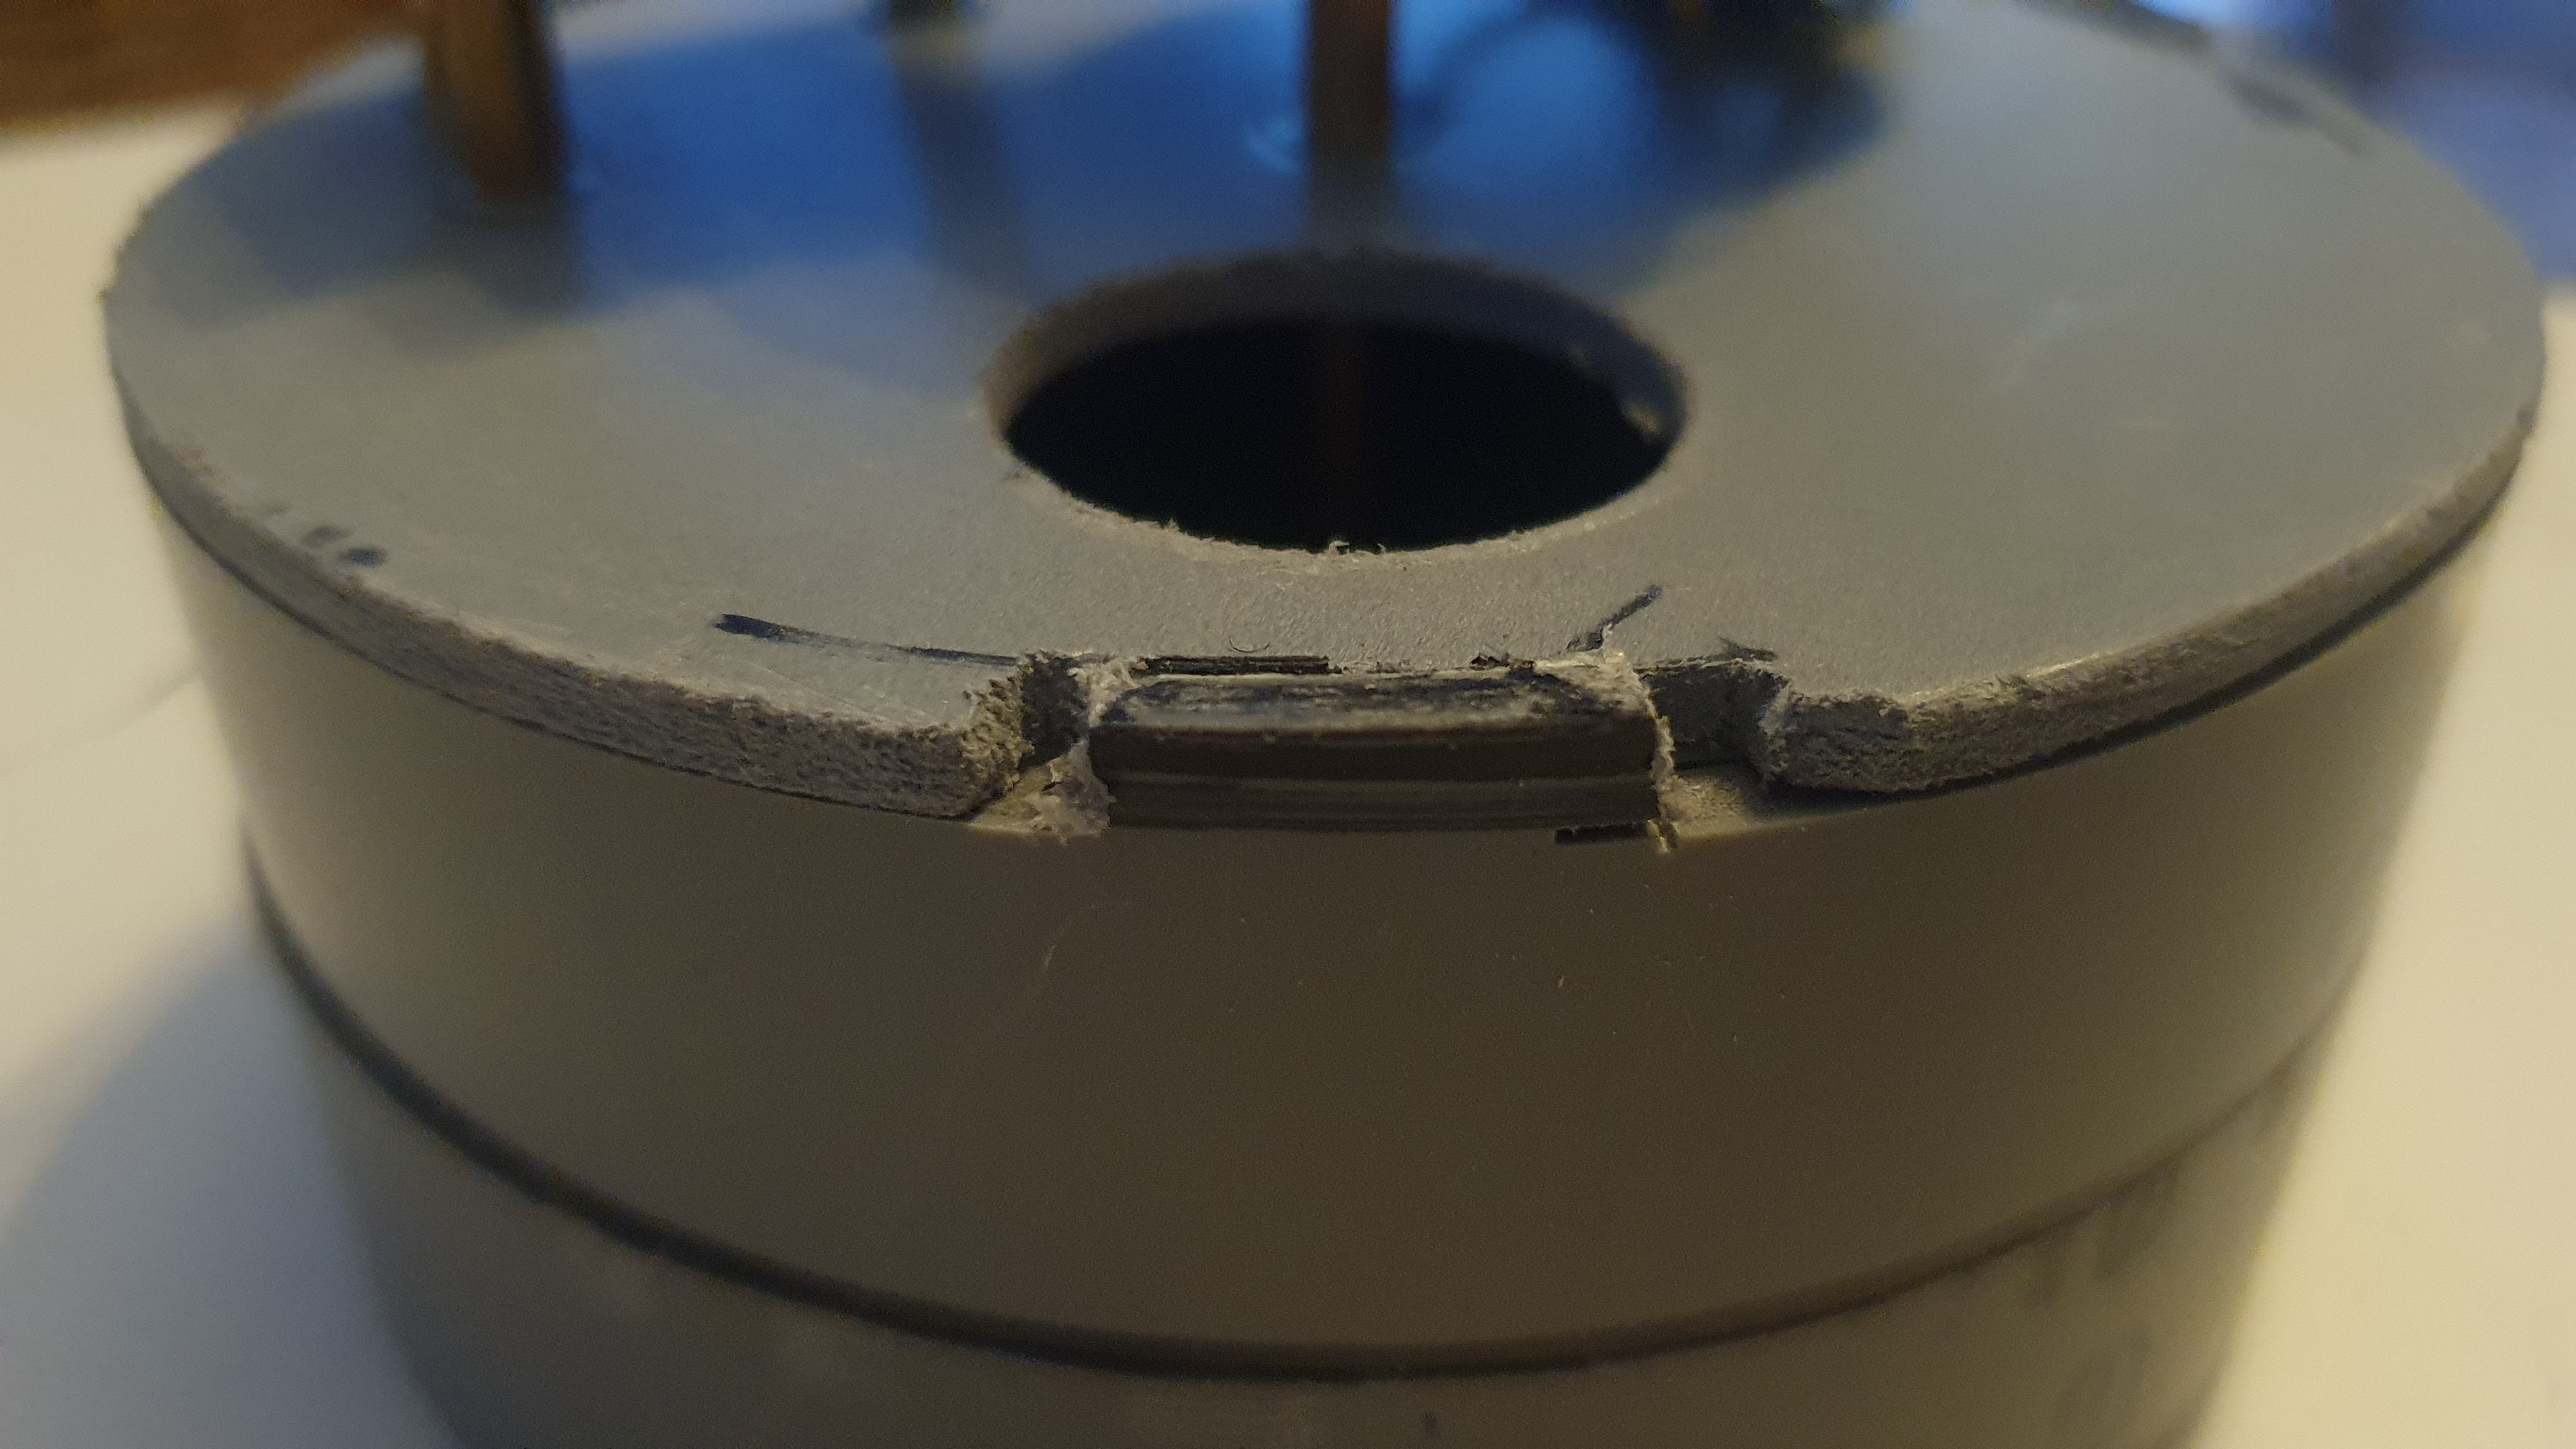
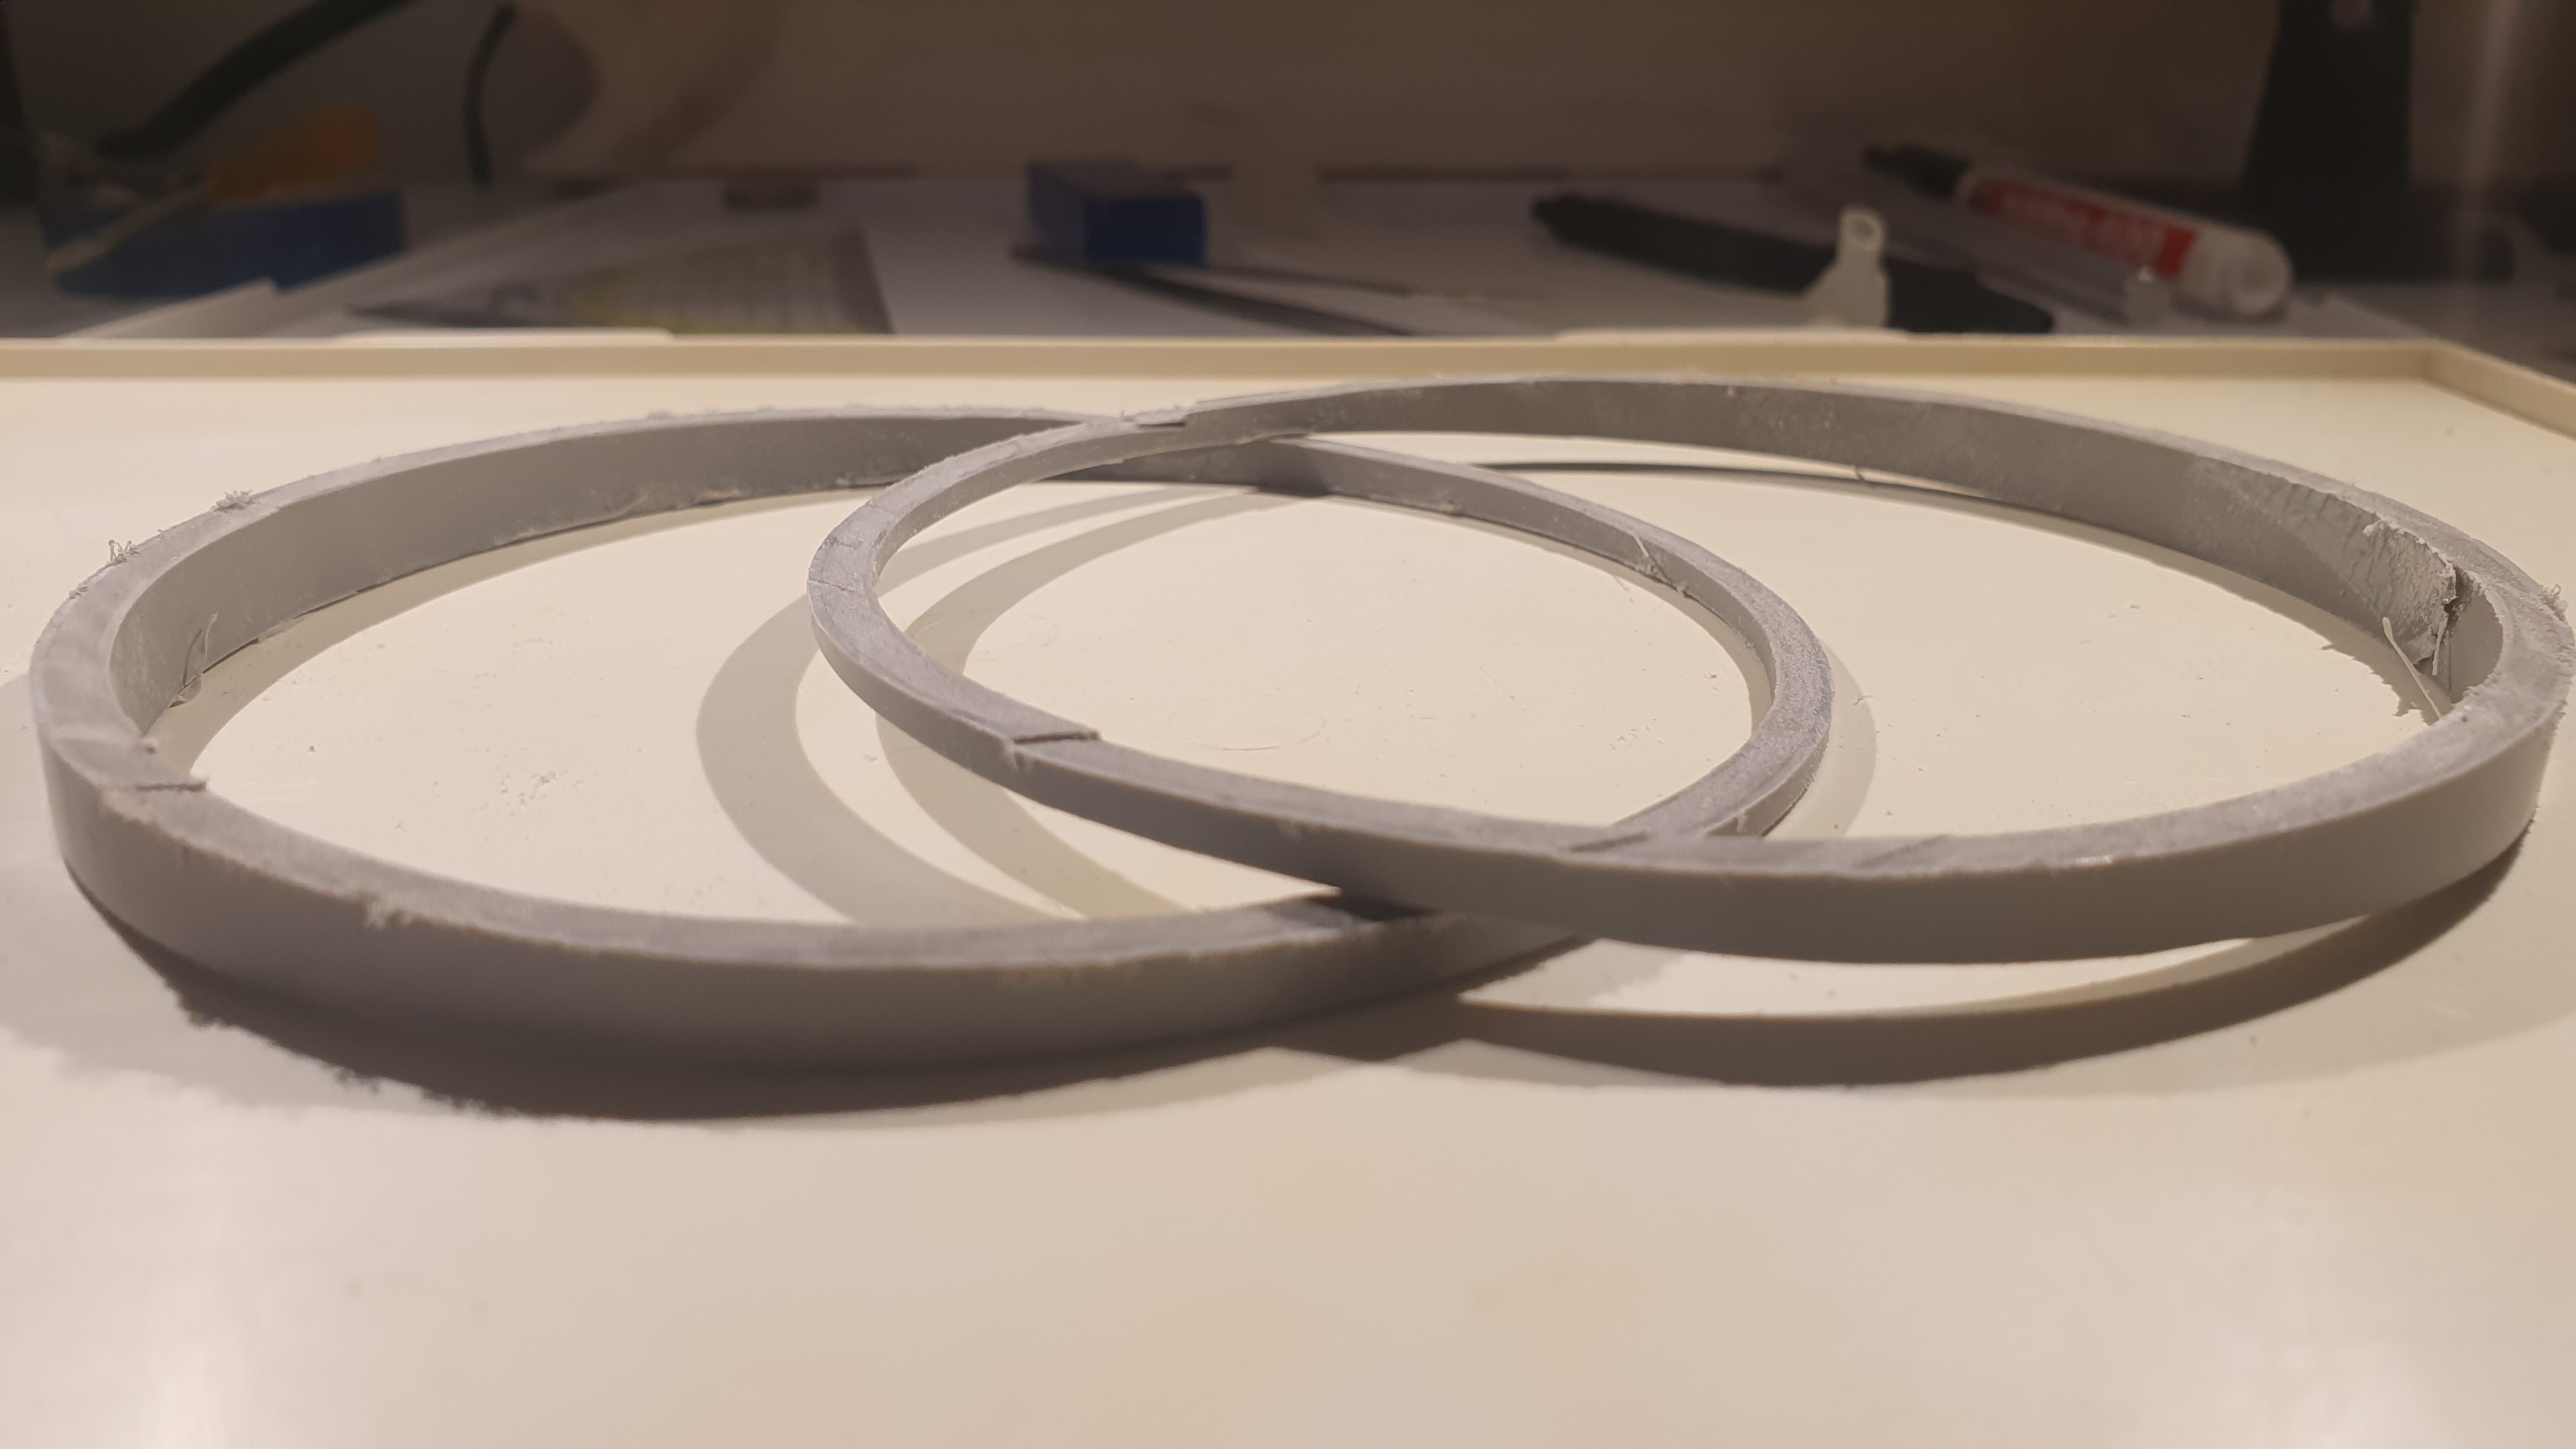
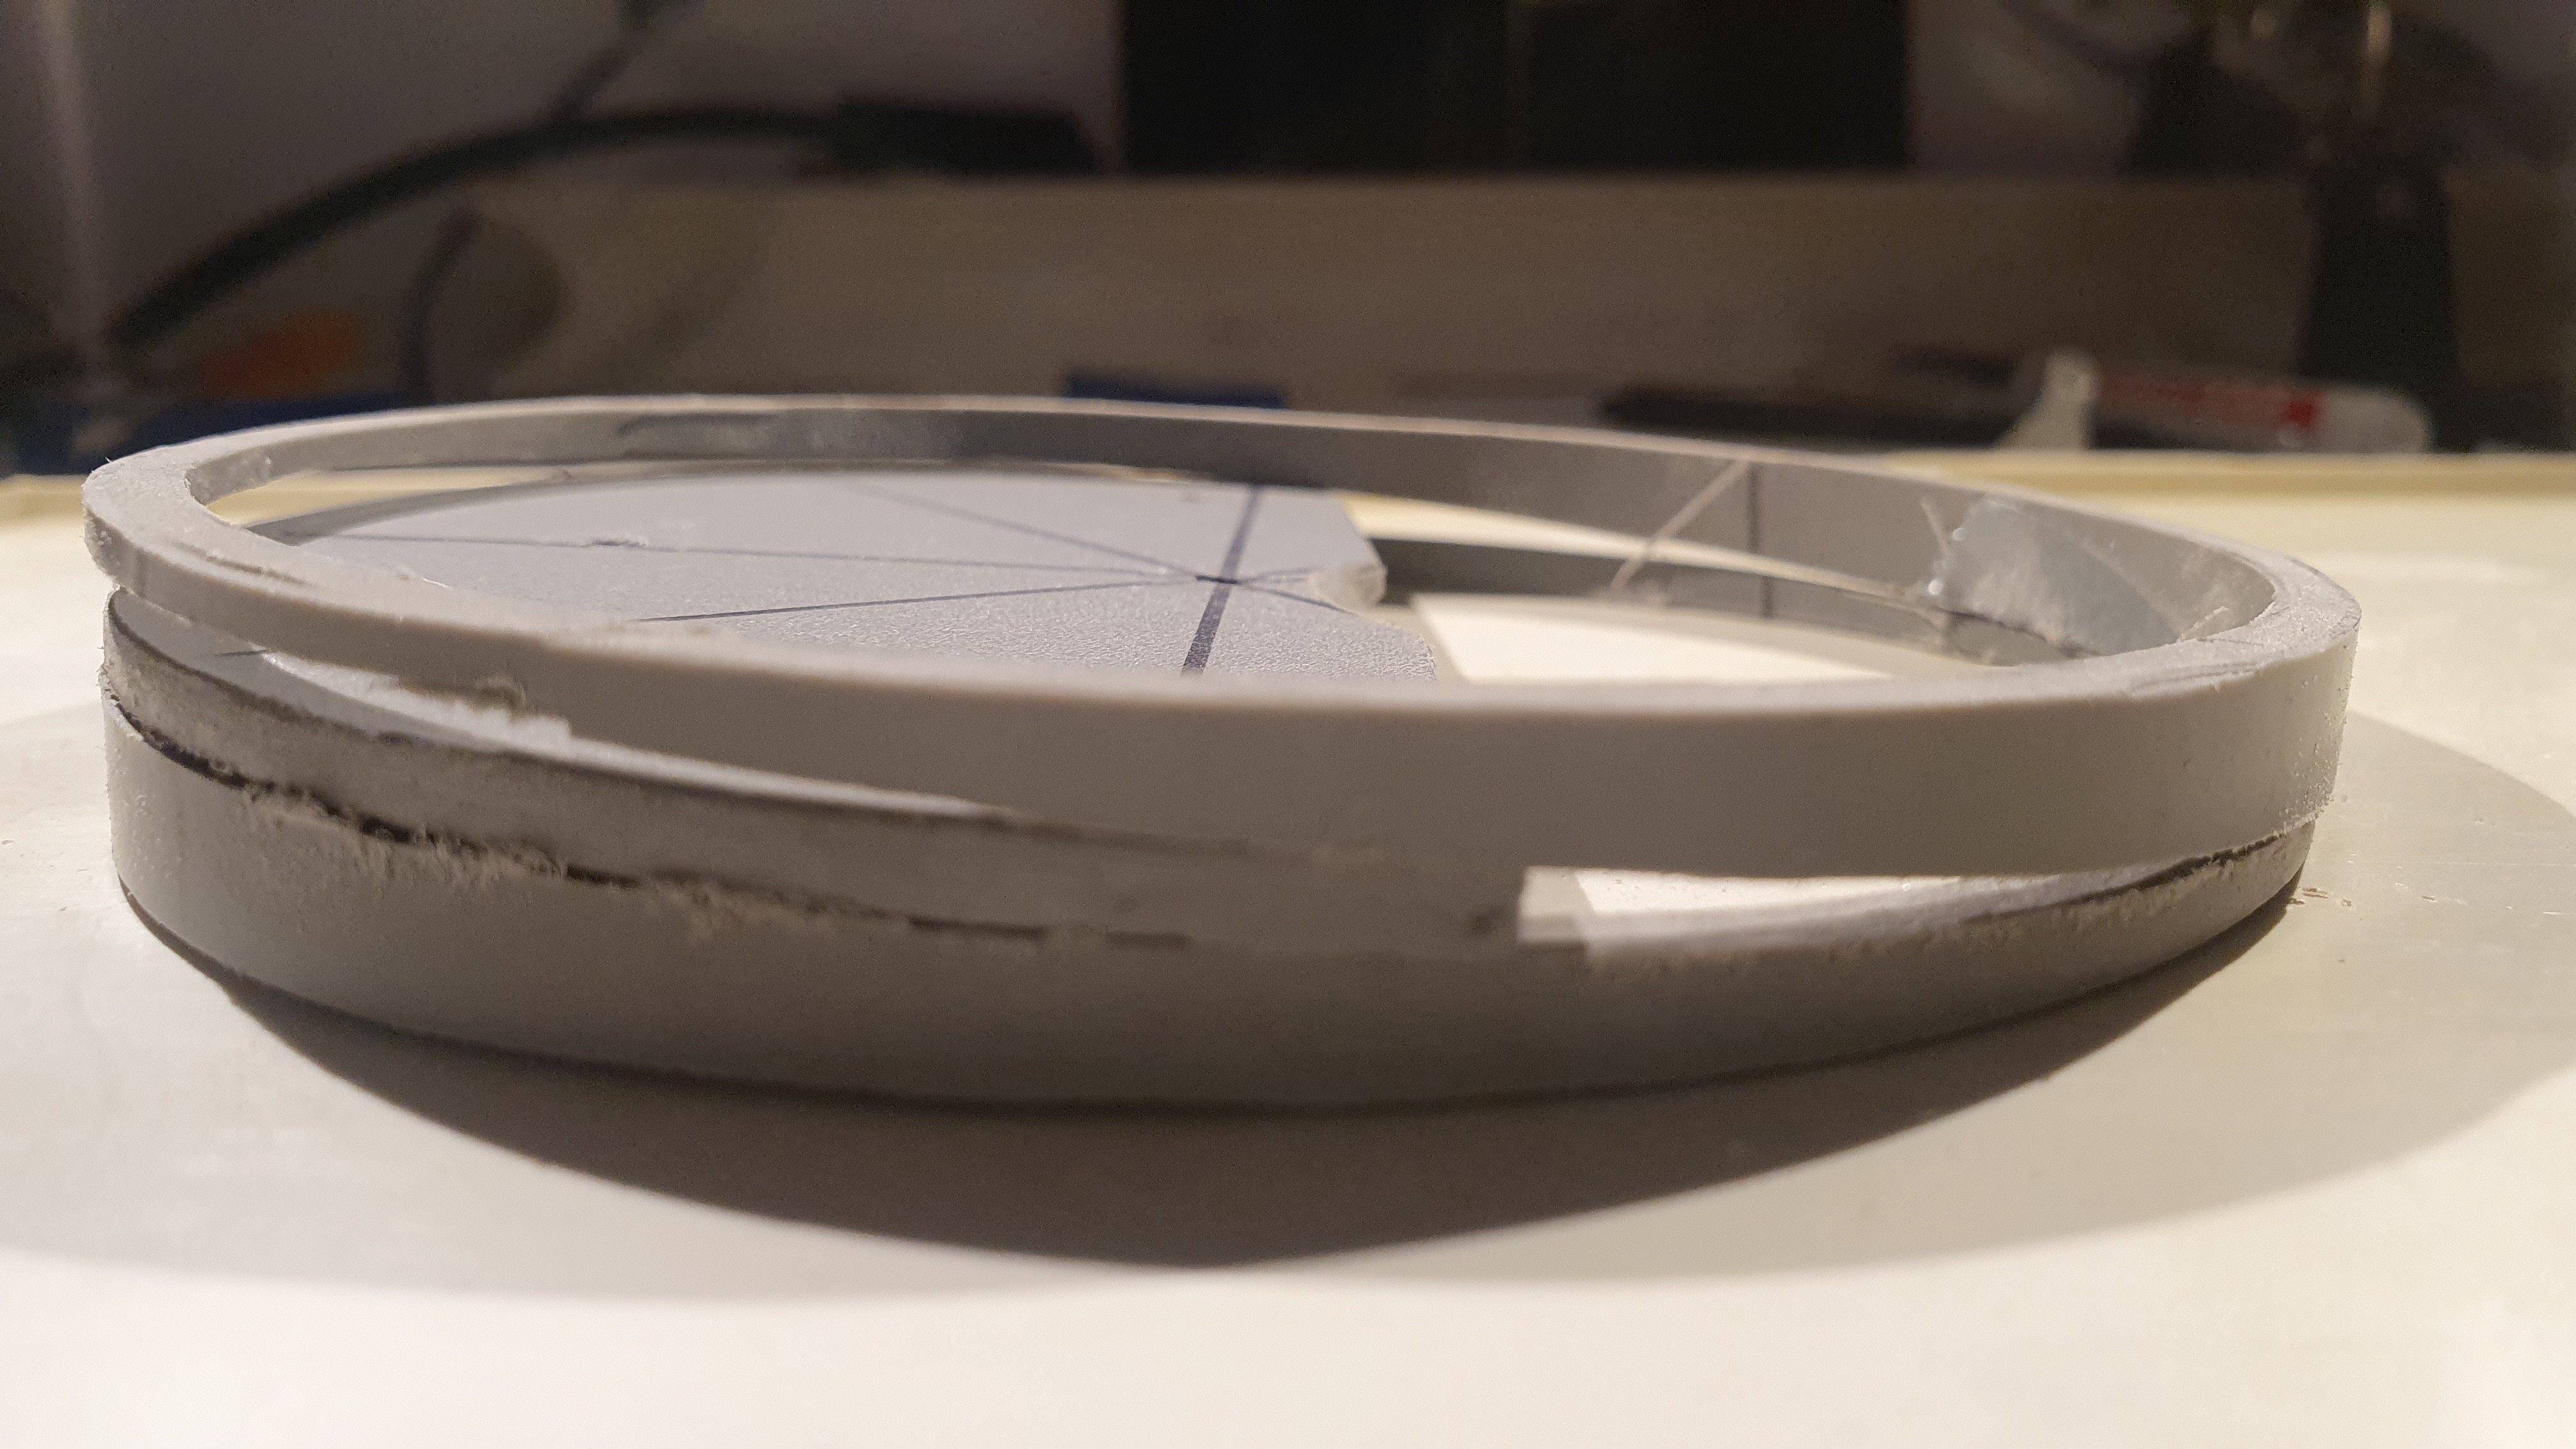
Improved Dispenser
To give the vibration platform a little slack to vibrate in and keep it from slowly rotating and tangling or pulling on wires. I cut 3 small legs into the PVC pipe slice that supports them and matching notches in the platform. This way, you don't need to manually adjust anything and it will work reliably.
![]()
![]()
Here is a short video showing the improved dispenser at work. It's quieter and faster than before.
https://cdn.hackaday.io/files/1847547904515136/20231029_175433.mp4
Improved Baffle
The baffle used to be horizontal, so some peanuts would just sit there as the vending machine peanut level ran low. I used a dremel to slice a piece of PVC pipe at a slight angle so it would have a downward slope. The slight vibration that reaches the baffle from the dispenser is enough to make sure everything rolls off down to the dispenser.
![]()
![]()
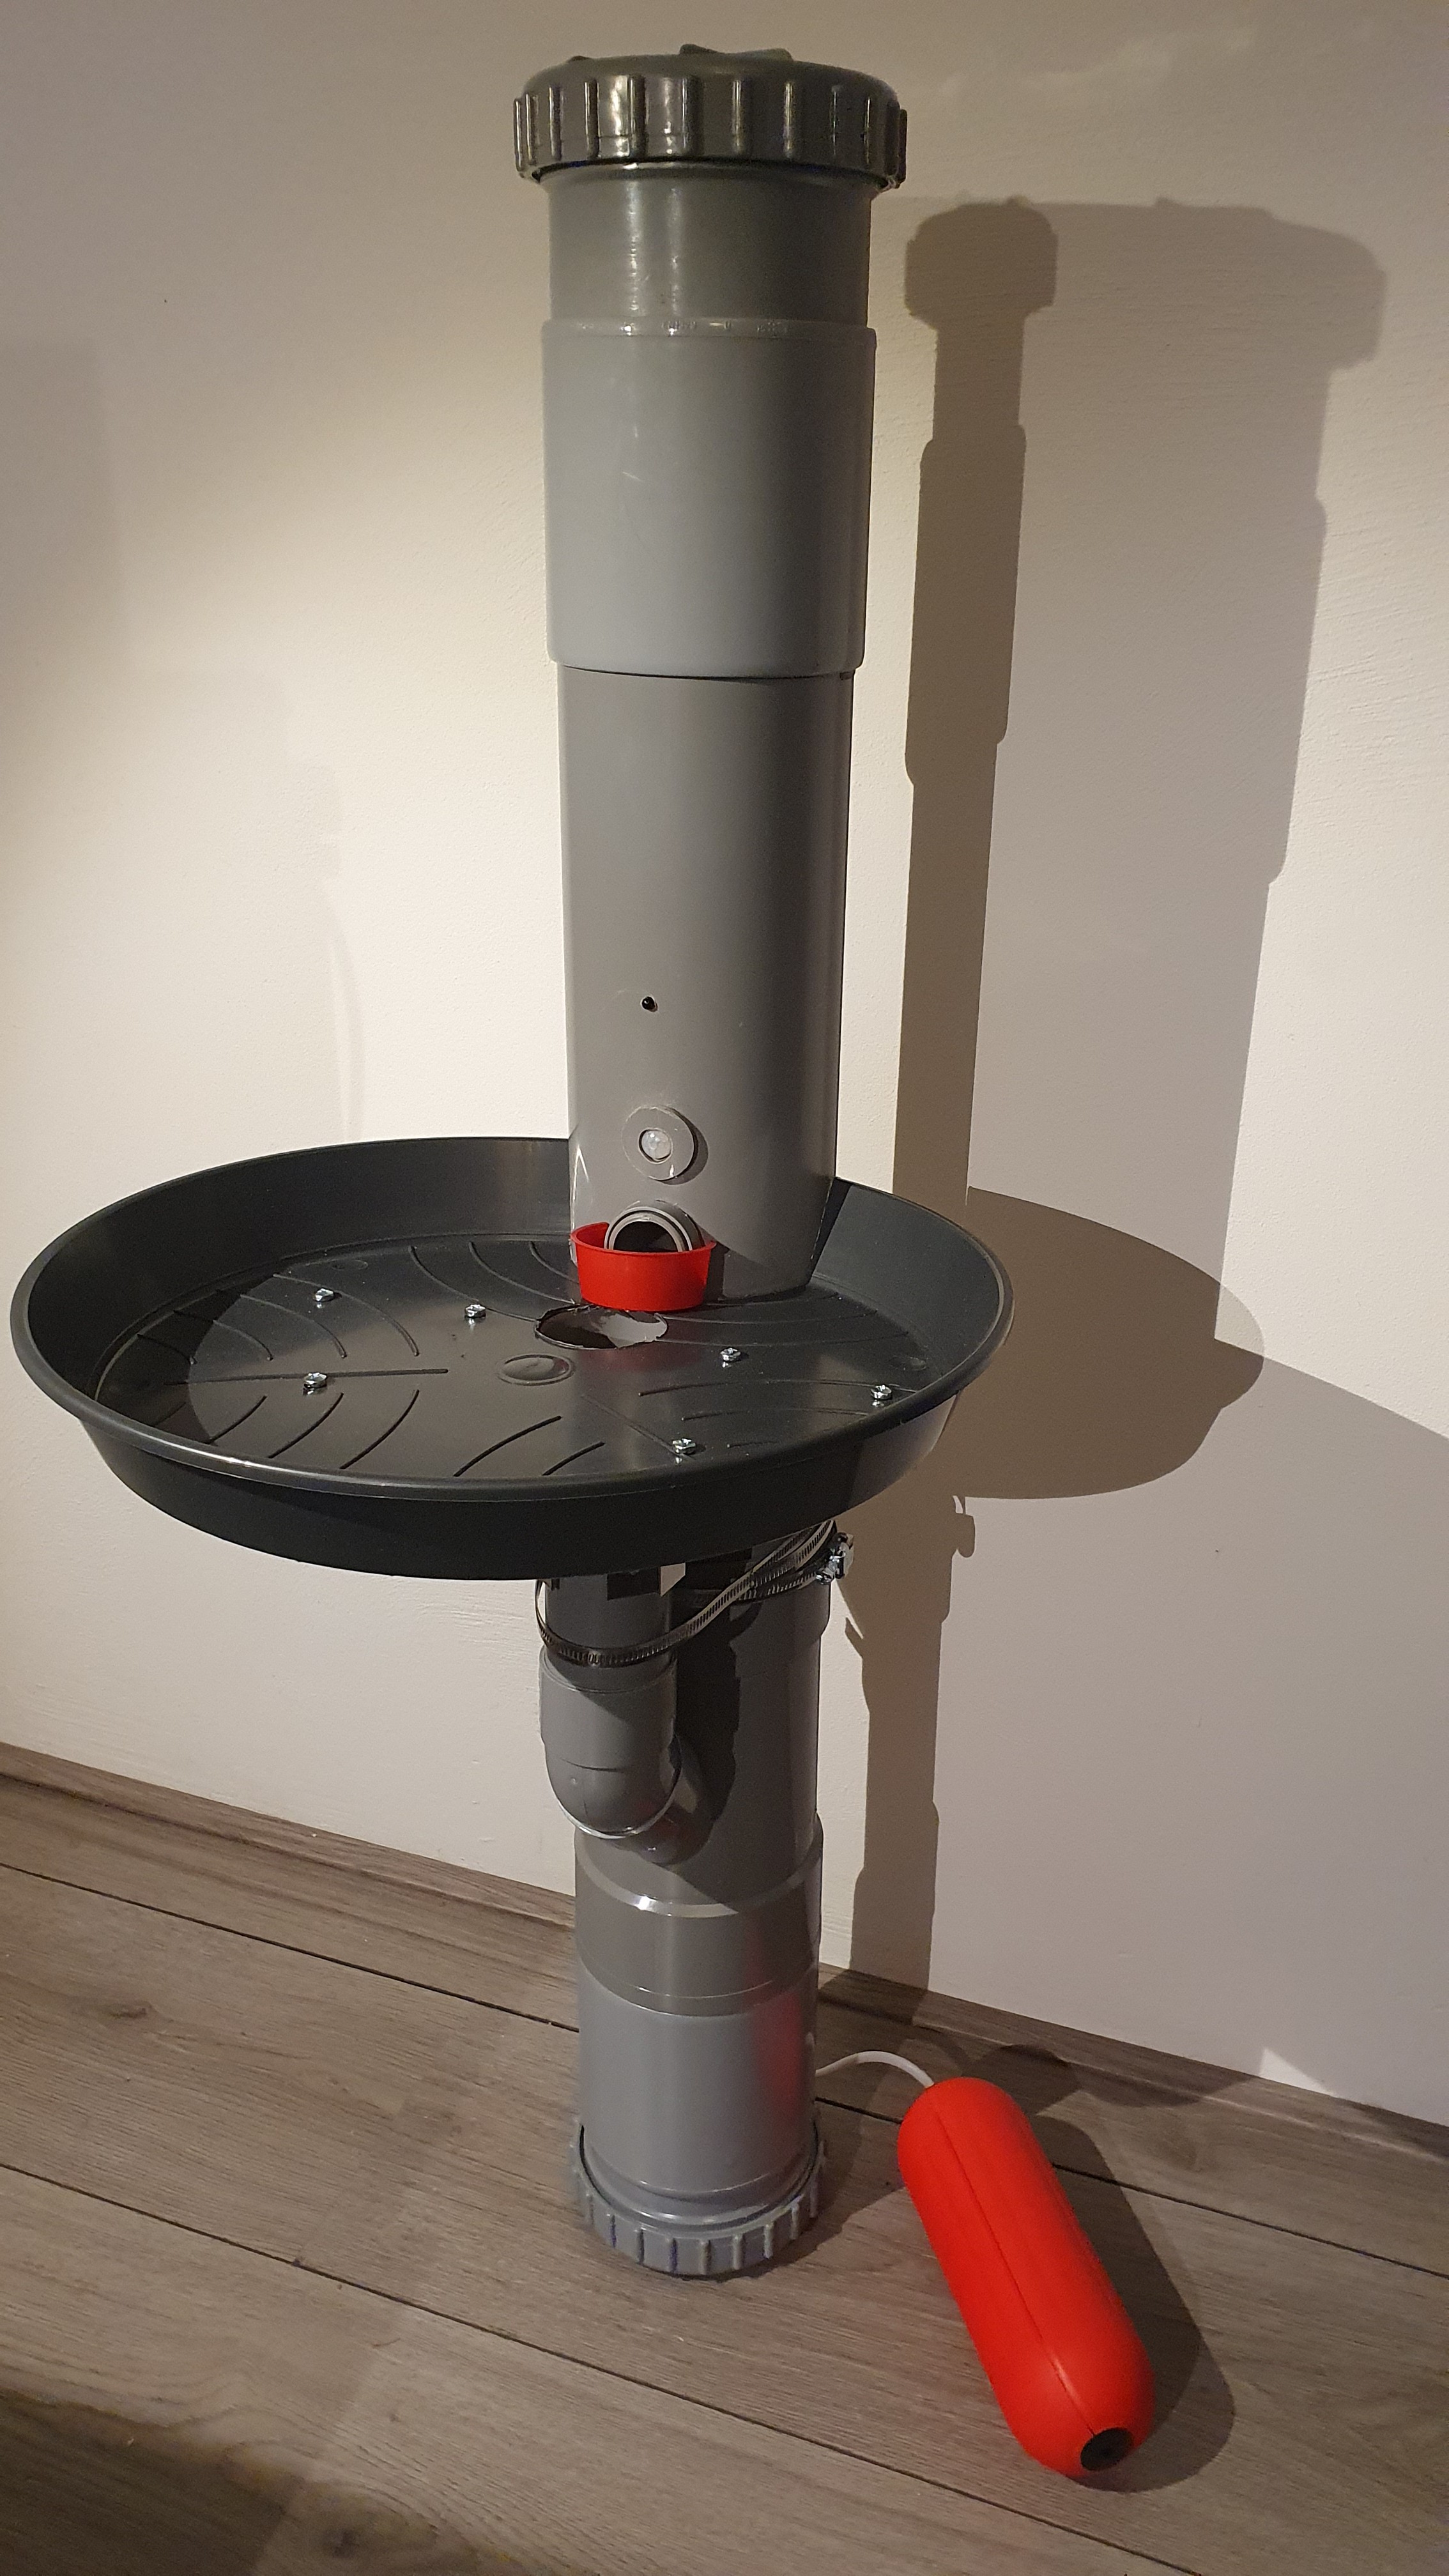
Simplified enclosure
The student will use an external camera, so I didn't put a camera arm on this one. I did simplify it a bit - slightly more compact with fewer parts. The deposit sensor monitors a 45° opening instead of a vertical opening, so rain and dripping water will not pass by the sensors while objects will. Any water that does get in will drain out the bottom.
They will also be using mains power outside, so I put a plug on it with a safety box. The lower half comes off if you loosen a hose clamp so you can look inside, swap batteries or troubleshoot.
![]()
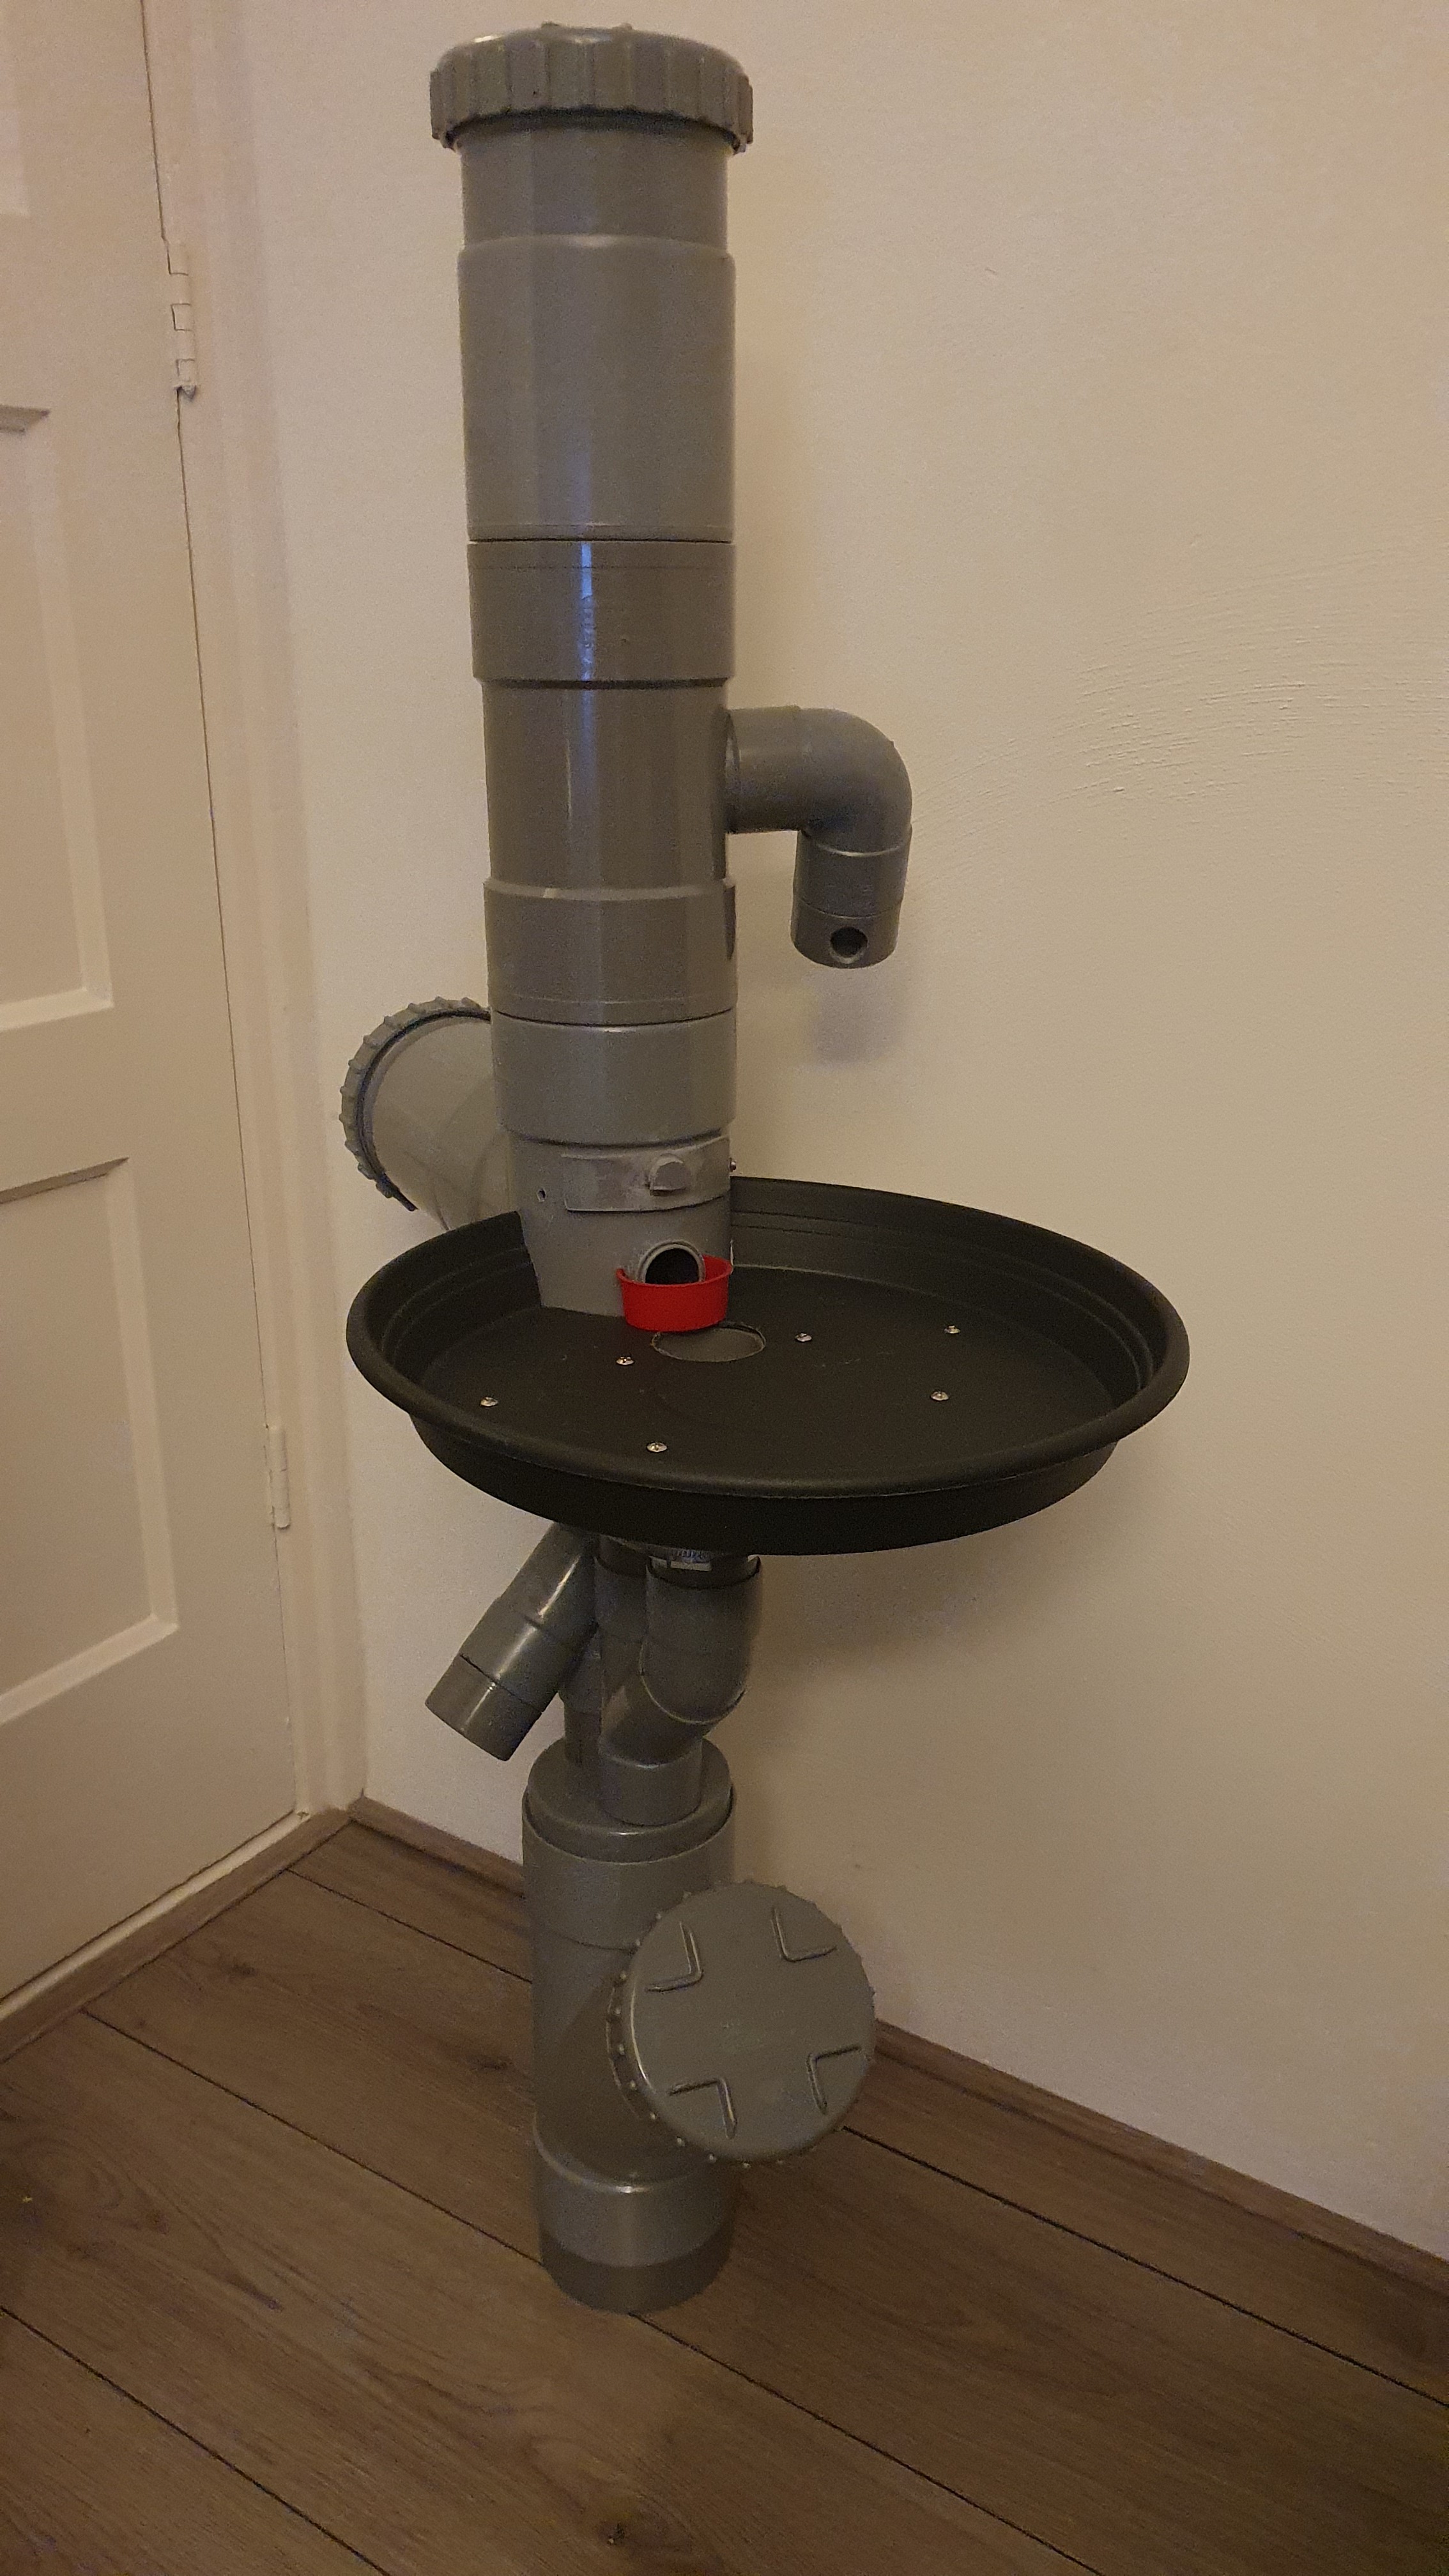
Mounting
I've found that when mounting on vertical objects like railing support or fence posts, hose clamps work great.
![]()
I plan to ship this in the next few days. Will be a challenge to pack and pad to insure it arrives in the same condition it leaves in.
-
Enclosure details - finally
09/28/2023 at 20:18 • 0 commentsI've been pretty lax on details for the enclosures and dispenser assemblies I've made, so I've finally documented the PVC pipe enclosure and dispenser in the project details here: https://hackaday.io/project/184754-vending-machine-for-birds/details
![]()
-
Camera and monitoring complete - for now
09/18/2023 at 11:10 • 0 commentsI managed to enable/disable the camera based on a schedule, so I think I can wrap this part up. Power consumption while the sensors are idle and the camera is disabled is ~110mA. With the camera enabled it draws ~185mA. Streaming adds another ~35mA (~220mA with camera enabled and streaming).
To recap what's there so far:
Monitors
- PIR - state and # of times it was triggered today
- Sensor IR - state (on or off)
- Timer - state (on or off)
- Feed - state (ok or low)
- Deposit - state (ok or jammed) and # of times it was triggered today
- Dispense - state (ok or jammed) and # of times it was triggered today
Controls
- manual start and stop of recording
- manual dispensing of feed
- manual snapshot of still images
I removed the manual turning on of the sensors, as this is not super useful by itself, at least with my use case. I also removed the buttons to manually enable and disable the camera, as there is already a place in the UI to do this.
Logs
- All monitored events are logged with datetime stamps
- Vending machine logs are rotated daily
Recording
- records while the sensors are on (meaning a bird is triggering the PIR)
Power Saving
- camera is enabled at 6:00am and disabled at 6:00pm (on/off times are configurable) to save power overnight
Updated scripts are on GitHub. I also added a VMFB_timer.sh script you could use instead of the 555-based timer on the PCB.
So now I will add some documentation to GitHub on how to use these scripts with motioneye/motioneyeos and the PVC enclosure build.
I am feeling like I've hit the "feature-complete" milestone on this project - it's doing everything I want it to.
- Works as a vending machine for birds
- Runs sustainably off solar power
- Optional remote monitoring and control
Now I just need to get it back outside somewhere.
-
I ♥ Motioneye
09/13/2023 at 14:15 • 0 commentsSo I'm nearly done with setting up monitoring and logging with motioneyeos. I have it running on an RPi Zero W (~15 EUR) with a 160° wide-angle camera module (also ~15 EUR). I have plenty of GPIO to do stuff with.
On the video overlay I am showing:
- PIR state and number of times it has been triggered today
- Sensor IR state (on or off)
- Timer state (on or off)
- Feed level (ok or low)
- Deposit sensor state (jammed or ok) and number of times it was triggered today
- Dispense sensor state (jammed or ok) and number of times it was triggered today
You can also control the following with buttons on the overlay
- Turn on sensor IR (light bulb icon)
- Dispense a peanut (down arrow icon)
- Start recording (alarm on icon)
- Stop recording (alarm off icon)
The camera records while the IR sesors are on (they are turned on by the PIR). Everything is logged, logs are rotated daily.
The python and bash scripts for this are on GitHub.
I would like to disable the camera at night to save ~100mA, which would result in a ~1000mAh power savings per day. Have experimented a bit but not found a reliable way to do this yet.
![]()
-
Solar Power
09/06/2023 at 13:15 • 0 commentsI finally bit the bullet and spent some money on a 27000 mAh powerbank with pass-though charging up to 40W and a 17W 18V solar panel so this can be placed without needing mains power or someone to change the battery.
The vending machine and camera together draw about 1W when idle and about 4W when dispensing a peanut. I estimate about 1.5W on average. I should be able to keep this charged via solar - it can run for about 2 days on the powerbank alone so it can tolerate a couple dark days and stay running.
I should be receiving the goods this week to start testing this out. I would like this to be someting you can place anywhere and only have to refil the hopper occasionally. For now it will still need a wifi access point in range for remote access.
UpdateIt works great. The 17W 18V solar panel charges the powerbank significantly faster than the vending machine and camera drain it.
-
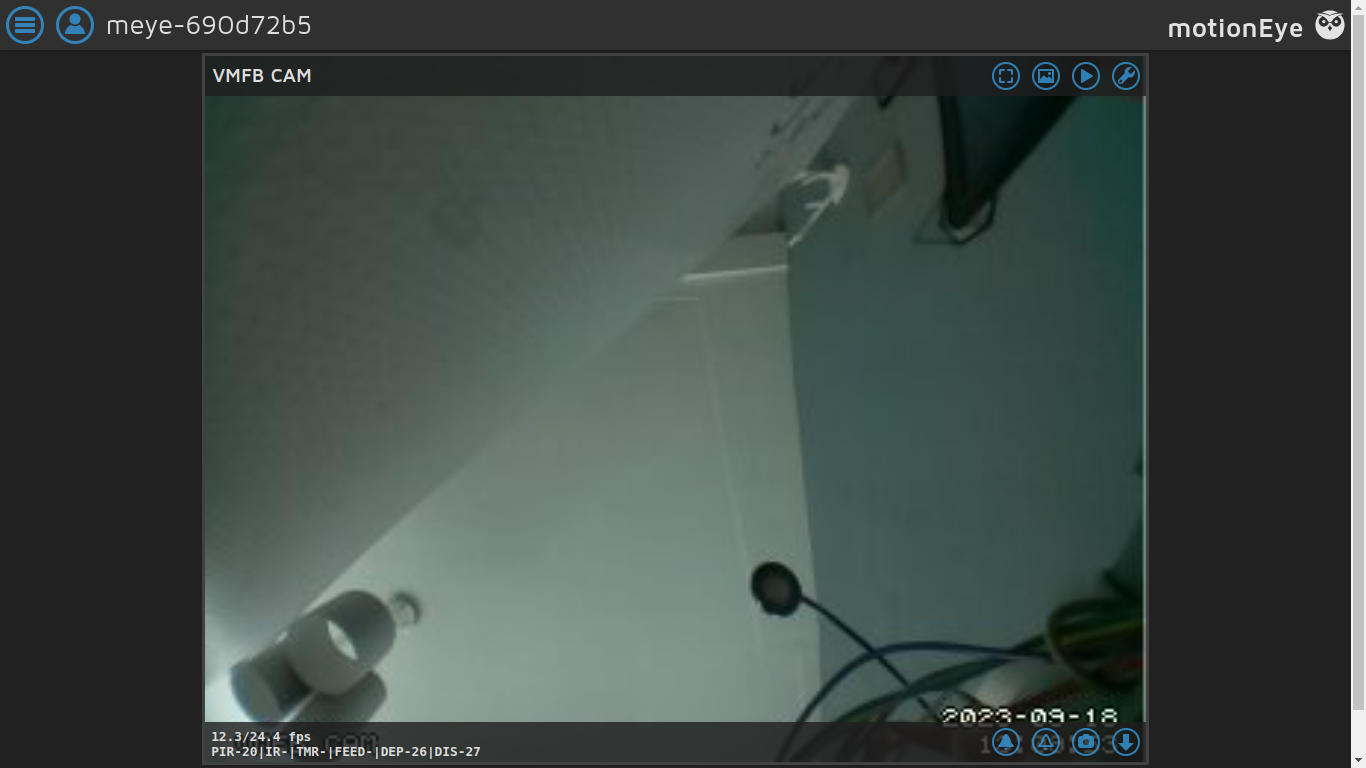
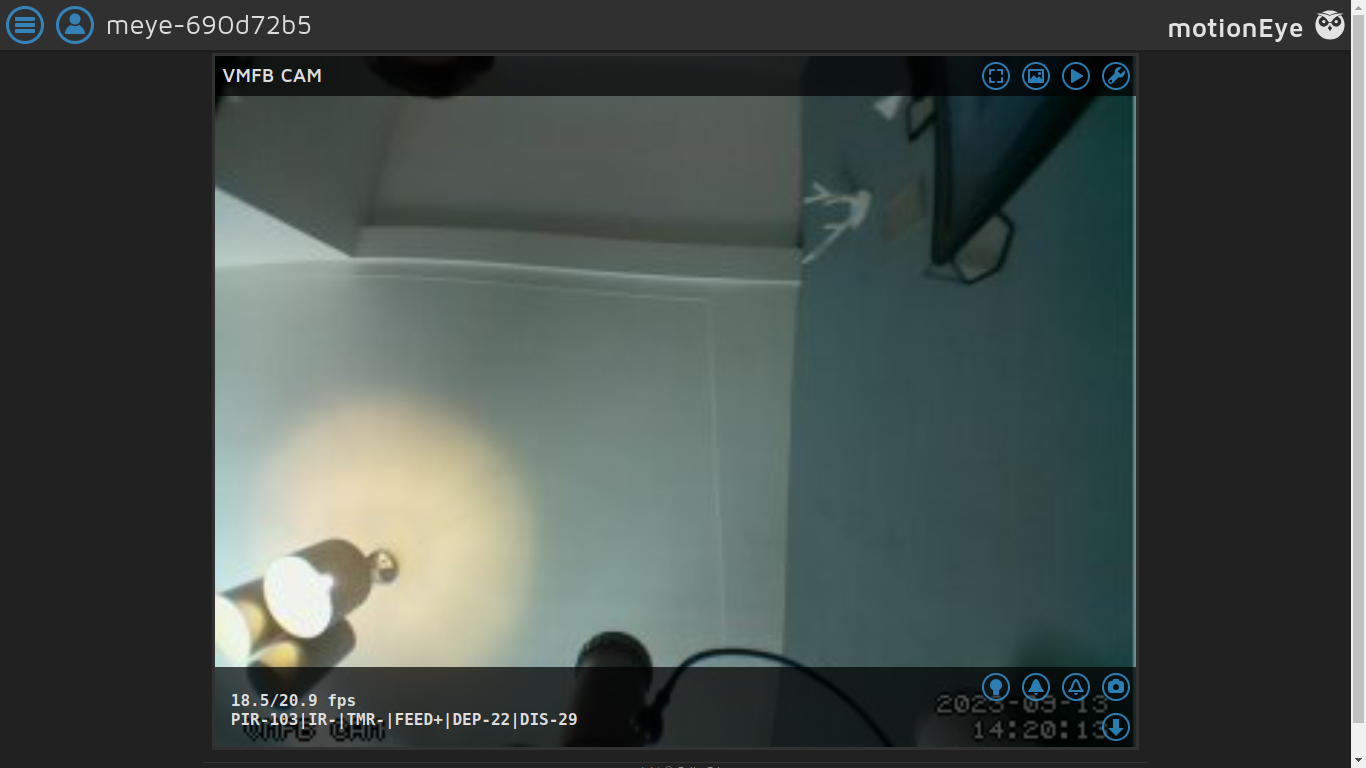
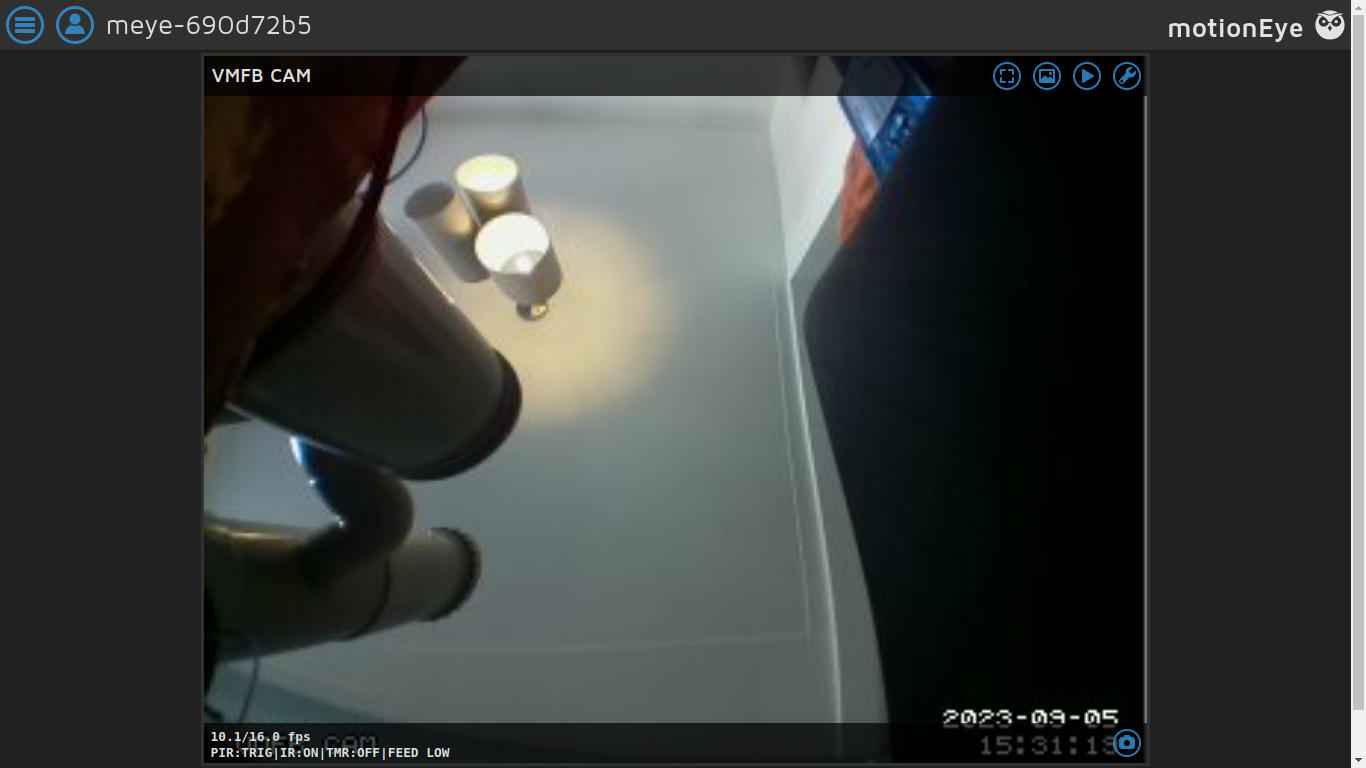
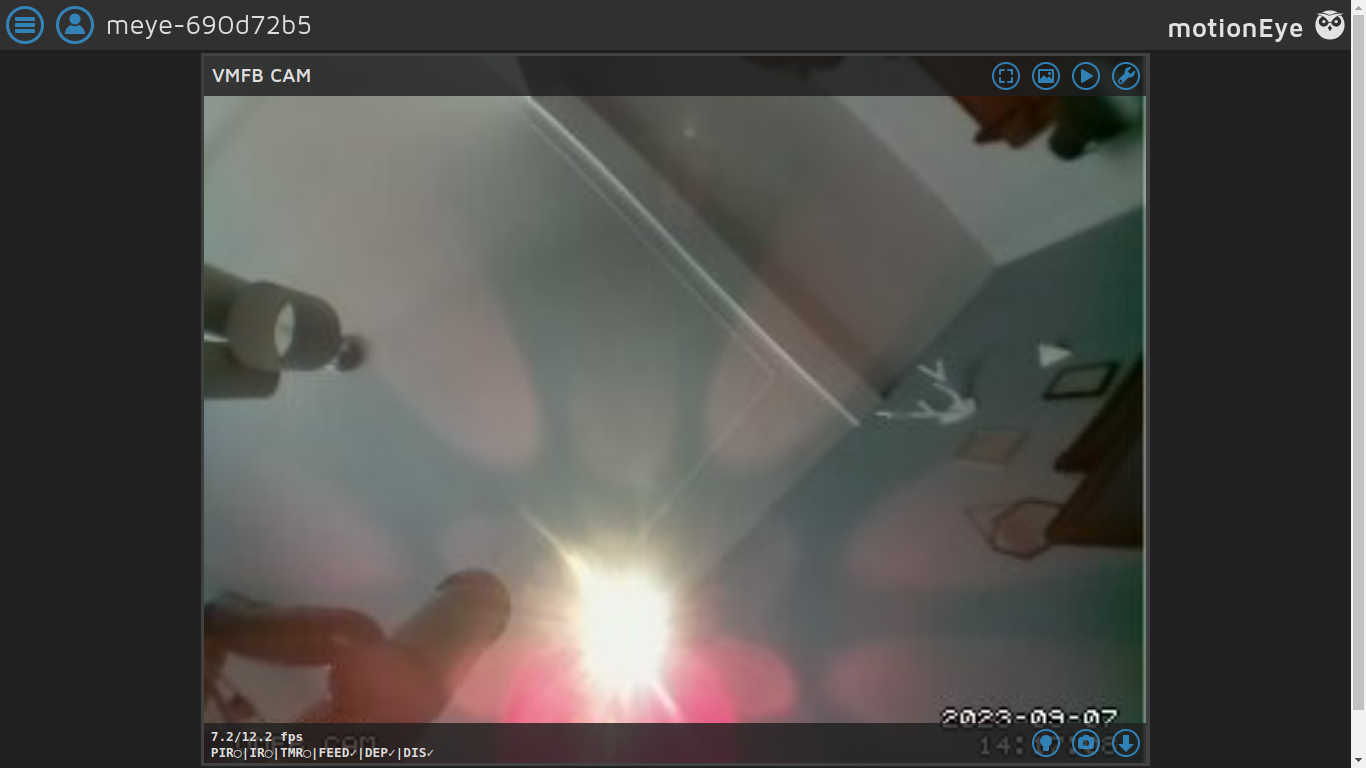
Remote Monitoring
09/05/2023 at 15:36 • 0 commentsI've been playing with motioneyeos to do some simple status monitoring on the vending machine so you can know what is happening remotely.
You can modify the monitor_<CAM_ID> file to show details based on GPIO status. So, making use of the monitoring header on the PCB I can tell if the PIR has been triggered, if the sensors are on, if the timer is active and if the feed level is low. I still need to log events to a log file, and would like to also log short events like deposit and dispense, which can be missed by the motioneyeos monitor since they are very short duration - I'm working on this.
You can also add "action buttons" that show up on the web interface. I have added a couple to allow manual triggering to turn on the sensors and dispense a peanut.
In the end I will monitor the PIR, sensors, hopper level, deposit and dispense events, and if the timer is enabled. Also will allow manual triggering to turn on the sensors or dispense a peanut. You will be able to download and analyze the log file to determine things like how often the PIR triggers, time between deposit and dispense, how many successful interactions and when they occur, etc.
I've added these file to the GitHub repo
- monitor_1 - shows monitoring information on the video feed
- light_on_1 and down_1 - action button scripts to allow manual triggering of sensors and dispensing peanuts
I think this logging and monitoring will make this more useful as an actual tool for animal behavior researchers.
You can see the monitoring info here (lower left corner)
Sensors Off
Sensors On
Update
Deposit and dispense events are too fast to catch with a script, so I will try out gpio interrupts for this.
I was able to set up everything else. It now displays status for:
- PIR
- Sensors
- Timer
- Feed level
- Deposit sensor jams
- Dispense sensor jams
I also added a couple action buttons to let you remotely trigger
- Dispensing a peanut (down arrow)
- Enabling the sensors (light bulb)
You can see the monitoring in the lower left and buttons in the lower right of this image.
The files related to this are on GitHub. Once I find a way to monitor very short GPIO events on the RPi I think this bit will be finished.
-
Some Updates
08/25/2023 at 15:17 • 0 commentsI've been up to a few things since my last post.
- I've put the RevB V1.0 board into the feeder and have tested it indoors. Works as expected.
- I also added the missing resistor to a new version of the board RevB V1.1 that I have ordered from PCBWay. GitHub is also updated with the latest changes. I'll test this as soon as I receive them.
- I've been asking children's zoos in the area if I can put my vending machine on their grounds for a few months - one has responded and is interested. More on that in September.
- Since I may have a location soon, I've been looking into solar power and have bought a couple 10W 5V panels and cabels. I will need to get a powerbank with passthough charging for this to work. I'd really like to not rely on mains power for reliable operation.
Hope to have some more exicting updates next month.
Once the RevB V1.1 boards get here I will populate one and test again. If it is bug-free, I will give the rest away to anyone that wants to build this.
-
Testing Rev B V 1.0 PCB
08/03/2023 at 13:12 • 0 commentsI've populated one of the new boards and have been testing it for a day or so. I gotta say, rolling my own PCBs in Kicad and getting them made by PCBWay has forced me to up my design testing game - I've made many mistakes on the way but have learned a lot and come pretty far in the last few months.
Everything works as planned, including the *new features
- Deposit Sensor
- Dispense Sensor
- Timed Dispense
- Powerbank Keep-Alive
- *Empty Sensor
- *Dark Sensor
Power Consumption
I increased the current going to the IR LEDs and motor. Current power consumption is as follows.
Without RPi
- Idle with Powerbank Keep-Alive and TImer enabled: 18mA
- Timer uses 8mA
- Powerbank Keep-Alive uses 4mA
- ^With both of these disabed it uses 6 mA
- IR LEDs on: 320mA
- IR LEDs and motor on: 510mA
With RPi Zero W and wide-angle camera module
- Idle with Powerbank Keep-Alive and TImer enabled: 220mA
- IR LEDs on: 520mA
- IR LEDs and motor on: 820mA
So with the camera I could get about 2 days out of a 20,000 mAh power bank. Not great, but not terrible.
Testing, Testing
Still futzing around with it a bit before I make a functional test video.
![]()
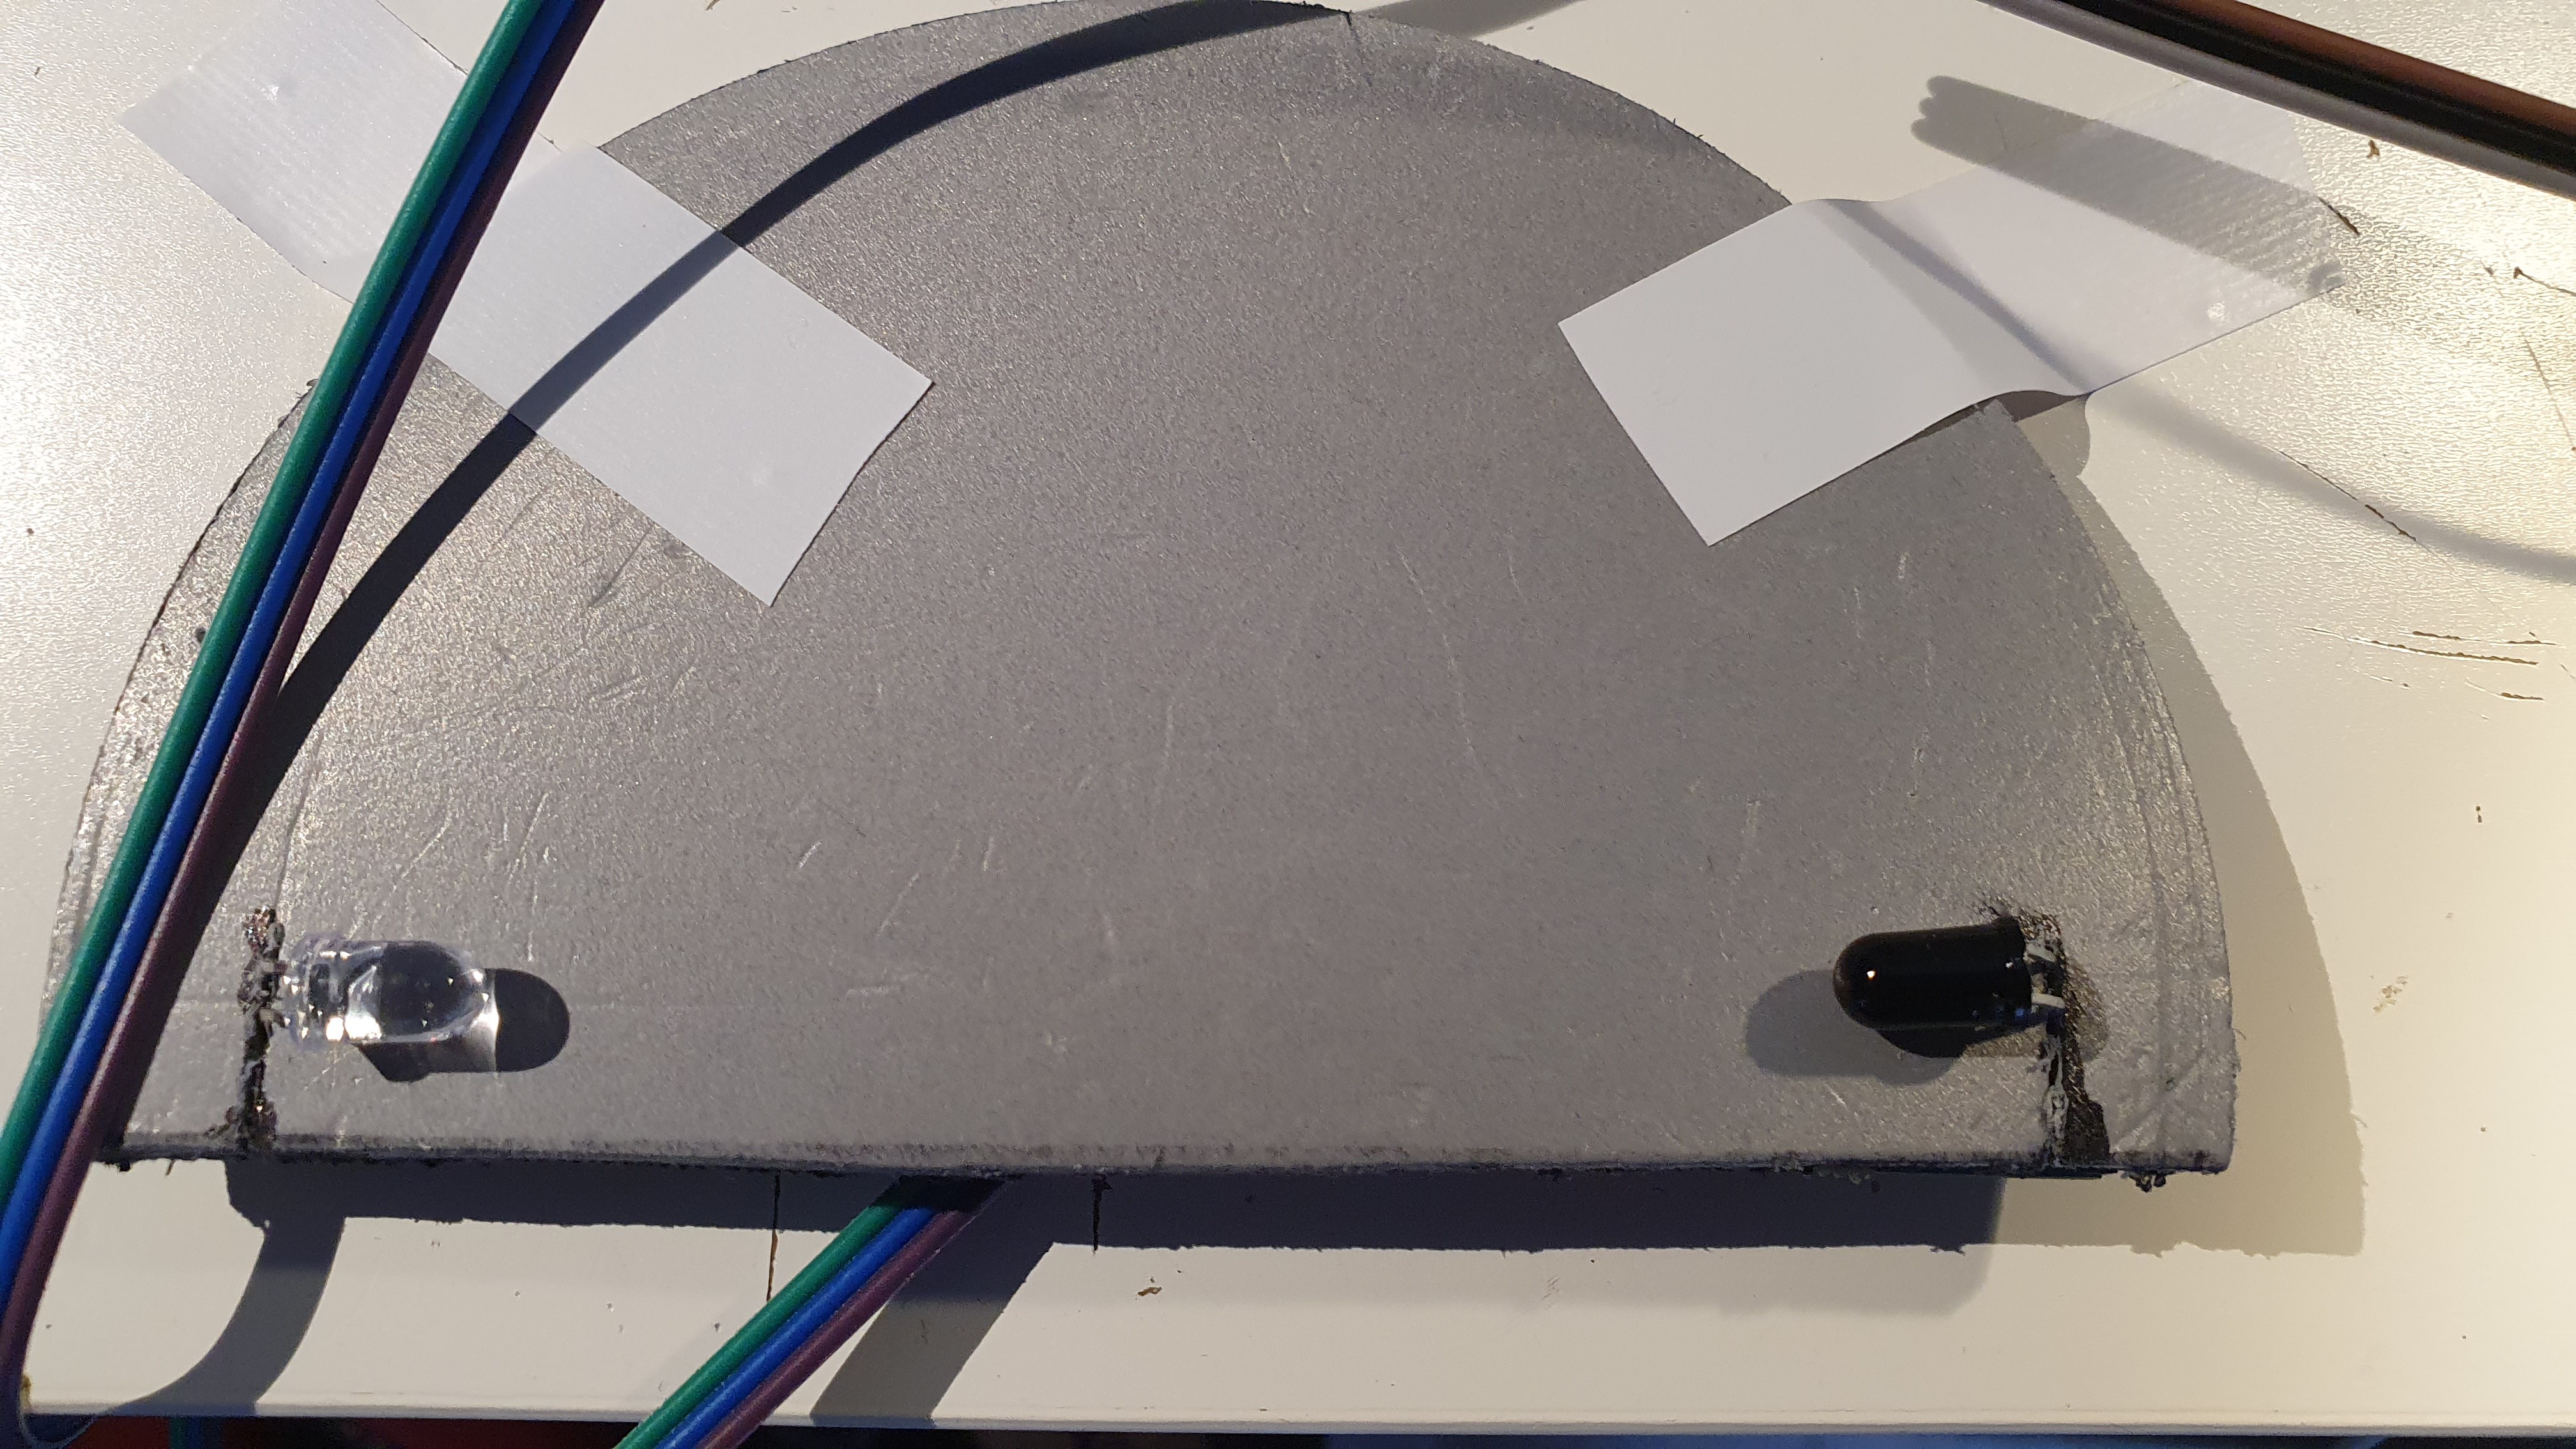
Here's some better shots of the empty sensor on the main baffle that goes in the peanut hopper.
![]()
![]()
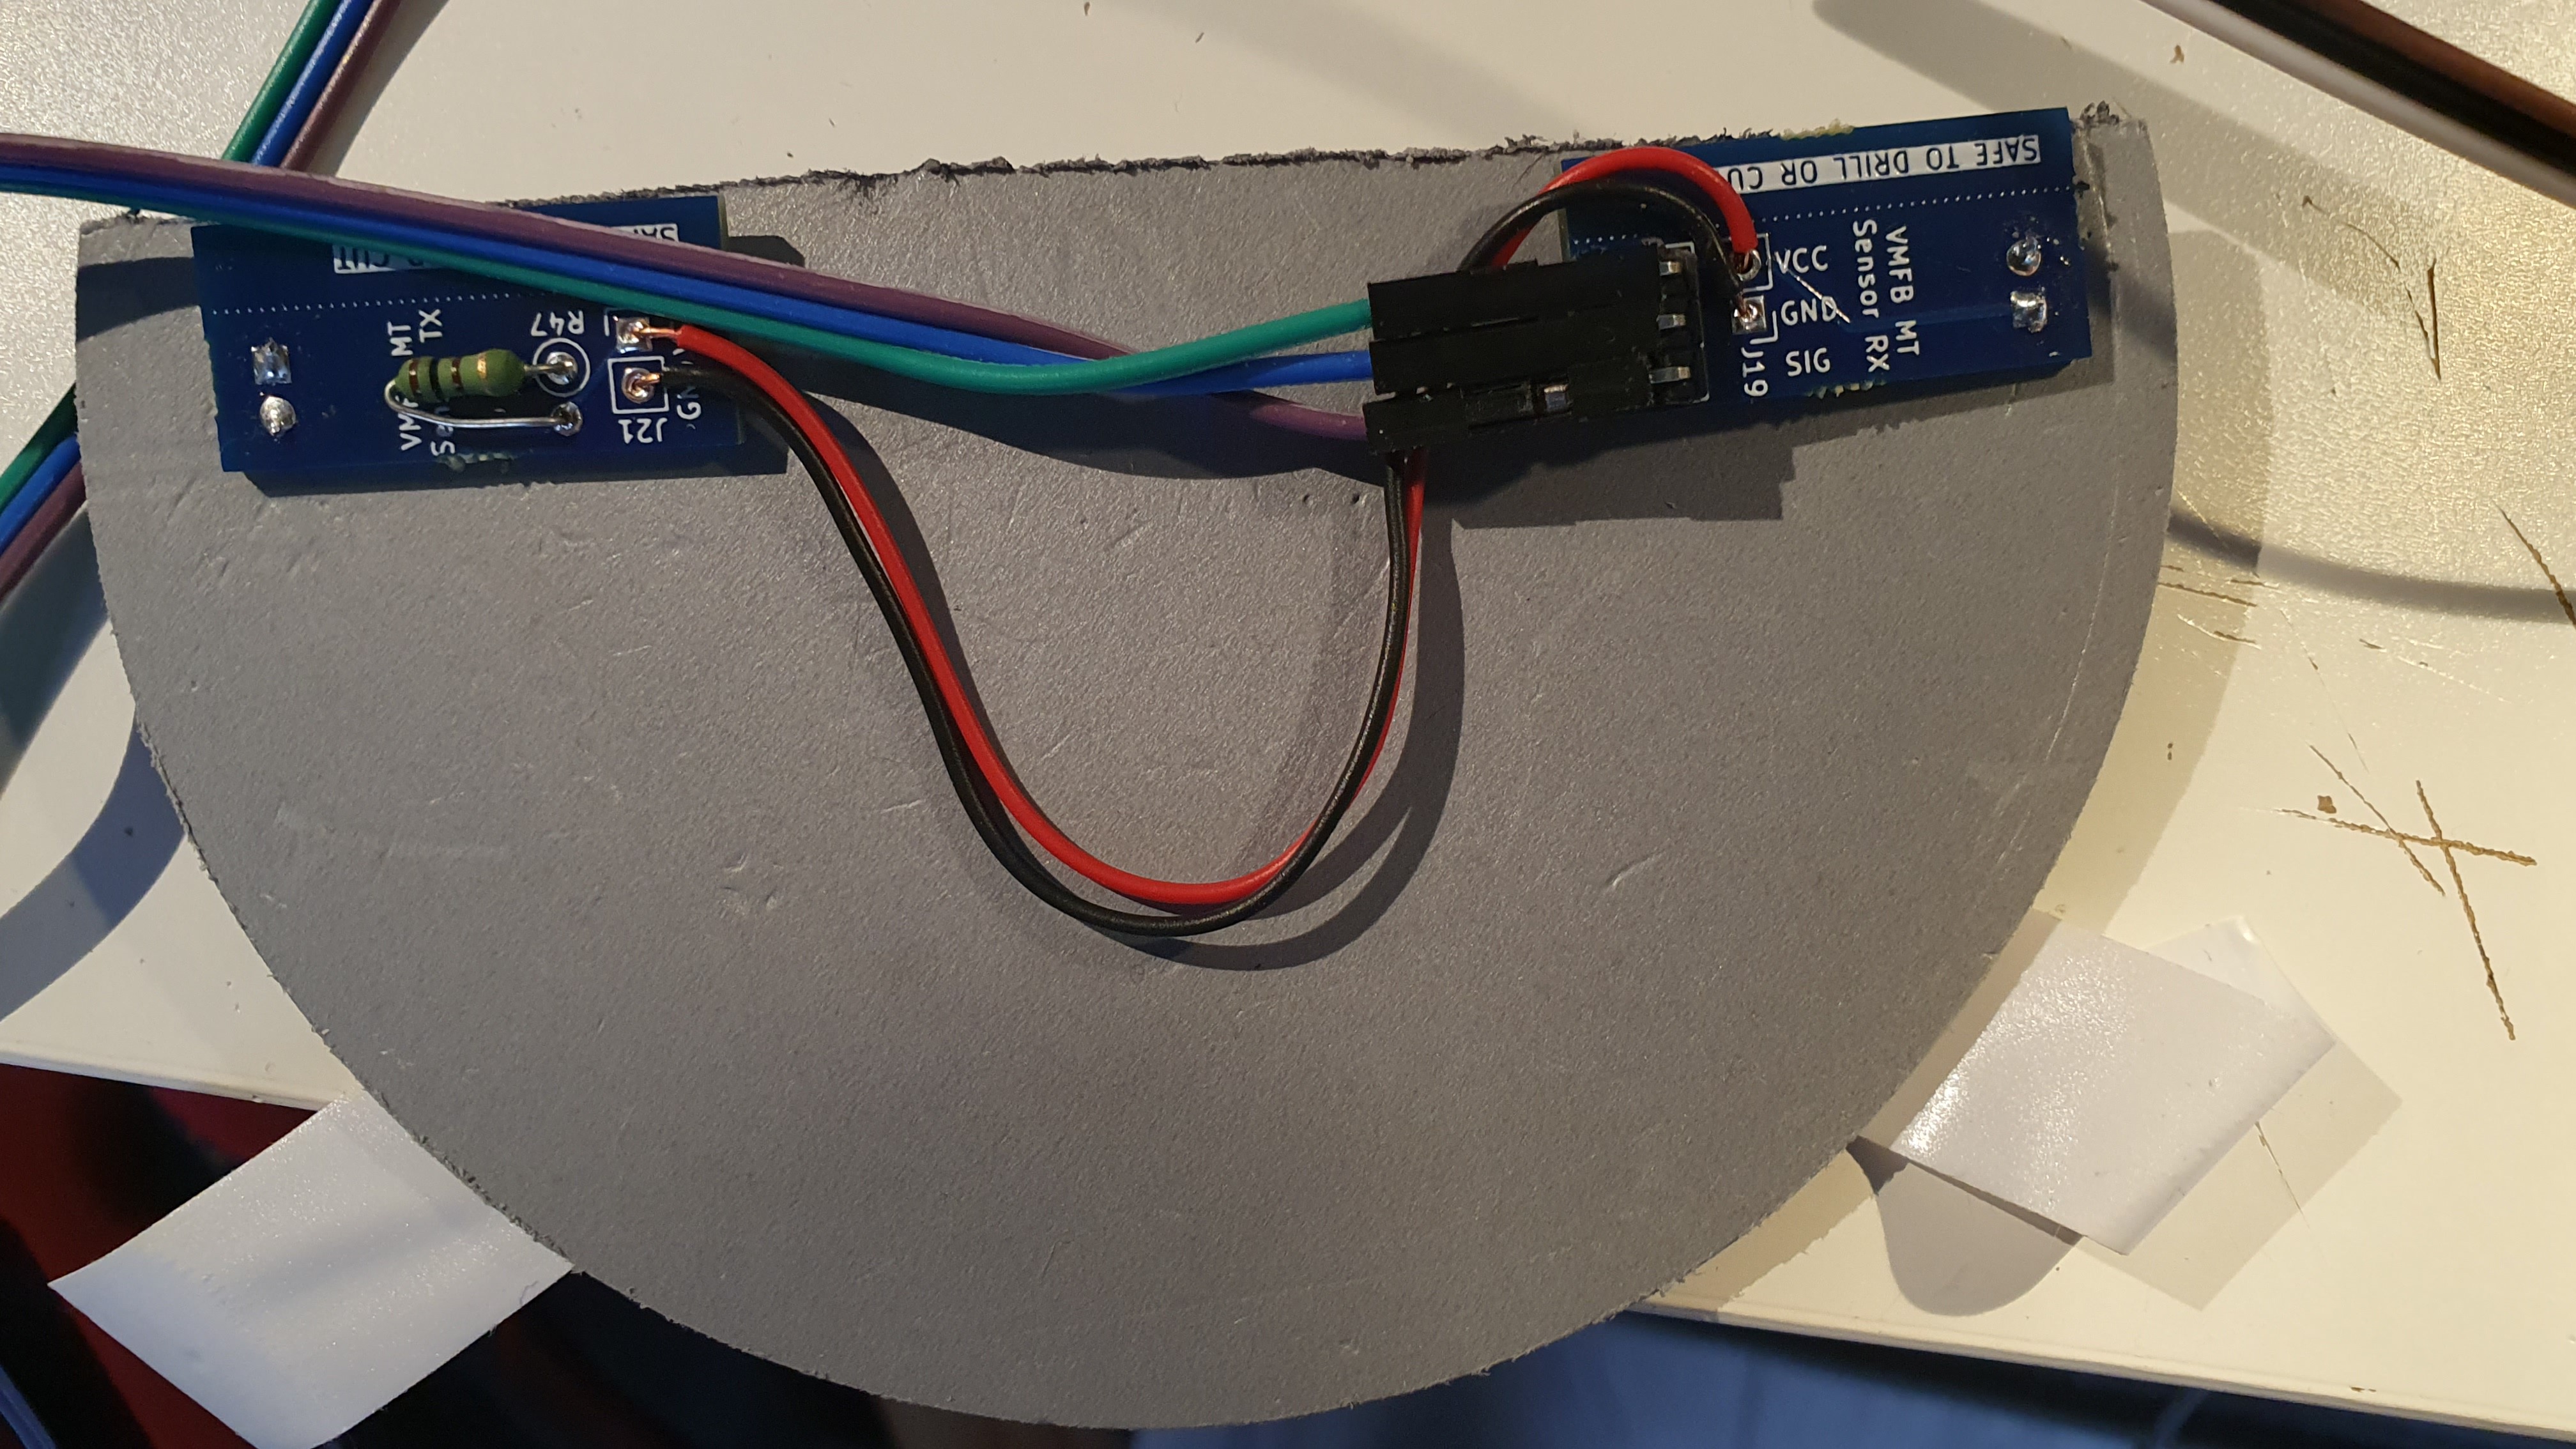
I did make one mistake (aaaaaaargh!) - I left the base of the BC547B NPN on the empty sensor floating and had to bodge a 10K resistor to ground to fix it. I've already corrected this on GitHub and once I've finished testing I'll make yet another run of boards, hoping that it will be bug free. If anyone else takes the time to build one of these I want it to just work without bodging.
You can see it here (upper right).
![]()
So will continue to test. If no issues I will put this board (bodge and all) in the feeder and continue to look for a good location. Here is a pic of the current enclosure on the stand I built from a wooden pallet I found in the trash pile.
![]()
-
Rev. B Ver. 1.0 Boards Arrived
07/25/2023 at 15:17 • 0 commentsI just received the hopefully-final-for-a-while Rev. B Ver. 1.0 PCB from PCBWay today. I hope to have one populated and tested over the weekend. Then I can start mounting the board and sensors inside the vending machine.
After this, just need to set up the Motioneyeos camera to read GPIO and find a good location to deploy it. One Dutch guy who made a similar, though much larger, machine was able to get it placed in a zoo. Once I have everything together I might see if Artis would be willing to do this with mine.
![]()
Vending Machine for Birds
Simple, inexpensive bird feeder that dispenses peanuts in exchange for dropping stuff in a hole. A vending machine for clever birds.