 Fabian
In 2020 I presented a wind turbine called "WinDIY", which can be largely made from 3D printable parts. (You can find information on this here: https://nerdiy.de/en/windiy-die-wind-turbine-aus-dem-3d-drucker/ and here: https://hackaday.io/project/172328-windiy-hawt-wind-turbine)
Quickly after building the first prototype, it became clear that I would like to build a new (completely redisgned) version. The construction of the first version of WinDIY worked in principle, but there was a lot of room for optimization.
For example:
- The mechanical brake is not really needed. To keep it simple I removed it from the design
- The whole construction was difficult to build
- No waterproof housing available
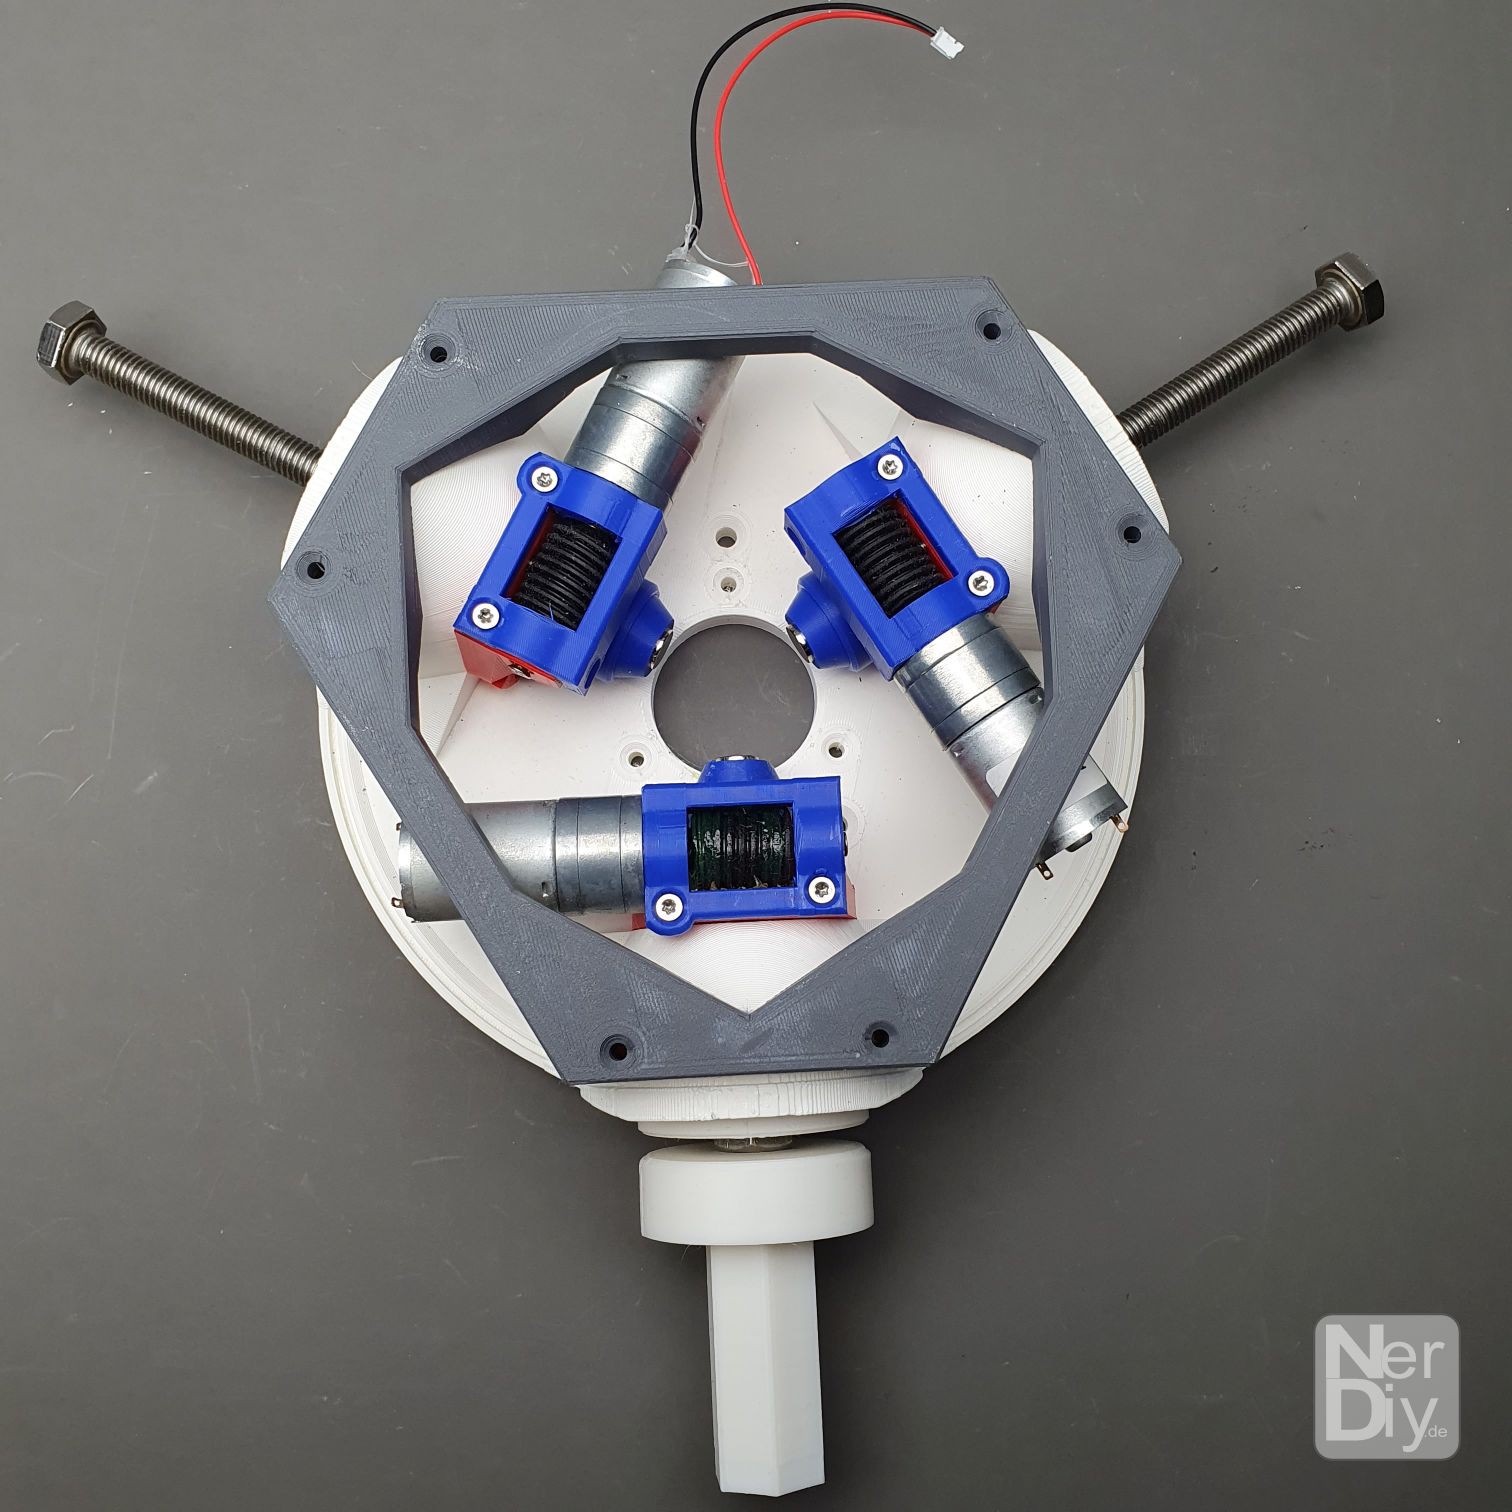
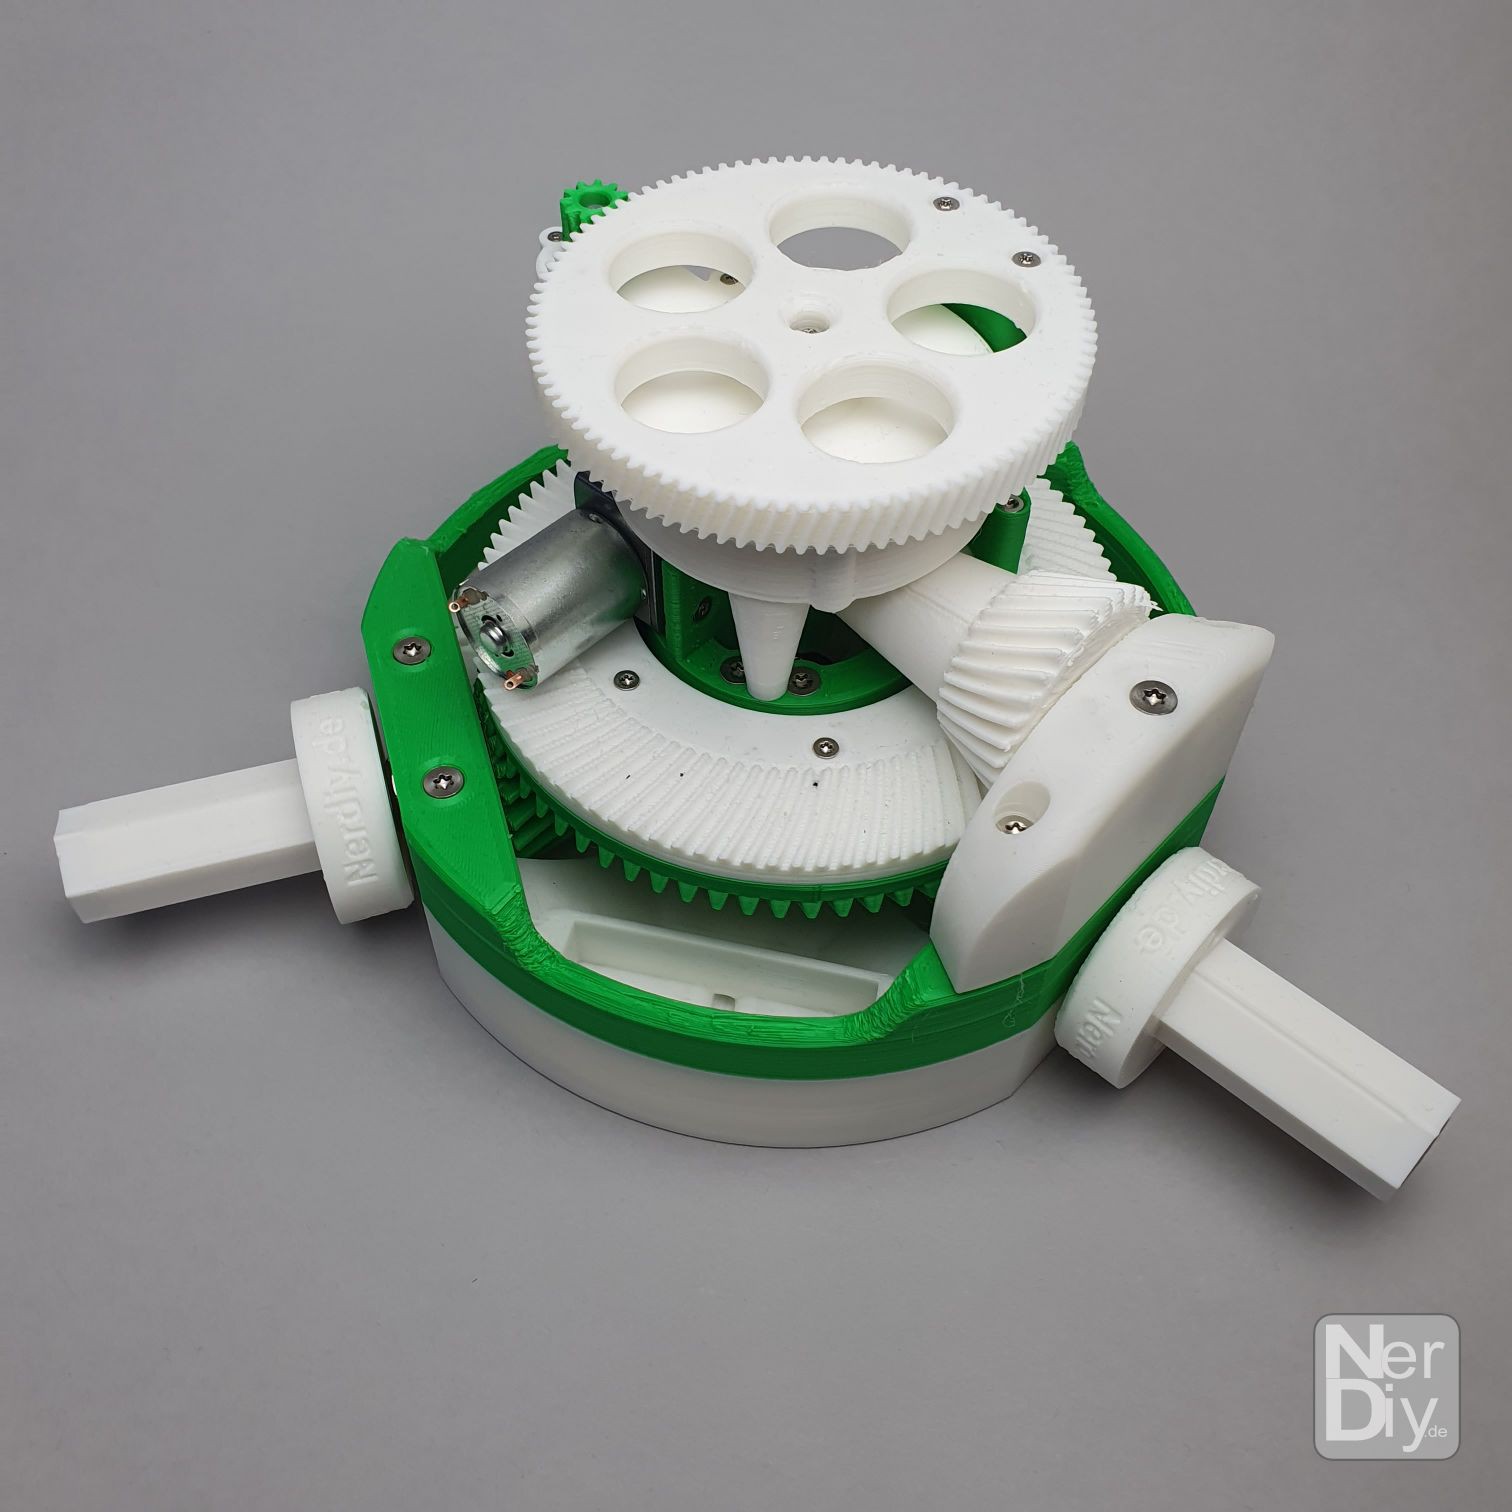
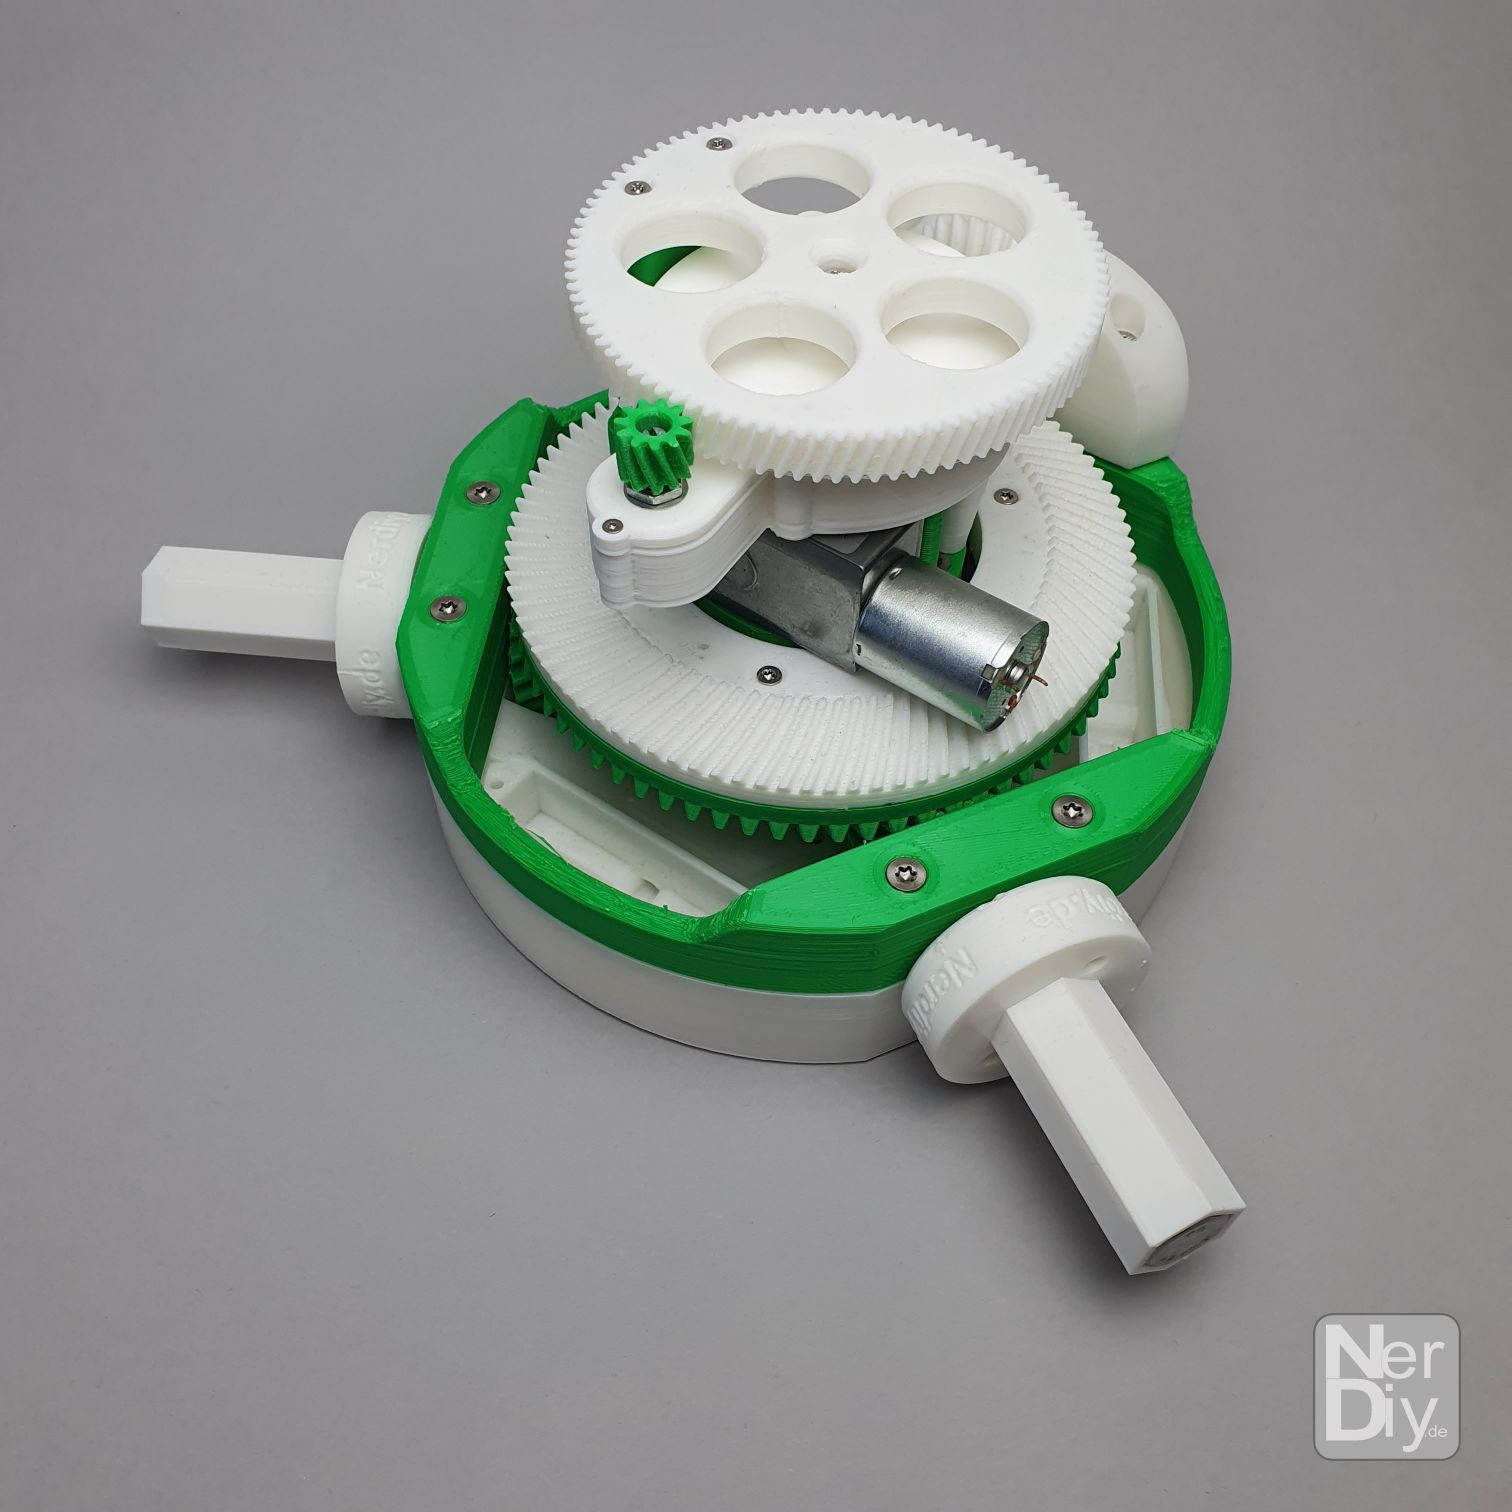
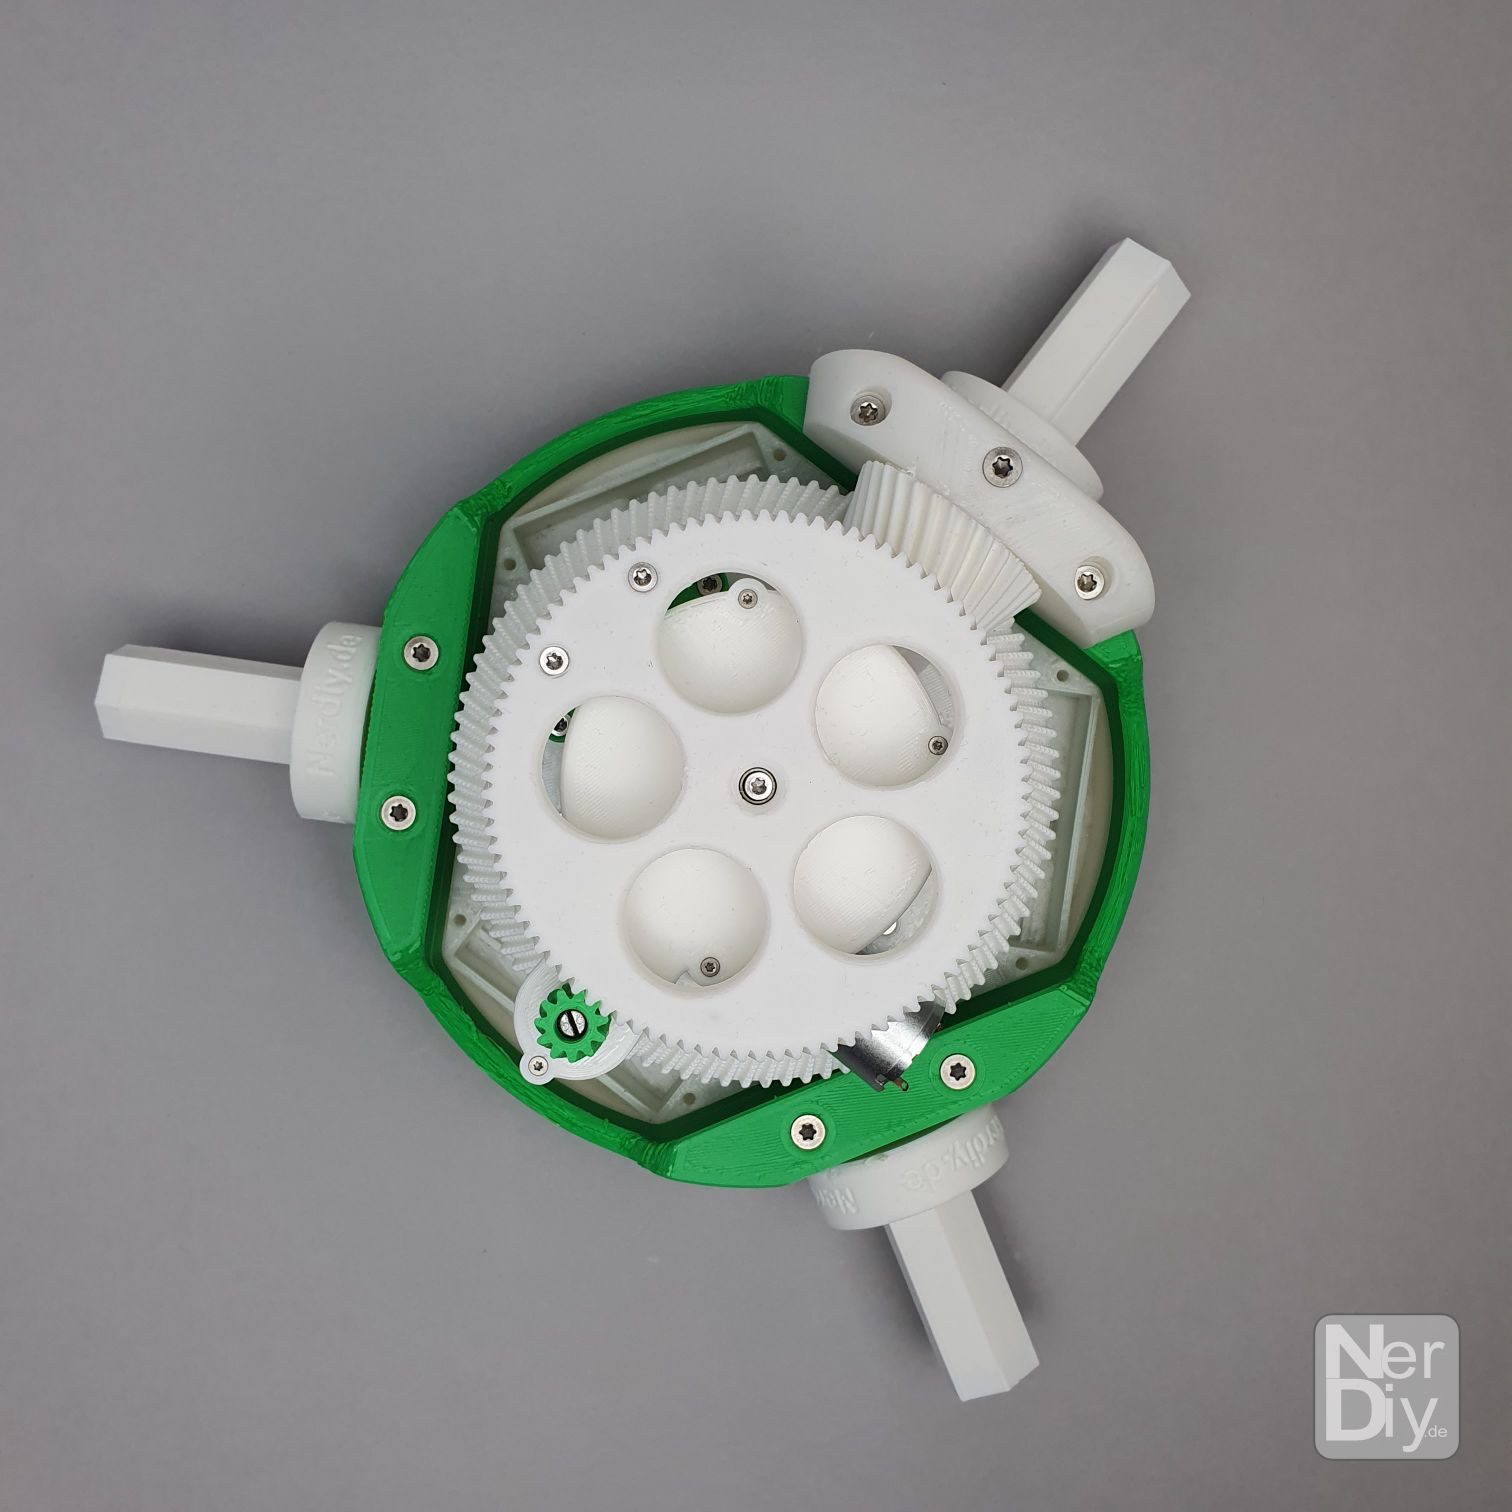
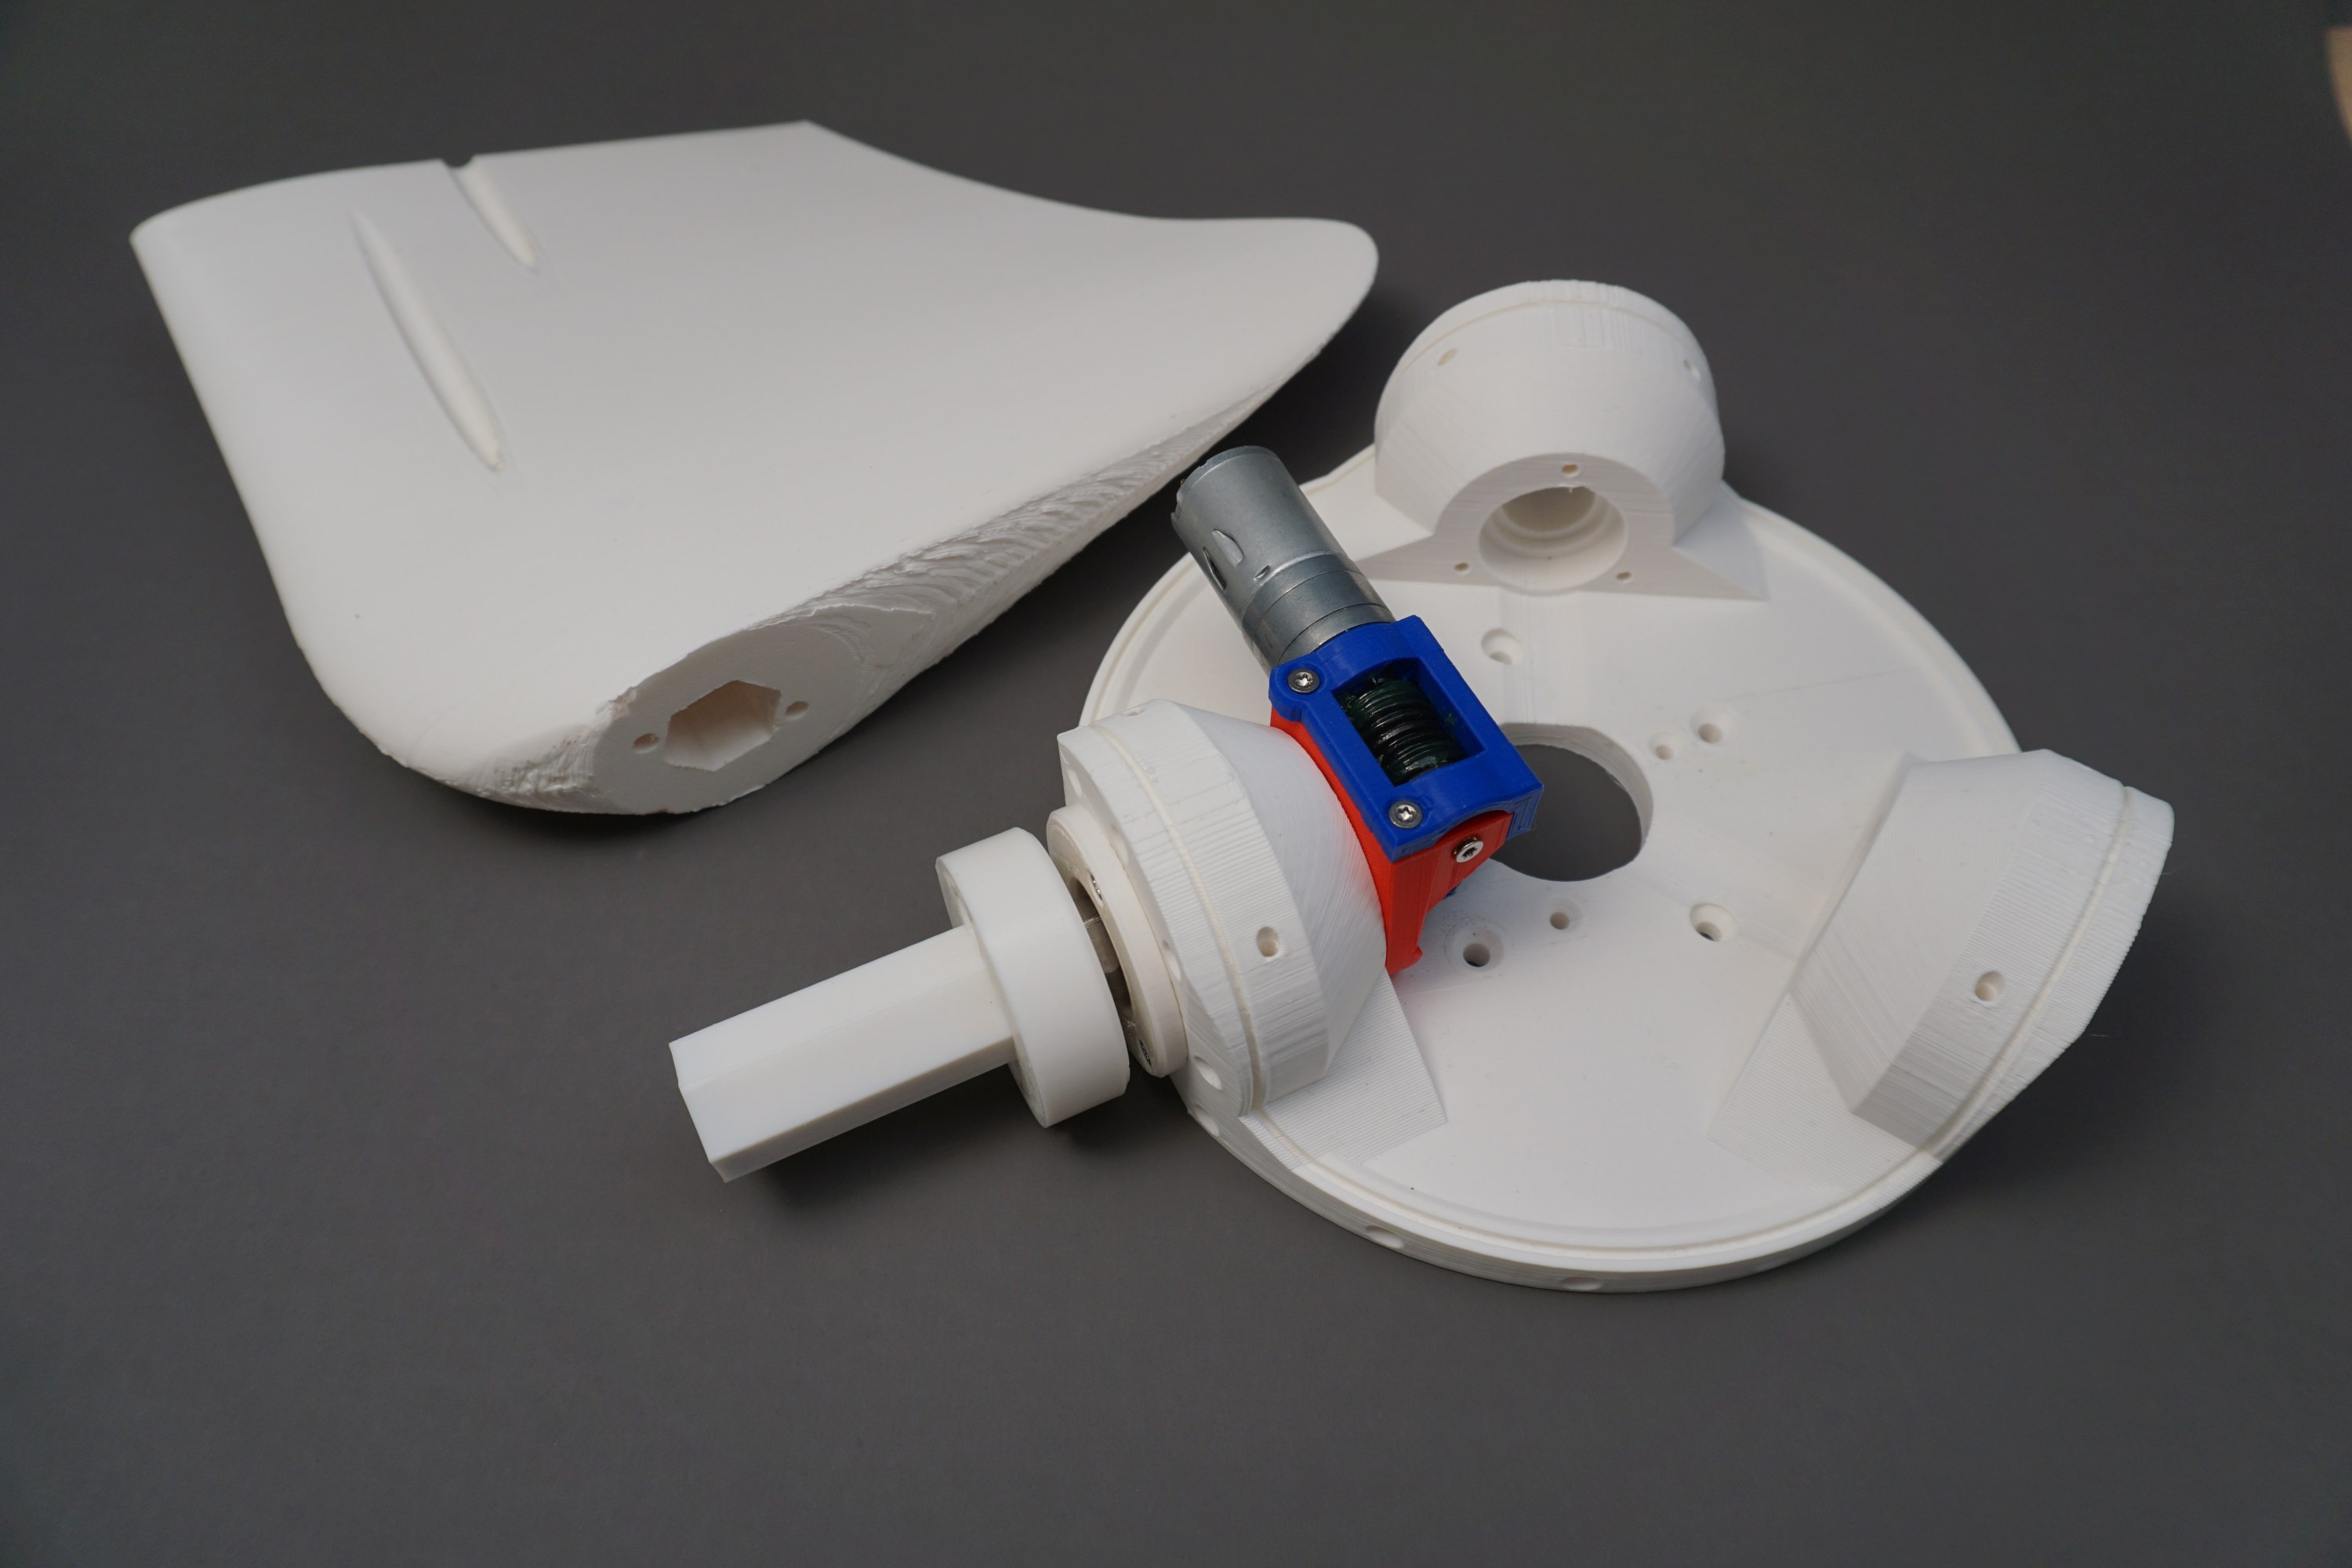
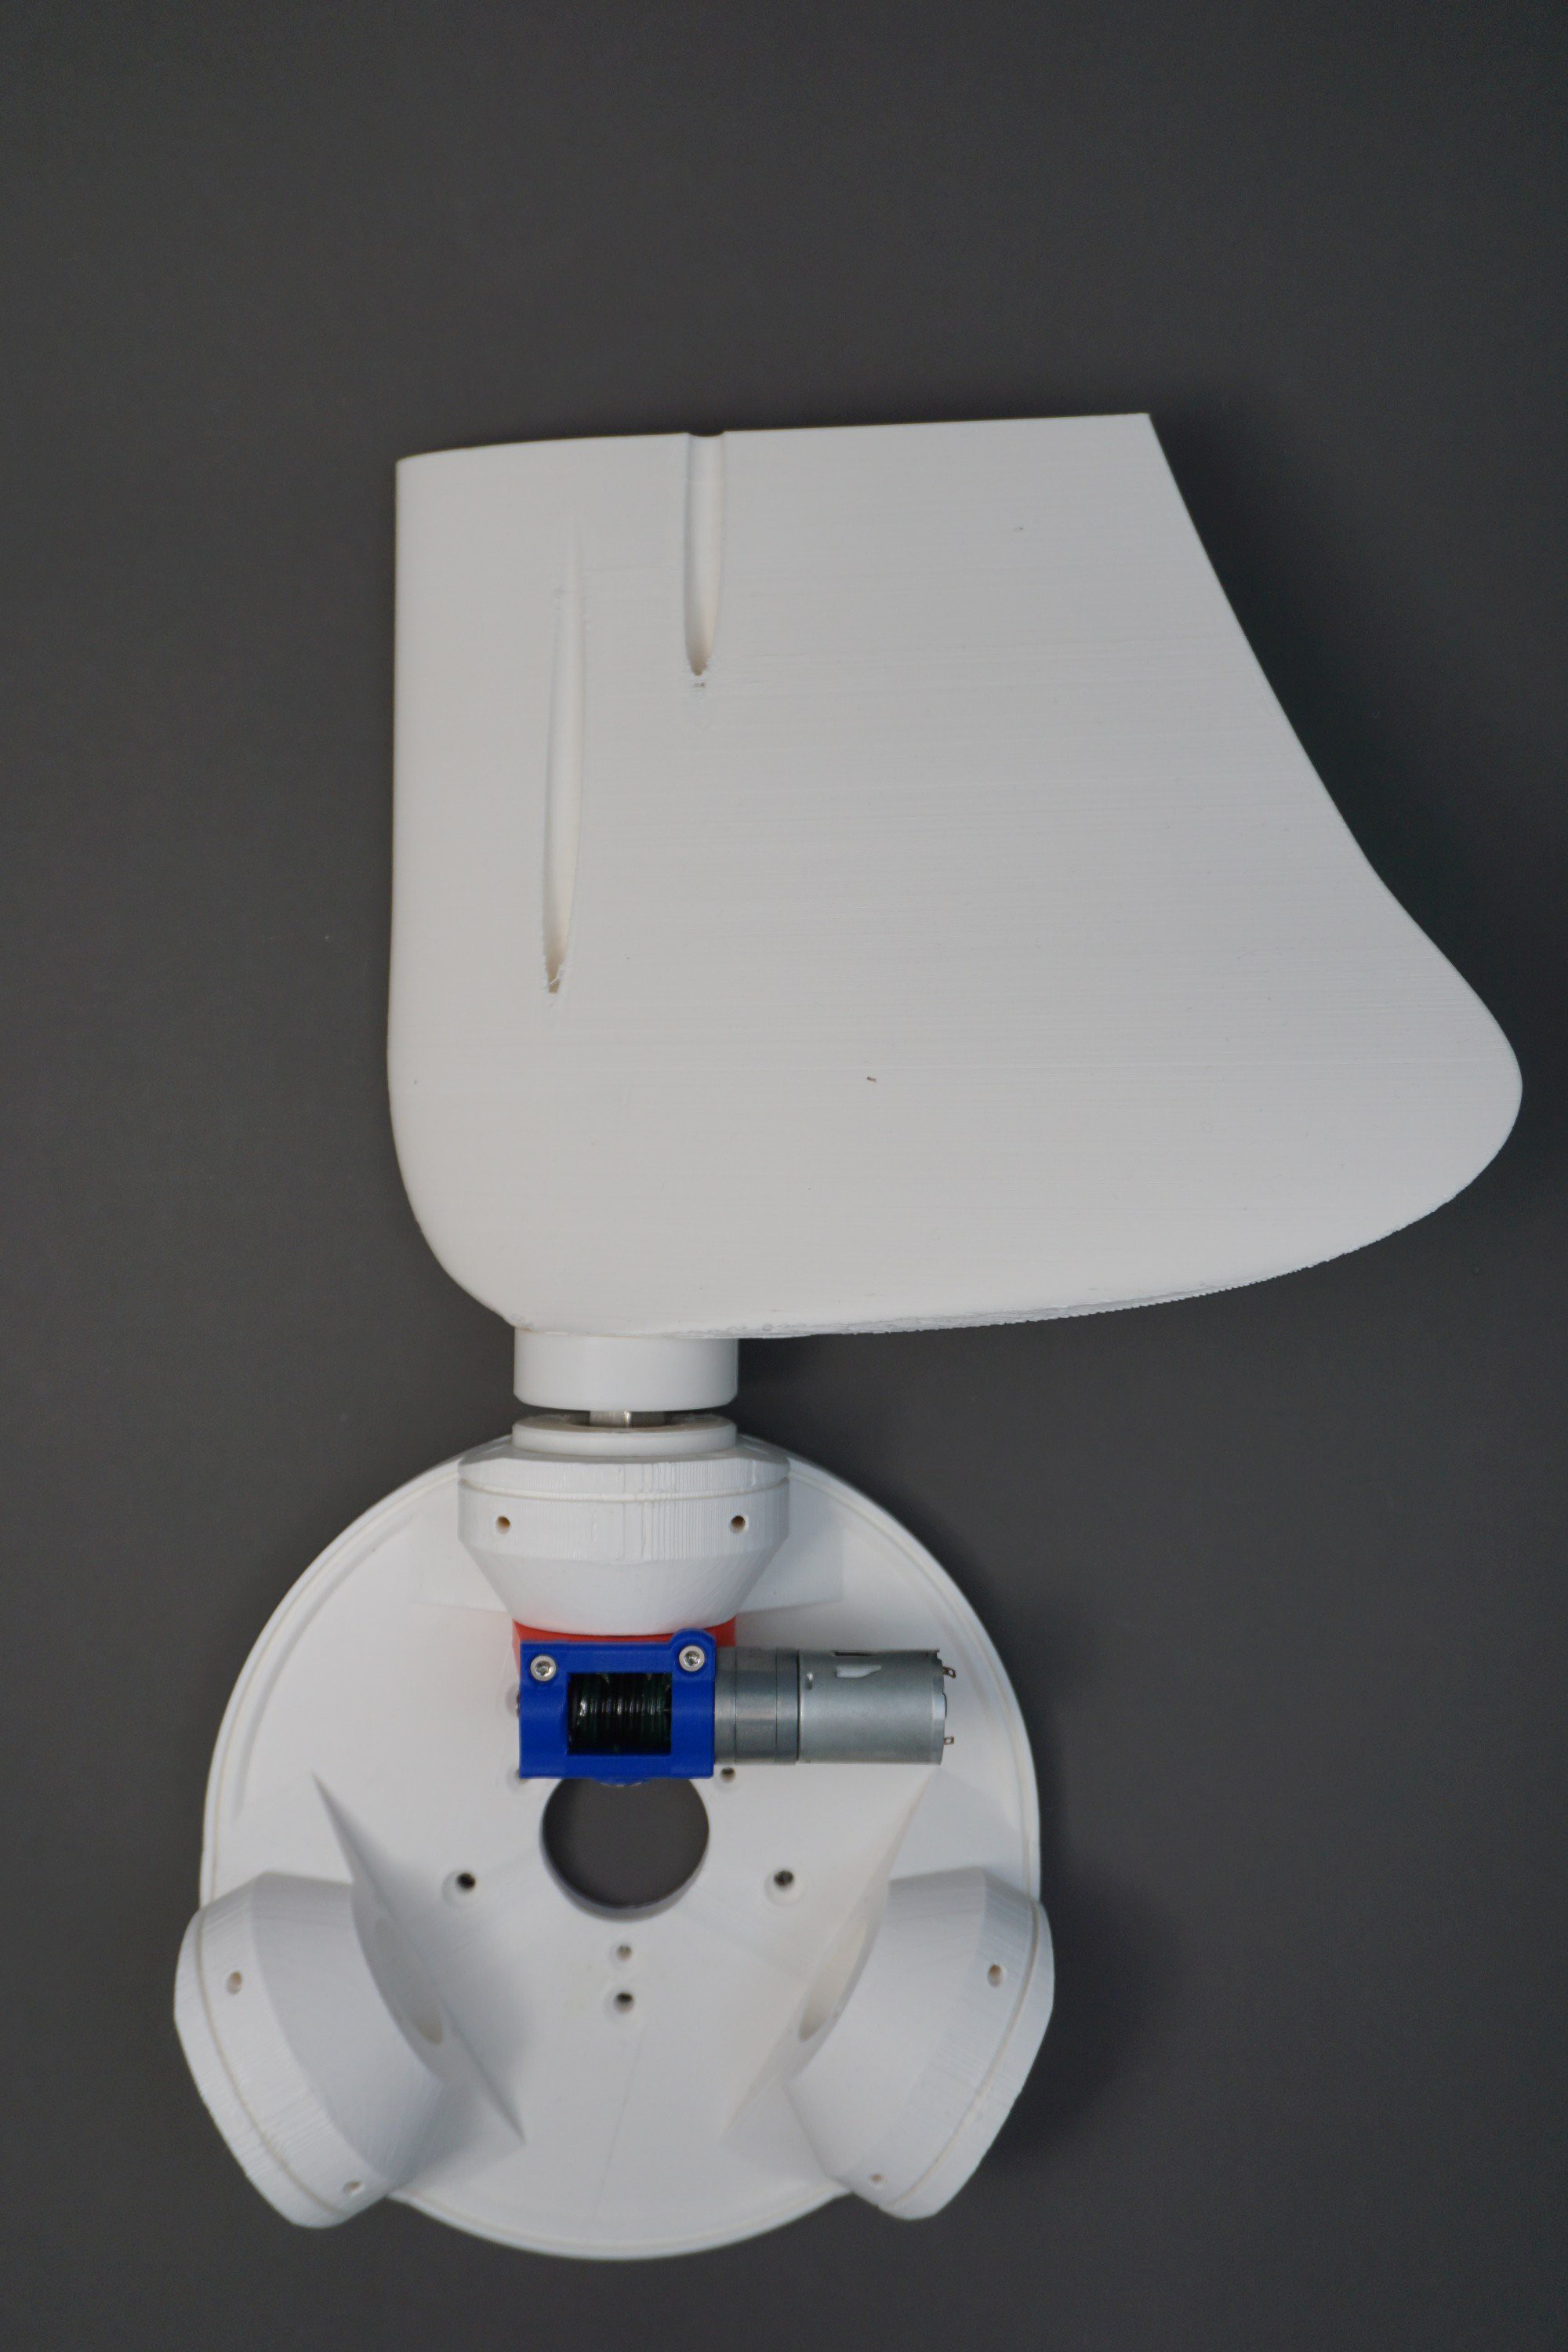
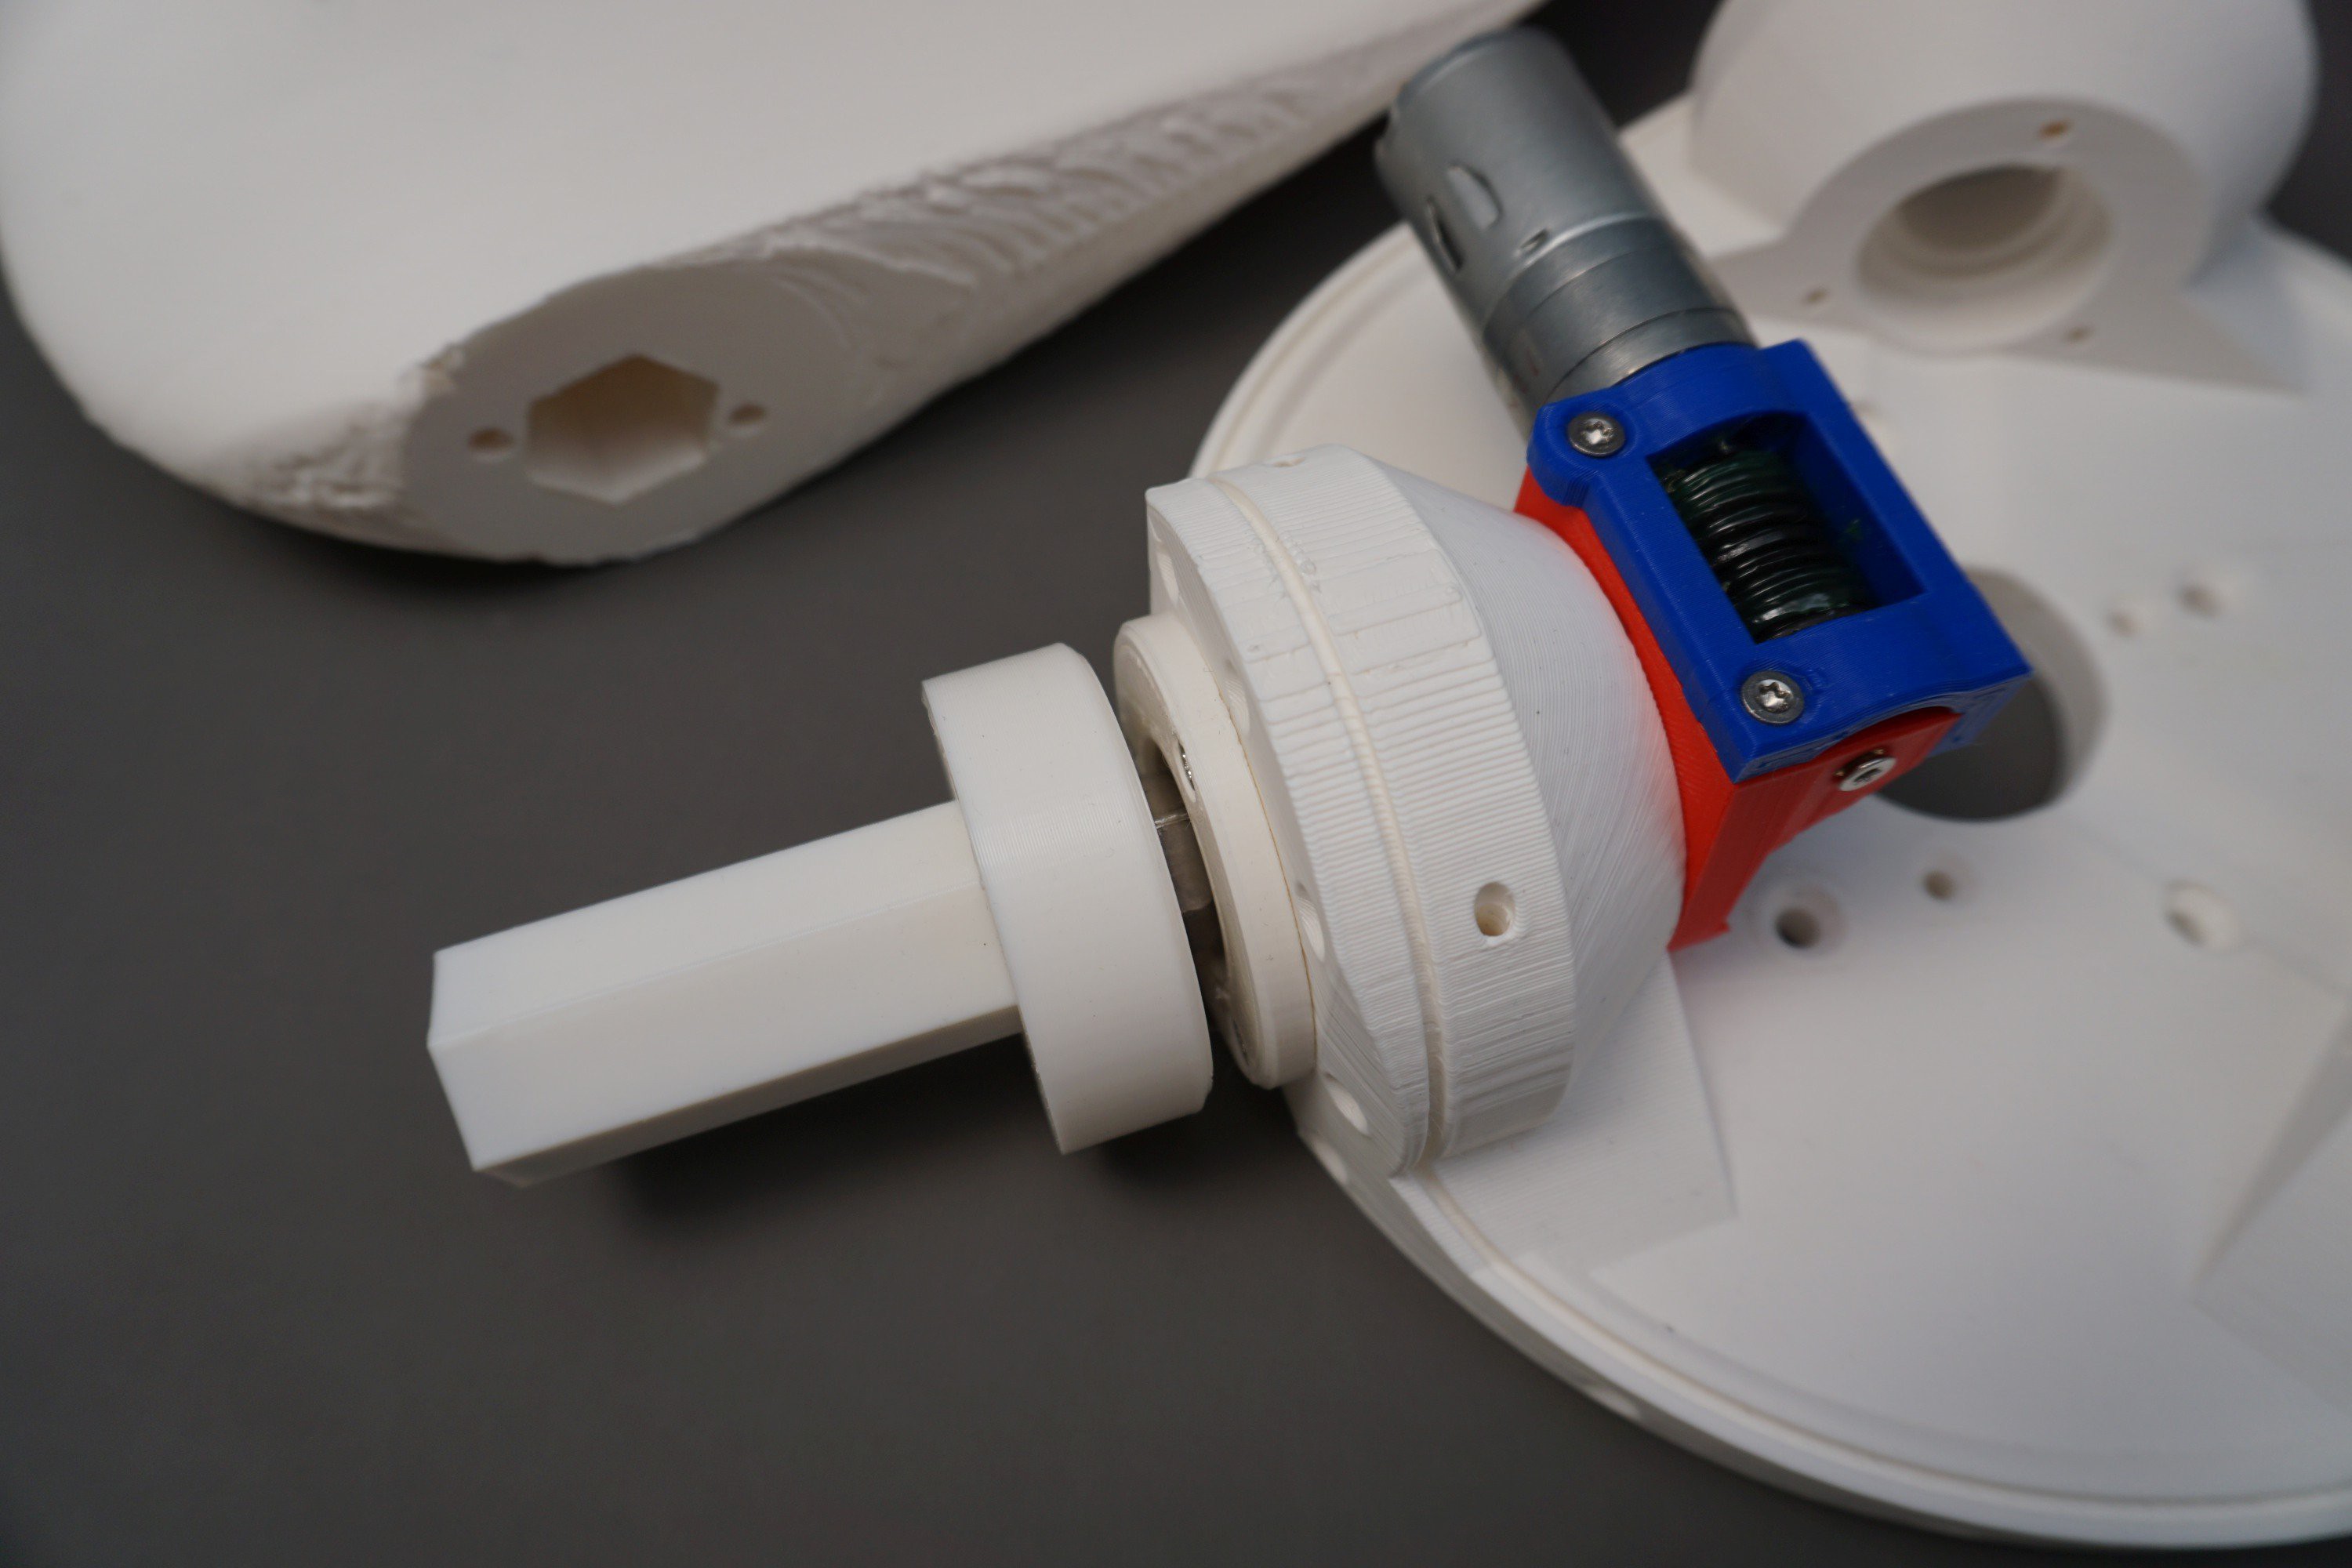
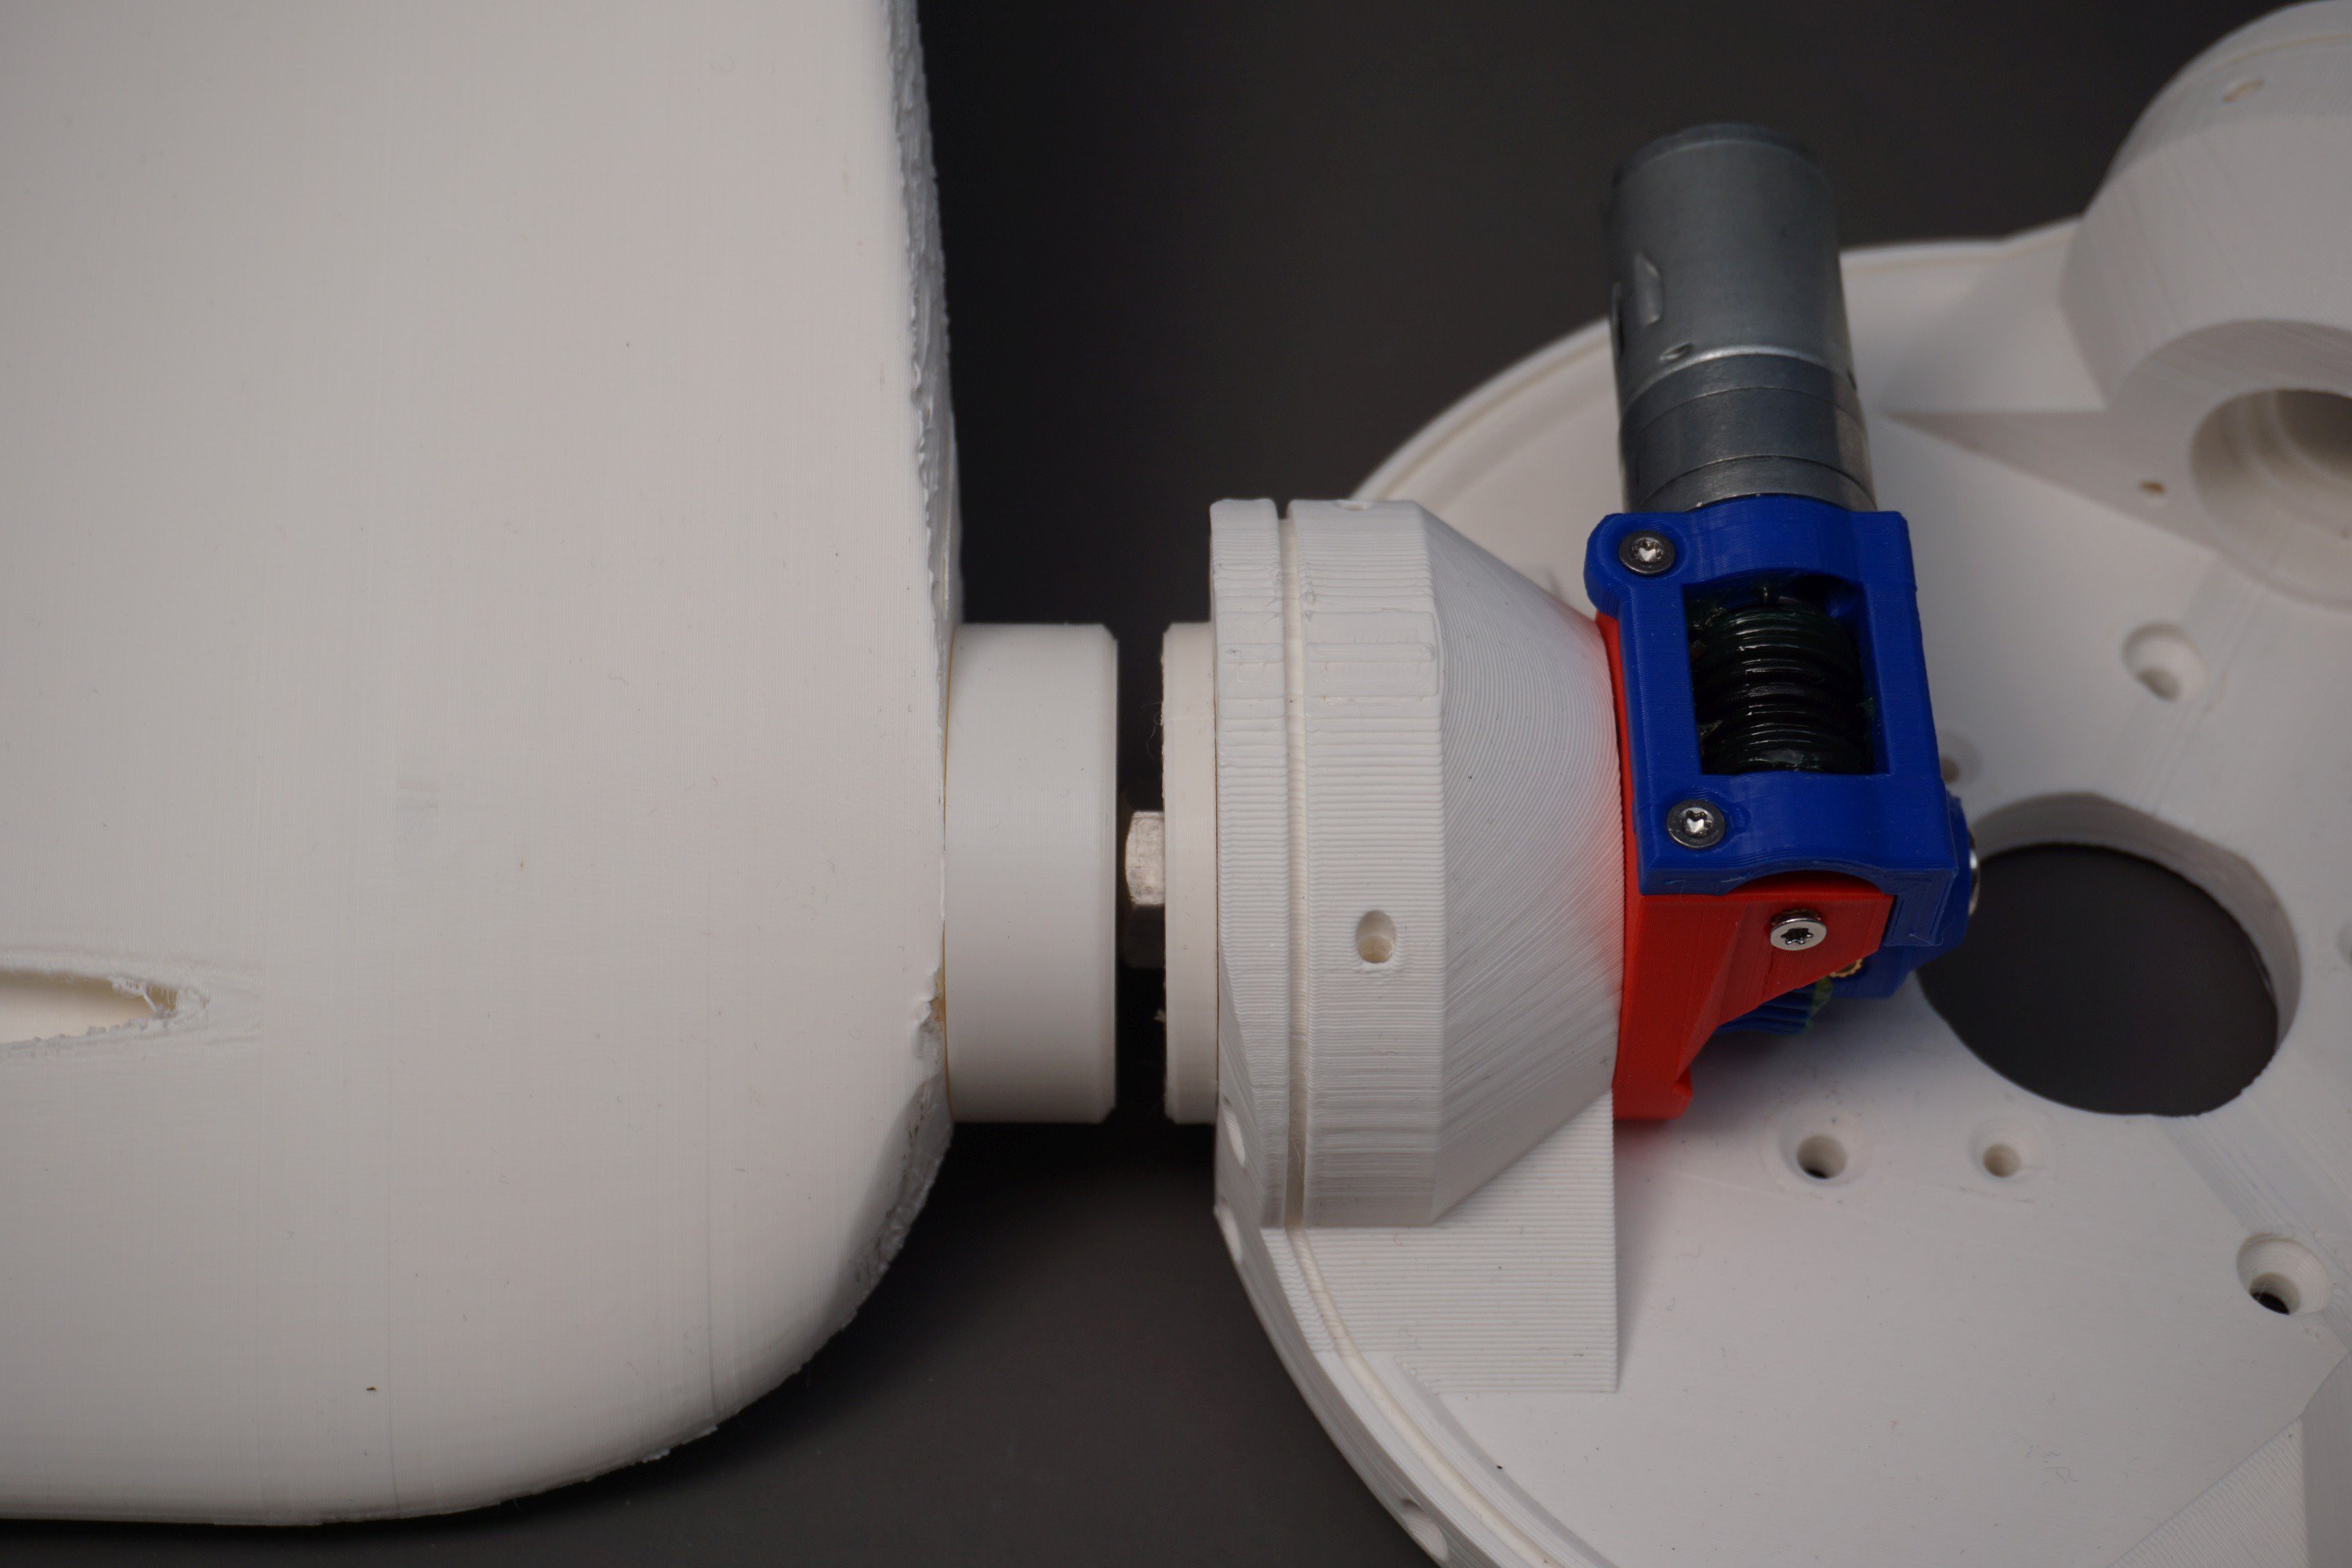
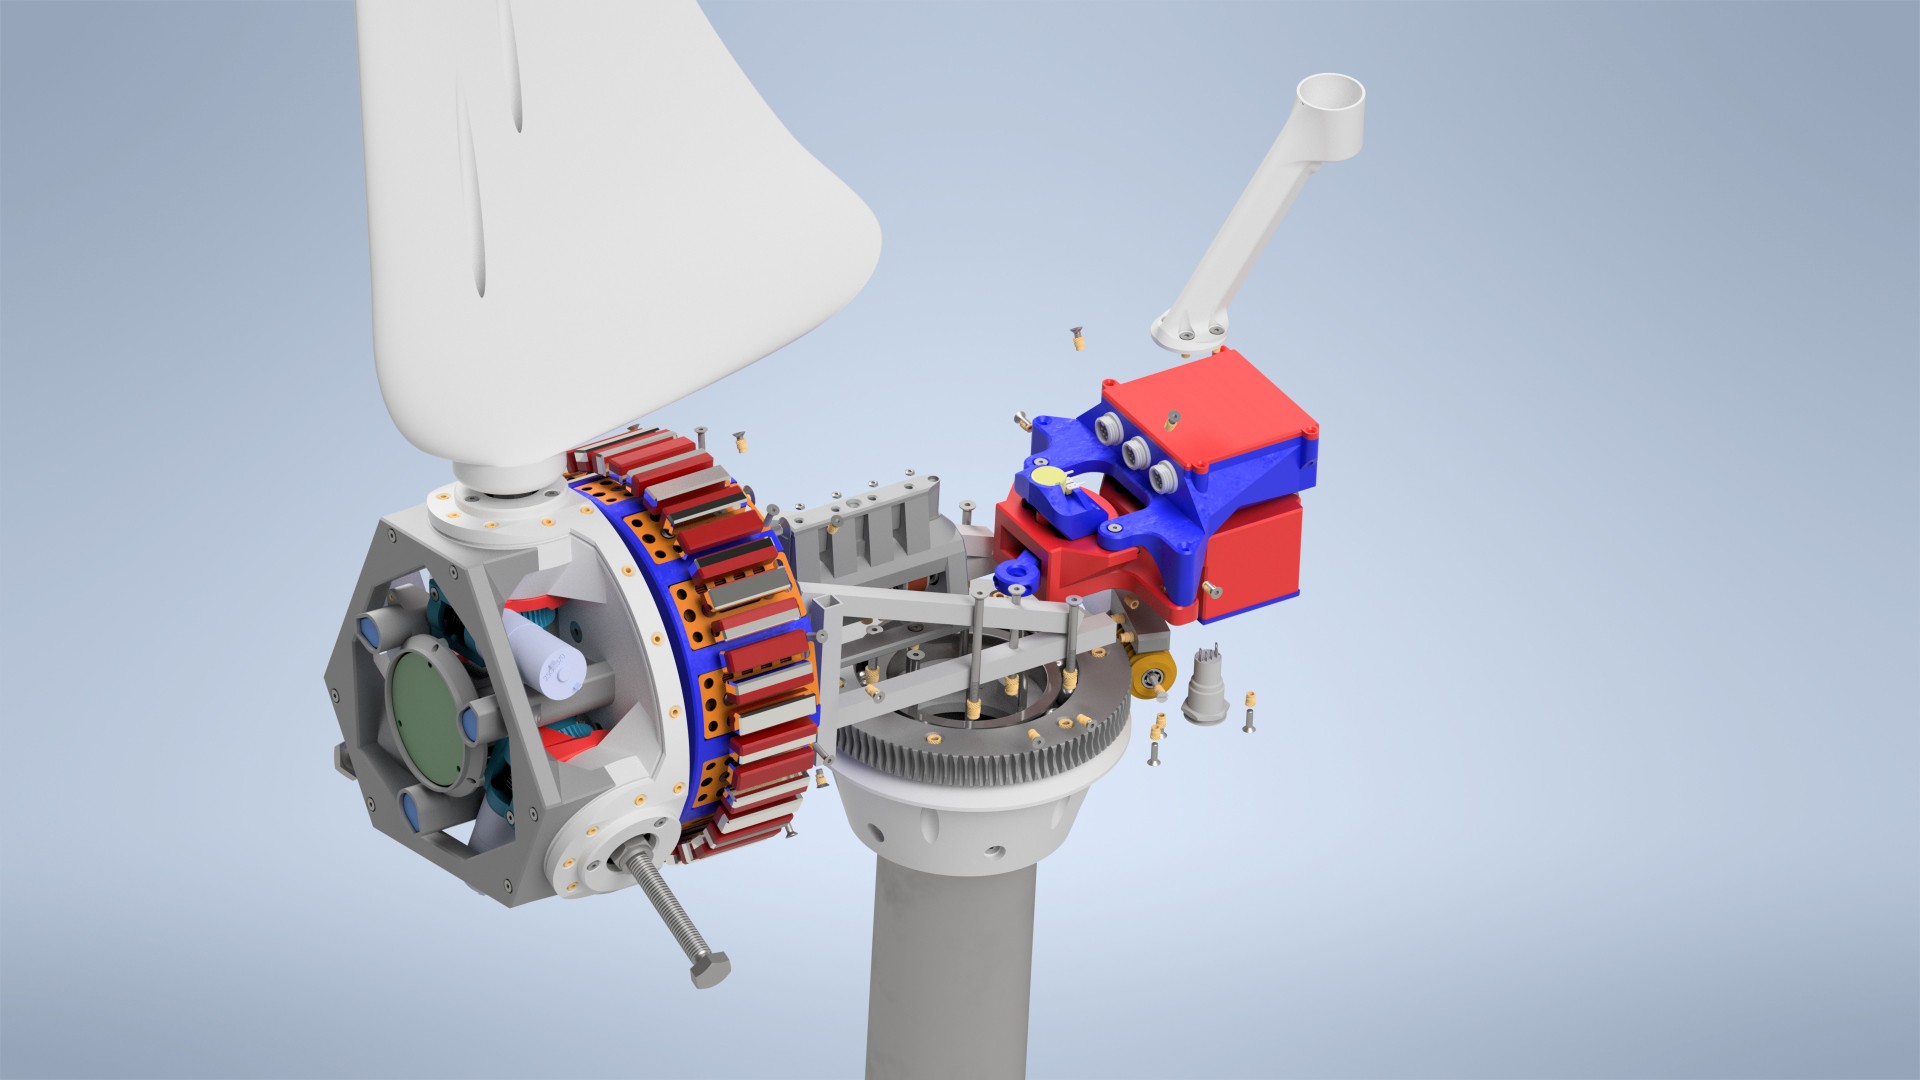
- Mechanical pitch control not reliable on long term
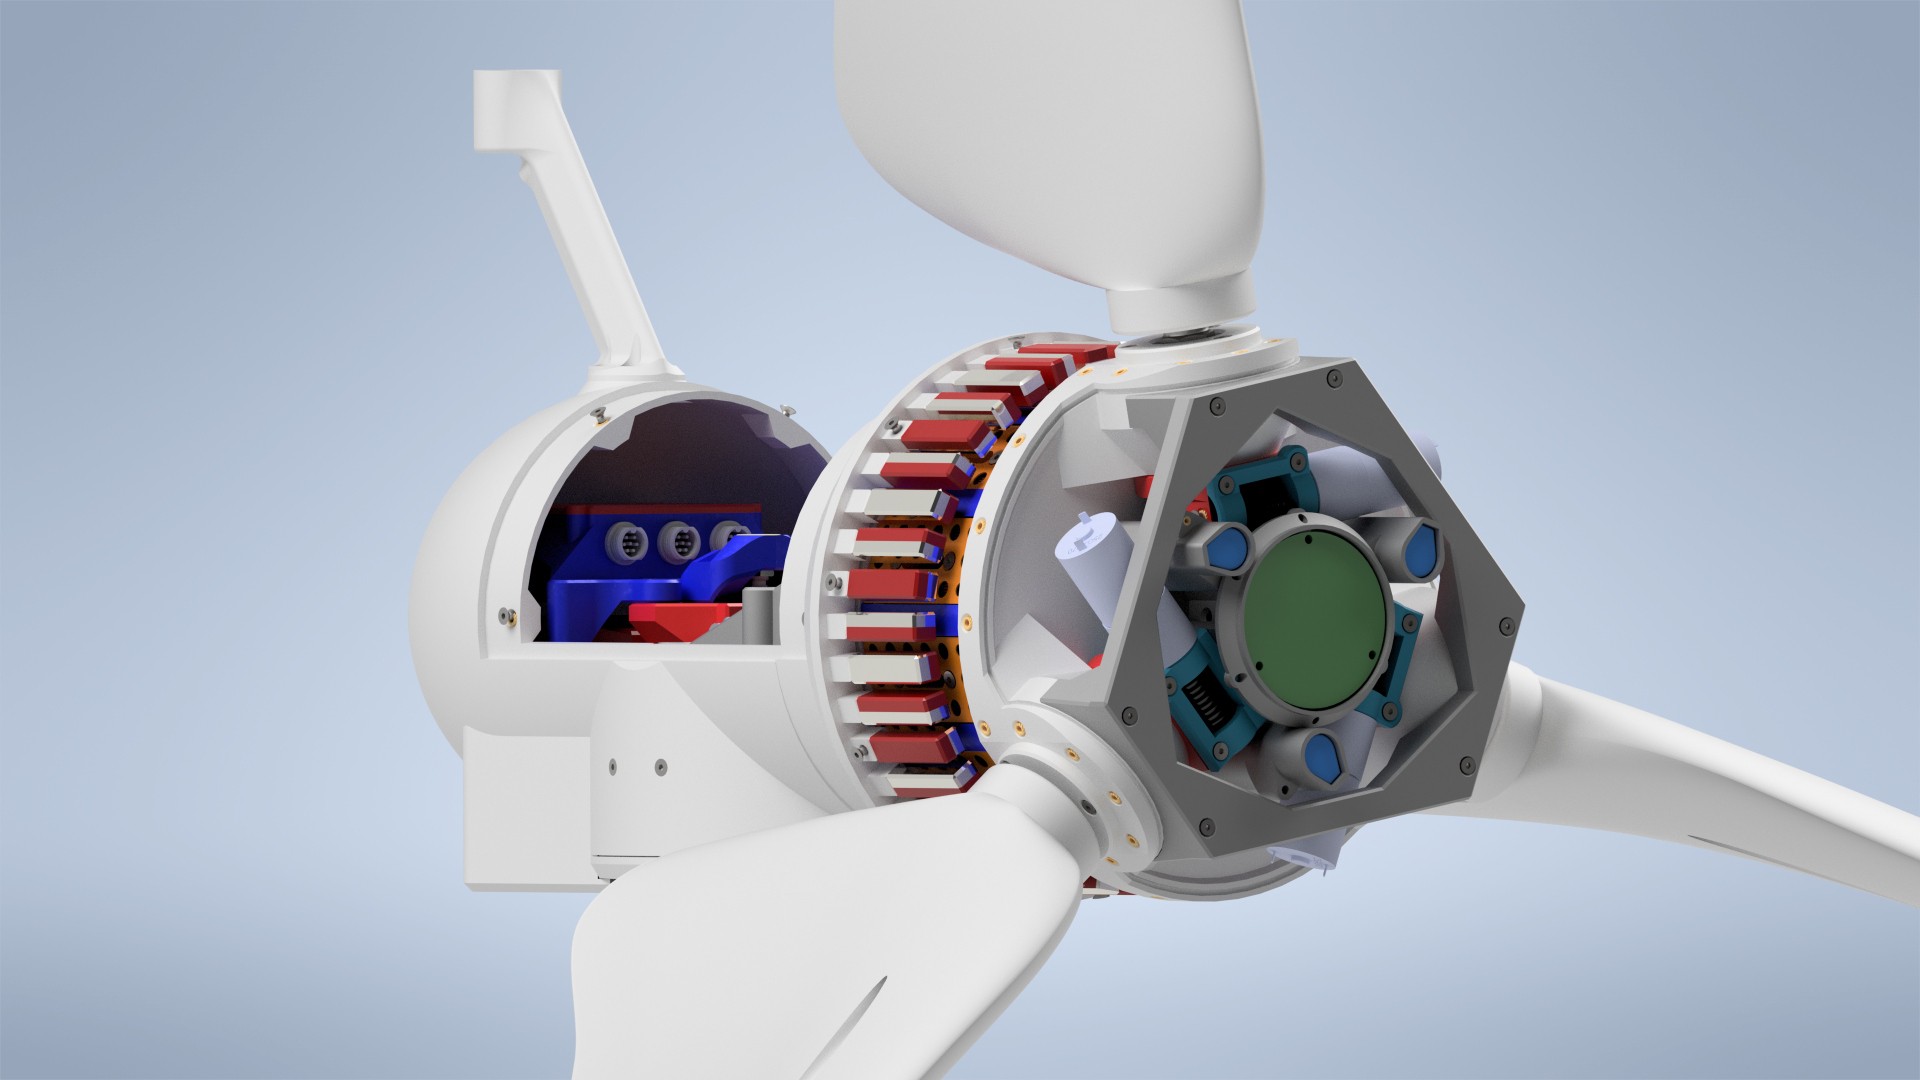
- Gondola and windvane use a lot of space
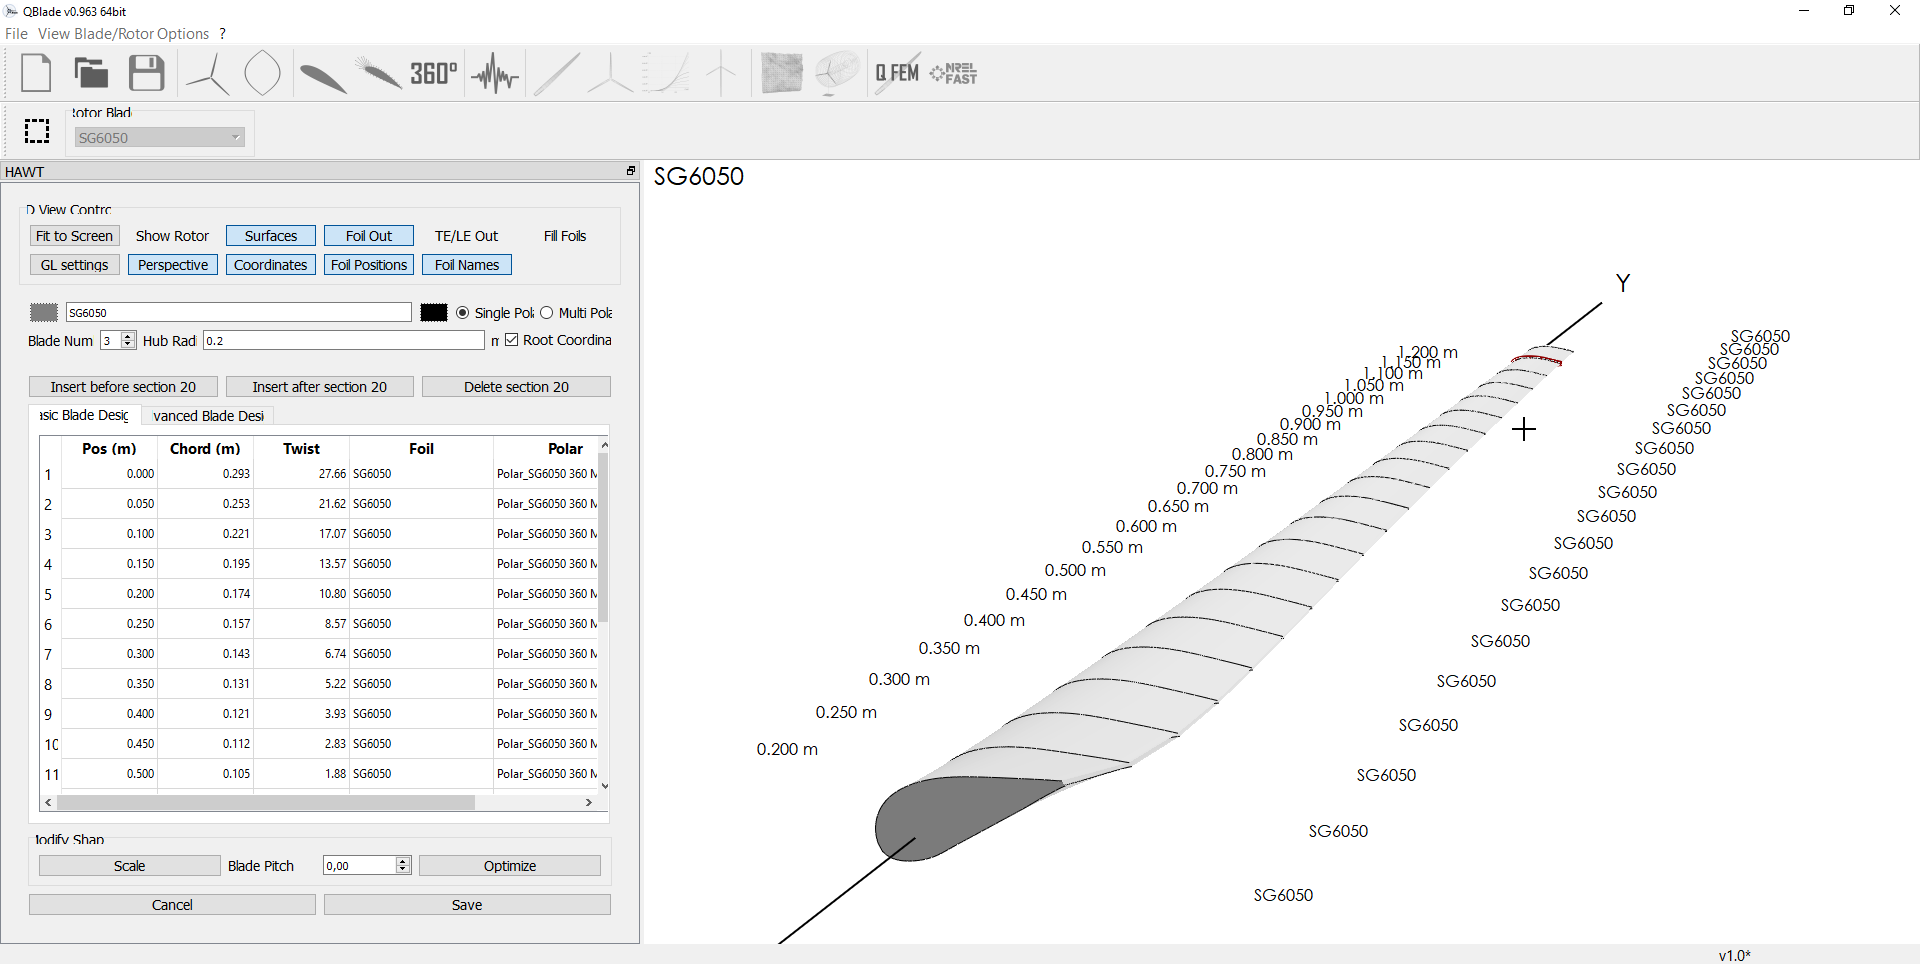
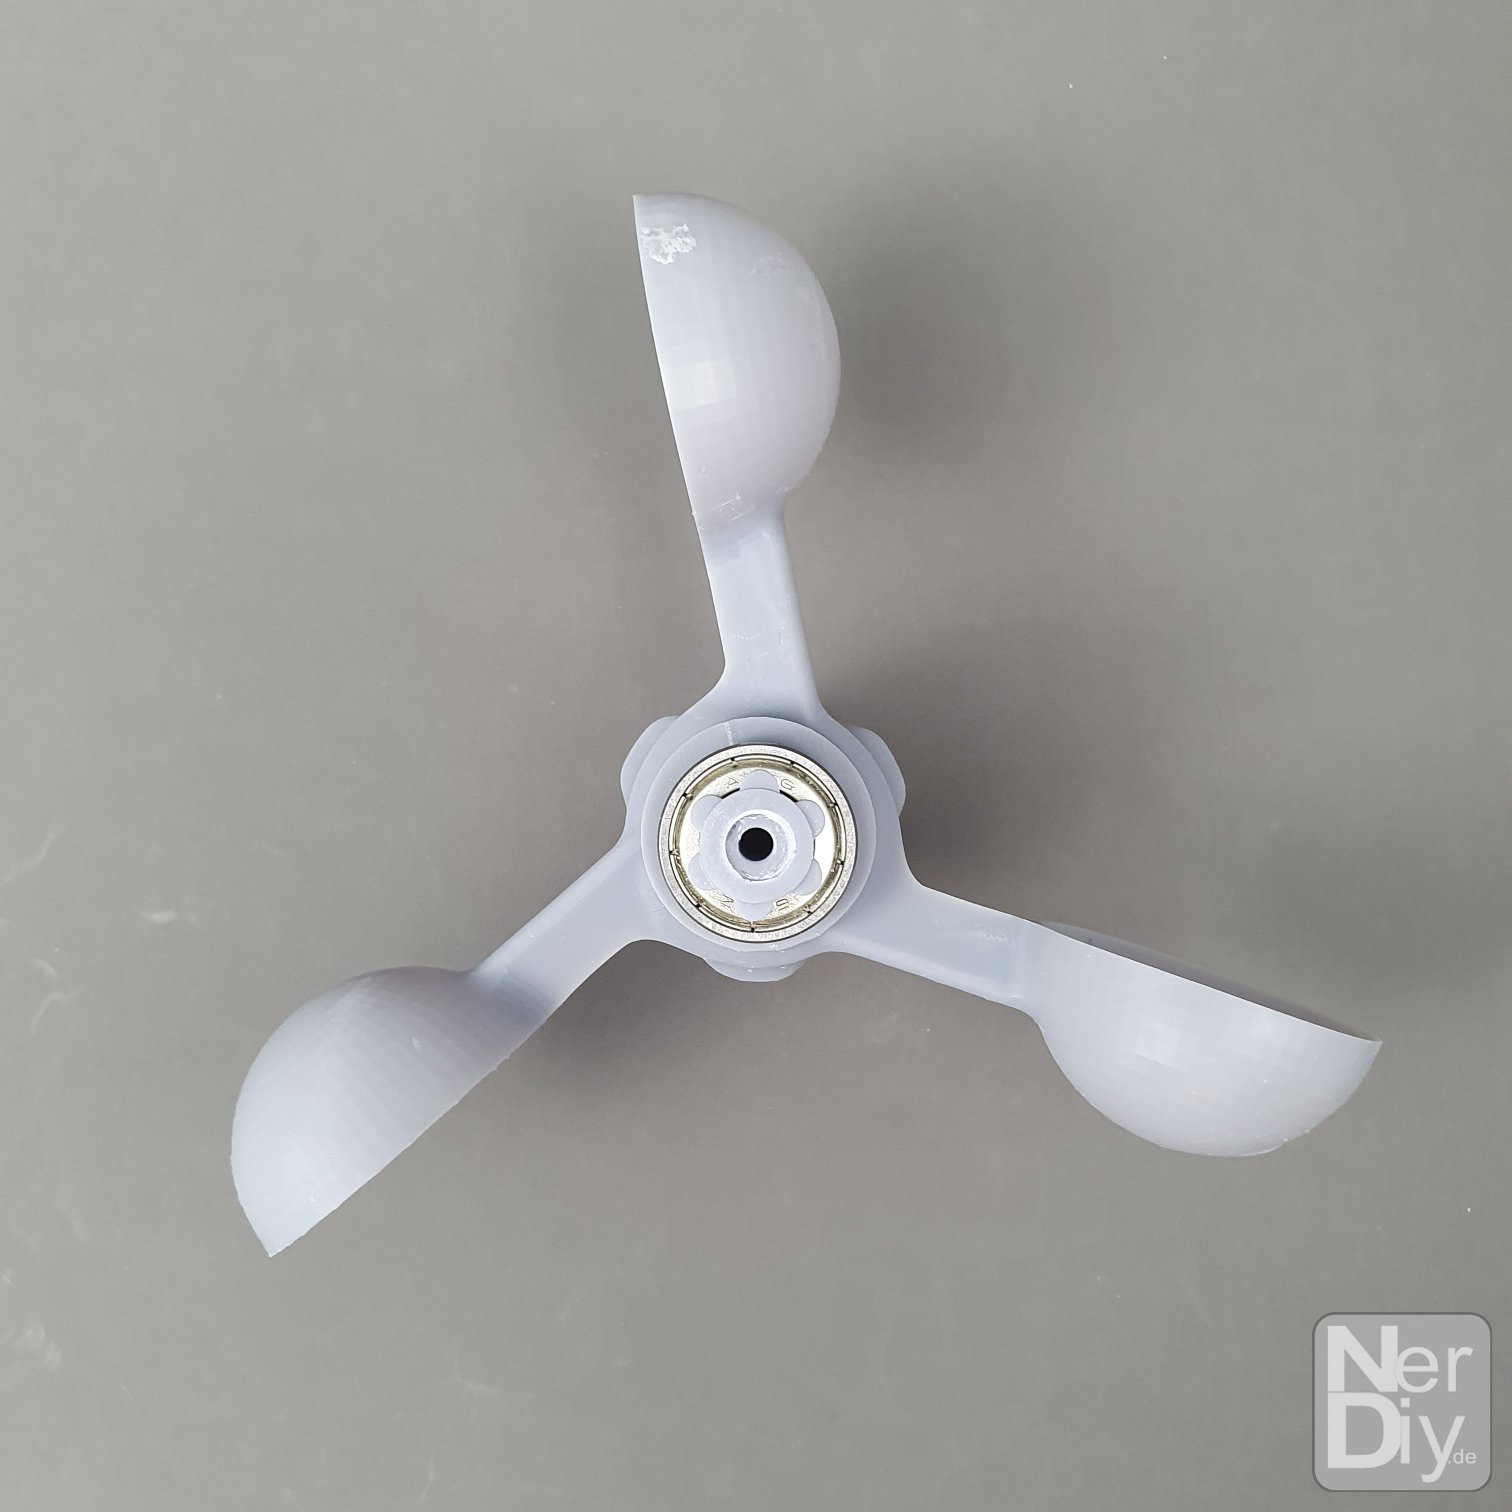
- Blades not tapered or optimized for the turbine and also difficult to build
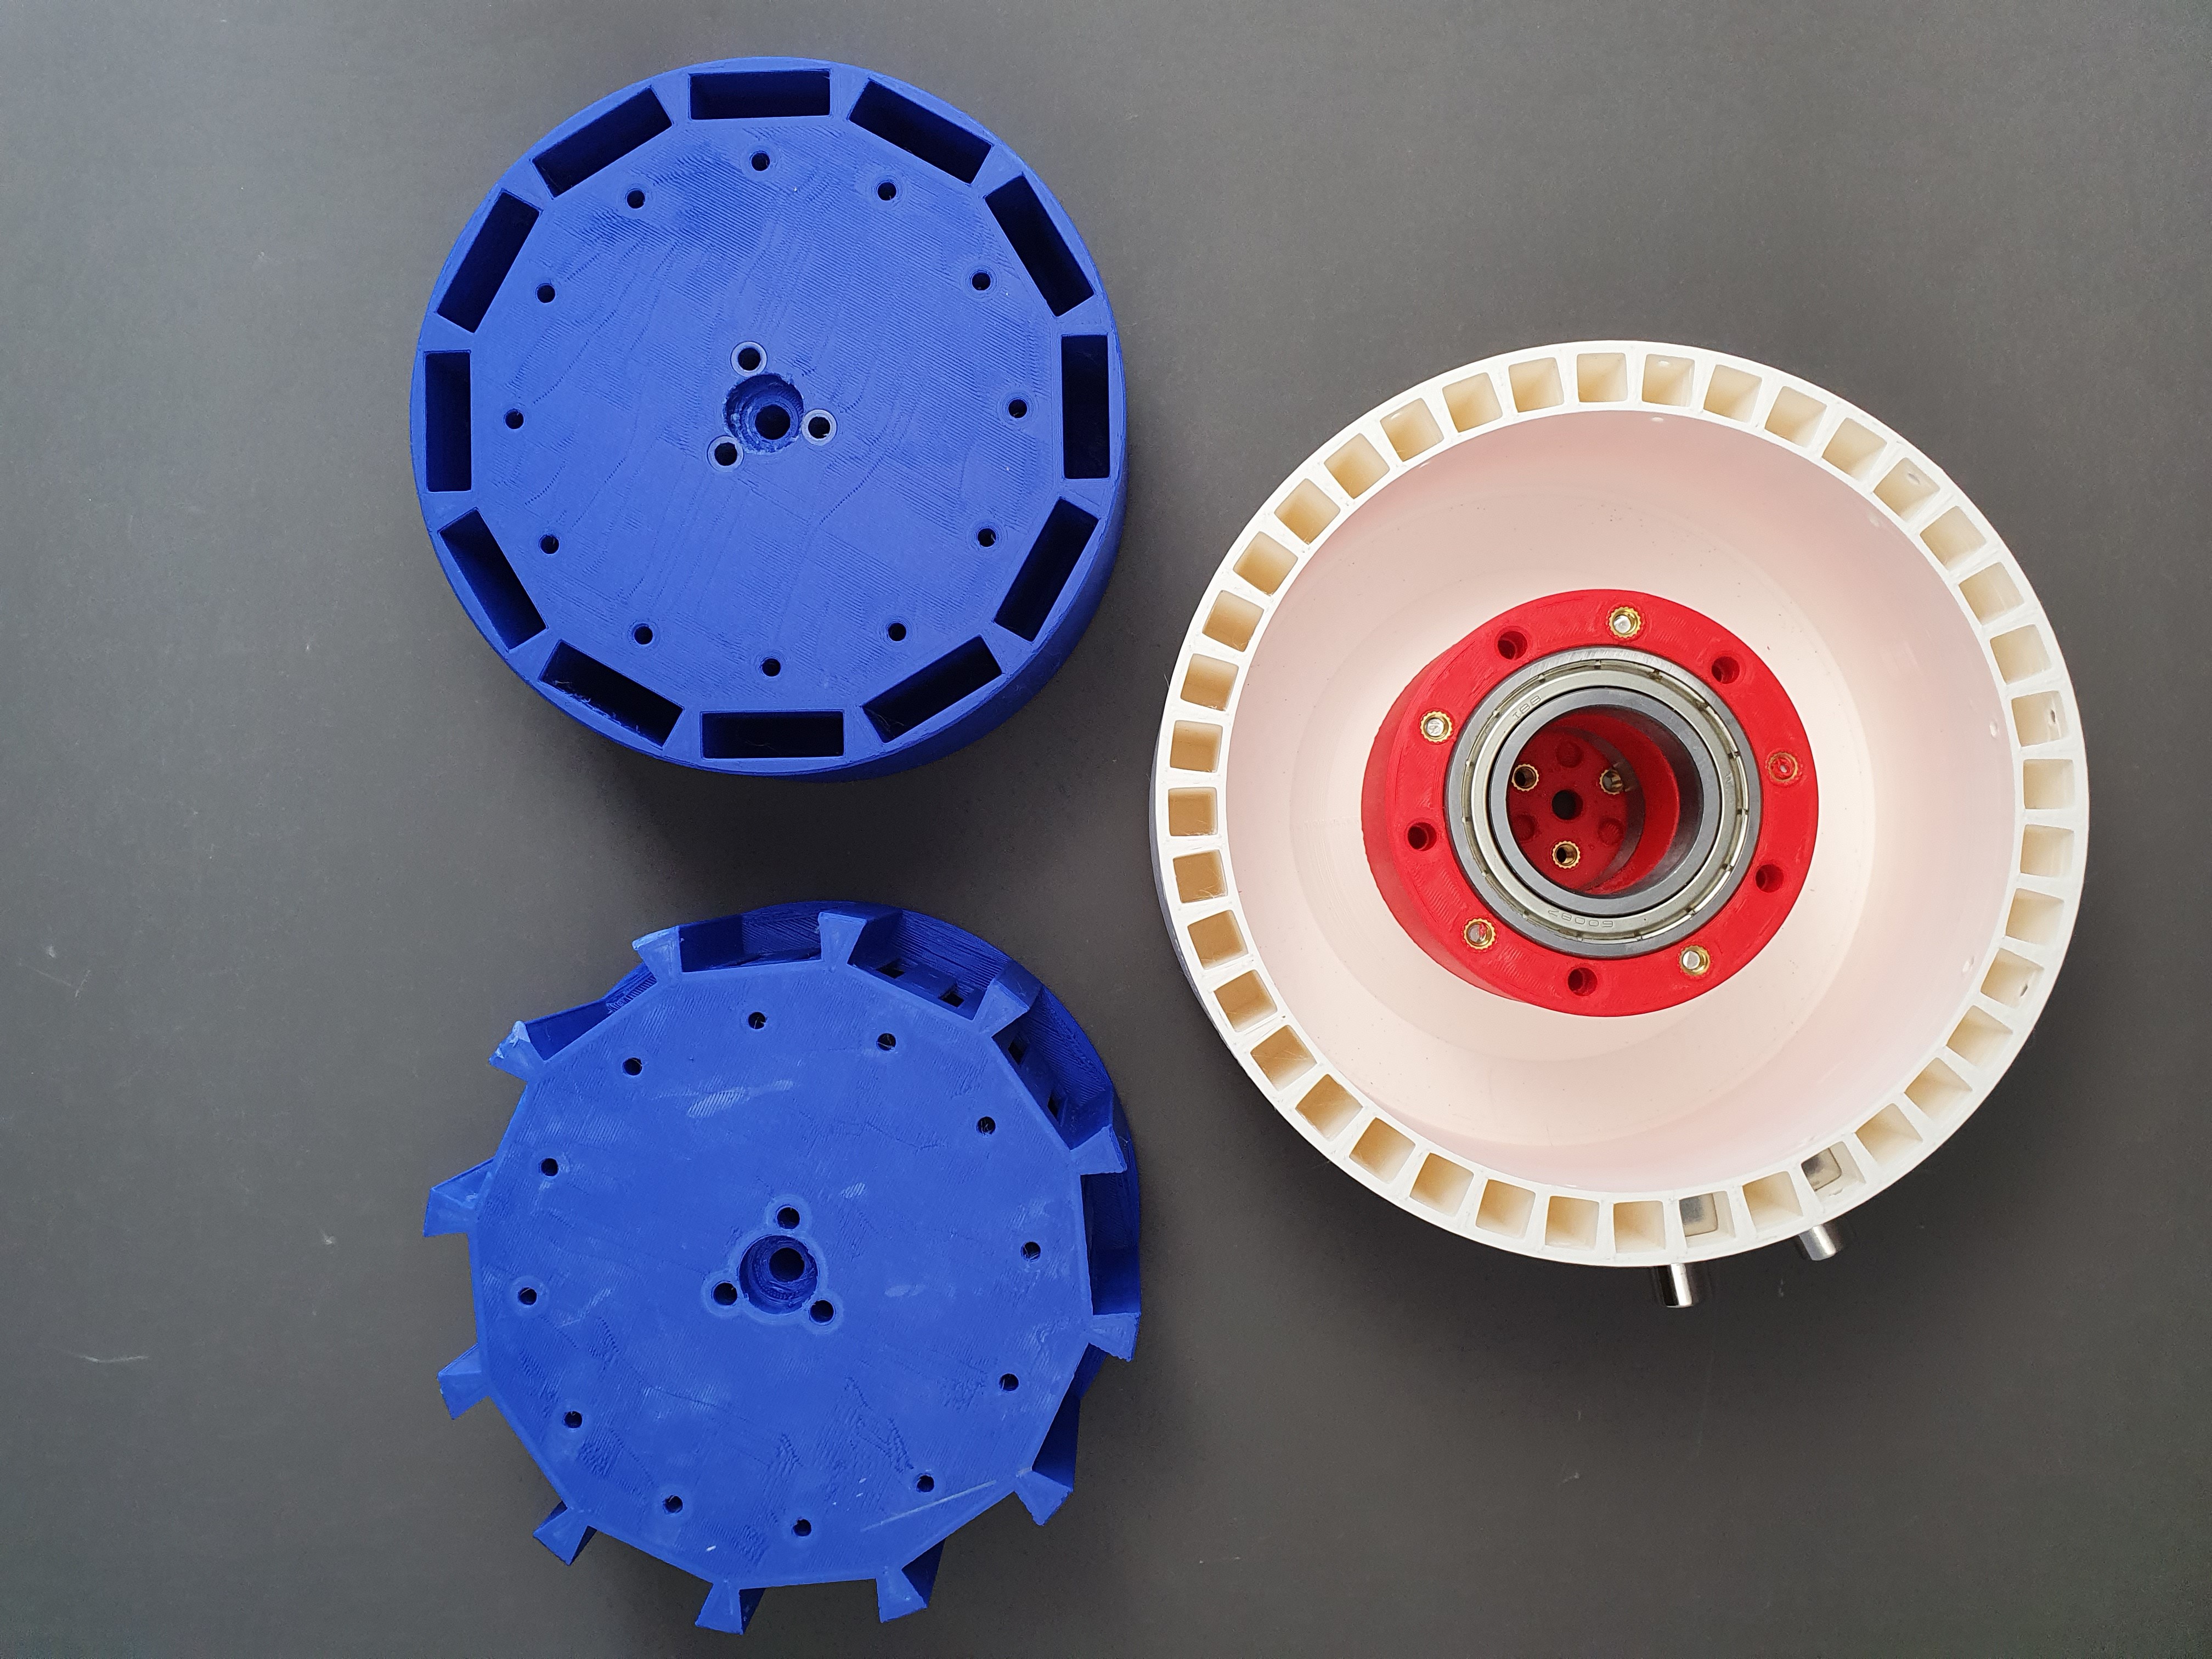
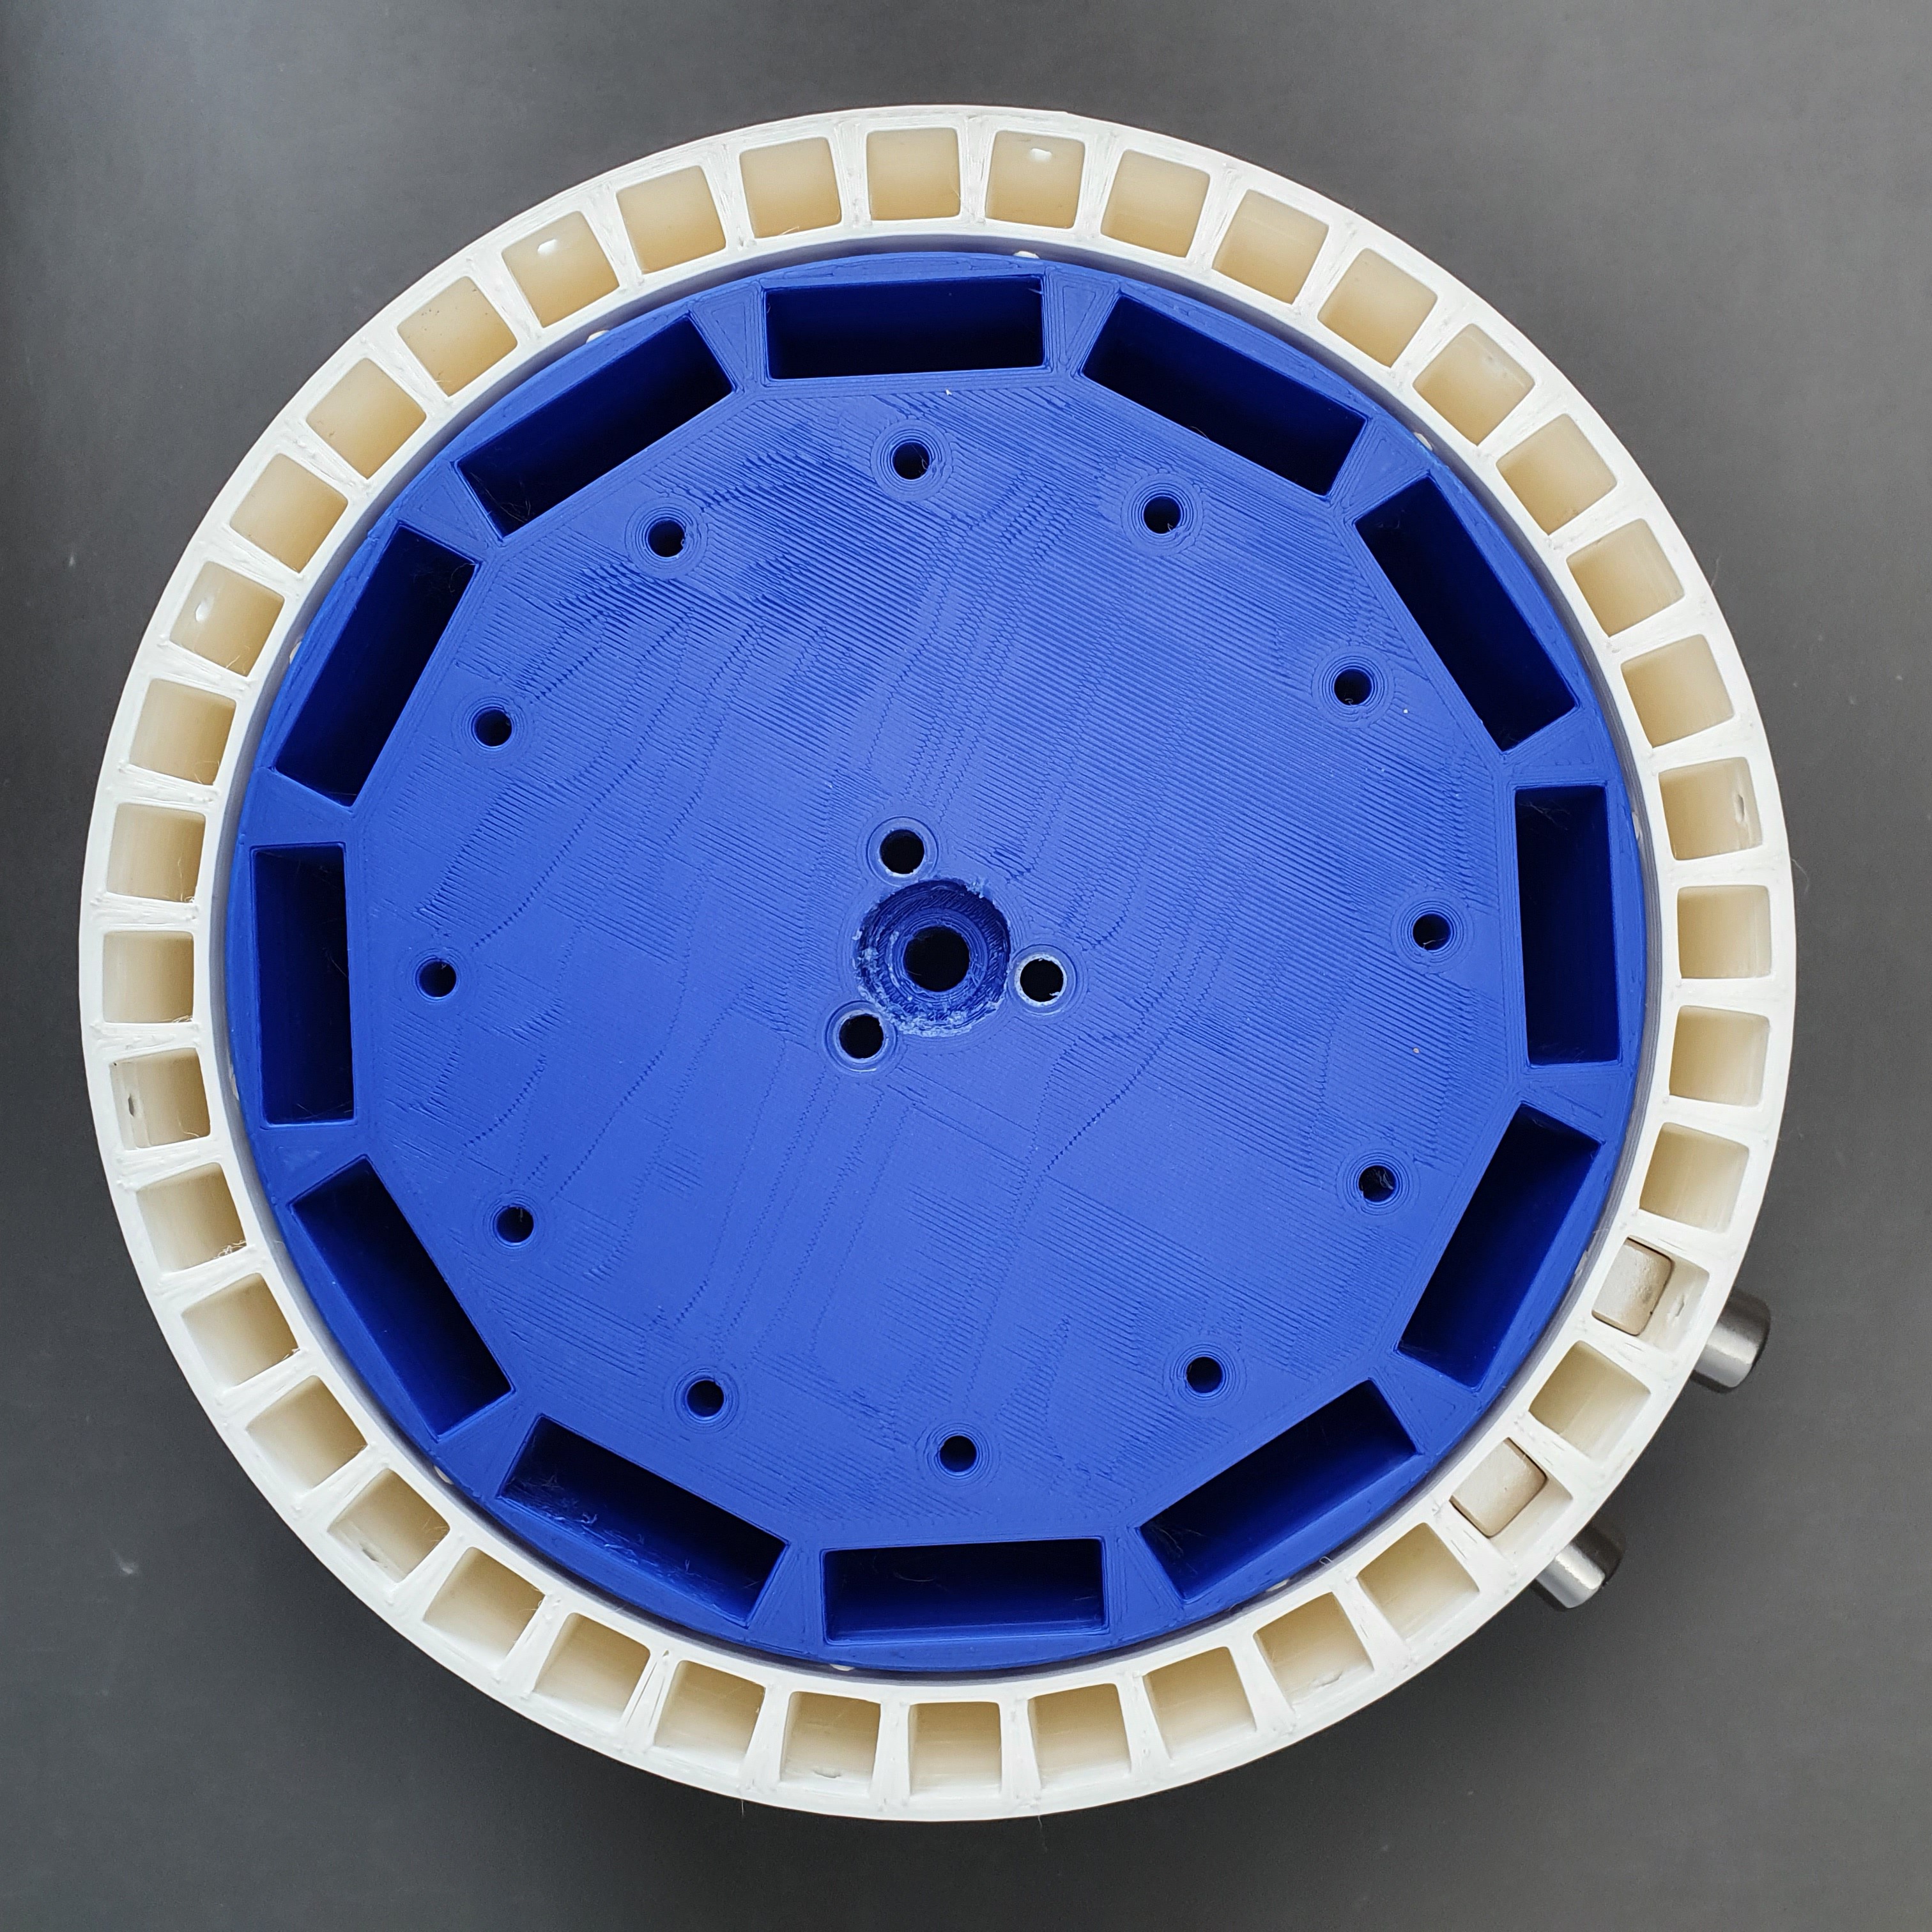
- Integrated generator has small power
- Complicated wiring of the electronics
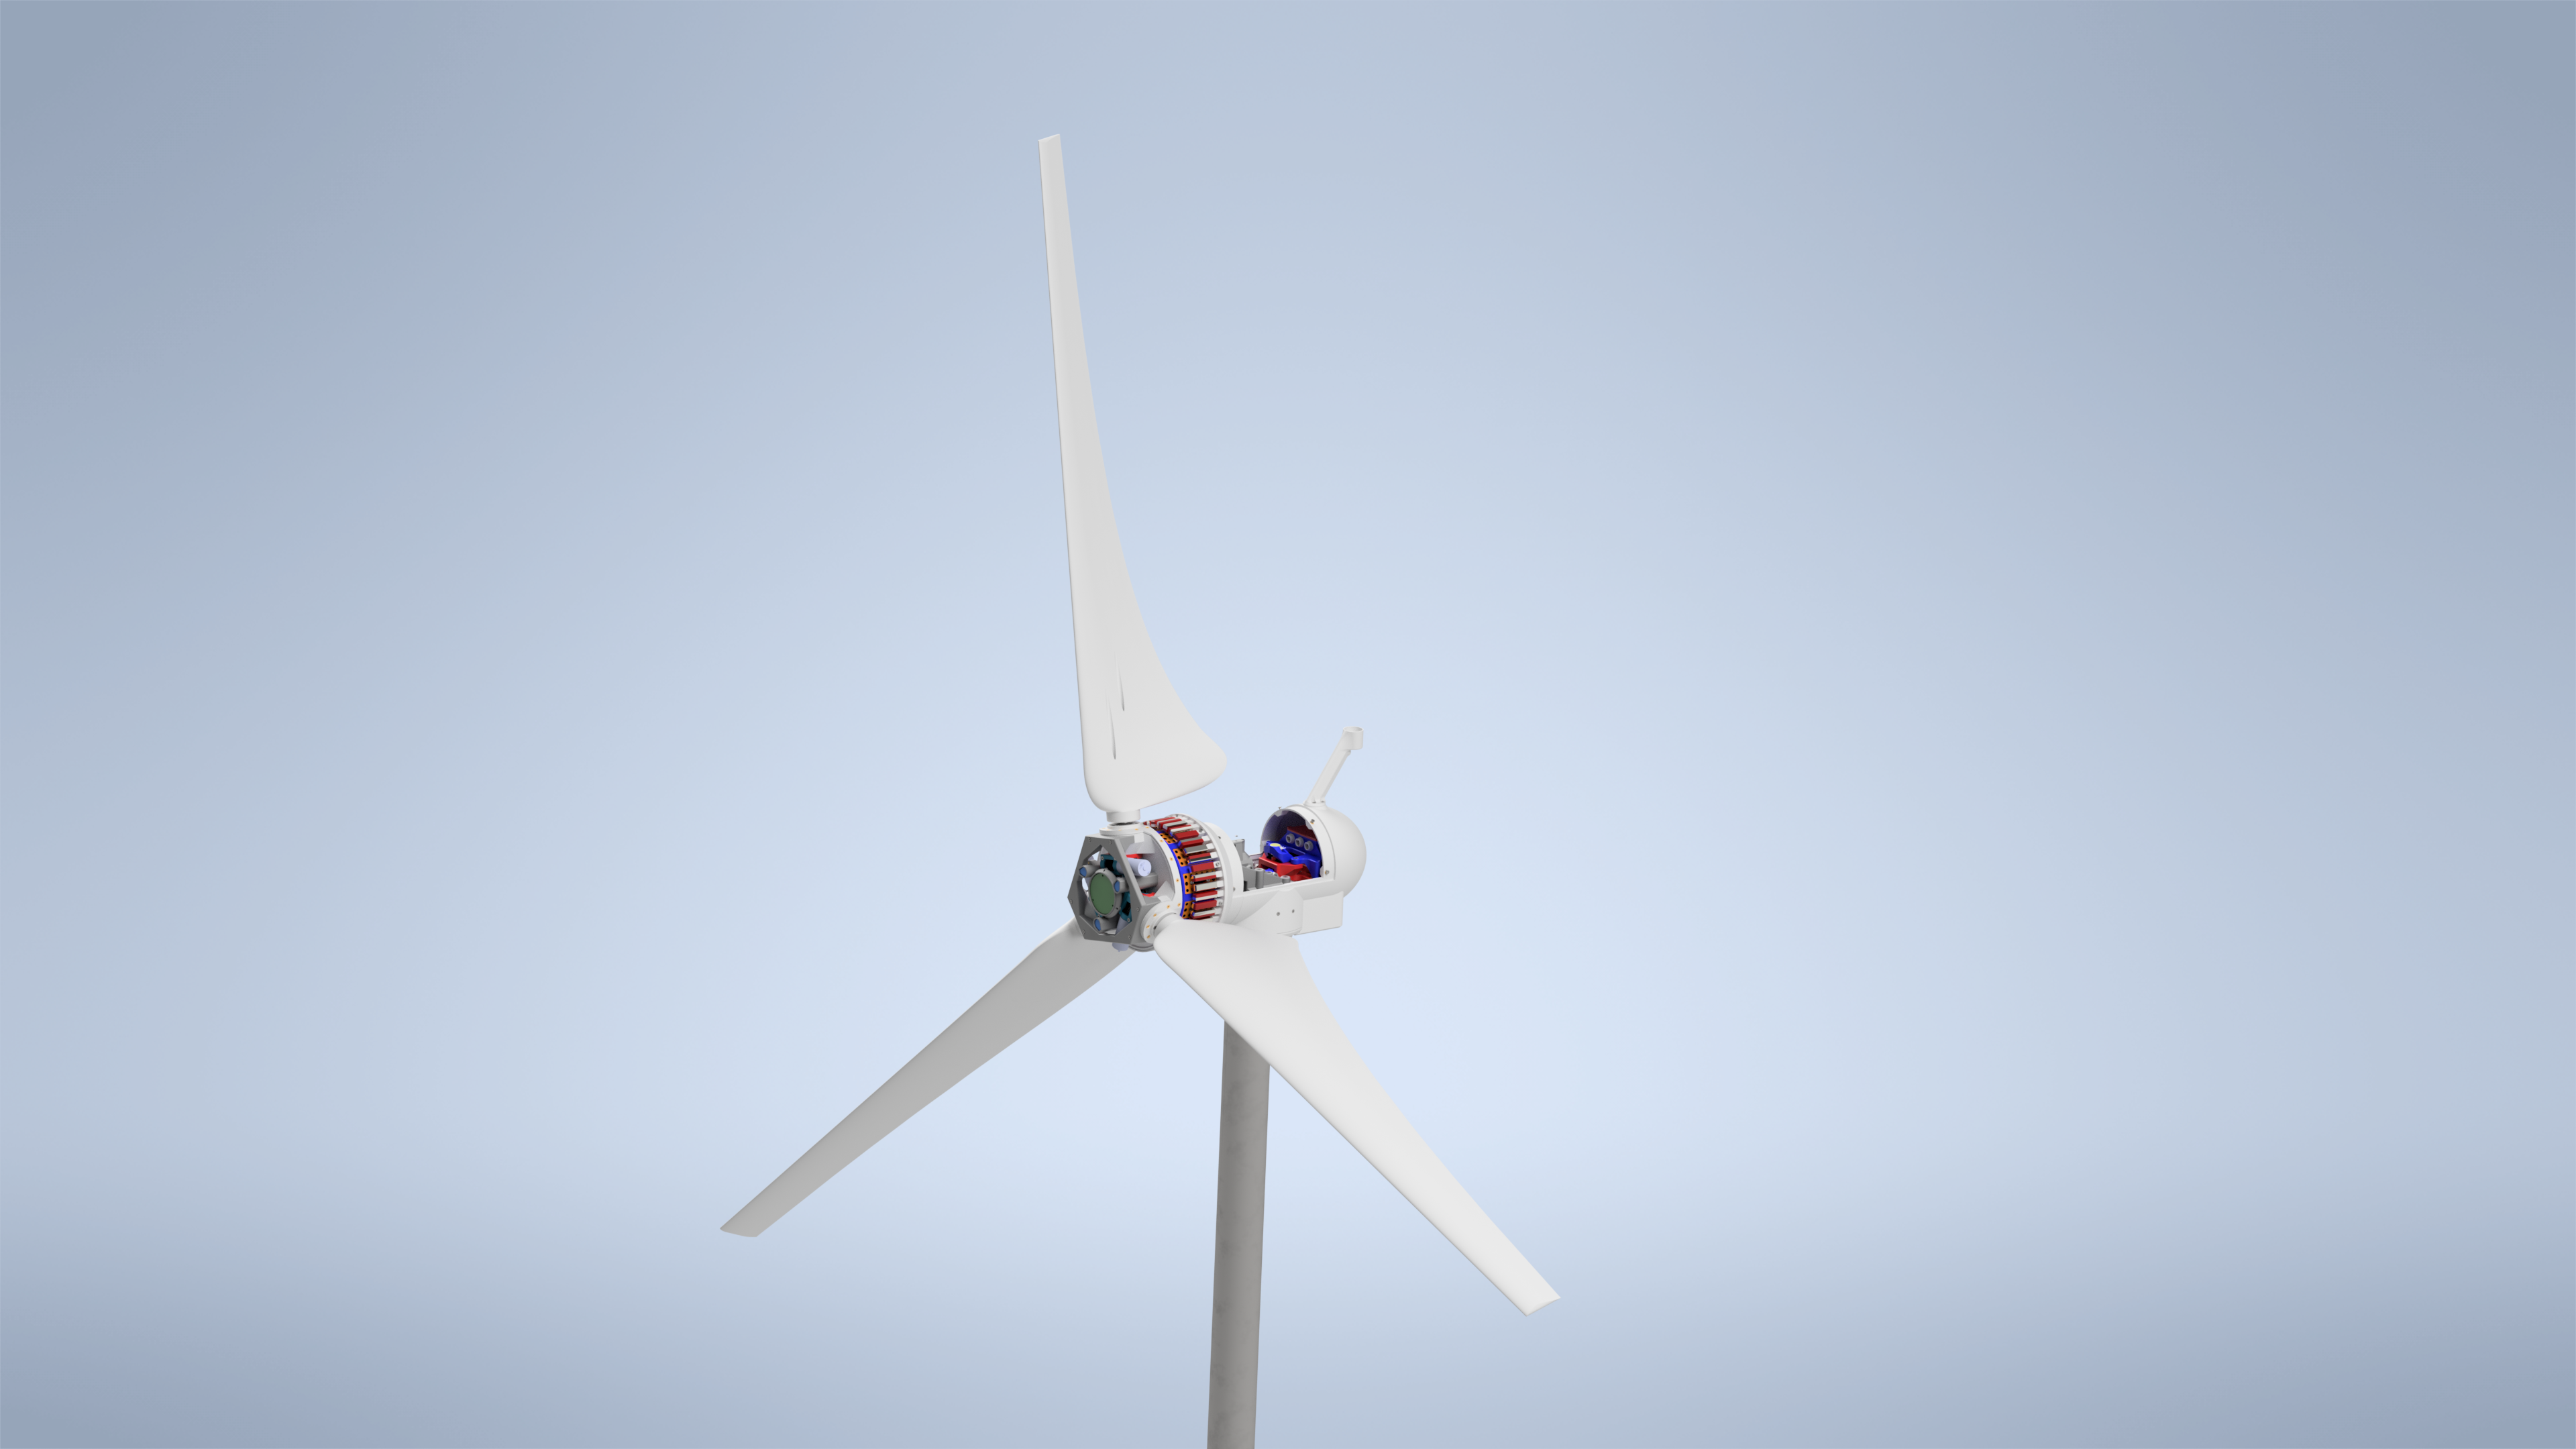
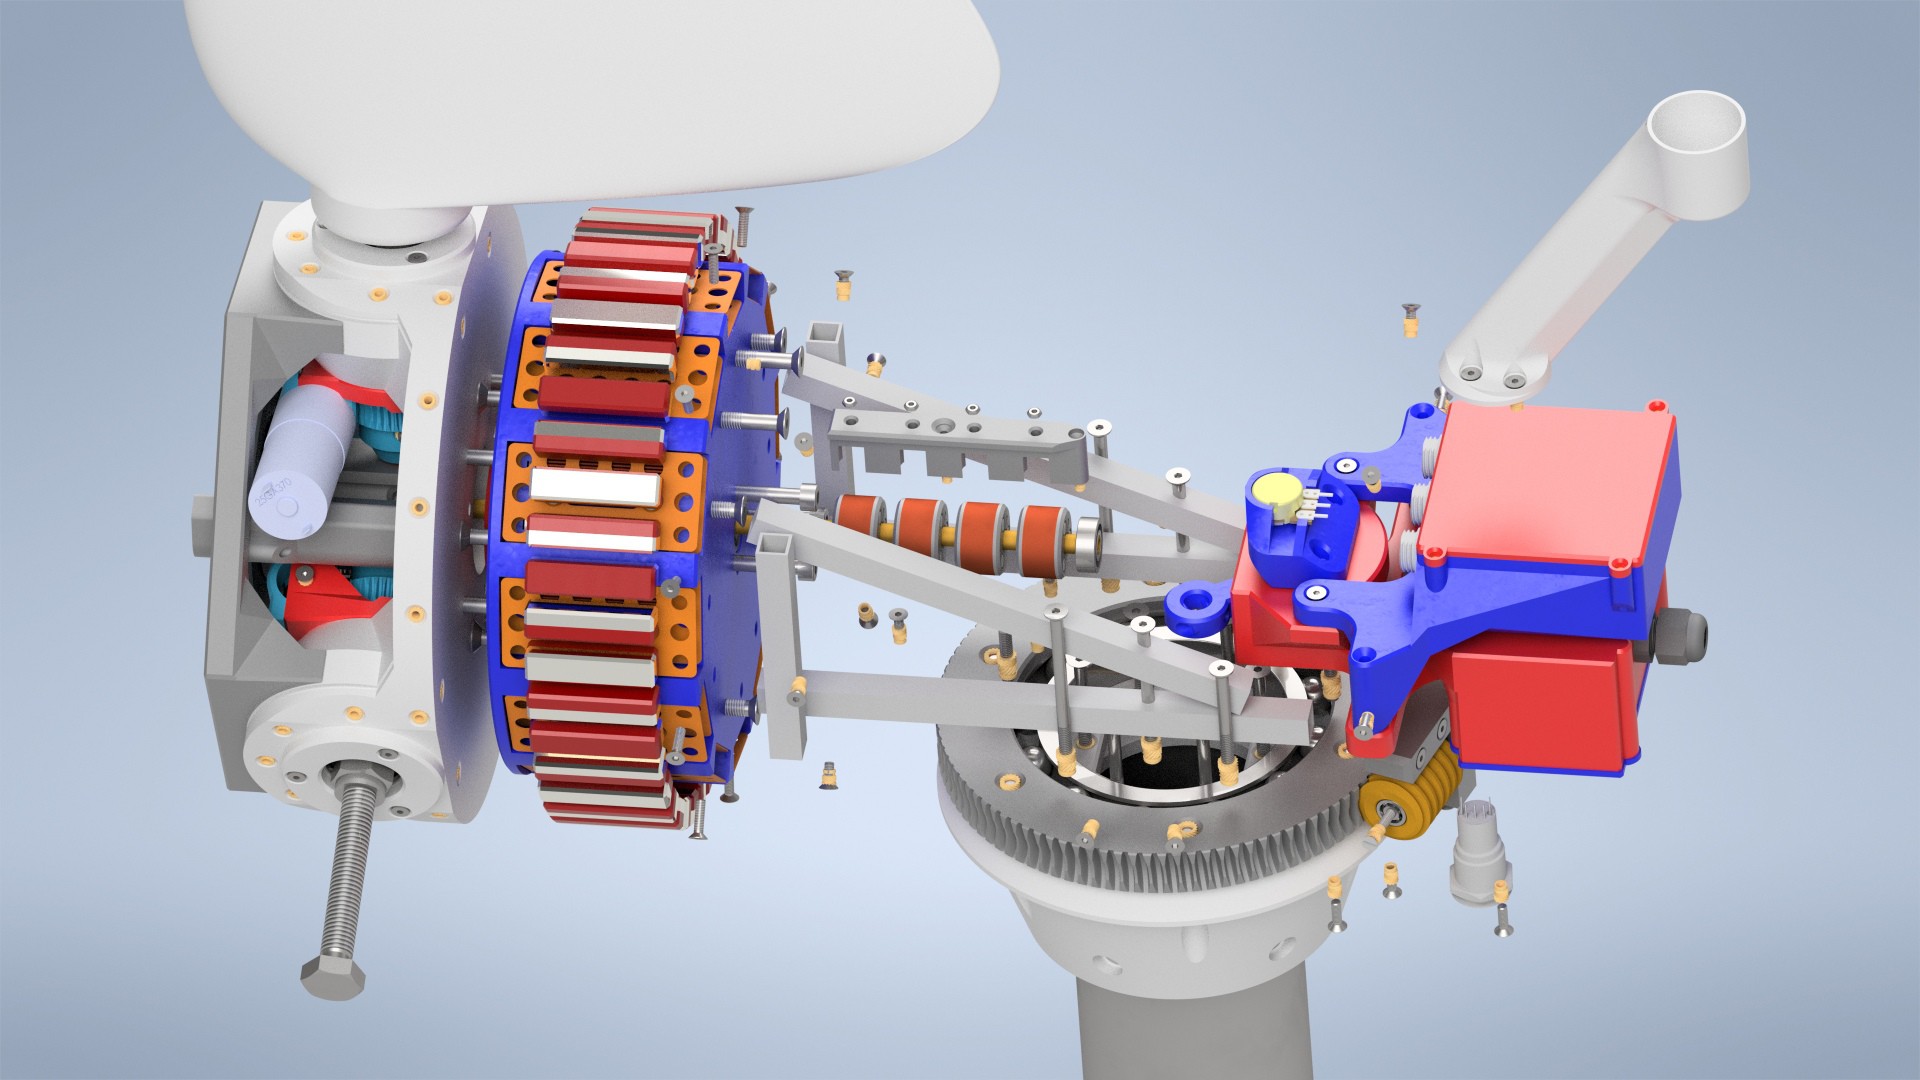
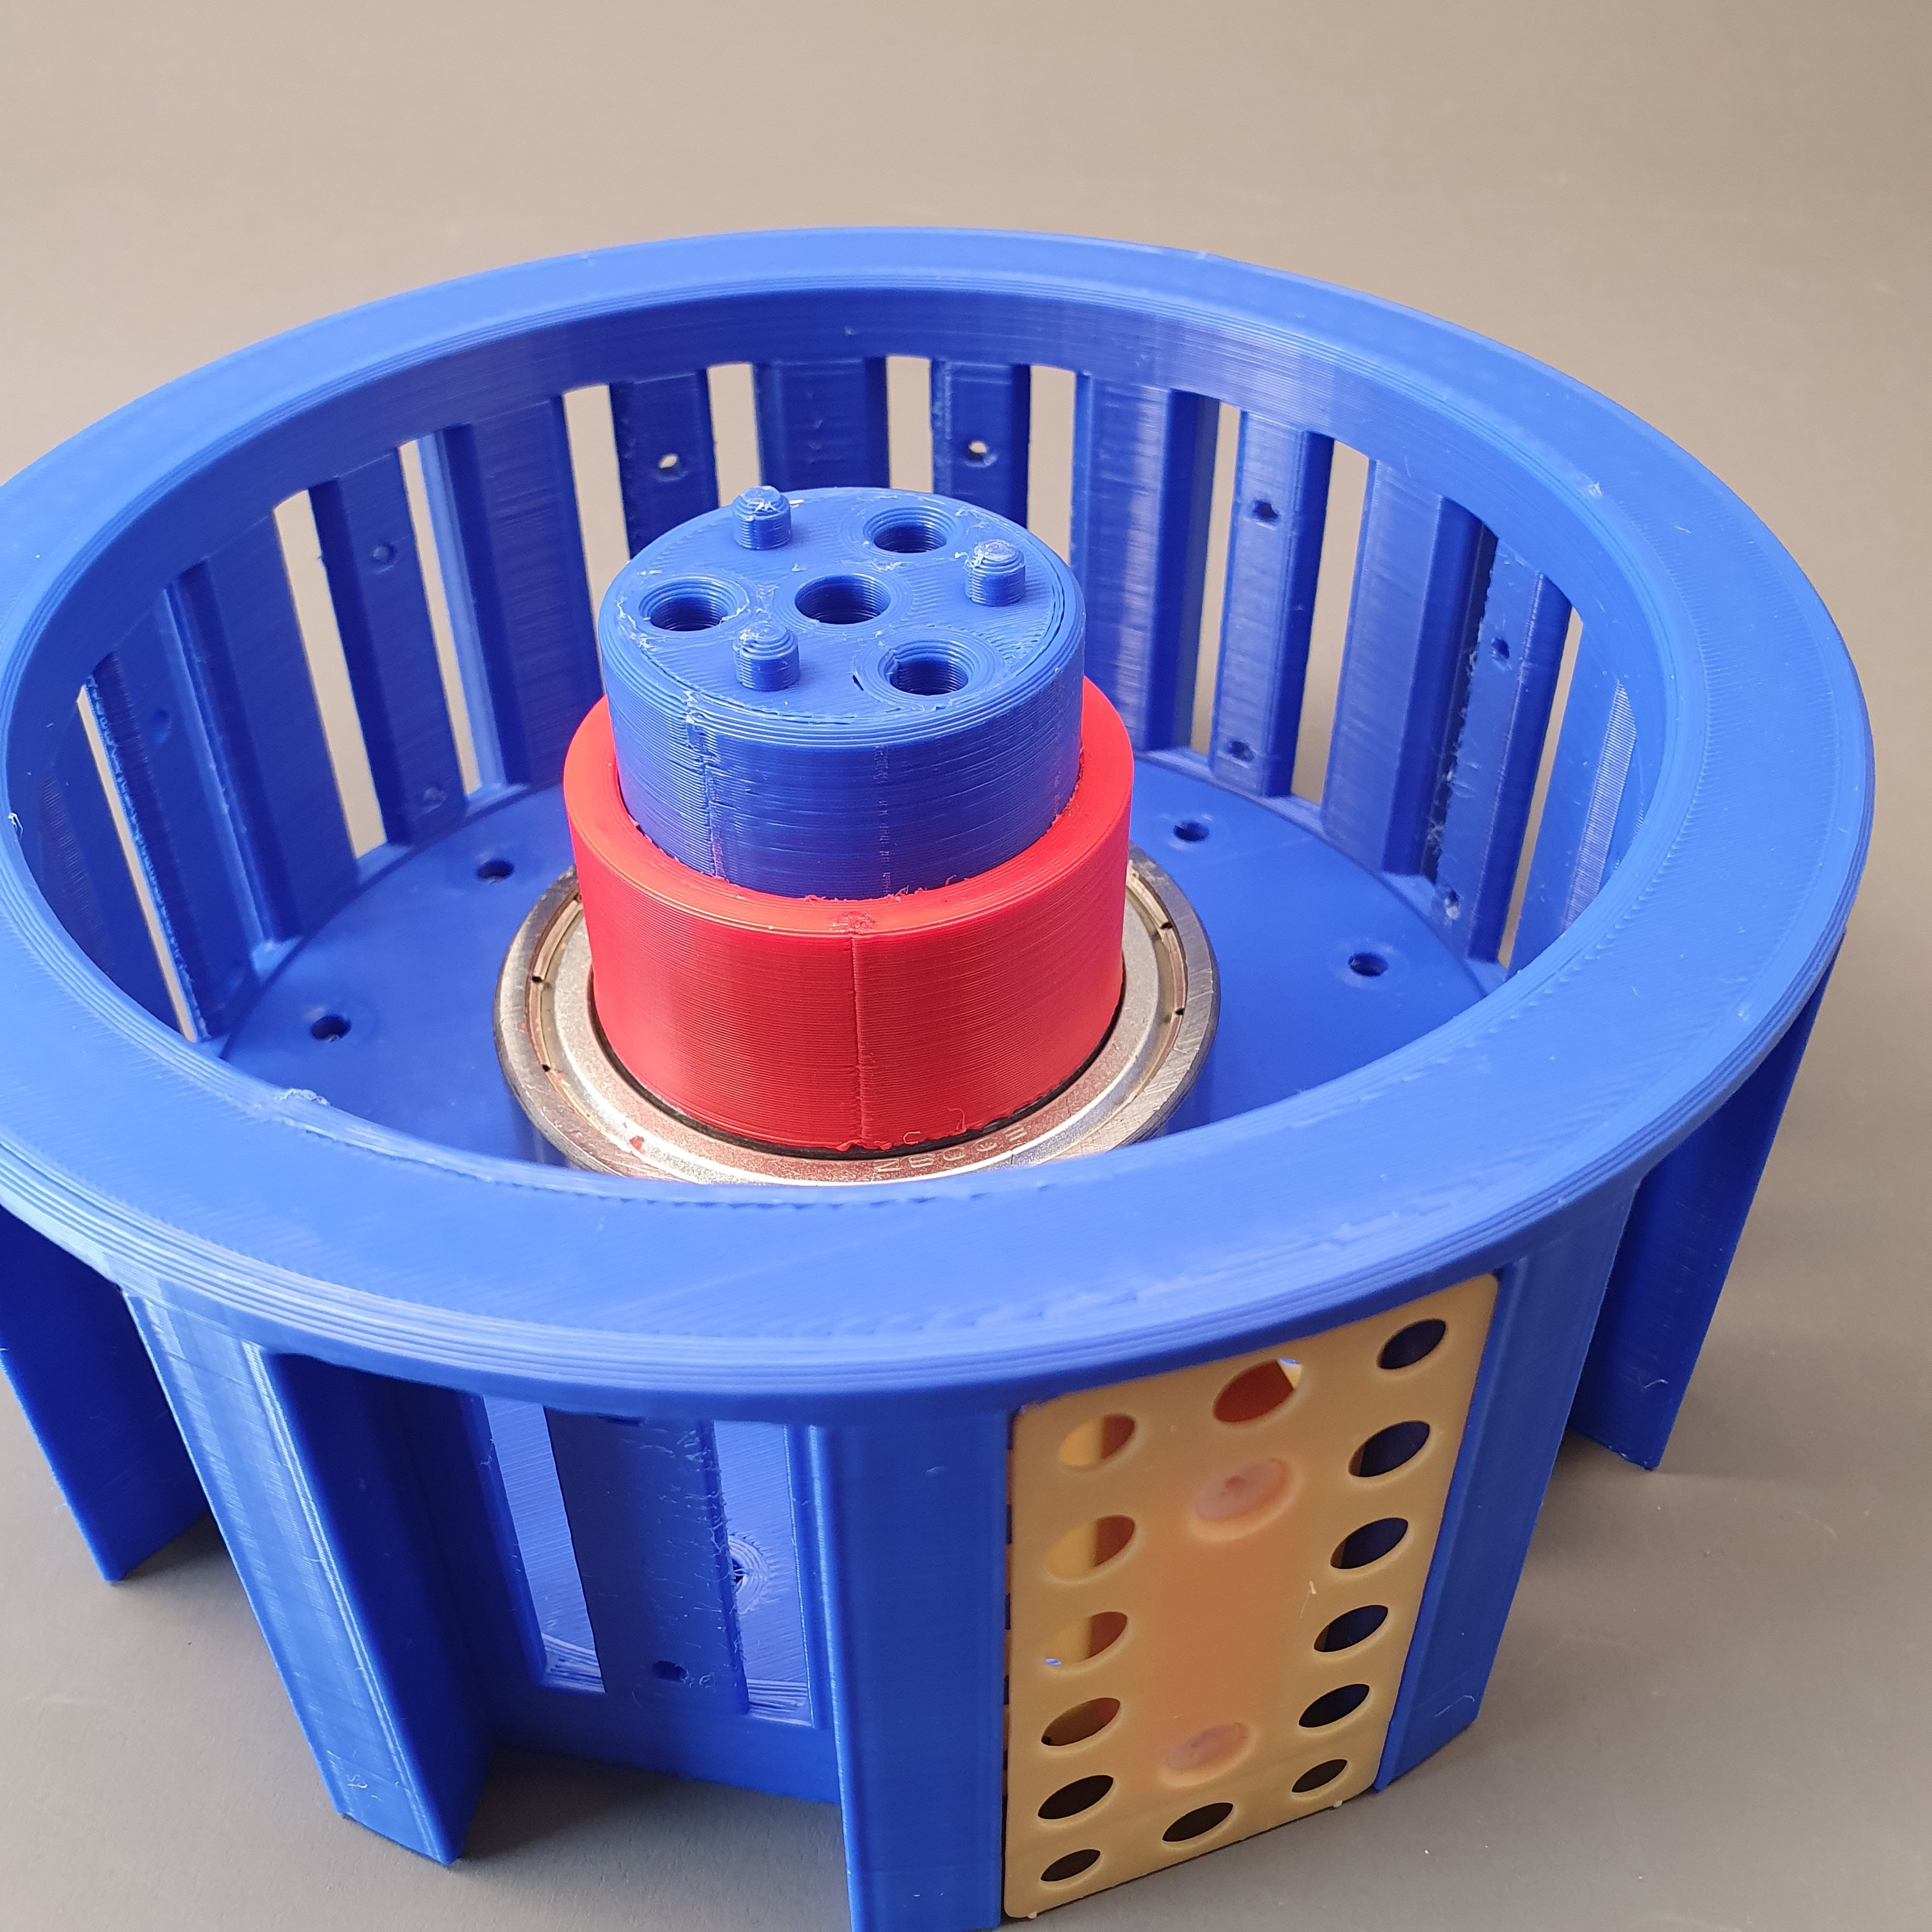
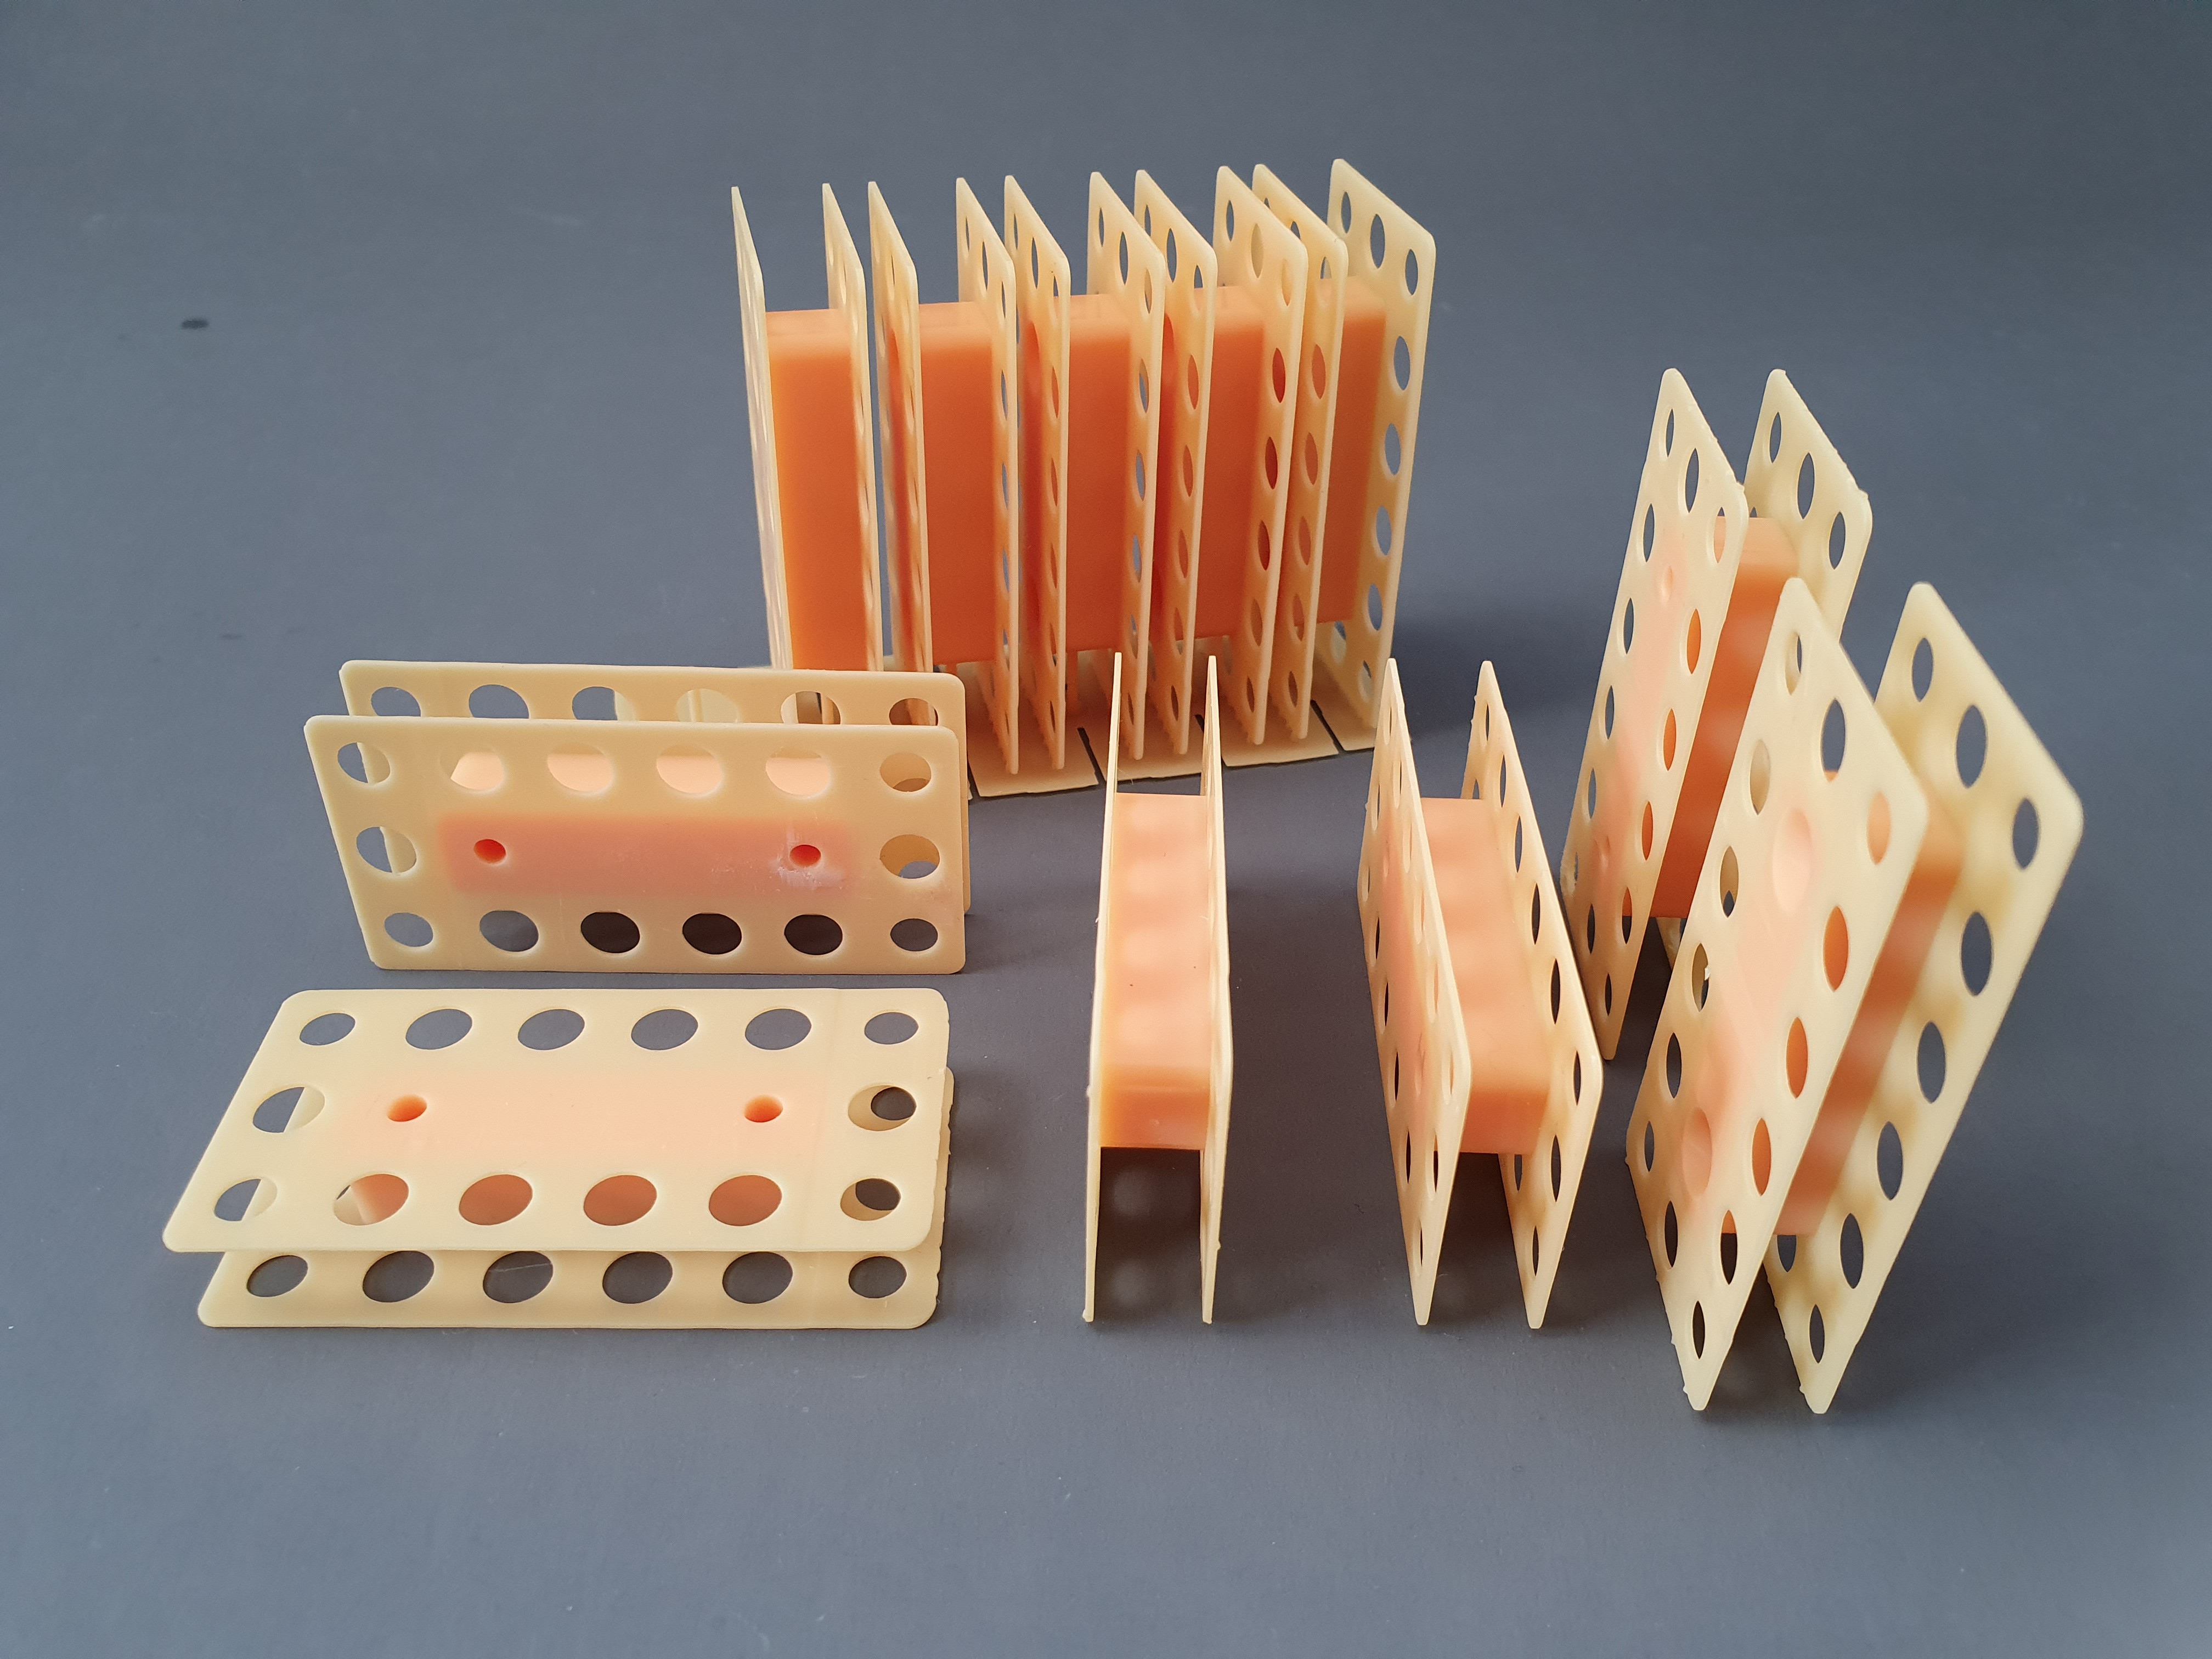
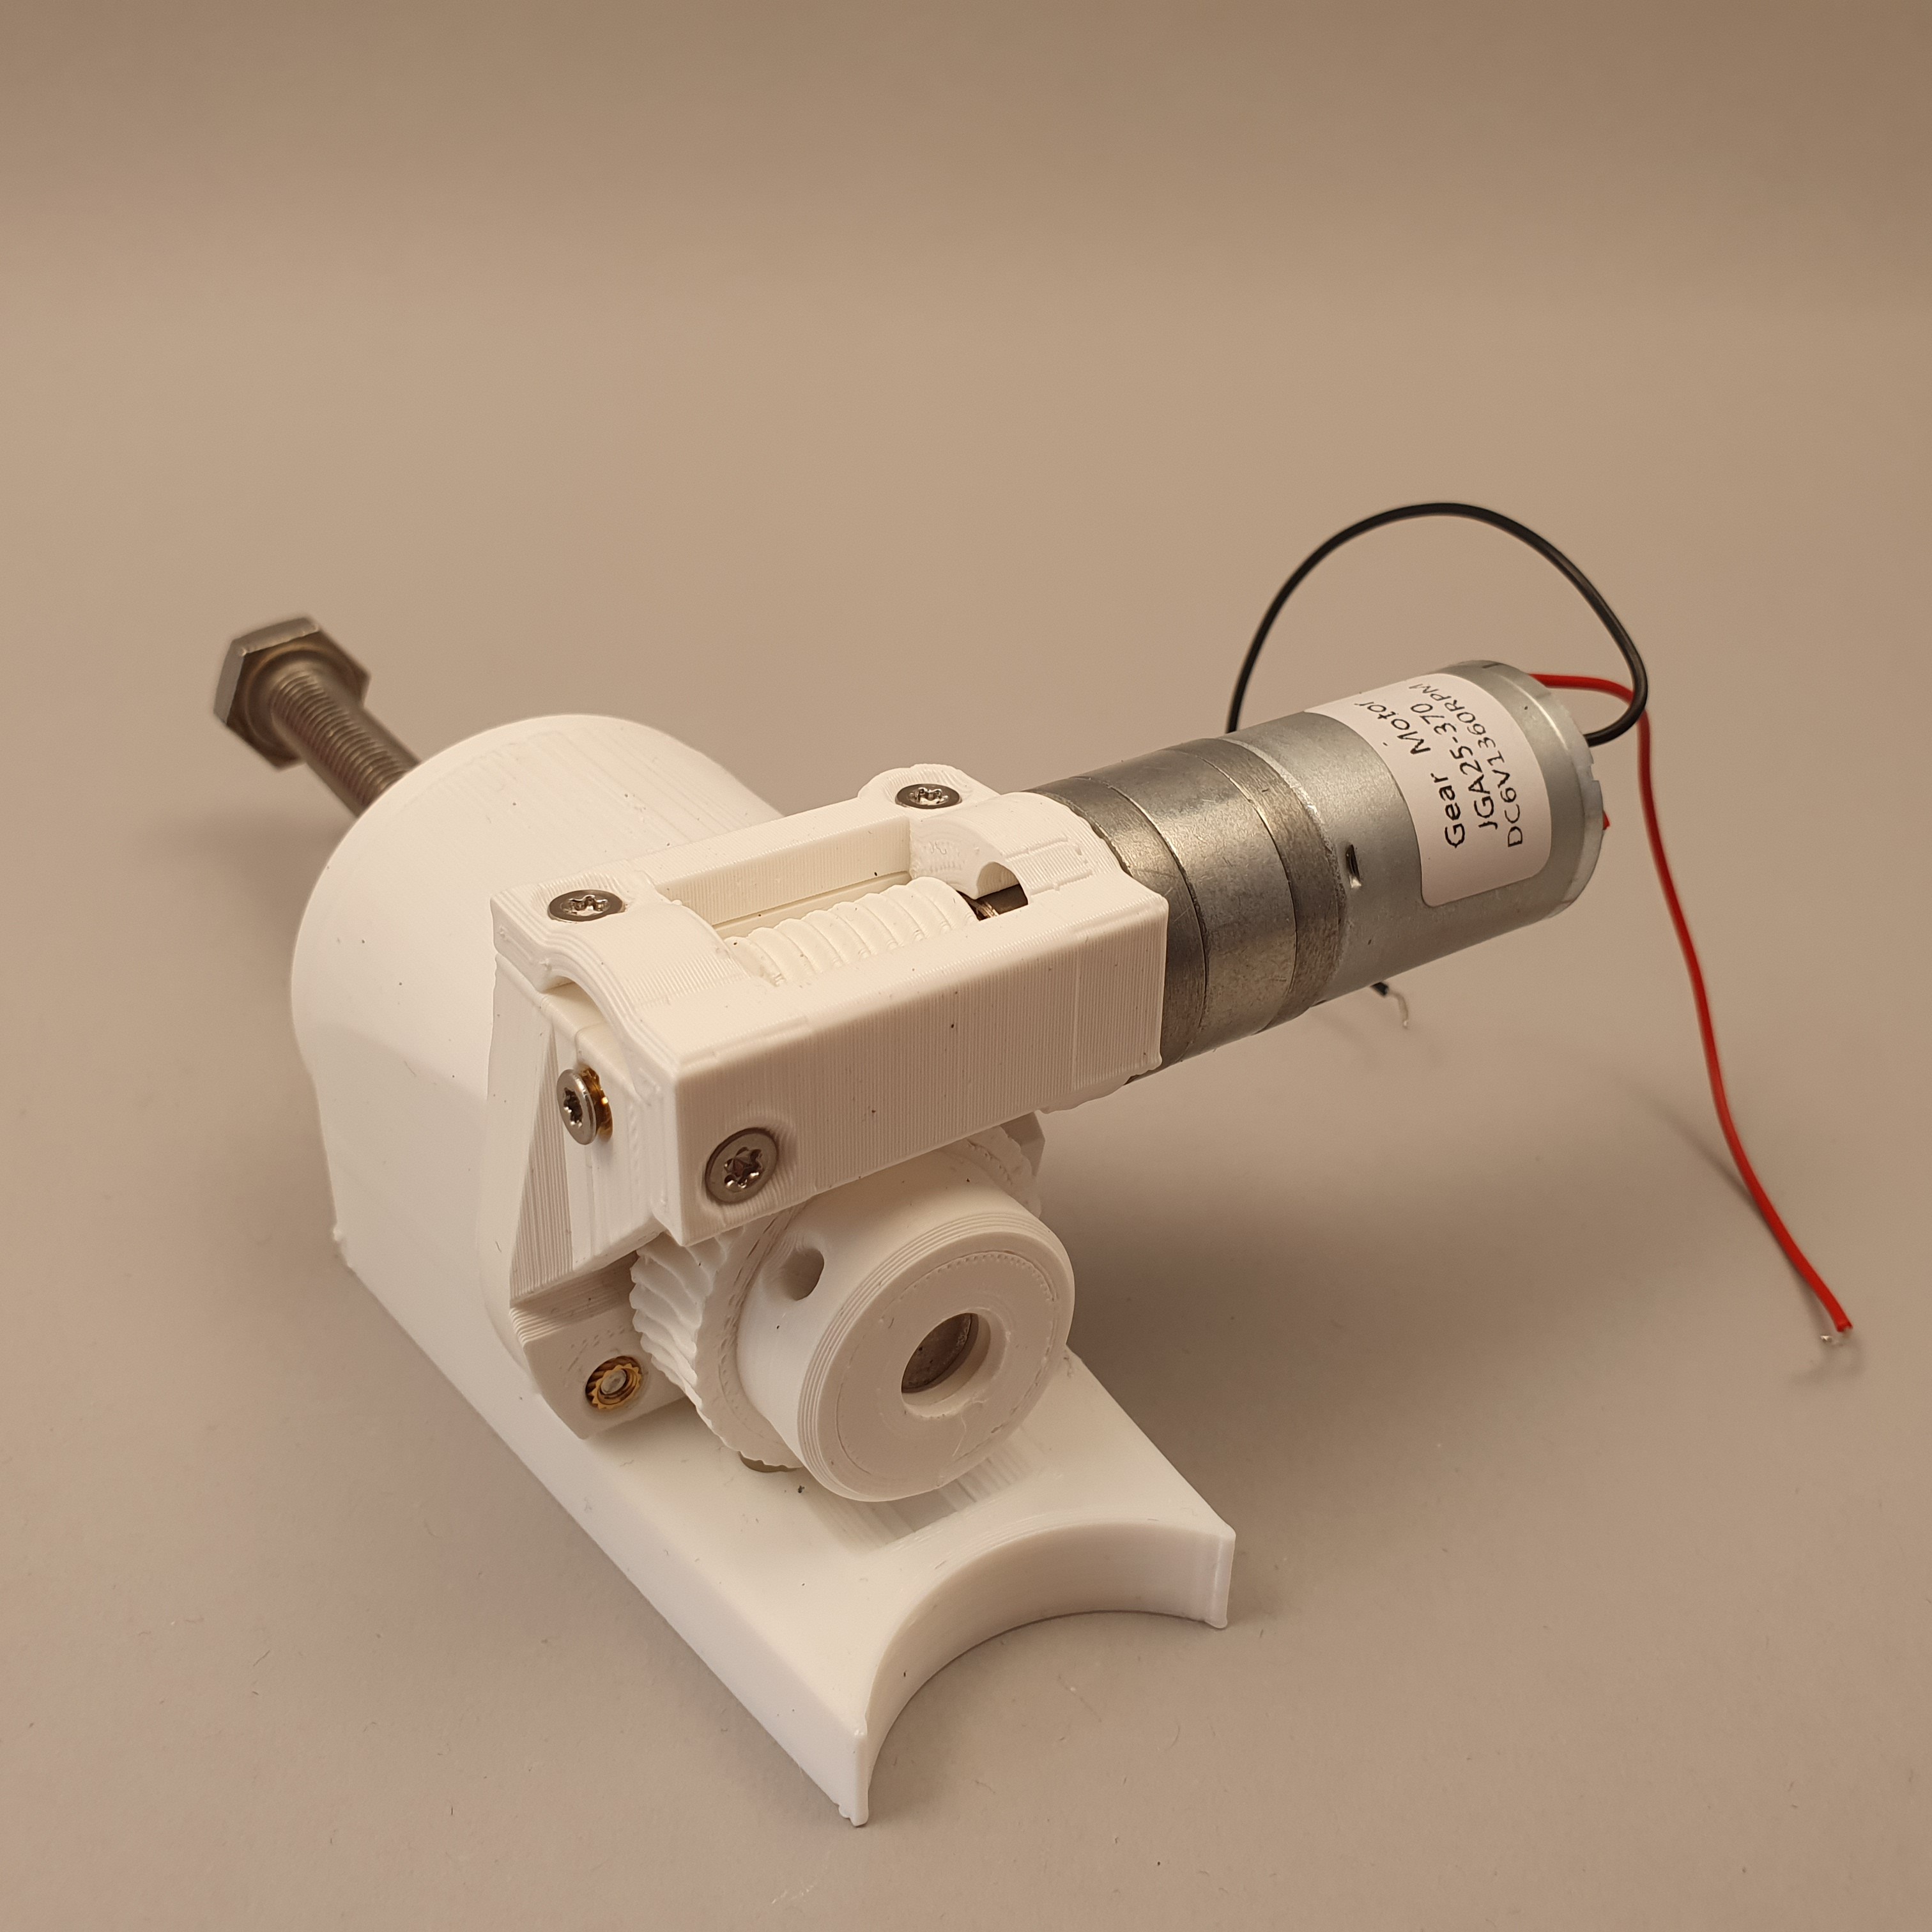
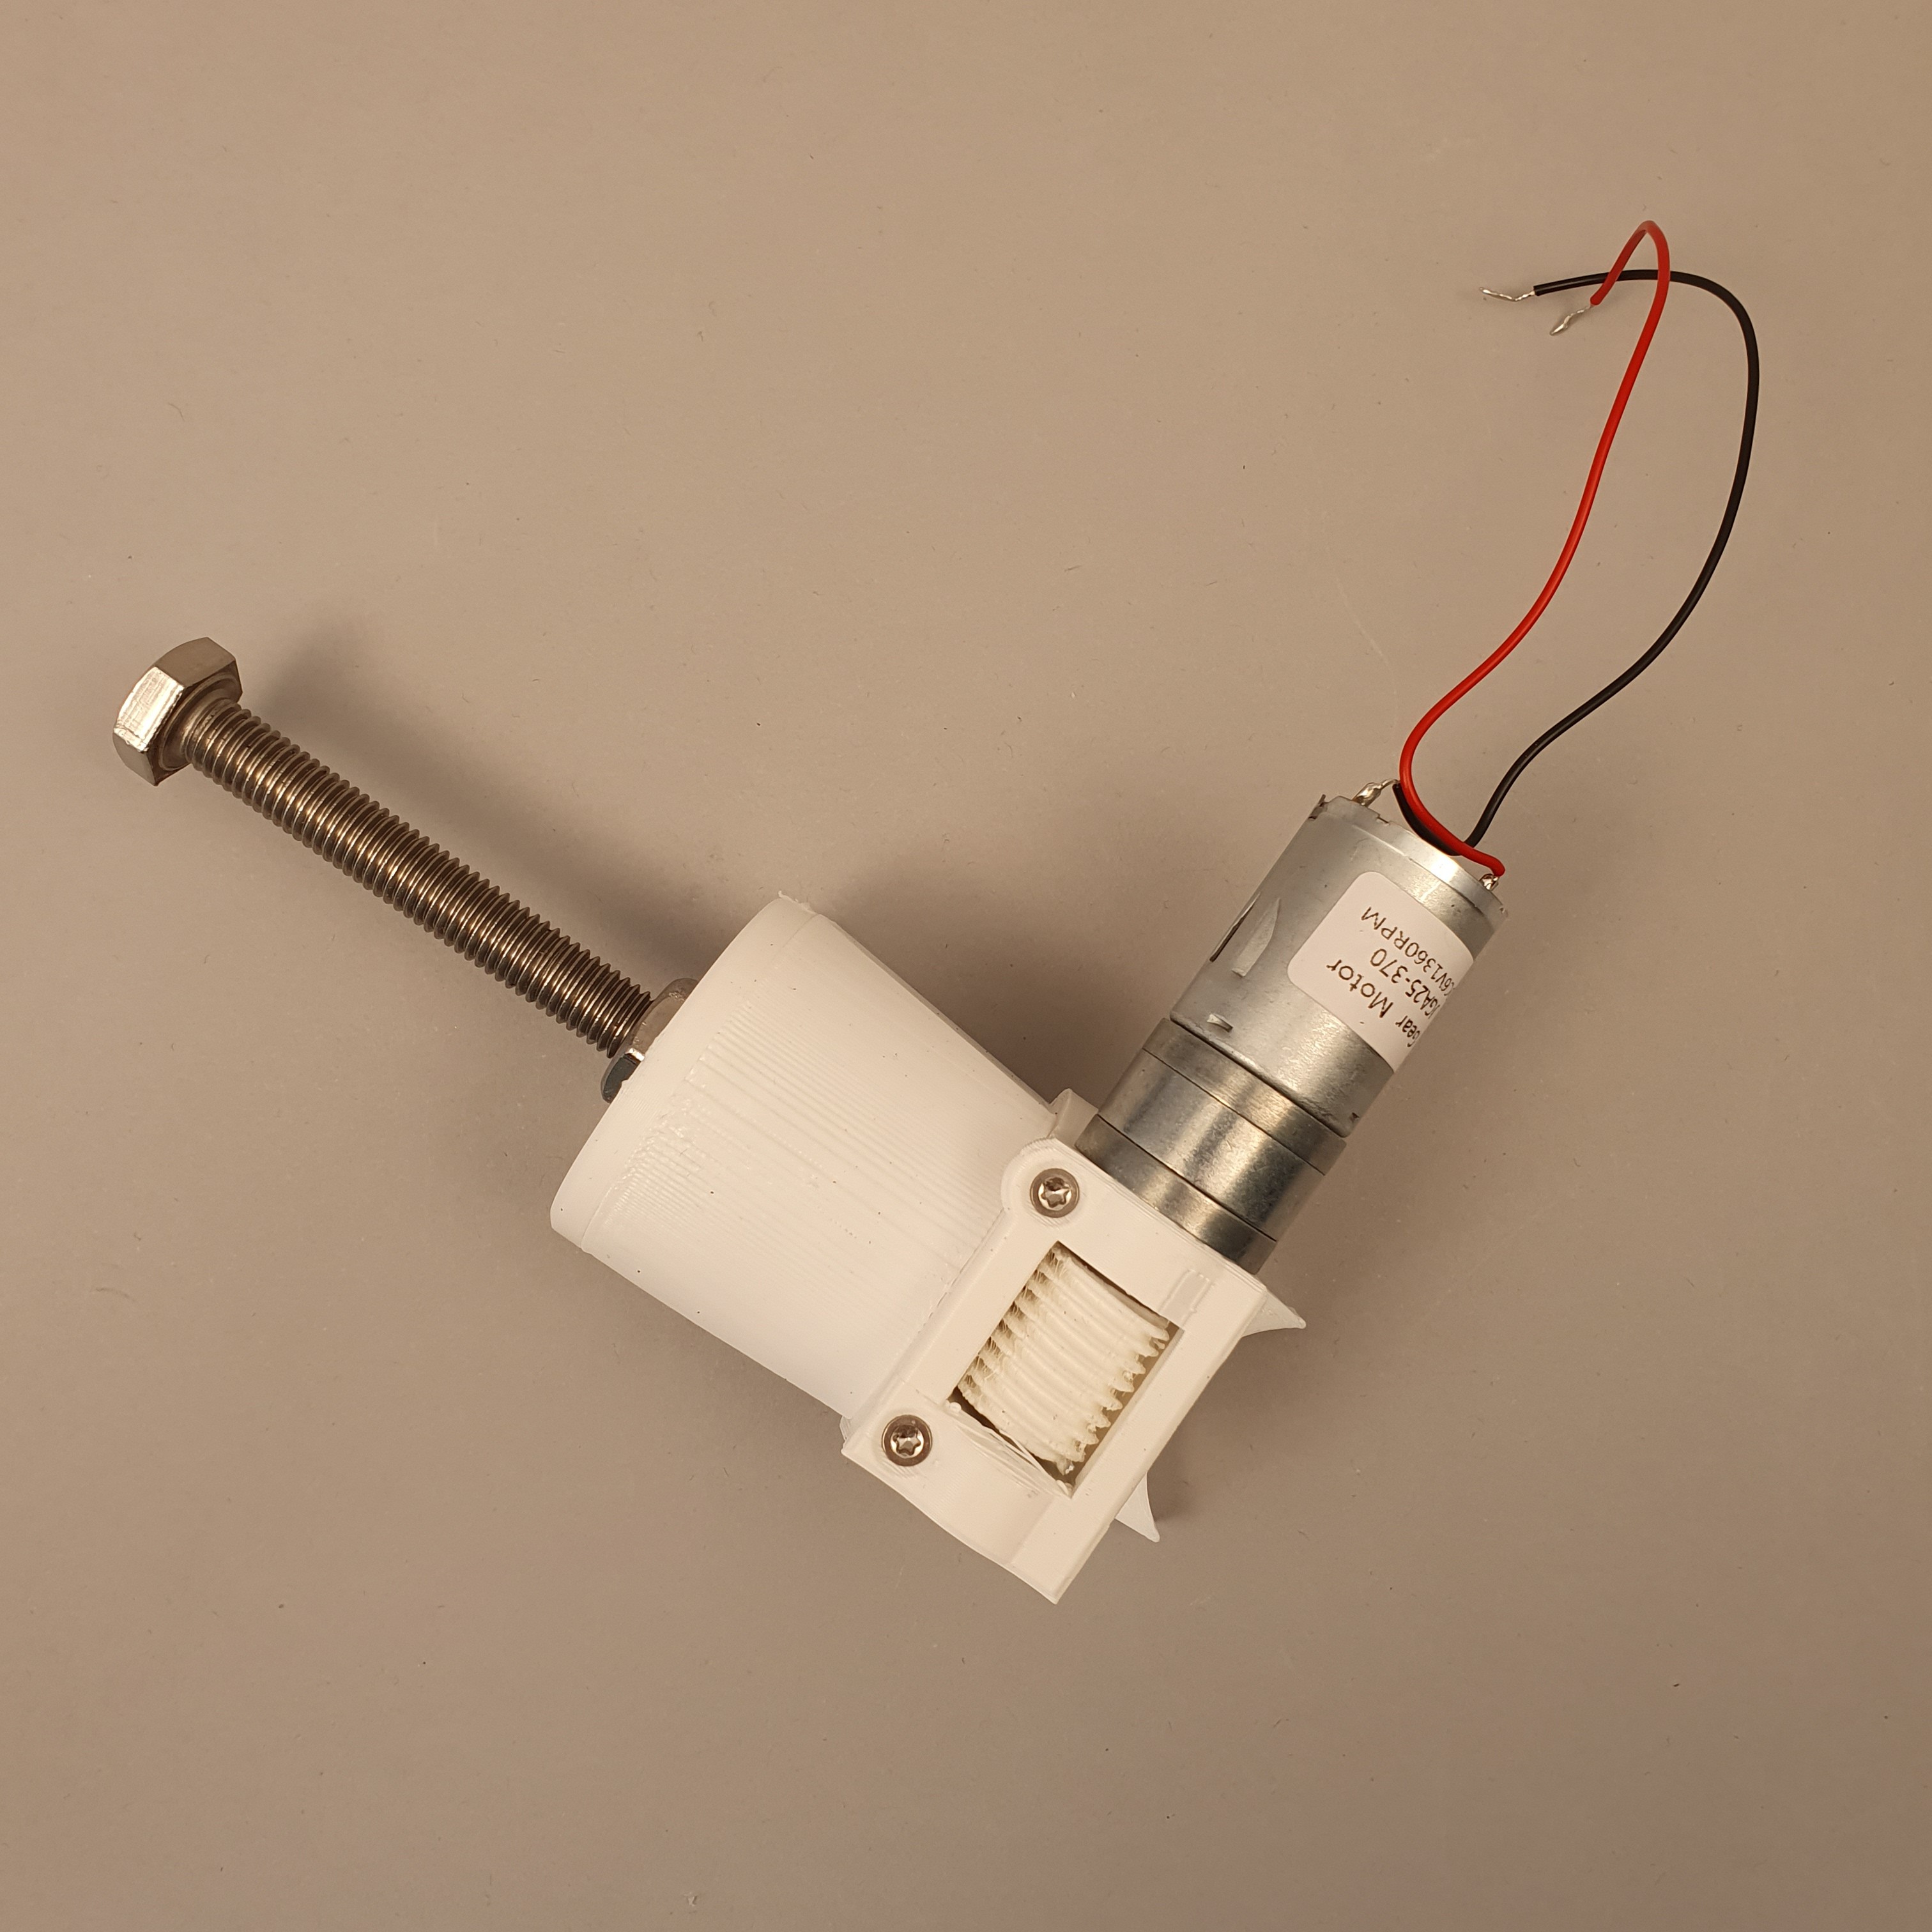
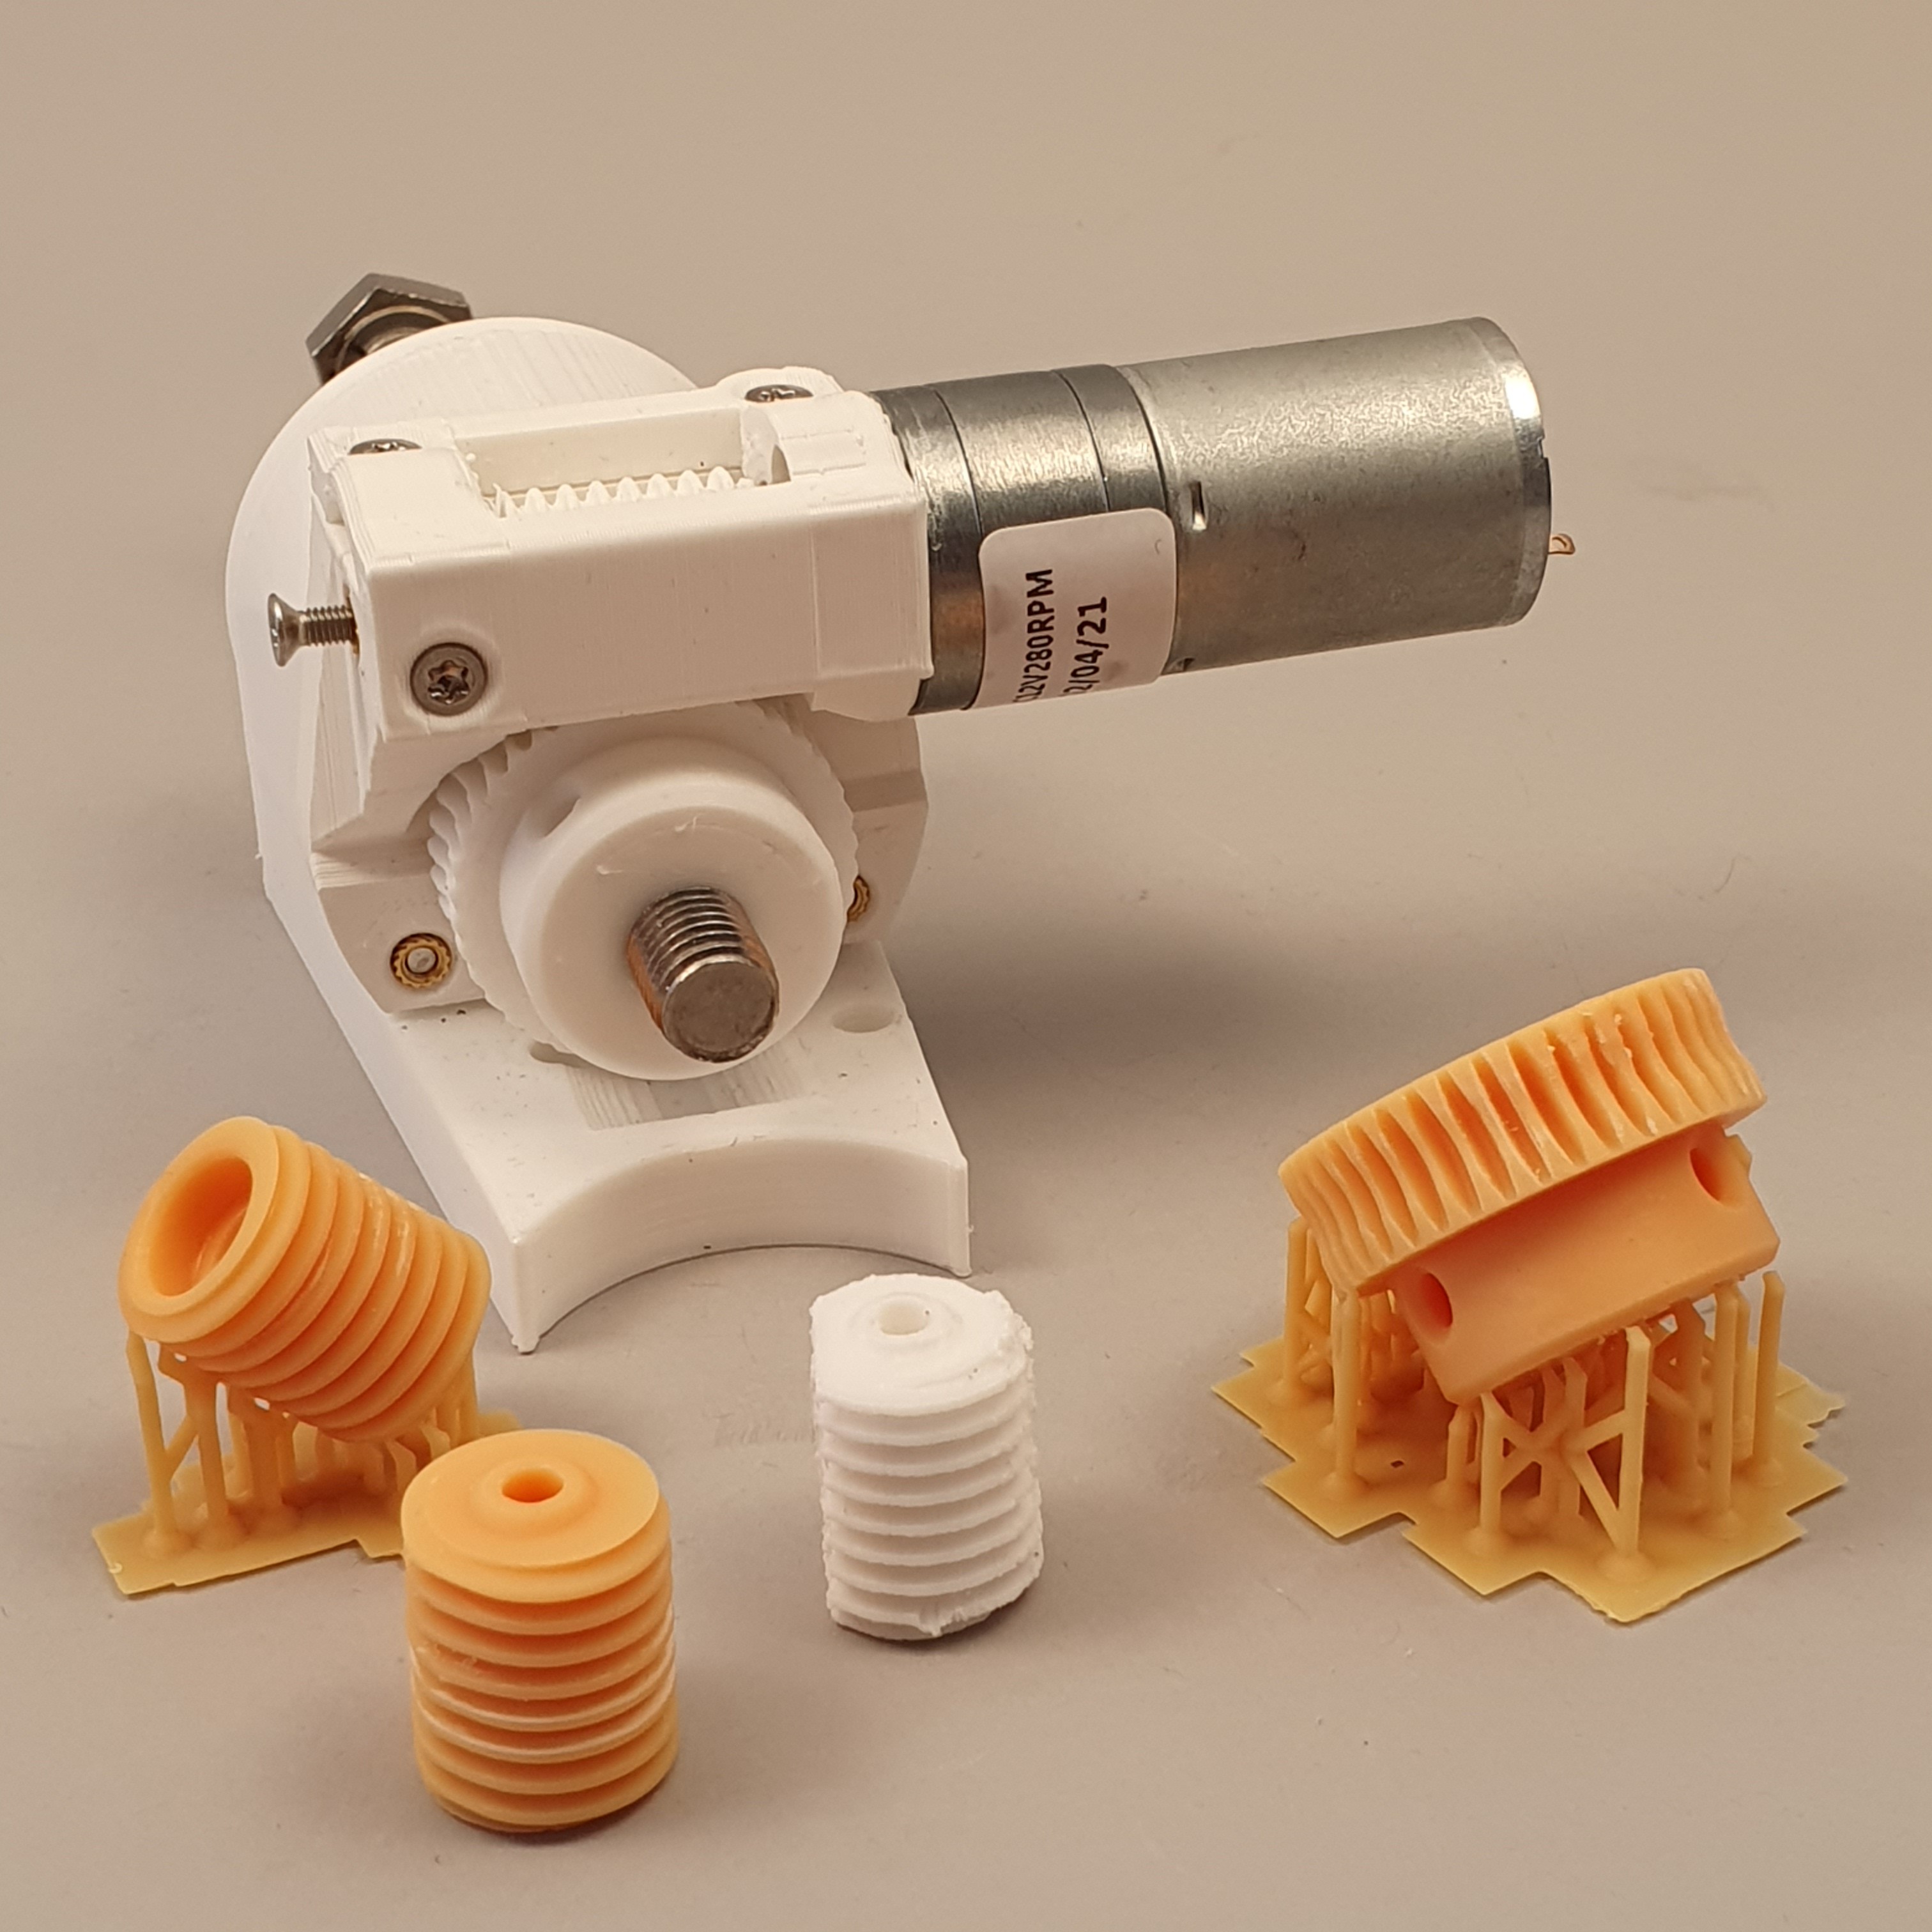
I want to implement these optimizations with a completely new design. For this, not only the design of the blades is being reworked. Also the 3D printed generator will be completely redesigned. In addition, I will also try to simplify the somewhat complex mechanics. Ultimately, the structure should be lighter, the turbine should run more efficiently and also be a little more compact.
I'm currently working on the first basics such as the newly designed pitch actuator and the generator. You can see the first progress in the project logs. :)
In the following video you can see a short overview of the current state.
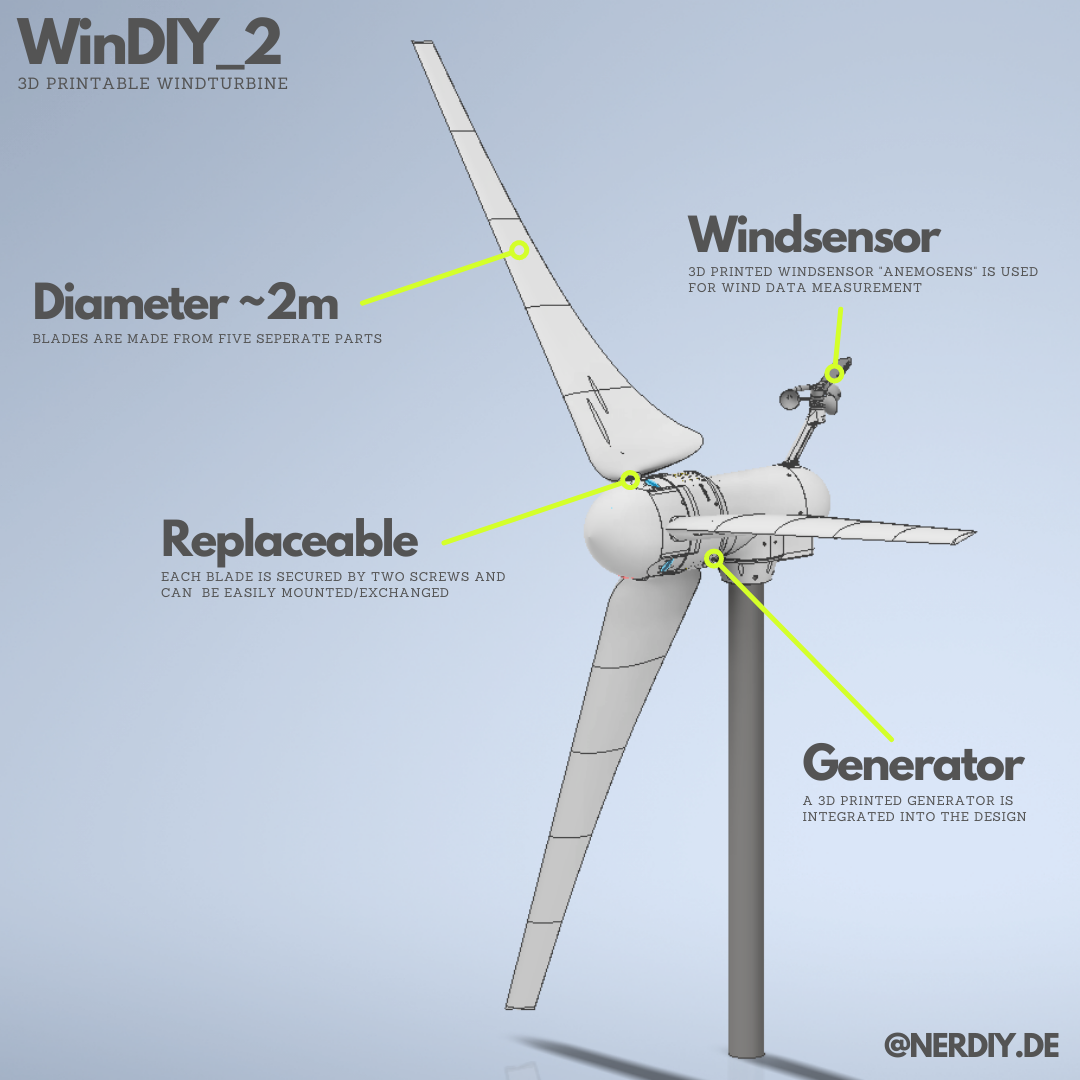
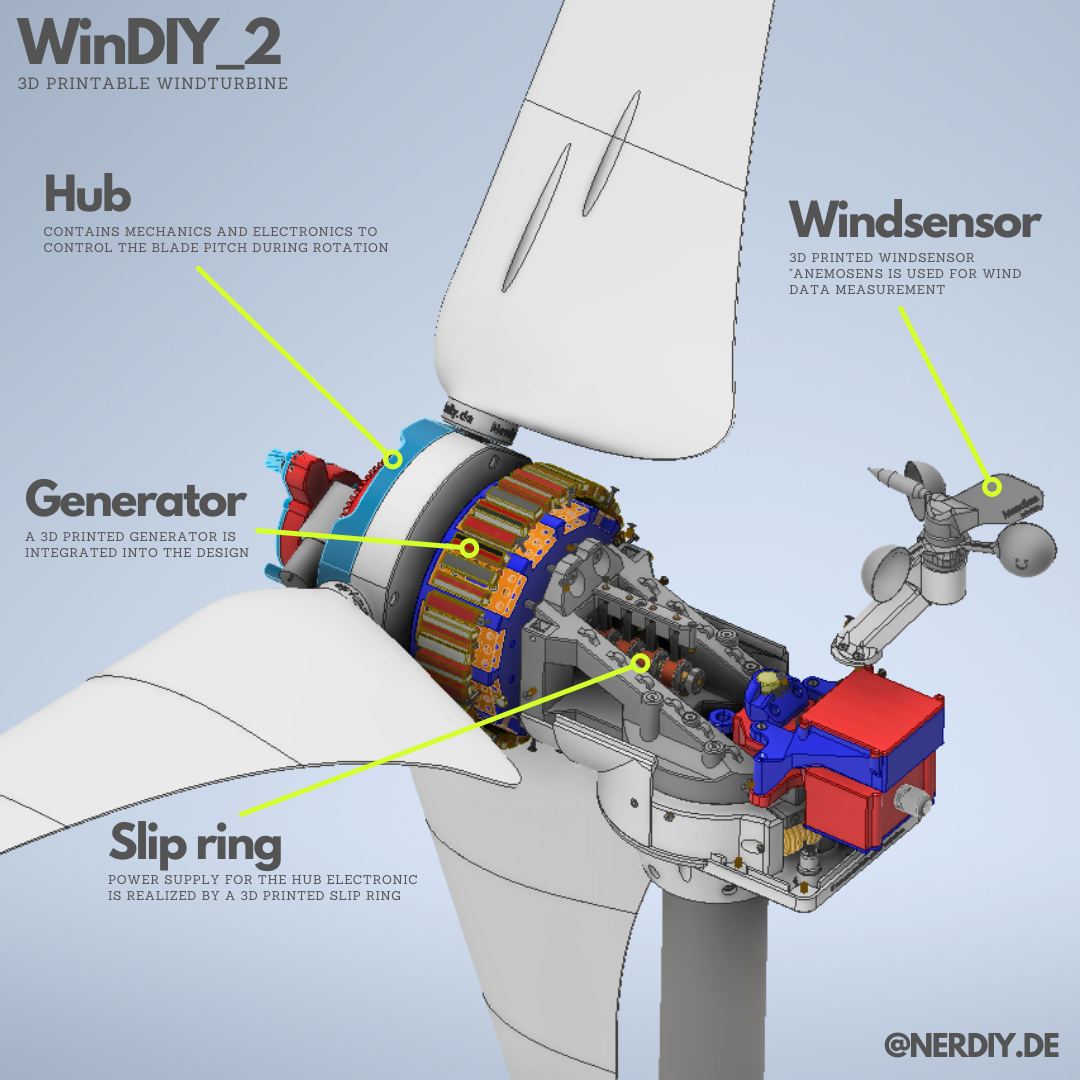
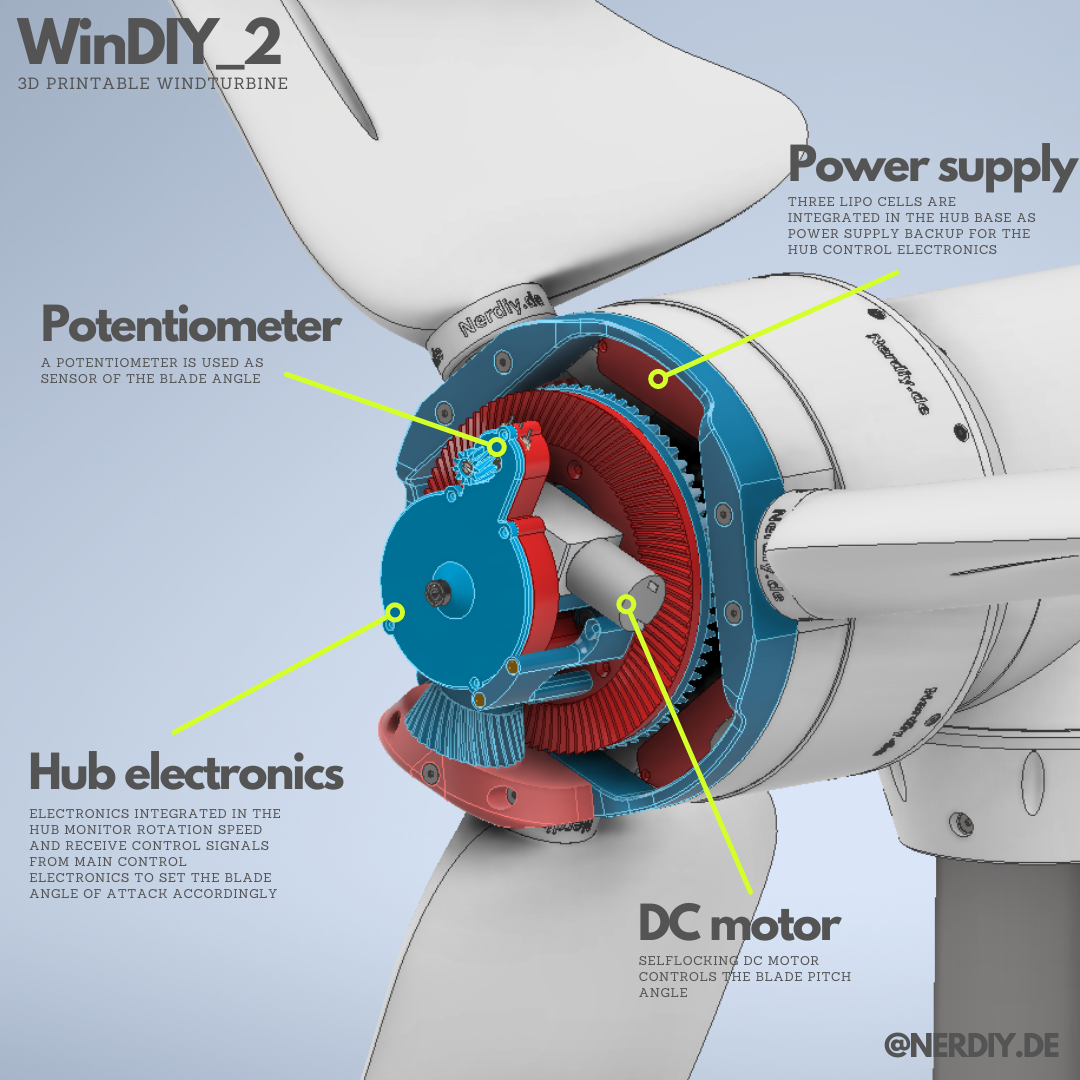
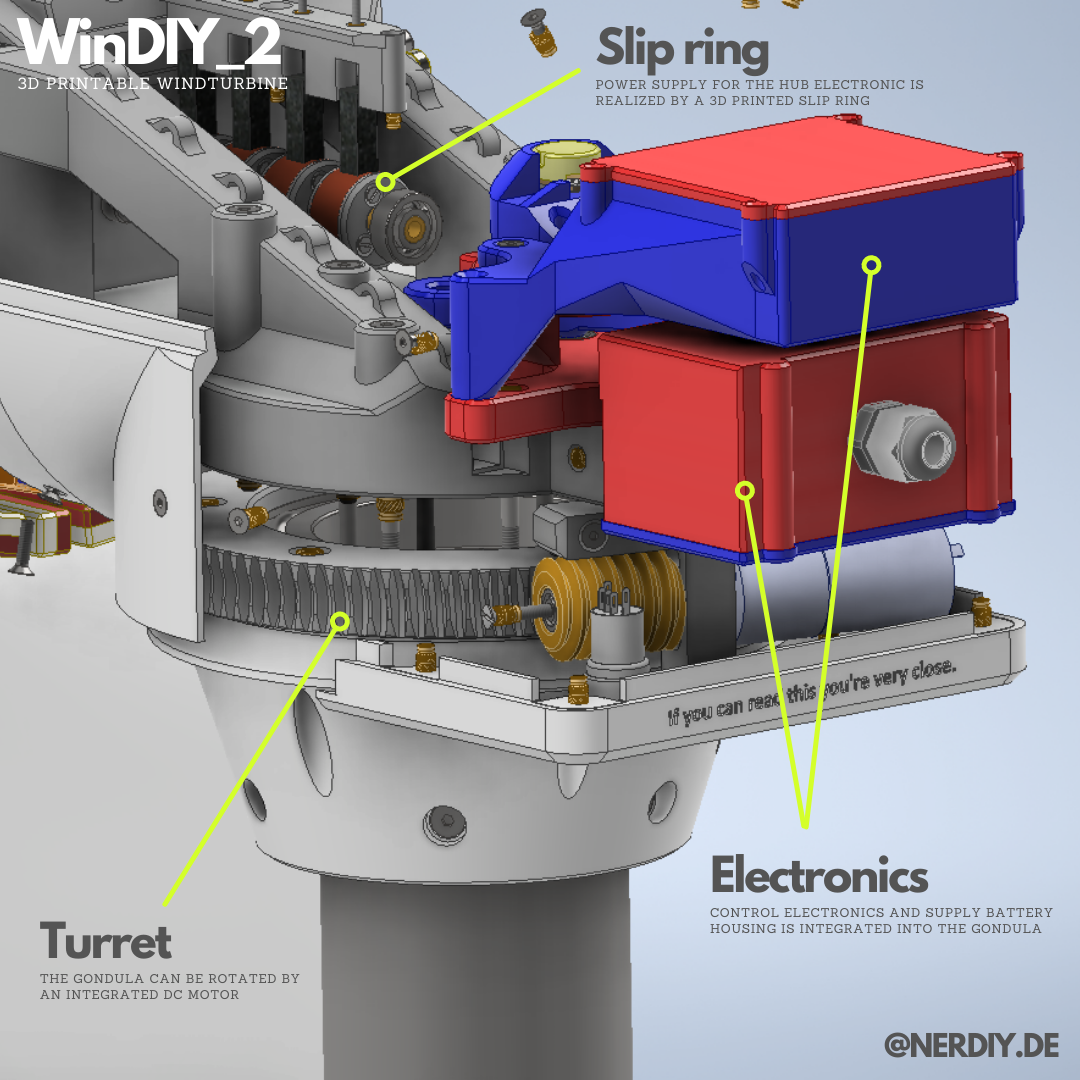
System overview:

Support:
If you want to support me, you can do so by like on this project page, on Instagram or by donating a coffee. :)
Licenses:
Content that is not based on software/code: Unless otherwise stated, all works presented here that are not based on software/code are subject to the CC BY-NC-SA 4.0 license (attribution – non-commercial – dissemination under the same conditions 4.0 international).
You can find a summary here: https://creativecommons.org/licenses/by-nc-sa/4.0/deed.de
You can find the complete legal text here: https://creativecommons.org/licenses/by-nc-sa/4.0/legalcode.de
Software/code-based works Unless otherwise stated, all software/code-based works presented here are subject to the GNU Affero General Public License v3.0
You can find a summary here: https://tldrlegal.com/license/gnu-affero-general-public-license-v3-(agpl-3.0)#summary
The complete legal text can be found here: https://www.gnu.org/licenses/agpl-3.0.de.html


 Vaibhav Chhabra
 Mathieu Lacage
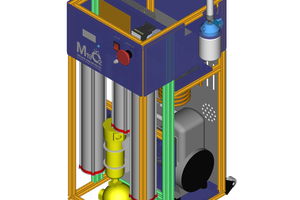
 Anool Mahidharia
 Shushanik Khachaturian
Hey, this looks extremely cool! I want to try reproducing the turbine and possibly help out in the project, do you have any CAD files you could share?
What kind of contributions would you like the most?