 Brian Wyld
-
1build and flash firmware to nRF51
clone the project from https://github.com/brianwyld/ble_nrf51_light
install tools (GNU gcc, make, jlink or other SWD probe, nrfjprobe)
build hex files
flash to the nrf51 breakout board.
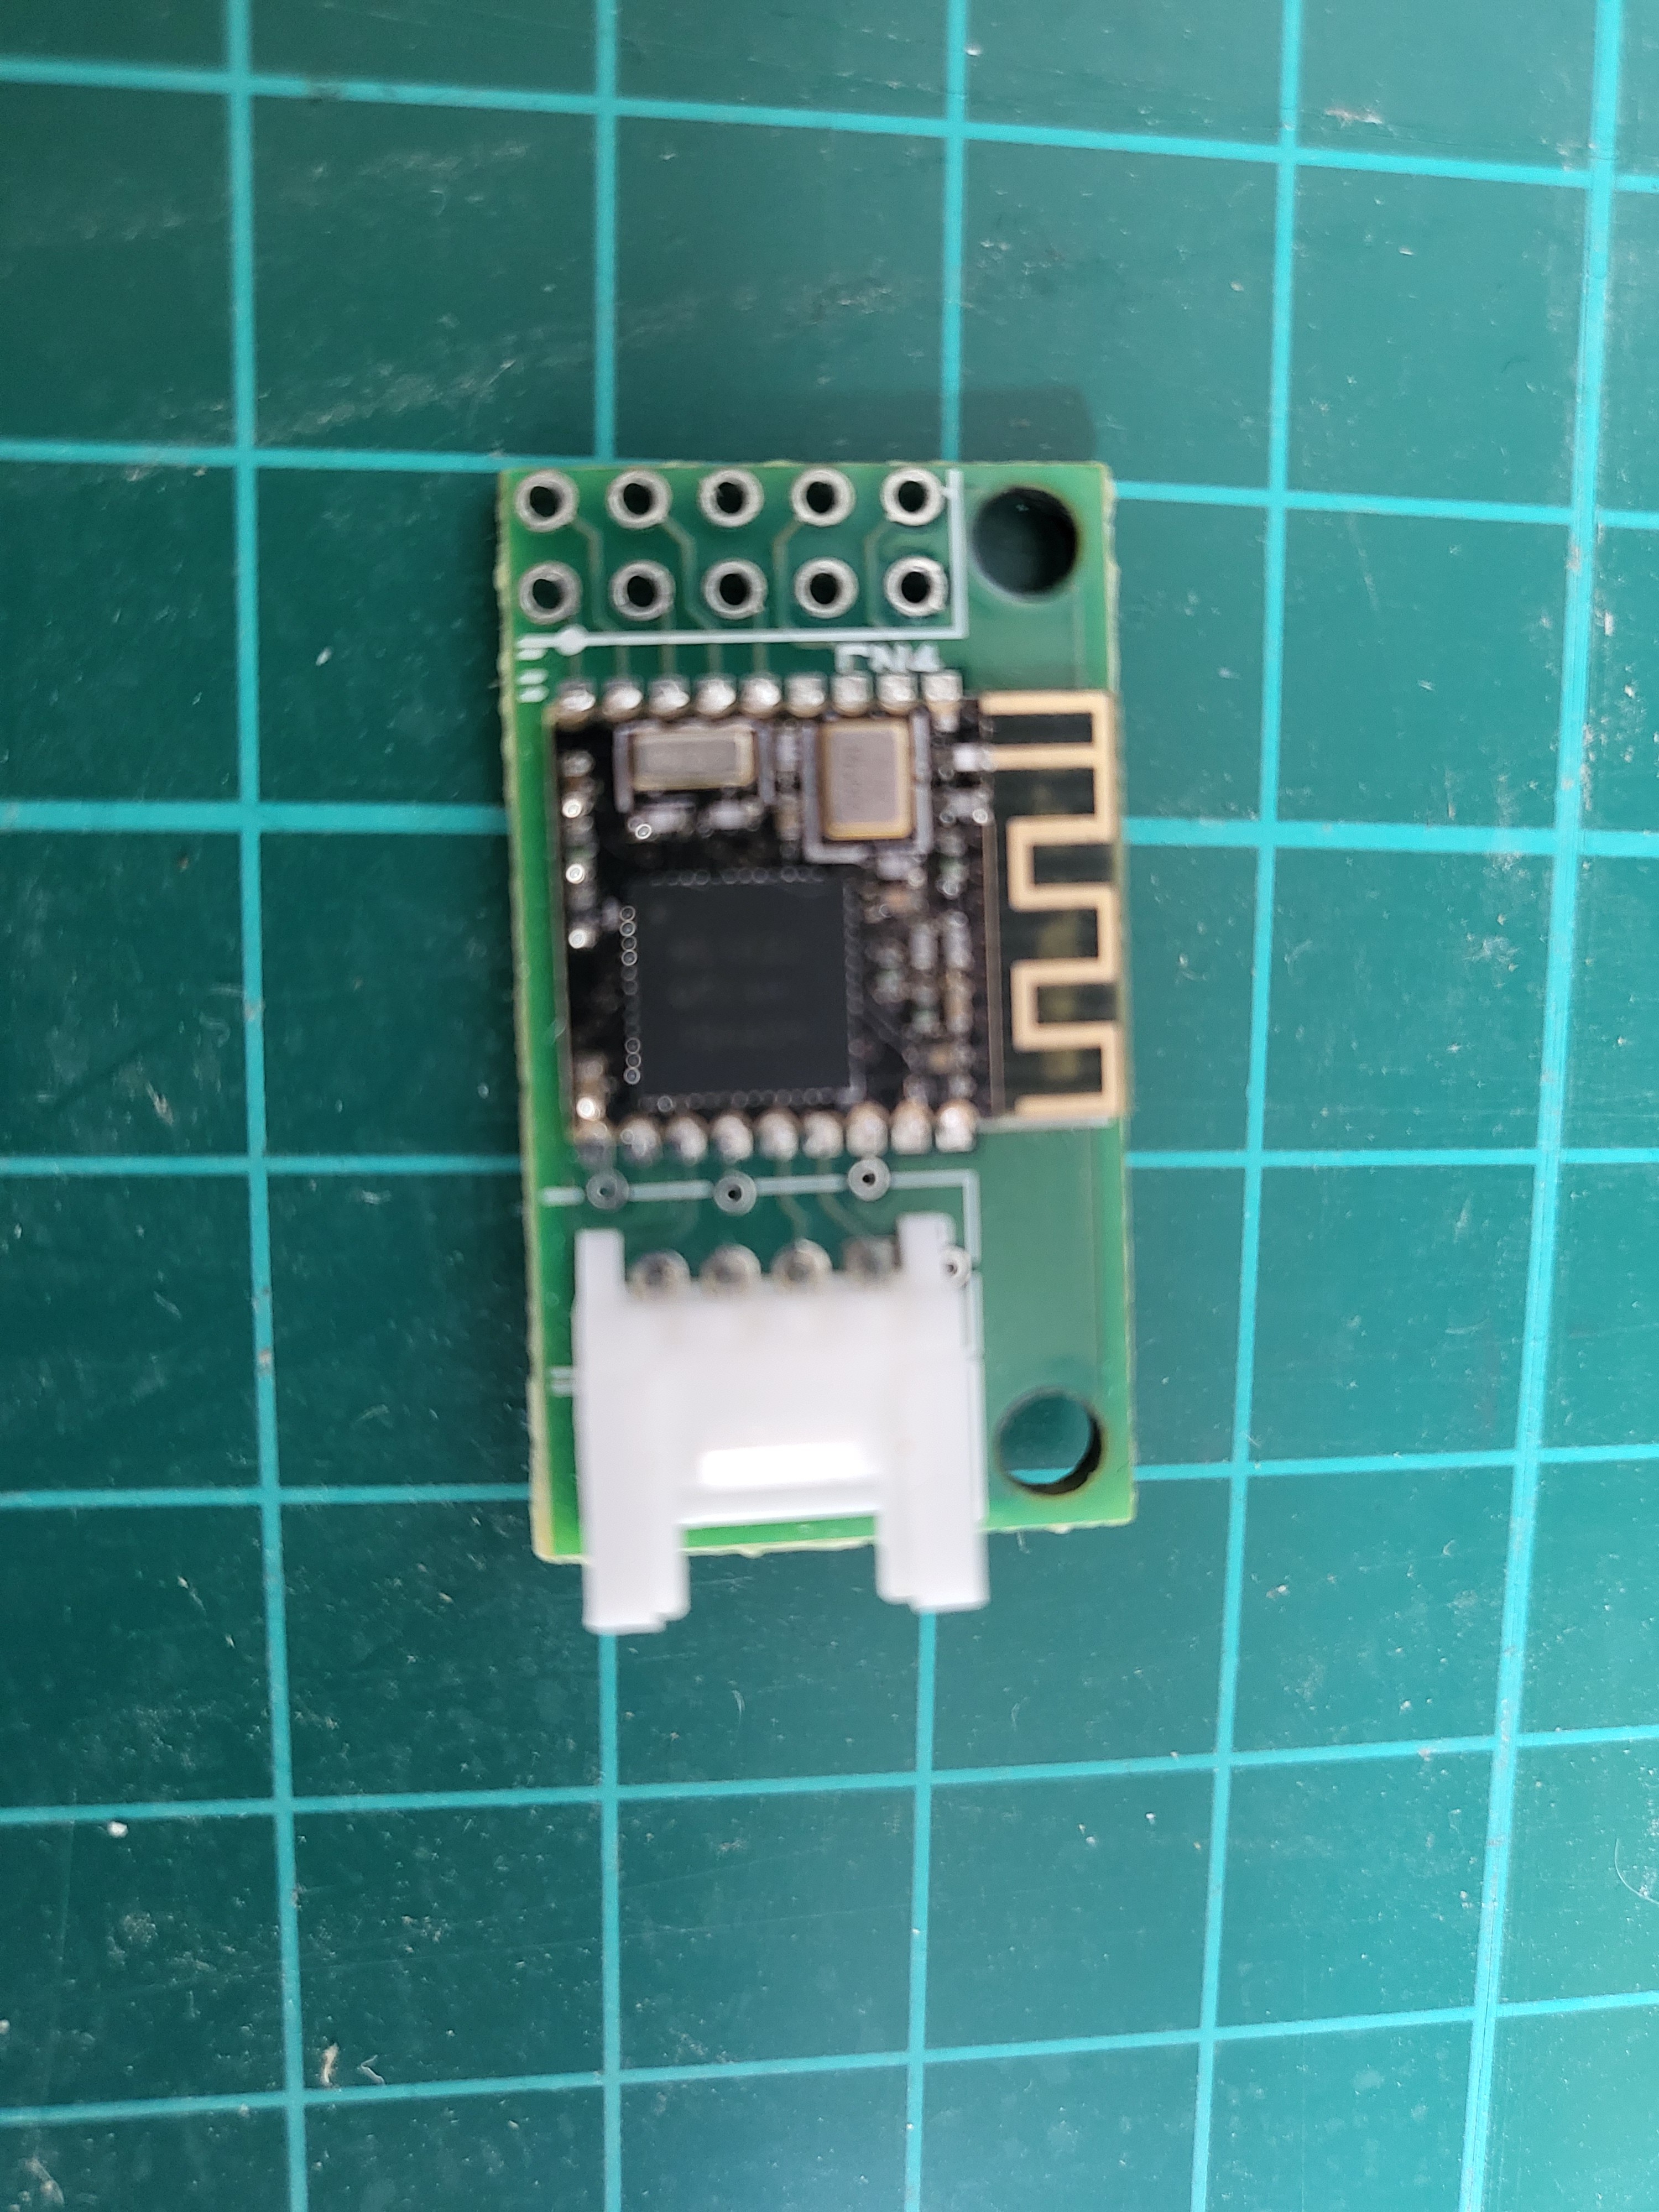
![]()
If you are not using this one from Tindie, you will need to adapt the pin allocations for the UART and the LEDs
To flash, I used a Jlink SWD probe and a 5-way pushpin "clothes peg'' to contact the 5 pads on the board.
![]()
-
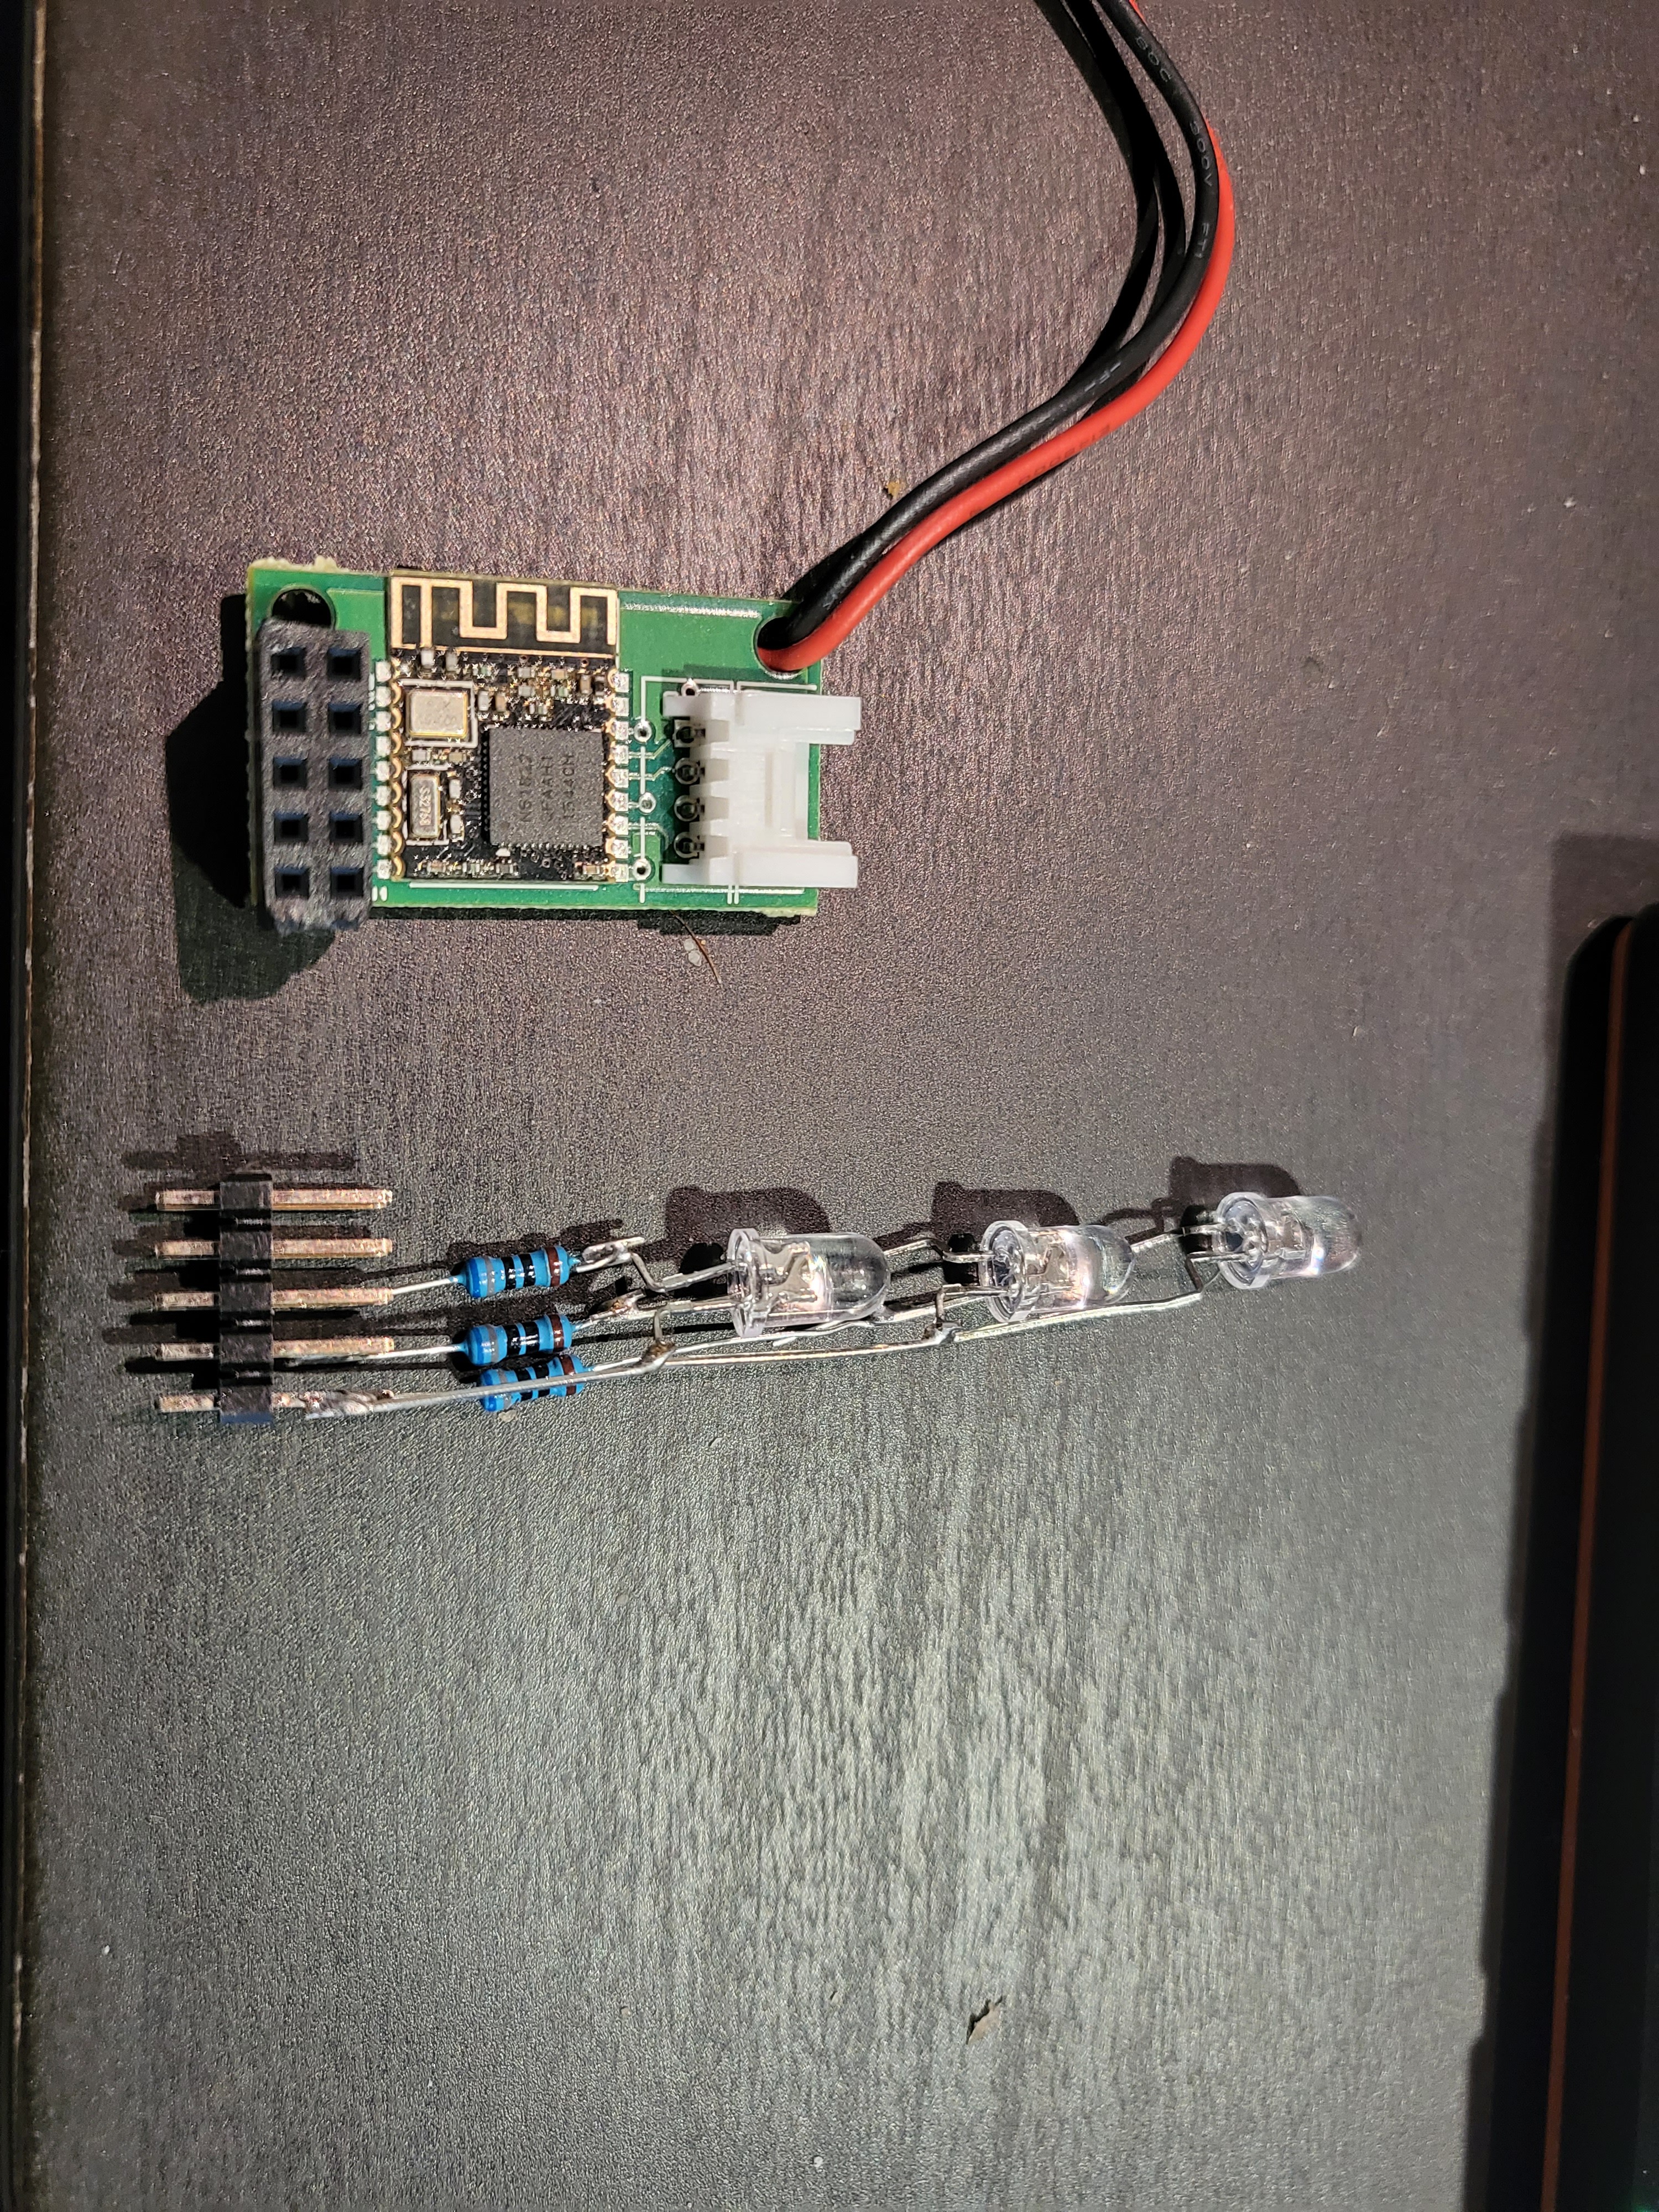
2build the LED 'tower'
Bend the LED leads to allow to solder them one above the next. Shorter led (-ve) are soldered together to go to GND, longer led (+ve) are each solderd to a 680ohm resistor to create the 3 led control signals.
solder the gnd and 3 resistor legs to a 2x5 header to make it easy to plug into the breakout board, or directly to the board if you are confident! (I wasn't)
![]()
plug the led tower into the breakout board
-
3test operation
Connect the UART grove connector tx/rx to a UART->USB dongle. I like to use the FTDI dongles with a built in cable that include a 3.3V supply as then this can also power the board (just make sure its a 3.3V one not the 5V one...)
![]()
Plug in the LEDs to the 2x5 header. (or the correct pins if you use a different nRF51 board)
Power up the breakout board (either by soldering on GND/3.3V wires and powering from 3.3V, or by a UART+power grove connection)
The LEDs should flash for 2s, and then go off. Logs should be visible on the UART output (115200 baud).
On the UART, type 'AT<CR>' and get a '+OK' return. AT+INFO<cr> to see the name of the device being advertised by BLE.
Using a BLE serial terminal app, find and connect to the advertised BLE 'Nordic UART service' : you can then send the same AT commands as the UART cable.
The Nordic Semi 'nrfConnect' app is also very useful to check the device is emitting adverts for connection, checking your iBeacon etc...
-
4configure ibeacon to control light
Assuming you have an iBeacon device of some kind (I used a Minew brand coincell powered ibeacon I had around, but you can also use a phone with an app, or another nRF51 board!), set its major and minor to (say) major=1, minor=1
On the UART, contigure the led-major/minor filter: The config system uses AT commands to get/set the config items - each item has a 'key' which is a 4 digit value. The LED major/minor filter ites are 010A and 010B respectively. AT+GETCFG <key> will show the value, AT+SETCFG <key> <value> will set it.
To change the config you must first 'authenticate' the connection, by doing AT+PASS <4 digit password>. The default password for config access is '1519' - you can change this in the code or by configuring it using the AT interface.
Example:
AT+PASS 1519
AT+SETCFG 010A 1
AT+SETCFG 010B 1
you should get a +OK response to each of these commands.
[Note you can also change the default config settings in the code (device_config.c) and reflash.]
Now, the LEDs shoudl ight up when your ibeacon is in range (1,2 or 3 LEds depending on the signal RSSI). UART logs will let you confirm its being detected.
-
5make the base
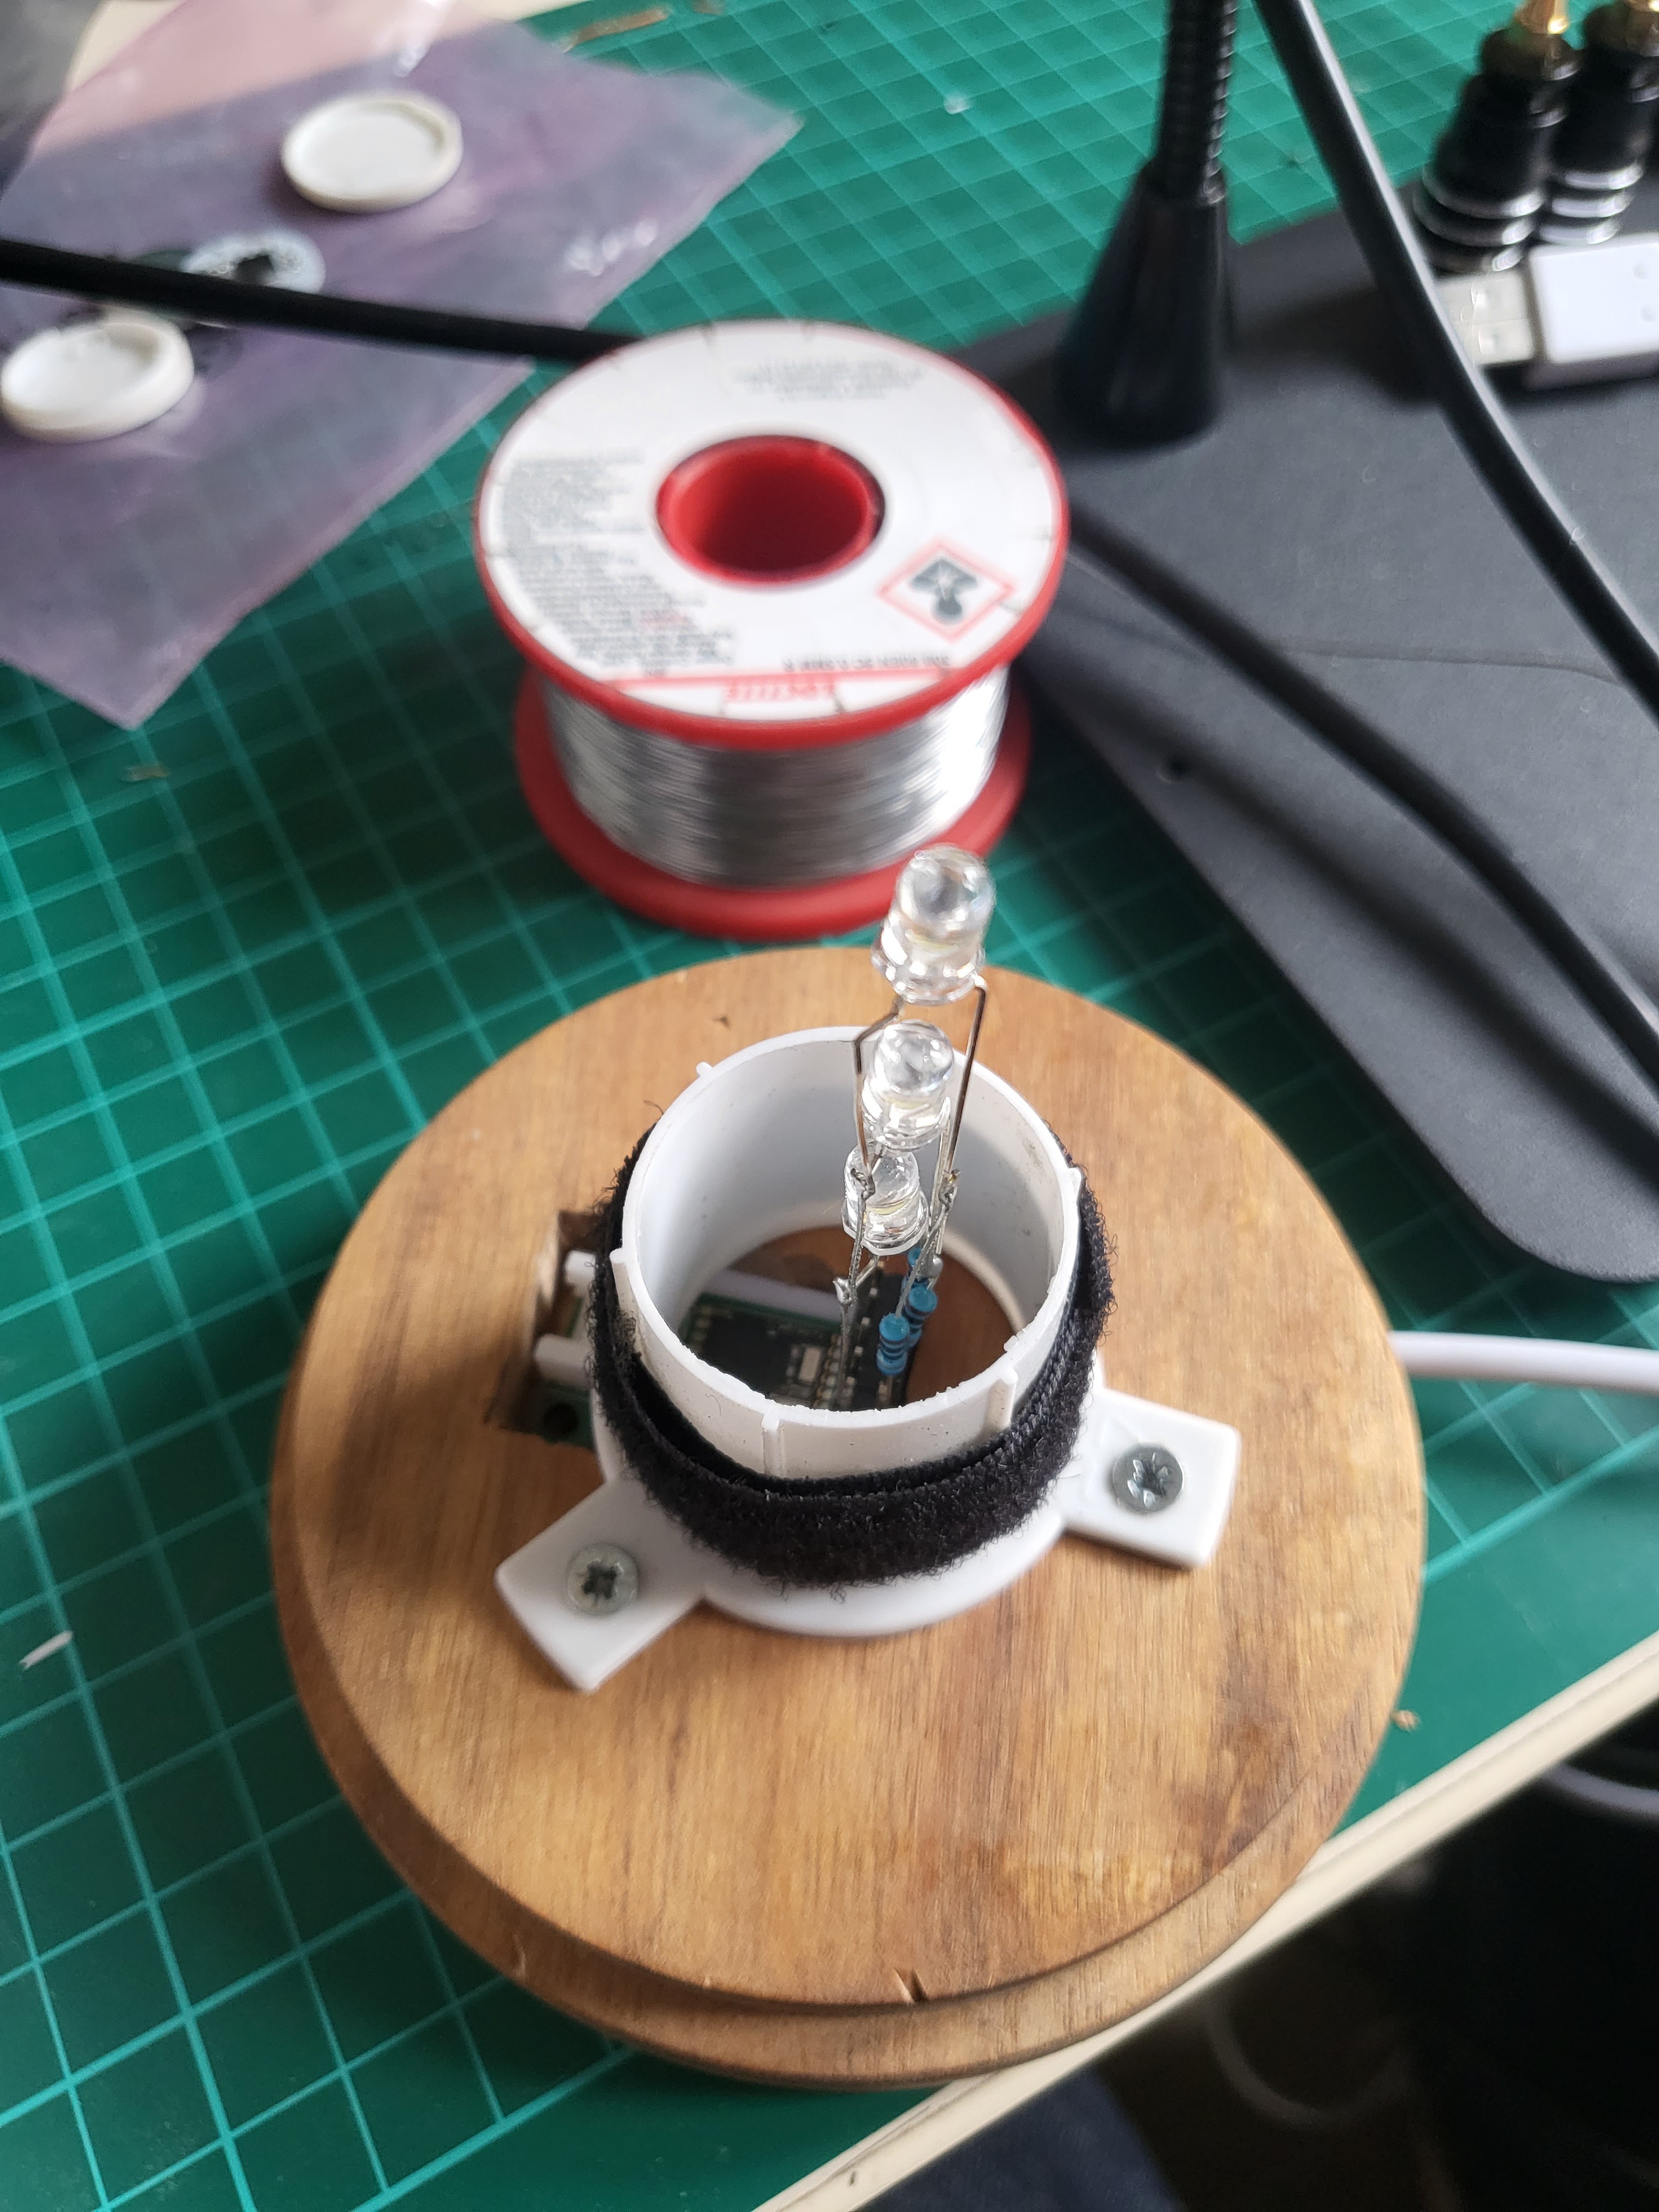
I used a wooden round base that was originally from an Ikea display glass dome (the glass dome was a victim of poor shelf management).
I found a Ikea lampshade plastic tube with 3 'feet' that could be used to keep the glass insulator centered on the base (with a little adaption to screw it down, and some velco tape to pad it...)
![]()
I milled out a rectangular depression on the top side for the breakout board, off center to let the LED tower be central. The power wires routed through a hole to the other side of the base, where another routed hole let me hot glue in the 3.3V supply board (another ex-project reuse case...)
![]()
With all these elements in place, I added a 'doughnut' of foam around the plastic tube for the glass to sit on.
![]()
-
6final assembly
Hot glue the power supply board in place, wire up the nrf51 breakout on the other side, add the supports and put the insulator on top!
Sit it on a shelf and plug it in...
![]()
Turning on the iBeacon (or bringing it in the room), and the LEDs light up. Take it away, and they go out!
My light sits in the window of my offices, and the ibeacon is small enough to go in my wallet -> so if you are passing you know if I'm in or out!
In theory, the approach of a AirTag should cause the LEDs to flash (again, 1,2,or 3 depending on RSSI of the airtag). I don't actually have an iPhone or Airtag so this is untested so far!!
Bluet$$th controlled light with high tension
High tension glass insulator plus nrf51 module equals a cool desk lamp


Discussions
Become a Hackaday.io Member
Create an account to leave a comment. Already have an account? Log In.