Materials used:
- 6x female jumper wires
- 8x 3904 transistors
- 8x 22KOhm resistors
- 16x 4" pieces of small gauge stranded core wire
- solder
- breadboard
- raspberry pi3 w/AC adapter and internet access
- 3 pack indoor wireless remote system by Westinghouse (will work with other wireless devices that function in a similar manner)
How it works:
- Basically I'm using the GPIO pins on the RPi and the transistors to "electronically push the buttons" on the remote, something that you would normally do with your finger but your fingers can't always stay at home but a RPi can! Uses a web server on the RPi to allow local and remote connections to turn the outlets off and on (or you can use the command line and SSH). Additionally you can set schedules to automatically turn them off and on with cronjobs.
Inefficiencies Addressed
- I'm aware that there's probably a better way to do this and some electronic engineer will have some advice for me on improvements, (I also didn't analyze the remote control's PCB closely to make the build more efficient) but who cares? It works and if it ain't broke don't fix it.
Known Improvements
- Additional improvements that could be made: the use of an 8 channel digital decoder chip to reduce the number of GPIO pins used from 10 to 5 (3 to represent the numbers 0-7, one to supply power to the chip and remote, and one for the ground. I don't have any of those lying around so I didn't do it. I'm also using a different GPIO package for the web server's interface that I will eventually implement into the python script.
Project is complete, I'm fine tuning a few thing and getting this write up together
I'm also figuring out Hackaday because I've never done this before
Will continue to update...

 Jorge Miar
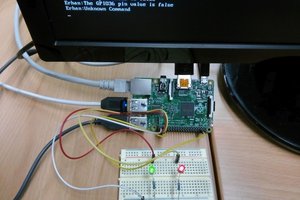
 erhanyilmaz.ytu
 Chris
Chris
 Dave12311