Close
0%
0%

3-Axis Skull Mod for 12ft Skeleton

The 12ft skeleton (Skelly) from Home Depot is an impressive decoration, but needs an extra kick to make it truly incredible!!!

Similar projects worth following
I've been in the world of Halloween based animatronics for over 10 years and have even made a name for myself with my MonkeyBasic software, now available through https://LifeApe.com.

So it only made sense that once I got my hands on one of these that I would cut it open!

This is my first time creating the 3-axis movements (plus jaw) from scratch, typically someone else beats me to it so I decided to combine my 3D printing ability, my limited mechanical knowhow and give this a whirl. I'm quite happy with the results!

I'm pretty sure this will void the warranty on your Skelly! LOL

Many of you have asked, so for those that feel brave enough to cut open their Skully, I've decided to start offering the 3D Printed Parts for sale. They will be listed on my Etsy page here: https://skellyparts.com

This project covers the construction of the mechanical parts and installation into the skull. It does NOT cover the electronics or programming of the routines.

I do not recommend doing this project if you are not comfortable with servos or animatronics. I'd recommend starting with a smaller 'normal size' skull first. Like those available from HalloweenSkulls.com or  Skulltronix.com

WARNING: You will be cutting large holes in your plastic skull as well as separating the jaw from the skull. You will also need to cut the metal pipe that protrudes out of the neck a small amount so it doesn't interfere. Be careful and make sure you are comfortable with this!!!

NOTE: This is not meant to be water-resistant!!! If you plan to keep you Skully out for the month of October, this may not be meant for you... or try to find a 2nd head you can swap in!

DUE THIS AT YOUR OWN RISK!!! I AM NOT RESPONSIBLE FOR ANY INJURIES OR DAMAGE YOU MAY CAUSE.

  • 1 × 3D Printed Parts (see external link to Thingiverse) For printing the parts of course!
  • 3 × Hitec HS-805BB w/ included Servo Arm and Hardware Hitec Giant Servos for Yaw, Roll & Pitch
  • 1 × Hitec HS-425BB w/ Servo Arm For the Jaw movement
  • 1 × Thrust Needle Roller Bearings with Washers 20mm Bore, 35mm OD
  • 1 × Flat Steel Bar (cut into 2 pieces) 1/8" thick, 1/2" wide

View all 14 components

View all 5 project logs

  • 1
    Interface assemble

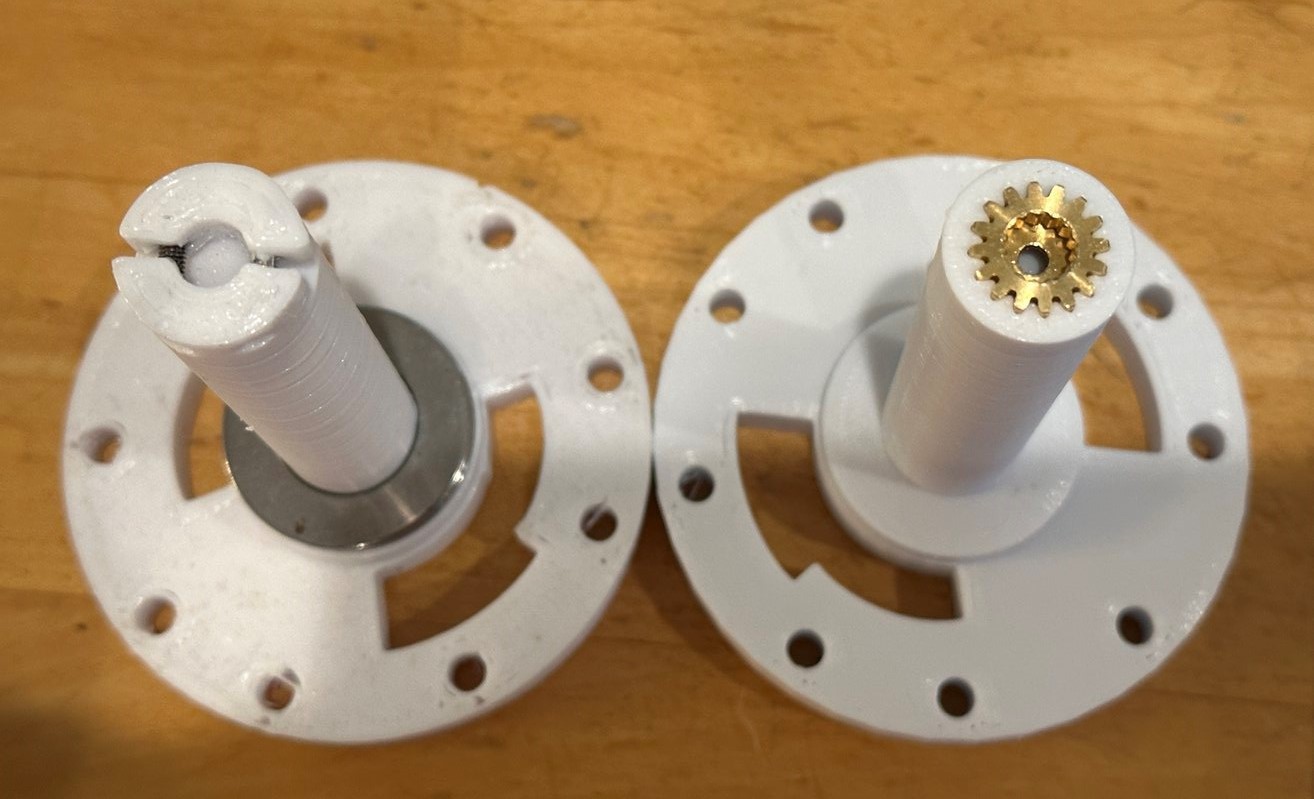
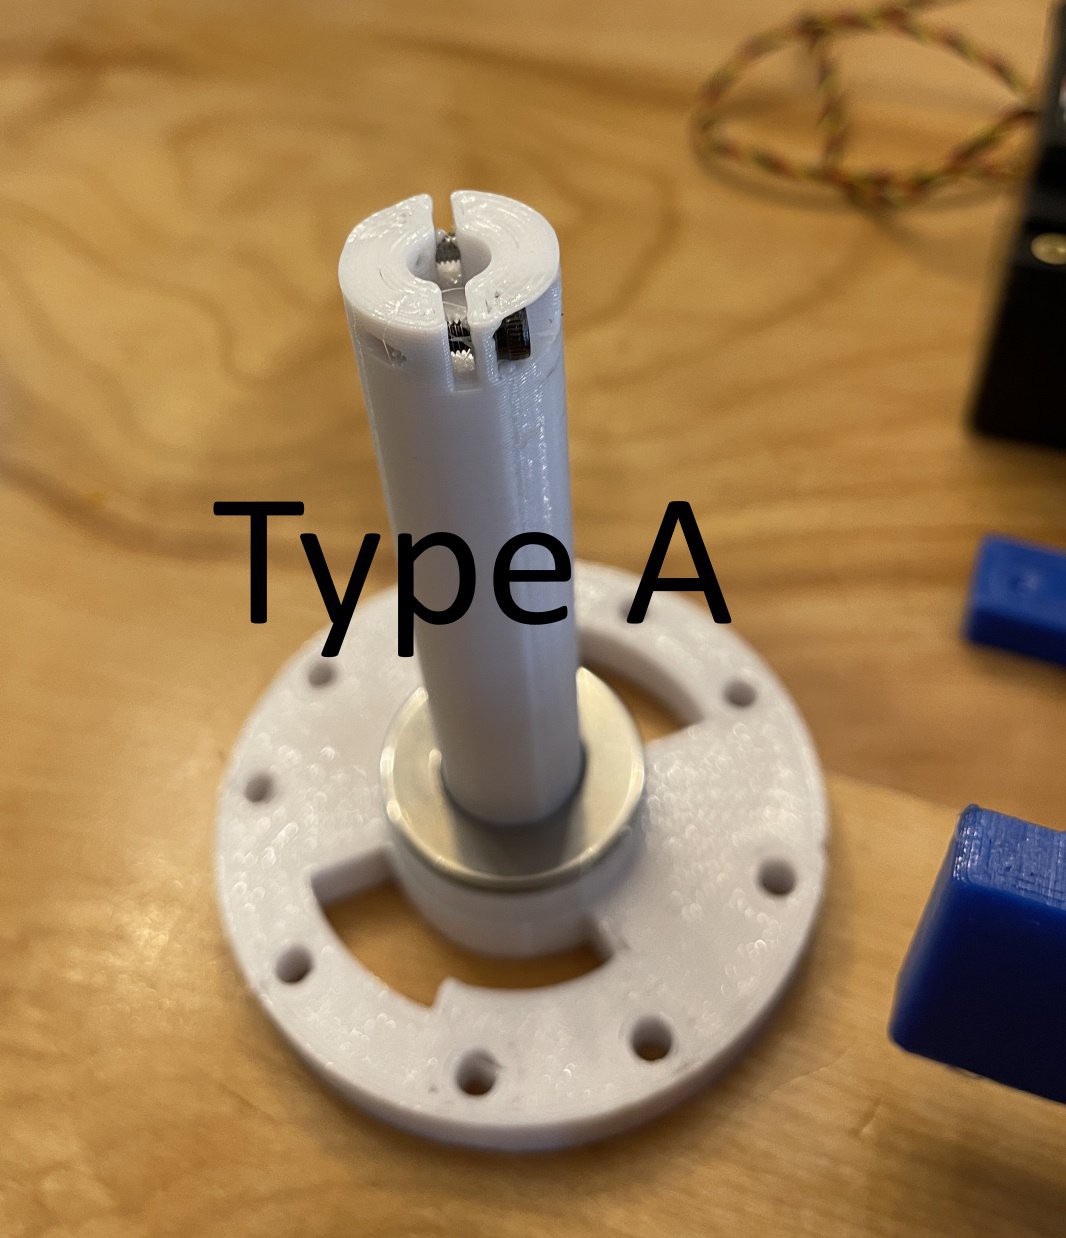
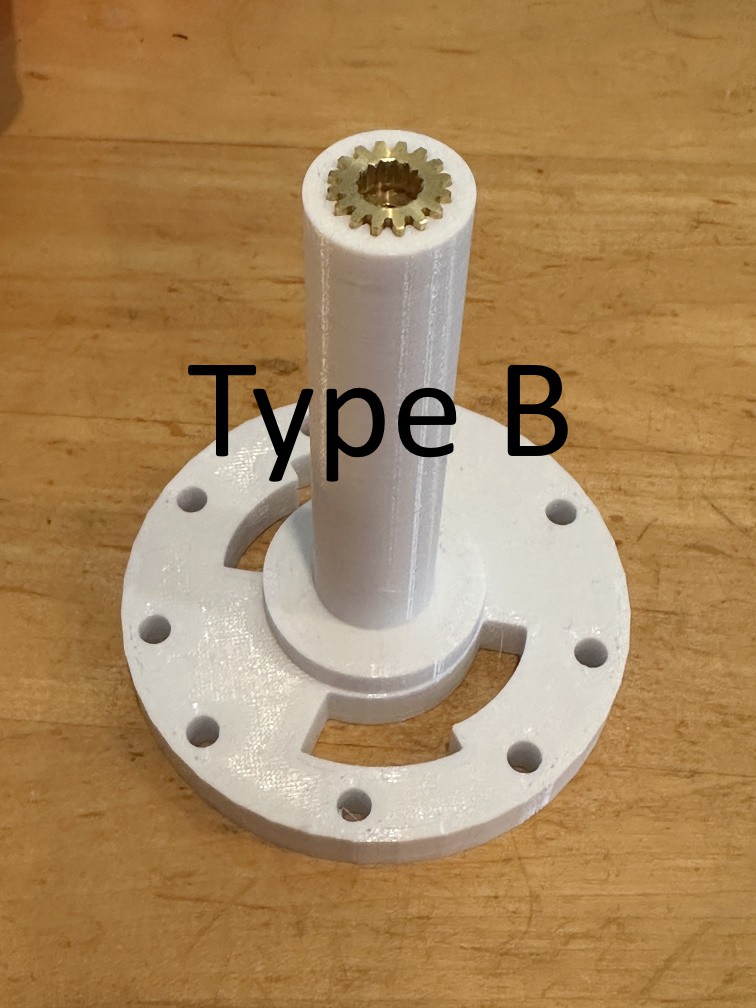
    NOTE: THERE ARE NOW 2 STYLES OF INTERFACE, THE PROCESS IS NEARLY IDENTICAL BUT PAY ATTENTION TO THE DIFFERENCES IN THE INSTRUCTIONS.

    Start with the (white) 3D printed part called "Skull_Mech_V3_Interface" This connects to the neck of the skeleton.

    1. Make sure the shaft is smooth, sand it down a little if needed.
    2. Slide the thrust needle bearing assembly down (washer, bearing, washer)
    3. This step varies based on the Type of Interface
      1. Type A: Screw in the two M3 screws (thread length around 12mm) at the top of the part. These will tighten the rotation servo onto this part later. Don't tighten the screws.
      2. Type B: Skip this step. You will attach the gear onto the Rotation Servo.
  • 2
    Rotation Servo installation

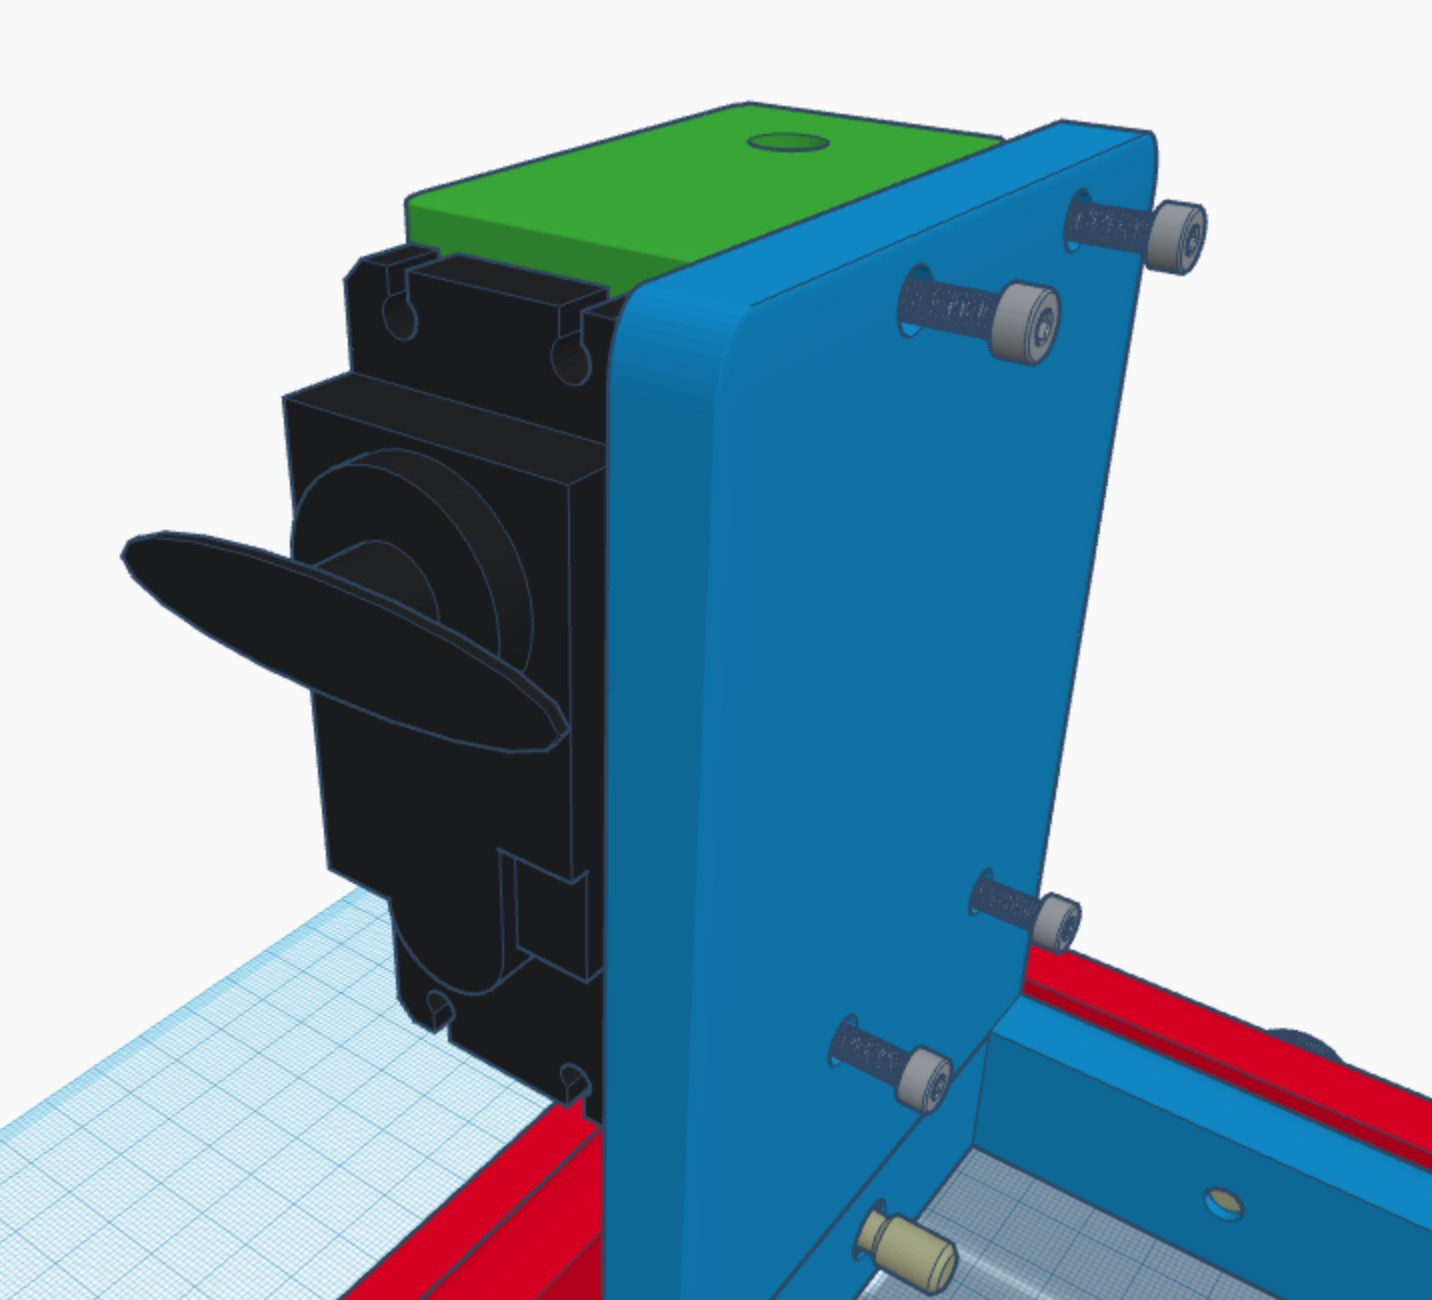
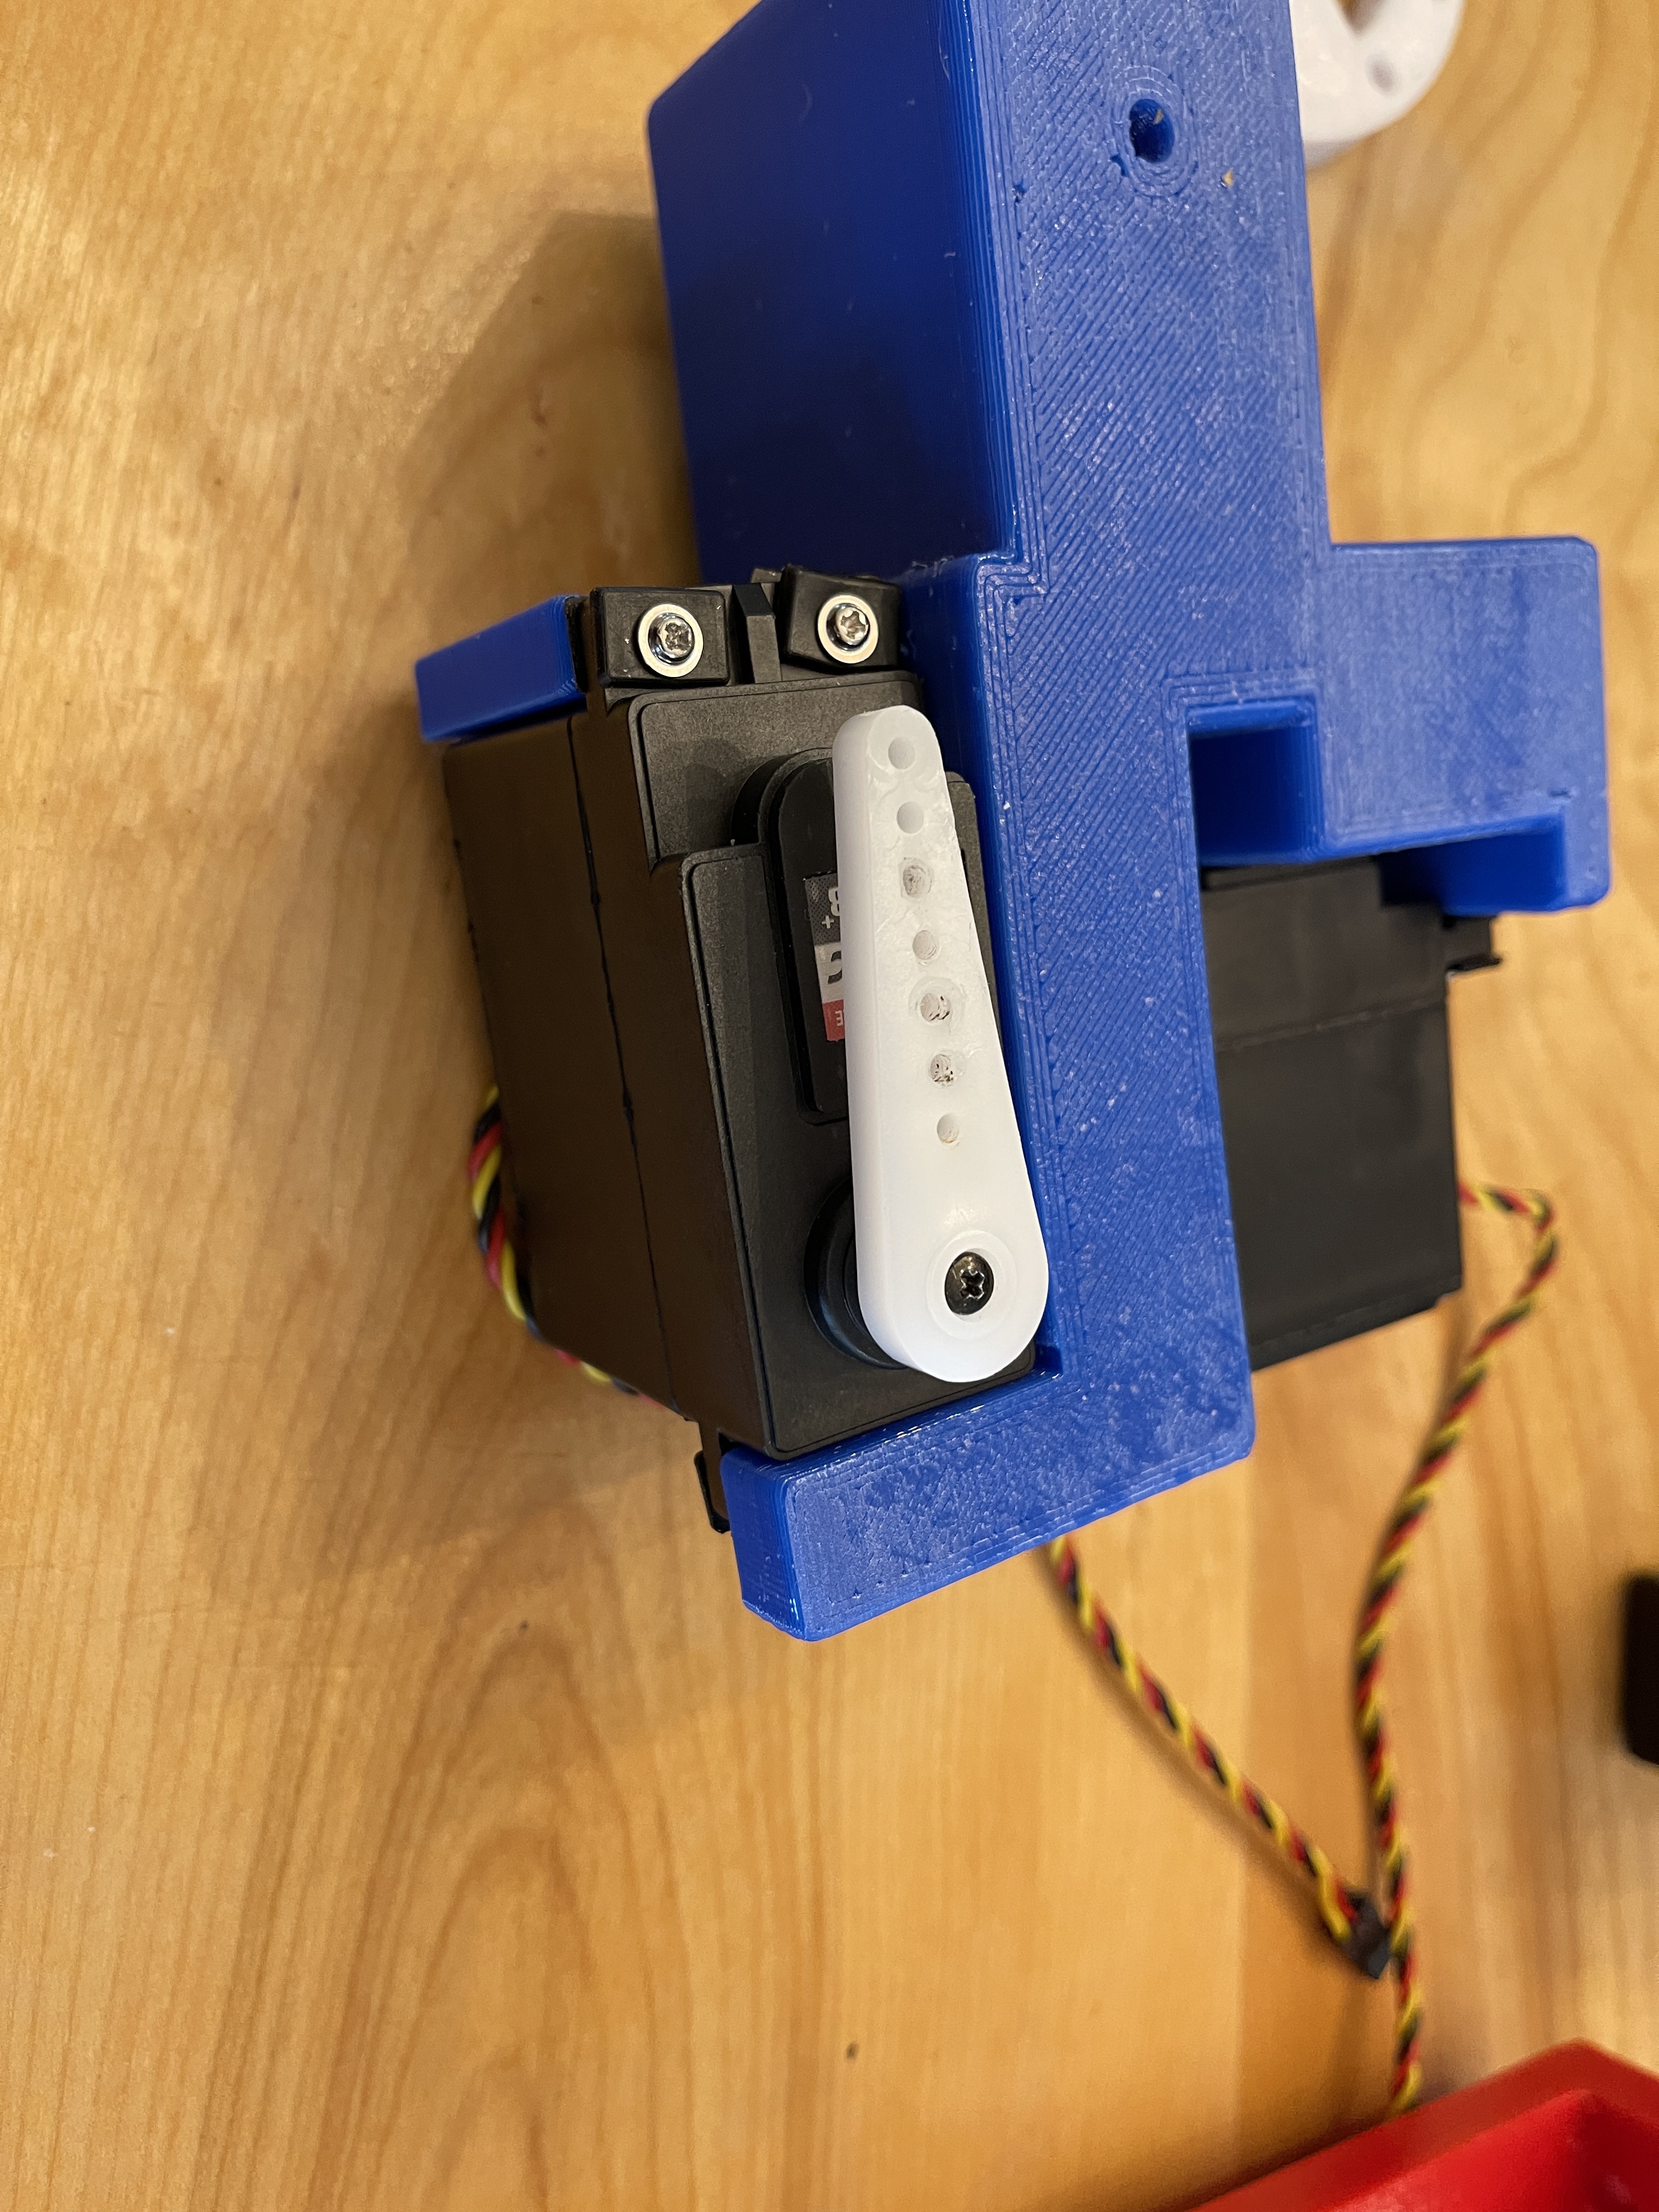
    You will be using the 1st level (blue) 3D part labeled "Skull_Mech_V3_1stLvl"

    1. Remove the servo arm (and screw) from the servo. 
    2. Type B Only: Attach the servo gear (from ServoCity) onto the servo. (Not pictured).
    3. Position the Rotation servo as shown and attach with the included hardware.
      1. There are holes in the 3D model for aligning the servo screws.
  • 3
    Tilt Servo Installation

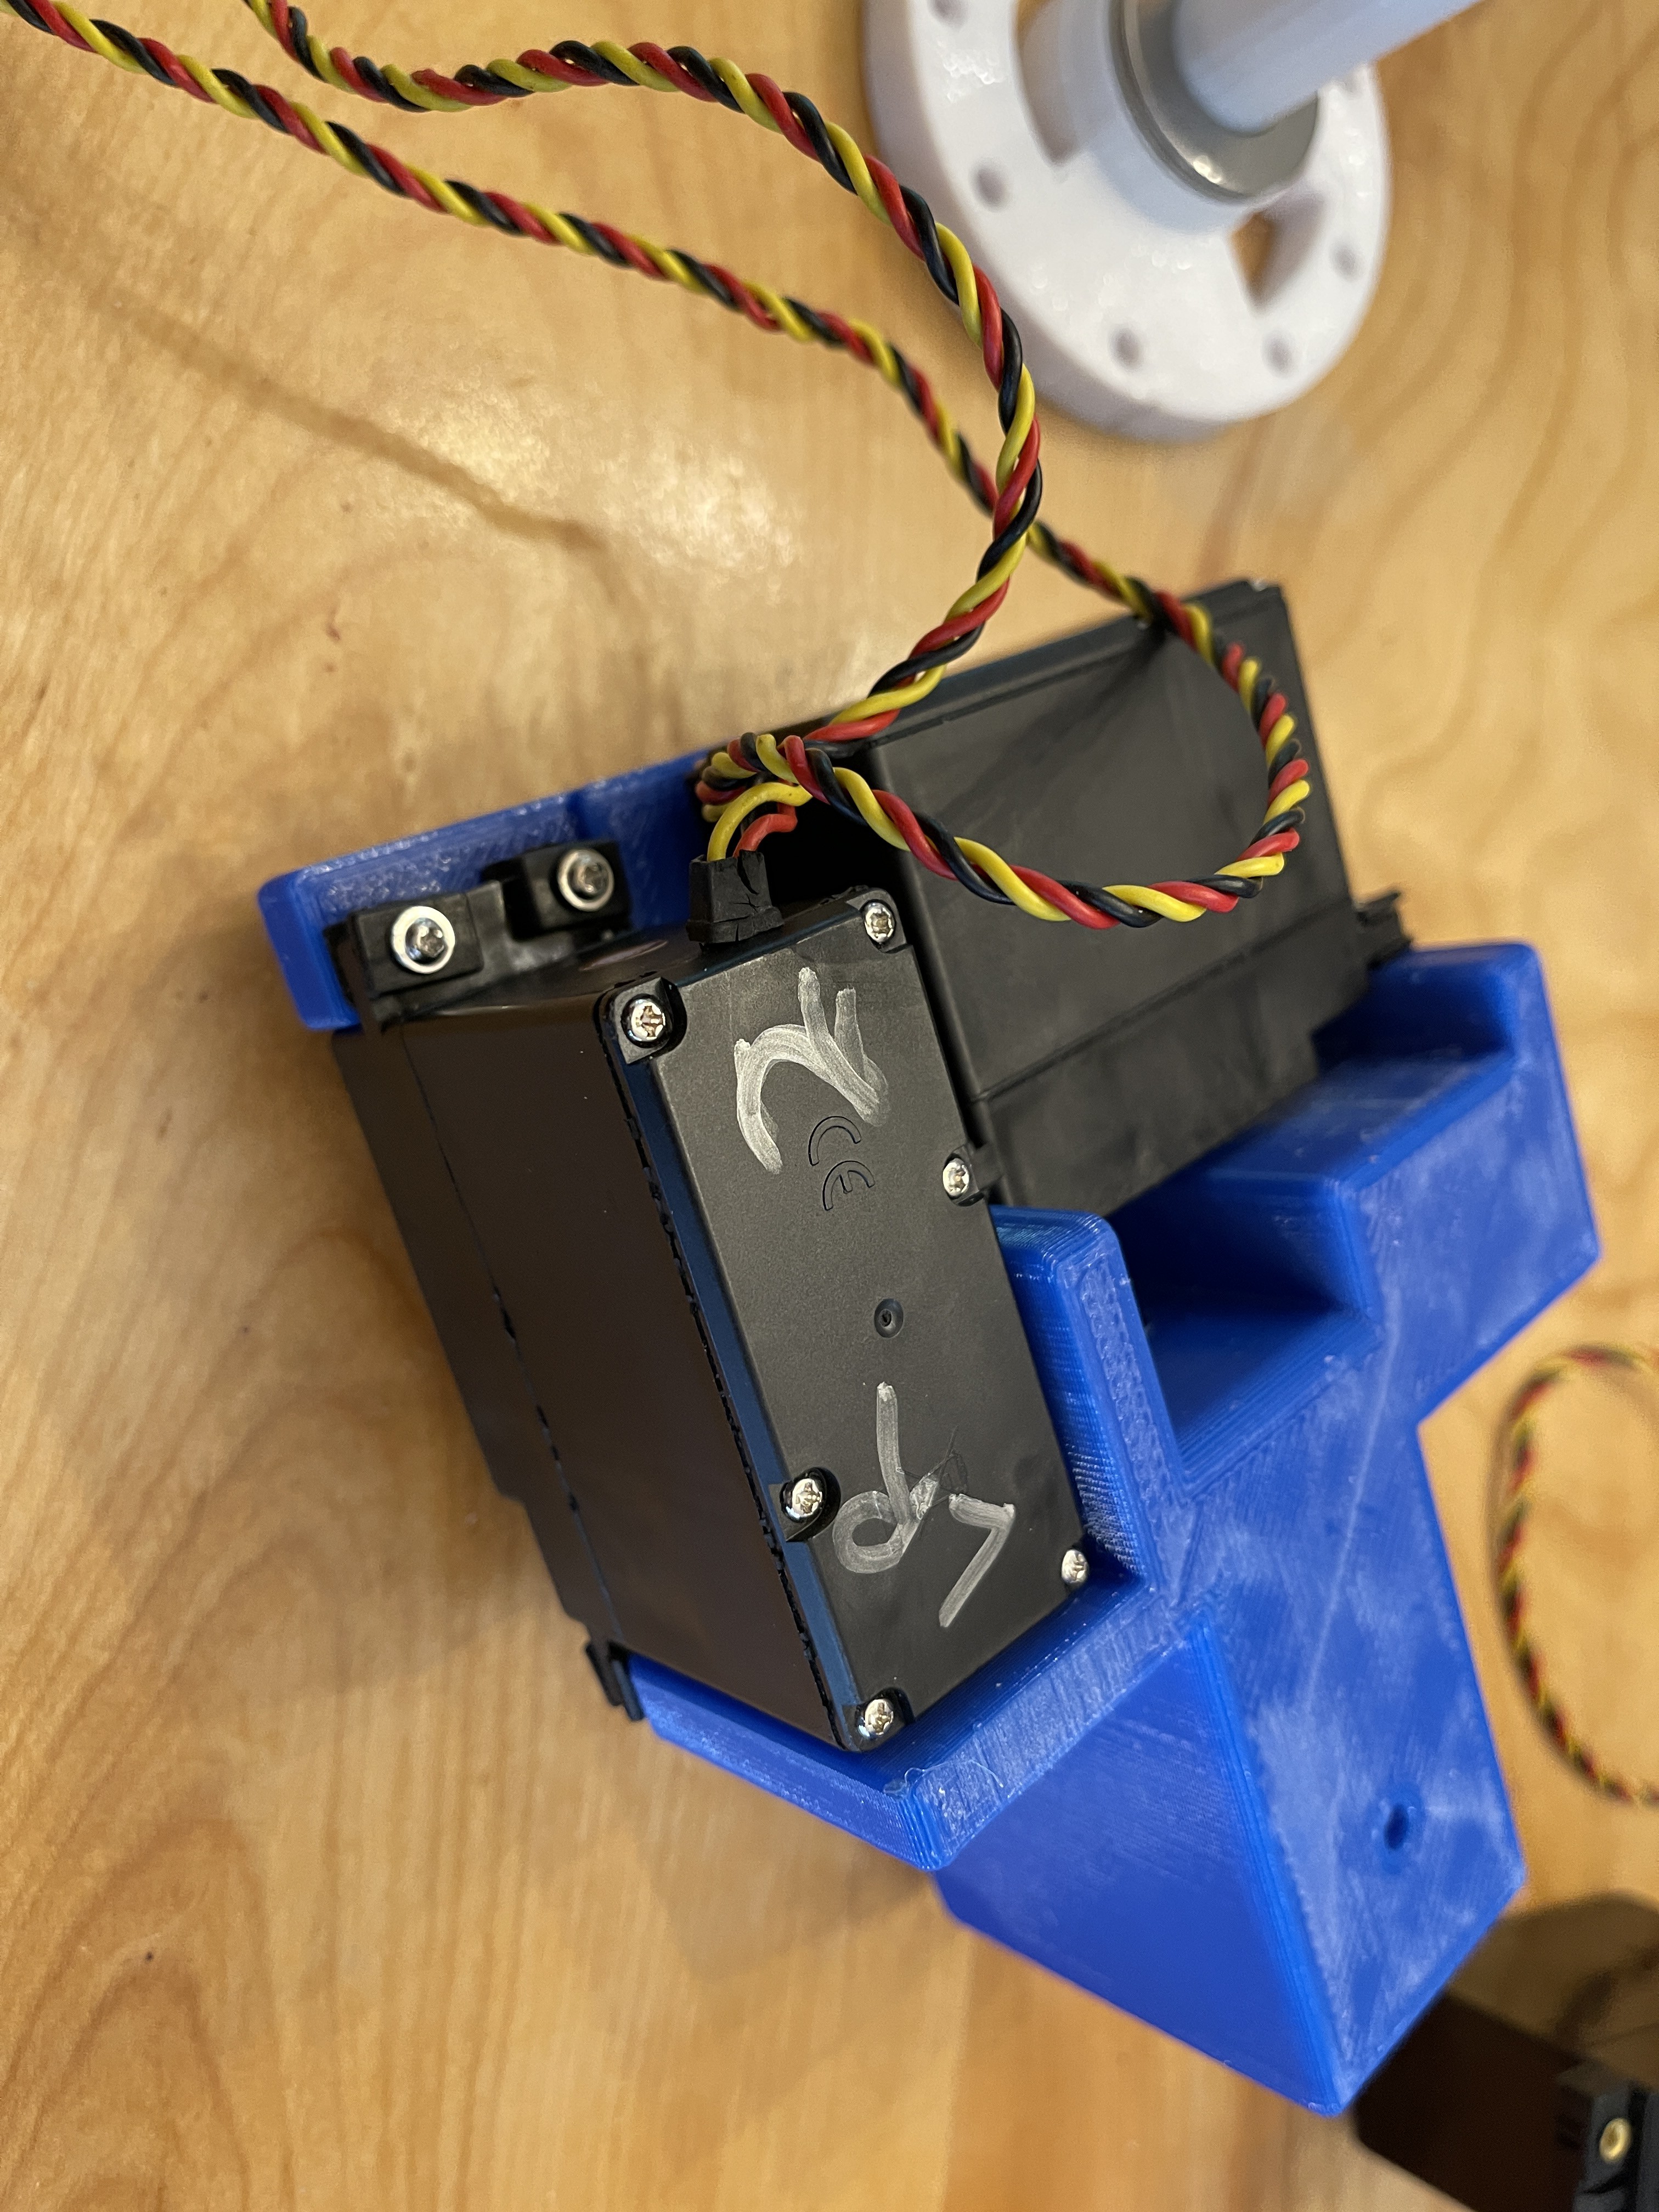
    Still using the 1st level (blue) 3D printed part.

    1. Install the servo arm shown (you may need to remove and adjust its position later on).
    2. Position the Tilt servo as shown and attach with the included hardware.

View all 21 instructions

Enjoy this project?

Share

Discussions

Westly Boswell wrote 11/05/2023 at 02:25 point

I knew nothing about the process of animating anything going into this. Servos, controllers, building scenes was all brand new to me. Following this guide, and taking advantage of the LifeApe.com software/products made this extremely accessible to a complete newbie. It took me well over 6+ months to get this over the finish line days before Halloween 2023, but I made it. Link to a short clip of one of his animations, https://imgur.com/a/M7bvweF. Nelson was extremely kind in helping answer all of my newbie questions. If I could pull this off, so could you. Step outside your comfort zone and create something awesome. Thanks again to Nelson.

  Are you sure? yes | no

Jeffrey.Reedy wrote 09/29/2023 at 15:05 point

How do you keep the head from flopping down when the animation is finished.  As soon as power is cut to the servos the head falls to an awkward position.  If I keep power to the servos they buzz and I'm concerned they will burn out.

  Are you sure? yes | no

a.a.andrew wrote 09/27/2023 at 16:27 point

I dont see the eyes in the parts list?  Link?  also, how do you program the voice into the box, more detailed instructions please.

  Are you sure? yes | no

Nelson Bairos wrote 09/27/2023 at 16:54 point

The eyes are already a part of the skull already. As far as programming, I don't cover that part because there are a lot of resources already out there that cover animatronics. This is a great place to start: https://www.youtube.com/@CatsMenagerie

  Are you sure? yes | no

brentaugustus wrote 09/14/2023 at 14:29 point

Does anyone have a VSA project they would be willing to share? I am looking for an example starting place, trying to make sense of it and start from zero is difficult for this newbie :D

  Are you sure? yes | no

dakota.justice wrote 05/10/2023 at 18:30 point

I just printed this up and have an AI Fortune Teller running the jawbone servo.  I was about to update the rotation servo connection but saw you might have an update yourself.  Any update on that or should I go ahead and figure it out?  Thanks!

  Are you sure? yes | no

Montanadude wrote 02/05/2023 at 18:47 point

Am I confused or are the eyes in your video using graphics or oled's?  If so, do you have details for the setup and such for them?   Also, where exactly did you get the head as on thingiverse I only see the rest of the parts to print?  Thanks a bunch.

  Are you sure? yes | no

Jaybo2099 wrote 03/19/2023 at 23:33 point

This project is a kit to animate the 12 ft Skeleton from Home Depot. It comes with the animated eyes.  Good luck trying to find one. They sell out quick.

  Are you sure? yes | no

martinisaacanywhere wrote 01/20/2023 at 20:19 point

I’d like to try this, but can’t find the links or files… am I missing something? 

  Are you sure? yes | no

Nelson Bairos wrote 01/31/2023 at 00:46 point

Hi, the link to the files is in the links section. Here it is again: https://www.thingiverse.com/thing:4926224

  Are you sure? yes | no

martinisaacanywhere wrote 01/31/2023 at 03:27 point

thanks! I can’t wait to try this. How did your progress come along for the coding?  Thanks ve had some success using chatterpi in the past, and now that some raspberry pis are back in stock, so I think I’m going to give that a shot for this project. Thanks again. 

  Are you sure? yes | no

Nelson Bairos wrote 01/31/2023 at 13:59 point

@martinisaacanywhere Just an FYI that I'm working on improving the engagement between the rotation servo and plastic. As another comment below mentioned, it can be a week point. So I'd hold off printing the rotation part (white piece). As far as programming, I use a stick PC with Brookshire Software's VSA and my LifeApe software. I've been tinkering with PI but nothing ready yet.

  Are you sure? yes | no

redpawFX wrote 11/02/2022 at 20:32 point

I printed this up for this halloween and it worked really well.  Thanks so much for the design!   I did upgrade the servos to  heavier duty  metal gear ones and  used a 1/4 scale servo for the jaw as well.  The only part I think could possibly  use a little tweak would be the  head turn  servo  interface.   I may have a  hack at trying to   physically bolt on a servo horn to the top  of the  "stem"  so it has proper  splines to mesh with,  or  reworking the model a bit  so it prints with room for embedded nuts  for the tightening screws to thread into.. I melted in my own for now, but if it thrashes  on a reset  of the programming  it could still slip and rotate further around, as happened to me at first before I tightened it down.    

  Are you sure? yes | no

Nelson Bairos wrote 01/31/2023 at 14:01 point

@redpawFX Sorry for the super late response. Glad it went well. As far as the rotation servo goes, I've had the same issues and am working on an update to better address the issue. Stay tuned, I'll post an update here and on Thingiverse.

  Are you sure? yes | no

sbbbugsy wrote 12/24/2021 at 04:06 point

Any chance that you will make this a kit?

  Are you sure? yes | no

Similar Projects

Does this project spark your interest?

Become a member to follow this project and never miss any updates